Note: This page was written in 2016 and reflects the gear we used and what was on the market at that time. Our current gear is all professional quality and includes Nikon Z8 and Nikon D850 camera bodies, Nikon lenses, Nikon polarizing filters, Really Right Stuff tripod legs, Benro tripod legs, Sunway Foto table top tripod legs, Really Right Stuff ball heads and Wimberly gimbals, Think Tank camera backpacks, 14 inch Apple Macbook Pros with M2/Max CPU 64 GB memory and 4TB internal drives, and SanDisk G-Raid external hard drives for backups and archiving. We still highly recommend the resources we used for learning photography and post-processing described further down the page.
Since we began our full-time RV travels in 2007, photography has become a huge part of our lives. Photography is an ideal hobby for travelers, and it isn’t hard to learn. Our learning curve has played out on the pages of this website, and it is satisfying to see our improvement over the years. When we first started traveling, we each shot about 6,000 photos per year. Now we each shoot over 35,000 photos per year (a little under 100 per day per person!).

Photography is a lot of fun, and it’s not hard to learn.
People have asked us what cameras and equipment we use, and how we improved our skills. This page presents all of our gear choices over the years, from our camera bodies to our favorite lenses to our filters and tripods to the goodies we use to take our cameras out for a hike to the software we rely on for post-processing.
It also explains how we organize all our photos and lists all the books, eBooks and online tutorials we have studied to learn to take better photos. We are entirely self-taught, and the inspiring resources we reference here lay it all out in plain language.
We’ve invested in our camera equipment because photography is our passion and we do it all day long. What you’ll see here is our progression through good solid “value” gear, from the “entry level” gear we started with to the more professional quality gear we use today.
For easy navigation, use these links:
The best time to buy camera gear is during the lead up to Christmas or when a manufacturer discontinues a camera model. An inexpensive but good quality DSLR is the Nikon D3400 camera which is available in kits with one or two lenses, camera bags, filters, etc., here
CAMERAS and LENSES
Return to top
Our Current Cameras and Lenses
As of 2018, we both shoot with Nikon D810 cameras. This is a professional level, truly awesome, full-frame 36 megapixel camera. We use these primarily for landscape shots.
We also both have Nikon D500 cameras which are crop-sensor 20 megapixel cameras that can shoot 10 frames per second, ideal for fast moving objects like wildlife and our adorable puppy.
Prior to these cameras, we both used Nikon D610 cameras. This is a full-frame, 24 megapixel camera. It is considered a “pro-sumer” camera, not quite professional quality but at the high end of the hobbyist ranks.
Although we have a big collection of lenses, we typically take no more than two apiece with us when we are out and about on foot. It’s just too much stuff to lug around!
I have a Nikon 28-300 mm lens on my camera which I use almost exclusively, simply because I love the flexibility of having both wide angle and zoom options with the twist of my wrist without having to change lenses.

When we got into photography, we jumped in with both feet.
Mark likes to pick a lens for the day and work within its limits. His favorites are prime (non-zooming) lenses, and he uses the Nikon 50 mm and Nikon 85mm lenses a lot. These are a lot less expensive than zoom lenses, and they are much faster lenses too (meaning they can be used in lower light). However, they do not have vibration resistance (also known as “image stabilization”), a technology that reduces the inherent wiggle caused by hand-holding a lens.
He also uses the Nikon 24-120 and the Sigma 24-105. These are very similar lenses, and we would have just one of them, but I used to use the Nikon 24-120 all the time before I got the Nikon 28-300, so he got the Sigma 24-105 to have one with a similar range. They’re both terrific lenses, so we can’t decide which one to keep and which one to sell!
We have a Nikon 70-200, which is a truly beautiful lens. For a long time neither of us used it much, but after I commented to that effect when I first published this post, Mark put it into his regular arsenal and uses it frequently now. It is a fabulous lens with excellent color rendition. Another advantage is that the zoom feature doesn’t lengthen or shorten the lens — it is always one length and all the zooming is physically done inside the lens. This means that dust doesn’t sneak into the lens when it is zoomed in and out the way it does with other lenses (like the 28-300, 24-120 and 24-105 mentioned above).
For wide angles, we have a Nikon 16-35 and a Nikon Nikon 18-35 so we can each shoot very wide angles simultaneously. Mark LOVES wide angle photography, and he uses these all the time. The 16-35 is more expensive, and was purchased as an upgrade from the 18-35, but he can’t seem to part with the 18-35 now, so I inherited it.
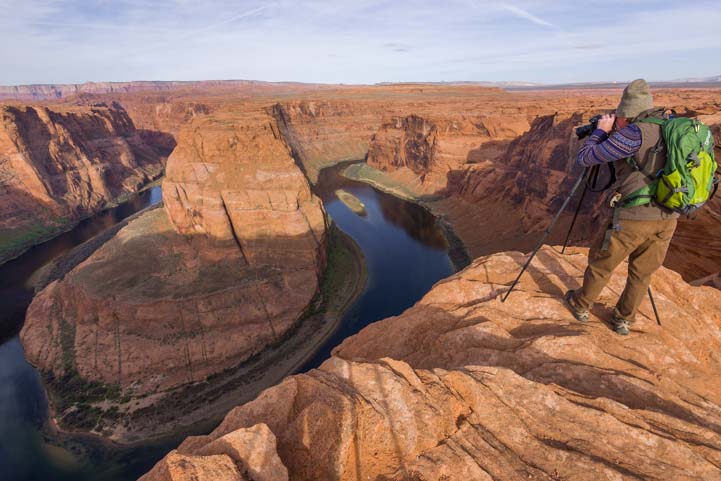
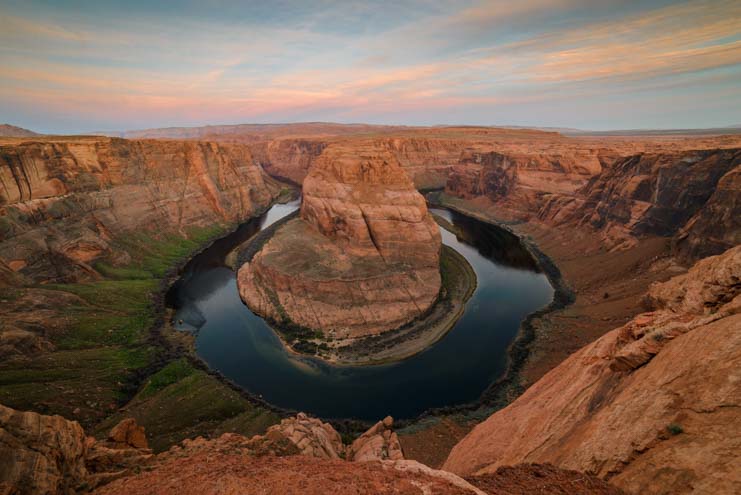
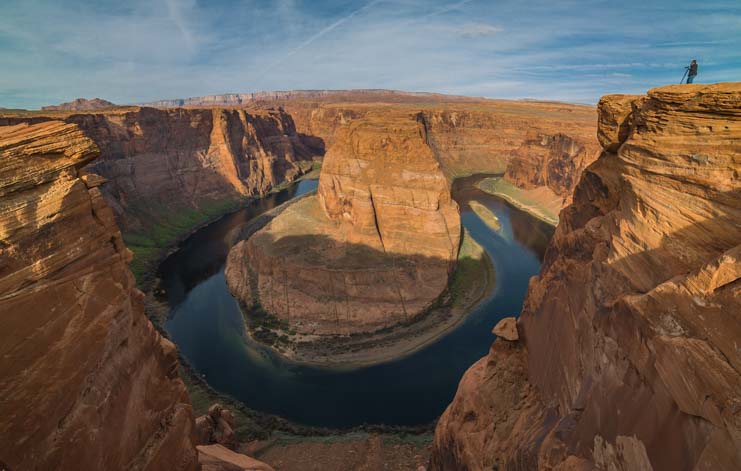
For super wide angles like at Horseshoe Bend in Arizona or for shooting stars at night (like the final image in this post or the first image in this post), we turn to the Rokinon 14 mm lens (with the Nikon focusing chip) or our very cool fisheye lens, the Rokinon 12 mm lens.
A few years back we bought a Tamron 150-600 mm G1 lens for shooting birds (like wild peach faced lovebirds here) and for wildlife — or even for stationary cacti at a faraway distance as in this image here. We loved this lens so much we bought the upgraded Tamron 150-600 mm G2 lens. While we got lucky with the first one and it worked great right off the bat, we had to send back our first copy of the G2 and get a replacement because it didn’t focus well. Now both lenses are awesome. Frankly, if you are picky about testing the lens to make sure you have a good copy, we find we are getting just as good pics from the older G1 lens as from the newer G2, so you might save a few bucks and get the G1. We used both lenses as well as the Nikon D500 and the Nikon D810 to capture the eagle and moon images in this post: Magical Moments in the RV Life.
An alternative to this lens that is priced similarly is the Sigma 150-600 contemporary series lens. Another awesome option that has become available since our purchase is the Nikon 200-500 mm lens.
What about those third party lenses?? Some are better than others, although Sigma’s Art Series lenses are really great these days (and expensive). When I was casting about for a “do it all” lens, we initially bought a Tamron 28-300 mm lens. It had terrible color rendition and didn’t focus for beans, so we returned it to buy the Nikon 28-300, which I totally love.
Our Past Cameras and Lenses
Do you need all this crazy stuff when you first get started? No!
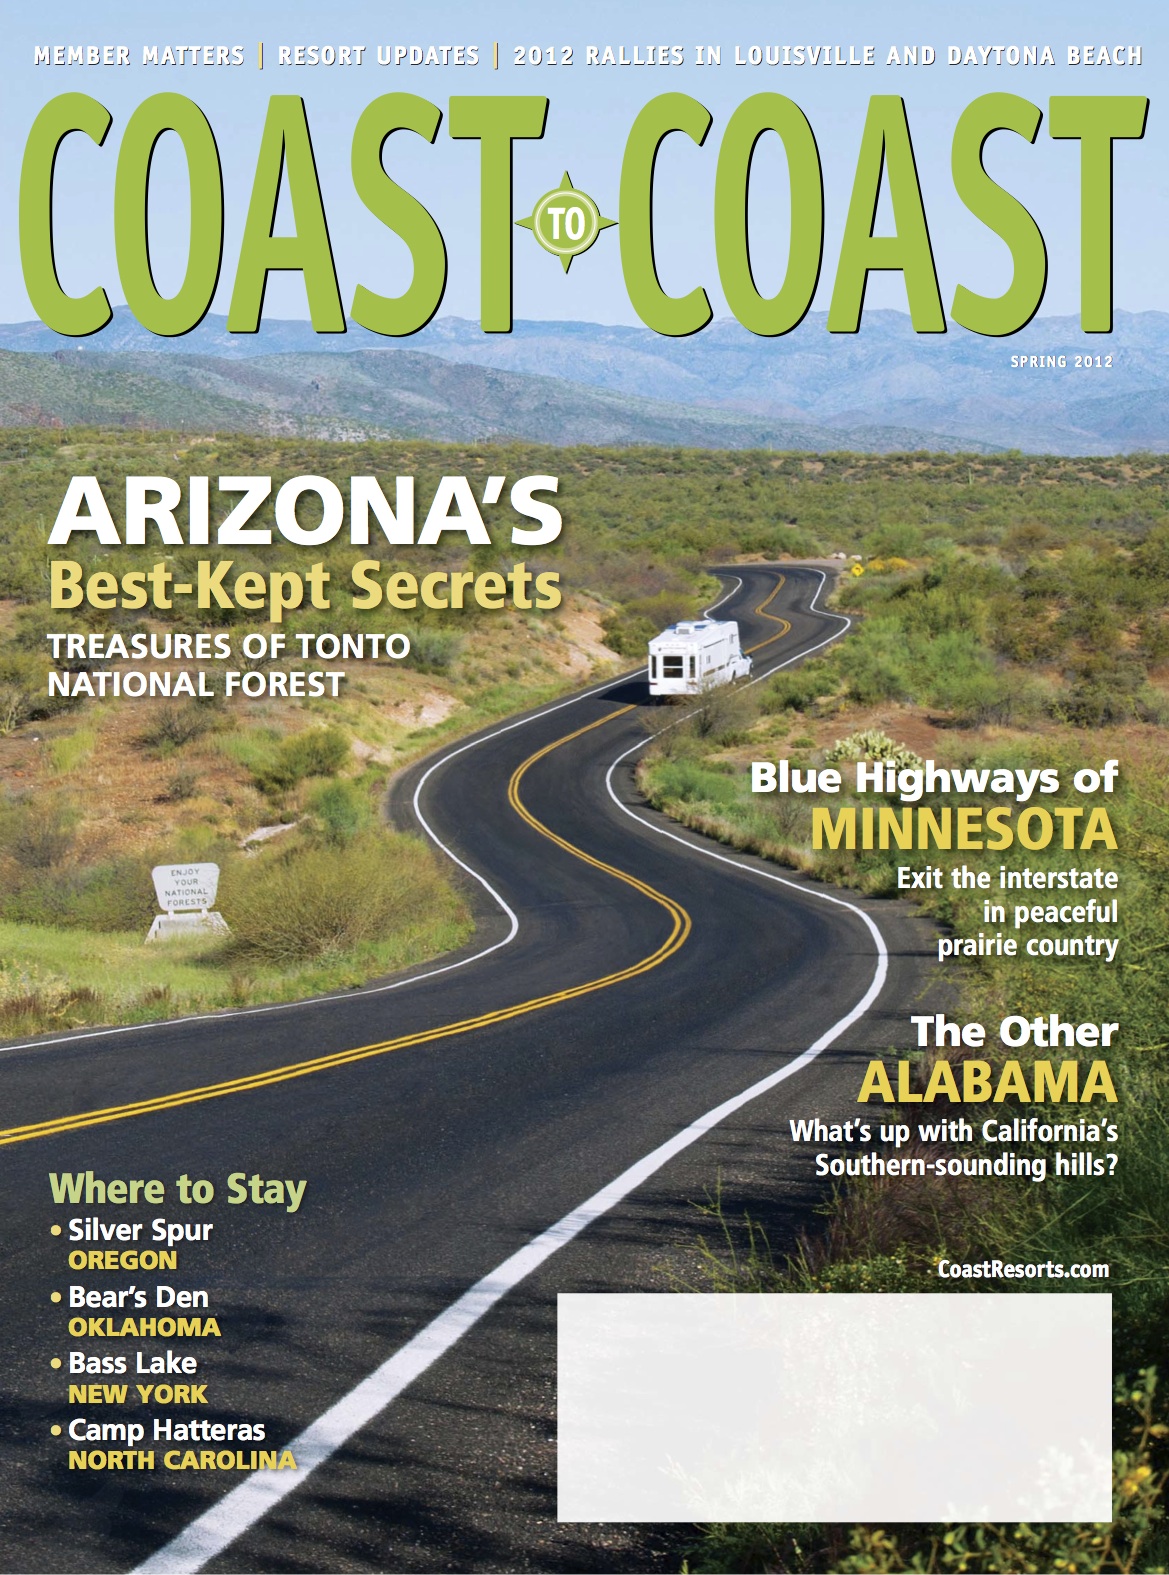
When we began traveling, we purchased two Nikon D40 cameras, which were 6 megapixel crop-sensor cameras. Each came with a Nikon 18-55 mm lens, and we got a Nikon 55-200 mm lens for distance. This was a great camera model to learn on, and we published five magazine cover photos taken with it.
Do you need to spend a bundle on a camera? No!
I took this photo with a Nikon D40 that you can buy today (used) for $100.
The Nikon D40 (and its modern day equivalent Nikon D3400) are “crop sensor” cameras (or “DX” in Nikon lingo). This means the sensor is smaller than on a “full frame” camera (like our current Nikon D810 cameras which are “FX” in Nikon lingo). This, in turn, means the image quality is slightly lower and if you blow up the image to poster size it won’t look quite as good up close.
The D40 was discontinued long ago, but can be found on Craigslist and eBay for $100 with two lenses. One that has been lightly used will work just as well now as it did years back.
How do you tell how “used” a used camera is??
If you have a Mac, an easy way to find out how many shutter clicks a camera has is to take a photo, download it to your computer, export it or locate it in the Finder, and open it in Preview by double clicking on it. Then click on Tools > Show Inspector, click the “i” button and then the “Exif” button. The Image Number is the number of shutter clicks the camera has on it. This works only for cameras that have a mechanical shutter, not for pocket cameras with an electronic shutter.
My only frustration with the Nikon D40 was that there was no built-in cleaning system for the camera sensor, so every time we changed lenses the sensor was vulnerable to picking up dust — and it did! We used the Nikon D40 cameras fro 2007 until 2011.
Today’s “equivalent” entry level DSLR is the Nikon D3400. It is a 24 megapixel camera that is far more sophisticated than the D40 and not “equivalent” in any way except the price point. If you want to get it in a kit with multiple lenses, filters, camera bag, tripod, etc., there are lots of kits here.

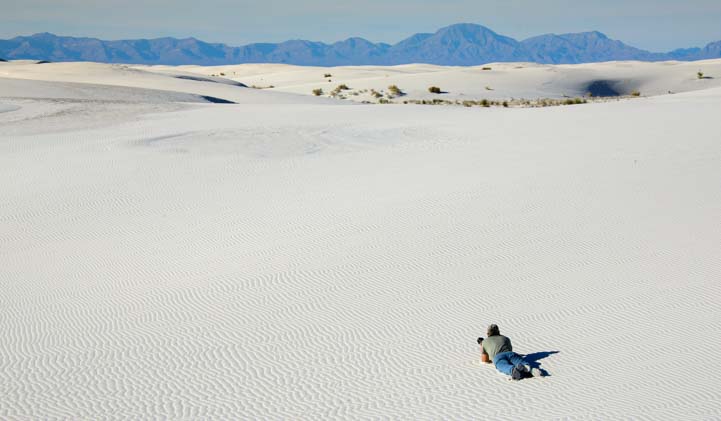
The Nikon D610 and Tamron 150-600 mm lens.
I’m in camo to keep from scaring the birds away.
Think it will work when I point this huge scary lens at them? Not!!
In 2011, we upgraded to the Nikon D5100, a 16 megapixel crop-sensor camera. Like the Nikon D40, this camera was also a “crop sensor” or “DX” camera. It came with a Nikon 18-55 mm lens. We got a Nikon 55-300 lens, and I ran all over Mexico with both of those lenses, switching back and forth all day long.
In hindsight, I should have gotten the Nikon 18-300 lens and spared myself the hassle of carrying a second lens and switching lenses all the time (I missed so many great shots because I was fumbling with the camera!). But I had read some iffy reviews of the first edition of that lens and decided against it (the current model is its 3rd generation and I’ve met people who LOVE this lens. Oh well!).
The best thing about that camera was the built-in sensor cleaner. Living in the salty and dusty environment of coastal Mexico, this was huge. The other fun thing about that camera was the flip-out display on the back. You could put the camera in Live View, then set it on the ground or hold it overhead and still see your composition on the back of the camera.
We used the Nikon D5100 cameras from 2011 to 2013. The Nikon D5100 has been discontinued. Today’s “equivalent” level DSLR is the Nikon D5300. It is a 24 megapixel camera that, again, is far more sophisticated than the predecessor that we had. This is an outstanding “intermediate” camera and can be purchased in a Nikon D5300 camera and lens bundle.
If you have a few more dollars to spend, the Nikon D7200 is even better. It is still a crop sensor camera, but it is very sophisticated. Like the others, if you are starting out, getting a Nikon D7200 Camera and Lens Kit is very cost effective.
Pocket Cameras
Sometimes carrying a big DSLR camera is inconvenient. We both like having a pocket camera for times when a DSLR is too big.
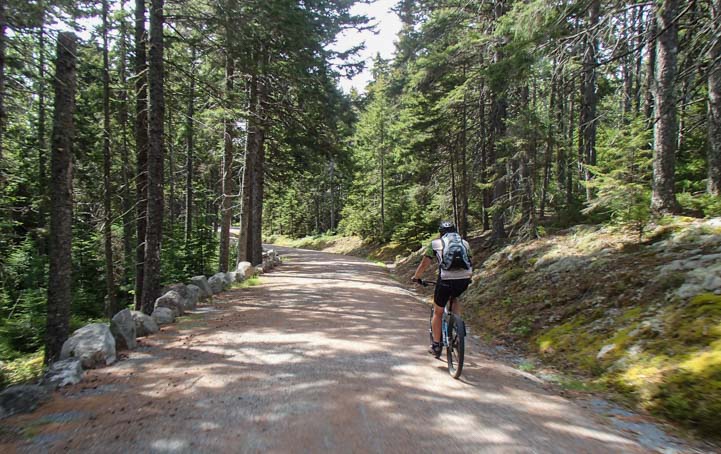
I use an Olympus Tough TG-4 camera when I ride my mountain bike. I used its predecessor when I snorkeled in Mexico too.
This camera is very rugged. The bruises it has given me on my backside are proof that it holds up a lot better than I do when I fall off my bike and land on it. I like it because the lens doesn’t move in and out when it zooms, and you can drop it and not worry about breaking it. Here are a bunch of photos it took: Bell Rock Pathway in Sedona Arizona.
Mark has a Nikon Coolpix A that he is nuts about because it is just like a mini DSLR. He doesn’t do crazy things like take photos while riding his bike one handed the way I do (and he’s less prone to falling off), so he doesn’t mind having a more delicate camera in his pocket. It is a 16 megapixel camera that has most of the features of a the Nikon D610, except it is a crop-sensor camera that has a fixed 28 mm lens that can’t be changed. It has been discontinued.
Prior to that, he had a Nikon Coolpix P330 (also discontinued). It could shoot in raw format, which was the reason he chose it, but it didn’t produce nearly the quality images of the Coolpix A.
Lots of folks use a smartphone for all their photo ops or as an alternative to their DSLR. We don’t have a smartphone, but we have used a lot of them at scenic overlooks when groups of people pass their cameras around to get pics of themselves. One thing we’ve noticed is that there is a big difference in dynamic range (the rendering of bright spots and shadows) between Androids and iPhones, with iPhones being much better. This is probably common knowledge and not news to you at all, and it may be partly due to which generation of smartphone a person hands us to get their portrait taken.
ADDITIONAL PHOTOGRAPHY EQUIPMENT and ACCESSORIES
Return to top
Batteries – We have two batteries for each of our cameras, so we each always have a fully charged battery on hand besides the one in the camera. We’ve found the Watson batteries are a good alternative to the more expensive Nikon batteries. My Watson battery died shortly after the manufacturer’s warranty expired, and I was impressed that they honored it anyway and replaced it for me. However, note that the Nikon D500 camera can’t use third party batteries, so you have to spend the bigger bucks on a Nikon brand EL-15 battery for that camera.
Memory Cards – We also have two memory cards in each camera (the Nikon D610, D810 and D500 all have two card slots in them). We use Sandisk brand for all our memory cards. We like the SanDisk “Extreme Pro” 95 MB/second SD cards. We like these fast SD cards because when we start shooting in a burst (holding the shutter down and letting the camera take pics as fast as it can — for instance, when a bison jumps over a fence in front of us), the faster the card can be written to, the faster the camera’s internal memory buffer will empty, and the longer the camera can keep shooting at top speed. Faster SD cards are also faster when downloading photos to a computer. Our Nikon D500s use Sandisk XQD cards and our Nikon D810s use Sandisk CF cards.
Every evening we download all our photos onto our laptops and reformat the memory cards in the camera. We’ve heard that this reduces the chance of the card failing and losing all our photos (which happened to me once long ago with a Kingston card – ugh!).
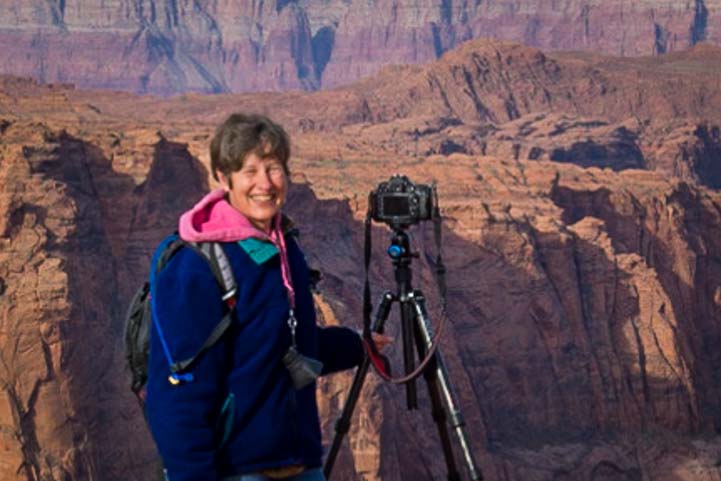
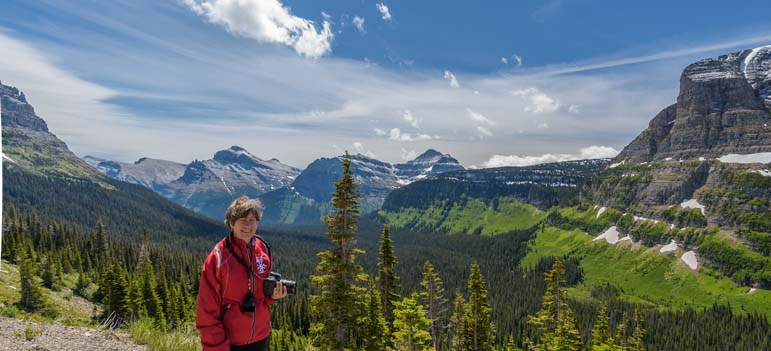
The Hoodman Loupe – A Game Changer! The Hoodman Loupe revolutionized our photography because we were suddenly able to see our photos clearly on the back of our cameras and then retake the photo if necessary. The loupe fits over the LCD screen, blocking the glare and magnifying the image. The lens is adjustable, so no matter how good or bad your eyes are, you can adjust it until you can see the image perfectly clearly. We have the original hard sided loupe. A new model collapses down so it can be stored more compactly. In a lot of the photos of me on this website, you can see my Hoodman loupe hanging around my neck!

The Hoodman Loupe lets you see the image on the back of the camera clearly, adjusted for your eyes, and without glare.
Battery Grip – Mark occasionally uses a Vello Battery Grip on his camera. This grip can hold extra batteries and also makes it possible to take portrait oriented shots (vertical images) while holding the camera as if it were upright rather than twisting your right arm over your head. Mark absolutely loves his. I use mine only occasionally because I can’t use it with my tripod L-bracket (see below).
Camera Straps – We replaced the standard Nikon camera straps with the Optech Pro Strap. This strap is thick and cushy and is slightly curved to fit the curve of your shoulder. It also has quick release clasps so you can easily unclip it from the camera when you’re using a tripod.
LENS FILTERS
For a long time we preferred the B+W brand for all our filters, although we’ve used a lot of Hoya filters over the years too. We’ve also tried Tiffen filters, but find they are hit-and-miss. Often, if a “lens deal” includes a filter with the lens, it’s not a great one. Most recently, we have begun buying Nikon filters which seem to be the best quality all around. Just be sure you get the right size for your lens (52 mm or 77 mm, etc.).

UV filter (top), Polarizing filter (left) & neutral density filter (right)
UV Filters – We have UV filters for all our lenses to provide protection for them.
Polarizing Filters – We also have polarizing filters for all our lenses. A polarizer makes it possible to enhance the colors or reduce the glare in certain lighting situations. It is best around midday and has less effect at dawn and dusk. It is wonderful around bodies of water and for removing the dashboard glare on the windshield when taking photos from inside a car. A polarizer adds a lot of contrast to an image, however, so while it can enhance a landscape beautifully, I’ve found it makes street photography of people too contrasty.
Graduated Neutral Density Filters – We occasionally use a graduated neutral density filter when the sky is very pale and the scene we are shooting is dark. This kind of filter is half colored and half clear. By twisting it so the colored part lines up with the sky and the clear part lines up with the darker landscape, the sky and landscape come out more evenly exposed. They are also very helpful for sunrises and sunsets.
Neutral Density Filters – When shooting moving water, a neutral density filter darkens what the camera sees enough so the shutter speed can be increased to show silky movement in the water without it being blown out and all white. These filters are also helpful if you want to use a very big aperture (small “F number”) to blur out a background and the camera’s top shutter speed isn’t fast enough to get proper exposure. These filters come in different degrees of darkness. A 10-stop filter is good for shooting a waterfall in broad daylight while a 4-stop filter is good for the same scene at dawn or dusk. We had fun with moving water photography at Watkins Glen in Upstate New York, the Blue Ridge Parkway in N. Carolina, and Great Smoky Mountains National Park in N. Carolina.
Lee Filter System – Mark also uses a Lee Filter System and loves it. This is a multi-part system of square filters that can be placed on any camera lens. You need the Lee Foundation Kit, an adapter ring sized to your lens and some filters. The advantage of this system is that for graduated neutral density filters you can position the transition point between light and dark. So, if you are shooting a sunset and have very little land and lots of sky, you can darken the sky and lighten the land even if the horizon is just above the bottom of your photo. Likewise if you have a bright sky and a dark hillside – you can rotate the filter so the transition is on an angle and not a horizontal line right through the middle of the photo.
TRIPODS
It is really hard to invest in a tripod after blowing the bank account on a nice camera, a few lenses, spare batteries, memory cards and filters. And you can have loads of fun with photography without getting a tripod. But if you want to play with shooting (and showing) motion (i.e., a car going by with a blurred background, clouds streaking across the sky or silky water flowing) or you want to have perfect exposure in very low light (like a sunset) without a flash, or you want to do some timelapse videos (very cool at sunrise in a big canyon) then a tripod is a must.

Sunwayfoto XB52-DL Ballhead with T2C40C Tripod and
Sunwayfoto DDC-60LR Quick Release Clamp
Most people end up upgrading their tripod several times because they just can’t believe, at first, that they have to spend good hard earned money on a tripod, and they go through a bunch of cheap ones before they bite the bullet and get a decent one! We did that, and lots of our friends did too.
The biggest difference between tripods is how much weight they can hold solidly, how easy they are to set up and adjust, and whether things drift or droop a little after you tighten the buttons. I have a Benro carbon fiber tripod that I absolutely love for hiking. The legs slide in and out really smoothly, and the adjustments are easy. I also have a set of super long Really Right Stuff tripod legs and a Wimberly gimbal which is awesome for letting me swing the Tamrom 150-600 lens around smoothly while shooting birds.
Mark has Sunwayfoto tripod legs and smaller ballhead for hiking and bigger ballhead that he loves and he uses a Sunwayfoto GH-01 gimbal head as well. We reviewed them in depth at this link:
Choosing a Tripod – Sunwayfoto Tripod and Ballhead Review
Sunwayfoto GH-01 Ballhead Review – Great Support for a Long Lens
We both have the SunWay Foto L-Bracket that attaches to the camera body and lets us set the camera in the tripod in either Landscape or Portrait orientation very easily. I keep my L-bracket on the camera all the time for simplicity in case I want to grab my tripod quickly, but it means I can’t use my Vello Battery Grip. Mark loves his battery grip, so he has to switch back and forth between the regular tripod bracket that fits on the camera along with the battery grip and the L-bracket that doesn’t.
FLASHLIGHT
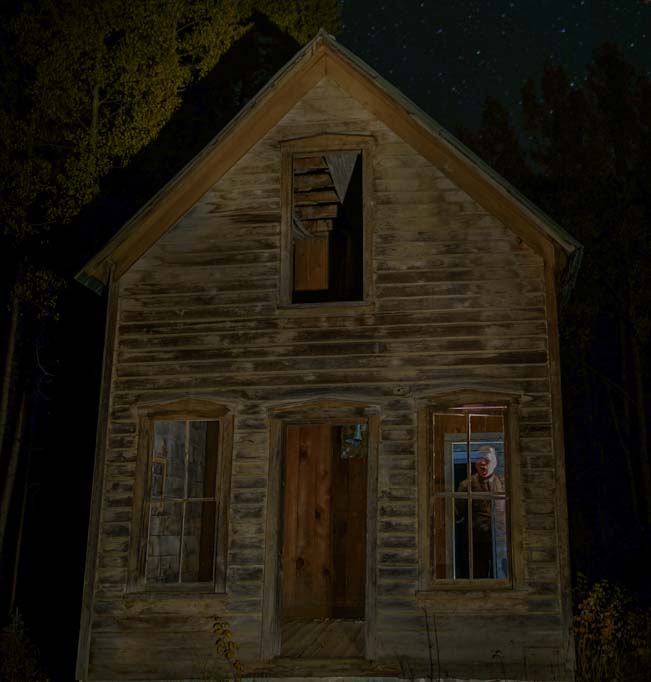
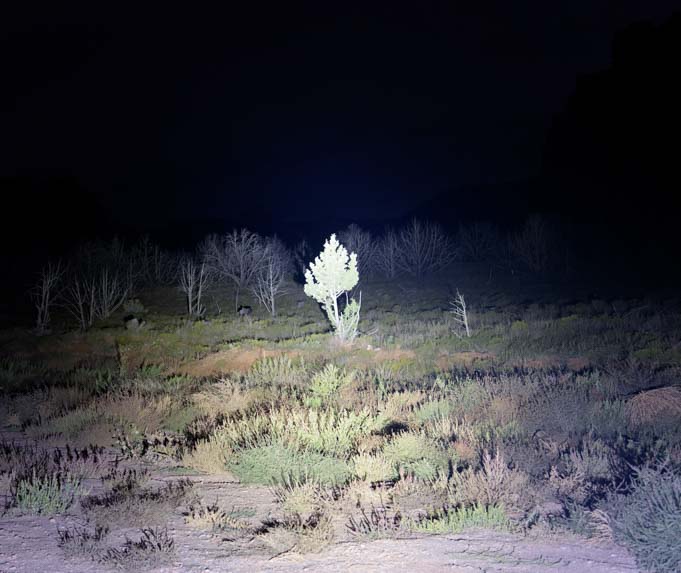
We love doing night photography, photographing the milky way and the stars, and doing light painting on old buildings for ghostly effects. At Waterton Lakes National Park we did a timelapse video of the Milky Way.
When we are hiking on a remote trail in the middle of the night, or light painting a building to make it appear visible in a nighttime photo, we find that a good flashlight is essential.
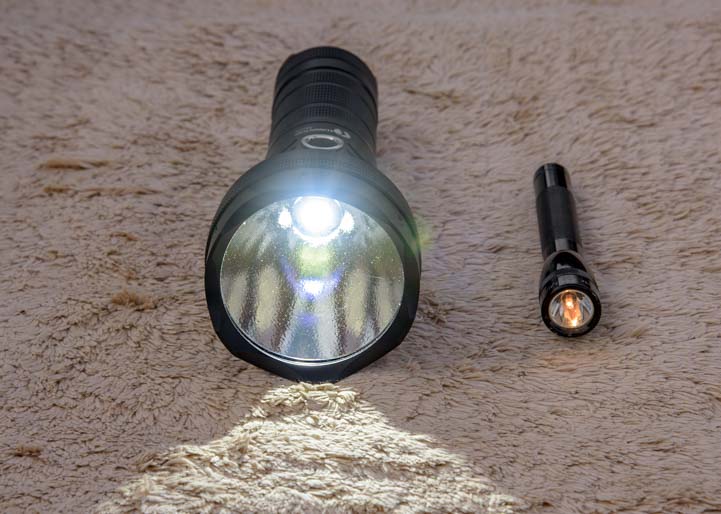
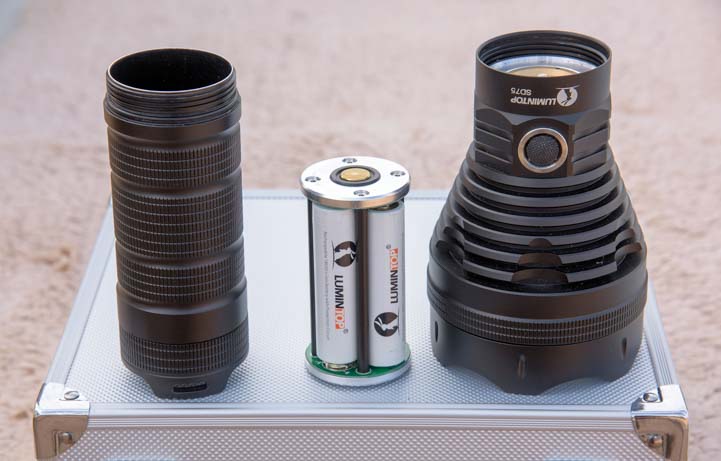
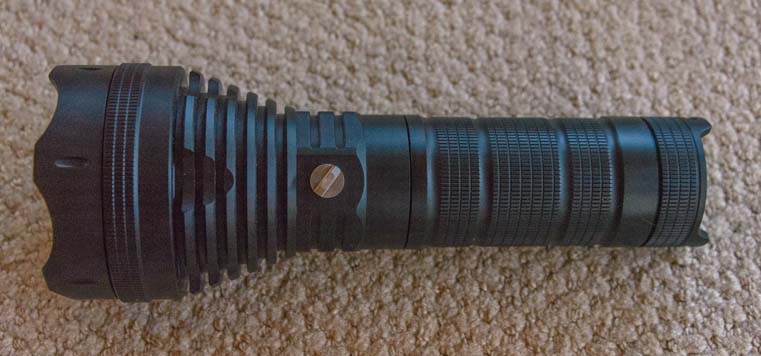
We use the fabulous, super high powered LED flashlight from Lumintop, the Lumintop SD75 4000 lumen flashlight. It is like having a car’s headlight in your hand!
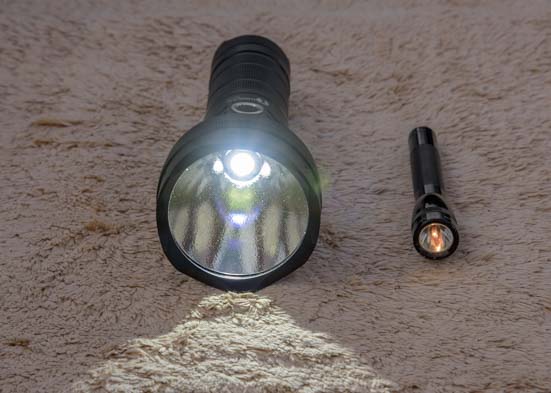
Lumintop SD75 4000 lumen tactical flashlight next to a pocket Mag Light
Built with heavy duty aerospace aluminum, it has a military grade hard-anodized aluminum finish and is water resistant to 2 meters. Offering 3 power levels plus a strobe, there’s also an LED tail light that can be used as a night light when we’re setting up our camera gear in the dark. It also has threads on the bottom for mounting on a tripod.
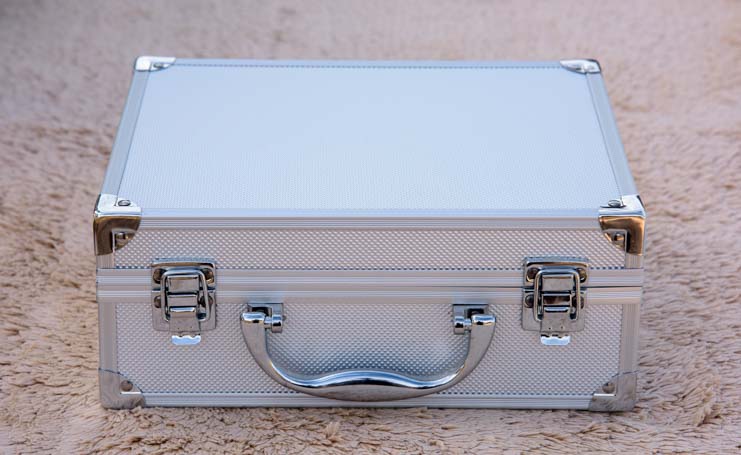
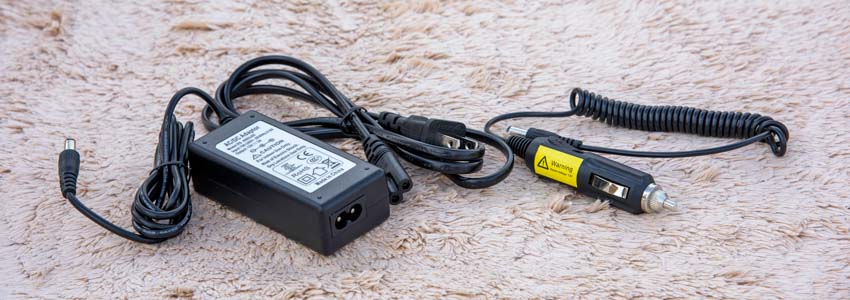
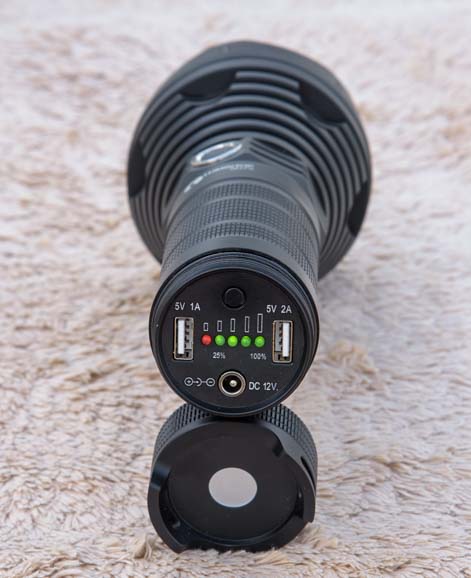
The flashlight batteries are rechargeable and there is a battery level indicator. The flashlight ships with a wall charger and 12 volt car charging cords, and it comes in a suitcase! The batteries are so strong, it can be used to recharge other smaller devices like cell phones via 2 USB ports.
This is not a pocket flashlight, but it has slots in the end for a strap that makes it very easy to carry.
We love this flashlight and just wish we had had it when we cruised Mexico on our sailboat, as it is far more powerful than the emergency floodlight we had for rescuing a man overboard!
HAULING, STORING & MAINTAINING OUR CAMERA GEAR
Return to top
With all this camera stuff, it can be a challenge to figure out how to carry it to scenic spots and where to store it in the RV and truck when we’re not using it. Also, our camera gear takes a lot of abuse from dusty air out west, salty air on the coast, and sunscreen from our faces and hands. So it needs to be cleaned periodically. Here’s where we’re at with all this right now:
Hiking With Camera Equipment
When we go on a hike of a few miles, it is likely to take us four hours or more because we stop to take so many photos. So, we want to have water, snacks, our camera gear, tripods, and possibly a jacket with us. There are a lot of camera-specific backpacks and sling style camera bags on the market, but none we’ve seen is really designed for hiking.
After a lot of searching, we finally decided to use big Camelback hydration packs instead of bona-fide camera bags when we hike with all our photography stuff, and we’ve been really happy with this choice.
I have a Camelback H.A.W.G. and Mark has a Camelback Fourteener. Both can carry 100 ounces of water, and each has enough capacity for the Tamron 150-600 lens along with everything else if need be. (We never take more than two lenses with us — one on the camera and one in the pack).
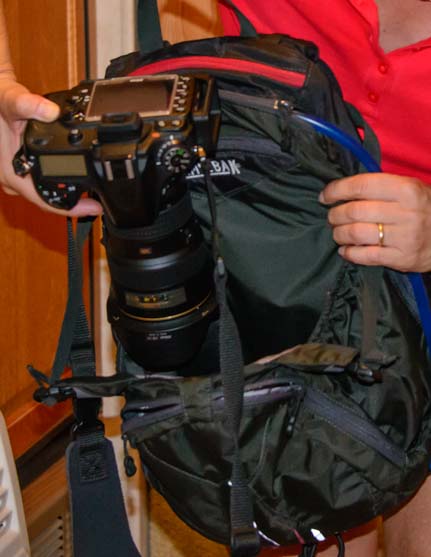
The Camelback H.A.W.G. can hold a big camera.
We generally hike with our cameras slung around our necks so we can take photos with them as we walk. I put the Camelback on first and then put the camera on afterwards so the camera straps aren’t trapped under the shoulder straps of the Camelback. There’s nothing like getting caught in the Tourist Tangle!
My main criteria for choosing a Camelback was that I wanted to be able to put my camera (with the 28-300 mm lens attached) inside the Camelback and then close that compartment so I could scramble over something gnarly that required two hands and not worry about the camera slipping out of the pack. And it had to do that with 100 ounces of water in the hydration pack.
My other criteria was that I wanted to be able to hang my tripod on one of the Camelback straps and hike without carrying it in my hand.
The straps on the sides of the H.A.W.G. aren’t designed to carry a tripod, and they may fatigue over time, but I’ve been really happy with how this Camelback has held up on the many hikes I’ve taken with it so far in two years of owning it.
The straps on the sides of the Fourteener are designed to hold ice picks and things like that, so they are probably a little more rugged. If I had known about the Fourteener before I bought my H.A.W.G., I probably would have bought that model instead. Mark has had it almost as long as I’ve had my H.A.W.G., and he is very happy with it as well.

The tripod fits neatly on the side of the H.A.W.G., and the camera straps aren’t trapped under the Camelback straps.
One really nice feature of both of these Camelback models is that they have a waterproof rain sack that can be pulled out of a hidden pocket and slipped over the whole Camelback, keeping the contents dry if you’re caught in a downpour. This came in super handy at the Duggers Creek Falls on the Blue Ridge Parkway!
One of the tricks with backpacks in general is that, if they have a waist belt, you can loosen the belt a little, slip your arms out of the arm straps and then swing the pack around so it is in front of you. This way you can get something out of it without taking it off and putting it on the ground. This is fantastic when you want to swap filters, grab a snack, or change batteries without taking the whole darn thing off.
Once we get to an area where we’re going to take a lot of photos, we take the tripods off the Camelbacks and we carry them around in our hands until we’re ready to hike out again.
We carry a plastic bag (a shopping bag is fine) in our packs in case it sprinkles and we want to cover our cameras for a short time. We also carry rain ponchos so we can cover ourselves and our Camelbacks in the event of unexpected rain.
Short Walks With Photography Gear
If we are going to spend the day roaming around but not hiking, or if we’re taking photos a short distance from the truck, we don’t take the big Camelbacks. I use a small fanny pack to carry a spare battery and possibly a second lens. Mark likes to wear a photographer’s vest that has lots of pockets for all his goodies. He likes the one he has, but has his eye on the Phototools Photovest 14!
Storing All This Stuff
In the trailer we have Ruggard camera cases and Ruggard backpacks to hold the cameras and lenses. We also have camera cases in the truck. We’ve found good homes for the tripods in the truck too, and they generally stay there so they are with us if we arrive somewhere and suddenly wish we had them with us.
Cleaning
A great way to get the dust off the camera and lenses is to blow it off with the Giotto Rocket Blaster (the largest size is best). The Nikon LensPen Lens Cleaner is good for brushing dust off too. For smudges and smears, we use the Eclipse Camera Cleaning Kit which comes with a cleanser and pads.
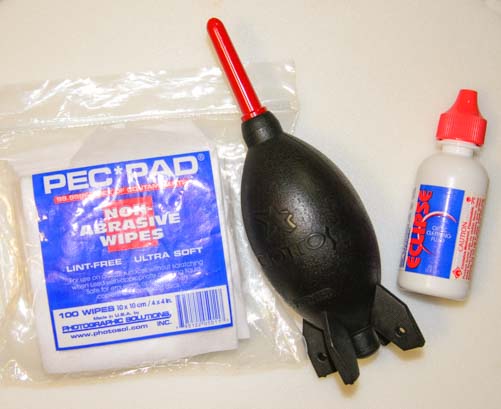
Giotto Rocket Blaster & Camera Cleaning Kit
Sometimes the camera’s built-in sensor cleaning system doesn’t quite do the trick, and getting debris off the camera sensor can be really intimidating. Rather than paying for an expensive cleaning at a camera shop, we’ve discovered that the Sensor Gel Stick sold by Photography Life does a phenomenal job (don’t get the cheap Chinese imitation ones). Check out the video under the product description here to see how to do it. It’s easy and we have done it many times.
PHOTO ORGANIZATION and POST-PROCESSING TOOLS
Return to top
We each have a plain MacBook Pro (no retina display) with 16 GB RAM and a 1 TB internal drive and slots for CD, SD card, Thunderbolt, etc. (2012-style case). We also each have a 4 TB external hard drive with a Thunderbolt dock that allows multiple drives to be daisy-chained.
We use Adobe Lightroom for most of our post-processing. The easiest way to learn Lightroom is the Julianne Kost Lightroom Videos. Julianne is Adobe’s “Lightroom Evangelist” (what a great title and job!) and her presentations are clear and concise.
Organizing photos is never easy, and everyone has a different method. Lightroom lets only one person work on a catalog at a time, so we each have separate Lightroom catalogs. We make use of the Smart Previews in Lightroom to get access to each other’s photos without transferring all the original photo files between our laptops. All we have to transfer is the catalog, previews and smart previews. It’s clunky — I know they could do better — but it works.
We also have a separate Lightroom catalogs for each year. The older catalogs are stored on external hard drives and the current year catalogs are on our laptops. We try to make sure all our photos are in two places (laptop and external drive or on two external drives). Some of our older photos are in Apple’s Aperture and our oldest are in Apple’s iPhoto, the two post-processing programs we used prior to Lightroom.
I don’t want to have to plug in an external drive every time I go into Lightroom, which is why we keep our current year’s photos and catalogs local to our laptops. We have our previous year’s catalogs and smart previews on our laptops so we can see and work with our older photos. If we need the full image of an older photo, we plug in the appropriate external hard drive, and the catalog on the laptop reconnects with the original images.
We don’t store anything in the cloud.
We organize our photos by location but like to have an overall sense of the chronological order in which we visited places, since that is the way we remember our travels. So, we label our folders with 2 digits followed by the state to bring up the states in the order in which we visited them.
Inside of each state folder, we name every download with a 4-digit date (month/day) followed by the specific location. For photos that aren’t location specific (like photos of our trailer disc brake conversion or fifth wheel suspension failure, we move them after downloading to a MISC folder and name a subfolder within it more appropriately or add them to an existing folder.

2 digits to order the states chronologically, then 4-digit dates on subfolders with the specific location.
We also use PHOTOSHOP for post-processing. The best instruction for learning Photoshop is offered by Brendan Williams. His free online tutorials on his YouTube channel are terrific. However, if your goal is to MASTER Photoghop, buy his video course and go through each of the videos slowly — and practice the techniques he teaches. His course is extremely well done and is worth every penny!
Photomatix Pro is an excellent program for creating HDR (high dynamic range) effects from several identical photos taken at different exposures, and Topaz Adjust and Topaz Detail in the Topaz Suite of software are great for getting a little wild with crazy effects at the click of a button.
For panoramas, we use Panorama Maker to stitch together a series of photos.
We use the X-Rite Color Checker Passport to create custom color profiles calibrated to specific camera and lens combinations. It also comes with a gray card that we sometimes use to set a custom white balance for particular light conditions.
RESOURCES FOR LEARNING PHOTOGRAPHY
Return to top
Photography is something you can spend the rest of your life learning. We’ve been reading and studying photography books and blogs for a few years now, and we have found the following printed books and ebooks and online resources to be really helpful in conquering both the technical aspects of understanding what all those buttons on our cameras do and the artistic aspects of how to capture the essence of what we’re seeing.
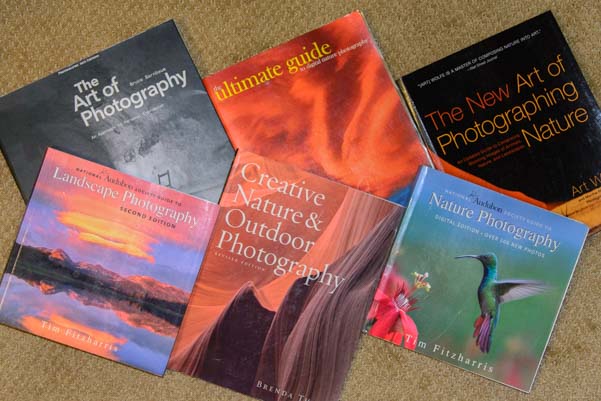
Some of our Favorite Photography Books
BOOKS ON PHOTOGRAPHY
- The first book we read was Creative Nature & Outdoor Photography by Brenda Tharp. It gives a nice overall introduction to photography, and her photos are beautiful.
- Tim Fitzharris has written several excellent books, and our favorites are:
- Art Wolfe is a true master. Besides hosting the inspiring PBS TV series, Travels to the Edge (which is mostly about travel to exotic places and a little about photography), his book, The New Art of Photographing Nature is superb.
- If you enjoy a good, dense, technical tome, The Art of Photography by Bruce Barnbaum is outstanding. It is heavy going, but if you can get through it, it’s like taking a college course on art theory, photographic techniques and the history of photography.
- There is a British Magazine/Book wrtten by Daniel Lezano that is chock full of great tips. It is published quarterly, and any issue is good: Essential Guide to Landscape Photography
eBOOKS ON PHOTOGRAPHY
ONLINE TUTORIALS
Steve Perry of Backcountry Gallery offers incredibly thorough and detailed camera reviews and photography tutorials on his YouTube channel, Backcountry Gallery. We were very fortunate to meet Steve and photograph prairie dogs and bison with him in South Dakota in 2017. In 2023 Steve was honored as one of the Top 40 wildlife photographers in the world. His eBooks are worth every penny and his videos offer outstanding and easy-to-follow instruction. He also leads wildlife photogrpahy tours to the far corners of the world where the most exotic wildlife live!
The website that taught us the most in the beginning was Photography Life written by Nasim Mansurov and his very talented team. He has super detailed gear reviews and his site is read by many of the top professionals in the photography world. His tutorials are excellent, and he has two pages with links to them all:
We were very fortunate to meet Nasim at his 2012 fall foliage photography workshop in Ridgway Colorado. Those extraordinary three days were a real turning point for our photography.
BLOGS, TIPS and GEAR REVIEWS
The photography blogs we read regularly are these:
- Nikon Rumors – The latest info about everything related to Nikon cameras: future products, recalls, Nikon deals and specials
- Photography Life – The most comprehensive camera/lens reviews anywhere and a top team of writers producing tutorials
- Ken Rockwell – The first online photography resources we found. We’ve been following ever since
- Ming Thein – Excellent and detailed camera reviews and truly inspiring photographs
- DigitalRev TV – Hilarious (and very informative) videos on all kinds of photography topics.
- Thom Hogan – Interesting photography-related essays as well as gear reviews
- Dreamscapes – Phenomenal, jaw-dropping photography that makes us want to keep learning, plus tutorials & eBooks
- DxO Mark – A laboratory that uses industrial testing equipment to do comparative camera, sensor and lens ratings
Subscribe
Never miss a post — it’s free!
Our most recent posts:
More of our Latest Posts are in the top MENU above.
New to this site? Visit RVers Start Here to find where we keep all the good stuff!!