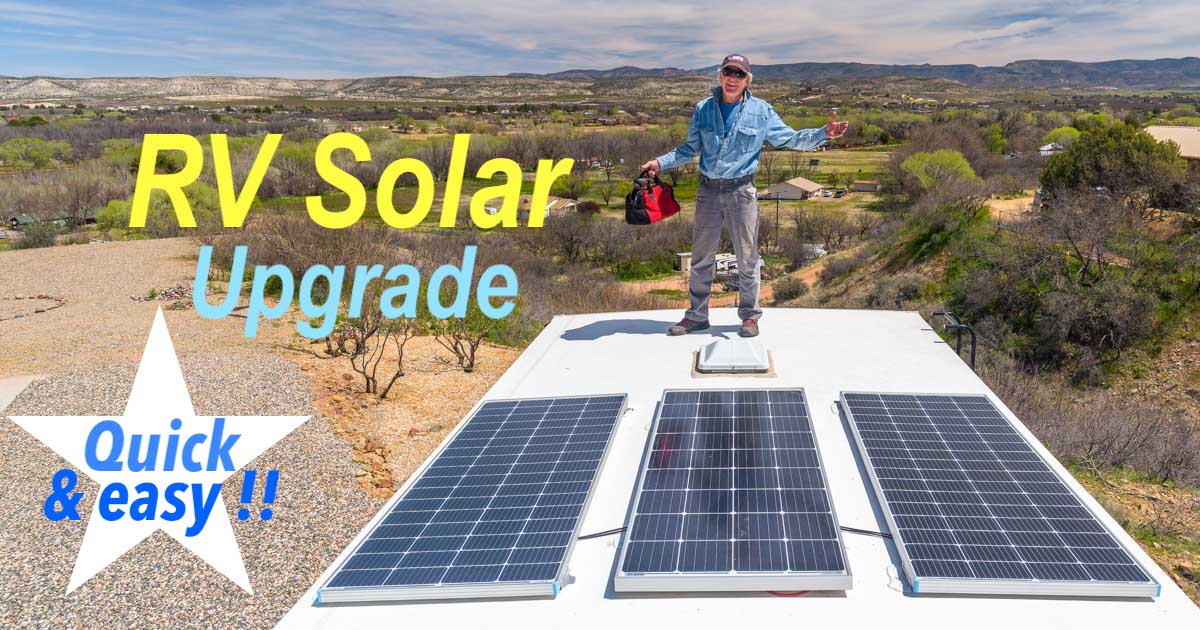
We recently did an RV solar upgrade project that proved to be quick, easy and cheap. We spent just $480 to jump from 190 watts of power to 570 watts, more than enough for our boondocking off-the-grid RV lifestyle. PLUS it took less than three hours to install. What a great bang for the buck!
.
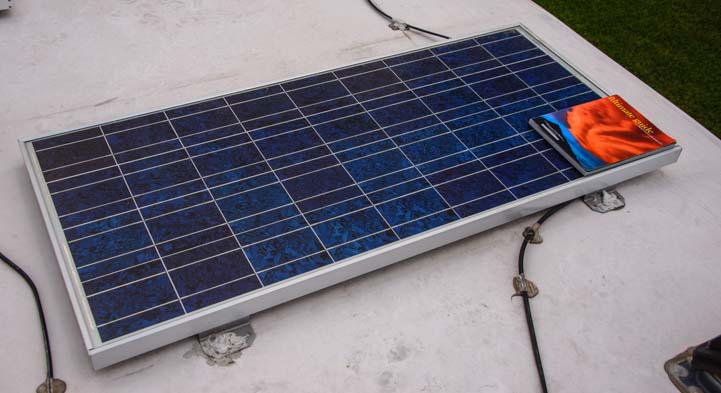
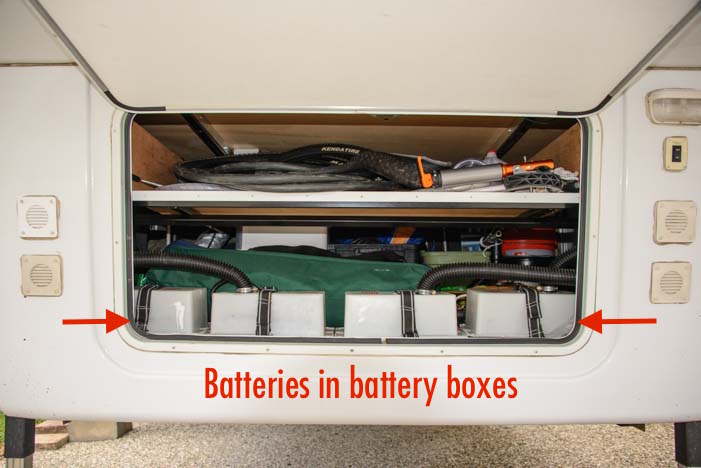
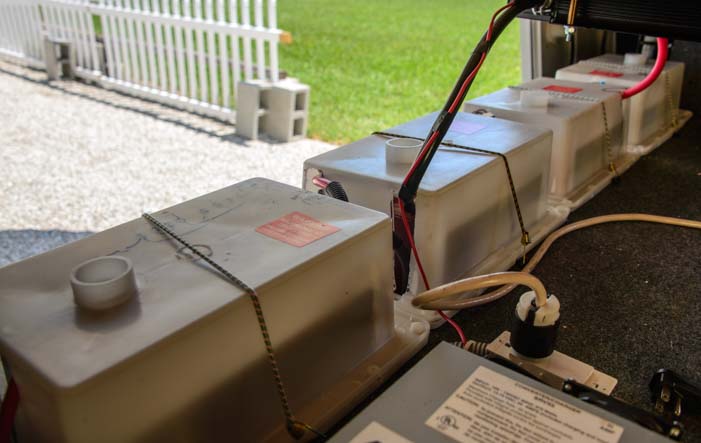
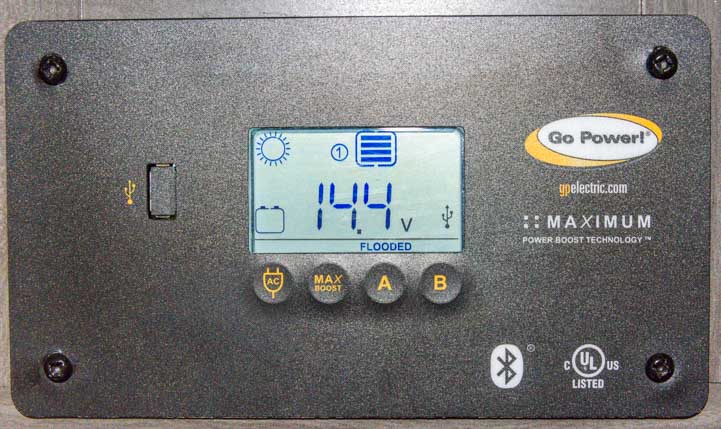
Our Genesis Supreme 28CRT fifth wheel toy hauler came with a small factory-installed Go Power RV solar power system that included a single 190 watt solar panel, a 1500 watt pure sine wave inverter and a 30 amp PWM solar charge controller connected to four dealer-installed Group 24 12-volt wet cell batteries with a capacity of 280 amp-hours.
Factory-installed RV solar power systems like this one are now a common option on many new RVs, and Go Power (a subsidiary of Dometic) is often the brand that RV manufacturers use.
Although none of the components in the system are “best of breed,” the Go Power system worked fine for us as we boondocked every night for four months last summer. As the months wore on towards the Fall (and away from the summer solistice), however, the batteries struggled more and more each day to reach full charge. In the last few weeks in late August and September they never did.
Fortunately, the Go Power 30 amp solar charge controller that came with this system can handle up to 600 watts of solar panels, so an RV solar upgrade was possible without replacing the charge controller!
As we contemplated doing an RV solar upgrade all last summer, the debate was: do we ditch the whole factory installed system and replace it with top of the line components or do we simply add some more panels to the existing system?
How much solar power do you really need when you live in an RV?
Answering that question is really important because it’s incredibly easy to end up installing a far bigger and fancier system than you actually need after hearing people discussing their mammoth systems around the campfire.
Just because a friend has a huge system doesn’t mean it will make sense for you to break the bank to install one too!
How big an RV solar power system you need depends entirely on how much power you use in your day-to-day RV lifestyle and how often your boondock.
We boondock every night, but we don’t use much power. Also, since we are now seasonal travelers instead of the full-timers as we used to be, we travel primarily in the summertime when the sun is high in the sky at a good angle for the solar panels and the days are long, allowing the solar panels to work for a few extra hours.
Our primary power use is our two laptops (which we use a lot), the water pump, and the interior lights for an hour at night (we go to bed early). We don’t watch TV and we rarely use the microwave or hair dryer.
Running the air conditioning on battery power is not possible for any but the most massive RV solar power charging systems and battery banks, so it’s not part of the equation for most people. We rely on the generator for running our a/c.
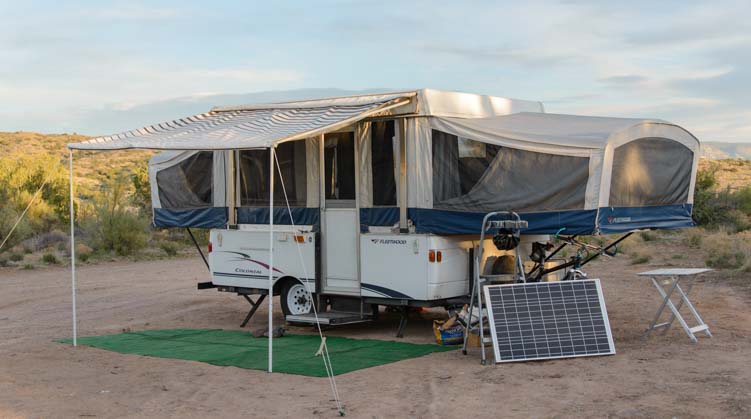
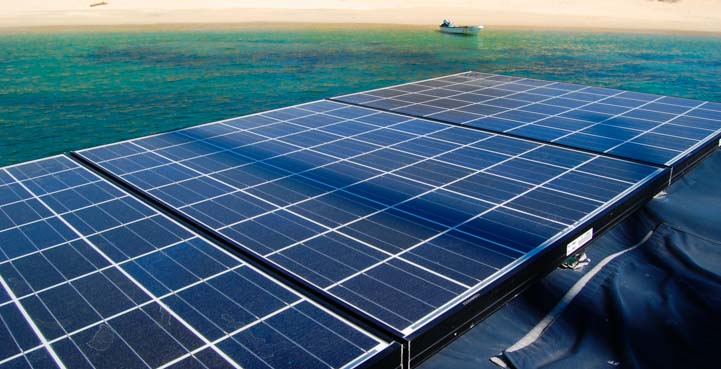
With our traveling lifestyle of minimal power use, we happily lived on 480 watts and 555 watts in our trailer and sailboat respectivlely for 13 years. That was plenty of power for us except in the dead of winter when the sun was low in the sky (poor angle to the solar panels) and the days were short.

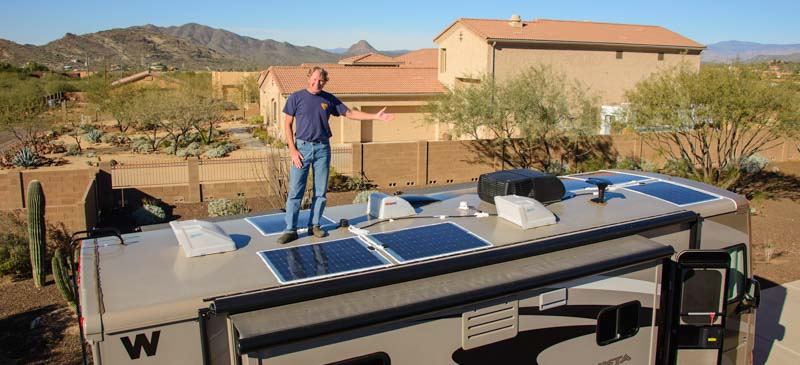
Our toy hauler had one factory installed solar panel (center).
An easy RV solar upgrade with two more panels tripled our battery charging capacity!

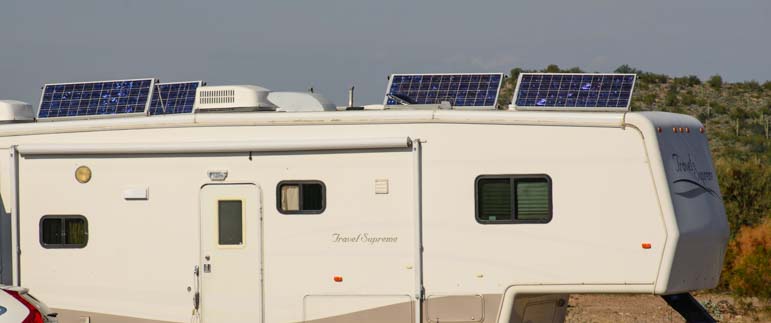
When we did those installations in 2008 and 2010, they were considered to be sizable for a boat or an RV. Seeing a rig with 1,000 watts on the roof in those days made everyone’s head turn while they mouthed the word, “WOW!”
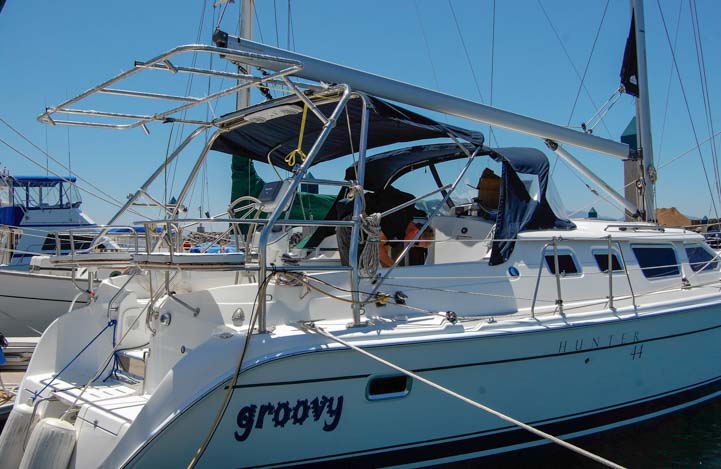
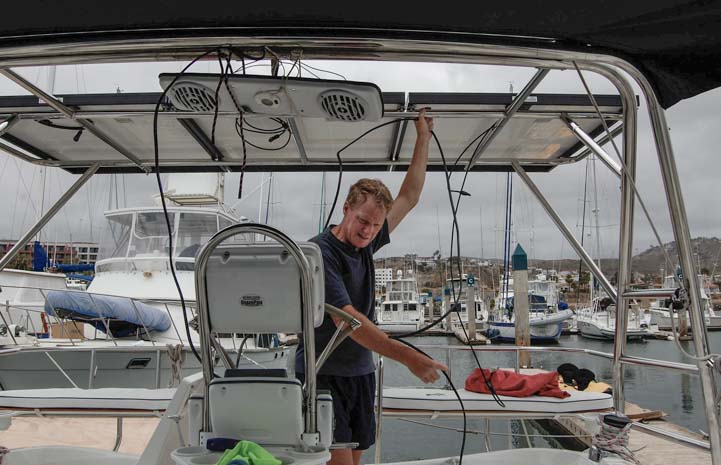
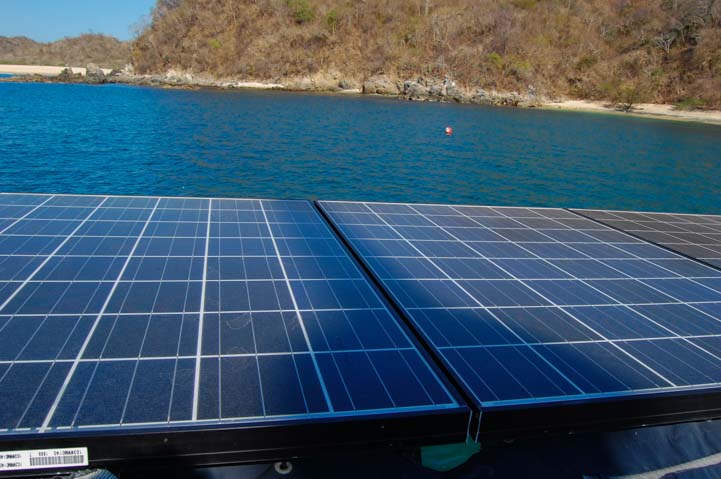
However, by today’s standards, we had small systems on both our RV and sailboat! The third owner of our boat Groovy upgraded the solar panels to 930 total watts instead of the original 555 watts.
Last year, we met a full-timing family who had 3,500 watts of solar power on the roof of their 44′ toy hauler. They also had two huge Victron solar charge controllers (the panels were wired in two separate arrays) and they had a massive bank of lithium-ion batteries in the basement.
They could run their air conditioning on battery power all day and they had a full-size residential refrigerator to boot. They liked to keep their TV on all day long and the kids spent hours watching videos on their iPads. The kids also did homework on their laptops and everyone in the family had had phones and laptops to charge. They also had several internet access devices that gave them a total of 500 GB of data each month. They used it all and sometimes fell a little short by month’s end!
So, the size of the system you need depends entirely on how you live your RV lifestyle.
We knew when we bought our toy hauler last year that 190 watts wouldn’t be enough for us long term, but we didn’t have time to fuss with and do an RV solar upgrade before starting our summer journey. We were also curious to see how it performed right from the factory.
The solar charge controller is a lower end PWM unit (Pulse Width Modulation) rather an MPPT (Maximum Power Point Tracker) type of controller that eeks out more power from the panels. We wondered if the system would work at all. We were pleasantly surprised that it worked quite well and did the job all summer long, although our batteries did get down to 11.9 or 12.0 volts on quite a few colder mornings at summer’s end, much lower than we’ve ever seen our house batteries before.
Go Power 30 amp PWM solar charge controller mounted on a wall inside the rig.
Ultimately, we decided the simplest and most stress-free RV solar upgrade we could do would be to add more solar panels and leave all the other components alone.
RV Solar Upgrade – Adding New Solar Panels – Wired in Parallel or in Series?
The Go Power solar panel that came with the rig is a 12 volt 190 watt panel. Although the Go Power 30 amp solar charge controller can handle 600 watts of power coming from the panels, it is unable to operate on anything but 12 volts. Fancier charge controllers can work with the panels at 24, 36 or 48 volts and then step down the voltage to 12 volts to charge the batteries.
This limitation meant we didn’t have the option of using 24 volt panels which are generally cheaper per watt. Also, it meant that the new panels would have to be wired in parallel with the existing panel to keep them all at 12 volts rather than having the option of wiring them in series because it would put the solar array at 36 volts.
As a side note, even though we didn’t have a choice in this case, the decision whether to wire the solar panels in parallel versus in series is a matter of how much shade the panels might encounter and how long the cable runs will be versus the guage of the wire.
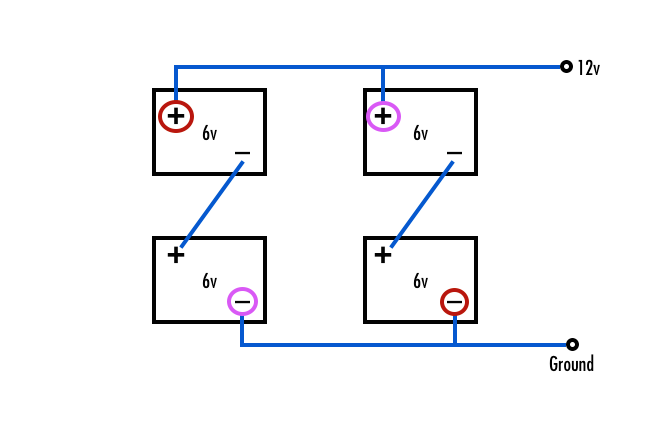
When solar panels are wired in series, if one panel gets shaded, all the panels reduce their power output dramatically. Also, the voltage of the panels is cumulative while the current stays the same. That is, three 12-volt panels will be at 36 volts but the current running in the wires will be the nominal current of a single panel, for instance, 10 amps.
When solar panels are wired in parallel, if one panel gets shaded, the others continue to produce power at their normal rate. So, in a three panel array, if one panel drops out you still get 2/3 of the power because the other two panels are still working. Also, the voltage of the panels remains the same but the current is cumulative. That is, three 12-volt panels will be at 12 volts but the current will be additive, or 30 amps.
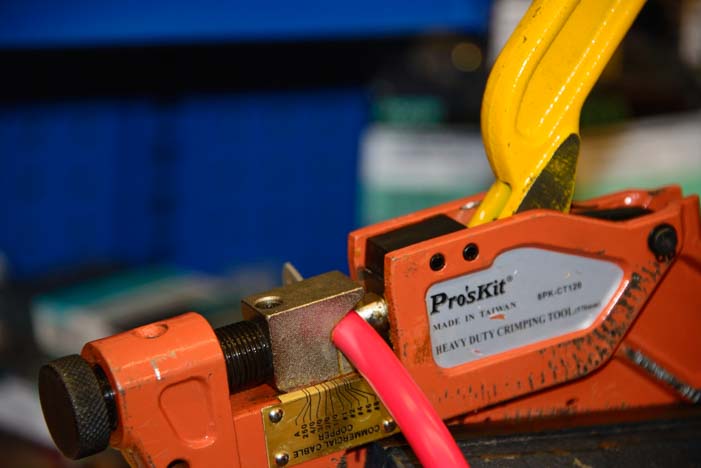
The more current there is in a wire, the shorter that wire has to be before some of the current dissipates as heat, leaving you less current for charging the batteries. A heavier guage wire will retain more current over a longer distance, but it is harder to work with during the installation and it is more expensive.
For reference, we wired the panels on our old full-timing fifth in series, and that worked fine because we almost always parked in full sun and rarely had any kind of shade on the panels. However, we wired the panels on our sailboat in parallel because the mast and boom cast a huge moving shadow across the panels as the boat swung at anchor, so one or another of the panels was frequently knocked out of the system.
New Solar Panels – What Size?
Whether the panels were wired in series or in parallel, any new panels we added to our system would produce the same watts as the existing panel: 190 watts. Even if the new panels were bigger than 190 watts, they would match the lower wattage of the existing panel.
There weren’t many 190 watt 12 volt panels available, except the same model Go Power panel we already had on the roof, and their panel is very expensive.

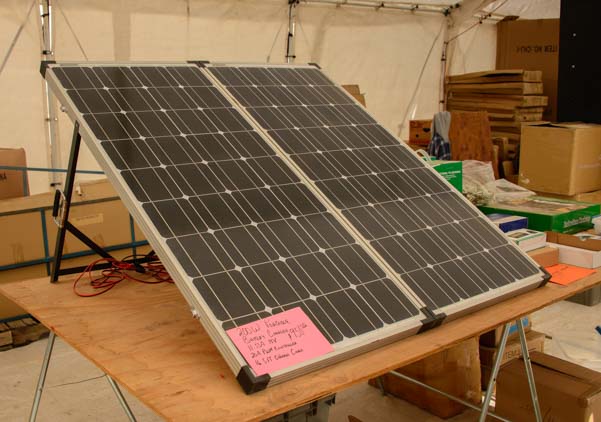
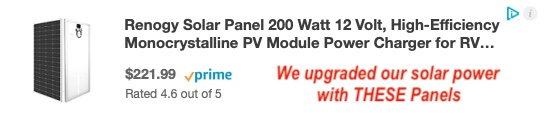
Instead, we got two Renogy 200 watt 12 volt panels, and these seem to be good quality. Because the new panels will drop down to 190 watts to match the existing panel in the system, this RV solar upgrade will give us 570 watts of total power (3 x 190).
570 watts is more than either our boat or our full-time trailer, so it should be more than enough!
As for the batteries, we don’t have room for more batteries, and the existing batteries haven’t died yet (to my surprise!). So, we’ve decided to hold off on swapping out the batteries until another season.
RV Solar Upgrade: Installation
The total cost of the solar power upgrade was about $480 which included:
- Two Renogy 200 watt 12 volt solar panels
- Two Renogy mounting Z bracket kits
- Two 3-to-1 branch connectors to wire the panels in parallel
- Two 6′ 10 AWG cables with MC4 connectors
- Two tubes of Dicor Self-Leveling Lap Sealant
The tools required to do this RV solar upgrade project were:
- Flat head screwdriver or narrow putty knife
- Cordless power screwdriver with a torx bit (manual is fine too)
- Cordless drill with a hex head bit
- Scratch awl (or a hammer and nail!)
- Caulk Gun
The installation was straight forward.
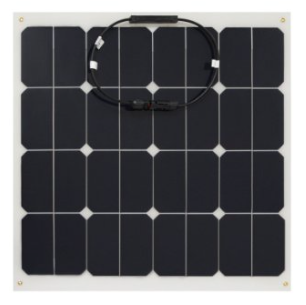
On the back of each panel — both the existing one on the roof and the two new ones — there is a junction box with two 10 AWG leads (positive and negative). They are about 18 inches long and have MC4 connectors on the ends.

Most solar panels have a junction box and short leads with MC4 connectors on the ends, one positive and one negative.
On the existing solar panel, the MC4 connectors at the ends of these cables were connected to two other cables that ran from the roof of the RV down to the solar charge controller inside the rig.
All of this cabling was invisible as you looked at the face of the solar panel on the roof because it was all underneath it. Also, beneath the solar panel, there were two holes in the roof where the cables went into the interior of the rig down to the solar charge controller.

Most solar panels have a junction box and two leads with MC4 connectors on the ends.
Here is a rough diagram showing the solar panel with its junction box and two 10 AWG cables with their MC4 connectors. These connectors are attached to two MC4 connectors on the ends of a long length of 10 AWG cable that goes through a hole in the roof (the blue circle) down to the solar charge controller in the interior of the rig (not shown).
The holes in the roof are actually under the panel, but this drawing shows the holes being above the panel so the diagram isn’t too messy!

Our factory installed solar panel had two leads, positive and negative, that attached to wires coming up through the roof from the charge controller inside the rig. The holes in the roof (blue circles) are actually located under the panel.
We purchased two 3-to-1 branch adapters that would make it super easy to wire the three panels in parallel. The adapters look like bird feet with three toes (one for each solar panel), and a leg that would attach to the cable that went through the roof into the rig.
One adapter would be connected to the positive side of the system and one would be connected to the negative side. That is, all three positive leads, one from each panel, would connect to the three toes on one bird foot (the “positive” 3-to-1 branch connector) and all three negative leads, one from each panel, would connect to the three toes on the other bird foot (the “negative” 3-to-1 branch connector).
We also bought two 6′ lengths of 10 AWG cable with MC4 connectors pre-installedat each end. These were essentially extension cables that would connect to the MC4 connectors on the cables coming up through the roof from the charge controller down in the rig.
They were color coded, so the red one would connect to the positive cable coming up through the roof and the black one would connect to the negative cable coming up from the charge controller.
Fortunately, Genesis Supreme had labeled the cables coming up from the charge controller so we could tell which one was positive and which was negative.

We got two 3-to-1 branch connector (“bird feet”) and one 6′ pair of 10 AWG cables with MC4 connectors pre-installed on the ends.
Here is a rough diagram showing the layout of the cables. As in the previous diagram, the two blue circles are the holes in the roof which are actually located beneath the original solar panel in the middle. However, for simplicity in showing how the cables connect, the “holes in the roof” are located above the panels in this diagram and the 6′ extension cables are really short!
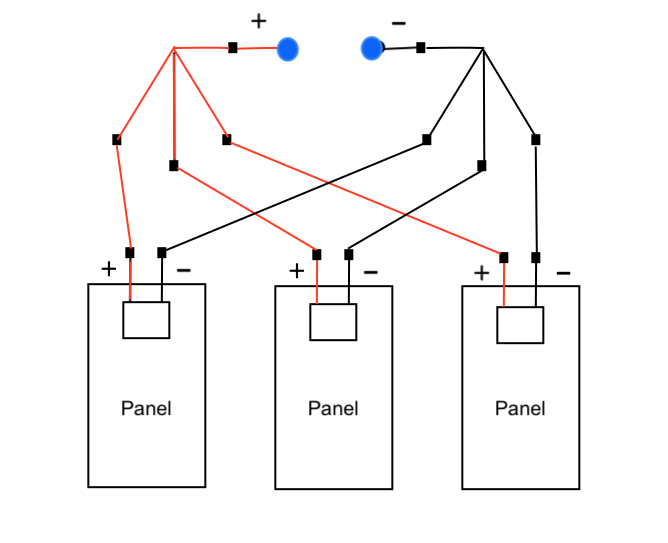
Our 2 new panels would be wired in parallel with the existing panel, connecting all the positives together on one 3-to-1 branch connector and all the negatives on the other. The extension cables would connect to the wires coming up through the holes in the roof (blue circles). Note that the holes in the roof are actually under the center panel and the 6′ extension cables are drawn super short.
Our mission was to :
- Lift the existing solar panel so we could access the cabling underneath
- Disconnect the MC4 connectors on the panel’s leads from the MC4 connectors on the cables that come up from the solar charge controller in the rig
- Reconnect the cables coming from the charge controller to the new 6′ “extension” cables
- Connect the “extension” cables to the legs of the 3-to-1 branch connectors which would designate one as “positive” and one as “negative”
- Connect each panel’s positive cable to the “positive” 3-to-1 branch connectors
- Connect each panel’s negative cable to the “negative” 3-to-1 branch connectors
All of this would be done by snapping the MC4 connectors together, simply inserting one end into the other and pressing it together. So easy!
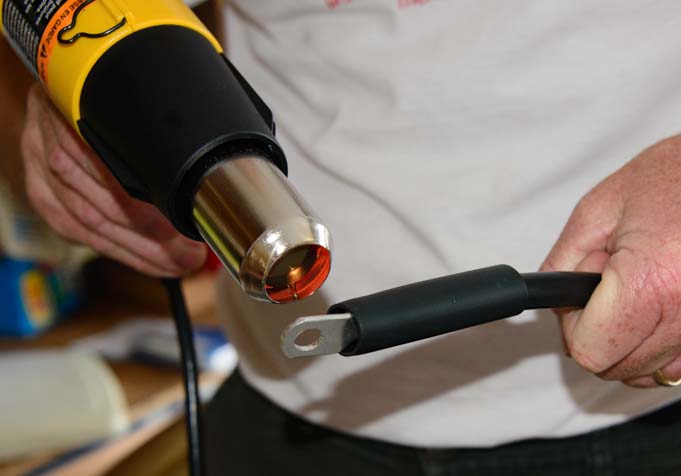
There’s a special tool for disconnecting MC4 connectors, but you can also disconnect them with your fingers by keeping the tab on one side depressed as you pull the two pieces apart.

MC4 connectors snap together.
To get at the cables under the existing Go power solar panel, Mark removed the hardened sealant that was covering each of the mounting brackets. He used a screwdriver but a narrow and rigid putty knife would work too.

First step was to lift up the existing panel which required removing the sealant on the mounting bracket screws and then unscrewing the screws.
Then he unscrewed each of the screws holding the mounting brackets in place.
We bought a wonderful cordless power screwdriver last year that we BOTH absolutely LOVE! It makes screwing and unscrewing things infinitely easier than doing it by hand, and it’s much less bulky than a cordless drill.


Unscrewing the screws.
The cordless screwdriver is one of our favorite tools!
He unscrewed all four feet and then lifted up one side to get at the cables underneath.

Working under the existing solar panel.
A positive (red) and negative (black) cable came up through the roof from the interior of the rig where they were connected to the solar charge controller and were connected directly to the solar panel. Mark disconnected each cable from the solar panel and then reconnected them to the two 6′ extension cables we had purchased.

The positive and negative extension cables go between the 3-to-1 branch connectors and the cables coming up through the roof from the charge controller inside the rig.
Then he connected the extension cables to the “legs” of each of the two 3-to-1 MC4 branch connectors (bird feet) and connected the solar panel’s negative and positve leads to the “toes” of the 3-to-1 branch connectors.
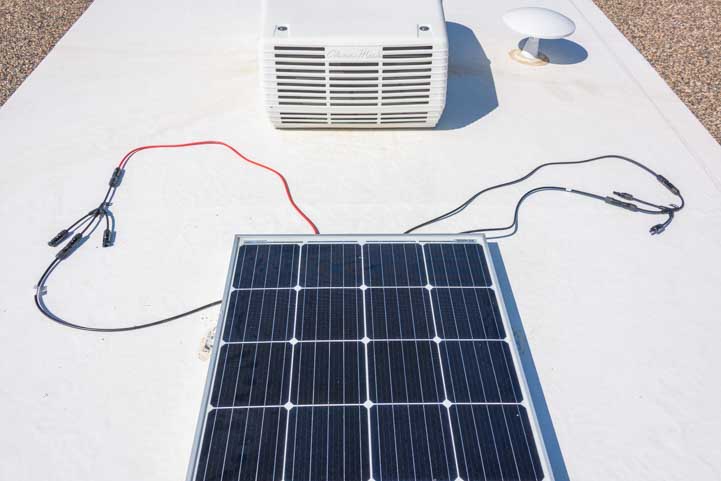
The original panel (black leads going to the middle “toes”) and the solar charge controller (red and black extension cables going to the “legs”) are now wired into the 3-to-1 branch connectors. We ran into the rig to verify everything looked okay and we saw the float voltage of 13.5 volts on the charge controller display.
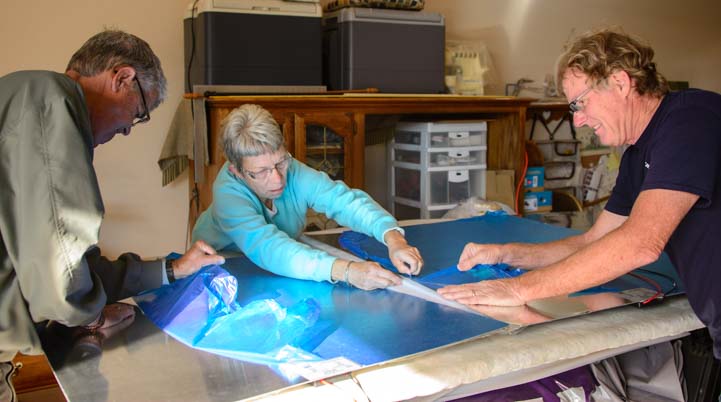
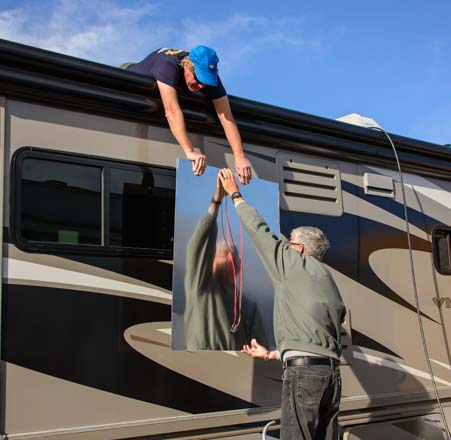
Next, we needed to get the two new Renogy solar panels onto the roof of the RV, place them on either side of the existing panel, and then connect their positive and negative leads to the positive and negative 3-to-1 branch connectors.
Before that, though, we needed to figure out how to get the panels up onto the roof which is 13.5 feet in the air! We opened the patio of the toy hauler and put a ladder on it. This was much more secure than carrying a heavy solar panel one handed up the ladder attached to the side of the rig!

The most solid way to get the panels up to the roof was to put a ladder on the patio!

Here comes the first one!
Once we got both panels up on the roof, we attached the MC4 connectors on the two new panels’ leads to the outer “toes” of the two 3-to-1 branch connectors, positive to positive and negative to negative.
Now all three panels were completely wired up in parallel.

.
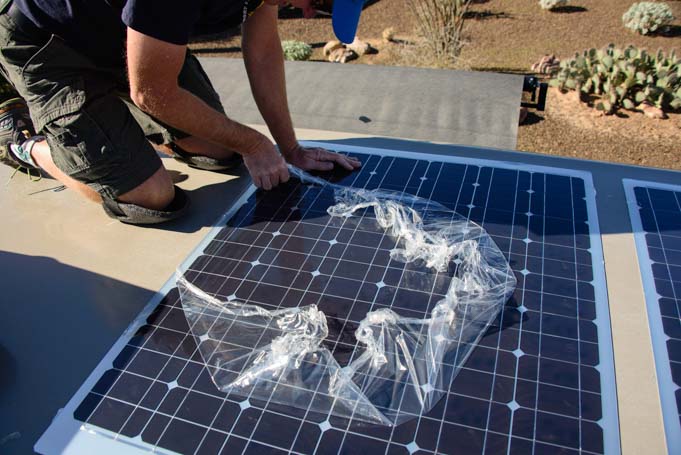
The next step was to mount the solar panels on the roof.
The roof is just wide enough (it’s an 8.5′ “widebody” trailer) that we could place the three panels side by side, leaving enough space between them so we could walk beyond them to the far end of the rig.
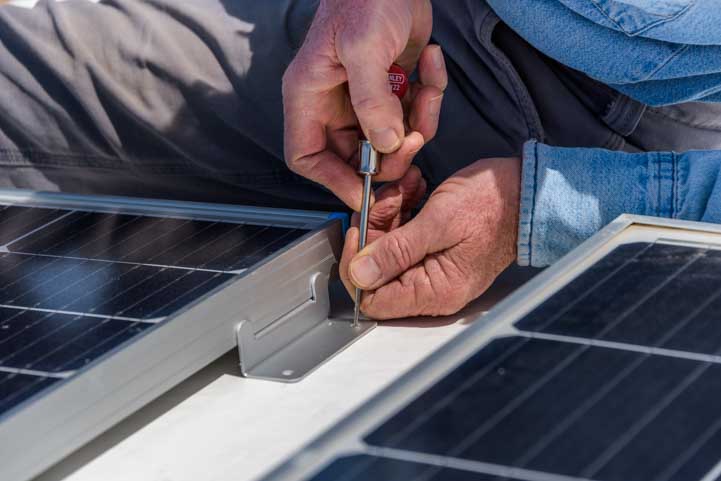
First Mark screwed the original Go Power panel’s mounting brackets back into the roof.

Then we used the Renogy mounting Z brackets to mount the new Renogy solar panels. The Renogy mounting brackets came with very handy hex head self-tapping screws.

Self-tapping screws. So easy!
Then Mark used a scratch awl to make a starter hole for the self-tapping screws. Pounding a nail in a little ways would have worked too.
Mark made a starter hole for the screws with a scratch awl.
Then he used a cordless drill with a hex head bit to screw them in all the way.
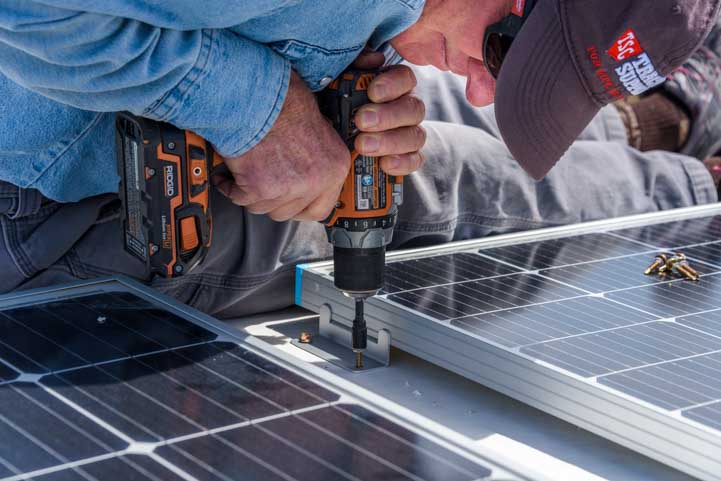
The mounting Z brackets got screwed into the roof.

Done.
Last of all, he used Dicor Self-Leveling Lap Sealant in a caulk gun to cover all the screws and seal all the edges of the mounting brackets. This will ensure that no water can find its way through the roof!

Dicor Self-Leveling Lap Sealant seals the whole mounting bracket so water can’t leak in.

After the Dicor Lap Sealant had leveled out, it completely surrounded and covered the mounting bracket
Ta da! The finished product looked great!

.
I couldn’t believe how easy this project turned out to be. Of course, the hardest parts were already done for us: running the cables from the roof down into the interior of the rig, wiring up the solar charge controller and wiring up the inverter. All we had to do was add two more panels and wire them up with the handy MC4 connectors.
If you have purchased a rig that has a “starter” solar power system like the Go Power system on our toy hauler, it’s not difficult to upgrade it like we did so you have the maximum amount of solar panel wattage that the charge controller can accept.
Subscribe
Never miss a post — it’s free!
Further reading…
SOLAR POWER OVERVIEW and TUTORIAL
- RV (and Marine) Solar Power Made Simple - An overview of how solar power works on an RV or boat
- Which Solar Panels To Buy? - What's Best: Flexible or Rigid Panels? 12 or 24 volt? Mono- or Polycrystalline? And WHY?
- Is RV Solar Power Affordable? - 3 solar power solutions for RVs and boats, including parts lists and actual costs
- Installing Solar Power on a Sailboat - How to overcome the unique challenges of solar power on a sailboat
- RV Solar UPGRADE that TRIPLED our Power - An EASY upgrade to a factory-installed baseline RV solar power system that TRIPLED the power output
- Solar Power Tutorial 1 - Basics - What makes up a solar power system and how does it work?
- Solar Power Tutorial 2 - Weekend/Vacation Systems - Everything needed for small "Weekending" and "Vacation" systems
- Solar Power Tutorial 3 - Full-time Systems - Describes the design of a "Full-time" system
- Solar Power Tutorial 4 - Solar Panel Selection & Wiring - Design considerations for choosing solar panels PLUS wiring tips
BATTERIES and BATTERY CHARGING SYSTEMS
- RV and Marine Battery Charging Basics - How do batteries get charged and what is the best charging method?
- Converters, Inverter/Chargers and Engine Alternators - No two battery charging systems do the job the same way.
- Solar Charge Controllers - How to optimize battery charging from the sun
- Solar Power and Shore Power Combined! - What happens when you're on solar and you plug into shore power?
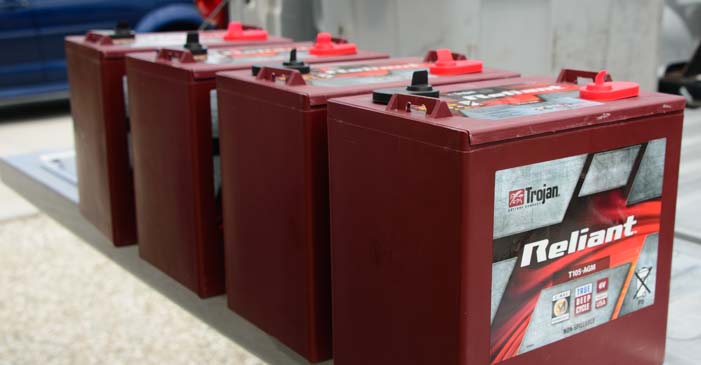
- Wet Cell vs. AGM Batteries in an RV or Boat - Why we upgraded our RV house battery bank from flooded to AGM!
LIVING ON 12 VOLTS
- Inverter Selection & Installation - Choosing and installing the best inverter to support all our lifestyle's 120 volt AC needs
- RV Electrical System Upgrade - Which converter, inverter and batteries we upgraded to after 8 years off the grid, and WHY!
- How Much Inverter is Enough? - What happened when we accidentally killed our big inverter
- Clean Technica: Solar Power Installation on Sailboat Groovy - An analysis of our boat's solar power setup
- Kyocera Solar Showcases our Sailboat's Solar Power Setup - Sailing Groovy on Kyocera Solar Power!
ARTICLES ABOUT OUR GENESIS SUPREME TOY HAULER
- Genesis Supreme 28CRT Toy Hauler – Why We Chose It!
- Toy Hauler Living – What’s it like to live in a Toy Hauler?
REFERENCES
Our most recent posts:
- Buckskin Mountain State Park – Fun on the Colorado River! 01/31/26
- How to Install Starlink Gen 3 in an RV? Use the Speedmount! 08/07/25
- Escape to Paradise – Rocky Mountain Magic! 08/01/25
- Is Forest River a Good RV? Well Built? Here’s Our Experience 06/20/25
- Sunset Crater Nat’l Monument – Lava & Camels at Bonito CG! 06/06/25
More of our Latest Posts are in the MENU.
New to this site?
Visit RVers Start Here to find where we keep all the good stuff. Also check out our COOL NEW GEAR STORE!! *** CLICK HERE *** to see it!