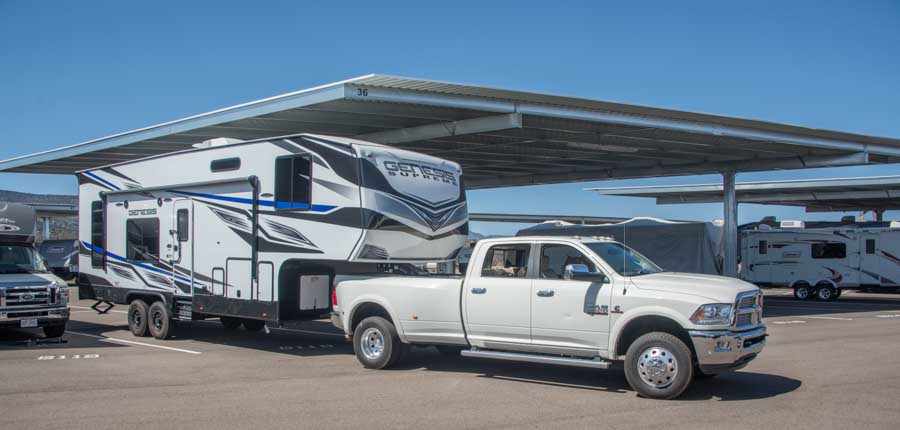
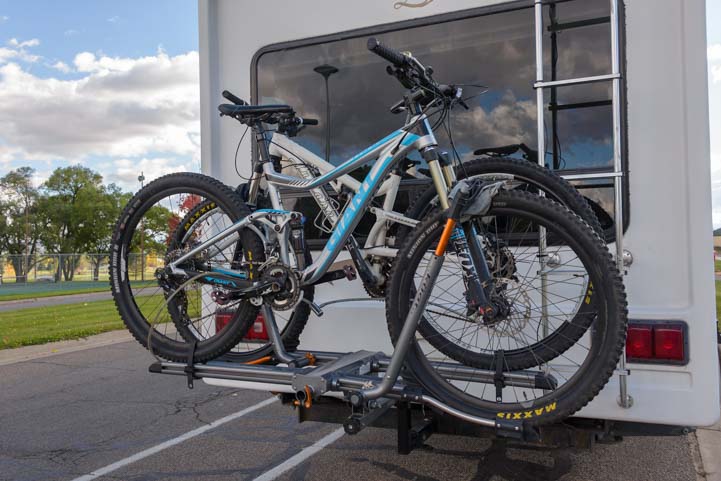
This page is a review of the Reese Goose Box 20k Gen 3. We’ve used ours for over a year and tested it thoroughly towing our 15,000 lb. Genesis Supreme toy hauler over 2,000 miles of varied terrain that included mountains, back roads, interstates, switchbacks and dirt roads. If you’re curious how to hitch and unhitch a Reese Goose Box, we’ve included some tips and tricks we’ve found make it as easy or easier than a traditional fifth wheel hitch!
This hitch is essentially a replacement for the original kingpin that came with the trailer. So, you remove the original kingpin and replace it with the Reese Goose Box. The beauty of the Reese Goose Box is that it hitches to a gooseneck ball in the truck bed, eliminating the need for a fifth wheel hitch all together and freeing up the truck bed completely when you’re not towing!
We paired the Reese Goose Box with a B&W gooseneck ball that is designed for the Dodge Ram OEM puck system (we have a 2016 Dodge Ram 3500 long bed dually truck).

What do we think of the Reese Goose Box after towing with it for 2,000 miles over the course of a year?
Read on and find out!
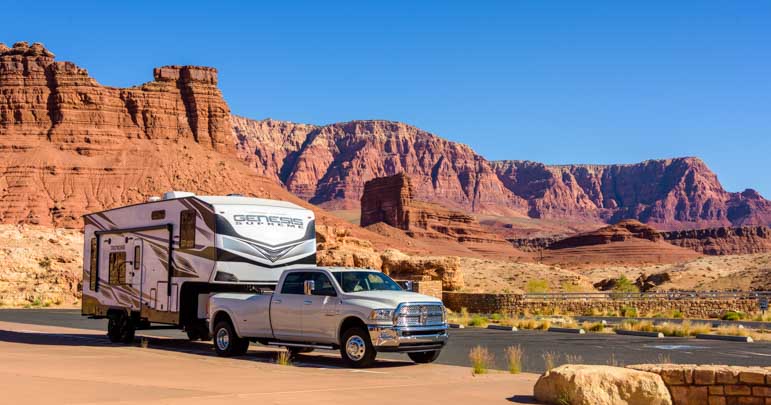
For over a year now, we’ve towed our trailer on all kinds of roads, including freeways, secondary roads, around tight winding switchbacks and on very lumpy, bumpy, potholed dirt roads on our way to remote boondocking locations. We’ve also climbed up and over several towering Colorado mountain passes, including Monarch Pass, Hoosier Pass and Slumgullion Pass (twice!), each of which is more than 11,300’ in elevation.
The Reese Goose Box has performed flawlessly everywhere. The ride is much smoother than any fifth wheel hitch we’ve ever used, and it’s easy to hitch and unhitch.

The Reese Goose Box replaced the original kingpin that came with our trailer.
We installed the Reese Goose Box on our trailer ourselves, just the two of us. It was intimidating but it wasn’t difficult, despite the heavy weight of the original king pin and the even heavier weight of the Reese Goose Box. (There’s a trick to it!)
However, before we describe that process and present our step-by-step installation method (in a future post), we wanted to explain why the Reese Goose Box is so unique and also show you how to hitch and unhitch a trailer so you can see exactly how it works.

The 20K Reese Goose Box is rated to tow up to 20,000 lbs.
Here are some shortcuts for this article:
- Why a Reese Goose Box?
- How to Hitch Up a Trailer Using a Reese Goose Box
- How to Unhitch a Trailer Using a Reese Goose Box
- Towing with a Reese Goose Box

WHY A REESE GOOSE BOX?
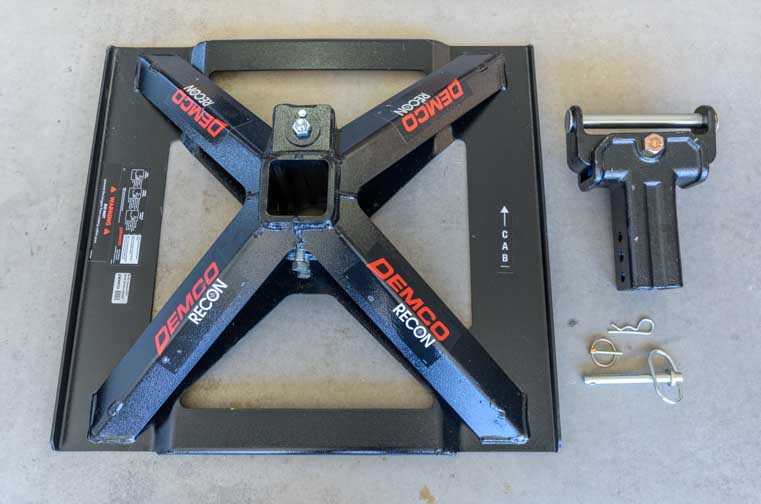
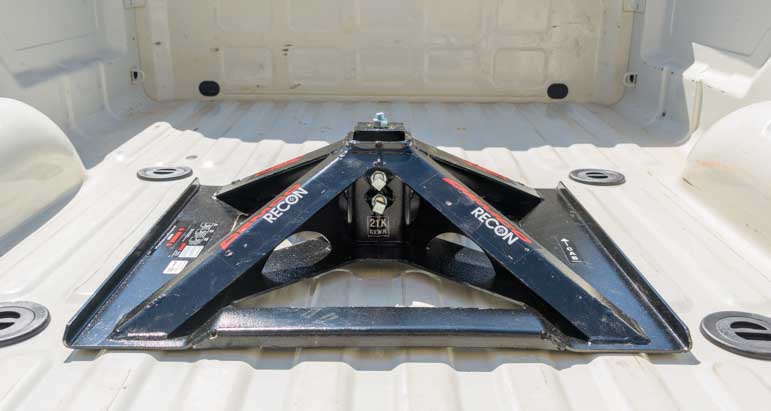
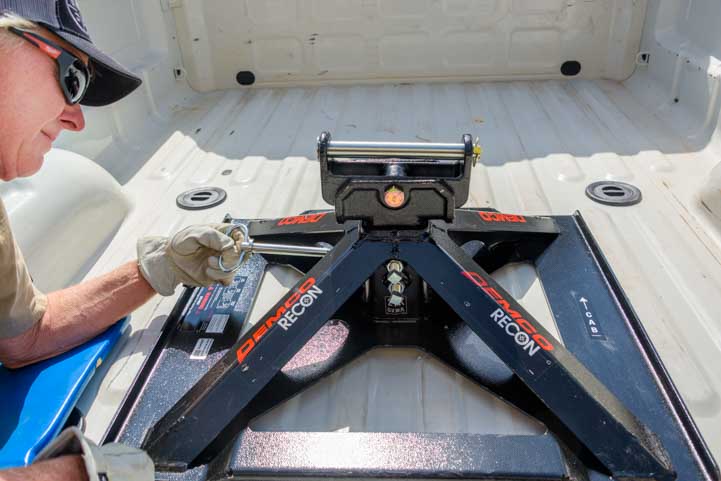
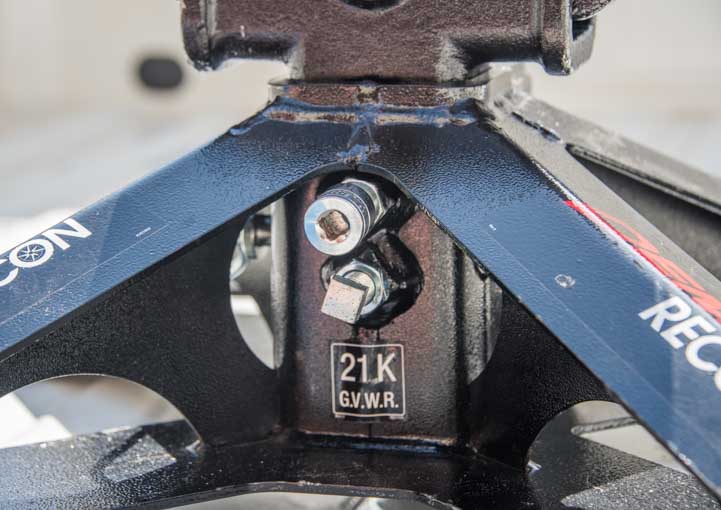
We’ve been towing fifth wheel trailers around for 15 years now, and we’ve used a variety of fifth wheel hitches made by Pullrite, B&W and Demco.
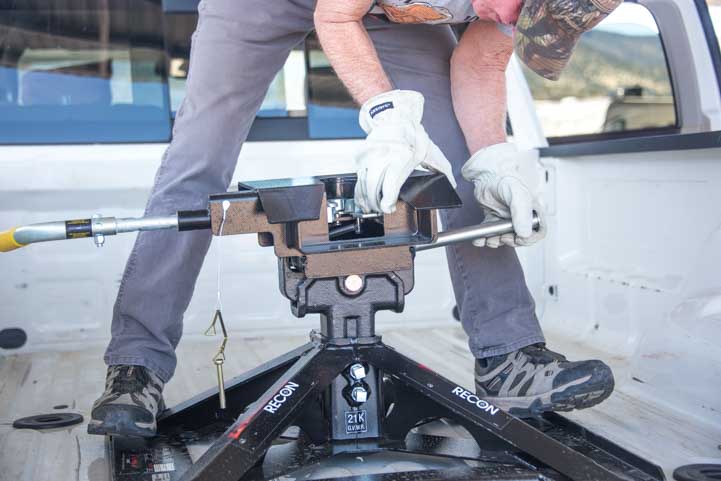
While each one was a fine hitch with certain great advantages, the drawback with any fifth wheel hitch is that when you aren’t towing a trailer, the bed of the truck is occupied by a large and heavy fifth wheel hitch.
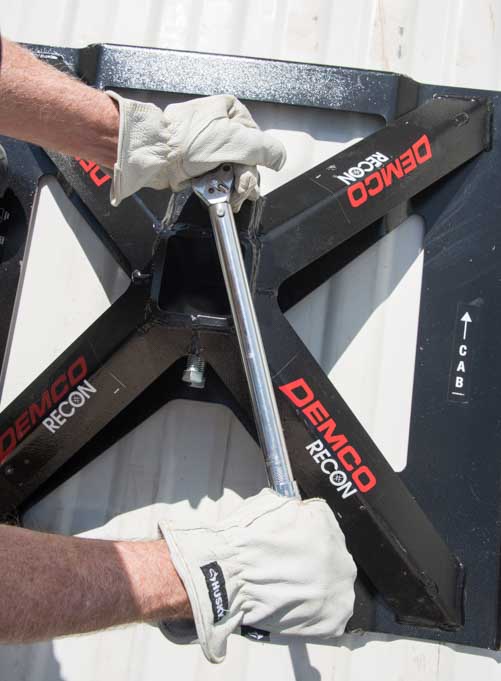
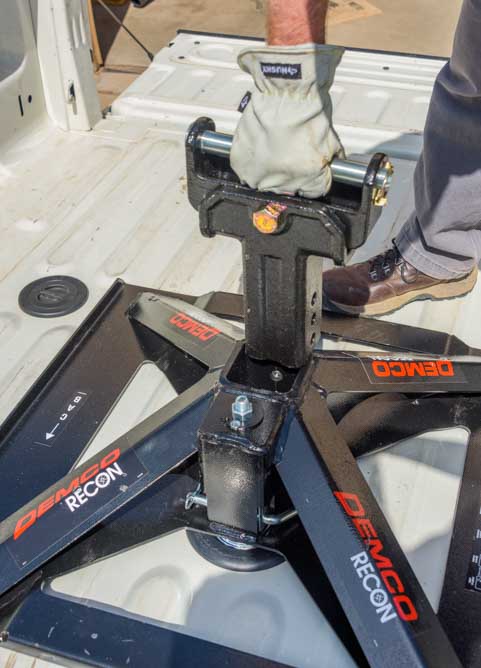
It is awkward to remove the hitch, even a lighter weight one (as we discovered with our Demco hitch), and it’s all too easy to avoid this chore and simply leave the hitch in the truck bed indefinitely. Unfortunately, with the hitch in there, you lose the use of the truck bed except for hauling smaller items that fit around the hitch!

With the Reese Goose Box there is no need to have a fifth wheel hitch in the bed of the truck.
When we were full-time RVers, we didn’t need the truck bed except for carrying whatever we used in that lifestyle: spare water jugs, patio mat and chairs, portable generator, bbq, etc.
However, now that we RV seasonally, we wanted to have the full use of our truck bed during the off-season when we’re at home. It’s no fun hauling plants, soil, mulch and lumber in the trunk of a passenger car or trying to fit those things around a fifth wheel hitch.
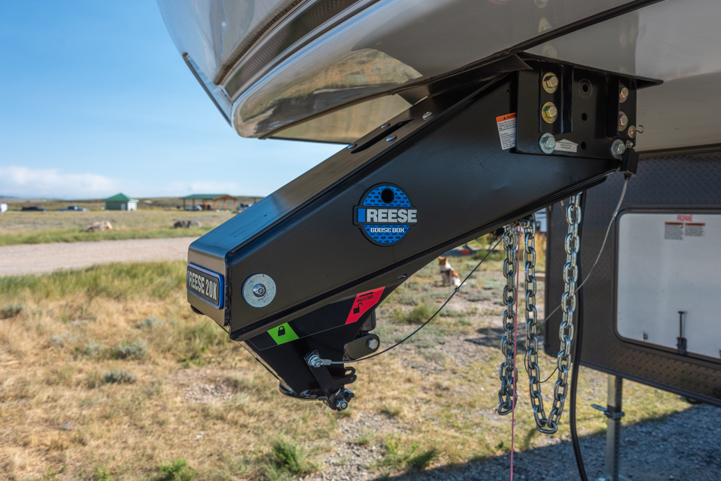
The “business side” of the Reese Goose Box is the driver’s side with the locking lever and air bag status window clearly visible (more on those important items below!).
By using a gooseneck style hitch instead of a fifth wheel hitch, all you need in the truck bed is a gooseneck ball and gooseneck receiver. The gooseneck receiver can be a factory installed OEM puck system or can be an after-market installation. What an easy way to free up the truck bed!
For this reason, some people switch out their fifth wheel kingpin for a gooseneck hitch. However, that puts a lot of strain on the fifth wheel trailer frame (fifth wheels are a lot taller than horse trailers…), and fifth wheel manufacturers advise against it.
Unlike a gooseneck hitch which has a long vertical lever arm that creates strain on the frame as it sways back and forth, the profile of the Reese Goose Box is angled and shaped like an ordinary fifth wheel kingpin. That reduces the strain on the frame significantly.
We were surprised to learn that the Reese Goose Box is the only gooseneck style hitch that Lippert Components Inc. has approved for use with their fifth wheel frames. I spoke to a Lippert sales rep to verify this, and he stated that, unlike other gooseneck style hitches, the use of a Reese Goose Box does not void the warranty on a Lippert fifth wheel frame. Like most fifth wheel trailers, our Genesis Supreme 28CRT toy hauler is built on a Lippert frame.
Obviously, many things can ultimately contribute to the failure of a fifth wheel frame, so I have no idea how that would play out in the event of the frame developing a crack. But it’s an impressive endorsement.
In our research, we came across some comments on the internet asserting that of course Lippert Components endorses the Reese Goose Box because they own Reese Products! However I looked into it, and that’s not true. Reese’s parent company, Horizon Global, was purchased by First Brands in early 2023, and neither Horizon Global nor First Brands is related to Lippert Components.
We have the 3rd generation of the Reese Goose Box that is rated to tow a 20,000 lb. Trailer. The Gen 3 version of the Goose Box was released in the Fall of 2022.

.
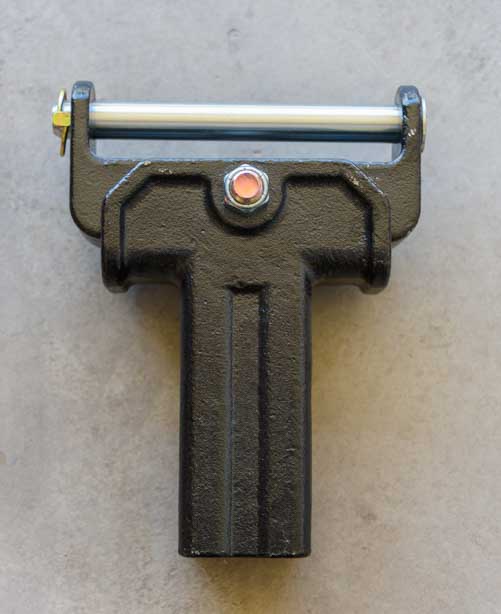
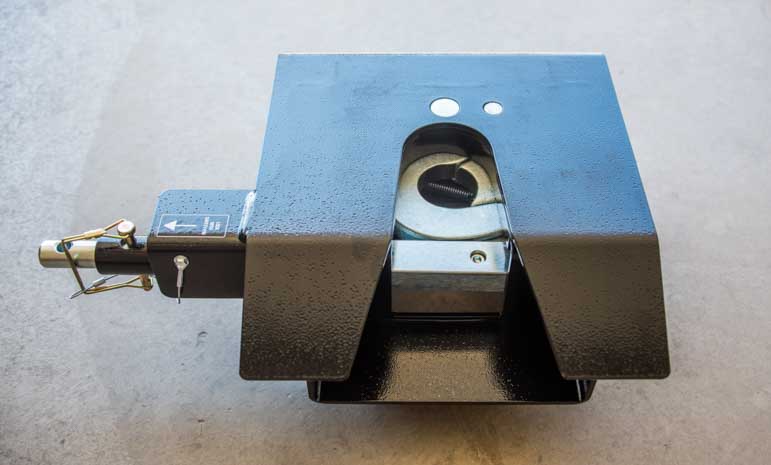
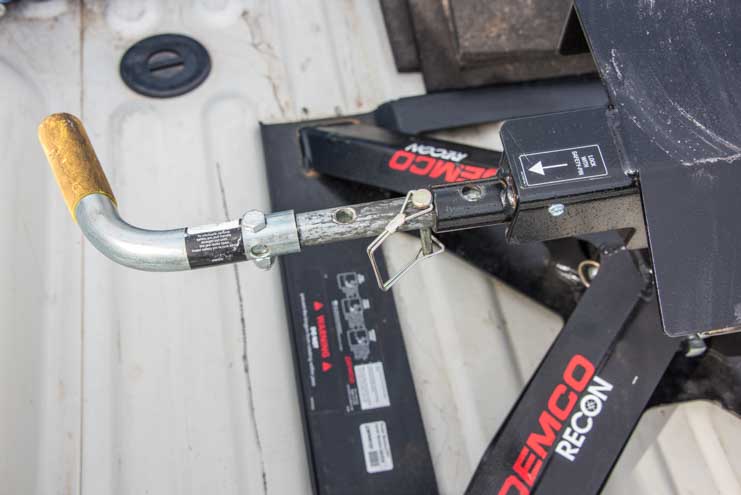
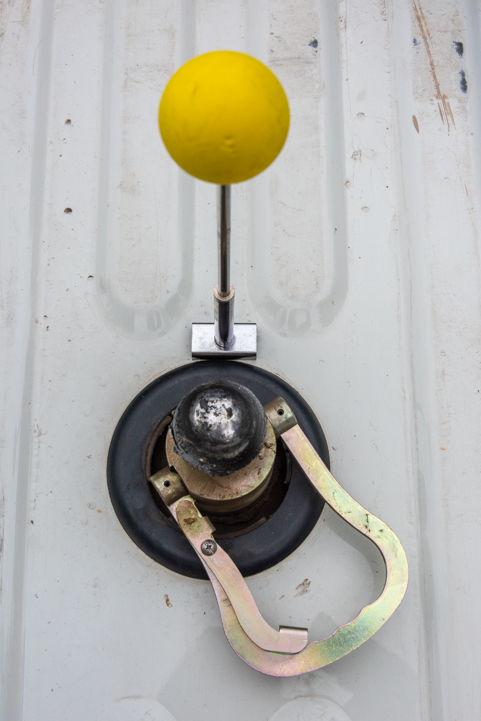
We decided to pair it with the B&W gooseneck ball designed for the Ram truck OEM puck system on our 2016 Dodge Ram 3500 long bed dually. This gooseneck ball is a very nifty piece of gear with a huge handle. You can easily latch the gooseneck ball into the gooseneck receiver in the truck bed and also pull it back out using that handle rather than grabbing the ball itself with your hands.

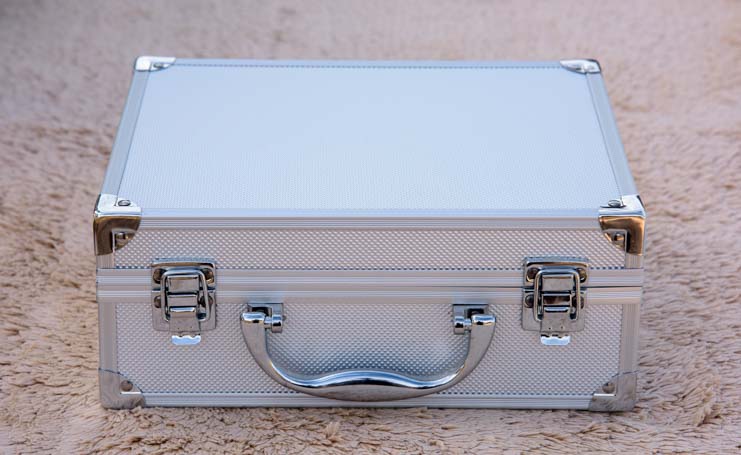
The B&W Gooseneck Ball and Safety Chain Kit fits in a cool suitcase.
The actual chains themselves are sold separately.
That may seem unimportant until you’ve actually lubed up the gooseneck ball and used it a few times! It’s much nicer to use a big handle to pull the gooseneck ball out of the truck bed rather than grab the greasy ball itself! We would have used this gooseneck ball with our Demco 21k Recon fifth wheel hitch, but the handle got in the way of the hitch.

The B&W OEM gooseneck ball kit also comes with two safety chain anchors that get inserted into the OEM puck system on a pickup. These are used to secure the safety chains (which are not part of the kit — we got the safety chains separately here).
HOW TO HITCH UP A TRAILER USING A REESE GOOSE BOX
REESE GOOSE BOX vs. FIFTH WHEEL HITCHING PROCEDURES
Hitching up a trailer using a fifth wheel hitch involves backing the truck (and its fifth wheel hitch) into the trailer’s king pin. It is a horizontal movement of the truck, and the connection locks in place once the truck has backed the hitch into the kingpin.
Hitching up a trailer using the Reese Goose Box involves lowering the trailer’s kingpin (the Goose Box) onto a gooseneck ball in the bed of the truck. It is a vertical movement of the trailer’s kingpin that is controled by the trailer’s landing jack leveling system. The connection locks in place once the Reese Goose Box is completely lowered onto the ball.
So, the hitching technique is quite different for each type of hitch.
ALIGNMENT: LEFT to RIGHT (DRIVER’S SIDE/PASSENGER’S SIDE)
With a fifth wheel hitch, we always found we had some room for error in aligning everything from right to left (driver’s side / passenger’s side) due to the shape of the fifth wheel hitch jaws.
If we backed the truck up so the fifth wheel hitch was slightly misaligned with the kingpin, the jaws of the hitch would catch the kingpin anyway and still make the connection and lock the two together.
However, with the Reese Goose Box, if the truck is slightly off, the kingpin will lower down and hit the top of the gooseneck ball and stop right there rather than slipping over the gooseneck ball as it is lowered into the locked position.
Where we could always “eyeball” the left/right alignment when backing up the truck with a fifth wheel hitch, we now use a small telescoping magnetic pole with a bright yellow ball on top to get a perfect alignment between the Reese Goose Box and the gooseneck ball.
Amazingly, that little pole makes this process a cinch!
I place the magnetic pole directly in front of the gooseneck ball and then Mark uses the pole to align the truck and Reese Goose Box side to side as he backs up.
Put the magnetic telescoping pole directly in front of the gooseneck ball

This simple little device makes it possible to be precise when backing up the truck.
We have the two Ram OEM backup cameras in the truck, but Mark finds them inadequate for this job and he prefers to use the magnetic telescoping pole with the ball on top.
He then backs up the truck until the kingpin hits the magnetic telescoping pole and tilts it forward.

The magnetic pole helps the driver align the gooseneck ball and the Reese Goose Box left to right.

When the magnetic pole tips forward, Mark stops the truck for a moment so we can adjust the alignment from front to back by an inch or two.

ALIGNMENT: FRONT to BACK
The Reese Goose Box has to be aligned accurately from front to back as well as left to right. For this, Mark relies on me peering into the bed of the truck and guiding him verbally until the alignment is correct. For folks who hitch up solo, you’ll probably have to get in and out of the driver’s seat a few times to get the truck positioned correctly. If you have some tips and tricks for solo drivers, let us know in the comments!
At 5’4” I am just tall enough to see into the bed of our 2016 Dodge Ram 3500 dually if I stand on my tiptoes.
When we were researching the Reese Goose Box, we saw reports that it is hard to hitch up. After learning how to do it ourselves, we suspect that those comment might have come from people who were either trying to eyeball the left/right alignment or were hitching up solo and struggling with the front to back alignment.
If you have a driver and a spotter, it’s a piece of cake.
LOWERING & LOCKING THE REESE GOOSE BOX – TRUCK IN NEUTRAL
Once the truck is positioned correctly, I use the landing jack leveling buttons to lower the Reese Goose Box onto the gooseneck ball. We’ve found it helps to put the truck in neutral at this point. That way, if the positioning isn’t 100%, the truck can shift a little bit as the Goose Box is lowered.
Our truck has an auto leveling option, so as soon as the truck senses the weight of the trailer in the truck bed, it inflates its airbags and raises the truck bed up. This effectively pushes the gooseneck ball up into the Reese Goose Box. At that point I generally don’t need to lower the trailer much further to complete the connection.
Just like a fifth wheel hitch, the Reese Goose Box automatically locks its connection to the gooseneck ball.
It’s easy to know when the Goose Box/gooseneck ball connection has locked. First, as the Goose Box slides over the gooseneck ball, the locking lever on the driver’s side of the Reese Goose Box moves slowly from the Locked position (green label) to the Unlocked Position (red label). Then, once it has locked in place, it snaps back to the Locked position (green label).
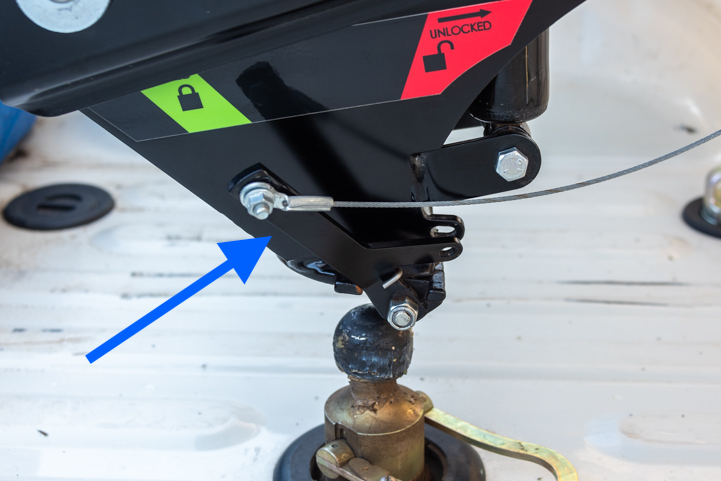
Before the Reese Goose Box slides over the gooseneck ball, the locking lever (blue arrow) is in the Locked position (green label)

As the Reese Goose Box slides down onto the gooseneck ball, the locking lever (blue arrow) slowly moves into the Unlocked position (red label)

As soon as the Reese Goose Box locks onto the gooseneck ball, the locking lever (blue arrow) snaps back into the Locked position (green label)
At this point I can finish raising the landing jacks up all the way into their fully raised position for towing.
SAFETY CHAINS and POWER CORD
The final steps to hitch up with the Reese Goose Box are to latch the two safety chains to the B&W safety chain anchors in the truck bed and plug in the power cord.
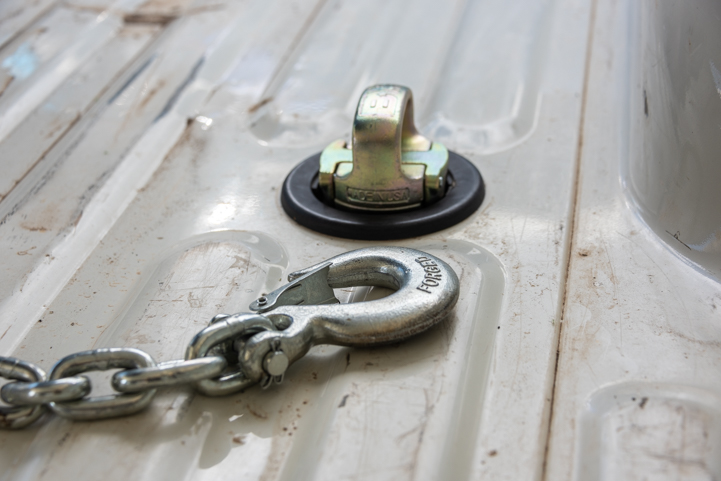
Next step is to connect the safety chains to the B&W safety chain anchors in the truck bed.

Connecting the safety chains.
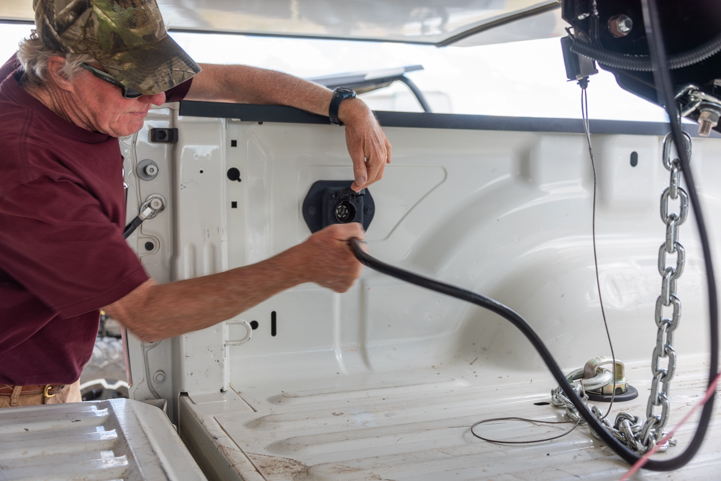
Last of all, connect the power cord.
Like all kingpins, the Reese Goose Box has a trailer breakaway cable that engages the trailer’s brakes if the trailer accidentally disconnects from the truck. With our fifth wheel hitches, we always looped this cable around the hitch handle. With the Reese Goose Box, we loop it through the hook on one of the safety chains.

Ready to tow.
Note that the trailer breakaway cable is connected to the safety chain hook on the left side.
The trailer breakaway cable is shorter than the safety chains. So, if the trailer were to become detached from the truck, the breakaway cable would snap and engage the trailer brakes before the safety chains were fully extended. At that point, the drag of the trailer brakes would keep the safety chains taut, and the driver would slow the truck and trailer to a stop.
AIR BAGS
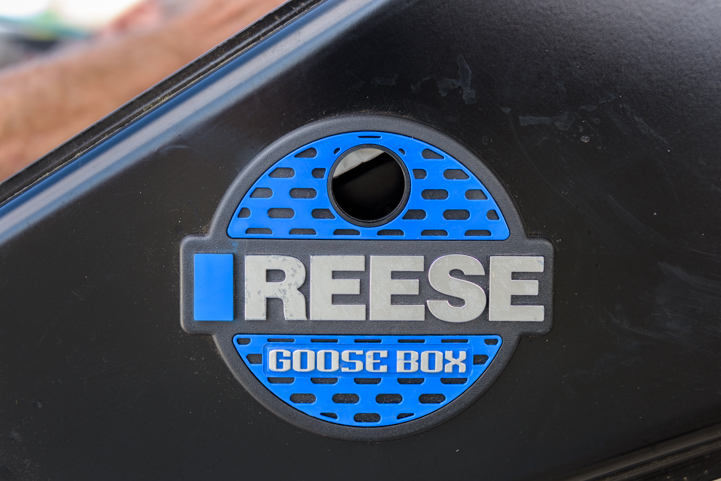
The Reese Goose Box is equipped with internal air bags that use the same technology as the Trail Air fifth wheel hitches. They are inflated using the Schrader valve on the top of the Goose Box. We used a pancake air compressor to inflate them.
That pancake compressor is too big to bring with with us in our RV travels, so we bought a Ryobi cordless power inflator to use on the road if needed.
Unfortunately, there isn’t enough room in the Goose Box’s Schrader valve compartment to attach the cordless power inflator’s locking valve to it. So, we purchased a 135 degree valve extender to use with it. Luckily, we haven’t needed to use that setup at all yet.

The Gen 3 Reese Goose Box has the Schrader valve for inflating the air bags on top in the center. Previous generation Reese Goose Boxes had this valve on the underside and it was hard to reach.


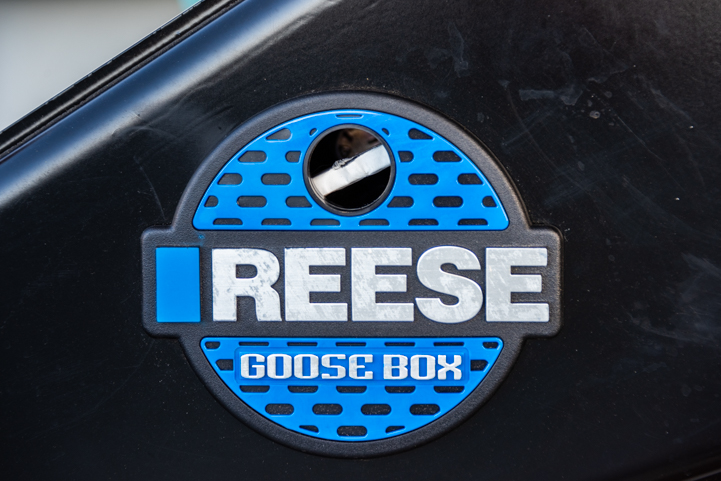
The Reese Goose Box 20k Gen 3 has a gauge on the driver’s side that allows you to see the level of inflation of the air bags. This is another new feature with the Gen 3 that wasn’t on the previous generation Reese Goose Boxes.
When the air bags have no air in them, the viewing window is a black circle. Once they begin to fill with air, a silver bar appears in the top left part of the window.
The air bag inflation window lets you see the status of the air bags. Here the bags are barely inflated.
As the air bags become more and more inflated, this bar moves lower and lower in the window.
When the air bags are inflated to the ideal amount (somewhere between 40 and 50 lbs. of pressure), the bar crosses the middle of the window at a slight angle.
As the air bags inflate, the silver bar moves down from the top.
When the bar is in the middle, as it is here, the air bags are properly inflated.
We have not had to change the inflation of the air bags at all in the two months we’ve been traveling with our trailer, despite being in altitudes ranging from 3,000’ to over 11,000’ and being in temperatures ranging from 30 degrees to 95 degrees.
HOW TO UNHITCH A TRAILER WITH A REESE GOOSE BOX
UNHITCHING CAN BE DONE SOLO (WITH AN EASY-TO-MAKE MODIFICATION!)
Unhitching a trailer with a Reese Goose Box is as easy as pulling on a cord and extending the landing jack legs! I love it because one person can easily do it solo.
Unhitching with a Reese Goose Box (as opposed to a fifth wheel) is particularly handy in situations where you won’t be driving the truck by itself but still want to raise the nose of the trailer to make it level.
For instance, when you stop for a quickie overnight in a rest area on unlevel ground, you might want to level the trailer from front to back by raising up the front end.
All you need to do is raise the trailer off the gooseneck ball to the point where the trailer is level from front to back and leave it there. When you are ready to continue driving, simply lower the trailer back down onto the gooseneck ball and away you go!
With a traditional fifth wheel hitch, the truck and trailer must be completely unhitched, i.e., the truck must be driven out from the hitch in order to level the trailer from front to back.
RELEASING the GOOSENECK BALL EASILY — With a SIMPLE MODIFICATION!
The Reese Goose Box is locked onto the gooseneck ball by a lever, as shown in the three hitching up photos above. While hitching up, the lever moves from the Locked position to the Unlocked position and back to the Locked position automatically as the socket on the Reese Goose Box slides onto the gooseneck ball.
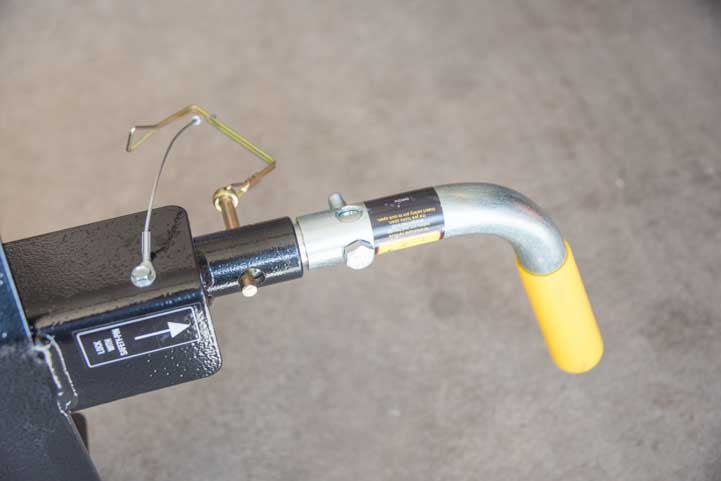
For unhitching, however, this lever must be held open in the Unlocked position to allow the Reese Goose Box to slide up off the gooseneck ball. You do that manually by pulling back on a long cable that connects to the locking lever.
The cable rests on a hook on the side of the Reese Goose Box. It has a nub on it that can be secured in front of the hook, forcing the lock to remain open while you extend the landing jack legs.

The hitch locking mechanism is automatic when hitching up. When unhitching, a long cable (above the arrows) must be pulled back to unlock the hitch and allow the Reese Goose Box to rise off the gooseneck ball. The white arrow shows the nub that can be secured in front of the hook (blue arrow) to keep the Goose Box unlocked.
We’ve found it very difficult to reach the cable’s handle from the back of the truck when the truck’s tailgate is open.
Ironically, the truck’s tailgate is always open at this stage of the unhitching process because you are disconnecting the safety chains and power cord. Also, you can’t drive the truck out with the tailgate closed.
When we did successfully maneuver ourselves to reach the handle, we found it extremely difficult to pull the cable back far enough to place the nub in front of the hook!
I’m sure Reese will address this issue since it has been raised by many people. However, in the interim, we found a super easy solution.
We tied a strong cord onto the latch cable’s handle and then used a short dowel to create a mini handle at the other end of the cord.

We tied a strong cord onto the handle of the hitch latching cable. Again, the white arrow is the nub that can be secured in front of the hook (blue arrow) to force the lock to stay open, but we found it tricky to do.
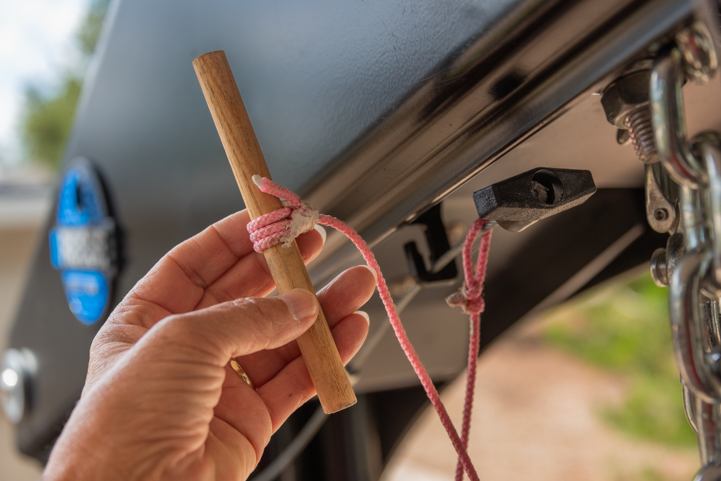
We made a handle at the other end of the cord with a short dowel.
Now, all we have to do to get the Reese Goose Box off the gooseneck ball is to pull this cord to open the lock and extend the trailer’s landing jacks. Then the Goose Box rises off the gooseneck ball very easily.
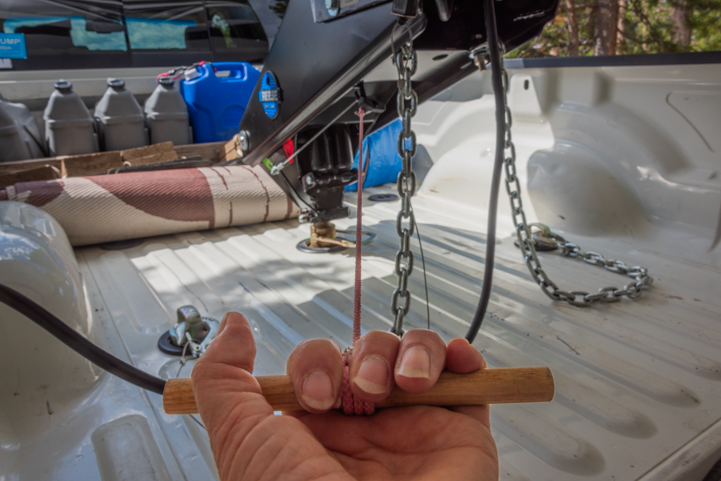
One person can simultaneously pull the hitch lock open and extend the trailer’s landing jacks!
The beauty is that one person can do this job alone by holding the Goose Box’s locking cord in their left hand and pressing the trailer’s landing jack control buttons with their right hand.
Once the Reese Goose Box is clear of the gooseneck ball, the Goose Box’s locking cord can be released and the truck can be driven out from under the trailer and parked elsewhere.
To tidy things up, just snap the safety chains onto the back of the Reese Goose Box and stow the power cord inside. Be careful, though, because there’s 12 volts coming from the trailer batteries on one of the pins.

There are two holes in the back of the Reese Goose Box to hold the hooks for the safety chains.

Chains and power cord are out of the way.
TOWING WITH THE REESE GOOSE BOX
As I mentioned, we have used the Reese Goose Box to tow our 15,000 lb. trailer all over Arizona and Colorado for two months on all kinds of crazy roads. Not only has the towing been smooth but we’ve been super happy with how easy it is to hitch and unhitch.
The airbags inside the Reese Goose Box make the ride super smooth. There is no chucking and no bouncing, and best of all, no noise! The trailer kind of floats along behind us.
We’ve taken some very sharp turns and haven’t had a problem with the Reese Goose Box touching the bed rails of the truck, and we’ve gone over some serious bumps and sharp inclines and declines and haven’t had the overhang of the fifth wheel come too close to the top of the bed rails either.
We are delighted with the Reese Goose Box and the B&W gooseneck ball. Best of all, now we’re able to haul anything we want in the truck bed, even 4×8 sheets of plywood. All we’ll have to do is remove the B&W gooseneck ball, clean it up and put it away in its little suitcase. Then the whole bed of the truck is available to use!

Never miss a post -- it's free!
Here are all the parts listed in this post and where to get them:
The Goose Box:
The Gooseneck Ball:
- B&W OEM Gooseneck Ball kit (Ram)
- B&W OEM Gooseneck Ball kit (Ford/GM/Nissan)
- Reese Goose Box Safety Chains
Magnetic Pole for Hitching Up:
Compressors:
More info about Reese Products:
- Reese Products Home Page
- Reese corporate buyout announcement (First Brands buys Horizon Global) – Business Wire
Other blog posts about trailers and hitches:
- 2005 Fleetwood Colonial Popup Camper
- 2007 36′ Hitchhiker 5th Wheel Trailer for Full-Time RV Living
- 2007 Fleetwood Prowler Lynx 27′ Travel Trailer
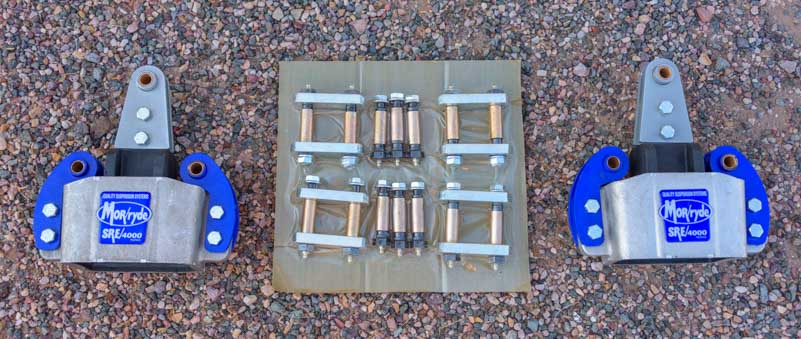
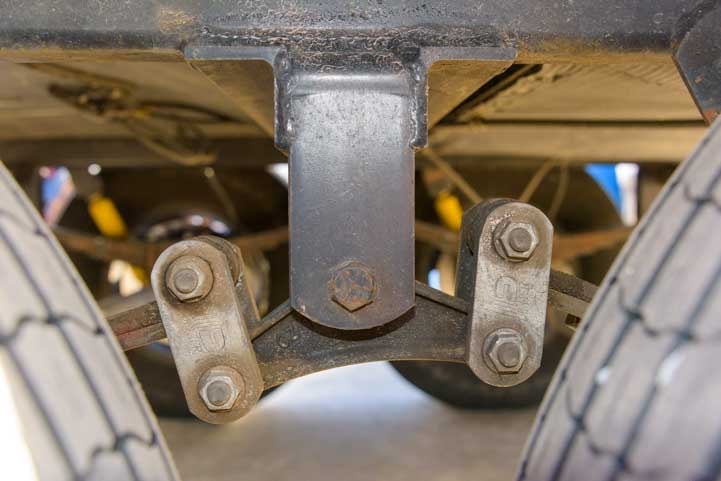
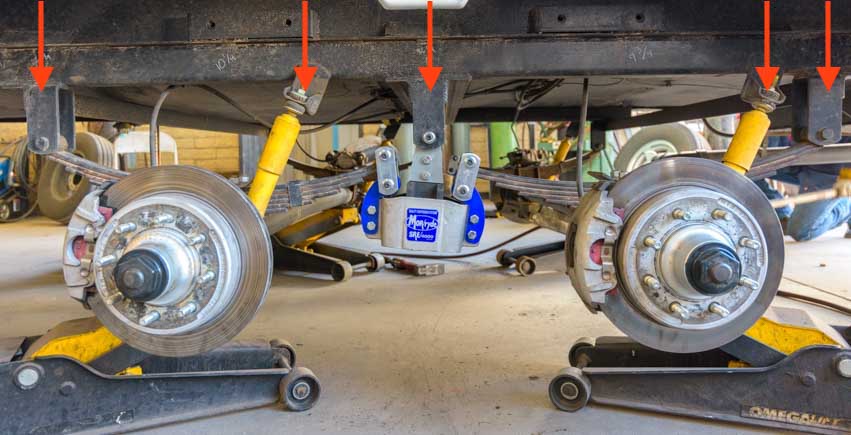
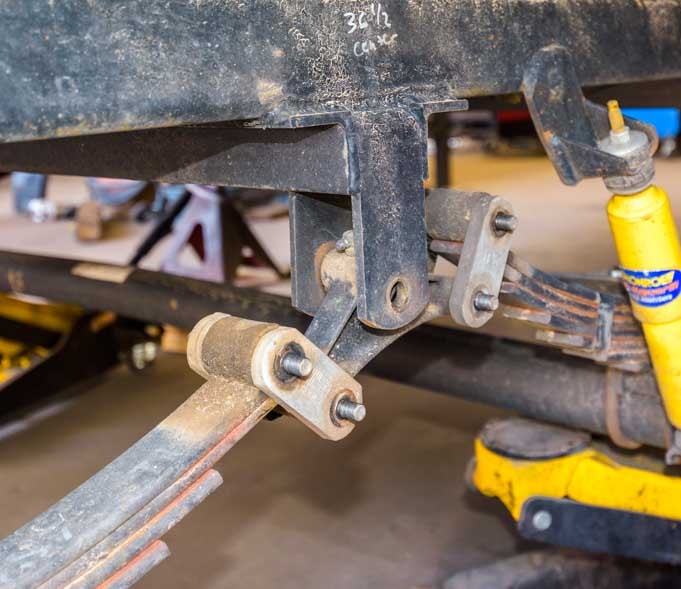
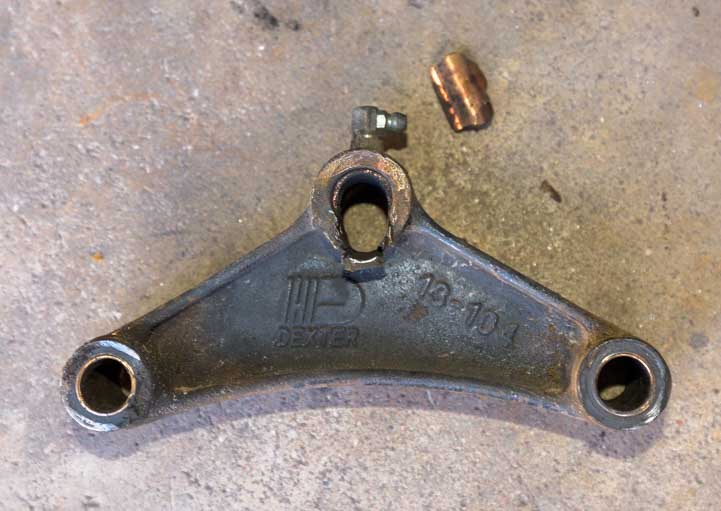
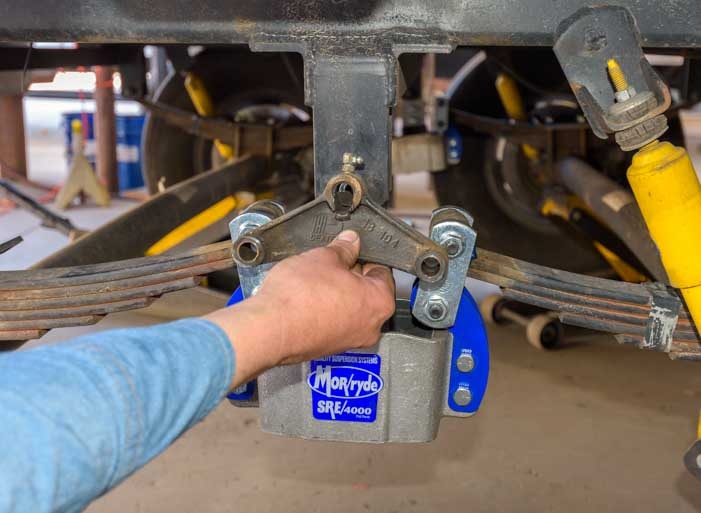
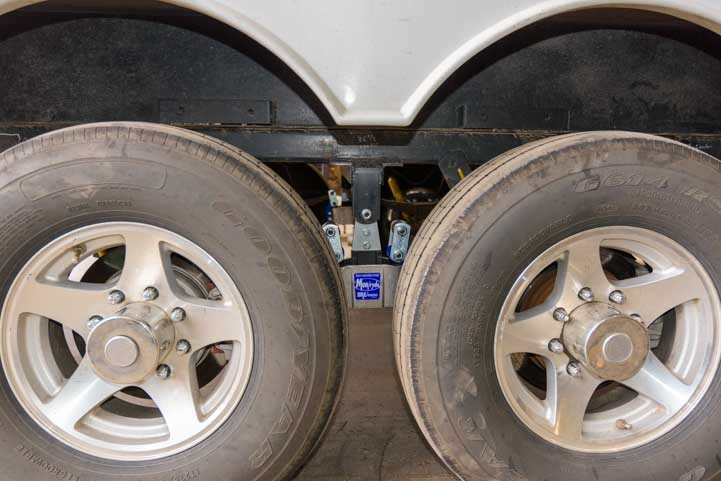
- 5th Wheel Trailer Suspension Failure – Replaced with our RV Warranty!
- Alice Cooper Sells Us a New Truck!
- B&W Companion Hitch Performance in a Fifth Wheel Trailer Rollover Accident
- B&W Companion OEM Fifth Wheel Hitch Installation – Easy!
- Choosing a Trailer for Full-time RVing: Cargo Carrying Capacity
- Demco 21K Recon Fifth Wheel Hitch Review and Installation
- Dodge Ram 3500 Dually Truck – Best RV Fifth Wheel Trailer Towing
- Edge Evolution CS Tuner Review – Peak Truck Performance!
- Go Cheap, Go Small, Go NOW!! Have Fun & LEARN in a Small RV
- How To Change The Inner Rear Tire on a Dually Truck
- How to Put DEF (Diesel Exhaust Fluid) in a Truck & Which is Cheapest?
- Reese Goose Box Review: 20K Gen 3 TESTED + How to Hitch
- RV Refrigerator Replacement – How an RV Warranty Saved Our Bacon!
- Trailer Disc Brake Conversion – Electric Over Hydraulic Disc Brakes – WOW!
Our most recent posts:
- Buckskin Mountain State Park – Fun on the Colorado River! 01/31/26
- How to Install Starlink Gen 3 in an RV? Use the Speedmount! 08/07/25
- Escape to Paradise – Rocky Mountain Magic! 08/01/25
- Is Forest River a Good RV? Well Built? Here’s Our Experience 06/20/25
- Sunset Crater Nat’l Monument – Lava & Camels at Bonito CG! 06/06/25
<-Previous || Next->