After living in our new Genesis Supreme 28CRT toy hauler for about 5 months, we are absolutely loving this rig. Huray for toy hauler life!
When we first purchased this 5th wheel toy hauler, we wrote an overview with photos of a walk-through which you can see here — Genesis Supreme 28CRT Toy Hauler – Why We Chose It! Now, with a little more experience under our belts, we wanted to show you what it’s like living in a toy hauler, especially an open box floor plan like ours.

What’s it like to live in a toy hauler?
Living in a toy hauler is different than other RV lifestyles, not only because of the big open garage space, ramp door and the ability to bring additional motorized vehicles along for the ride, but because of the back patio — a game changer! If you are considering getting one or are just curious about what it’s like living in a toy hauler, this page will give you a few things to think about and explain why we like ours so much.
Nevermind the garage and all the things it offers…
We’ve found the patio on our toy hauler totally transforms the interior of our RV!
Toy Hauler Pros and Cons
There are advantages and disadvantages to living in a toy hauler, like there are with every type of RV. Here are some of the biggest advantages of toy hauler life:
Toy Hauler Pros:
Water: The fresh water tank is usually very big. 100 gallons is typical but 160 gallons isn’t unusual.
Gas: Because toy haulers are built to haul gas powered toys, there’s usually a gas station onboard complete with a gas tank beneath the floor of the rig and a gas nozzle on the side to fill the toys. This makes it easy (and typical) for toy haulers to sport onboard gas generators that seamlessly tie into the gas tank. Our gas tank is 40 gallons, and I believe most toy haulers have a 30-50 gallon tank. However, some of the major brands don’t list the gas tank sizes on their websites.
Patio: The ramp door on most modern toy haulers converts into a rear 8′ x 8′ patio. Some toy haulers have a side patio too.
Beds: The powered Happijac bunks that come on most toy haulers in the rear of the garage have a queen mattress on the top bunk and a queen or full size “mattress” on the bottom bunk, plenty of room for kids or guests. The “mattress” on the bottom bunk is actually two loveseats laid flat that can be raised up to face each other. A mattress topper or custom RV queen mattress is a great toy hauler upgrade.
The top bunk is a queen size and the bottom bunk is a full size. The bottom bunk also becomes two loveseats that face each other.
Toy Hauler Cons:
Decor: Many toy haulers make me feel like I’m in a sports bar. All we’d need to top it off would be a keg, some munchies and the big game on TV!
Furniture: You may not want or need the lower Happijac bunk convertible sofas or the factory supplied heavy moveable table(s) that go between the recliners and between the rear sofas. However, they generally come standard with every toy hauler.
Kitchen: To fit everything into a modest length rig, the kitchen often takes a big hit. Pantries and counter space are reduced or virtually eliminated.
Storage: A toy hauler has less storage per linear foot than a traditional fifth wheel because you can’t have cabinetry on the lower part of the garage walls.
Setup/Breakdown: If you use a toy hauler to haul a toy, loading and unloading it plus dealing with the tie-downs takes time during setup and breakdown.
Rear Wall: Because the ramp door can’t have a window, the back of the garage is a big black wall when the ramp door is closed. If the trailer has a side patio, that creates another big dark wall when it’s closed.
Dirt: If you haul an ATV or UTV, dirt and/or mud will be tracked into the garage.
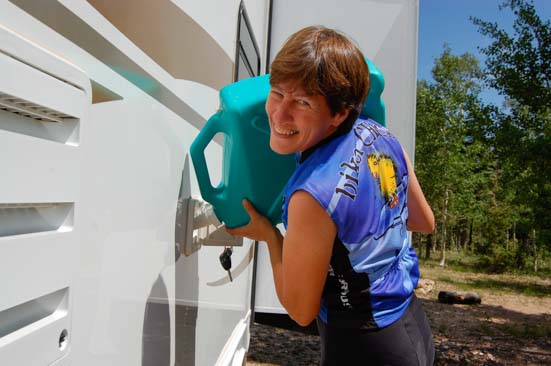
Gas Fill: Maneuvering a long toy hauler at a gas station to fill the gas tank can be a challenge, especially if the gas fill intake is at the rear end of the rig.
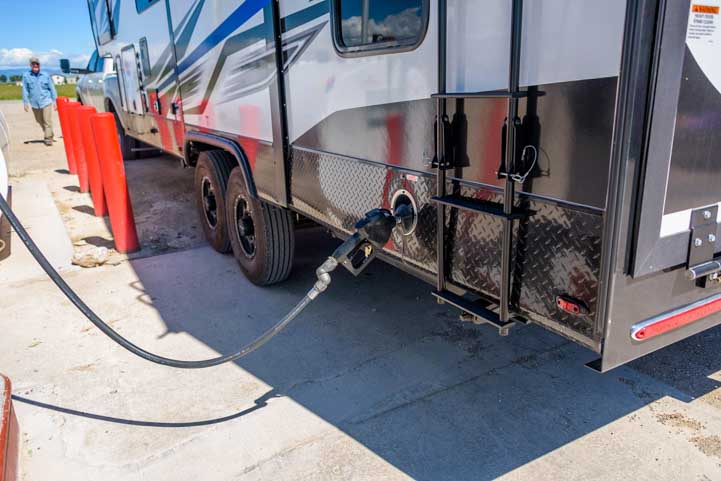
“Fill ‘er up!”
The far back end of our toy hauler is at the gas pump here. There must be room ahead of the gas pump for the whole truck and trailer…
Enclosed Garage vs. Open Box Toy Haulers
There are two basic layouts for toy haulers: a “separate enclosed garage” where the garage is separated from the living space by a wall with a door, and an “open box” floor plan where the garage space converts into living space using moveable furniture. There are big trade-offs when you choose one layout over the other.
Enclosed garages are much more common in fifth wheel toy haulers and open box floor plans are much more common in travel trailer toy haulers.
Here is the floor plan for our 33′ long open box fifth wheel toy hauler with its 16′ garage compared to a 44′ long separate enclosed garage floor plan (a 2023 Keystone Raptor 415) that has a 15′ garage.
When you unload the toys from our open box toy hauler, the whole trailer becomes 33′ of 100% living space. In contrast, you don’t need to unload anything from the 44′ enclosed garage toy hauler to get 29′ of dedicated living space.
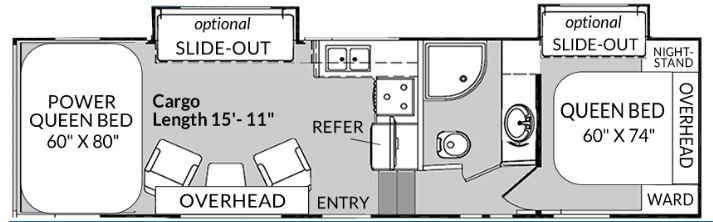
2022 Genesis Supreme 28CRT 5th wheel toy hauler floor plan
33′ long trailer with a 16′ garage.

Keystone Raptor 415 5th wheel toy hauler floor plan
44′ long trailer with a 15′ garage
Here are some of the tradeoffs between open box and enclosed garage toy haulers:

Dirt: A separate enclosed garage keeps all the dirt related to the toy(s) in the garage. An “open box” style layout brings the dirty muddy toy right into your living room!
Overall Length: A separate enclosed garage adds 10-15 feet to the length of an ordinary fifth wheel. At the back end of most toy hauler garages the last 18 inches of the floor is ramped. So, if you want your vehicle to ride level and not have two wheels heading downhill, you must add 18 inches to the overall garage length you need. Designers reduce the living area to keep their rigs under 50′ long, but almost all fifth wheel toy haulers with separate garages are over 40′ in length, nose to tail. An open box design allows for the overall length to be as little as 33′. When towing, a 33′ trailer is much easier to maneuver than one that’s well over 40′.
Garage Length: An open box trailer can offer a longer garage in a shorter overall trailer length. Whereas most enclosed garages top out at 13-15 feet in a trailer that is 38-46′ long, a shorter 33-34′ open box trailer can have a 16′ garage. At the long end of open box floor plans, one 44′ open box design has a 26′ long garage! That’s a heckuva lot of room for toys or for indoor party space with friends on rainy days or late at night.
Comfort and Storage: Separating the garage and living area means that both spaces are dedicated to their individual purposes. This allows the living space to have lots of built-ins and be more comfortable and attractive. For a given garage length, an enclosed garage rig has a lot more storage space than an open box design because the garages can’t have any lower cabinetry and in an open box design half of the rig’s length is the garage.
Single Overnights: An enclosed garage can be filled to the brim without impacting the usability of the rest of the rig. If you pull over at a rest area or stay just one night in an RV park and don’t feel like unloading the toys, you can still be comfortable in the rig. With an open box design your living space is gone once the toy(s) are loaded inside. The only way to get your living room back is to unload the toy(s). That isn’t possible or desireable in a rest area and it’s unnecessary extra work if you’re in transit to a distant destination and aren’t planning to use the toy(s) during a one or two night stay in an RV park or campground on the way there.
Tie-down Rings: The garage has tie-down rings and table pedestal supports built into the floor. With a separate garage, these toe-stubbers aren’t in your living room. However, in an open box design, they are. You can cover them with a carpet, but that is yet another thing that needs to be set up or put away each time you travel.
Bottom line: How do you plan to use the rig and the garage? A separate garage room can be used for anything — kids’ room, office, workshop, yoga room, art studio, storage, party room — but it will be a smaller space requiring a longer trailer. An open box offers an open floor plan with a cavernous living area that has a kitchen at one end, a patio at the other, and portable furniture throughout. However, if you’re hauling a toy, the living room will need to be set up and broken down every time you travel, and your toy(s) will bring dirt in with them.
An Open Box Flexible Floor Plan is Fun!
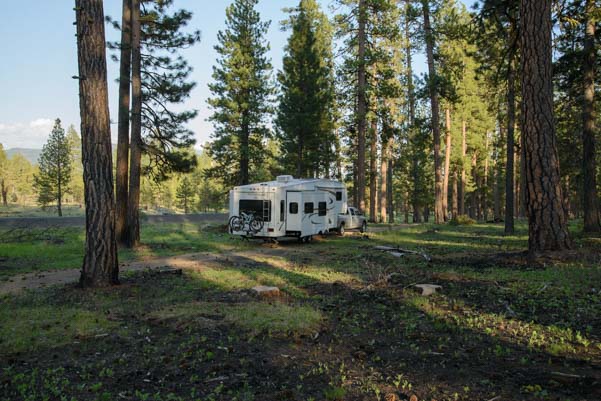
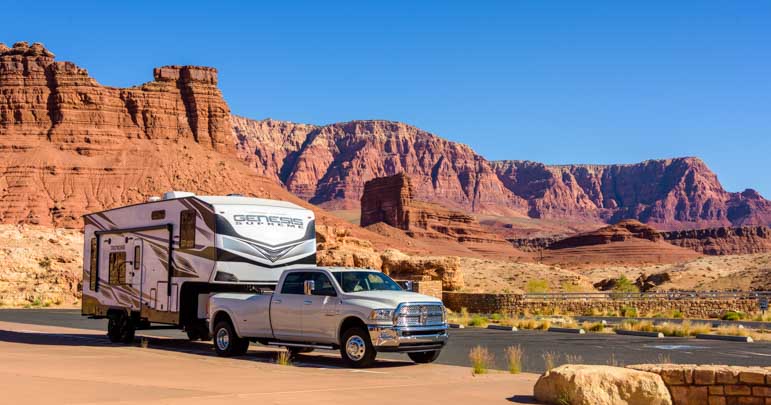
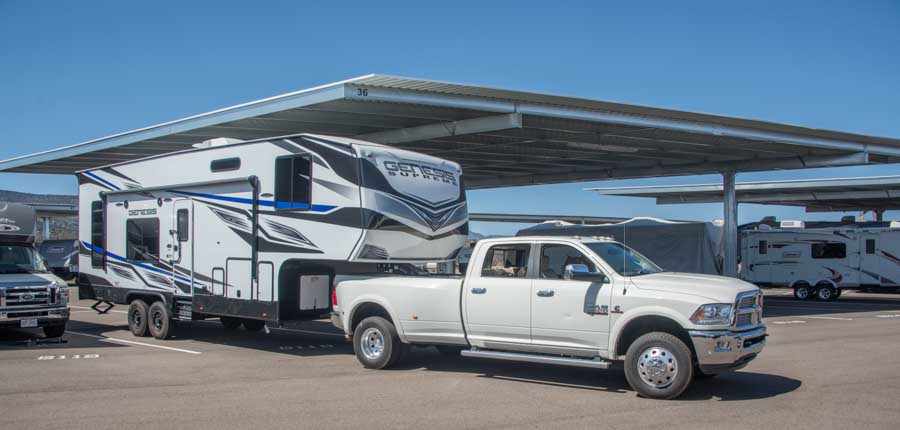
We love our 33′ long open box Genesis Supreme 28CRT toy hauler because our 9′ long Polaris RZR 900 (the reason for getting a toy hauler) fits in it well and the trailer is very maneuverable to tow and park.
Even though this trailer isn’t cushy in the way that our Hitchhiker fifth wheel was, we have found the flexible floor plan is a lot of fun. We set it up differently depending on where we are, where the views are and how long we’ll stay.

Factory Provided Furniture We Don’t Use
Like many toy hauler owners, we removed all the moveable pedestal tables that came with the rig (ours had three). The tabletops for these tables are very heavy, and stowing the tabletops and the poles for traveling was awkward.
Also like many other toy hauler owners, we don’t use the opposing sofas that make up the bottom bunk in the Happijac bunk bed and we haven’t used the lower bunk for anyone to sleep on either.
We do use the lower bunk for storage, however. There is a 6 inch gap between the two bunks when they are flush against each other, just enough to slide in a folding table onto the lower bunk. However, if the items stored there are not secured and you go down a steep descent, things can slide off. We live in a hilly area and face a 150 yard long 25% descent every time we leave home, and we’ve had a folding table slide off the lower bunk in its raised position and land on the roof of the RZR side-by-side.
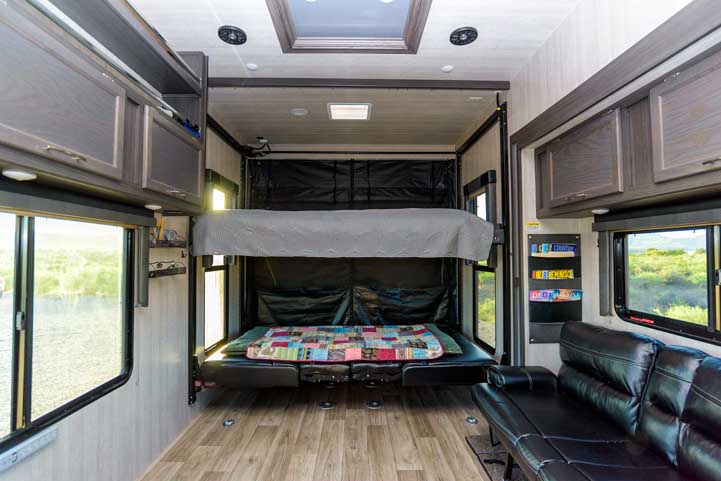
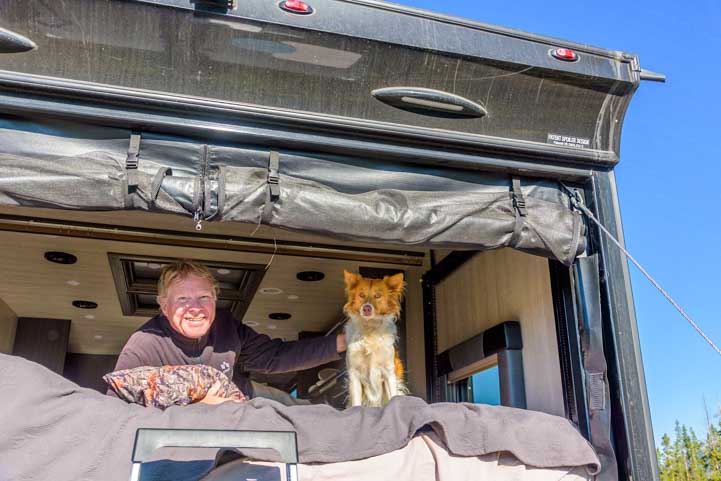
When we are set up for camping, we keep the bunk beds raised up to the ceiling so we have unencumbered floor space underneath. The upper bunk can make a fantastic napping spot, though, especially when the ramp door is open. It’s like being in a big wide comfy hammock!
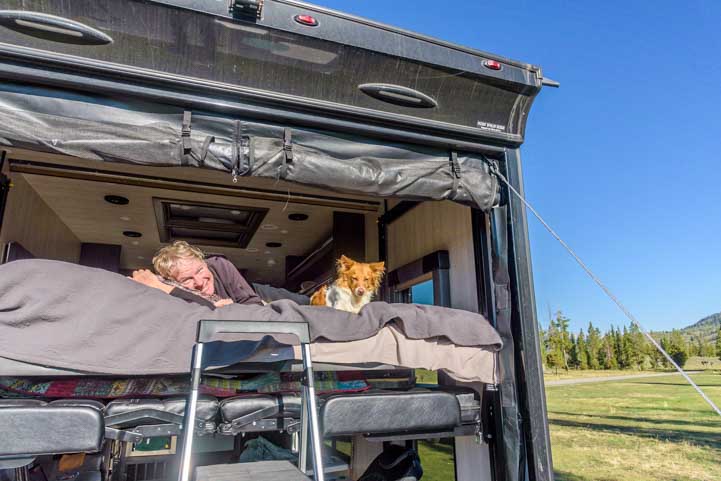
Mark and Buddy snuggle in for an afternoon nap.
Toy Hauler Fun – Bring Your Own Furniture!
So, with all that furniture not being used and the powered bunk beds raised to their Up position (allowing us to move around freely underneath), here is what the floor plan looks like:

2022 Genesis Supreme 28CRT 5th wheel toy hauler actual floor layout
(i.e., it doesn’t show the raised bunk beds or the moveable furniture).
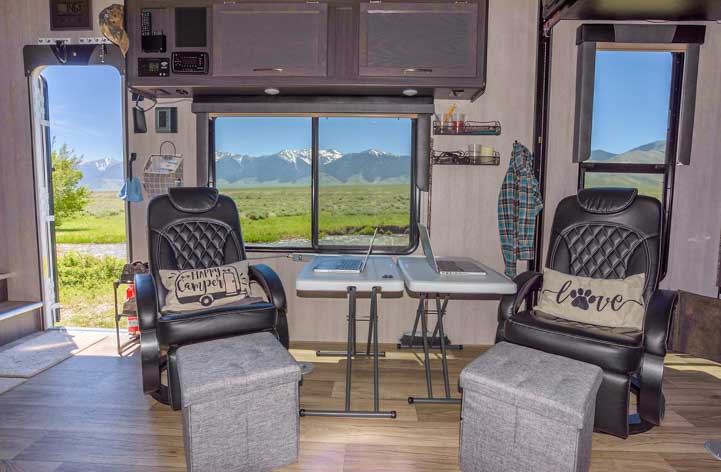
We replaced the factory-provided pedestal tables with two small folding tables that can be set to dining table height or coffee table height.
This gives each of us a “desk” or we can place them side by side to make a larger table. We can also put one or both at coffee table height if we have company. Sometimes we leave one stowed on the lower bunk and bring out just one folding table if we’re not staying very long.

We also got two small ottomans that have a drawer and a tray flip top. This gives us each a personal “junk drawer” and storage space for small items.
This is a typical layout we use if we’re not staying long. We share a table between us and use the small ottomans (trays up) to set drinks and snacks on.

Here we have both “desks” set up and the ottomans become footstools
(the Eurochair foot rests aren’t very comfortable).
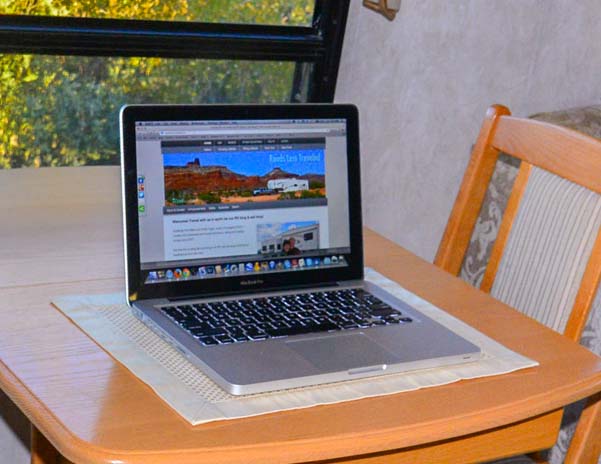
When we travel, we spend a lot of time on our laptops processing our photos, and having desks is fantastic.
Our Hitchhiker fifth wheel had a tiny built-in desk, but it was so small we never used it. Instead, we always had the laptops in our laps. How nice it is to have our laptops on a table along with a pen and paper, if needed, and a snack or a drink!
Buddy likes to hang out on the sofa. He loves to watch the Outdoor Channel!

Buddy keeps an eye on things from the sofa.
Last summer we made a foldable perch for Buddy’s dog bed so he could look out the rear window comfortably and not have to stand on the sofa to see out.

We built an experimental perch for Buddy’s dog bed by the rear window last summer (back left corner).
Once we got home, we ordered a large storage ottoman bench that is the perfect size and height for Buddy to sit or lie on and look out a rear window. The fabric even has a travel motif! We didn’t install the legs that come with it because that would make it too high for the window. As a bonus, this storage ottoman has a flip up lid and a large interior which gives us a huge storage locker!

A window seat for Buddy with storage for us!

On watch…
You may think we went a little crazy with the storage ottomans, but we had two in our fifth wheel trailer that we loved. We used them to replace the chairs that came with the dinette (blog post about that here). They are very handy because you can sit on them, put things on them and put things inside them!

Our most common layout is to place one chair and table opposite the sofa and the other one towards the back of the rig. This gives each of us plenty of space.

Our typical setup.
A slipcover on the black loveseat lightened and softened the decor a little bit
(it’s available here — I think that’s Buddy’s cousin in their ad photo!)
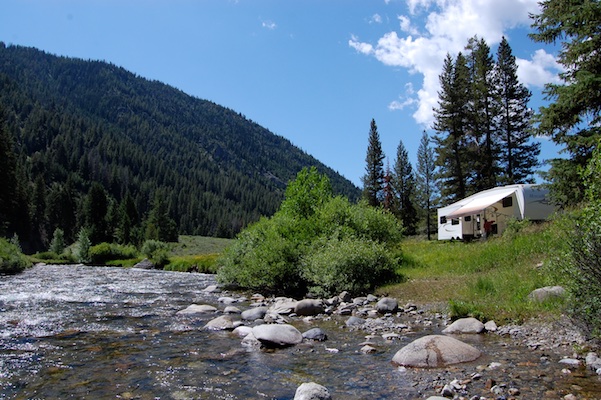
If the views are spectacular, we like to face them.

Room with a View.
Unfortunately, there are huge divets with raised rims in the floor where the factory-provided table pedestals attach, and those big bumps as well as the D-ring tie-down attachment points in the floor get in the way when we move our furniture around. The D-rings are necessary equipment, but hopefully we can find a way to remove the five metal supports in the floor that hold the table pedestals we aren’t using. We have some ideas…

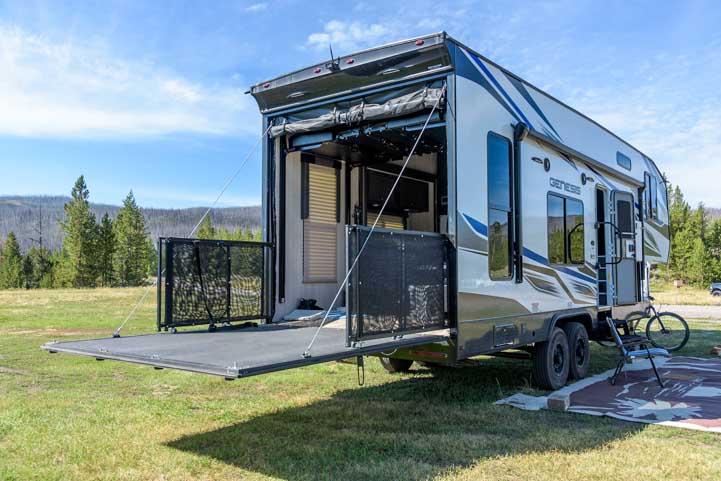
Bright and airy with the patio open.
The Patio is a Game Changer!
The biggest surprise for us was how totally awesome it is to have a patio. It has been a game changer for us. We would have LOVED having a patio during all those years we spent living in an RV!

For us, the toy hauler patio has completely changed the way we live our RV life.

We used two of these solar panels to upgrade our toy hauler's factory-installed 200 watt system to a 600 watt system.
See our DIY installation here:
RV Solar Power Upgrade
Ramp Door = Patio Floor!
We have a ramp door made by Lippert that is not too heavy. I can open and close it myself although it takes some effort. Mark can do it alone quite easily, and for the two of us together it’s a breeze.
MorRyde makes a ramp door that is so lightweight it takes just one finger to raise or lower it and it can hold its position partway open as well. Quite a few toy hauler brands have these cool ramp doors but Genesis Supreme trailers do not.

Our ramp door is heavy but not unmanageable, even for one moderately strong person like me.
At first we weren’t sure exactly how and when we would use the patio, and after our first afternoon of totally loving it, we had a bad experience with it overnight.
Most toy haulers have an accordion door system that can close out the elements out of the rig’s interior when the patio is open. There are windows in those doors so you can choose to block out the hot or cold temps with glass or allow the breezes to flow through the doors with the screens.
Vinyl Patio Screen
Our trailer is a lower end model, so instead of accordion doors, it came with a vinyl screen that has mesh “windows” for bug-free fresh air flow. The screen rolls down from the ceiling.

A vinyl screen rolls down from the ceiling. It has mesh windows in the upper half that allow fresh breezes to flow through the rig. There are vinyl flaps that close these windows if the weather takes a turn for the worse.
On our first night we left the patio open. The vinyl screen was in place, fully zipped closed with the bottom resting on the floor. By midnight the entire rig was filled with huge ugly moths that had crawled in on the floor underneath the vinyl screen because there is no seal there.
Talk about a rude awakening. It was like a scene out of a horror movie as we jumped around the rig swatting the walls like mad and shrieking (me)!
After that, we never left the patio open at night again, and we soon stopped using the vinyl screen all together because it is cumbersome and time consuming to set up.
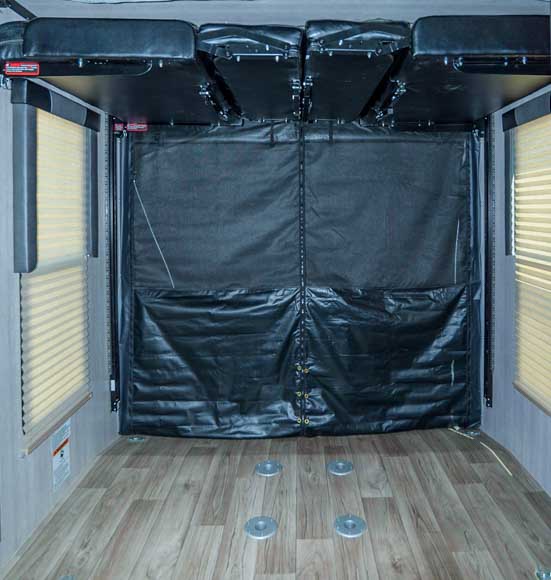
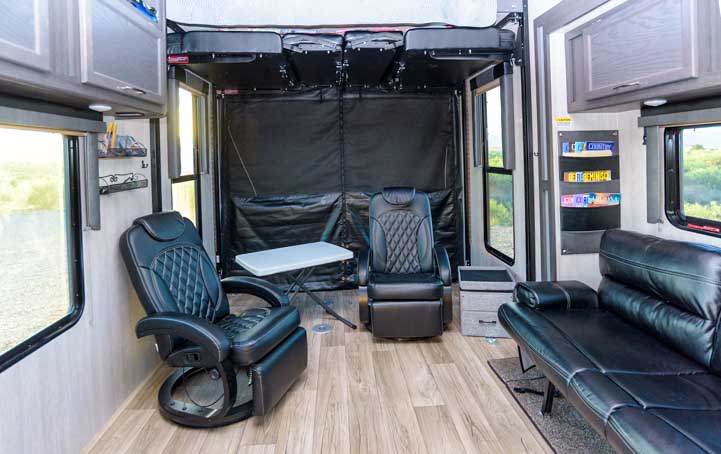
The vinyl screen is lowered and zipped closed (the ramp door is also closed).
Here you can see 4 of the 5 the toe-stubbing table pedestal attachment points for the factory supplied tables that came with the rig (and that we don’t use).
Vinyl screen rolled up.
Not only does the vinyl screen require rolling/unrolling two large 8′ x 4′ panels (which are held against the ceiling with snap ties) but three zippers (two sides and the middle) must be zipped or unzipped from ceiling to floor.
Once the screen is in place, you are either inside or outside and you have to unzip the middle zipper to get from one area to the other. Most important, even with the mesh screen “windows,” air flow is restricted and the see-through mesh only goes from the ceiling to waist height. From waist height to the floor it’s black vinyl. In contrast, the more upscale accordion doors on higher end units have glass windows on both top and bottom, bringing lots of light in.
Let the Breezes Flow!
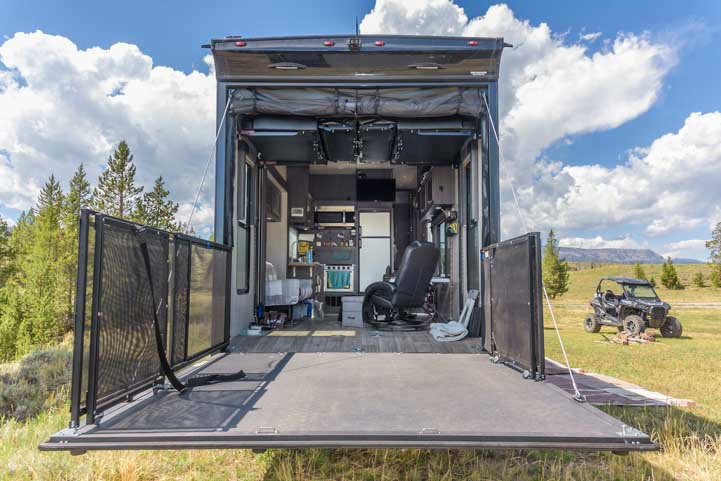
However, if we simply open the patio door and leave the vinyl screen rolled up against the ceiling, the interior of the rig is completely transformed. We open both the front door and the patio door, and any stray bugs that wander by fly in one door and out the other. This wouldn’t work in a buggy area, but the areas where we travel in the West have few bugs during the day.
The patio extends the floor space of the rig by another 8′ and you can wander freely from inside to outside. We tend not to sit out on the patio, but we love being inside and having all that fresh air and nature right there.

Out on the patio it can be hot in the sun and blowy in the wind and impossible to see a laptop screen.
Sitting inside with the patio open, however, it feels like we’re sitting on a covered deck.

It took us a while to figure out how to make the best use of the patio, but after missing out on a few campsites where it would have been fabulous, we realized just how transformative the patio can be!
Patio Rails
Most toy haulers come with a complete patio kit that includes the accordion doors and railings that go around the patio so you don’t fall off. Our patio rails were an option that the first buyer sprang for, but in hindsight they aren’t entirely necessary for the way we use the patio.
Our patio rails are hinged on the outer walls and roll open like two large doors. Once completely open to the outer edges, they get extended to reach the far corners of the patio and then they unfold again, creating a 3-sided rail system around the perimeter of the patio.

In the stowed position, the folded patio rails rest against each other in the back of the trailer.
The patio rails roll open until they are aligned with the outer edges of the patio floor.
The railings are easily clamped to the patio floor along the outer edges, and the overall effect is an attractive and sturdy fence system. There’s a gate at the far end so you can step (or jump) down to the ground.
Trailer manufacturers provide big heavy stair systems for patios, but we didn’t want to deal with storing something like that. So, we bought a 16 inch tall lightweight plastic folding step stool to help get up and down. Of course, depending on how level or unlevel the ground is, the patio floor may be very high off the ground or quite close to it. We haven’t used that step stool all that often, but it’s nice to have along just in case.
Over time, we realized that we just weren’t sitting out on the patio the way we anticipated. We were happy to stay inside but feel the cool air or warm sun coming in the back end of the trailer. So, we began simply rolling the patio rails out along the two outer edges of the patio and leaving it at that. Since we weren’t hanging around on the patio itself, we didn’t risk falling off!

The patio rails can be extended to the far corners of the floor and then unfolded further to fence in the end of the patio, but we often leave them just like this so the views from the interior are unobstructed.

The patio rails don’t need to be extended and set up all the way.
Some folks like the patio rails because their furry friends can sit outside on the patio while still being contained without being tied up. One caveat: the floor of the patio gets very hot in the summer sun — too hot for bare feet or puppy paws. We throw a mat down so Buddy can enjoy the patio too.
Many toy haulers have an awning over the patio but ours doesn’t. We’ve found that in the summer months it’s best to orient the rig so the patio gets the cooler morning sun but is shaded by the rig itself in the afternoon. Likewise, when we’ve taken it on winter trips, we’ve placed the rig so the patio gets the afternoon sun, making it possible to open it up for a few hours.
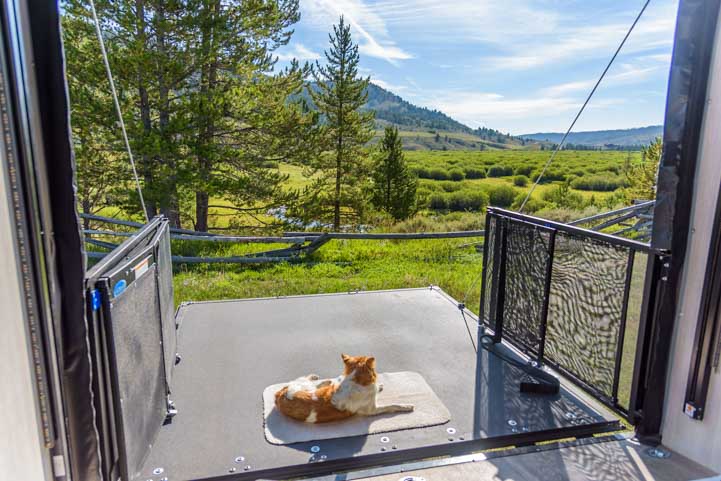
Buddy enjoys the morning sun…

…and a little shade too!
Although it’s really tempting to buy a set of folding chairs and a folding table just for the patio, we haven’t done that yet. When we want to sit outside, we’ve found it’s just as easy to drag the Euro chair recliners onto the patio as it is to set up camp chairs. We’ve been putting our old camping chairs out on the ground for sitting outside down there.
For us, the jury is still out on the chairs in general. I’ve thought replacing the Euro chairs with good quality zero gravity chairs with some really cushy cushions. We’ll see!
Loading and Unloading the Side-by-side

In she goes!.
Although it was super intimidating at first, loading the RZR is not hard. We put down rubber mats under each wheel and that’s what Mark aims for as he drives in.
We use CargoBuckle retractable ratchet straps to hold the RZR in place, and those are worth their weight in gold.
Back in our fifth wheel days when we towed the side-by-side behind the fiver on a flatbed trailer, we used to mess with traditional ratchet straps but they never held the RZR totally securely. We’d have to stop driving to check and tighten them and they chafed through quite often.
Then Mark found the CargoBuckles which mounted permanently to the frame of the flatbed trailer, and suddenly tying down the RZR was a breeze!
The CargoBuckle retractable ratchet straps worked so well on our flatbed trailer that we got another set for the toy hauler. To use these straps with the D-rings in the floor of the toy hauler, we use S-hook adapters rather than mounting the CargoBuckles permanently in the floor of the toy hauler.
These awesome retractable ratchet straps have transformed the whole process of loading and unloading the RZR. We wrote a blog post about how we installed them and use them on both our flatbed trailer and in our toy hauler HERE:
CargoBuckle Retractable Ratchet Tie-Downs – SO EASY!


Mark aims for the rubber mats on the floor (they are there to protect the flooring)
Notice the table pedestal support holes in the floor (one rubber mat can’t even be flush to the floor), and notice the small storage ottomans and other gear has been stowed against the wall.
What’s It Like When There’s a Toy in the Garage?
For us, one of the most important features in an RV is that when it is fully loaded for traveling and the slides are in, you can still make and eat a meal as well as use the bathroom and sleep. That way, if we end up at a rest area or truck stop overnight, we can still be somewhat comfortable.
This is not possible in every toy hauler, and it is not possible in every other kind of RV either. However, the Genesis Supreme 28CRT floor plan works well this way as long as the toy is around 10′ or less in length.
We place the Euro recliner chairs side by side in front of the side-by-side facing into the kitchen. This gives us a place to sit while also leaving enough open area to move around the kitchen and use the sink and stove.

Looking towards the back of the trailer, everything fits, even the bike.
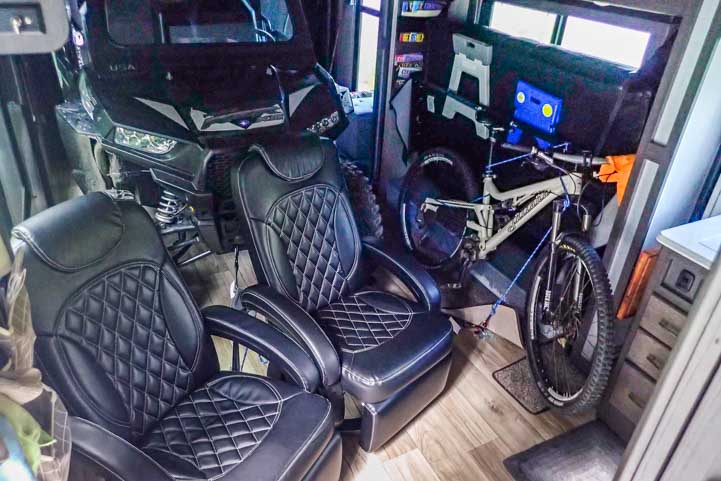
It’s a tight squeeze but it works. Note that the flip-up sofa is flipped up against the slideout wall with the window, and two folding step stools are tucked in behind a metal bar on the underside of the sofa.
If our side-by-side were longer it would still work, but the Euro chairs might have to be stowed in the hallway that goes to the bedroom instead. This would be fine as long as you didn’t plan to sit in them at all.
Obviously, lots of people travel with their RVs and never overnight in places where they can’t open their slideouts or unload their toys, but it’s something to consider if you travel by the seat of your pants the way we do.
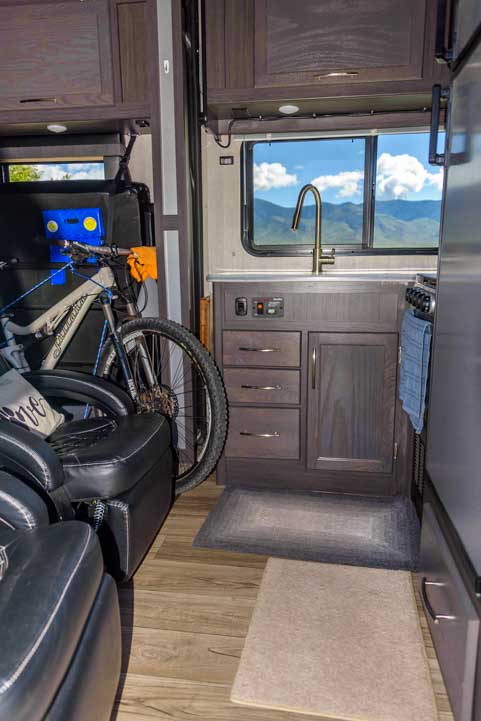
Full access to everything in the kitchen.

Sometimes we have to turn the bike wheel a little to get into the lower drawers.
What Toys to Bring?

Last summer we traveled with one mountain bike and the RZR. Before we bought the trailer, I thought there would be enough space for two bikes and the RZR, but once we started working out exactly how we would load the garage, I discovered two bikes would be too tight. So, we took just one bike and loaded it in and out of the trailer at every campsite.
Buddy loves running with our bikes on forest roads and trails, but it wasn’t the same going out without both of us together. So, the bike never really got used.
Now that we’ve lived in the toy hauler for a few months, I’m not so sure I’d want to load and unload two bikes and a side-by-side every time we set up camp anyway. Perhaps a longer trailer would make it possible to stow two bikes until they were wanted.
A bike rack on the back of the trailer wouldn’t work because of the ramp door. So, for all those reasons we won’t have any bikes with us this summer, and I think life will be simpler.
There’s a fine line between taking everything you could ever want along with you in an RV versus being comfortable day to day because you are willing to live without a few things and you’re not crowded out of house and home by all your stuff.
I devised a way to tie the bike to the sofa when it was in its flipped up stowed position against the wall and also clamp it to two D-rings in the floor using rope and two caribiners. The bike was rock solid when we traveled but it was a tight squeeze to get to the back of the trailer if we needed to.
Because of that, we learned to stow the most important daily items in the forward cabinets so they were easy to reach when we were in transit and all loaded up!
What About the Dirt?

Having a RZR in our living space is definitely dirtier than not having one. However, it’s more manageable than I expected. We sweep out the garage before loading the side-by-side and after unloading it. We don’t have a carpet so it’s easy to sweep the vinyl floor. On our next adventure we’re bringing a portable vacuum too.
In reality, when it’s muddy, Buddy brings about as much mud in on his paws as he runs in and out all day long as the RZR brings in on its wheels when we travel from place to place, and the RZR doesn’t bring any dirt into our bed!
So, if dirt is something that would keep you from considering an open box toy hauler yet you have a dog(s) that loves to run around outside, perhaps reconsider. You’ll be cleaning up mud and dirt regardless.
The toy hauler has a fresh water spigot on the outside and 100 gallons of fresh water, so we can rinse off the RZR or at least wipe it down before loading it inside.
Also, if the RZR gets really filthy, we can always drive it to a car wash. We haven’t done that yet, but there have been times when we’ve thought about it!
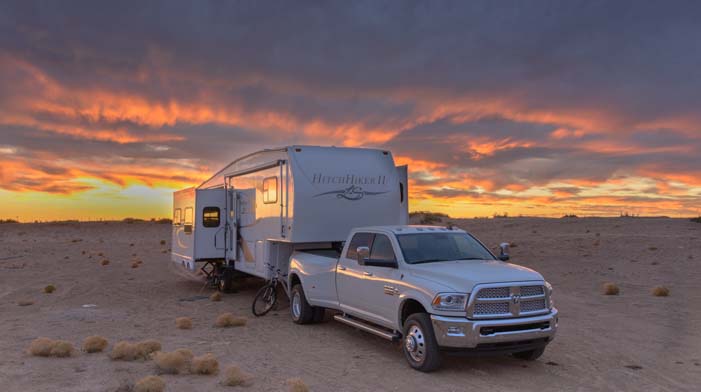
Overall Impressions
We love this rig. It is just right for part-time travels, and the flexibility of the floor plan and ability to bring the RZR on our adventures is everything we wanted.
In my first post about this toy hauler, before we’d taken it out on a four month journey, I was quite certain I’d never consider an open box floor plan for full-time living. In hindsight, though, we’ve found it actually makes for a very cool home on wheels and could work quite well for full-timing.
In that case, I’d look at a longer rig, perhaps 36′ to 38′ end to end. That would give us a bigger kitchen and/or bigger bedroom. I’d also hunt around for super comfortable and lightweight recliners, and I’d make sure I bought a rig with a light colored decor!
Subscribe
Never miss a post — it’s free!
References:
Genesis Supreme 5th Wheel Toy Haulers – Ours is the 28CRT
More articles on similar topics:
- What are the Most Important Features in a Full-time Fifth Wheel?
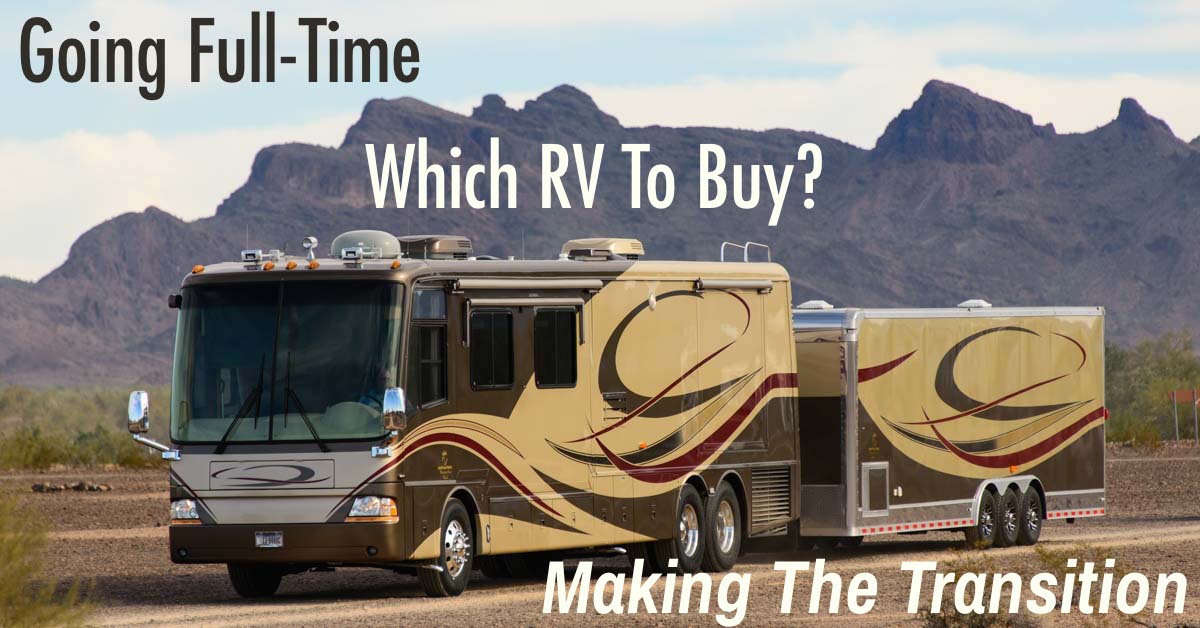
- Going Full-time – How to Transition and Which RV is Best?
- Finding a Fifth Wheel or Toy Hauler to be a Full-time Home
- Triple Tow or Toy Hauler – Which is the Best Choice?
- Trailer Cargo Carrying Capacity – What to Look For
- How Big an RV do you Need?
- Go Cheap, Go Small, Go Now – Learn RVing Without Breaking the Bank!
- RV Lifestyle Tips - Index of articles
- RV Tech Tips - Index of articles
- Product Reviews - Index of articles
The RVs and sailboat we’ve traveled in:
- 2024 Alpha Wolf 17CB Travel Trailer - Current rig
- 2022 Genesis Supreme 28CRT 5th Wheel Toy Hauler - Two years of seasonal journeys
- 2005 Arctic Fox Truck Camper - 1 year of weekending adventures
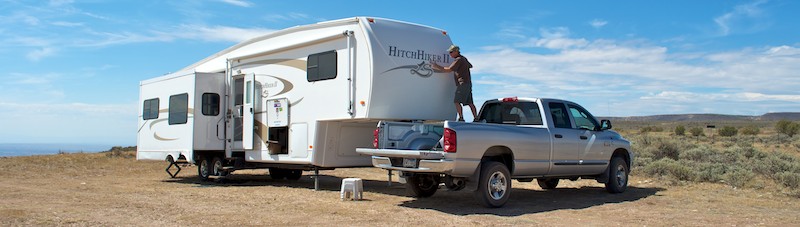
- 2007 Hithhiker 34.5 R.. 5th Wheel - 12 years full-time (some years alternating with our boat)
- 2008 Hunter 44DS Sailboat - Nearly 4 years (alternating with our fifth wheel during hurricane season)
- 2007 Fleetwood Lynx Travel Trailer - 1 year full-time
- 2005 Fleetwood Colonial Popup Tent Trailer 157 thrilling nights (weekends and vacations) in 2 years
Below are some of our most POPULAR POSTS (also in the MENUS above)
Buddy - A Journey in Spirit - The story of an event that changed our lives forever. ARTICLE INDEXES- RV Tech Tips Articles - A one page index of links to all our RV Tech Tips, RV Upgrades & RV Maintenance articles.
- RV Lifestyle Tip Articles - An index of links to all our RV Lifestyle Tips (finances, boondocking, major repairs, work/jobs, etc.)
- Solar Power Articles - Overview and tutorial articles for how to design and install solar power on an RV or boat
- Product Reviews - An index of links to all of our Product Reviews
- Basic RV Tool Kit - What tools do RVers need? Here's a list of essentials, from tire changing to electricity, plumbing & more
- RVing Tips & Tricks - Tips and tricks to make RVing easy
- Reese Goose Box - Reclaim your TRUCK BED with air ride smooth towing + How to hitch and unhitch!
- RV Heater Installation - Step-by-step guide for how to select and install a vent-free propane heater
- CargoBuckle Ratchet Straps - These retractable straps make it a CINCH to tie down a side-by-side, motorcycle or ATV
- How to change a dually truck's inner rear tire - Tips for changing the inner rear tire on a dually truck.
- EASY SOLAR POWER UPGRADE - We TRIPLED our factory installed solar power output for CHEAP
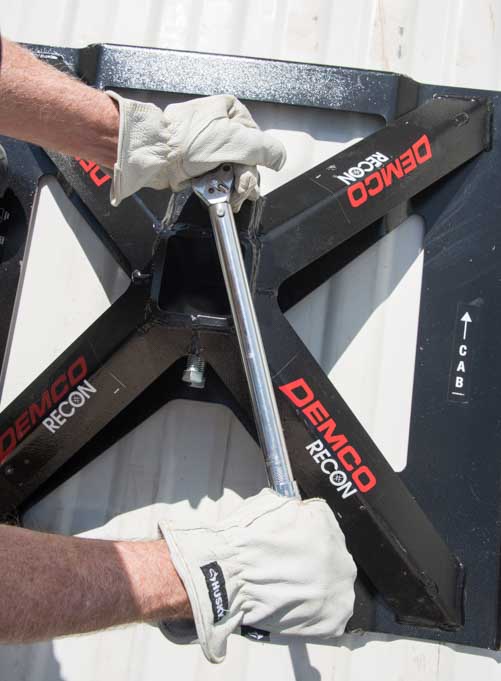
- B&W Fifth Wheel Hitch - Why we chose this hitch for our fiver plus an easy 5th Wheel Hitch Installation Guide.
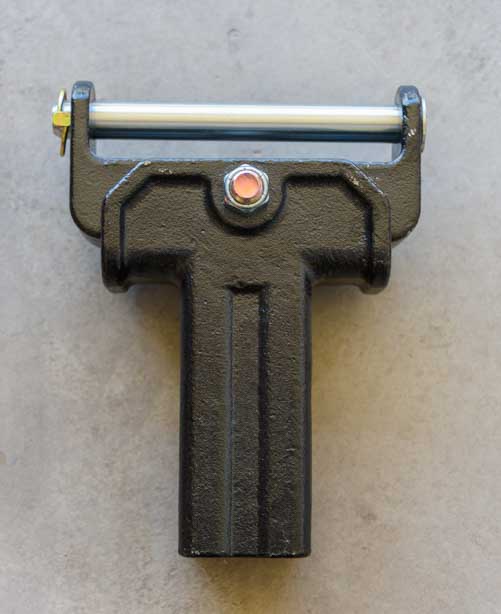
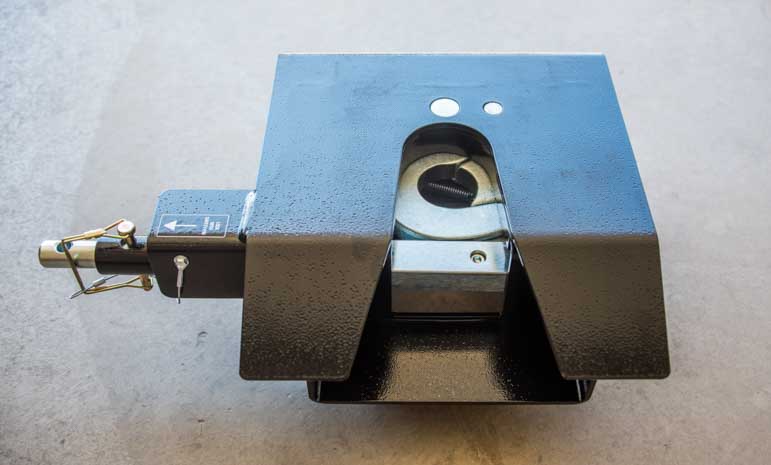
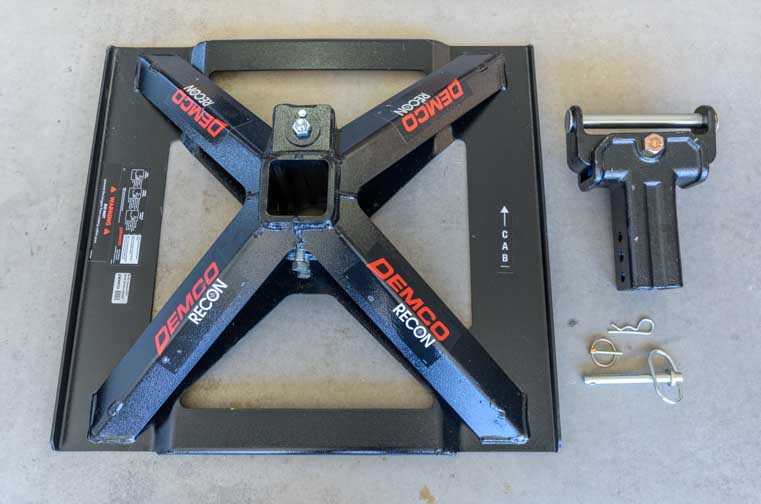
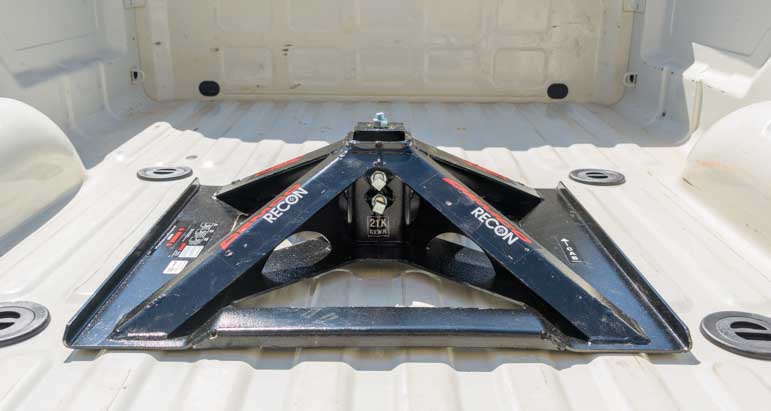
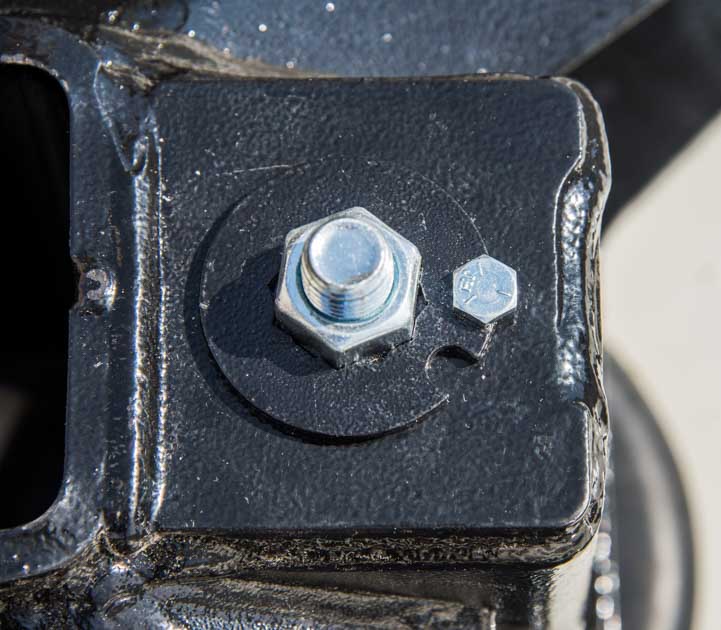
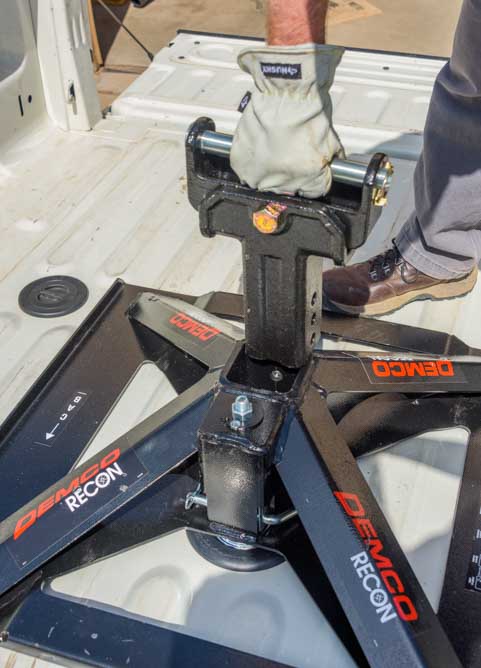
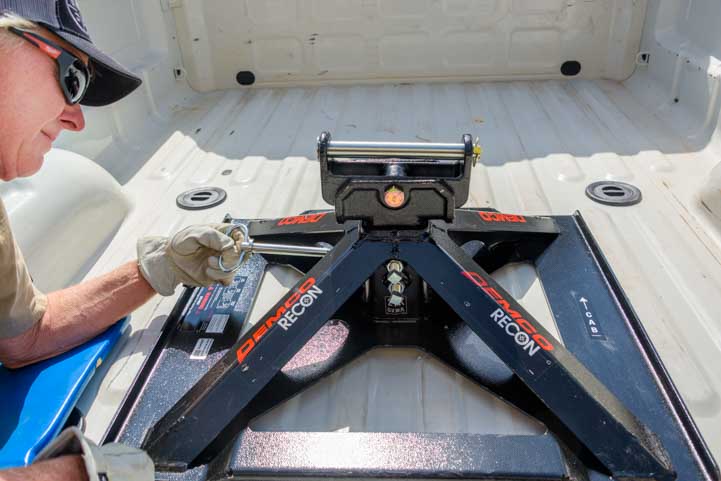
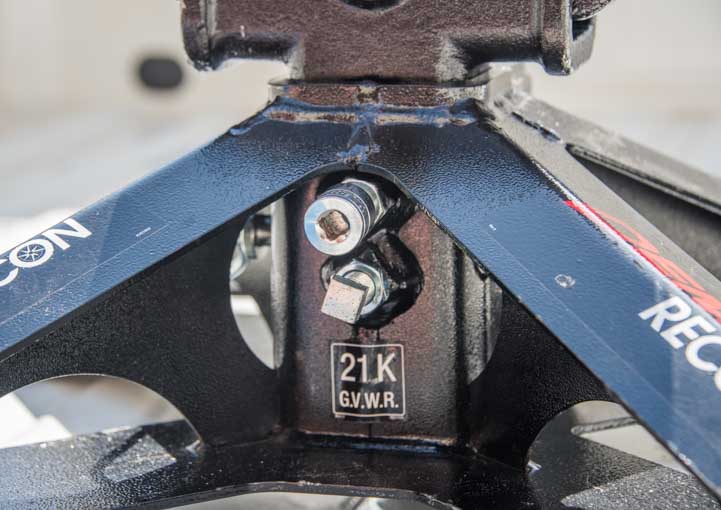
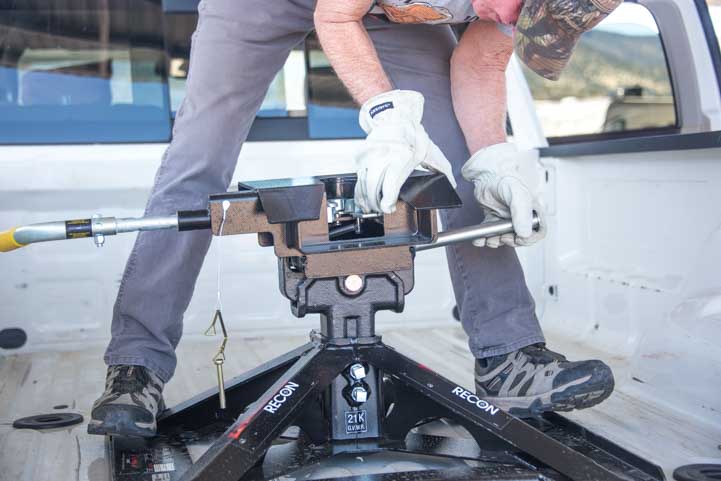
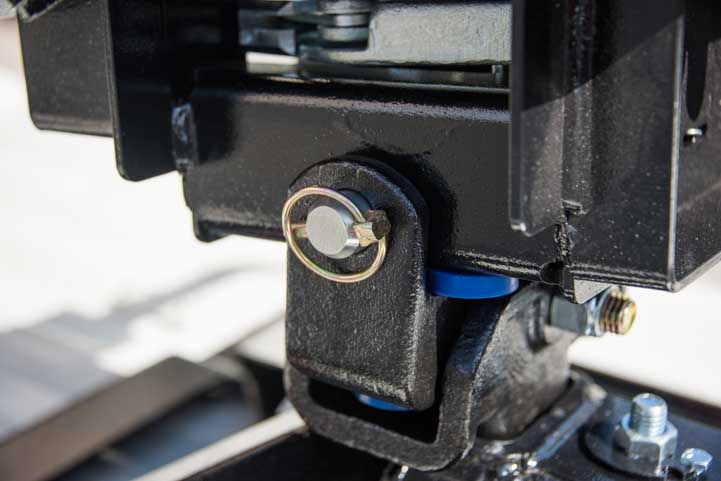
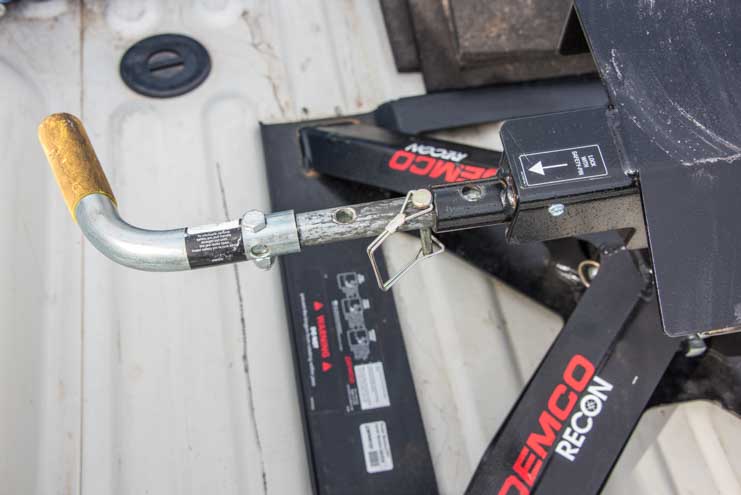
- Demco 21k Recon Fifth Wheel Hitch - This fifth wheel hitch mounts on a gooseneck ball in the truck bed!
- Increase Your RV Storage Space - Add precious storage space at the RV dinette with storage benches!
- Buying a Truck - Which options turn an ordinary diesel pickup into a massive TOWING MACHINE?
- Battery Charging Primer - The low-down on RV and marine batteries and how to charge them effectively.
- Which Solar Panels are Best? - Which is better: FLEXIBLE or RIGID?? 12 or 24 volt?? monocrystalline or polycrystalline???
- RV Solar Power Made Simple - An overview of how solar power works on an RV
- Trailer Disc Brake Conversion - Massively improve trailer stopping power with electric over hydraulic disc brakes
- Truck Engine Upgrade - How we improved performance, towing power and fuel economy with an engine tuner
- How to Defrost an RV Refrigerator in 20 Minutes - It is actually a cinch to defrost an RV fridge!
- Solar Charge Controllers - Understand and OPTIMIZE your RV / marine battery solar charging
- Wet Cell vs. AGM Batteries - Which is better, why we upgraded, PLUS wiring tips to optimize battery life
- Suspension Overhaul on a 5th Wheel - A Total Re-design for our Suspension: Hangers, springs, shocks & more!
- Can you run SOLAR POWER and SHORE POWER together? - What happens when you're on solar and you plug in?
- Converters, Inverter/Chargers and Engine Alternators - How do these battery charging systems REALLY work?
- RV Budget, Costs and Expenses - A detailed analysis of RVing expenses over 7 years of RVing full-time
- RV Extended Warranties - Is an RV warranty a good investment or a waste of money? Our personal case history.
- Working and Living on the Road - How do you make money on the road and who lives this nomadic lifestyle?
- Sell or Lease the House? - Is it better to SELL or LEASE your house when you start a life on the road?
- Mexican Dentists - Are the Dentists in Mexico any good? Just how cheap are they? Here are our PERSONAL experiences.
- How An RV Warranty Saved Our Bacon - Literally! - One repair on our RV practically paid for our RV Extended Warranty
- Still Smiling After 3 Days at the RV Repair Shop - Why? Our RV Warranty put us $2,000 ahead of the game!
- 5th Wheel Suspension Replacement - When our trailer's suspension failed, we $aved $$$ Thousands getting it replaced.
- RV Toilet Replacement - Our RV toilet quit flushing (ugh!) but our RV warranty saved us again. Now we're $6,700 ahead!
- RV Boondocking - Tips for how to live in an RV off the grid
- Which RV Is Best for Full-Time Living? - Transitioning from a house to an RV - Which RV makes the best home?
- Truck Camper Pros and Cons - The GOOD, the BAD and the UGLY!
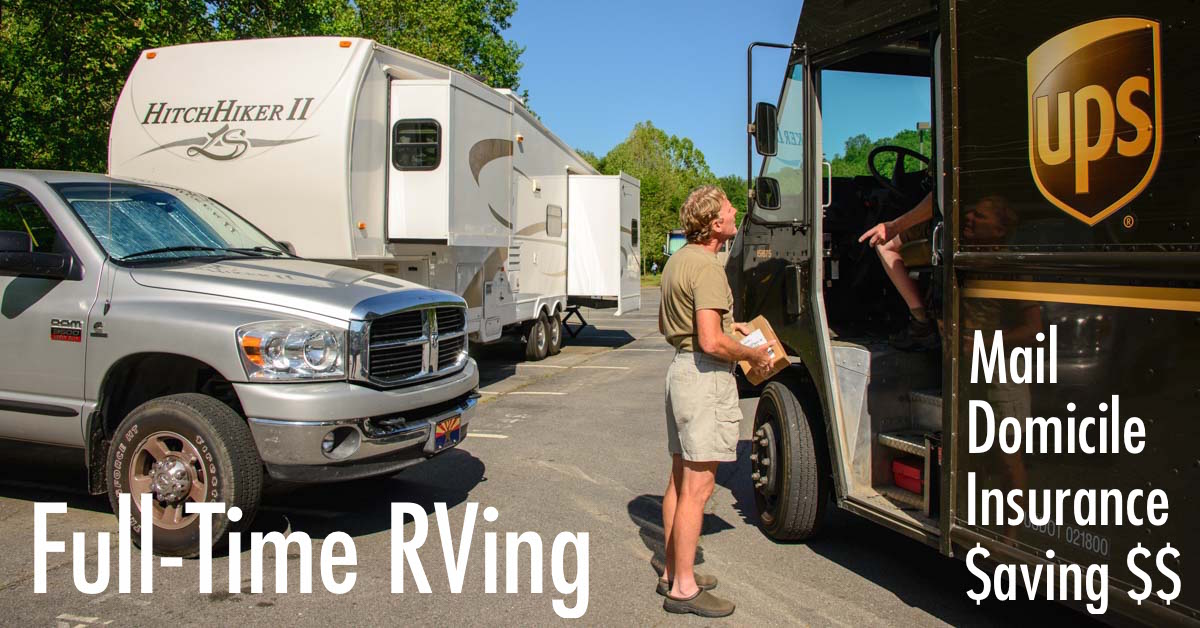
- Full-time RV Lifestyle Tips - Full-time RVing Logistics - Mail, Domicile, Insurance, Warranties, Saving Money at RV Parks
- Toy Hauler Life - What's it like to live in an OPEN BOX Toy Hauler?
- What are the MOST IMPORTANT FEATURES in a Full-time Fifth Wheel? - For anyone planning to live in an RV!
- Internet & Phone Access for RVers - An inexpensive, minimalist solution for internet access on the road
- RV Dump Stations & Composting Toilets - How to do the dirty deed at the RV dump PLUS RV Composting Toilet tips
- Choosing a Trailer for Full-time RVing - Why the payload capacity is so important
- Learn RVing the Fun Way!! - Go Cheap, Go Small, Go NOW and have a blast in little RV!
- Free RV Campsites - Resources for locating campsites for boondocking
- Glimpses of the Full-time RV Life - Anecdotes from the road and essays about living the RV dream.
- Travel Photography Tips! - All the cameras, gear, books, blogs and tools we used to learn to take great pics!
- Gear Store - A list of the goodies, equipment and gear we've found useful in our RV lifestyle!
Our most recent posts:
- Buckskin Mountain State Park – Fun on the Colorado River! 01/31/26
- How to Install Starlink Gen 3 in an RV? Use the Speedmount! 08/07/25
- Escape to Paradise – Rocky Mountain Magic! 08/01/25
- Is Forest River a Good RV? Well Built? Here’s Our Experience 06/20/25
- Sunset Crater Nat’l Monument – Lava & Camels at Bonito CG! 06/06/25
More of our Latest Posts are in the MENU.
New to this site?
Visit RVers Start Here to find where we keep all the good stuff. Also check out our COOL NEW GEAR STORE!! *** CLICK HERE *** to see it!


 As responsible RVers, I think it is in all of our best interests if we use chemicals that won’t pollute our ground water supply.