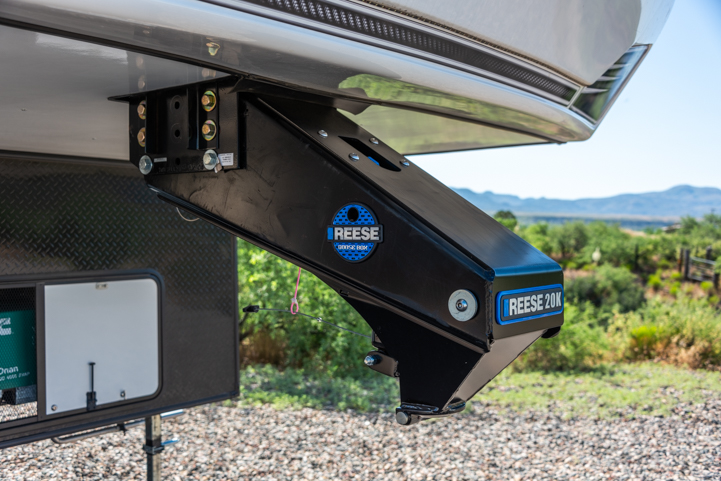
Reese Goose Box Review: 20K Gen 3 TESTED + How to Hitch

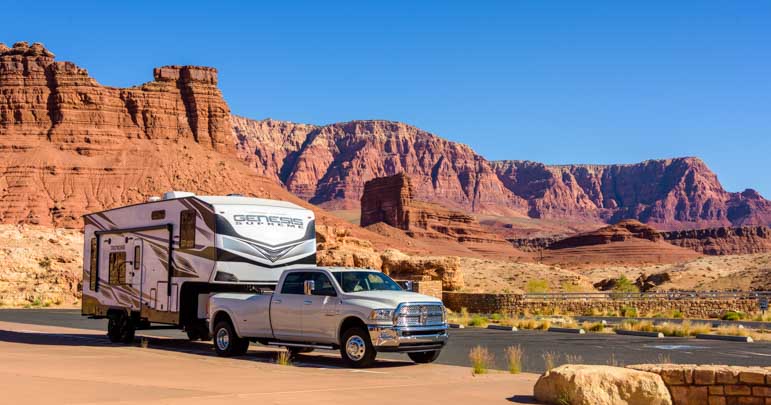
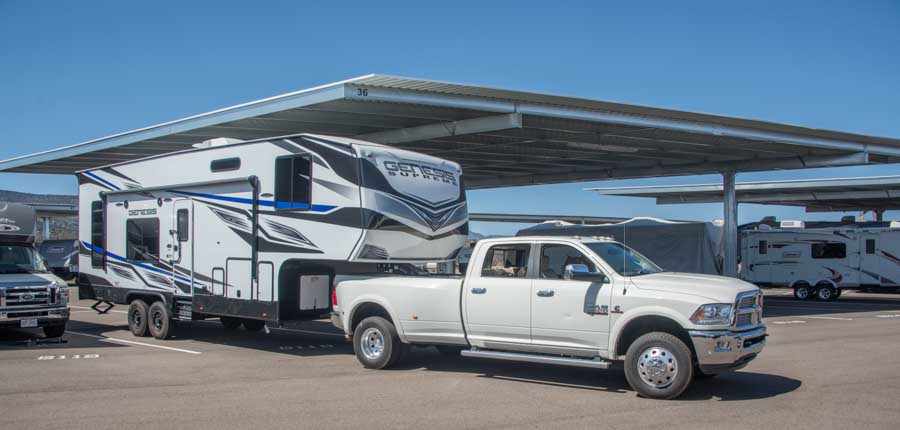
This page is a review of the Reese Goose Box 20k Gen 3. We’ve used ours for over a year and tested it thoroughly towing our 15,000 lb. Genesis Supreme toy hauler over 2,000 miles of varied terrain that included mountains, back roads, interstates, switchbacks and dirt roads. If you’re curious how to hitch and unhitch a Reese Goose Box, we’ve included some tips and tricks we’ve found make it as easy or easier than a traditional fifth wheel hitch!

This hitch is essentially a replacement for the original kingpin that came with the trailer. So, you remove the original kingpin and replace it with the Reese Goose Box. The beauty of the Reese Goose Box is that it hitches to a gooseneck ball in the truck bed, eliminating the need for a fifth wheel hitch all together and freeing up the truck bed completely when you’re not towing!

We paired the Reese Goose Box with a B&W gooseneck ball that is designed for the Dodge Ram OEM puck system (we have a 2016 Dodge Ram 3500 long bed dually truck).

Reese Goose Box Review 20k Gen 3 Tested + how to hitch and unhitch

What do we think of the Reese Goose Box after towing with it for 2,000 miles over the course of a year?
Read on and find out!

For over a year now, we’ve towed our trailer on all kinds of roads, including freeways, secondary roads, around tight winding switchbacks and on very lumpy, bumpy, potholed dirt roads on our way to remote boondocking locations. We’ve also climbed up and over several towering Colorado mountain passes, including Monarch Pass, Hoosier Pass and Slumgullion Pass (twice!), each of which is more than 11,300’ in elevation.

The Reese Goose Box has performed flawlessly everywhere. The ride is much smoother than any fifth wheel hitch we’ve ever used, and it’s easy to hitch and unhitch.

Reese Goose Box 20k Gen 3 Hitch - How to hitch and unhitch

The Reese Goose Box replaced the original kingpin that came with our trailer.

We installed Reese Goose Box on our trailer ourselves, just the two of us. It was intimidating but it wasn’t difficult, despite the heavy weight of the original king pin and the even heavier weight of the Reese Goose Box. (There’s a trick to it!)

However, before we describe that process and present our step-by-step installation method (in a future post), we wanted to explain why the Reese Goose Box is so unique and also show you how to hitch and unhitch a trailer so you can see exactly how it works.

How to Hitch and Unhitch the Reese Goose Box 20k Gen 3 Hitch

The 20K Reese Goose Box is rated to tow up to 20,000 lbs.

Here are some shortcuts for this article:


WHY A REESE GOOSE BOX?

We’ve been towing fifth wheel trailers around for 15 years now, and we’ve used a variety of fifth wheel hitches made by Pullrite, B&W and Demco.

While each one was a fine hitch with certain great advantages, the drawback with any fifth wheel hitch is that when you aren’t towing a trailer, the bed of the truck is occupied by a large and heavy fifth wheel hitch.

It is awkward to remove the hitch, even a lighter weight one (as we discovered with our Demco hitch), and it’s all too easy to avoid this chore and simply leave the hitch in the truck bed indefinitely. Unfortunately, with the hitch in there, you lose the use of the truck bed except for hauling smaller items that fit around the hitch!

Reese Goose Box 20k Gen 3 - how to hitch and unhitch

With the Reese Goose Box there is no need to have a fifth wheel hitch in the bed of the truck.

When we were full-time RVers, we didn’t need the truck bed except for carrying whatever we used in that lifestyle: spare water jugs, patio mat and chairs, portable generator, bbq, etc.

However, now that we RV seasonally, we wanted to have the full use of our truck bed during the off-season when we’re at home. It’s no fun hauling plants, soil, mulch and lumber in the trunk of a passenger car or trying to fit those things around a fifth wheel hitch.

How to Hitch and Unhitch the Reese Goose Box 20k Gen 3

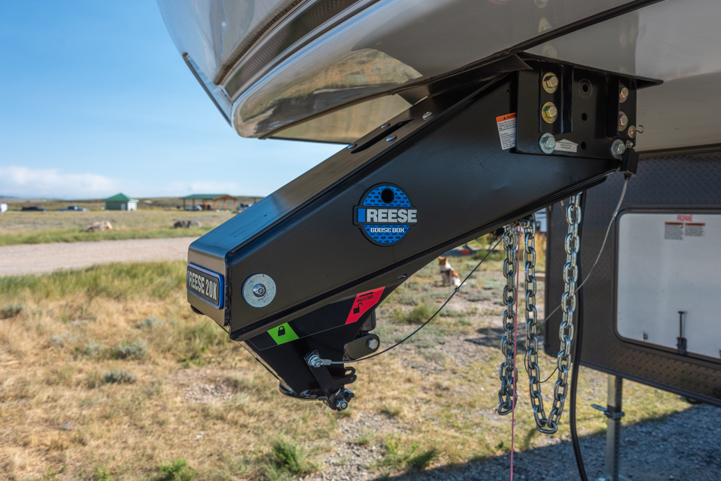
The “business side” of the Reese Goose Box is the driver’s side with the locking lever and air bag status window clearly visible (more on those important items below!).

By using a gooseneck style hitch instead of a fifth wheel hitch, all you need in the truck bed is a gooseneck ball and gooseneck receiver. The gooseneck receiver can be a factory installed OEM puck system or can be an after-market installation. What an easy way to free up the truck bed!

For this reason, some people switch out their fifth wheel kingpin for a gooseneck hitch. However, that puts a lot of strain on the fifth wheel trailer frame (fifth wheels are a lot taller than horse trailers…), and fifth wheel manufacturers advise against it.

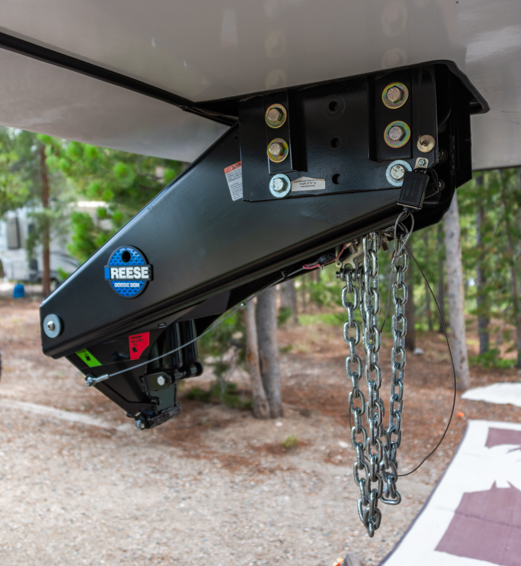
Unlike a gooseneck hitch which has a long vertical lever arm that creates strain on the frame as it sways back and forth, the profile of the Reese Goose Box is angled and shaped like an ordinary fifth wheel kingpin. That reduces the strain on the frame significantly.

We were surprised to learn that the Reese Goose Box is the only gooseneck style hitch that Lippert Components Inc. has approved for use with their fifth wheel frames. I spoke to a Lippert sales rep to verify this, and he stated that, unlike other gooseneck style hitches, the use of a Reese Goose Box does not void the warranty on a Lippert fifth wheel frame. Like most fifth wheel trailers, our Genesis Supreme 28CRT toy hauler is built on a Lippert frame.

Obviously, many things can ultimately contribute to the failure of a fifth wheel frame, so I have no idea how that would play out in the event of the frame developing a crack. But it’s an impressive endorsement.

In our research, we came across some comments on the internet asserting that of course Lippert Components endorses the Reese Goose Box because they own Reese Products! However I looked into it, and that’s not true. Reese’s parent company, Horizon Global, was purchased by First Brands in early 2023, and neither Horizon Global nor First Brands is related to Lippert Components.

We have the 3rd generation of the Reese Goose Box that is rated to tow a 20,000 lb. Trailer. The Gen 3 version of the Goose Box was released in the Fall of 2022.

Reese Goosebox
Reese Goose Box 20k Gen 3 hitch as seen from behind the truck

.

We decided to pair it with the B&W gooseneck ball designed for the Ram truck OEM puck system on our 2016 Dodge Ram 3500 long bed dually. This gooseneck ball is a very nifty piece of gear with a huge handle. You can easily latch the gooseneck ball into the gooseneck receiver in the truck bed and also pull it back out using that handle rather than grabbing the ball itself with your hands.

B&W Gooseneck Ball and Safety Chain Kit

The B&W Gooseneck Ball and Safety Chain Kit fits in a cool suitcase.
The actual chains themselves are sold separately.

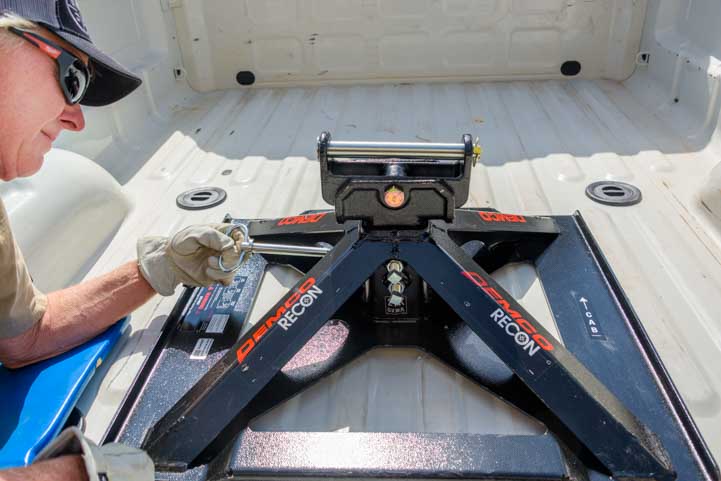
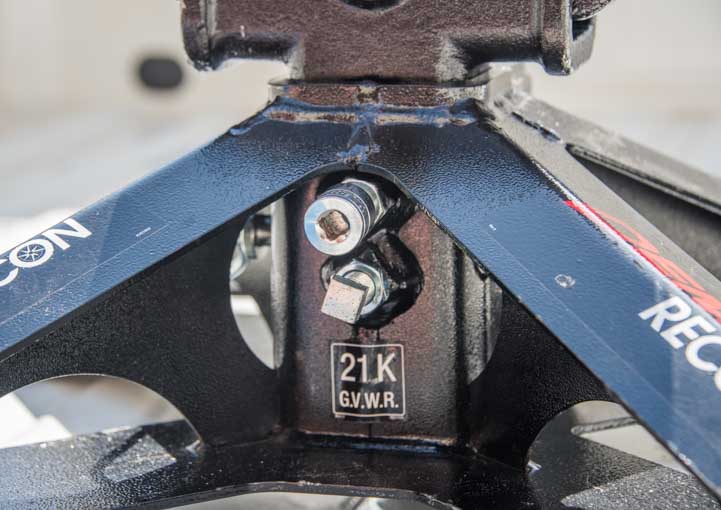
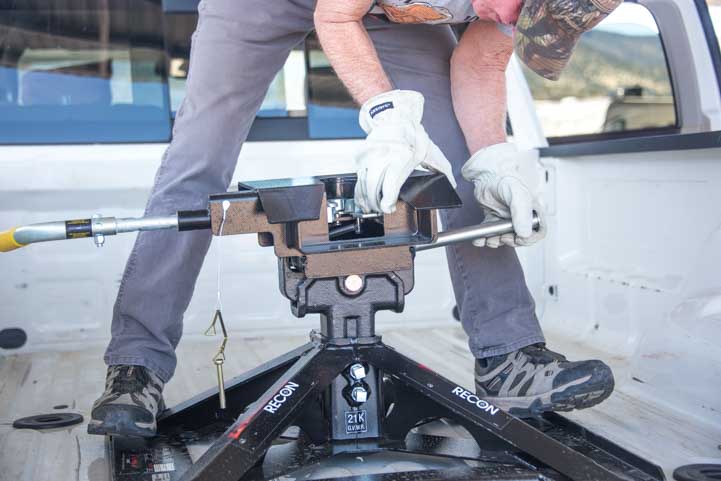
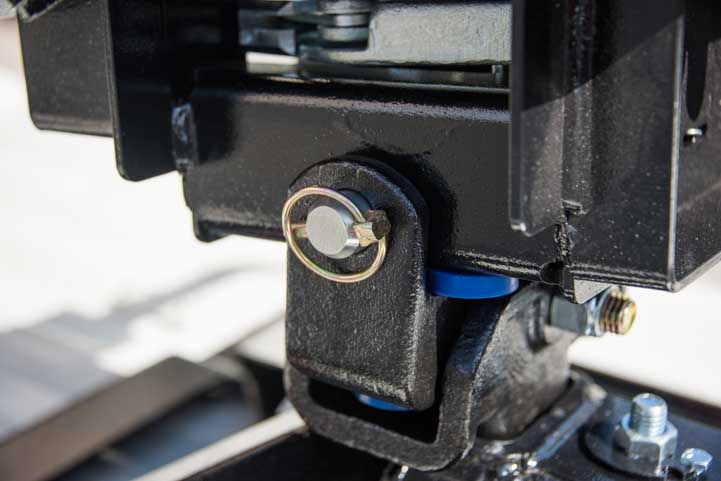
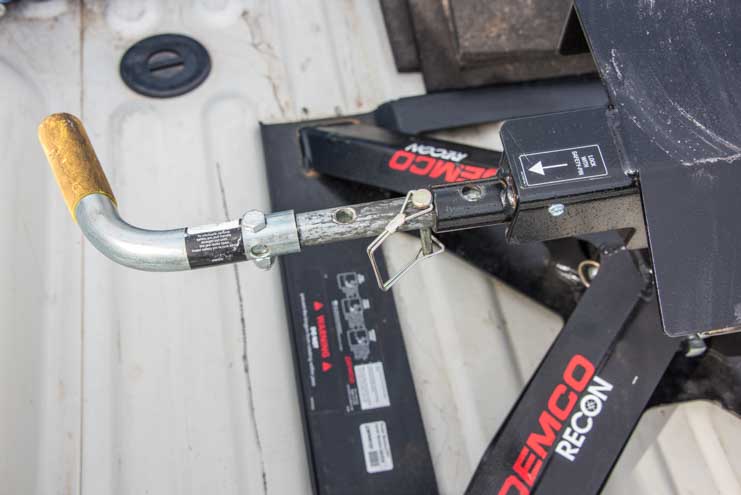
That may seem unimportant until you’ve actually lubed up the gooseneck ball and used it a few times! It’s much nicer to use a big handle to pull the gooseneck ball out of the truck bed rather than grab the greasy ball itself! We would have used this gooseneck ball with our Demco 21k Recon fifth wheel hitch, but the handle got in the way of the hitch.

B&W Gooseneck Ball for Ram Trucks

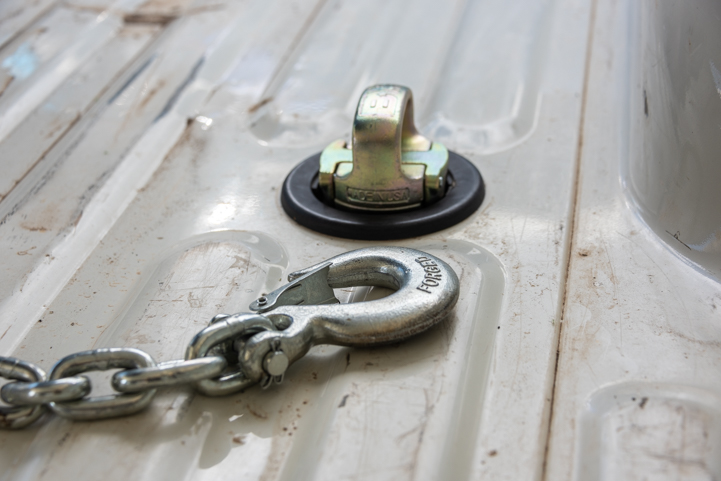
The B&W OEM gooseneck ball kit also comes with two safety chain anchors that get inserted into the OEM puck system on a pickup. These are used to secure the safety chains (which are not part of the kit — we got the safety chains separately here).

Reese Goosebox Safety Chains


HOW TO HITCH UP A TRAILER USING A REESE GOOSE BOX

REESE GOOSE BOX vs. FIFTH WHEEL HITCHING PROCEDURES

Hitching up a trailer using a fifth wheel hitch involves backing the truck (and its fifth wheel hitch) into the trailer’s king pin. It is a horizontal movement of the truck, and the connection locks in place once the truck has backed the hitch into the kingpin.

Hitching up a trailer using the Reese Goose Box involves lowering the trailer’s kingpin (the Goose Box) onto a gooseneck ball in the bed of the truck. It is a vertical movement of the trailer’s kingpin that is controled by the trailer’s landing jack leveling system. The connection locks in place once the Reese Goose Box is completely lowered onto the ball.

So, the hitching technique is quite different for each type of hitch.

ALIGNMENT: LEFT to RIGHT (DRIVER’S SIDE/PASSENGER’S SIDE)

With a fifth wheel hitch, we always found we had some room for error in aligning everything from right to left (driver’s side / passenger’s side) due to the shape of the fifth wheel hitch jaws.

If we backed the truck up so the fifth wheel hitch was slightly misaligned with the kingpin, the jaws of the hitch would catch the kingpin anyway and still make the connection and lock the two together.

However, with the Reese Goose Box, if the truck is slightly off, the kingpin will lower down and hit the top of the gooseneck ball and stop right there rather than slipping over the gooseneck ball as it is lowered into the locked position.

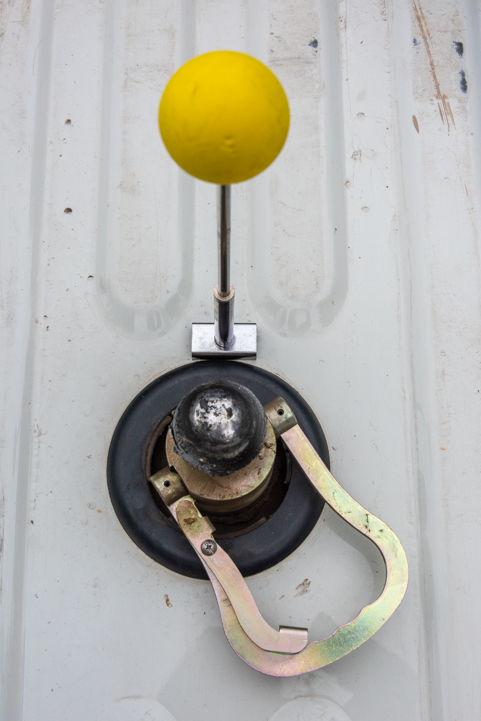
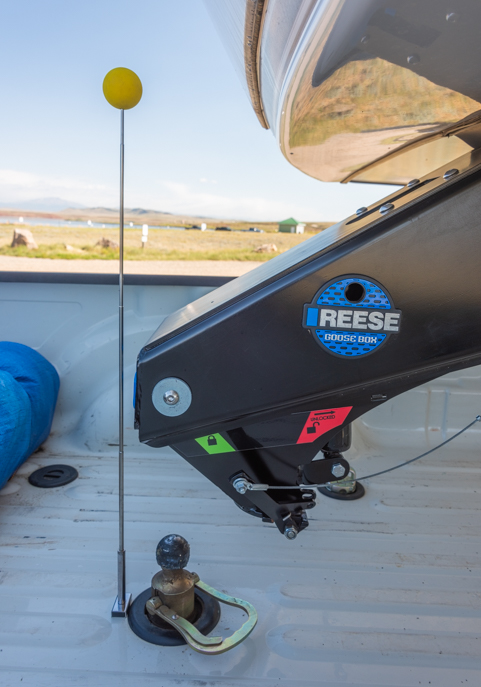
Where we could always “eyeball” the left/right alignment when backing up the truck with a fifth wheel hitch, we now use a small telescoping magnetic pole with a bright yellow ball on top to get a perfect alignment between the Reese Goose Box and the gooseneck ball.

Amazingly, that little pole makes this process a cinch!

I place the magnetic pole directly in front of the gooseneck ball and then Mark uses the pole to align the truck and Reese Goose Box side to side as he backs up.

How to hitch and unhitch the Reese Goose Box with a magnetic telescoping alignment pole

Put the magnetic telescoping pole directly in front of the gooseneck ball

Reese Goose Box 20k Gen 3 Hitch - How to hitch and unhitch

This simple little device makes it possible to be precise when backing up the truck.

We have the two Ram OEM backup cameras in the truck, but Mark finds them inadequate for this job and he prefers to use the magnetic telescoping pole with the ball on top.

He then backs up the truck until the kingpin hits the magnetic telescoping pole and tilts it forward.

How to hitch and unhitch the Reese Goose Box Gen 3

The magnetic pole helps the driver align the gooseneck ball and the Reese Goose Box left to right.

How to hitch and unhitch the Reese Goose Box Gen 3 Hitch

When the magnetic pole tips forward, Mark stops the truck for a moment so we can adjust the alignment from front to back by an inch or two.

Magnetic Trailer Hitch Alignment Kit

ALIGNMENT: FRONT to BACK

The Reese Goose Box has to be aligned accurately from front to back as well as left to right. For this, Mark relies on me peering into the bed of the truck and guiding him verbally until the alignment is correct. For folks who hitch up solo, you’ll probably have to get in and out of the driver’s seat a few times to get the truck positioned correctly. If you have some tips and tricks for solo drivers, let us know in the comments!

At 5’4” I am just tall enough to see into the bed of our 2016 Dodge Ram 3500 dually if I stand on my tiptoes.

When we were researching the Reese Goose Box, we saw reports that it is hard to hitch up. After learning how to do it ourselves, we suspect that those comment might have come from people who were either trying to eyeball the left/right alignment or were hitching up solo and struggling with the front to back alignment.

If you have a driver and a spotter, it’s a piece of cake.

LOWERING & LOCKING THE REESE GOOSE BOX – TRUCK IN NEUTRAL

Once the truck is positioned correctly, I use the landing jack leveling buttons to lower the Reese Goose Box onto the gooseneck ball. We’ve found it helps to put the truck in neutral at this point. That way, if the positioning isn’t 100%, the truck can shift a little bit as the Goose Box is lowered.

Our truck has an auto leveling option, so as soon as the truck senses the weight of the trailer in the truck bed, it inflates its airbags and raises the truck bed up. This effectively pushes the gooseneck ball up into the Reese Goose Box. At that point I generally don’t need to lower the trailer much further to complete the connection.

Just like a fifth wheel hitch, the Reese Goose Box automatically locks its connection to the gooseneck ball.

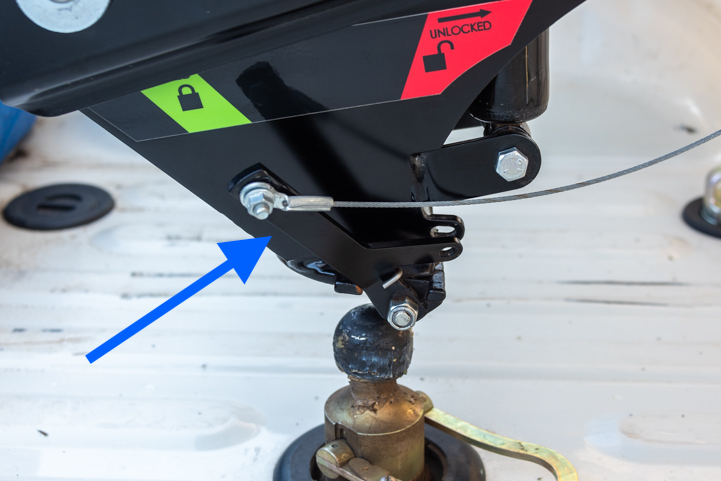
It’s easy to know when the Goose Box/gooseneck ball connection has locked. First, as the Goose Box slides over the gooseneck ball, the locking lever on the driver’s side of the Reese Goose Box moves slowly from the Locked position (green label) to the Unlocked Position (red label). Then, once it has locked in place, it snaps back to the Locked position (green label).

How to hitch and unhitch the Reese Goose Box Gen 3 and locking the gooseball

Before the Reese Goose Box slides over the gooseneck ball, the locking lever (blue arrow) is in the Locked position (green label)

The Reese Goose Box Gen 3 hitch unlocks autoamtically

As the Reese Goose Box slides down onto the gooseneck ball, the locking lever (blue arrow) slowly moves into the Unlocked position (red label)

The Reese Goose Box locks onto the gooseneck ball automatically

As soon as the Reese Goose Box locks onto the gooseneck ball, the locking lever (blue arrow) snaps back into the Locked position (green label)

At this point I can finish raising the landing jacks up all the way into their fully raised position for towing.

SAFETY CHAINS and POWER CORD

The final steps to hitch up with the Reese Goose Box are to latch the two safety chains to the B&W safety chain anchors in the truck bed and plug in the power cord.

Reese Goose Box 20k Gen 3 Hitch safety chains

Next step is to connect the safety chains to the B&W safety chain anchors in the truck bed.

Connecting the safety chains to the Reese Goose Box 20k Gen 3 Hitch

Connecting the safety chains.

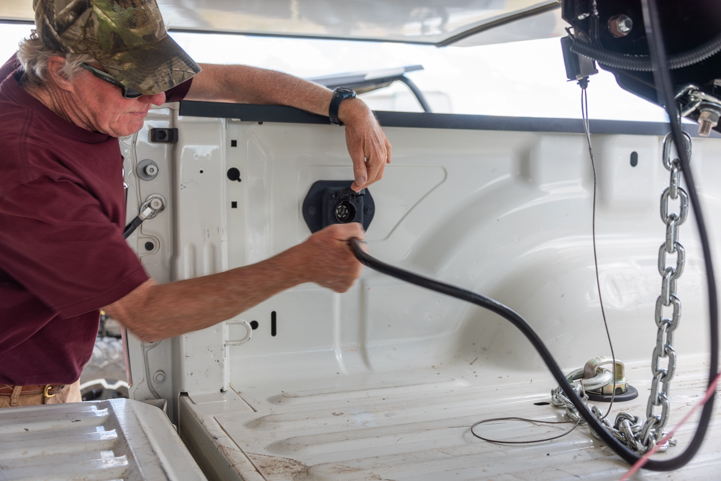
How to hitch and unhitch the Reese Goose Box 20k Gen 3 Hitch: connecting the power cord

Last of all, connect the power cord.

Like all kingpins, the Reese Goose Box has a trailer breakaway cable that engages the trailer’s brakes if the trailer accidentally disconnects from the truck. With our fifth wheel hitches, we always looped this cable around the hitch handle. With the Reese Goose Box, we loop it through the hook on one of the safety chains.

Reese Goose Box Gen 3 hitched up with safety chains attached

Ready to tow.
Note that the trailer breakaway cable is connected to the safety chain hook on the left side.

The trailer breakaway cable is shorter than the safety chains. So, if the trailer were to become detached from the truck, the breakaway cable would snap and engage the trailer brakes before the safety chains were fully extended. At that point, the drag of the trailer brakes would keep the safety chains taut, and the driver would slow the truck and trailer to a stop.


AIR BAGS

The Reese Goose Box is equipped with internal air bags that use the same technology as the Trail Air fifth wheel hitches. They are inflated using the Schrader valve on the top of the Goose Box. We used a pancake air compressor to inflate them.

That pancake compressor is too big to bring with with us in our RV travels, so we bought a Ryobi cordless power inflator to use on the road if needed.

Unfortunately, there isn’t enough room in the Goose Box’s Schrader valve compartment to attach the cordless power inflator’s locking valve to it. So, we purchased a 135 degree valve extender to use with it. Luckily, we haven’t needed to use that setup at all yet.

Reese Goose Box 20k Gen 3 has the air bag inflator on the top of the kingpin

The Gen 3 Reese Goose Box has the Schrader valve for inflating the air bags on top in the center. Previous generation Reese Goose Boxes had this valve on the underside and it was hard to reach.

Ryobi Portabe compressor 135 Degree Valve Extension

The Reese Goose Box 20k Gen 3 has a gauge on the driver’s side that allows you to see the level of inflation of the air bags. This is another new feature with the Gen 3 that wasn’t on the previous generation Reese Goose Boxes.

When the air bags have no air in them, the viewing window is a black circle. Once they begin to fill with air, a silver bar appears in the top left part of the window.

Reese Goose Box 20k Gen 3 Hitch inspection window shows the air bags are not inflated

The air bag inflation window lets you see the status of the air bags. Here the bags are barely inflated.

As the air bags become more and more inflated, this bar moves lower and lower in the window.

When the air bags are inflated to the ideal amount (somewhere between 40 and 50 lbs. of pressure), the bar crosses the middle of the window at a slight angle.

Reese Goose Box 20k Gen 3 Hitch inspection window shows the airbags are properly inflated

As the air bags inflate, the silver bar moves down from the top.
When the bar is in the middle, as it is here, the air bags are properly inflated.

We have not had to change the inflation of the air bags at all in the two months we’ve been traveling with our trailer, despite being in altitudes ranging from 3,000’ to over 11,000’ and being in temperatures ranging from 30 degrees to 95 degrees.


HOW TO UNHITCH A TRAILER WITH A REESE GOOSE BOX

UNHITCHING CAN BE DONE SOLO (WITH AN EASY-TO-MAKE MODIFICATION!)

Unhitching a trailer with a Reese Goose Box is as easy as pulling on a cord and extending the landing jack legs! I love it because one person can easily do it solo.

Unhitching with a Reese Goose Box (as opposed to a fifth wheel) is particularly handy in situations where you won’t be driving the truck by itself but still want to raise the nose of the trailer to make it level.

For instance, when you stop for a quickie overnight in a rest area on unlevel ground, you might want to level the trailer from front to back by raising up the front end.

All you need to do is raise the trailer off the gooseneck ball to the point where the trailer is level from front to back and leave it there. When you are ready to continue driving, simply lower the trailer back down onto the gooseneck ball and away you go!

With a traditional fifth wheel hitch, the truck and trailer must be completely unhitched, i.e., the truck must be driven out from the hitch in order to level the trailer from front to back.

All this is truly awesome, but we did have to make one minor modification to the Reese Goose Box to make it possible to unhitch so easily, as explained below.


RELEASING the GOOSENECK BALL EASILY — With a SIMPLE MODIFICATION!

The Reese Goose Box is locked onto the gooseneck ball by a lever, as shown in the three hitching up photos above. While hitching up, the lever moves from the Locked position to the Unlocked position and back to the Locked position automatically as the socket on the Reese Goose Box slides onto the gooseneck ball.

For unhitching, however, this lever must be held open in the Unlocked position to allow the Reese Goose Box to slide up off the gooseneck ball. You do that manually by pulling back on a long cable that connects to the locking lever.

The cable rests on a hook on the side of the Reese Goose Box. It has a nub on it that can be secured in front of the hook, forcing the lock to remain open while you extend the landing jack legs.

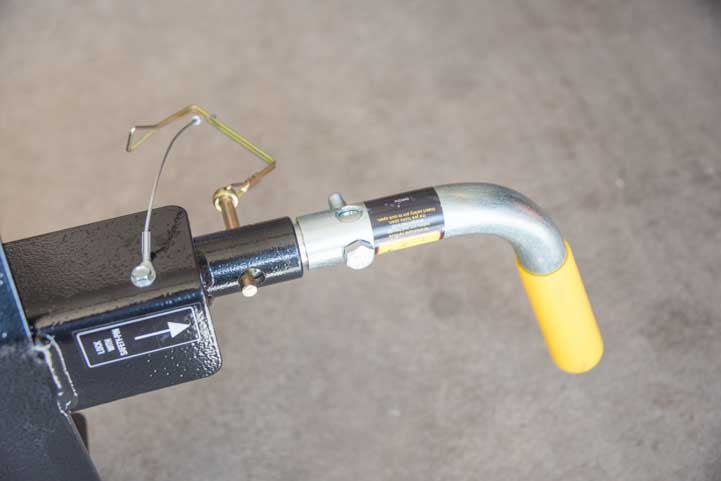
How to hitch and unhitch the Reese Goose Box lock release handle

The hitch locking mechanism is automatic when hitching up. When unhitching, a long cable (above the arrows) must be pulled back to unlock the hitch and allow the Reese Goose Box to rise off the gooseneck ball. The white arrow shows the nub that can be secured in front of the hook (blue arrow) to keep the Goose Box unlocked.

We’ve found it very difficult to reach the cable’s handle from the back of the truck when the truck’s tailgate is open.

Ironically, the truck’s tailgate is always open at this stage of the unhitching process because you are disconnecting the safety chains and power cord. Also, you can’t drive the truck out with the tailgate closed.

When we did successfully maneuver ourselves to reach the handle, we found it extremely difficult to pull the cable back far enough to place the nub in front of the hook!

I’m sure Reese will address this issue since it has been raised by many people. However, in the interim, we found a super easy solution.

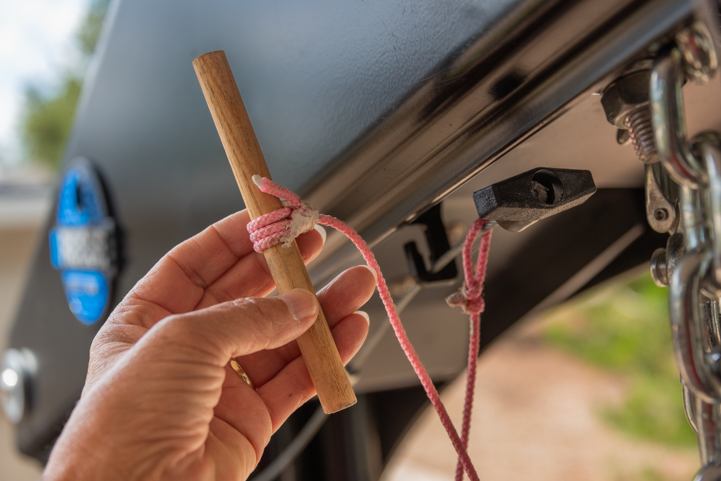
We tied a strong cord onto the latch cable’s handle and then used a short dowel to create a mini handle at the other end of the cord.

Reese Goose Box Gen 3 lock release handle modification

We tied a strong cord onto the handle of the hitch latching cable. Again, the white arrow is the nub that can be secured in front of the hook (blue arrow) to force the lock to stay open, but we found it tricky to do.

Reese Goose Box lock release handle modification

We made a handle at the other end of the cord with a short dowel.

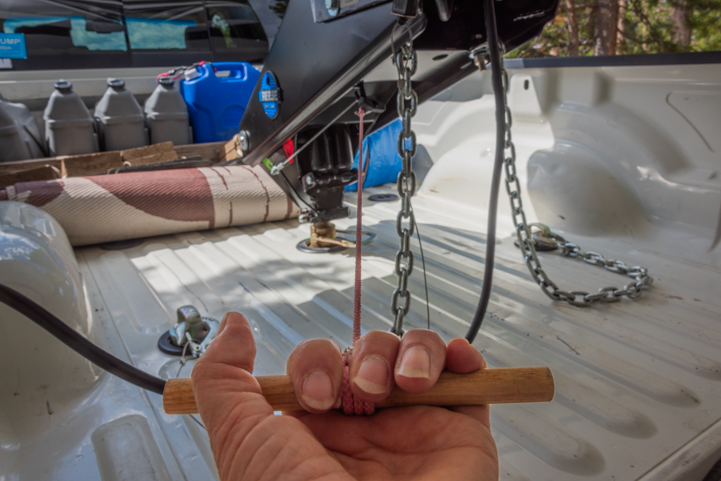
Now, all we have to do to get the Reese Goose Box off the gooseneck ball is to pull this cord to open the lock and extend the trailer’s landing jacks. Then the Goose Box rises off the gooseneck ball very easily.

Reese Goose Box lock release handle modification

One person can simultaneously pull the hitch lock open and extend the trailer’s landing jacks!

The beauty is that one person can do this job alone by holding the Goose Box’s locking cord in their left hand and pressing the trailer’s landing jack control buttons with their right hand.

Once the Reese Goose Box is clear of the gooseneck ball, the Goose Box’s locking cord can be released and the truck can be driven out from under the trailer and parked elsewhere.

To tidy things up, just snap the safety chains onto the back of the Reese Goose Box and stow the power cord inside. Be careful, though, because there’s 12 volts coming from the trailer batteries on one of the pins.

How to hitch and unhitch a Reese Goose Box 20K Gen 3

There are two holes in the back of the Reese Goose Box to hold the hooks for the safety chains.

How to hitch and unhitch the Reese Goose Box 20K Gen 3

Chains and power cord are out of the way.


TOWING WITH THE REESE GOOSE BOX

As I mentioned, we have used the Reese Goose Box to tow our 15,000 lb. trailer all over Arizona and Colorado for two months on all kinds of crazy roads. Not only has the towing been smooth but we’ve been super happy with how easy it is to hitch and unhitch.

The airbags inside the Reese Goose Box make the ride super smooth. There is no chucking and no bouncing, and best of all, no noise! The trailer kind of floats along behind us.

We’ve taken some very sharp turns and haven’t had a problem with the Reese Goose Box touching the bed rails of the truck, and we’ve gone over some serious bumps and sharp inclines and declines and haven’t had the overhang of the fifth wheel come too close to the top of the bed rails either.

We are delighted with the Reese Goose Box and the B&W gooseneck ball. Best of all, now we’re able to haul anything we want in the truck bed, even 4×8 sheets of plywood. All we’ll have to do is remove the B&W gooseneck ball, clean it up and put it away in its little suitcase. Then the whole bed of the truck is available to use!

So, that’s our review of our fully tested Reese Goose Box 20k Gen 3. If you have any questions, please put them in the comments below. We’ll be happy to answer as best we can. If you own one of these very cool hitches, we’d love to know what you think of it!

Subscribe
Never miss a post -- it's free!

Here are all the parts listed in this post and where to get them:

The Goose Box:

The Gooseneck Ball:

Magnetic Pole for Hitching Up:

Compressors:

More info about Reese Products:

Other blog posts about trailers and hitches:

Our most recent posts:

More of our Latest Posts are in the MENU.   New to this site? Visit RVers Start Here to find where we keep all the good stuff. Also check out our COOL NEW GEAR STORE!! *** CLICK HERE *** to see it!

<-Previous || Next->

Quick Release Pull Pins for Fifth Wheel Landing Jacks – YES!

One of the very first upgrades we did to our 2022 Genesis Supreme toy hauler was to install quick release pull pins for the fifth wheel landing jacks. Our full-time Hitchhiker fifth wheel trailer had come with this kind of landing jack pin installed at the factory, so we assumed it was standard for all fifth wheels with electric landing jacks. Not so! And what a difference they make!

Quick Release Pull-Pins for Fifth Wheel Landing Jacks Installation

.

Our Genesis Supreme toy hauler came with goofy D-ring pins that were clumsy and fussy and added a frustrating and unnecessary step to hitching and unhitching our rig.

https://amzn.to/3xJ4mVD

These pins were slow and frustrating to use!

After messing with these things two or three times, I got online and started hunting for the really nice quick release spring loaded pins we were accustomed to, hoping that they were something we could get our hands on. They were! We got ours HERE.

Tools and parts needed to install Fifth Wheel Landing Jack quick release pull pin

The quick release pull pins (left two) and the tools necessary to install them (right two). Not much to it!

We put a bottle jack under the front of the fifth wheel to support the trailer while we removed the silly pins that had come with it and replaced them with the quick release pull pins. You can also hitch the fifth wheel to the truck and work on the legs that way instead. However, the bottle jack worked just fine.

Bottle jack supports fifth wheel trailer for landing jack quick release pull-pin installation

We supported the front of the fifth wheel trailer with a bottle jack.

Fifth Wheel Landing Jack D-ring Pin 2

We removed the D-ring.

The hardest part of installing the quick release pull pins on the landing jacks is simply lining up the two pieces. They fit on either side of the landing leg like a clamshell with two long bolts holding them in place.

Make sure the handle is on the outside of the fifth wheel where you’ll be grabbing it.

Installing fifth wheel landing jack quick release pull pin

One half of the quick release pull pin.

Installing quick release pull pin for fifth wheel landing jack

Both halves of the quick release pull pin with long bolts that will hold them in place.

We used Loctite to make sure the bolts wouldn’t unscrew and walk back out.

Using Loctite to install fifth wheel landing jack quick release pull pin

We applied a little Loctite.

Then we tightened the bolts.

Installation of quick release pull pin for fifth wheel landing jack

Getting the bolts started.

Installation of fifth wheel landing jack quick release pull pin

Tightening the bolts down.

And there it was — a fabulous new quick release pull pin on our fifth wheel landing jack.

Installation of quick release pull pin for fifth wheel landing jack=k

Ready to go!

We installed the other quick release pull pin on the other landing jack and sighed a huge sigh of relief. These things are so much easier to use!

To hitch up: Simply raise the electric landing legs with the Retract button. Once the jacks are in their fully retracted position, pull out the spring loaded handle and slide the lower portion of the leg upwards into the upper portion. Then release the spring loaded handle to latch it in place.

To unhitch: Pull the quick release pull pin’s spring loaded handle and let the leg drop all the way down so the foot is on the ground. Then raise the leg slightly until the spring loaded handle snaps into place through the hole in the lower leg.

Fifth Wheel Landing Jack D-ring Pin

.

And that’s it! We purchased this quick release pull pin for our 33’ 15,000 lb. GVWR trailer, but there are others available> too.

Hitching and unhitching a fifth wheel trailer can be stressful enough as it is. For us, having a super simple mechanism for getting the landing jacks in position is an important stress reliever. It was an inexpensive upgrade, but has made a huge difference.

Subscribe
Never miss a post — it’s free!

Other RV tech posts:

Our most recent posts:

More of our Latest Posts are in the MENU.   New to this site? Visit RVers Start Here to find where we keep all the good stuff. Also check out our COOL NEW GEAR STORE!! *** CLICK HERE *** to see it!

<-Previous || Next->

How to Replace Electric Fifth Wheel Landing Legs – Easy DIY!

Have you ever wondered how in the world to replace electric fifth wheel landing legs? Well, it turns it’s a surprisingly easy DIY project! We’ve done it twice now, once on our full-timing Hitchhiker fifth wheel 10 years ago, and again on our current Genesis Supreme Toy Hauler a few weeks ago. Yikes!

How to Replace Electric Fifth Wheel Landing Legs

.


At the end of our RV trip to Colorado last summer, our 2022 Genesis Supreme toy hauler fifth wheel landing legs started acting up when we were getting ready to hook up and leave one day. Our fifth wheel landing legs are electric, not hydraulic, and they are driven by two separate motors, one for each leg.

Suddenly, the driver’s side leg started making a clicking sound as we raised the front of the trailer to hitch up. The sound was coming from the gear box which is driven by the landing leg motor. The gears were slipping for some reason.


The Reese Goose Box was a GAME CHANGER for us. We got the bed of our truck back (yay!) and hitching/unhitching is easy.

Check out our review: HERE!


We were able to get hitched up despite the slipping gears, and we stayed hitched up all the way from Lake Granby in Colorado, to our home in Arizona. We didn’t unhitch once the whole way!

When we got home, Mark removed the landing leg from the trailer to do some investigating. With the trailer hitched to and supported by the truck, it was easy to remove the driver’s side landing leg to check it out.

When you remove the top cap from the leg, you should be able to turn the shaft on the side of the leg by hand. However, he could barely turn it. Something was binding and making the leg very stiff to retract or extend.

We weren’t sure just how stiff this gear should be, though. So, just to verify whether the gear on this leg was unusually stiff, he removed the passenger side leg and repeated the process. On that side the leg was butter smooth and he could easily turn the shaft by hand.

10 years prior, we’d had a similar problem on our 2007 Hitchhiker fifth wheel. However, that fifth wheel had had only one motor to drive both landing legs — not a very rugged frame design.

We’d been pleased when we bought the Genesis Supreme that it had a dedicated motor for each leg. Nevertheless, here we were again! Argh!!

The Hitchhiker landing leg motor was made by Venture Manufacturing in Ohio. So, when those landing legs failed, Mark purchased a replacement landing leg kit from them. He installed it while we were boondocking in the Arizona desert. We never had any trouble with our landing legs after that.

Mark called Venture Manufacturing again this time to see if they could help us with the binding landing leg on our new toy hauler.

He was delighted to speak to the same customer service rep as he had 10 years prior, Sue Haller. She asked him for some details about the landing legs on our toy hauler. It turned out that they were made by a Chinese knock-off company.

Once he heard that, he decided to replace both landing legs, gear boxes and motors with parts made by Venture Manufacturing. These come in a kit.

The installation was surprisingly simple and the new parts are super smooth. We now feel confident in our trailer’s landing legs as we get ready for our next adventure.

Venture Manufacturing Fifth Wheel Landing Leg Replacement Kit

All the parts that are in the Venture Manufacturing replacement landing leg kit.

Having a good quality socket set in your RV is important. Check out what other tools we keep in our RV basement and in our truck here: Basic RV Tool Kit - Essential Tools & Supplies for RVers


Here are the basic steps for replacing the landing legs on a fifth wheel trailer:

  1. With the trailer hitched to the truck, run the landing legs all the way up.
  2. Turn off the battery disconnect switch
  3. Pull the spring pin and drop the lower legs and foot all the way out and set them aside
  4.  
    Do these next steps for each landing leg:

  5. Cut the positive and negative wires to the landing leg motor
  6. Remove the 8mm bolt from the lower gearbox shaft and slide the plastic collar off
  7. Remove the two 10mm bolts (11 and 5 o’clock position) from the motor and slide the motor off the shaft
  8. Slide the gearbox assembly off the motor shaft.
  9. Remove the two 9/16” nuts and bolts holding the leg onto the “U” channel
  10. Spread the “U” channel slightly to slide the leg out.

To install the new landing leg assembly, simply follow the above steps in reverse order!

Here are some pics from our installation:

How to replace Fifth Wheel Landing Leg - Venture Manufacturing Lower Leg

Remove the lower leg section to be able to drop the upper leg assembly out from trailer.

How to replace fifth wheel landing leg - Venture Manufacturing leg view From Outside

Looking in from the outside: The landing leg and gearbox.

How to replace Fifth Wheel Landing Leg - Venture Manufacturing Plastic anchor

To remove the gearbox just remove this screw and slide the plastic piece off the shaft. The gearbox will slide off next.

How to replace fifth wheel landing leg - Venture Manufacturing leg view From inside

Motor & gearbox removed.


If your fifth wheel has electric landing jacks but didn't come with Quick Release Pull Pins, they'll make you're life easier and they're super easy to install!


How to replace Fifth Wheel Landing Leg Upper Bolt

To remove the upper portion of the leg, remove the upper leg 9/16″ nut.

How to replace Fifth Wheel Landing Leg - Venture Manufacturing Lower Bolt

Remove lower 9/16″ nut. You may need to spread the “U” channel a bit to slide upper portion of the leg out.

How to replace fifh wheel landing legs - Looking from inside

Ta Da! New motor and gearbox attached.

All done! To install the replacement fifth wheel landing legs, do these steps in reverse order.

Subscribe
Never miss a post — it’s free!

More Info:

More RV tech tips:

Our most recent posts:

More of our Latest Posts are in the MENU.   New to this site? Visit RVers Start Here to find where we keep all the good stuff. Also check out our COOL NEW GEAR STORE!! *** CLICK HERE *** to see it!

><-Previous || Next->

CargoBuckle Retractable Ratchet Tie-Downs – SO EASY!

Trying to tie down an ATV, side-by-side or boat on a trailer for safe towing can be a real pain in the neck! Fortunately, we’ve discovered the CargoBuckle Retractable Ratchet Tie-Downs which are a total game changer for us.

CargoBuckle Retractable Ratchet Tie-Down System is SO EASY!

Easy to install and a cinch to use, the CargoBuckle retractable ratchet straps revolutionized our tie-down process!

For the past six years, we have towed our Polaris RZR 900 side-by-side in three towing arrangements:

  1. On a flatbed trailer behind our fifth wheel in a “double tow” arrangement (also known as a “triple tow”)
  2. On a flatbed trailer behind our dually truck (with and without our truck camper)
  3. Inside our Genesis Supreme toy hauler.


TRADITIONAL TIE-DOWN RATCHET STRAPS – NOT GOOD!

Using traditional tie-down ratchet straps, we found it was nearly impossible to keep the straps fully tightened as we drove. We’d have to stop after an hour or so to tighten the straps, and then we’d stop to check them every hour or so after that if the trip was long. More often than not, they’d have loosened again and we’d have to re-tighten them.

Also, the setup on our flatbed trailer had some sharp corners and awkward angles that the tie-down straps had to cross in order to secure the side-by-side onto the trailer. This caused the straps to sever completely multiple times. We bought at least three sets of ratchet straps in just a few months of towing our side-by-side!

Needless to say, all of this was very annoying, and also made us quite uneasy when we were underway!

Triple tow Fifth wheel and flatbed trailer with side-by-side double-tow arrangement

Traveling with The Train, we got a LOT of chucking in the caboose…!

Tow Polaris RZR 900 XC EPS Edition on utility trailer-min

Mark used traditional ratchet straps at first.


CARGOBUCKLE RETRACTABLE RATCHET STRAPS – WHAT A GREAT CONCEPT!

Cargo Buckle Retractable Ratchet Strap secures a side-by-side onto a flatbed trailer

CargoBuckle G3 Retractable Ratchet Tie-down permanently mounted on a flatbed trailer.

Mark did some research and found a product called the CargoBuckle Retractable Rachet Tie-Down System that mounted permanently to the flatbed trailer, one for each corner of the side-by-side.

In order to tie down the side-by-side, you simply pulled out each strap and hooked it onto a tie-down location on the RZR and ratcheted it tight. To unload the side-by-side, you simply released the tension on each strap to unhook and then let it retract. Easy peasy!

Mounting the straps on the utility trailer eliminated the need to tie everything down from scratch each time we secured the RZR to the trailer. Instead, the strap was right there where we needed it. All we had to do was pull it out!

CargoBuckle Retractable Ratchet Tie-Down system for permanent instsallation

CargoBuckle G3 (2″ strap).

This is a super slick concept and it completely revolutionized our tie-down process. Now we could tie the RZR down in just a few minutes by pulling out each strap, hooking it onto the RZR and ratcheting it tight. Even better, the straps never loosened underway, so we never had to stop to tighten them or worry that they might come loose as we drove.

Cargo Buckle Retractable Ratchet Straps for front of a side-by-side on a flatbed trailer

The front of our RZR is tied down with two CargoBuckle retractable ratchet straps mounted on the front of the flatbed trailer.

Two CargoBuckle Retractable Ratchet Straps secure the back end of a side-by-side on a flatbed trailer

The back of our RZR is tied down with two CargoBuckle retractable ratchet straps mounted on the rear sides of the flatbed trailer.

It was just a matter of a few minutes to get the RZR off the trailer too. All we had to do was release each ratchet handle, unhook the strap from the side-by-side and let the strap retract. Best of all, we didn’t have to deal with long messy tie-down straps or stow them anywhere.

We loved this whole concept so much that when we bought our fifth wheel toy hauler we got another set! In addition, we got an S-hook Adapter to bolt onto each CargoBuckle so we could hook the CargoBuckles into the D-rings rather than bolting them permanently to the garage floor.

CargoBuckle Retractable Ratchet TIe-Down System for a toy hauler

The CargoBuckle G3 ratchet strap is bolted to an S-adapter hook for removable installations like the D-rings on a toy hauler floor.

Besides providing a very secure tie-down as we drive, these straps are work with that we don’t hesitate to unload the RZR to go exploring for an while and then load it back into the toy hauler and carry on. This is ideal for seeking out boondocking locations down unfamiliar dirt roads.


FLATBED TRAILER CARGOBUCKLE INSTALLATION:

Our first CargoBuckle installation on our flatbed trailer was straight forward.

We aligned each of the retractable straps so there was a straight line between the CargoBuckle and the tie-down point on the RZR. Then we drilled a hole in the frame of the trailer for each strap and bolted the CargoBuckle onto the trailer frame. Done!

We angled the CargoBuckles slightly to ensure the straps wouldn’t cross over anything sharp that could make them chafe through. And that was it!

Use an awl before drilling a hole in the side of a flatbed trailer

First we made a starter hole in the flatbed trailer frame with a center punch.

Before drilling into a flatbed trailer frame spread 3-in-one oil on the drill bit

Then we lubed a small drill bit with 3-in-1 oil to keep the metal cool while drilling.

Drill a hole in the frame of a flatbed trailer before mounting CargoBuckle Retractable Ratchet Straps

Then we drilled a pilot hole.

We then selected larger and larger drill bits and repeated the lubrication/drilling process until the hole was big enough to fit the bolt.

Bolt the CargoBuckle Retractable Ratchet Strap onto the frame of a flatbed trailer

Once the hole was drilled, we bolted the CargoBuckle ratchet strap onto the flatbed trailer frame.

Cargo Buckle Retractable Ratchet Strap secures a side-by-side onto a flatbed trailer

One down, three to go!


FLATBED TRAILER CARGOBUCKLE TIE-DOWN PROCEDURE:

Securing the RZR to the flatbed trailer was now just a matter of extending each retracted strap and placing its hook in the tie-down point on the RZR and then ratcheting the strap until it was tight. Once all four straps were hooked up and tightened, the RZR was fully loaded and ready to go.

Unloading the RZR was equally easy. We released the tension on each strap, removed the hook from the RZR and retracted the strap into the CargoBuckle on the trailer.

We didn’t even have to mess with coiling and storing any long straps because they retracted out of sight on the side of the trailer!

CargoBuckle Retractable Ratchet Strap tie downs for a side-by-side

We positioned the front CargoBuckles close together to absorb the most severe shocks which is front-to-back.

The straps are 2 inches wide and are made of the same material as a car seatbelt. The ratcheting and releasing mechanisms are very smooth.

We’ve towed our flatbed trailer behind our truck, both with and without our pickup camper, for about 1,000 miles with no trouble whatsoever!


TOY HAULER INSTALLATION:

Polaris RZR side-by-side with Genesis Supreme Toy Hauler

Buddy checks out our toy hauler as the RZR waits patiently to be loaded.

The garage floor on our Genesis Supreme toy hauler has D-rings mounted on the floor (bolted to the frame) that are intended for tying down whatever toys you bring along in your travels — ATV, side-by-side, motorcycles, etc.

With an open box floor plan like ours, our garage is also our living room (yes, the RZR travels in our living space!) and the D-rings are right in the middle of our living room floor! So, the permanently mounted CargoBuckle retractable ratchet straps weren’t suitable.

Fortunately, the manufacturer of CargoBuckles, IMMI (Indiana Mills Manufacturing Inc.), makes S-Hook Adapter Straps specifically for situations where the CargoBuckles can’t be permanently mounted.

The S-Hook Adapter Straps gets bolted onto the CargoBuckle (G3) creating a single unit that has an open hook at one end, a locking hook on the other end and a ratchet mechanism in the middle.

Attaching the S-hook adapter strap to a Cargo Buckle Retractable Ratchet Tie-Down System for a toy hauler installation

The CargoBuckle G3 ratchet strap is bolted to an S-hook adapter so it can be hooked to a D-ring in the toy hauler floor.

Bolting the pieces together took no time at all and gave us four ratchet straps to hook into the D-rings in the garage floor and clip onto the tie-down locations on the RZR. The D-rings are not positioned symmetrically in our toy hauler.  However, we found four that worked well for tying down the RZR, two in the front and two in the back.

CargoBuckle Retractable Ratchet Tie-Downs for use in a toy hauler with D-rings on the floor

All four CargoBuckle ratchet straps have S-hooks attached for use in our toy hauler.


TOY HAULER CARGOBUCKLE TIE-DOWN PROCEDURE:

When loading the side-by-side, we simply hook the CargoBuckle S-hook onto the D-ring in the toy hauler floor, extend the strap so it can reach the tie-down location on the RZR and clip the CargoBuckle hook onto it. We do this for all four contact points on the side-by-side.

When unloading, we release the tension in each CargoBuckle, unclip it from the side-by-side and unhook the S-hook from the D-ring in the floor. We stow our CargoBuckles on the floor by the toy hauler ramp door along with the rubber mats we place under the RZR wheels to protect the flooring as we travel.

OVERALL IMPRESSIONS:

We have towed our RZR using the CargoBuckle retractable ratchet tie-downs 10,000 miles so far. We’ve set up camp in 64 different campsites and loaded and unloaded the side-by-side each time. In addition, we’ve loaded and unloaded the RZR dozens of other times for scouting and exploring while in transit.

Loading and unloading the RZR has been a sheer delight, and the whole setup has been rock solid in the garage and has never loosened once.

Tightening a CargoBuckle Retractable Ratchet Strap

Tightening the CargoBuckle at the rear of the side-by-side in the toy hauler.

Tightening a Cargo Buckle Retractable Ratchet Tie-Down

Ratcheting the rear of the RZR in the toy hauler.

Perhaps the most impressive testament to the security of this tie-down system was our 94 mile drive between Shiprock and Gallup, New Mexico, on US-491 in 2023. If you can avoid this highway, please do! It is loaded with shallow dips you can’t see as you drive but that sent our entire rig flying any time we were going faster than 50 mph.

When we finally got to our destination, we were astonished to find that the RZR hadn’t budged and the CargoBuckles were all still completely secure. However, the Lifetime cooler that we keep tied down in the back of the RZR was another story, Even though it was tightly secured on the side-by-side, it jumped clear out of the RZR on one of those flying dips.  When we opened the toy hauler ramp door, we found it dangling off the back end of the side-by-side!

Back end of a Polaris RZR side-by-side is tied down in a toy hauler using CargoBuckle Retractable Ratchet Straps

.

If you have to tie down anything in your travels, whether it’s a side-by-side, ATV, motorcycle or boat, no matter what kind of trailer you’re tying it down to, your life be a whole lot easier if you use CargoBuckle Retractable Ratchet Tie-downs!

These clever retractable straps transformed our whole attitude towards bringing our fun little RZR along on our adventures!

Subscribe
Never miss a post — it’s free!

More info about CargoBuckle Retractable Ratchet Tie-Downs:

More RV tech tips:

Our most recent posts:

More of our Latest Posts are in the MENU.   New to this site? Visit RVers Start Here to find where we keep all the good stuff. Also check out our COOL NEW GEAR STORE!! *** CLICK HERE *** to see it!

<-Previous || Next->

Basic RV Tool Kit – Essential Tools & Supplies for Rvers

RVers preparing to go RVing full-time have asked us, “What are the essential tools and supplies we’ll need for the RV life?” That’s a big question, but when we began gathering items for our online Gear Store last week, we realized it was a perfect time for us to provide an answer and outline a good solid basic RV tool kit.

Mark just completed two sizeable repair projects in the last few weeks too: replacing the landing legs on our fifth wheel toy hauler and replacing the start motor plus relocating the start relay (so it’s easier to access) in our Polaris RZR side-by-side. Since he had just pulled out all of the tools necessary for these jobs, the whole issue of “essential” vs. “not-so-important” tools was fresh in his mind.

RV Tool Kit - Essential tools for RVers and RV living

What are the “must have” tools when you run off to a life of adventure in an RV?

I asked him to do a pretend shopping spree and assemble an RV tool kit on Amazon while I took Buddy for a walk. When I returned, he’d put together a terrific basic RV tool kit. He’d also discovered a few cool tools he didn’t have yet, and they were all sitting in our Amazon shopping cart!

Well, the Master Mechanic in any RV or boat can never have too many tools, right?!

Mark keeps most of his tools in the basement of our fifth wheel. He also has two additional mini tool kits. One mini tool kit lives in the truck and has duplicates of all the most basic tools he might need for a breakdown on the road or a tire change. The other mini tool kit lives in our Polaris RZR side-by-side in case it has a breakdown or needs a tire change.

You can find all of the tools discussed here in the “RV Tool Kit” curation in our Gear Store or click the blue boldface titles or the images below.

HANDHELD TOOLS for an RV TOOL KIT

RV Tool Kit - Handheld Tools

Handheld Tools

Handheld tools are the heart of the tool kit. Craftsman is a great brand that comes with a lifetime warranty. So, a lot of the tools listed here are Craftsman. If a Craftsman tool breaks, you can just take it to a hardware store that carries Craftsman and they’ll replace it free of charge.

Mechanic’s Tool Set – A good place to start is to get a robust mechanic’s tool kit that has a wide variety of tools: hammer, screwdrivers, sockets, drill bits, pliers, etc. Mark keeps his in the truck so he doesn’t have to go digging for a tool in the basement when something comes up as we drive.

Socket Set – This particular set includes both SAE and metric sizes as well as 1/4 and 3/8 inch drives.

Wrench Set – A robust set like this one includes wrenches of every size in both metric and SAE. Some sets skip certain sizes, so verify that you’ll be getting all the sizes you need. This set can also be rolled up in its fabric case so it’s easy to carry and store.

Adjustable Wrenches – A big one and a small one will do the trick.

Screwdriver Set – Be sure to include both Phillips head and flat head screwdrivers. Want more variety? here is a bigger set.

Screwdriver #2 Square Head – Many RVs are built with things that require a #2 square head screwdriver. We use ours all the time!

Basic Pliers Set – This set includes channel locks and needle nose along with regular pliers. This bigger set has more variety.

Hand Saw – You might need to cut some lumber (we have!)

Hack Saw – You might need to cut some metal pipe (we have!)

Folding Saw – Sometimes we use this saw to cut back overhanging branches at our campsite.

Telescoping Inspection Mirror – With some projects it’s super difficult to see into the deep recesses of where you’re working. A telescoping mirror makes it possible to see the backs of things and around corners.

Telescoping Magnet Tool – If you drop that vital nut down into an impossible to reach spot, you can retrieve it with this nifty tool.

Measuring Tape – Handy if you need to measure something.

Level – Handy if you want something to be level or square.

Kneeling Pad – When you’re working on something low, it really helps to have a kneeling pad to cushion your knees. Mark uses his all the time!

CORDLESS POWER TOOLS for an RV TOOL KIT

RV Tool Kit - Cordless Tools

Cordless Tools

Several companies make a suite of cordless power tools that all use the same battery pack. If possible, stick to one brand to avoid storing a variety of battery packs and chargers (although we’ve ended up with a mix ourselves!).

Ryobi, Rigid, DeWalt, Milwaukee and Makita all make sets of tools based on their battery packs and are good reliable brands. However, each brand offers a different suite of tools. The products linked to here are all Ryobi which we like a lot. We keep two battery packs on hand so we can be using one while the other is charging…or use both at the same time!

Cordless Drill – We not only use ours for standard drilling purposes, but we also use it to raise and lower our landing jacks. We did this on our full-timing fifth wheel and now on our toy hauler. Both trailers came with manual landing jacks. To set up our drill for this purpose we put a 1/4 to 3/8 socket adapter in the chuck and attach an 8 inch extension and a 3/4 inch deep socket with 3/8 drive.

Drill Bit Set – There are bigger kits, but this is a good basic selection.

Cordless Screwdriver – This little gem is fabulous and saves your wrists if you have a lot of screwing and unscrewing to do.

Cordless Screwdriver Hex Bits – These are super handy to use in the cordless screwdriver if you have a lot of bolts to tighten.

Cordless Tire Inflator Air Compressor – This tire inflator can inflate all kinds of tires (Schrader valve) and basketballs too! We use it to inflate the air bags on our Reese Goose Box.

Cordless Dust Blower – After driving our side-by-side, we use this to blow the dust off ourselves. It can inflate air mattresses too.

Work Light – A super bright light that can be hung right over your work area makes it much easier to see what you’re doing.

Hand Vacuum – RV floor space and storage space is so limited that we prefer to use a hand vac instead of a stand-up vacuum.

Flashlight – You can never have too many flashlights. This one is a good all around bright light in a modest size that Mark uses every day.

TOOLS & SUPPLIES FOR RV ELECTRICAL WORK

RV Tool Kit - Tools for Electrical Repairs

For Electrical Work

Multimeter – This is critical for anything and everything electrical. If you want to test what’s going on in a specific location, a clamp-on meter can be placed around a wire and you’ll see the current at that spot.

Aligator Test Clip Leads – Vital for troubleshooting problems

Heat Shrink Butt Connector Kit – This suitcase style kit has marine grade butt connectors from 22 to 10 AWG and comes with a heat shrink tool and crimper. Mark lovs this kit!

Black Electrical Tape – Scotch is a good brand for electrical tapes. Cheaper brands are a waste of money. Get the good stuff!

Colored Electrical Tape – Same as the above but for cases where you want to color code your work.

TOOLS & SUPPLIES FOR RV PLUMBING & GAS WORK

RV Tool Kit - Plumbing Tools

For Plumbing & Gas

PVC Pipe Cutter – It’s really hard to cut PVC without one of these, and they also cut the blue and red PEX water lines with ease.

Tubing Cutter – Use this to cut copper pipe (we used it when installing our vent-free propane heater)

Teflon Tape – Blue Monster is the best brand of teflon tape. We learned about it from a plumber, and Mark has never gone back to the brands he used to use!

TOOLS FOR CHANGING A TIRE

RV Tool Kit - Tire Changing Tools

In case of a flat!

Heavy Duty Lug Wrench — To screw and unscrew the lug nuts on the wheel

Hydraulic Bottle Jack — Get one strong enough to lift your RV or your truck.

18” Breaker Bar — If the Lug Wrench can’t crack the lug nuts loose, a breaker bar and deep impact socket will do the trick. Then switch to the Lug Wrench to finish screwing or unscrewing the lug nut.

Deep Impact Socket — Works with the breaker bar. Match the size of the socket to the lug nuts on your vehicle’s wheels

1/2 inch Drive 10 inch Socket Extension — Necessary to change the inner rear wheel on a dually truck (Mark demonstrates that HERE!).

Flat Tire Repair Kit – It may be possible to patch the tire rather than use the spare.

Fix a flat – When all else fails, it doesn’t hurt to have a can on hand!

Small compressor – Get that baby pumped up!

Tire Pressure Gauge – It’s important to check the tire pressure!

TAPE & FASTENERS

RV Tool Kit - Tape and Fasteners

Tape & Fasteners

Gorilla Tape — All purpose super sticky tape that can attach virtually anything to anything

Alien Tape — Thick double-sided tape that is great for mounting things

Velcro Extreme Mounting Tape – Excellent for mounting things you’ll remove at some point (like clocks that need batteries).

WORK GLOVES

RV Tool Kit - Work Gloves

Hand Protection

Leather Gloves – Protect your hands when doing heavy lifting

RV Dump Gloves – Disposable Nitrile gloves are great protection while doing the dirty deed at the RV dump.

Cut-Resistant Work Gloves – Protect your hands when dealing with sharp metal parts and tools

Are there tools in your RV tool kit that you depend on and that we’ve missed here? Please list them in the comments below!

Check out all of these essential tools under “RV Tool Kit” in our online Gear Store HERE. Or click the image below to see our basic RV tool kit plus all the other goodies we’ve put on the shelves!

RLT Gear Store Storefront

Subscribe
Never miss a post — it’s free!

Tech Tips related to RVs and Trailers:

Tech Tips related to Trucks:

Our most recent posts:

More of our Latest Posts are in the MENU.   New to this site? Visit RVers Start Here to find where we keep all the good stuff. Also check out our COOL NEW GEAR STORE!! *** CLICK HERE *** to see it!

How to Fix a Car or Truck Key Fob in Minutes!

Vehicle key fobs are insanely expensive, but when ours died, we found out how to fix a car or truck key fob in just a few minutes…for next to nothing! What a relief (and surprise) it was to get our key fob working again rather than buying a new one!

How to fix a car or truck key fob in minutes!

Our car key fob died a slow death. First it couldn’t open the doors while standing or approaching the car on the passenger’s side. Then the problem migrated to the driver’s side too. Ugh!

We tried standing closer to the car and further away. We tried holding the key fob higher in the air, holding it lower, and aiming it in different directions. We opened the car key fob up and cleaned all the electrical contacts and changed the battery. But it was all to no avail. Nothing we tried would make the car key fob work reliably, and eventually the key fob stopped working all together.

The only way to unlock the car was to use the key, and the only key lock on the whole car was located on the driver’s door.

Oh my! Talk about inconvenience! Now we had to walk up to the driver’s side door to unlock all the doors and then walk all the way around the car to the other side if we wanted to access the seats on the passenger’s side! How on earth did our moms live without remote car key fobs in their day, what with bunches of kids running around, carrying groceries and all?

We didn’t want to spend hundreds of dollars to get a new key fob, so we dug around on the internet and found a really easy fix!

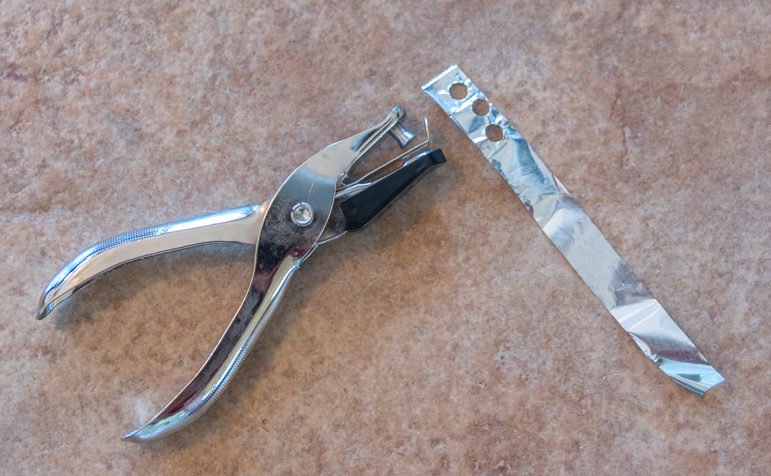
All that was required was an ordinary paper hole punch, a strip of aluminum foil, some tweezers and some glue! And we had these things already!

What happens with some key fobs as they age is that the electrical contacts under the buttons on the shell of the fob wear away. The idea with this fix is to replace that conductive material with a tiny piece of aluminum foil.

Our key fob has three buttons: Lock, Unlock and Trunk. So, we punched out 3 holes in the aluminum foil and set the small round pieces aside.

How to fix a car or truck key fob using aper hole punch and aluminum foil

Using an ordinary paper hole punch, punch 3 holes in a piece of aluminum foil and keep the tiny round pieces.

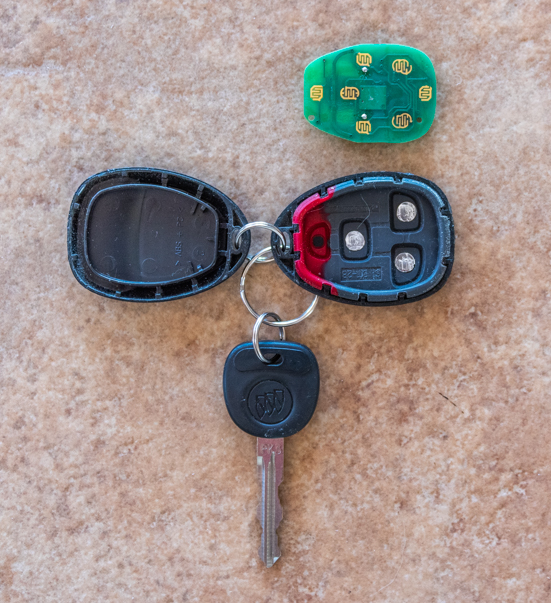
Then we removed the little electronic board from the key fob and, using a toothpick, put a tiny dab of glue on the rubber at each of the three contact points under the key fob buttons. Then, delicately holding each piece of aluminum foil with tweezers, we placed the foil on the three contact points in the key fob. We made sure to use just enough glue to hold each piece in place without affecting the connectivity between the electrical contact and the aluminum foil.

Car key fob opened up with the electrical contacts exposed

Glue the pieces of aluminum foil onto the electrical contact points in the key fob.

How to fix a car or truck key fob using a hole punch and aluminum foil

Closer view: aluminum foil pieces glued on contact points in the key fob.

We put the car key fob back together again, and BINGO!! The key fob worked perfectly locking and unlocking the doors and unlocking the trunk every single time, no matter where we stood or how high or low we held the darn thing!!

Paper Hole PunchAluminum foil

So…if you have a car or truck key fob that isn’t working right, even after changing the battery and cleaning the electrical contacts, grab a hole punch, some aluminum foil and some tweezers and try glueing the foil onto the contact points under the key fob buttons!

Not every vehicle key fob can be opened and repaired in this way, but you may be in luck just like we were!

Subscribe
Never miss a post — it’s free!

More tech tips for trucks:

Our most recent posts:

More of our Latest Posts are in the MENU.   New to this site? Visit RVers Start Here to find where we keep all the good stuff. Also check out our COOL NEW GEAR STORE!! *** CLICK HERE *** to see it!

RV Keyless Entry Door Lock Problems? Try this quick fix!

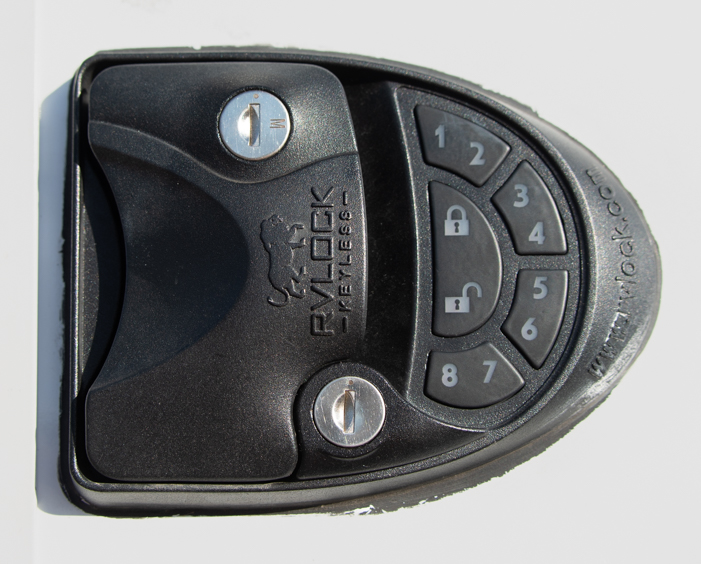
Do you have one of those groovy RV keyless entry door locks on your rig? Our Genesis Supreme toy hauler came with one, and we weren’t sure we’d like it until we started using it. Then we loved it! But after a while it started having problems and acting up.

RV Keyless Entry Door Lock Repair & Quick Fix

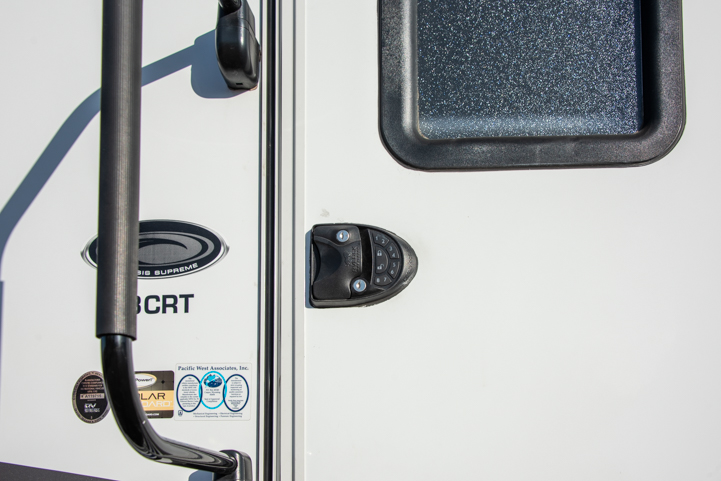
The way these keyless entry door locks work is you punch in a secret code on the keypad and then it sings a little jingle. When you are unlocking the door, the notes in the tune ascend to a higher pitch. When you are locking it, the notes descend to a lower pitch. Kinda makes sense for opening and locking the door. Sing up and it opens, sing down and it locks.

One day when we went to unlock the door, the tune wasn’t so friendly — it made a nasty noise with two notes. Right after the nasty tune it made the sound of locking the door…but we were unlocking it!

RV keyless entry door lock

An RV keyless entry door lock is awesome — until it starts acting up!

For the next few months, every time we locked or unlocked the door we heard the nasty error message tune followed by the opposite sound for what we were doing. Unlocking the door gave the sound of locking the door, and locking it gave the sound of unlocking the door.

Every time we locked and unlocked the rig, we each thought, “We’ve gotta look up these weird sounds in the manual!” But we never did. The door still locked and unlocked, it just made weird noises. We lived with it.

RV keyless entry door lock

You enter the code and then press the “lock” or “unlock” button. It’s magic!

RV Keyless entry door lock

Finally, the other day, Mark decided enough was enough, and he opened up the battery compartment on the back side of the keyless entry keypad (on the inside of the entry door).

Back of RV keyless entry door lock

The battery compartment is accessed by removing these two screws.

The problem was immediately obvious: the batteries had leaked battery juice all over the place and they were dying a slow death.

Insides of an RV keyless entry door lock

Mark removed the cover and saw dried white fluid from the batteries.

Leaky Duracell AA batteries from an RV keyless entry door lock

The batteries were covered with yuck.

He cleaned out the little compartment that holds the batteries, put in a new set of four AA batteries, and POOF! The RV keyless entry door lock worked like a charm. No error code tune, and the locking and unlocking sounds matched what we were doing.

Duracell AA Batteries

So, if you have an RV keyless entry door lock on your rig, and it starts making unexpected sounds when you lock and unlock the door, you might need new batteries. Take the cover off the keypad and check them out. And keep some spare AA batteries on hand!

Subscribe
Never miss a post — it’s free!

We had battery problems on our sailboat in Mexico too:

If you are intrigued by locks and keys, check out this incredible YouTube channel:

Other RV Tips:

Our most recent posts:

More of our Latest Posts are in the MENU.   New to this site? Visit RVers Start Here to find where we keep all the good stuff. Also check out our COOL NEW GEAR STORE!! *** CLICK HERE *** to see it!

RV Solar Upgrade with Renogy and Go Power – QUICK & CHEAP!

We recently did an RV solar upgrade project that proved to be quick, easy and cheap. We spent just $480 to jump from 190 watts of power to 570 watts, more than enough for our boondocking off-the-grid RV lifestyle. PLUS it took less than three hours to install. What a great bang for the buck!

RV Solar Upgrade - CHEAP & EASY with Go Power + Renogy

.

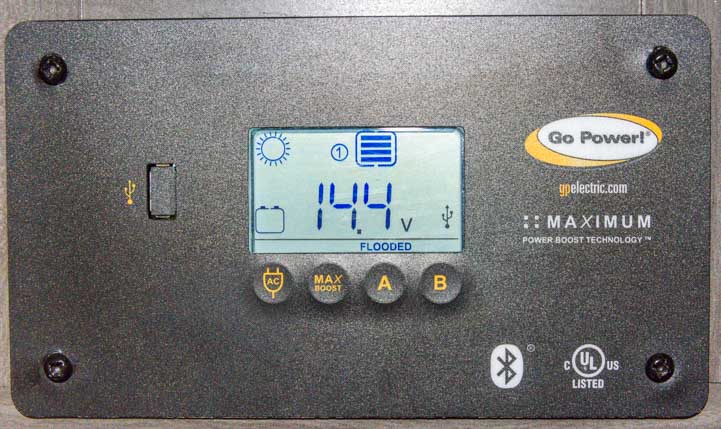
Our Genesis Supreme 28CRT fifth wheel toy hauler came with a small factory-installed Go Power RV solar power system that included a single 190 watt solar panel, a 1500 watt pure sine wave inverter and a 30 amp PWM solar charge controller connected to four dealer-installed Group 24 12-volt wet cell batteries with a capacity of 280 amp-hours.

Factory-installed RV solar power systems like this one are now a common option on many new RVs, and Go Power (a subsidiary of Dometic) is often the brand that RV manufacturers use.

Although none of the components in the system are “best of breed,” the Go Power system worked fine for us as we boondocked every night for four months last summer. As the months wore on towards the Fall (and away from the summer solistice), however, the batteries struggled more and more each day to reach full charge. In the last few weeks in late August and September they never did.

Fortunately, the Go Power 30 amp solar charge controller that came with this system can handle up to 600 watts of solar panels, so an RV solar upgrade was possible without replacing the charge controller!

As we contemplated doing an RV solar upgrade all last summer, the debate was: do we ditch the whole factory installed system and replace it with top of the line components or do we simply add some more panels to the existing system?


How much solar power do you really need when you live in an RV?

Answering that question is really important because it’s incredibly easy to end up installing a far bigger and fancier system than you actually need after hearing people discussing their mammoth systems around the campfire.

Just because a friend has a huge system doesn’t mean it will make sense for you to break the bank to install one too!

How big an RV solar power system you need depends entirely on how much power you use in your day-to-day RV lifestyle and how often your boondock.

We boondock every night, but we don’t use much power. Also, since we are now seasonal travelers instead of the full-timers as we used to be, we travel primarily in the summertime when the sun is high in the sky at a good angle for the solar panels and the days are long, allowing the solar panels to work for a few extra hours.

Our primary power use is our two laptops (which we use a lot), the water pump, and the interior lights for an hour at night (we go to bed early). We don’t watch TV and we rarely use the microwave or hair dryer.

Running the air conditioning on battery power is not possible for any but the most massive RV solar power charging systems and battery banks, so it’s not part of the equation for most people. We rely on the generator for running our a/c.

With our traveling lifestyle of minimal power use, we happily lived on 480 watts and 555 watts in our trailer and sailboat respectivlely for 13 years. That was plenty of power for us except in the dead of winter when the sun was low in the sky (poor angle to the solar panels) and the days were short.

RV solar panel installation using Go Power and Renogy panels

Our toy hauler had one factory installed solar panel (center).
An easy RV solar upgrade with two more panels tripled our battery charging capacity!

When we did those installations in 2008 and 2010, they were considered to be sizable for a boat or an RV. Seeing a rig with 1,000 watts on the roof in those days made everyone’s head turn while they mouthed the word, “WOW!”

However, by today’s standards, we had small systems on both our RV and sailboat! The third owner of our boat Groovy upgraded the solar panels to 930 total watts instead of the original 555 watts.

Last year, we met a full-timing family who had 3,500 watts of solar power on the roof of their 44′ toy hauler. They also had two huge Victron solar charge controllers (the panels were wired in two separate arrays) and they had a massive bank of lithium-ion batteries in the basement.

They could run their air conditioning on battery power all day and they had a full-size residential refrigerator to boot. They liked to keep their TV on all day long and the kids spent hours watching videos on their iPads. The kids also did homework on their laptops and everyone in the family had had phones and laptops to charge. They also had several internet access devices that gave them a total of 500 GB of data each month. They used it all and sometimes fell a little short by month’s end!

So, the size of the system you need depends entirely on how you live your RV lifestyle.

We knew when we bought our toy hauler last year that 190 watts wouldn’t be enough for us long term, but we didn’t have time to fuss with and do an RV solar upgrade before starting our summer journey. We were also curious to see how it performed right from the factory.

The solar charge controller is a lower end PWM unit (Pulse Width Modulation) rather an MPPT (Maximum Power Point Tracker) type of controller that eeks out more power from the panels. We wondered if the system would work at all. We were pleasantly surprised that it worked quite well and did the job all summer long, although our batteries did get down to 11.9 or 12.0 volts on quite a few colder mornings at summer’s end, much lower than we’ve ever seen our house batteries before.

Go Power 30 amp PWM solar charge controller

Go Power 30 amp PWM solar charge controller mounted on a wall inside the rig.

Ultimately, we decided the simplest and most stress-free RV solar upgrade we could do would be to add more solar panels and leave all the other components alone.

RV Solar Upgrade – Adding New Solar Panels – Wired in Parallel or in Series?

The Go Power solar panel that came with the rig is a 12 volt 190 watt panel. Although the Go Power 30 amp solar charge controller can handle 600 watts of power coming from the panels, it is unable to operate on anything but 12 volts. Fancier charge controllers can work with the panels at 24, 36 or 48 volts and then step down the voltage to 12 volts to charge the batteries.

This limitation meant we didn’t have the option of using 24 volt panels which are generally cheaper per watt. Also, it meant that the new panels would have to be wired in parallel with the existing panel to keep them all at 12 volts rather than having the option of wiring them in series because it would put the solar array at 36 volts.

As a side note, even though we didn’t have a choice in this case, the decision whether to wire the solar panels in parallel versus in series is a matter of how much shade the panels might encounter and how long the cable runs will be versus the guage of the wire.

When solar panels are wired in series, if one panel gets shaded, all the panels reduce their power output dramatically. Also, the voltage of the panels is cumulative while the current stays the same. That is, three 12-volt panels will be at 36 volts but the current running in the wires will be the nominal current of a single panel, for instance, 10 amps.

When solar panels are wired in parallel, if one panel gets shaded, the others continue to produce power at their normal rate. So, in a three panel array, if one panel drops out you still get 2/3 of the power because the other two panels are still working. Also, the voltage of the panels remains the same but the current is cumulative. That is, three 12-volt panels will be at 12 volts but the current will be additive, or 30 amps.

The more current there is in a wire, the shorter that wire has to be before some of the current dissipates as heat, leaving you less current for charging the batteries. A heavier guage wire will retain more current over a longer distance, but it is harder to work with during the installation and it is more expensive.

For reference, we wired the panels on our old full-timing fifth in series, and that worked fine because we almost always parked in full sun and rarely had any kind of shade on the panels. However, we wired the panels on our sailboat in parallel because the mast and boom cast a huge moving shadow across the panels as the boat swung at anchor, so one or another of the panels was frequently knocked out of the system.

New Solar Panels – What Size?

Whether the panels were wired in series or in parallel, any new panels we added to our system would produce the same watts as the existing panel: 190 watts. Even if the new panels were bigger than 190 watts, they would match the lower wattage of the existing panel.

There weren’t many 190 watt 12 volt panels available, except the same model Go Power panel we already had on the roof, and their panel is very expensive.

Go Power 190 watt solar expansion kit

Instead, we got two Renogy 200 watt 12 volt panels, and these seem to be good quality. Because the new panels will drop down to 190 watts to match the existing panel in the system, this RV solar upgrade will give us 570 watts of total power (3 x 190).

570 watts is more than either our boat or our full-time trailer, so it should be more than enough!

Renogy 200 watt solar panel

As for the batteries, we don’t have room for more batteries, and the existing batteries haven’t died yet (to my surprise!). So, we’ve decided to hold off on swapping out the batteries until another season.


RV Solar Upgrade: Installation

The total cost of the solar power upgrade was about $480 which included:

The tools required to do this RV solar upgrade project were:

The installation was straight forward.

On the back of each panel — both the existing one on the roof and the two new ones — there is a junction box with two 10 AWG leads (positive and negative). They are about 18 inches long and have MC4 connectors on the ends.

Renogy solar panel junction box and MC4 connectors

Most solar panels have a junction box and short leads with MC4 connectors on the ends, one positive and one negative.

On the existing solar panel, the MC4 connectors at the ends of these cables were connected to two other cables that ran from the roof of the RV down to the solar charge controller inside the rig.

All of this cabling was invisible as you looked at the face of the solar panel on the roof because it was all underneath it. Also, beneath the solar panel, there were two holes in the roof where the cables went into the interior of the rig down to the solar charge controller.

Renogy solar panel MC4 wires and junction box

Most solar panels have a junction box and two leads with MC4 connectors on the ends.

Here is a rough diagram showing the solar panel with its junction box and two 10 AWG cables with their MC4 connectors. These connectors are attached to two MC4 connectors on the ends of a long length of 10 AWG cable that goes through a hole in the roof (the blue circle) down to the solar charge controller in the interior of the rig (not shown).

The holes in the roof are actually under the panel, but this drawing shows the holes being above the panel so the diagram isn’t too messy!

Diagram of single solar panel with MC4 connectors on an RV roof

Our factory installed solar panel had two leads, positive and negative, that attached to wires coming up through the roof from the charge controller inside the rig. The holes in the roof (blue circles) are actually located under the panel.

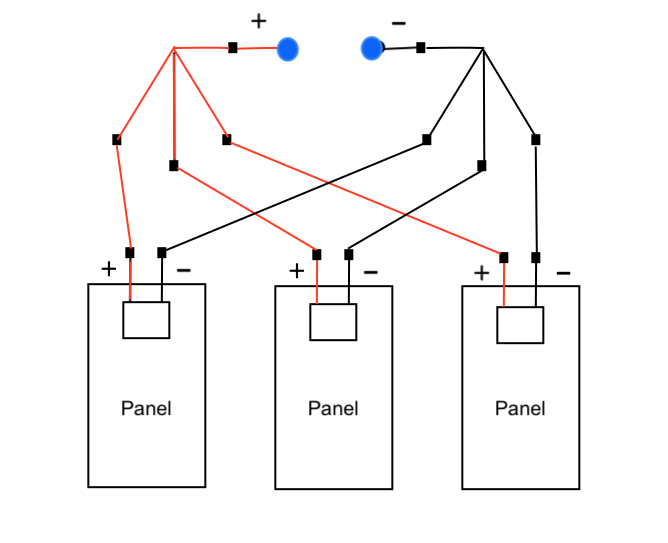
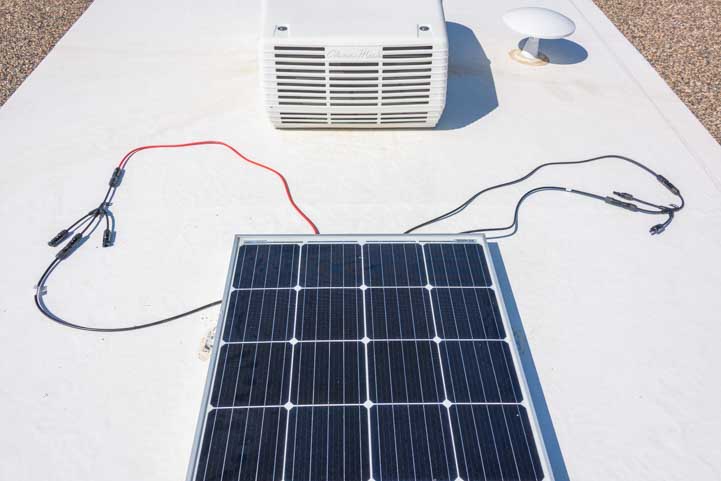
We purchased two 3-to-1 branch adapters that would make it super easy to wire the three panels in parallel. The adapters look like bird feet with three toes (one for each solar panel), and a leg that would attach to the cable that went through the roof into the rig.

One adapter would be connected to the positive side of the system and one would be connected to the negative side. That is, all three positive leads, one from each panel, would connect to the three toes on one bird foot (the “positive” 3-to-1 branch connector) and all three negative leads, one from each panel, would connect to the three toes on the other bird foot (the “negative” 3-to-1 branch connector).

We also bought two 6′ lengths of 10 AWG cable with MC4 connectors pre-installedat each end. These were essentially extension cables that would connect to the MC4 connectors on the cables coming up through the roof from the charge controller down in the rig.

They were color coded, so the red one would connect to the positive cable coming up through the roof and the black one would connect to the negative cable coming up from the charge controller.

Fortunately, Genesis Supreme had labeled the cables coming up from the charge controller so we could tell which one was positive and which was negative.

MC4 solar panel wire connectors for an RV installation

We got two 3-to-1 branch connector (“bird feet”) and one 6′ pair of 10 AWG cables with MC4 connectors pre-installed on the ends.

Here is a rough diagram showing the layout of the cables. As in the previous diagram, the two blue circles are the holes in the roof which are actually located beneath the original solar panel in the middle. However, for simplicity in showing how the cables connect, the “holes in the roof” are located above the panels in this diagram and the 6′ extension cables are really short!

Diagram of RV solar power upgrade from 1 panel to 3 panels in parallel

Our 2 new panels would be wired in parallel with the existing panel, connecting all the positives together on one 3-to-1 branch connector and all the negatives on the other. The extension cables would connect to the wires coming up through the holes in the roof (blue circles). Note that the holes in the roof are actually under the center panel and the 6′ extension cables are drawn super short.

Our mission was to :

  1. Lift the existing solar panel so we could access the cabling underneath
  2. Disconnect the MC4 connectors on the panel’s leads from the MC4 connectors on the cables that come up from the solar charge controller in the rig
  3. Reconnect the cables coming from the charge controller to the new 6′ “extension” cables
  4. Connect the “extension” cables to the legs of the 3-to-1 branch connectors which would designate one as “positive” and one as “negative”
  5. Connect each panel’s positive cable to the “positive” 3-to-1 branch connectors
  6. Connect each panel’s negative cable to the “negative” 3-to-1 branch connectors

All of this would be done by snapping the MC4 connectors together, simply inserting one end into the other and pressing it together. So easy!

There’s a special tool for disconnecting MC4 connectors, but you can also disconnect them with your fingers by keeping the tab on one side depressed as you pull the two pieces apart.

Connecting MC4 connectors in an RV solar panel installation

MC4 connectors snap together.

To get at the cables under the existing Go power solar panel, Mark removed the hardened sealant that was covering each of the mounting brackets. He used a screwdriver but a narrow and rigid putty knife would work too.

Removing a Go Power solar panel from an RV roof

First step was to lift up the existing panel which required removing the sealant on the mounting bracket screws and then unscrewing the screws.

Then he unscrewed each of the screws holding the mounting brackets in place.

We bought a wonderful cordless power screwdriver last year that we BOTH absolutely LOVE! It makes screwing and unscrewing things infinitely easier than doing it by hand, and it’s much less bulky than a cordless drill.

Ryobi cordless screwdriver
Removing a Go Power solar panel from an RV roof

Unscrewing the screws.
The cordless screwdriver is one of our favorite tools!

He unscrewed all four feet and then lifted up one side to get at the cables underneath.

Changing the wiring under a Go Power solar panel under an RV roof

Working under the existing solar panel.

A positive (red) and negative (black) cable came up through the roof from the interior of the rig where they were connected to the solar charge controller and were connected directly to the solar panel. Mark disconnected each cable from the solar panel and then reconnected them to the two 6′ extension cables we had purchased.

Changing the wiring under a solar panel on an RV roof

The positive and negative extension cables go between the 3-to-1 branch connectors and the cables coming up through the roof from the charge controller inside the rig.

Then he connected the extension cables to the “legs” of each of the two 3-to-1 MC4 branch connectors (bird feet) and connected the solar panel’s negative and positve leads to the “toes” of the 3-to-1 branch connectors.

RV solar panel MC4 connector wiring on an RV roof

The original panel (black leads going to the middle “toes”) and the solar charge controller (red and black extension cables going to the “legs”) are now wired into the 3-to-1 branch connectors. We ran into the rig to verify everything looked okay and we saw the float voltage of 13.5 volts on the charge controller display.

Next, we needed to get the two new Renogy solar panels onto the roof of the RV, place them on either side of the existing panel, and then connect their positive and negative leads to the positive and negative 3-to-1 branch connectors.

Before that, though, we needed to figure out how to get the panels up onto the roof which is 13.5 feet in the air! We opened the patio of the toy hauler and put a ladder on it. This was much more secure than carrying a heavy solar panel one handed up the ladder attached to the side of the rig!

Ladder roof access on a toy hauler RV patio

The most solid way to get the panels up to the roof was to put a ladder on the patio!

Lifting a solar panel onto an RV roof

Here comes the first one!

Once we got both panels up on the roof, we attached the MC4 connectors on the two new panels’ leads to the outer “toes” of the two 3-to-1 branch connectors, positive to positive and negative to negative.

Now all three panels were completely wired up in parallel.

Three solar panels wired with MC4 connectors on an RV roof

.

The next step was to mount the solar panels on the roof.

The roof is just wide enough (it’s an 8.5′ “widebody” trailer) that we could place the three panels side by side, leaving enough space between them so we could walk beyond them to the far end of the rig.

First Mark screwed the original Go Power panel’s mounting brackets back into the roof.

Then we used the Renogy mounting Z brackets to mount the new Renogy solar panels. The Renogy mounting brackets came with very handy hex head self-tapping screws.

Self-tapping screws for installing a Renogy solar panel on an RV roof

Self-tapping screws. So easy!

Then Mark used a scratch awl to make a starter hole for the self-tapping screws. Pounding a nail in a little ways would have worked too.

Mounting an RV solar panel on the roof

Mark made a starter hole for the screws with a scratch awl.

Then he used a cordless drill with a hex head bit to screw them in all the way.

RV solar panel installation- attaching the solar panels to the roof

The mounting Z brackets got screwed into the roof.

Solar panel mounting brackets screw directly into the RV roof

Done.

Last of all, he used Dicor Self-Leveling Lap Sealant in a caulk gun to cover all the screws and seal all the edges of the mounting brackets. This will ensure that no water can find its way through the roof!

Sealing the holes in an RV roof after mounting a solar panel

Dicor Self-Leveling Lap Sealant seals the whole mounting bracket so water can’t leak in.

Dicor Lap Sealant on a solar panel mounting bracket

After the Dicor Lap Sealant had leveled out, it completely surrounded and covered the mounting bracket

Ta da! The finished product looked great!

RV solar upgrade cheap and easy with Go Power and Renogy

.

I couldn’t believe how easy this project turned out to be. Of course, the hardest parts were already done for us: running the cables from the roof down into the interior of the rig, wiring up the solar charge controller and wiring up the inverter. All we had to do was add two more panels and wire them up with the handy MC4 connectors.

If you have purchased a rig that has a “starter” solar power system like the Go Power system on our toy hauler, it’s not difficult to upgrade it like we did so you have the maximum amount of solar panel wattage that the charge controller can accept.

One thing to consider before buying any solar gear, especially from an online retailer, is to buy each piece individually rather than in a big kit. The problem with a kit is that if one item in the kit doesn’t work and needs to be returned, online retailers, like Amazon, may require you to return the entire kit. If the failed element is a solar panel and you’ve already installed the other panels in the kit and they are working fine, it may be a hassle to get approval to return just the one broken panel. I’ve read of cases where the entire system had to be dismantled and reboxed and sent back. For that reason, we opted to buy each piece separately just in case.

Subscribe
Never miss a post — it’s free!

Further reading…

SOLAR POWER OVERVIEW and TUTORIAL

BATTERIES and BATTERY CHARGING SYSTEMS

LIVING ON 12 VOLTS

ARTICLES ABOUT OUR GENESIS SUPREME TOY HAULER

REFERENCES

Our most recent posts:

More of our Latest Posts are in the MENU.   New to this site? Visit RVers Start Here to find where we keep all the good stuff. Also check out our COOL NEW GEAR STORE!! *** CLICK HERE *** to see it!

Demco 21K Recon Fifth Wheel Hitch Review and Installation

When we sold our Hitchhiker fifth wheel, which had been home-sweet-home for twelve of the thirteen years of our full-time RV adventure, we thought we’d never own a fifth wheel trailer again. So, we let our fifth wheel hitch go with the trailer as part of the sale.

Oops! Never say “Never!”

After trying Truck Camper Vacation Life for a year, we realized we wanted a bigger RV, and we purchased a 2022 Genesis Supreme 28CRT fifth wheel toy hauler for extended travels and shorter getaways.

Suddenly, we needed a hitch so we could tow our new trailer home from the seller’s storage lot! Enter the Demco Recon 21k Fifth Wheel Hitch!

Demco 21K Recon Fifth Wheel Hitch Review and Installation

.

This is a detailed article. Here are shortcut links to each section:

Demco Recon 21k Hitch

We’ve owned two fifth wheel hitches over the years. The first was a Pullrite traditional fifth wheel hitch that was installed permanently on rails mounted under the bed of our 2007 Dodge Ram 3500 single rear wheel truck. This rail-mounted hitch design had been an industry standard for fifth wheel hitches for many years. We used it for 7 years.

Our second hitch was a B&W Ram OEM fifth wheel hitch. This new style hitch used the Dodge Ram OEM factory installed pucks that came with our 2016 Ram 3500 dually to mount the hitch to the truck bed. The four corners of the hitch base were secured into the four pucks by turning each puck handle a quarter turn. The hitch could be removed from the truck just as easily simply by turning the four puck handles, a game changer! We used that hitch for 5 years.

We loved being able to install and remove the B&W hitch at a moment’s notice, even though it had a big, beefy base that was a little bit of a challenge for one person to manage alone. So, when we went hitch shopping, we wanted our new hitch to be equally mobile but a bit lighter, if at all possible.

01 771 Genesis Supreme 28CRT toy hauler towed by Ram 3500 dually truck with Demco 21K Recon fifth wheel hitch

Our first stop on our 16 week maiden voyage!

One of the shortcomings of any OEM puck system fifth wheel hitch is that the three diesel pickup manufacturers, Ford, GM and Dodge, have all designed their own unique footprints for the placement of their pucks in their pickup beds. This means that an OEM hitch designed for a Ram truck will not work in a Chevy or Ford and vice versa.

As we contemplated which hitch to get for our new toy hauler, we knew that there might come a day fairly soon when we would want to replace our current truck. Of course, that may never happen, especially given the weird state of the car and truck market today, but it has been on our minds for a while.

So, our hitch requirements boiled down to these two:

  1. Could be easily installed in or removed from the bed of any brand or age of truck
  2. Would be comprised of components light and small enough for one person to maneuver alone

Demco 21k Recon Fifth Wheel Hitch – A Gooseneck Ball Mounted Hitch!

We discovered that the Demco 21k Recon fifth wheel hitch is mounted on a gooseneck ball in a gooseneck receiver in the truck bed. Gooseneck receivers come standard with all OEM puck systems and can also be installed as an after-market addition in any truck that doesn’t have an OEM puck system.

The beauty of this hitch design is that the Demco 21k Recon fifth wheel hitch can be used in any brand or age of truck. This took care of Requirement #1 in our new hitch wish list!

Like the OEM puck system fifth wheel hitches, the Demco 21k Recon fifth wheel hitch is installed in two basic parts: a base that installs onto a gooseneck ball mounted in the gooseneck receiver in the pickup bed, and a hitch head which mounts onto the base and latches onto the kingpin of the fifth wheel trailer.

Demco 21k Recon Fifth Wheel Hitch Base

The Base unit for the Demco 21k Recon Fifth Wheel Hitch

The hitch head can be further broken down into two parts: the actual hitch head itself and a center column that inserts into the base. These two parts can be installed and removed separately, which adds a step to the process but keeps each individual part quite lightweight. Or they can be handled as a single and slightly heavier unit.

Upright Centerl Column Demco 21k Recon Fifth Wheel Hitch

The Center Column (or “Upright”) that supports the hitch head.

Demco 21k Recon Fifth Wheel Hitch Head

The hitch head for the Demco 21k Recon Fifth Wheel

I called Demco to talk to a salesperson about the hitch and get some details about the sizes and weights of the individual components.

And I was absolutely floored when an operator answered the phone on the second ring and immediately transferred me to a salesman who picked right up and greeted me warmly.

How often does THAT happen nowadays?

We were delighted to find that the total weight of the hitch and the weights and physical dimensions of the individual components were slightly less than other manufacturers’ OEM puck based hitches. That took care of Requirement #2 in our hitch wish list!

But back to that phone call… In a fifth wheel towing setup, the fifth wheel hitch is one of the most important pieces of equipment to ensure you get down the road safely. For us, it is reassuring to have the company behind the product be easy to reach by phone without having to listen to endless lists of menu selections, punch in endless numbers and wind up leaving a voicemail in some unmonitored voicemail box anyway. In the RV industry today, most brands are owned by massive umbrella corporations. It is rare to find an independent manufacturer that is not a subsidiary of a massive corporation.

Demco Recon 21k Fifth Wheel Hitch Specifications:

  • Rated to tow a 21,000 lb. trailer. Our toy hauler has a GVWR of 15,000 lbs which is well within the limit.
  • Mounts onto a standard 4″ tall 2 5/16 gooseneck ball.
  • Total Hitch Weight: 134 lbs.

The component weights are:

  • Head Weight: 35.75 lbs.
  • Center Column Weight: 20 lbs.
  • Base Weight: 78.25 lbs.

If the Center Column and Base remain connected as a single unit, the weights of the two components are:

  • Head Weight: 35.75 lbs.
  • Center Column + Base Weight: 98.25 lbs

Demco 21k Recon Fifth Wheel Hitch Installation

The installation proved to be straight forward. As mentioned above, the hitch has three main components:

  1. The Base which is installed on a gooseneck ball in the truck bed
  2. The Center Column which slides into the Base and sets the overall height of the hitch
  3. The Head which mounts on the Center Column and whose jaw latches onto the trailer’s kingpin.

The parts included the following:

Demco 21k Recon Fifth Wheel Hitch Base and Base Parts

The Base, the Center Column Upright and some pins.

Demco 21k Recon Fifth Wheel Hitch Head Handle and Parts

The Head, hitch handle and bolt, and a blue urethane pivot bumper.


Tools Required for Installation

Installing the Base

The gooseneck coupler (or socket) on the underside of the Base slips over the gooseneck ball in the bed of the truck.

If you flip over the Base, you can see that the coupler is slilghtly offest from the center of the Base. The coupler location is offset to accommodate the Center Column which stands directly in the center of the Base (for balanced support) and holds the Hitch Head.

Demco 21K Recon Fifth Wheel Hitch underside of the Base

On the underside of the Base you can see the gooseneck ball socket is offset from center.

When the hitch is installed in the truck bed, the gooseneck ball coupler is positioned towards the cab of the truck.

The Base is secured to the gooseneck ball in the truck bed by sliding the Coupler Pin through the hole in the square column at the bottom of the Base. By tightening the Top Coupler Bolt nut on the top of the Base to 30 ft-lbs, the Coupler Pin is cinched up against the Base, clamping the Base and gooseneck ball together into the bed of the truck. A very clever design!

Before getting to that step, however, the Top Coupler Bolt on the Base was loosened so the gooseneck ball coupler would slide over the gooseneck ball easily. We did this before placing the hitch in the truck bed.

Unbolt collar Demco 21K Recon 5th Wheel Hitch

The Bolt Retainer Assembly was removed and the Top Coupler Bolt was loosened so the hitch Base could slip over the gooseneck ball in the truck bed.

Remove bolt retainer assembly Demco 21K Recon 5th Wheel Hitch

The Bolt Lock Plate was removed.

The Top Coupler Bolt was loosened.

Then the Base was placed in the bed of the truck with the Gooseneck Ball Coupler sliding over the Gooseneck ball. As you can see, when the hitch is removed from the truck, the entire bed of the truck is open except for the small bump of the gooseneck ball. You can haul things in the truck or just drive around peacefully without a fifth wheel hitch clanking around in the back (especially helpful when driving on rutted dirt roads)!

Pickup truck bed with gooseneck ball

The gooseneck ball was ready and waiting in the pickup bed.

Demco 21k Recon Fifth Wheel Hitch Base in Truck Bed

The hitch Base was mounted onto the gooseneck ball. The footprint of the Base is contained well inside the four OEM pucks which makes it both lighter and less awkward to maneuver than a larger OEM fifth wheel hitch base.

In order to secure the Base into the bed of the truck, the Coupler Pin was inserted into the Coupler Hole on the Base below the round head of the gooseneck ball. Then the nut on the Top Coupler Bolt was tightened to 30 ft-lbs using a torque wrench and 15/16 socket.

Demco 21K Recon 5th Wheel Hitch Ready for torque

The Top Coupler Bolt cinches the Coupler Pin under the Gooseneck Ball up against the Base frame, securing the hitch Base onto the ball.

Demco 21k Recon Fifth Wheel Hitch Top bolt

The Top Coupler Bolt is tightened to 30 ft-lbs.

The Bolt Lock Plate was placed over the Top Coupler Bolt head and then tightened the adjacent 1/4″ bolt with a 7/16 socket. The Bolt Retainer assembly blocks the Top Coupler Bolt from turning.

Demco 21k Recon Fifth Wheel Hitch Notched Bolt Lock Plate

The Bolt Lock Plate slides over the Top Coupler Bolt and is held in place with a 1/4 inch bolt to prevent the Top Coupler Bolt from unscrewing.

Notched bolt lock plate aligns correctly flipped over

The Bolt Lock Plate goes over the Top Coupler Bolt.

Notched bolt lock plate with two bolts

The Bolt Retainer Assembly was secured using a 7/16 socket on the 1/4 inch bolt.

Installing the Center Column

Next, the Center Column was placed into the square opening in the Base.

Demco 21k Recon Fifth Wheel Hitch Inserting Center Column in the Base

The Center Column was placed in the square opening in the Base.

The Center Column can be positioned at one of three different heights that are 1 1/4 inches apart. The height of the Center Column determines the vertical distance between the bottom of the fifth wheel overhang and the top of the truck box. Demco recommends that this distance should be about 6 inches.

The middle height looked like it would be the best choice, so we placed the Cross Pin through the center hole in the Center Column. The Cross Pin was secured with an R-clip.

Hitch head height Demco 21K Recon 5th Wheel Hitch

The Cross Pin is inserted in the middle hole in the Center Column

Demco 21k Recon Fifth Wheel Hitch Cotter Pin

An R-clip secures the other end of the Cross Pin.

Two set screws hold the Center Column in place in the Base. Using a 3/4 inch 12 point socket, the set screws were tightened to Demco’s recommended spec of 100 ft-lbs of torque. Then the jam nuts were tightened using a 15/16 inch deep well socket.

12 point socket Demco 21K Recon 5th Wheel Hitch

The two set screws holding the Center Column in place were tightened to 100 ft-lbs with a 3/4 inch 12 point socket. The jam nuts were tightened with a 15/16/ deep well socket.

721 Demco 21k Recon Fifth Wheel Hitch Torque to 100 ft-lbs

The Set Screws were tightened to 100 ft-lbs with a torque wrench.

Installing the Head

Flipping the head over, the blue Urethane Pivot Bumper was placed on the bottom of the Head. This quiets the hitch when you aren’t towing.

Dampening bumper for hitch head 27 721 Hitch head pin Demco 21K Recon 5th Wheel Hitch

To minimize noise when not towing, a urethane pivot bumper dampens the movement of the hitch head.

Dampening bumper for hitch head Demco 21K Recon 5th Wheel Hitch

.

Then the Head was placed onto the Base, and a 1 inch Pin was slid through it to hold it in place. The 1″ Pin was secured with a Lynch Pin.

Demco 21k Recon Fifth Wheel Hitch Installing the Center Column

The hitch Head was set onto the Base.

Hitch head pin Demco 21K Recon 5th Wheel Hitch

A 1″ pin held it in place.

Demco 21k Recon Fifth Wheel Hitch D-Ring on Center Column

The 1″ pin was secured by a Lynch Pin.

Then the Hitch Handle was assembled. A Safety Lock Pin held the handle in place while the bolt was tightened. A light coat of White Lithium Grease was applied between the Safety Lock Pin hole and the handle housing.

Hitch handle Demco 21K Recon 5th Wheel Hitch

The Safety Lock Pin held the handle open so the bolt on the handle could be tightened.

Lube hitch handle Demco 21K Recon 5th Wheel Hitch

A light coat of White Lithium Grease lubricated the hitch handle.

That was it!

Genesis Supreme 28CRT Toy Hauler Fifth Wheel towed using a Demco 21K Recon Fifth Wheel Hitch

Ready for new travel adventures!

Hitching and Unhitching

There are many different mechanisms used for locking a fifth wheel hitch’s jaws around a kingpin. The jaws of the Demco Recon hitch wrap completely around the kingpin. This 360 degree wrap makes a very tight seal around the kingpin and helps reduce chucking when towing, which we loved.

Demco 21K 5th Wheel Hitch has a wraparound locking jaw

The Demco 21K Recon fifth wheel hitch has a very tight wrap-around jaw that minimizes chucking.

However, the hitch’s tight wrap-around jaw also makes the process of hitching and unhitching a little bit more finicky.

Demco provides two brief videos that show the process of hitching up and unhitching (“coupling and uncoupling”) in action (click here and here).

These are well worth watching to get a feeling for the relative positions of the hitch head and the king pin. The videos are for Demco’s rail mounted fifth wheel hitch, but the positioning of the components is identical to the Demco 21k Recon gooseneck ball hitch.

Demco also recommends using wheel chocks for both hitching and unhitching operations. We weren’t accustomed to using wheel chocks, but we found they made a huge difference in easing the fifth wheel’s king pin into and out of the Demco hitch while preventing the trailer from rolling slightly.

RV wheel chocks

Wheel chocks are recommended when hitching and unhitching with this hitch.

The Demco 21K Recon hitch also requires that the fifth wheel’s landing jacks be lowered slightly below where they would be with other hitches.

We found that as we were hitching up, the trailer king pin’s lube plate needed to be positioned slightly lower than the hitch plate. The truck would squat a bit once the trailer was hitched up. Eyeballing across the lube plate and hitch head, the lube plate needed to be coming at the hitch about halfway up the little lip on the edge of the hitch head.

When unhitching, there needed to be just a slight hairline crack of light showing between the king pin’s lube plate and the hitch plate. Since our truck has a factory installed auto-leveling system, we’ve found we need to wait until the truck bed has completely stopped raising or lowering and then see if a hairline crack of light is visible betwen the lube plate and the hitch plate.

For unhitching, Demco provides a Safety Lock Pin to hold the hitch handle open until the truck has pulled out completely. We found we needed to use this Lock Pin whenever we unhitched or the handle would close on its own before the truck had pulled out completely.

Demco 21K 5th wheel hitch with handle open for unhitching

The Safety Lock Pin holds the hitch handle open while unhitching.

We also stabilized our Rota-Flex pin box with an Andersen Rota-Flex lockout kit as Demco recommended. Because both the Rota-Flex pin box and the Demco hitch are mobile in multiple directions, the two can end up working against each other. One will move in one direction and then the other will compensate for that motion in a counterproductive way. The Anderson Rota-Flex lockout kit prevents the pin box from moving at all, allowing the Demco hitch to make all the movements necessary to hitch up or unhitch.

After using the Anderson Rota-Flex lockout kit for a few thousands miles during our trip, we removed it and found that we didn’t really need it. So, if your trailer has a Rota-Flex king pin, you might try using the Demco hitch without the lockout kit first and purchase the lockout kit only if you are having trouble hitch and unhitching.

Towing

Underway, we have found that when suddenly accelerating or braking hard, or turning a sharp corner or starting a steep climb or descent, the hitch sometimes clunks loudly as it adjusts to the change in motion.

However, although we’ve taken the trailer over some very rough terrain and deeply pot-holed dirt roads, we’ve found the motion of the trailer has been surprisingly smooth. This absence of chucking is due to the very tight fit of the wraparound jaws encircling the king pin and is a wonderful feature.

After about 1,000 miles of towing, the shaft of the Center Column began to wobblie slightly. Interestingly, the set screws hadn’t come loose by unscrewing themselves because the two jam nuts were still tight. Probably the set screws had worn away a little metal on the shaft from all the jiggling as we went down the road. We didn’t have our torque wrench with us, so Mark tightened the two set screws as hard as he could and they never loosened again.

After 4,000 miles of towing, we noticed that the hitch base had twisted very slightly in the truck bed, about 5 degrees of rotation. This was due to the hitch being secured to the truck in just one location in the center, by compression on the gooseneck ball, rather than being connected in four corners like an OEM or traditional hitch. With the hitch slightly twisted in the truck bed, it was harder to slide the king pin in and out of the jaws while hitching and unhitching. We straightened the hitch and tightened it down again and it hasn’t twisted since.

One of our readers left a comment below suggesting that we try putting a rubber horse mat (sold at farm and feed stores) in the bed of the truck under the hitch with a hole in it for the gooseneck ball. This would provide some friction that might prevent rotation and would also protect the bed of the truck.

Demco 21K Recon 5th Wheel Hitch rotated in the bed of the truck

After 4,000 miles of towing we noticed the hitch had rotated slightly in the truck bed. We realigned and retightened the hitch and it hasn’t rotated again.

Portability

The three components of this hitch are slightly lighter than some of the OEM puck system hitch counterparts, and the Base has a smaller footprint too, so it is less awkward to load into and unload from the truck bed than other hitch bases.

Mark can lift the Base in and out of the truck easily by himself. Of course, it is even easier with a second pair of hands and I happily jump in to help! The other two components, the Center Column and Head, are easily lifted and maneuvered by one person, even me.

That said, if you choose to keep the Center Column attached to the Base after the initial installation, which saves you from loosening and re-tightening the two set screw bolts on the Base to torque spec, then two people may be required to lift that Base/Center Column combined unit in and out of the truck.

Overall Impressions

The three great benefits of the Demco 21k Recon fifth wheel hitch are that it is:

  • Compatible with any pickup truck
  • Easily installed and removed by one person
  • Almost free of chucking when towing

The process of hitching and unhitching is a little different than with other fifth wheel hitches but is easily mastered (it took us a while to realize we had been doing it wrong!). The hitch also required two small adjustments after we had used it for a few thousand miles, but our adjustments have held since we made them.

Subscribe
Never miss a post — it’s free!

More info about this hitch:

Other fifth wheel trailer hitches we’ve installed and reviewed:

Below are some of our most POPULAR POSTS (also in the MENUS above)

Buddy - A Journey in Spirit - The story of an event that changed our lives forever.

ARTICLE INDEXES
  • RV Tech Tips Articles - A one page index of links to all our RV Tech Tips, RV Upgrades & RV Maintenance articles.
  • RV Lifestyle Tip Articles - An index of links to all our RV Lifestyle Tips (finances, boondocking, major repairs, work/jobs, etc.)
  • Solar Power Articles - Overview and tutorial articles for how to design and install solar power on an RV or boat
  • Product Reviews - An index of links to all of our Product Reviews
RV UPGRADES, SYSTEMS & TIPS
MONEY FULL-TIME RV LIFESTYLE GEAR STORE
  • Gear Store - A list of the goodies, equipment and gear we've found useful in our RV lifestyle!
 

Our most recent posts:

More of our Latest Posts are in the MENU.   New to this site? Visit RVers Start Here to find where we keep all the good stuff. Also check out our COOL NEW GEAR STORE!! *** CLICK HERE *** to see it!

Goldline RV Cover – Winter protection for our new trailer!

After our summer travels, it is time to put our Genesis Supreme 28CRT fifth wheel toy hauler to bed for the winter with a Goldline RV Cover, something we never had to do as full-timers. For those who are going to be doing the same thing, we wanted to let you see what how this winter protection will work with our new trailer.

Goldline RV Cover for a Fifth Wheel Trailer

.

Before we left in June, one of the things that concerned us most about buying our virtually brand new Genesis Supreme toy hauler was how we’d protect it from the elements during the eight months of the year it was sitting dormant waiting to be the Mothership for our travel adventures the next summer.

Our 2007 Hitchhiker fifth wheel that we lived in full-time was out in the elements 24/7/365 for the twelve years we owned it because we were living in it year round except for the months it was in storage between 2009 and 2013 as we sailed Mexico’s Pacific Coast on our boat.

Sadly, even though we washed and waxed the Hitchhiker fifth wheel regularly, by the last few years we owned it, the exterior seriously showed its age and looked terrible. Likewise, the exterior of the formerly garage kept Arctic Fox truck camper we owned for a year was just beginning to show a few signs of aging after it sat outside for the 12 months we had it.

We don’t have a good covered storage option for our new trailer, so we decided we’d try protecting our new trailer each winter with a fabric RV cover.

There are quite a few brands of RV covers on the market, and all get mixed reviews. They tend to tear over time and generally fall apart. For several weeks before we left, we read reviews of various RV covers until our eyes got tired.

Then we came across a discussion in the Escapees RV forum about the Goldline RV cover, a brand we hadn’t heard of before.

This cover is made from a 7-ply material rather than the standard 6-ply material used by other manufacturers, and the reviews and discussion about its construction were very favorable.

We dug a little deeper and discovered that one of the things that makes the Goldline RV cover unique is the Marine Grade fabric used in its construction. Similar to Sunbrella, which has a weave density of 800D, this fabric, Marinex, has a weave density of 600D which translates to a 33% weight savings, a big plus when trying to pull a 50′ x 25′ piece of it up onto an RV roof!

Also, the the color of the fabric is obtained by dyeing the thread rather than dyeing the finished fabric which makes the color hold much better over time.

One of the things we liked is that the Goldline RV covers are sized in two foot increments. Other covers we considered have as much as four foot increments between sizes, making it difficult to get a good fit.

Our toy hauler is 32′ 10″ long, so we chose a 33′ Goldline RV cover. We’ve done a trial run of putting the RV cover onto the trailer so we could see how it worked and what we are in for when we’re finally ready to cover it for the winter.

It’s not hard to put this RV cover on. We laid it out on the ground next to the toy hauler, putting the “Front of cover” label at the front of the rig, and then Mark pulled it up onto the roof and lowered the sides.

Eevelle Goldline RV Cover fifth wheel installation 1

We laid the cover on the ground alongside our trailer.

Eevelle Goldline RV Cover fifth wheel installation 2

We located the “Front of Cover” label. You can also look for the piping that is on each side of the fifth wheel overhang.

Eevelle Goldline RV Cover fifth wheel installation 3

Up the ladder he goes! This is where the full weight of Sunbrella fabric would be a challenge.

There are panels on the two sides of the Goldline RV cover that can be rolled up by the roof or lowered down and zipped closed. This allows access to the RV door, windows and hatches as needed.

Goldline makes toy hauler RV covers for travel trailer toy haulers that have an opening in the back for the ramp door as well. This would be terrific! However, they don’t have a model for a fifth wheel toy hauler like ours available yet, so we went with the regular fifth wheel RV cover. We just won’t be able to open the ramp door when the cover is on the trailer.

Eevelle Goldline RV Cover fifth wheel installation 4

Mark pulled the cover towards the back of the trailer and let the sides fall as he went.

The last step in the installation is to cinch up the straps that go beneath the trailer and hold the sides down and also to tighten the straps on the rear end as well as the fabric that covers the fifth wheel overhang.

Eevelle Goldline RV Cover fifth wheel installation 5

Looking good up there!

Eevelle Goldline RV Cover fifth wheel installation 6

It seems like a good overall fit.

I’ll be writing a more detailed review of this RV cover once we’ve had it on our trailer for the winter months, gone in and out of various hatch compartments and the front door with the cover in place, and seen the cover through the worst of the mid-winter storms.

We rarely get snow in our area but we do get plenty of heavy rain in short doses, some wind, and tons of UV-filled sunshine. Those UV rays cause the worst damage to an RV’s exterior, so we’re excited to have found an RV cover made of UV resistent fabric that can protect our rolling home and hopefully keep it looking good!

Eevelle Goldline RV Cover fifth wheel installation 7

We tied a few of the straps but not all of them…this was a trial run.

Eevelle Goldline RV Cover fifth wheel installation 8

While it’s “in storage” we’ll be able to go in and out of it easily…nice!

Subscribe
Never miss a post — it’s free!

More info about the Goldline RV Cover:

Other RV tech tips:

Our most recent posts:

More of our Latest Posts are in the MENU.   New to this site? Visit RVers Start Here to find where we keep all the good stuff. Also check out our COOL NEW GEAR STORE!! *** CLICK HERE *** to see it!