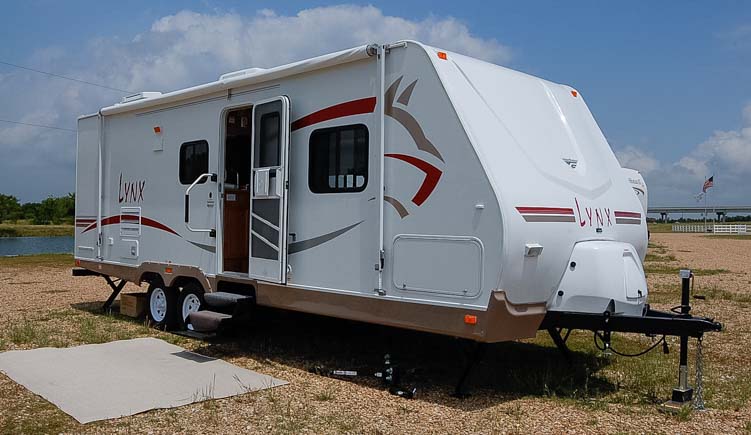
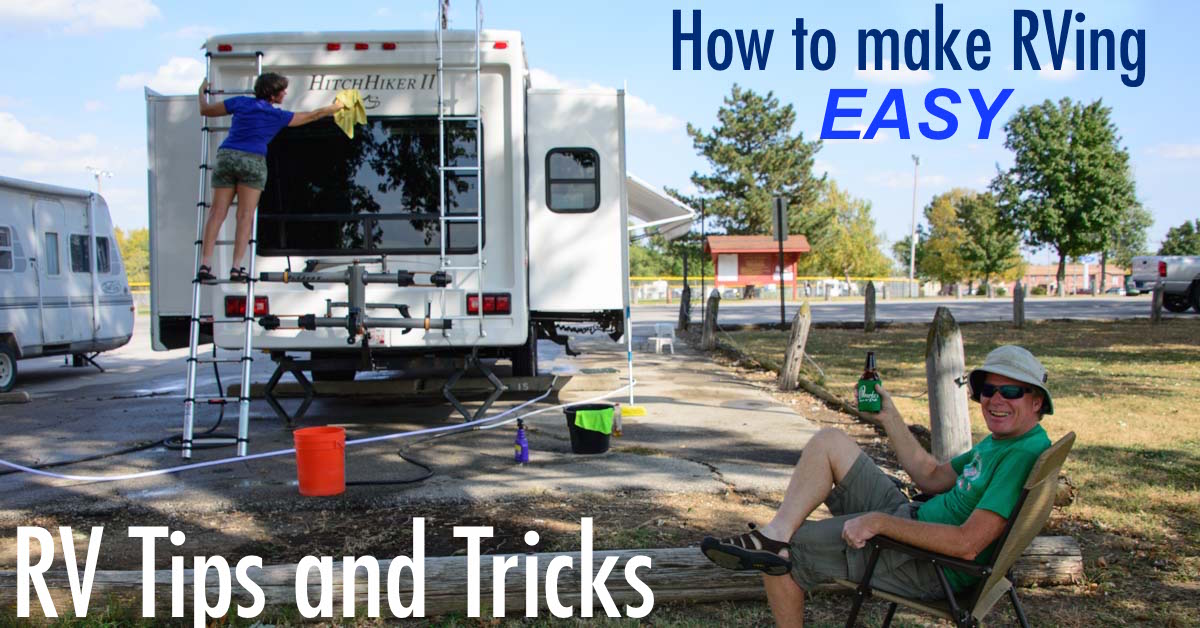
There are a million RV tips and tricks to make the RV life easier, and this page offers some little jewels we’ve discovered since we started RVing full-time in our fifth wheel trailer in 2007. We’ve broken them down into:
.
OUTDOOR RV TIPS and TRICKS
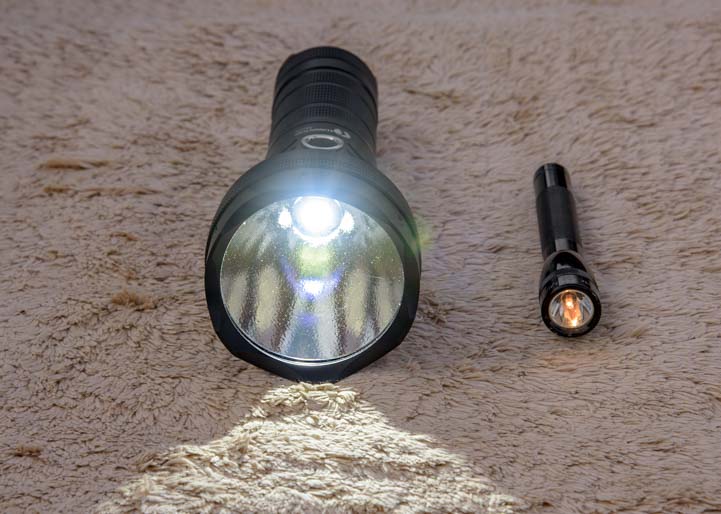
High Powered “Search” Flashlight
We often camp in areas that are quite remote, and getting to and from and around the rig at night is much easier with a very high powered flashlight!
We have a Lumintop SD75 Flashlight which is downright phenomenal. We have hiked Bryce Canyon and the Grand Canyon at night to photograph the stars and the Milky Way, and this flashlight is literally like holding a car headlight in your hand.
Here is more info about this flashlight:
Lumintop SD75 Flashlight Review
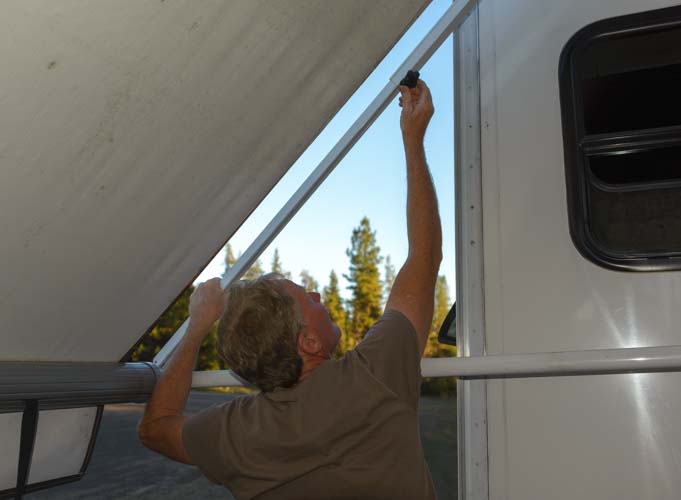
Getting Parked Without Damaging Anything
The most basic element in RVing is learning to hitch up and unhitch, whether you are driving a car pulling a popup, a diesel truck towing a fifth wheel or a Class A motorhome towing a car. Of course, lots of people have loads of fun in their motorhomes without towing a car behind, but getting hitched up and unhitched is part and parcel of the RV lifestyle for an awful lot of us.
The most important thing for the driver and the person standing outside of the rig is to stay in eye contact with each other. This is entirely up to the person running around outside. If you can see the driver’s face in the rear view mirrors, you are golden. If you can’t, then any kind of gesture you make, including jumping up and down and waving your arms because the driver is about to drive the rig right off a cliff, will never be seen.
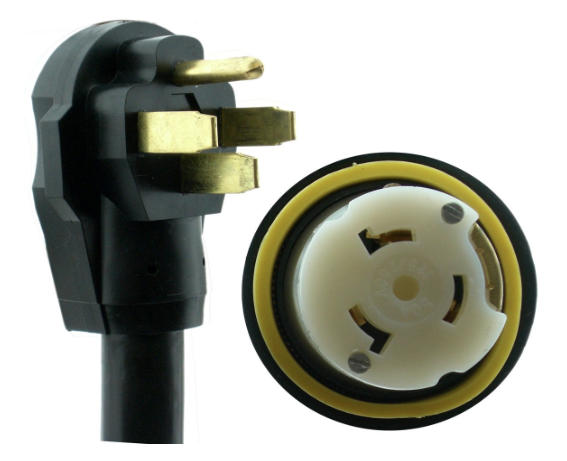
We use two-way radios to give us a way to talk to each other and to lessen the impact if I inadvertently end up in a position where Mark can’t see me in the rearview mirror. We use the longest distance radios we can get, to make sure the signal is decent. Right now we have 36 mile GMRS radios, which are realistically good to about 3-5 miles. We used these on our boat (a godsend when anchoring) and we’ve used them ever since we started RVing. We’ve gone through three sets so far, because the salt air ate up two pairs during our cruising years.

We use our two-way radios all the time…
Besides the radios, it’s really helpful to have good hand signals. I indicate the distance until disaster by spreading my arms wide and then bringing my hands closer and closer together until I give a “halt” sign (palms forward). Shaking my head and waving my hands and giving a few slices to the neck can help too if it starts to look really bad.

36 mile GMRS radios
It is royally embarrassing to make all these gestures when you’ve got an audience of people watching, but I’ve learned that there’s no ego in getting the rig parked well. Every RVer who has been around a while has made a huge blunder of some kind while parking, and they’ve all lived through it. So a few members of your giggling audience will probably be very sympathetic to whatever mistakes you have up your sleeve.
My worst gaffe was in front of two very special friends we hadn’t seen since we’d moved into our fifth wheel a year earlier. They had come out to camp with us, and we were all excited. I had just finished telling them (with great pride) that we didn’t need their help parking because we parked our rig all the time, we had a system, and we had gotten pretty darn good at it.
Mark began to back up as our friends watched, and I began to warn him that he needed to go more towards the driver’s side to avoid a tree. He adjusted, but again, I told him, he needed to go more towards the driver’s side! I kept repeating my instructions louder and louder as our good friends watched in bewilderment. When Mark was just about to cream the tree, we all started shouting STOP!!! Mark got out of the truck, calmly assessed the situation, and then said to me: “Ahem…. which side does the driver sit on?”
Our friends smiled weakly and I looked for the nearest rock to crawl under…
So, don’t be embarrassed and don’t be shy. Make your gestures big and strong, and remember which side of the rig the driver sits on!
Hitching and Unhitching a Fifth Wheel Trailer
Some folks drive their RVs solo, and although I can’t say much about hitching and unhitching a motorhome and car combo, our good friend Bob has found a great way to hitch and unhitch a fifth wheel trailer solo. He marked the front landing leg that’s near the extend/retract button at regular intervals all the way up and down the leg.
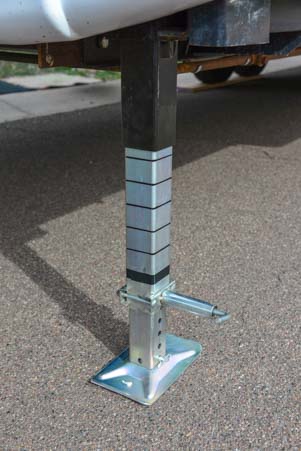
Hash marks on a landing leg help get the rig back to the right height before hitching up.
Then he numbered each hash mark. He keeps a pad and pen in the hatch near the landing legs button. When unhitching, once he’s raised the trailer to where he can drive the truck out from under it, he jots down the hash mark number that is visible on the leg. Then he drives out, parks, and returns to the trailer and raises or lowers the landing legs as necessary to get the trailer level.
When he hitches up again to leave, he adjusts the trailer height to the exact position where he unhitched. That way, when he gets in the truck to hitch up, he knows the trailer will be at the correct height as he backs the truck up into the hitch pin (and he doesn’t have to get in and out of the truck several times to check and adjust the height of the trailer).
We marked our landing legs at 1.5″ intervals and have not numbered them. There are only 6 hash marks, and I make a mental note of what mark we were at when we unhitched. Frequently, by the time we leave, I’ve forgotten where we were at before we leveled the trailer, but I’ve developed a good eye for knowing how much to raise or lower the rig as Mark backs the truck towards the trailer.
We also marked the centerline of the fifth wheel pin box and pin plate so it is easy for Mark to line up the hitch with the pin box and king pin when he is backing the truck into the trailer.
Leveling the Trailer
There are many methods for getting a trailer level, and hydraulic leveling is a blessing that takes all the excitement out of it. For those without hydraulic leveling, we found in our early years that with two 5′ lengths of 2″x8″ board and one 5′ length of 1″x8″ board we could always find a combination that worked to get the trailer level from side to side. A 5′ board is relatively easy to drive onto and provides a solid platform for the trailer’s wheels.
We store the boards in the bed of the pickup. When using two boards, we stagger them a few inches so the trailer is driven first onto one level and then up a step to the next. We have to remember to back up when coming off stacked boards or the upper one will tip up and hit the bottom of the trailer while driving off it (think of a sailor walking the plank).

This was an extremely unlevel spot where we used quite a few boards and strips of horse stall mat.
If you don’t like the idea of hauling long boards around in your truck, there are nifty plastic leveling board kits (here’s another type) that are very popular.
We also use plastic wheel chocks whenever we park on a steep incline to prevent the trailer from rolling, especially while unhitching and hitching up.
Our friend Ken introduced us to using a sliced up horse stall mat rather than pine boards. We cut a 4’x6′ sheet of horse stall mat into five 1×5 strips and four 1×1 squares, and those have worked really well for us. They hold up to the elements really well and they roll along with the contour of whatever crazy surface we might park on. It is also possible to drive off of them either forwards or backwards because they don’t slap the underside of the trailer.
The only disadvantage is that they are much heavier than pine boards, but we can drag them around and they don’t disintegrate. We use the 1’x1′ squares under the landing legs and scissor jacks for cushioning.
We also have four large blocks made of three 1′ lengths of 2″x8″ boards screwed together. We put handles on the ends to make them easy to lug around. In a really unlevel site in the Smoky Mountains we had to stack them on top of each other AND extend the jack legs all the way!

A very unlevel spot that required two blocks plus all the leg length.
What Is Level and How Do You Know?
Determining what constitutes “level” inside an imperfectly constructed RV is an interesting trick. We used a carpenter’s level on our kitchen floor, in several directions, and on our table, and on the bedroom floor. Of course, none agreed! But we found a good compromise and then mounted some RV levels on the outside of the rig to give us a reasonable guess when we’re setting up.
There are two different types of levels: Bubble Levels that have an air bubble that floats to the high side, and Ball Levels that have a ball that drops to the low side. Bubble levels are more responsive (the bubble moves more quickly as the RV moves). Ball levels take a few seconds to react. If you use both types, you can get confused because they move in opposite directions.
We have a large Level Master level on the fifth wheel pin box that is easy to see from inside the truck. We also have two small bubble levels on the trailer on the corner by the landing jack power button, one facing forward (for left to right leveling) and one facing sideways (for front to back leveling).

The ball style level (visible from inside the truck) shows which side of the rig is low.
We painted a line on the pin box to help with hitching up.
Our pin box mounted Level Master, a ball level, is easy to see from inside the truck. When the trailer is higher on one side than the other, the Level Master ball falls to the low side.
Our smaller levels on the front corner of the fifth wheel are bubble levels, so the one on the front of the rig showing the side-to-side level has a bubble that rises to the high side. This is the opposite of the ball level on the pin box, and sometimes, when we are struggling with white line fever from hours on the road, this messes us up.

Small bubble levels show left/right and front/rear level near the landing jack power button on our fifth wheel.
I’d recommend sticking to either ball levels or bubble levels and not mixing and matching like we did! A good solution might be to mount a ball level like this on both the pin box and on the front of the trailer near the landing jack power button.
Why do you need two side-to-side levels? When I’m running around placing the boards in line with the wheels for Mark to drive onto, I want to see a level on the fiver easily myself, and the front of the pin box is impossible to see from the side of the truck when we’re hitched up.
However, lots of folks rely on a single pin box mounted level that has both side-to-side and forward-back levels in it. There are a few from Camco and Hopkins that are very popular.
You can forego all this nonsense with a slick hydraulic leveling system. However, this does introduce a complicated and expensive system into your life, and we’ve heard many stories of the jacks falling down while driving, or not retracting properly and systems failing in other ways. On the plus side, though, you can easily jack up the trailer to change a flat!
Cordless Drill for Easy Jack Setup
We don’t have electric stabilizer jacks on our fifth wheel trailer (nor did we on our travel trailer). However, we use an 18 volt cordless drill, and it’s very easy.

Ready for action with the drill, extension and socket for the stabilizer jacks
We use the following setup to crank the scissor jacks:
We keep the 1/4″ Hex to 3/8″ Socket Adapter in the drill. Mark glued the extension and 3/4″ socket together with JB Weld, making it ultra easy to grab the extension, jam it in the drill and go.

18 volt cordless drill, extension, socket and adapters for RV scissor stabilizer jacks
This setup worked on both the four stab-jacks on our travel trailer and the two rear scissor jacks on our fifth wheel. We keep the drill right inside a basement hatch door so it’s easy to find during both setup and breakdown of the trailer.

Raising and lowering the jacks takes 2 seconds!

This goofy radio is in the Rigid Drill Kit (along with an impact driver & regular drill & lithium ion batteries and charger). We love it even more than the other stuff!
Camco makes a special Leveling Scissors Jack Socket that replaces those three pieces, but there is no 8″ extension. Personally, I like the long extension because you don’t have to crawl in so far to make contact with the scissor jacks.
Last year we bought a Rigid drill kit which includes a regular 18 volt drill, an impact driver (awesome for the lug nuts when changing a tire) and a radio as well as two rechargeable lithium-ion batteries and a charger.
After going through three different 18 volt drills during our years of RVing and sailing, we’ve been really impressed with this Rigid kit. The Lithium-Ion battery charges up in about 15-20 minutes and it’s good for a really long time.
The kit comes with two batteries, so we use one for the drill and one for the radio. And what a hoot it is to have a portable radio. In this day and age of slick electronics, we’ve gotten such a kick out of this thing…
Cleaning the RV
No matter where we park, the slide roofs need attention before we bring them in. Either they are dusty, in the desert, or they are covered with twigs and leaves, in the woods, or they are wet from rain. Slide toppers might help with this, although I have heard that they tend to make noise in high winds, sag over time, and sometimes end up with leaves and twigs trapped underneath.
Mark has a long handled squeegee he uses to get the water off, a broom for the leaves and branches, and a California Duster and/or broom for the dust. Getting up on the roof is also useful for checking out all the rooftop items like hatches, TV antenna, solar panels and wiring. His favorite cleaning tool for all this is a telescoping scrub brush that we used for cleaning our boat.
He just loves this soft bristled brush. Murphy’s Oil Soap mixed with water is a good solution to wash the roof. To get rid of black scuff marks on the outside of the rig, he uses Mr. Clean Magic Eraser sponges.
Telescoping Ladder
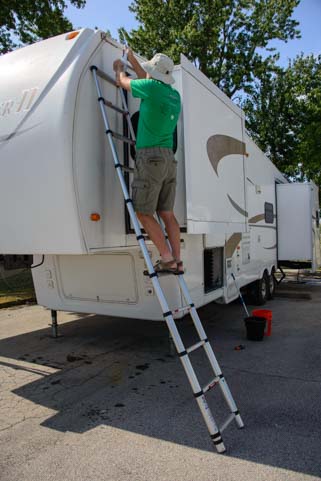
A second ladder is really helpful!

.
The first trailer we lived in full-time didn’t have a walk-on roof, and the signature of an RV without a walk-on roof is that it doesn’t have a built-in ladder.
We got a telescoping ladder so we could get up on the roof, and we have kept that ladder and used it ever since, even though our fifth wheel has a built-in ladder.
You may not think you need a second ladder when you’ve got one on the rig already, but polishing the front cap is one job where you do.
Washing or working on any part of the rig that is high up and out of reach of the ladder on the back is much easier with a second ladder, including the high corner of the rear end opposite the built-in ladder!
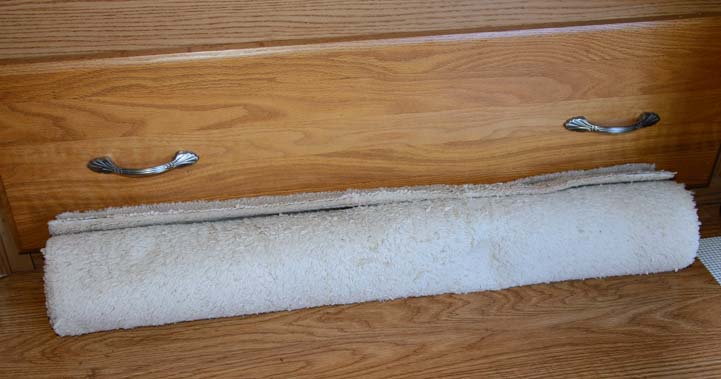
RV Patio Mats
A beautiful patio mat extends your living space and defines your outdoor area in an elegant way, and we love ours.
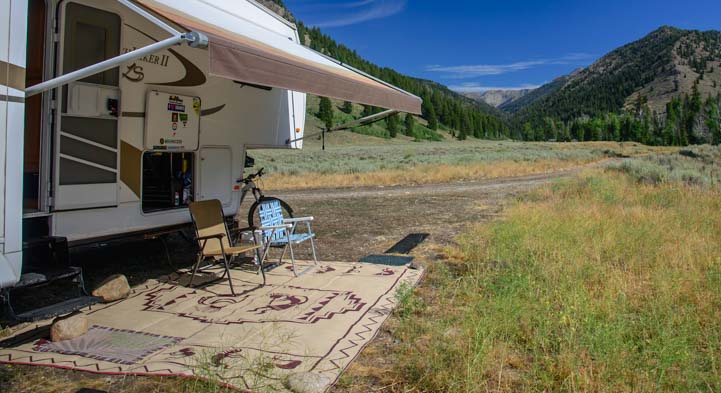
A classy patio mat extends your living space into the outdoors.
But they can be pricey if you’re just getting started with weekend RVing. An alternative is to get some green indoor/outdoor carpeting. We had this with our popup tent trailer, and it fit the bill perfectly (and our friends who now own our popup still use it!).

Save a few bucks and use green indoor/outdoor carpeting!
Waxing the Fifth Wheel Cap
Unfortunately, there’s no quick fix for getting the fifth wheel cap to have a deep shine. It’s made of ABS plastic and shows every swirl mark of a first-pass at waxing. The only way to bring back the luster it had when it was new is to use an orbital buffer and fiberglass polish and a whole lot of elbow grease.
Mark likes the 3M Marine Cleaner & Wax that we used on our sailboat. Unfortunately, you’ve gotta do this a bunch of times, and the worse condition the front cap is in, the more times it takes. But eventually you can get the shine back. Just be sure you keep the buffer moving lightly across the surface at all times so you don’t dig a hole in the plastic!
We have more cleaning tips for giving an RV that extra shine while boondocking here: Tips for Washing an RV While Boondocking
Truck Overloads
Timbren SES Suspension
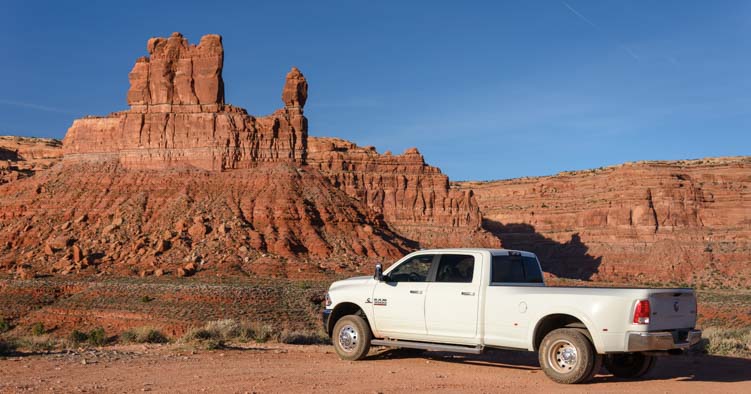
Our 14,000 lb. fifth wheel was right at the weight limit of what our 2007 Dodge 3500 could tow, and the pin weight of the trailer along with all the things we carry in our truck loaded down the bed of that truck quite a bit.
When hitched up, although the rig looked quite level, the truck sagged a bit, leaving the front wheels a little light and giving the truck a tendency to wander.
To alleviate this, we installed a Timbren Suspension Enhancement System between the axles and leaf springs of the truck. These are solid rubber donuts (not airbags) that fit between the axle and the leaf springs. That made the truck sit better and wander less.
We had that setup for eight years. In 2016 we purchased a 2016 Dodge Ram 3500 dually truck which had a much higher weight capacity in the truck bed and could handle the pin weight of the trailer along with the additional weight of the water jugs and leveling boards we carry in the bed of the truck much better.
How to Put Diesel Exhaust Fluid (DEF) in a Truck
Our 2016 Dodge Ram 3500 has a five gallon Diesel Exhaust Fluid tank which needs to be refilled every thousand miles or so. We’ve got some tips for where to get this stuff cheap and how to get it in the truck without spilling here:
How to Put Diesel Exhaust Fluid (DEF) in a Truck and Which Brand is Cheapest
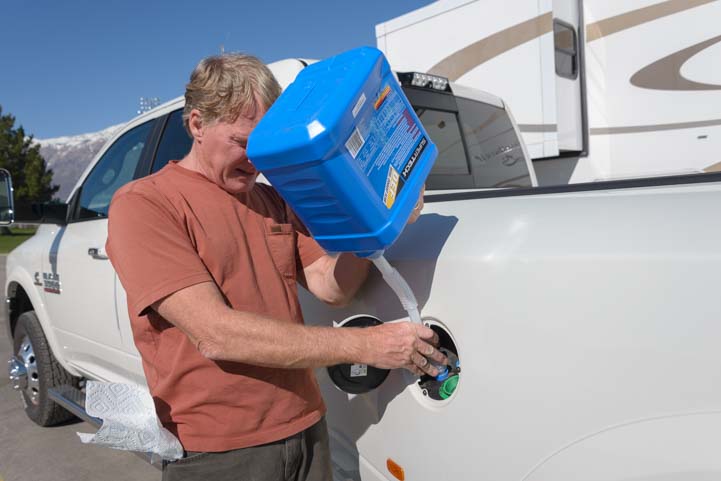
Putting DEF in a diesel truck is a new necessary evil, but there are tricks to make it cheap and easy…
RV Grill Operating on the RV’s Propane Tanks
Mark loves to barbecue, and ever since our first popup trailer, we’ve had a wonderful, small RV barbecue, the “RV sidekick grill.” It comes with a mounting kit to hang it on the side of an RV. Flipped sideways, this same kit becomes legs so the grill can stand up off the ground.
We had this grill installed on the side of both our popup tent trailer and travel trailer, but with the fifth wheel, Mark installed an extra gas line and valve coming from the RV’s propane tanks so it can run from them. A quick disconnect LP gas hose goes from the grill to this gas line.
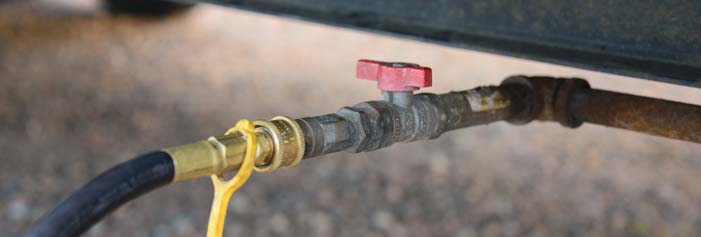
An extra gas line and valve lets the grill runs from the trailer’s propane tanks.
We’ve had this little grill since 2005 and it still makes a great meal!
RV Water Toys – Water Spigot Connections
In many dry camping campgrounds where there are water spigots available but no water hookups at the campsites, the water spigots don’t have threads. We’ve found a water bandit makes it possible to thread our water hose onto the spigot so we can fill up with water easily.
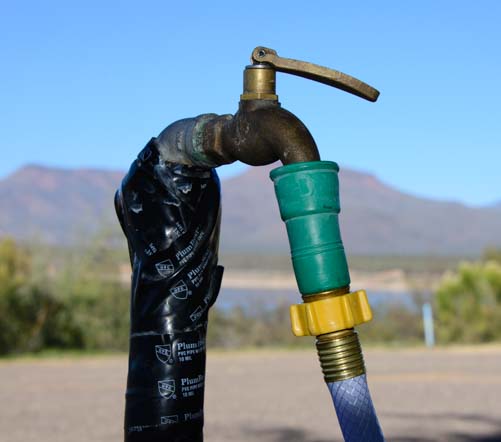
The water bandit makes it possible to connect a fresh water hose when there are no threads on the spigot.
In cases where we get water hookups and leave the water hose connected to the trailer, we screw a 90 degree elbow onto the trailer so the hose can hang straight down rather than come out of the our city water connection horizontally and then droop down towards the ground, putting pressure on the connection and potentially causing drips. We discovered this nifty little elbow when we lived on our boat in a marina before our cruise.
In addition, a water pressure regulator keeps the water pressure down to a level inside the rig that prevents any unexpected damage or leaks. A quick release makes it easy to connect and disconnect the fresh water hose. Mark also keeps a Y valve in his water hose arsenal. This is handy if the rig is connected to city water and we want to fill pails with water for washing the truck, or if an RV dump station has only one water spigot and we want to fill our fresh water tanks and run the black water flush at the same time.
Lots of folks like to attach a water filter as well. We used various filters at first, but no longer use any, although we periodically add a cap full of bleach to the fresh water tank. When we got a new fresh water tank, we were surprised that there was no sludge of any kind inside the old tank, even after 7 years of use.
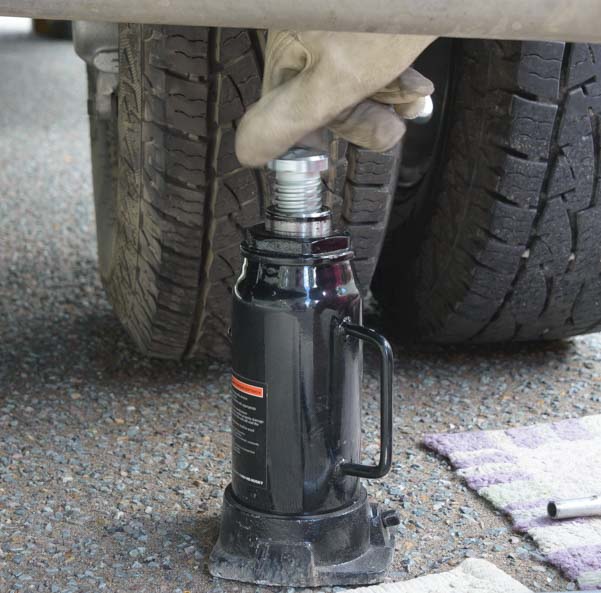
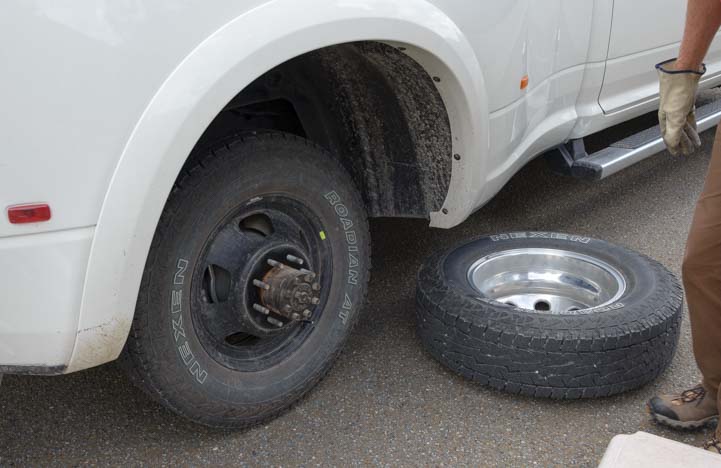
Changing the Inner Rear Tire on a Dually Truck
We have a Dodge Ram 3500 dually truck with a B&W fifth wheel hitch, and wouldn’t you know it, the first time we had to change a tire on it, it was the inner rear tire. Ugh!
We had always wondered exactly how you went about doing this, and we found out. Here is a blog post that explains the entire process:
How to Change the Inner Rear Tire on a Dually Truck
INDOOR RV TIPS and TRICKS
Creating STORAGE SPACE with Seating for Four in the Dinette
We replaced the two chairs in our dining area with two wonderful storage ottoman benches, and this has increased our storage space by quite a bit. The storage ottomans we chose have a nice faux leather padded top that is really comfy to sit on, and they have voluminous storage space inside.

Our dining area – lots of storage and seating for four.
We have his-and-hers benches, and we keep our camera gear in them. The great thing is it got rid of all our clutter and gave us a place that is low down in the trailer and slightly ahead of the trailer’s axles (a smoother ride) where we could make custom padded storage for this delicate gear.
For more info and more pics of our benches, see this blog post about our setup: Making STORAGE SPACE in an RV.
You can buy the storage ottomans we purchased HERE, and you can get ideas of other brands and sizes of storage ottomans on the market HERE.
Protecting the Carpets Under the Slide-Outs
The carpets take a beating as the slide-outs roll in and out. Some slide-outs aren’t quite square and one wall or the other presses particularly hard on the floor while driving. You can buy fancy carpet protectors that fit under the slides. We went a cheaper route and bought a package of four flexible plastic cutting boards.
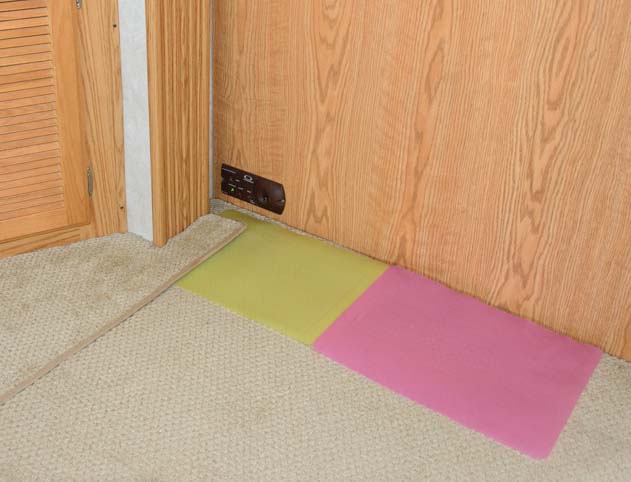
Flexible cutting boards taped together protect the carpet under the slide-outs.
We used packing tape to tape two of these together, end-to-end, and each pair fits under the slide-out walls perfectly yet are thick enough to protect the carpets. I keep one pair under one slide-out wall while driving, because that slide is crooked and its one wall gets wedged against the floor pretty tightly. The other slide-out walls hover above the carpet as we drive, so I pull the plastic cutting boards out from under them so they don’t get lost underneath while in transit.
Keeping the Cabinets Closed
After having a cabinet door fly open while driving over a bumpy road, causing two unbreakable Corelle bowls to fly across the trailer and break in half, we now latch every cabinet door with 6″ bungee balls. For drawers we use mini 10″ bungee cords with a hook at each end, hooking the top and bottom drawer handles.

Bungee balls and bungee cords ensures the cabinets and drawers all stay closed.
Rolled up Carpets
We have a large pots-and-pans drawer that occasionally likes to open. We roll up our throw rugs and place them so they can’t unroll in front of the drawer to keep it closed.
Rolled up throw rugs keep this big pots and pans drawer closed while driving.
Rubber Shelf Liners
Rubber Shelf liners are invaluable, keeping everything in its place on each shelf as we travel. We try to make sure no plates, mugs or glasses are touching each other when we set out.
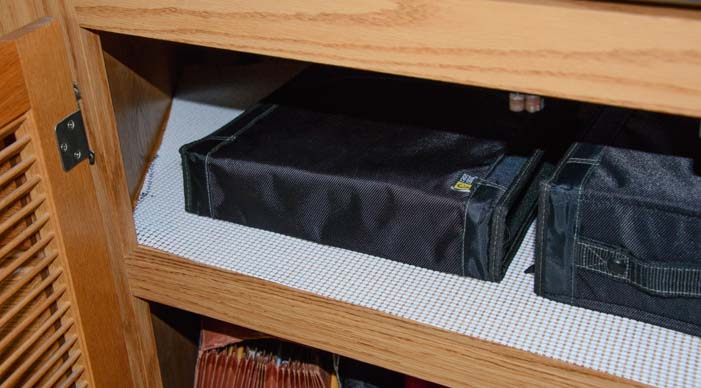
Shelf liner keeps things in place when we drive
Closet Organization with Plastic Drawers
Our bedroom has a marvelous 8′ wide closet with sliding doors on it, but the interior is just open space with a rod for hangers. We don’t use it as a hanging closet (we have a different closet for that). Instead, we put stacked plastic drawers inside to give us more drawer space as well as a horizontal surface on the top.

We created more drawer space in one closet with lightweight, inexpensive plastic drawers.
These drawers don’t latch closed, so Mark drilled a hole through each drawer and the frame, and we simply slip a screw through each hole to keep it closed as we drive.
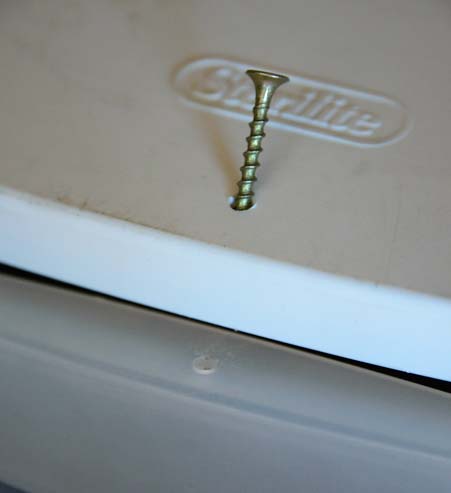
A screw through each drawer keeps it from opening in transit
Book Organization with Special Bins
We like to keep our heaviest items, like books, on the floor, as shelving in an RV tends to be quite flimsy. I found an awesome line of Rubbermaid “All Access” bins that have a clear plastic latching door on the front. Ours fits neatly under our desk (which we never use as a desk, so it’s wasted space). We can move the whole thing easily, can load it from the top easily and can get at the books from the front easily.
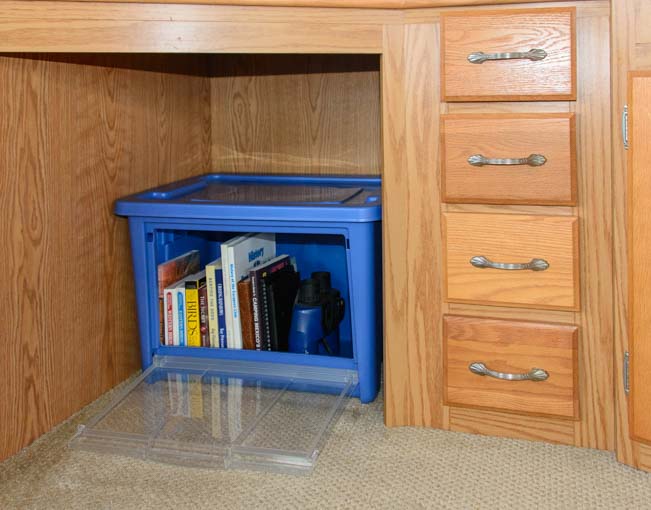
Rubbermaid’s “All Access” bins have clear front opening doors!
Dish Drying Mat
We do several small loads of dishes everyday, and I just love our little dish drying mat. It soaks up all the water, and once I move the dishes off of it I can hang it up to dry. Every so often I throw it in the laundry with the dish towels, and it comes out just fine.

A dish drying mat sops up water, can be hung out to dry and thrown in the laundry.
How to Defrost an RV Refrigerator in 20 Minutes!
Propane RV refrigerators build up a lot of frost very quickly. After trying many different methods for defrosting our fridge over the years, we’ve outlined the steps we use to get this job done quickly:
How to Defrost an RV Refrigerator in 20 Minutes!
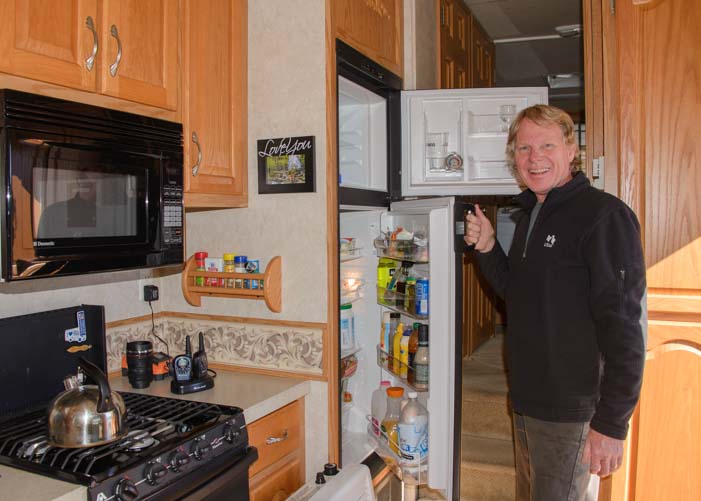
Defrosting the fridge doesn’t have to be a big nasty chore…
LED Wax Pillar Candles
I love romantic lighting, and there’s nothing like candles for that. But having an open flame isn’t great. Sailing friends of ours introduced us to pillar shaped LED candles made of real wax, and they are delightful. We’ve had ours for five years now, and we’ve had to change the batteries just once. They are wonderful for dim lighting in the pre-dawn hours or late at night, and they are a nice light around the rig when we watch a movie. The best part is they really look and feel like real candles, but you don’t have the risk that comes with an open flame.

LED pillar candles add warmth and create romantic mood lighting
Departure Checklist

All our mistakes on one page
with the worst ones underlined!
We thought we could memorize all the things that need to be done when we pack up the rig for towing, but a few mishaps taught us otherwise.
We now have a checklist taped inside the same cabinet that houses the main slide-out controls.
A quick glance before we leave ensures us that indeed all the hatches are closed, the shower door is latched, the window-mounted hummingbird feeder is not stuck on a window somewhere, etc.
This list is a comedy of errors made over several years of RVing. I’m sure more items will be added in the future!
Simmons Beautyrest Mattress
An RV can be outfitted with ordinary residential furniture, and we have upgraded our recliners to comfy La-Z-Boys.
More important for full-time RVers, there is no need to sleep on some funky RV mattress every night. We upgraded our mattress to a Simmons Beautyrest and just love it.
One important note is that many RV mattresses are non-standard sizes. An “RV Queen” is shorter than a standard Queen, and an “RV King” is narrower than a standard King. Here’s a chart showing the differences:
|
Standard |
“RV” Size |
| Queen |
60″ x 80″ |
60″ x 74″ |
| King |
76″ x 80″ |
72″ x 80″ |

A good night’s rest…
In most rigs that have a Queen bed, the floorplan clearly states whether it is an RV Queen or a regular Queen. However, in virtually all RVs that have a king bed, it is an RV king. If you are buying an RV with a king bed and think you might want to upgrade to a residential mattress someday, make sure there are 4″ of extra width on the sides so the mattress can fit, even if it hangs over a little.
Laptop Lap Insulator
I mentioned that we don’t use our desk, and that’s because we use our dining room table for writing things out by hand and we use our laptops on our laps in our recliners. To keep from frying our legs with our laptops, we each have a laptop sized thin piece of foam that was part of the packaging of a solar panel. If you don’t have that handy, there are laptop lap insulators that can do the trick.

A thin piece of foam keeps our legs from cooking under our laptops
Cleaning the Ceiling
We have a fabric ceiling liner and twice we’ve had to clean a stain from it. Each time we used spray bleach and the results were miraculous. You couldn’t see where the stain had been. Just make sure you cover everything nearby before spraying bleach in the air or you’ll have not just a clean ceiling but white spots on the rugs and upholstery too.
HEALTH and COMFORT in the RV LIFE
Living in an RV is not all that different than living in a stick-built house, so anything you enjoy in a conventional life is more than likely going to be something you can enjoy in your RV life. Here are some goodies that we use everyday, that have made a significant difference in our lives, and that we will continue to use daily no matter what kind of home we live in:
Amazing Grass

Helps keep fair haired people with thin skin from bleeding!
Mark has found that when he works around the rig, it is really easy for him to get little cuts and blood spots on the backs of his hand his hands. This turns out to be common with fair haired (red haired) formerly freckle-faced guys over 50. After some research, we found that the remedy is bunches of Vitamin K, and it turns out that wheat grass is loaded with Vitamin K! It has lots of other beneficial nutrients as well.
As long as Mark drinks a small dose of wheat grass everyday, his hands are as tough as when he was 20. But miss that wheat grass for a few days, and the next time he does any work around the rig, the slightest flick of his hand against something breaks the skin and he’s bleeding again. The best brand we’ve found is Amazing Grass.
Sound weird or too good to be true? We’ve suggested this crazy remedy to formerly red-haired friends, and they are now big believers and wheat grass connoisseurs too. Mark mixes it with fruit juice and actually loves the flavor! For those who don’t like veggies, the claim is that a spoonful of this wheatgrass powder is akin to a bushel basket of veggies. I don’t believe that myself, and I keep putting broccoli on our plates, but I think this stuff is worth its weight in gold when it comes to toughening up thin skin.
Hand-held Electric Massager
As former athletes, we’ve both spent a lot of time looking for ways to soothe aching muscles. We’ve owned a lot of different hand-held massaging tools over the years, including the very popular massager, and they’ve all been okay. But many of them ultimately wound up in yard sales because they had bad habits of pinching skin or were awkward to use.
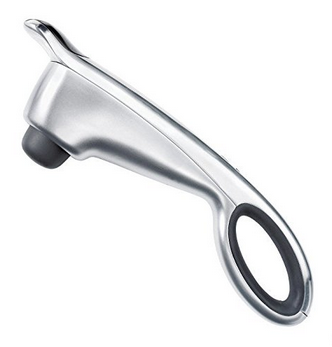
electric massager
We’ve found that the hand-held massager is really fantastic. Because it has just one ball head on it (rather than the more common and goofy twin ball heads), you can place it over any sore spot and get instant relief. Rub it slowly on your leg muscles after a hike or bike ride or rub it on that weird spot in your neck after you sleep funny and wake up unable to turn your head, and you’ll feel better right away.
This massager was a lifesaver for me after a bad cycling accident I had years ago that messed up my shoulders and collar bone for a very long time, and Mark recently relied on it heavily when he wrenched his back. We’ve never had it pinch our skin at all.
The neat thing about these massagers is that they increase the blood and fluid flow in the sore area, which is really helpful for getting nutrients into the injured spot and getting waste fluids out. You don’t need to press hard on it — just place it on the sore area and you’ll feel the muscle relax instantly.
We have had ours for four years now, and we used it both on the boat and in our RV. It’s amazing just how kinked up you can get living in a small space, and it is so helpful to be able to get unkinked in a matter of minutes. We keep it in our living room so it’s always handy.
Sonicare Toothbrush

Sonicare toothbrush
If only these Sonicare toothbrushes (and toothbrush heads) had been around when we were kids! It may seem ridiculous to spend a bunch of money on an electric toothbrush, but brushing your teeth with one of these makes your mouth feel like you just came from a cleaning at the dentist’s office. I’ve used a Sonicare toothbrush for 13 years now, and what a difference it has made in the overall health of my teeth.
One note for boondockers and off-the-grid RVers living on solar power, Phillips, the manufacturer of Sonicare toothbrushes has noted that the rechargeable batteries do not like modified sine wave inverters very much. I read this years ago, and have always charged ours on our pure sine wave inverter. Perhaps the batteries are better in newer models, I don’t know.
Also, for tech junkies who like to collect tech goodies, the magnet inside the Sonicare toothbrush heads is incredibly strong. Mark has saved a few of the magnets from our discarded Sonicare toothbrush heads and has found all kinds of interesting uses for them, including gluing one onto a long stick to retrieve tiny metal objects from hard to reach spots in the bowels of something.
Other RV Tips & Tricks
We have loads of other tips and tricks for RVers on this website. Many of the links can be found here:
RV Tech Tips and Product Reviews
A small sampling is below:
A wonderful website dedicated to RVing tips and tricks is RVtravel.com
Subscribe
Never miss a post — it’s free!
Our most recent posts:
More of our Latest Posts are in the MENU.
New to this site?
Visit RVers Start Here to find where we keep all the good stuff. Also check out our COOL NEW GEAR STORE!! *** CLICK HERE *** to see it!
Below are some of our most POPULAR POSTS (also in the MENUS above)
Buddy - A Journey in Spirit - The story of an event that changed our lives forever.
ARTICLE INDEXES
- RV Tech Tips Articles - A one page index of links to all our RV Tech Tips, RV Upgrades & RV Maintenance articles.
- RV Lifestyle Tip Articles - An index of links to all our RV Lifestyle Tips (finances, boondocking, major repairs, work/jobs, etc.)
- Solar Power Articles - Overview and tutorial articles for how to design and install solar power on an RV or boat
- Product Reviews - An index of links to all of our Product Reviews
RV UPGRADES, SYSTEMS & TIPS
MONEY
FULL-TIME RV LIFESTYLE
- RV Boondocking - Tips for how to live in an RV off the grid
- Which RV Is Best for Full-Time Living? - Transitioning from a house to an RV - Which RV makes the best home?
- Truck Camper Pros and Cons - The GOOD, the BAD and the UGLY!
- Full-time RV Lifestyle Tips - Full-time RVing Logistics - Mail, Domicile, Insurance, Warranties, Saving Money at RV Parks
- Toy Hauler Life - What's it like to live in an OPEN BOX Toy Hauler?
- What are the MOST IMPORTANT FEATURES in a Full-time Fifth Wheel? - For anyone planning to live in an RV!
- Internet & Phone Access for RVers - An inexpensive, minimalist solution for internet access on the road
- RV Dump Stations & Composting Toilets - How to do the dirty deed at the RV dump PLUS RV Composting Toilet tips
- Choosing a Trailer for Full-time RVing - Why the payload capacity is so important
- Learn RVing the Fun Way!! - Go Cheap, Go Small, Go NOW and have a blast in little RV!
- Free RV Campsites - Resources for locating campsites for boondocking
- Glimpses of the Full-time RV Life - Anecdotes from the road and essays about living the RV dream.
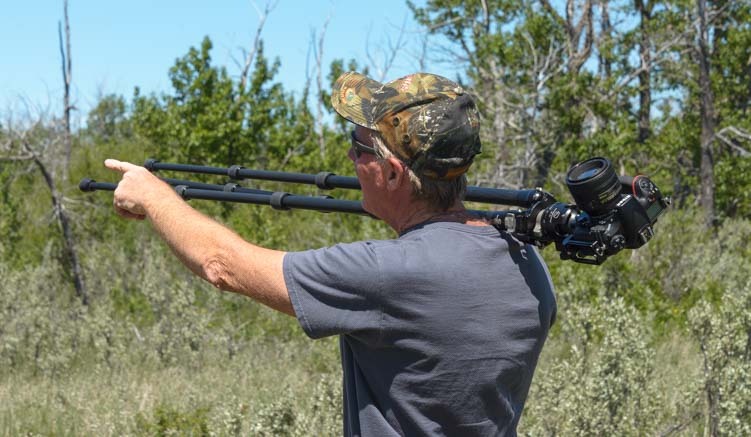
- Travel Photography Tips! - All the cameras, gear, books, blogs and tools we used to learn to take great pics!
GEAR STORE
- Gear Store - A list of the goodies, equipment and gear we've found useful in our RV lifestyle!