Grand Canyon History: A Navajo & a Mule Link Us to the Past

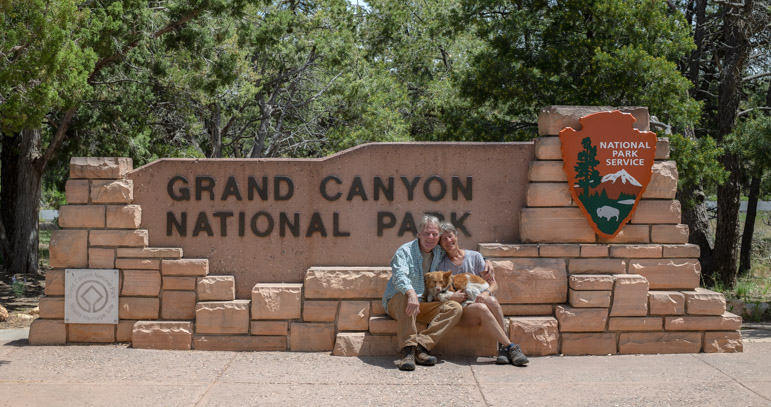
The Grand Canyon is most beloved for the raw power of its majestic views, but Grand Canyon history is fascinating too. Learning some of the stories behind the development of this world famous tourist destination and being able to make a personal connection to that history through the world famous mule rides (of all things!) was thought-provoking…and fulfilling.

Grand Canyon History and Mules!

Our Grand Canyon visit took a very special turn when we met this man!

As we have discovered America’s history during our many years of RV travel, I have felt a special attachment to the late 1800s and early 1900s because, as a child, my much adored great-uncle, who was born in 1885 and was a professional artist, lived with my family until his death in 1971 when I was 11.

Throughout my life, whenever we’ve encountered anything to do with his era, I’ve thought of him and wondered whether he saw it, or was aware of it, or what kind of stories he might have heard about it from friends and relatives.

Near the end of his life, he would often say that he’d lived during a period of history that had seen more change than any other: growing up with horses, buggies and trains for transportation in the late 1800s, witnessing the transformative rise of the automobile followed by the airplane in the early to mid-1900s, and finally flipping on a TV to watch astronauts ride a rocket ship to the moon and back in 1969.

Puppy checks out the train tracks

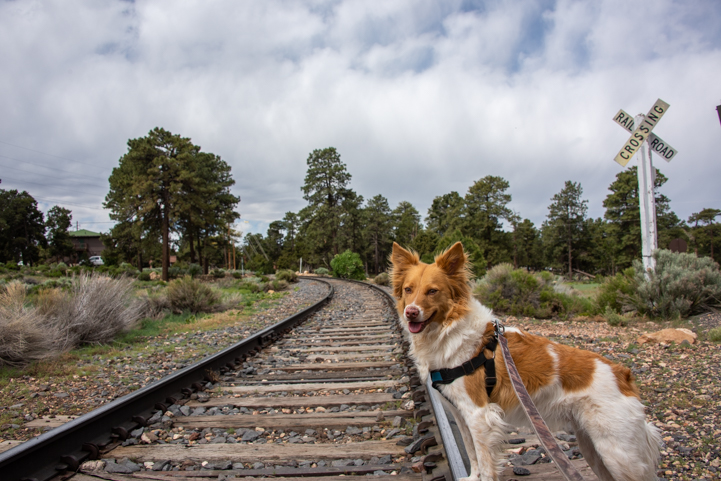
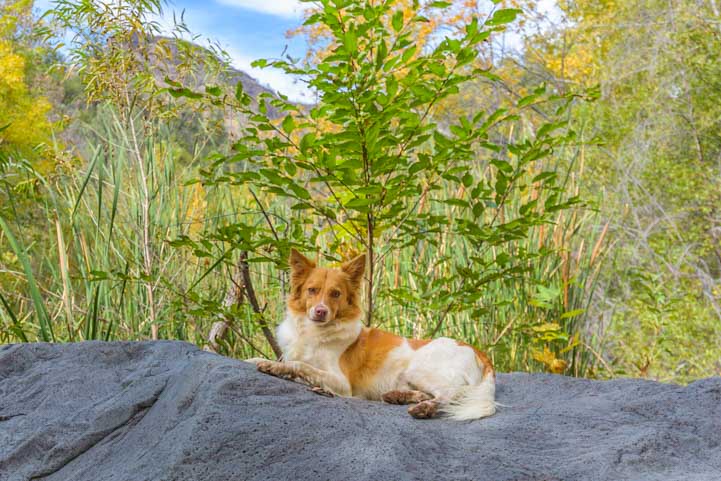
Buddy checks out the train tracks that travel through time at Grand Canyon

One of his treasured memories from his young adulthood was the trip he took to the Grand Canyon around 1907. Sitting around the dinner table in urban Massachusetts in the 1960s, we heard about his ride on a mule down the Bright Angel Trail and the beauty of the El Tovar hotel.

I couldn’t picture any of it, though. Not the Grand Canyon, not the narrow cliffside trail, maybe the hotel, but definitely not my very ancient great-uncle as a nimble young man astride a mule!

Grand Canyon Fodors Guide
Hikers on Bright Angel Trail in Grand Canyon National Park

The beginning of the Bright Angel Trail in Grand Canyon National Park.
Hikers and mules pass each other on these narrow cliff-side trails.

Hikers on Bright Angel Trail in Grand Canyon National Park

Bright Angel Trail, like most trails in the Park, has lots of exposed areas where you’re hiking right on the edge!

So, on this trip to Grand Canyon, I wanted to peel back the layers of what modern tourists see at the Grand Canyon, especially Grand Canyon Village, and try to envision something of what the experience might have been like back around 1907 for a newly minted Art Institute of Chicago graduate (class of 1905) who was in his early 20s.

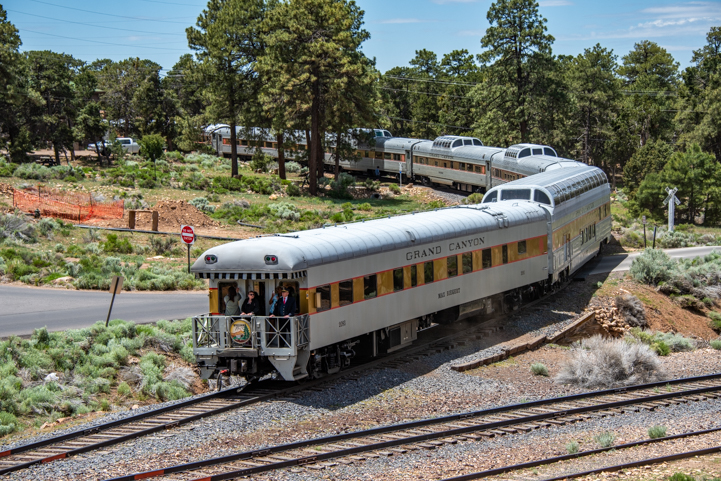
He rode the train from Chicago to get to there, of course, and today thousands of people come to the Grand Canyon by train everyday on the same tracks that the Santa Fe Railraod completed in 1901.

Grand Canyon history - the Railway train prior to 1910

A train at the Grand Canyon depot before 1910 when it was still just a humble shack!

The arrival of the train in the tiny settlement on the edge of this vast and charismatic chasm changed everything about it.

Settlers had lived in the area since the mid-1800s, and everyone who dared make a go of it struggled to make a life for themselves in the harsh and remote land. Most were miners and cattle ranchers. The few people who saw the tourism potential built their own private roads from Flagstaff and Williams through 70 miles of forest to their own rustic properties at different points along the rim. Many homesteaded their land.

Grand Canyon history - the arrival of the train at Grand Canyon National Park

The arrival of the Grand Canyon Railroad changed everything about Grand Canyon.

Before the train arrived, only a trickle of die-hard travelers would visit Grand Canyon. They would take the train to Williams or Flagstaff and then catch a stage coach or rent a buggy to travel one of the private roads that led to a proprietor’s guest house or tent somewhere along the rim.

What is now an hour and a half long ride in a car generally took two bumpy days by horse-drawn stage coach, and the accommodations for most travelers visiting the the Grand Canyon were simple tents.

Grand Canyon Railway arrival at Grand Canyon National Park 2

The train took just a few hours to get to Grand Canyon whereas a stage coach ride took two days!

The big money railroad men recognized the immense tourism potential of the Grand Canyon, and after completing the train tracks, Santa Fe Railroad went on to build a stunning resort hotel in 1905. They called it El Tovar and positioned it right at the end of the train tracks next to the Bright Angel Trail that took hikers down into the Canyon.

At this point in time, destination spa hotels in remote locales were rare or didn’t even exist. Not only were the rooms at El Tovar beautifully appointed, but there were two barbershops, a solarium, hot and cold running water, and the freshest food imaginable.

In addition, the El Tovar hotel had a chicken coop for fresh eggs, two roof gardens, a music room, an art room, a billiard hall and a gift shop! Staying there was an elegant and all inclusive affair.

It was the finest of high class living in a place that had never offered visitors much more than the most basic, rustic accommodations.

Grand Canyon Guide Book

Unlike today’s tourists, many of whom drive straight to the rim, say “WOW!” a few times, get a selfie and then leave, a journey to the Grand Canyon in those days was a trip that deserved a fairly long stay, making those barber shops a necessity.

El Toval Hotel and Grand Canyon history

El Tovar Hotel.

A room at El Tovar cost $4.50 a night as compared to just $1.00 to $3.00 for a tent or rustic hotel room. However, a stage coach ride cost $15 while the train was a mere $3.50. (For reference, rooms at El Tovar are going for $394 per night now!).

No doubt customers did some quick calculations and realized there was no reason to undertake a two day bone jarring journey on a small private road to a second rate hotel or tent when you could watch the world go from a comfortable window seat on a train for a mere three hours and stay at a top flight resort for a similar outlay, depending on how long you stayed.

Rooftop of El Toval Hotel and Grand Canyon history

El Tovar has a beautiful roof line.

Not surprisingly, the stage coach lines and livery stables went out of business shortly after the Santa Fe Railroad began bringing tourists to El Tovar and other hotels at the head of the Bright Angel Trail. The smaller hotels and guest tents that were miles away from Bright Angel Trail along Grand Canyon’s rim soon went out of business too.

Sadly — and shockingly — in the end, only one of the original proprietors that homesteaded and initially developed the land on the rim of the Grand Canyon made a profit on the sale his property!

The hub at Bright Angel Trail eventually became known as Grand Canyon Village, and the tourism age for this iconic spot was off and running. It would be decades before the other areas along the South Rim were further developed or redeveloped.

El Tovar Hotel in Grand Canyon Village

El Tovar has a unique look with wonderful, huge, shady porches.

One such place is Grandview Point, 13 miles from the Bright Angel Trailhead. Today, it is just an overlook with a parking lot and a very steep trail heading down below the rim past remnants of the mine that once put Grandview Point on the map. However, nothing remains of the Grandview Hotel, and it is hard to imagine where it might have stood.

With all of this info swimming in our heads (the stories are told on plaques along the Rim Trail in Grand Canyon Village and in a PDF document I’ve linked to at the bottom), we gazed at the El Tovar Hotel in wonder.

There’s a charming beer garden out back with a view of the Grand Canyon that is a delightful place to while away the afternoon.

Beer Graden at El Toval Hotel Grand Canyon National Park 2

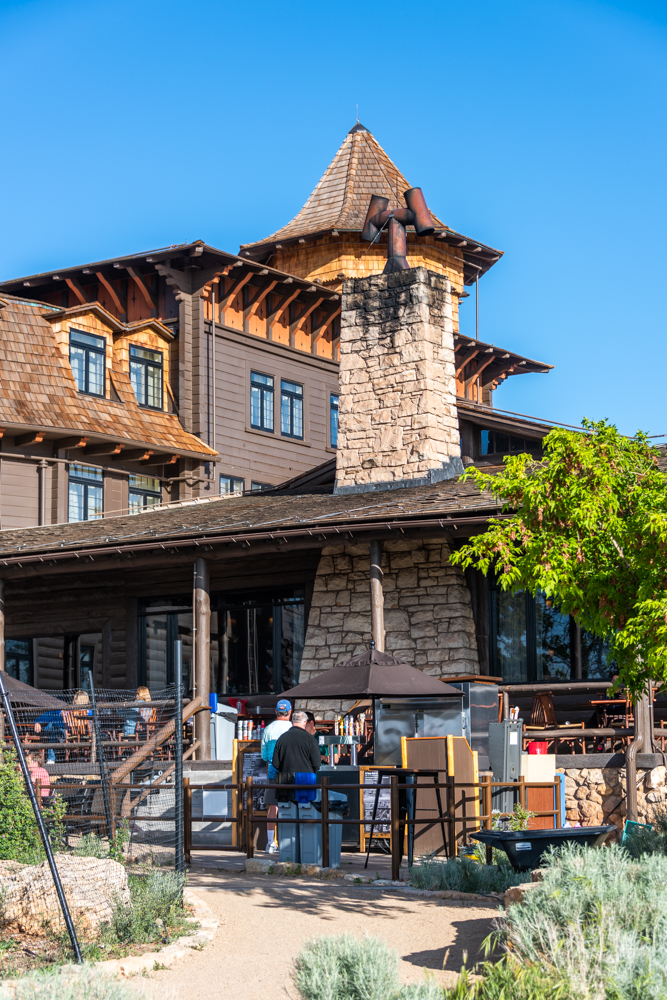
El Tovar Beer Garden.

One of the nicest features of the El Tovar, to this day, are the big shaded porches that are filled with wooden rocking chairs and porch swings. This is yet another perfect place to unwind with a world class view.
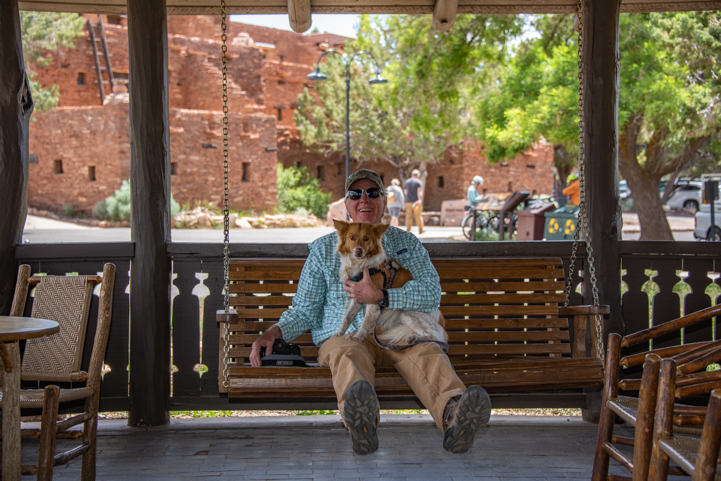
Swing on the porch of El Toval Hotel Grand Canyon National Park 2

Just kicking back.

Arizona Delorme Atlas

The Bright Angel Lodge is another historic hotel that is very close to El Tovar. Originally a cabin and some tents dating back to 1885, it was renovated 50 years later by Mary Jane Colter into a complex that incorporates several historic buildings. A few of the doors have vivid Indian designs on them.

Elaborate door at Bright Angel Lodge: Grand Canyon history in the Park

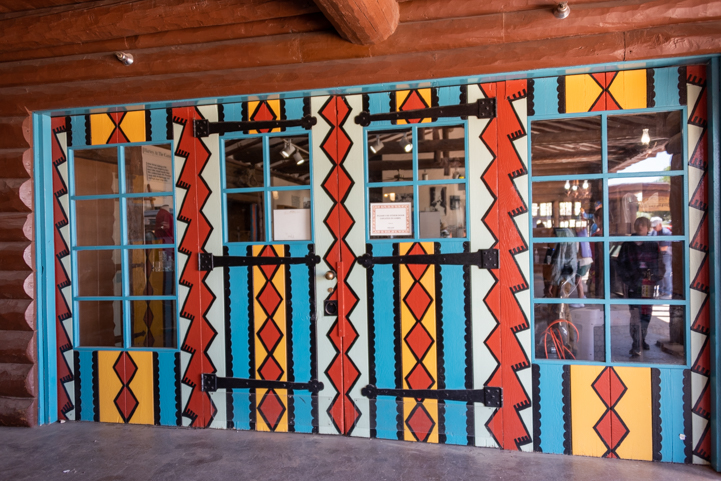
Bright Angel Lodge has some very colorful doors painted with an Indian motif.

In the 1930s Mary Colter began exerting a strong influence on the construction of new buildings at the rim. She designed the Hopi House to resemble the stone pueblos of the Hopi Indians nearby.

Hopi House: Grand Canyon history in the National Park

Hopi House has some fabulous Indian artwork inside.

Other artists had studios in fantastic dwellings that hang right out over the rim. What an inspiring place and view for a studio!

Kolb Studio: Grand Canyon history in the National Park 2

Kolb Studio.

Kolb Studio: Grand Canyon history in the National Park

Kolb Studio.

Lookout Studio: Grand Canyon history in the National Park 2.jpgLookout Studio

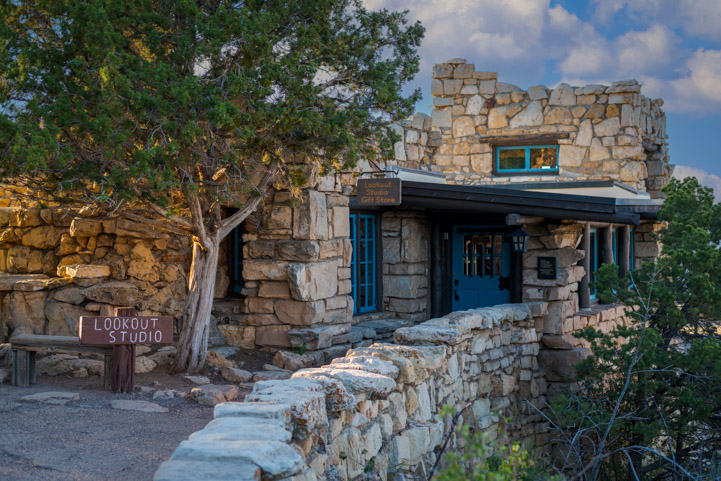
The Lookout Studio was built under Mary Colter’s guidance in 1914

In Grand Canyon Village at Grand Canyon National Park

All of the historic buildings in Grand Canyon Village are just steps from the rim.

This was all wonderful and interesting to learn about, but it was the mules I was really after. I wanted to make a connection to my great-uncle’s past, and it seemed a great way to do that would be to get a photo of the mules coming up the Bright Angel Trail after their overnight at Phantom Ranch at the bottom.

When I asked around to see what time they usually returned, a mule ride leader I saw giving instructions to a group of customers told me they arrived between 1:00 and 1:30, although “it’s an inexact science!”

I got to the trailhead at 1:00, and a bus stop attendant right there told me they hadn’t come up yet that day. Yay! So, I stood in the sun waiting patiently for two hours while Mark and Buddy amused themselves in the shade by El Tovar. But the mules never showed up!

Bright Angel Trail: Grand Canyon history at the National Park

I’m here. But where are the mules?

Hiking Grand Canyon

I spoke with a concierge at Bright Angel Lodge, and she told me they actually come up between 11:30 and 12:30 at this season due to the heat. So, I arrived around 11:00 the next day and milled around at the rim for a while first. Suddenly I caught a whiff of mule sweat and dung. Oh no! Were they already here?

I rushed over to the mule corral next to the bus stop at Bright Angel Trailhead, and there they were, lined up side by side. A wrangler was attending to each one. The sight was something from another era.

Grand Canyon Mule and wrangler at Grand Canyon National Park

A wrangler was tending to the mules after their two day journey down to Phantom Ranch and back.

I ran over to the wrangler and quickly got swept up in conversation about the mules, the rides and the history. His name was John, and he’d been guiding the mule rides since December, although he’d done guiding elsewhere for many years.

He proudly told me that this mule outfit had taken a million people in groups of less than 10 at a time down to Phantom Ranch and back on the narrow, twisting, cliff-hanging Bright Angel Trail since they began operations in1890, and not one mule, not one wrangler and not one guest had ever died.

Grand Canyon Mule named Cholla and wrangler John at Grand Canyon National Park

John and friendly mule Cholla (she is one of the good natured mules that guests get to ride)

He casually mentioned that people die rafting the Colorado River at the bottom of the Grand Canyon all the time, and that people fall off the edge to their deaths quite frequently too.

Sitting on the edge of Bright Angel Trail in Grand Canyon National Park

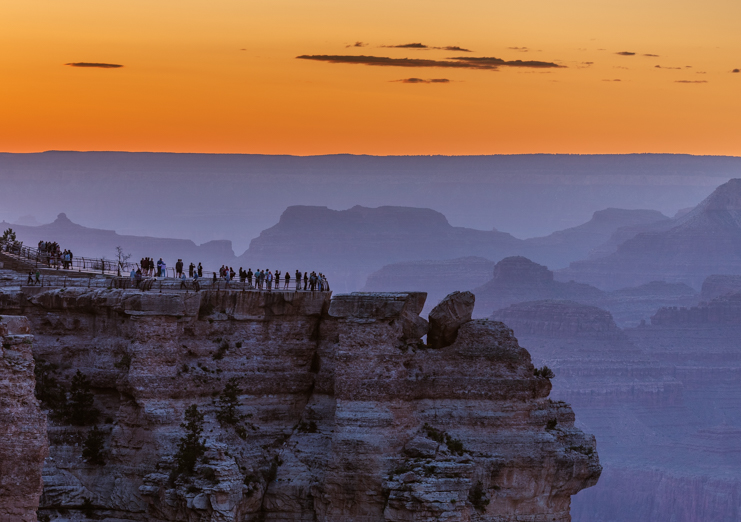
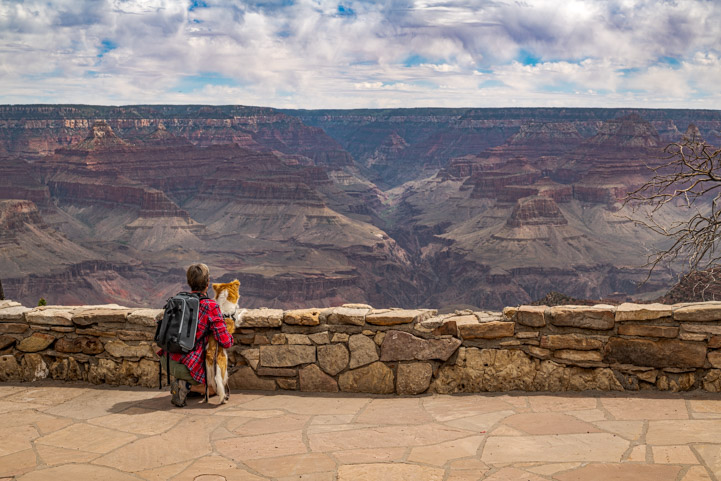
It’s tempting to get yourself right out to the very edge, but it’s not always a good idea!

Over the Edge at Grand Canyon

“These mules are the safest way to get to the bottom of the Grand Canyon,” John said earnestly.

For inexperienced riders, though, I’ve heard the several hour long journey can leave you very sore and struggling to walk when you get to Phantom Ranch! And then you have to ride your mule back out again the next day!

I asked him if mules are stubborn, and he said that they’re actually super smart.

“They can sense 32 different things that might go wrong if they put their foot in a certain place, and they just won’t take the risk if they think it’s unsafe.” And they hold their ground on that opinion!

He gestured to another wrangler, Simon, and said that he’d been guiding these Grand Canyon mule rides for 16 years. John said he’d learned a lot from Simon.

Simon introduced himself as a Navajo, and when I asked if he’d mind if I took a photo of him with his mule (named Paco), he not only posed next to Paco but quickly mounted him for another photo.

Grand Canyon Mule named Paco and wrangler Simon at Grand Canyon National Park

Ride leader Simon and his trusty mule, Paco.

Once seated on Paco, Simon began talking about the meaning of the Grand Canyon to the Navajo and how it is a sacred place for them. He loves being able to bring visitors into this beautiful canyon that he holds so dear, and share God’s wonder with them.

He went on to describe a huge monolith stone that is shaped like an Indian face that you come to after going through the second tunnel on the Bright Angel Trail descent. It is a sacred rock for the Navajo, and they refer to its spirit as the Keeper of the Canyon.

Bright Angel Trail first tunnel Grand Canyon National Park

This is the first tunnel on Bright Angel Trail. Simon told me that after the second tunnel you come to a huge stone that looks like an Indian face which the Navajo refer to as the Keeper of the Canyon.

“When we reach that point in the trail, I always say a prayer for our group, asking God for a safe journey for everyone on our way to Phantom Ranch and for a safe journey home the next day. In English it goes like this…”

He then recited the prayer.

Grand Canyon mule wrangler Simon and Mule Paco at Grand Canyon National Park

Simon recited the prayer he says each time he takes a group of guests down Bright Angel Trail.

I was touched by his sincerity and openness, and I imagined his guests sitting on their mules and listening to him saying this prayer to the Almighty while they were next to the towering rock Indian face.

Then he said, “In Navajo it goes like this…” and he suddenly launched into the prayer in Navajo.

My mouth fell open and I felt a shiver run up my spine…I was mesmerized watching him as he gazed up at the sky saying this lovely prayer in the language of his forebears.

Grand Canyon mule wrangler Simon and Mule Paco at Grand Canyon National Park

I had goose bumps listening to Simon recite the prayer in Navajo.

When he was done, I was speechless. I wished I’d recorded him with a video, but it was such an intimate gift he’d gave me that it wouldn’t have felt right.

We chatted a little more and then he suggested I go to the Mule Barn where I could read the prayer if I wanted to. So off I went.

A bunch of mules were roaming about outside the barn nibbling grass and hay, and two wranglers were working inside. I started chatting with one of them, explaining that my great-uncle had ridden a mule to the bottom of the Grand Canyon around 1907. “This mule barn was built in 1907” he grinned.

Grand Canyon Mules resting at the Mule Barn in Grand Canyon National Park

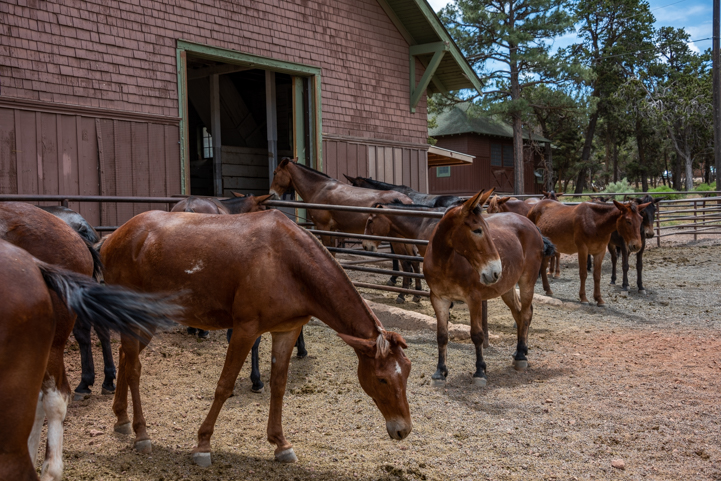
Mules relaxing at the Mule Barn.

Suddenly, he turned and said, “They’re here!”

I looked out the door and there were John and Simon coming around the corner with all the mules from the ride they’d just finished in tow. I snapped away taking pics as they approached, my heart singing as my wish for a unique Grand Canyon mule experience was completely fulfilled.

Grand Canyon Mules being brought back to the Mule Barn at Grand Canyon National Park

John and Simon bring the mules back to the Mule Barn for a much needed rest after two days on the trail.

We can’t step into the past and live it exactly as it was, but if we’re lucky, we can capture the spirit of a time and place and feel its essence envelop us.

I don’t know what captivated my great-uncle’s imagination most about his visit to Grand Canyon and his mule ride to Phantom Ranch, but I remember that he painted several beautiful and evocative images of Indians in his last years.

I believe he would have been as moved as I was listening to a Navajo guide seated on his mule and reciting a special prayer in the native tongue of his people. If there were a way to connect a beloved great-uncle and his great-niece through the veil of life and death and across more than a century of time, surely that was it.
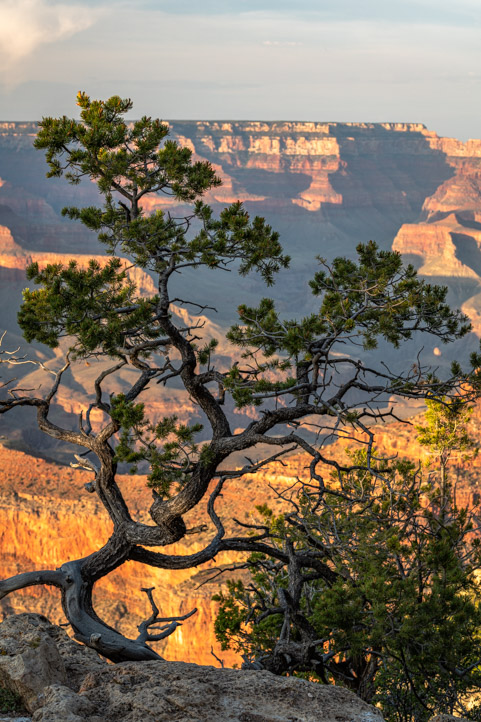
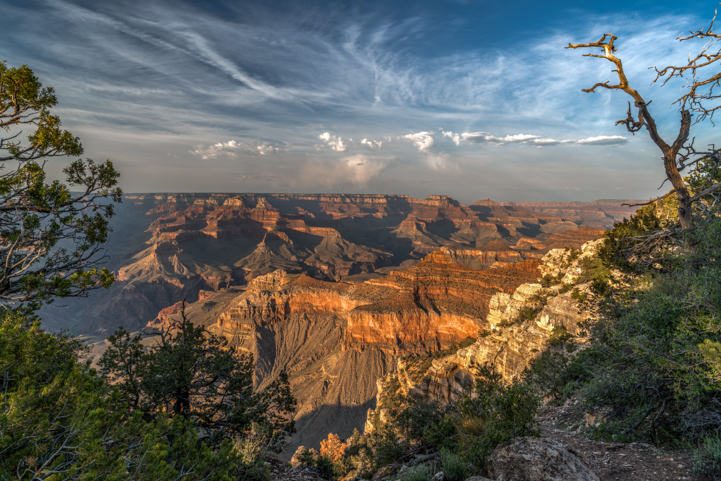
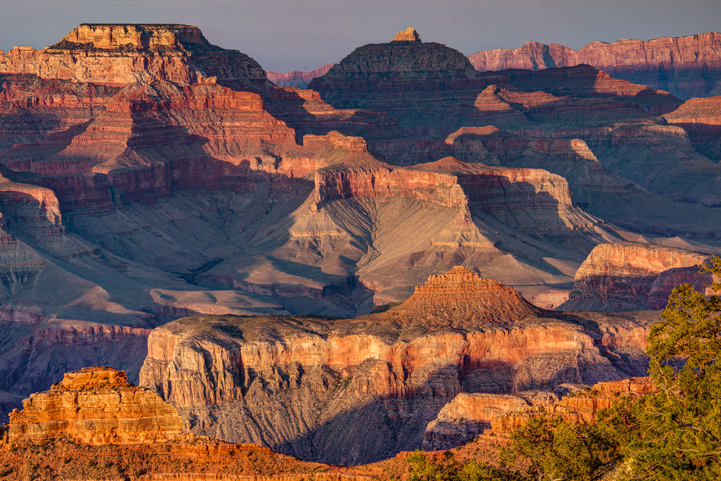
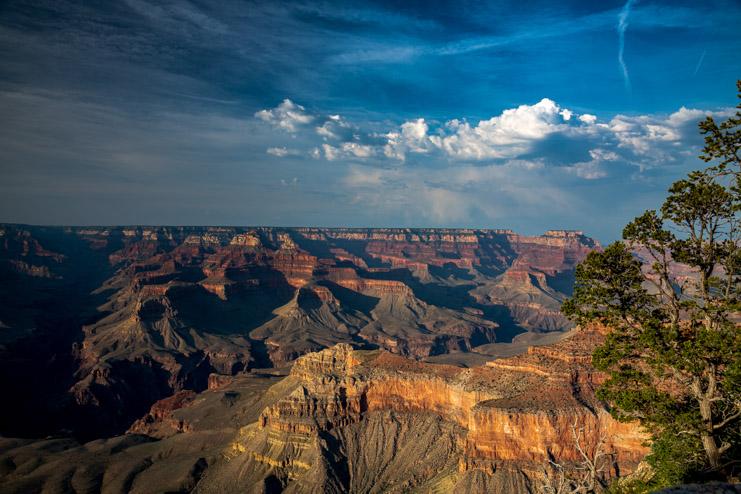
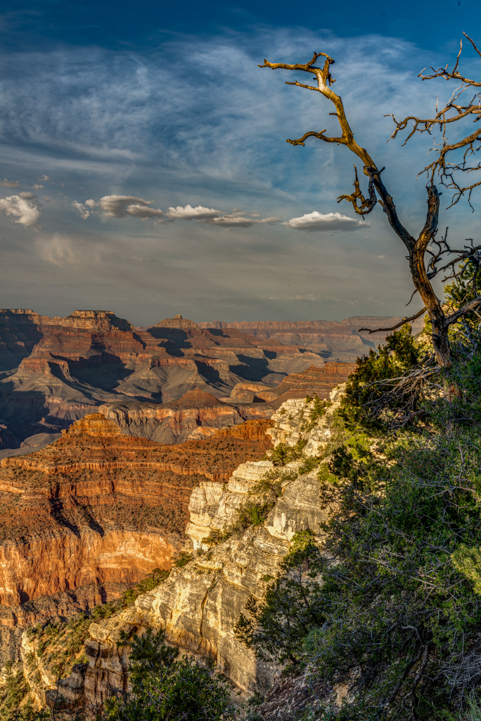
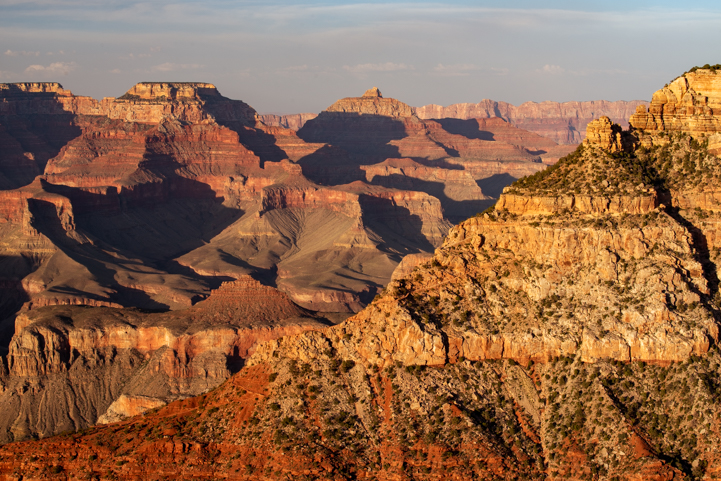
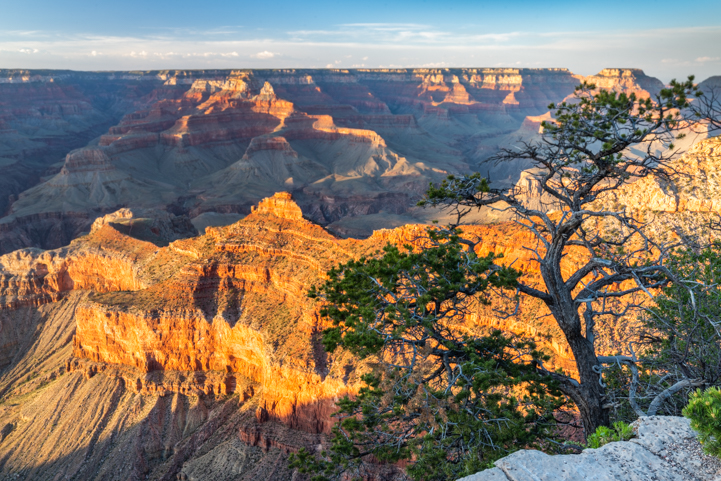
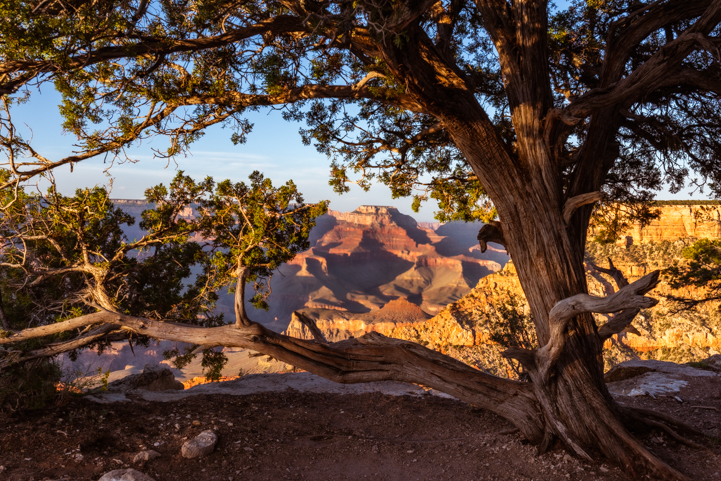
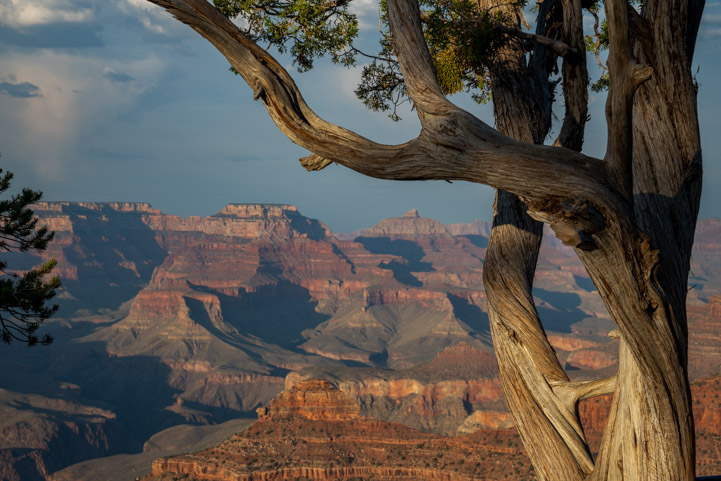
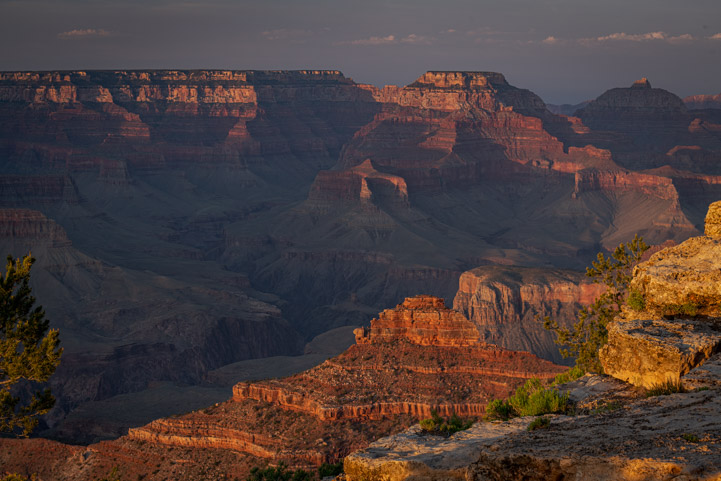
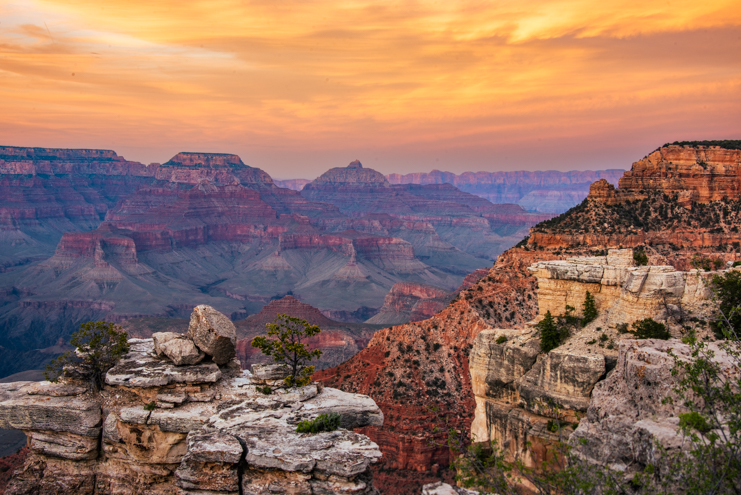
Grand Canyon National Park

Grand Canyon.

Sidney Riesenberg, artist and illustrator, 1968

My great-uncle, Sidney Riesenberg, as I knew him, painting at his easel, in 1968

Sidney Riesenberg, artist and illustrator 1968 2

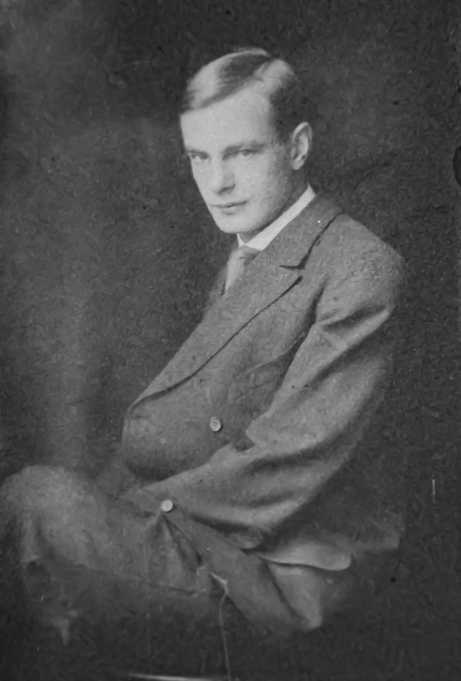
Sidney Riesenberg as a young man

Subscribe
Never miss a post — it’s free!

More info about Grand Canyon History and the Mule Rides:

Articles from our travels to the Grand Canyon:

Inspiring Encounters with Special People, Unusual Travelers and the Divine:

Living the Dream:

Our most recent posts:

More of our Latest Posts are in the MENU.   New to this site? Visit RVers Start Here to find where we keep all the good stuff. Also check out our COOL NEW GEAR STORE!! *** CLICK HERE *** to see it!


<-Previous || Next->

Grand Canyon South Rim RV Trip – Views, Views, VIEWS!!

June 2023 – We decided to start off this year’s RV summer travel season with a bang, so off we went to the South Rim of Grand Canyon National Park!

Grand Canyon National Park Mather Point Sunset

Grand Canyon South Rim at sunset.

There are many RV camping options at the Grand Canyon South Rim, including RV parks and campgrounds with hookups ranging from none to full and either dirt or paved campsite pads both inside and outside the Park. There’s also a USFS campground with paved loops but no hookups in the Kaibab National Forest ten miles away and dispersed campsites scattered further afield. It all depends on how close you want to be to the Grand Canyon views and how much dust you can tolerate when it gets windy in the forest.

We found a spot to call home for a few days, set up camp, and promptly drove into Grand Canyon National Park, grinning from ear to ear. A beautiful summer had begun!

RV camping in a toy hauler in the US National Forests

Home sweet home.

Renogy 200 watt solar panel

It was late in the afternoon, and we had white line fever from a long day of driving. Even though we have both been to the South Rim of the Grand Canyon many times, we realized we still did’t know it all that well.

The National Park Service has quite a task on its hands to manage the more than three hundred million Grand Canyon visitors each year, and in many ways their Job #1 can be boiled down to one thing: Crowd Control.

People arrive at Grand Canyon’s entrance gates via car, bus, train, bike, horse and even on foot, and once there, they need to figure out what’s where. We were no exception!

Grand Canyon National Park sign

Grand Canyon here we come!

In a smooth move that reminded me of the way the crowds were handled by the East Germans back in the 1980s when I and an array of hitchhiking college age kids ventured through the Iron Curtain into East Berlin, the maps handed out by the National Park Service are, well, minimalist.

When my youthful pals and I arrived in East Berlin, we were given tiny maps that had just four intersecting streets on them and nothing else for the whole city. The authorities wanted us to stay on the streets surrounding a single city block.

And so it is at the Grand Canyon where the NPS maps show certain roads in bright colors and others in faded gray. The colorful roads are the city bus routes that take people from place to place without having to find parking. The other roads can be driven, but the NPS map doesn’t make that clear.

So, we followed the purple road to the orange road, and that led us straight to a mammoth parking lot just steps from the Yavapai Point overlook. Perfect! Those simple directions turned out to be just what we needed at that late hour of the day.

Grand Canyon Fodors Guide

In hindsight it was smart of the National Park Service to guide new visitors away from the hotel, restaurant and boutique store hubs in the interior of the Park where things get congested and, instead, take them right to a satisfying overlook well worthy of their long journey through Arizona to get there.

Looking to the west where the sun was falling fast, the Grand Canyon view was layer upon layer of silhouetted mountain shapes.

Grand Canyon at dusk

Looking west from Yavapai Point.

Layers in the mist at Grand Canyon National Park

Layers of peaks fade into the distance.

Looking to the east, the mysterious forms took on their true shape and color, the peaks highlighted by the vivid orange and yellow sunlight and the valleys steeped in shadow.

Grand Canyon golden hour before sunset Yavapai Point

Looking east in the late afternoon.

The lovely paved Rim Trail goes along much of the South Rim, offering one jaw dropping view after another. Sometimes the views are wide open, and sometimes they are slightly obscured by wonderful gnarly trees.

Grand Canyon tree silhouette

.

You can choose to look at the view from an official overlook behind very sturdy steel and masonry fencing or you can take a seat anywhere on the ground that looks appealing and soak it all in.

Grand Canyon overlook at Yavapai Point

The formal overlooks have very solid barriers and bench seating so you don’t fall off the edge.

Grand Canyon view at Yavapai Point

However, you can also sit anywhere you’re comfortable and enjoy the astonishing view without a barrier.

We strolled slowly along the Rim Trail, our eyes glued to the view. As the sun sank lower and lower in the sky, the colors of the Canyon became ever richer and deeper.

Grand Canyon at Yavapai Point sunset

Grand Canyon South Rim view.

Grand Canyon late afternoon Mather Point

Crevices and peaks created by erosion.

RV patio mat 9x18
Grand Canyon Yavapai Point

.

Tree silhouette at Grand Canyon National Park

Another fabulous tree.

Surprisingly, the Grand Canyon South Rim is one of the more dog-friendly National Parks we have seen. Although the Park Service strongly recommends leaving your pooch at home, especially in the heat of the summer when the pavement is searingly hot for bare paws and the temperatures soar, dogs on leashes are allowed on the trails at the rim of the Canyon.

The Rim Trail goes for over 5 miles along the edge of the Canyon, and we were just thrilled there was a place for us to enjoy the Grand Canyon with Buddy as long as we stayed on that trail or elsewhere along the rim. Otherwise, of course, we would have gone somewhere else for the first leg of our RV trip!

Buddy loved walking the Rim Trail and found lots of wonderful smells along the way. Sometimes he plopped down in the shade and insisted we stop for a spell.

Patient puppy on the Rim Trail at Grand Canyon National Park

The Rim Trail.

We stopped to grab a lot of photos too.

Grand Canyon Photography

.

We strolled the Rim Trail between Yavapai Point and Mather Point. What a wonderful area this was for our first foray into the Grand Canyon on this trip.

Grand Canyon sunset at Yavapai Point

.

As you can see in the photo above, several forest fires deliberately set by the US Forest Service nearby created a thick brown haze of smoke above the horizon in certain directions, but the views were still out of this world

Grand Canyon Rim Trail

.

Grand Canyon Guide Book
Grand Canyon views at Yavapai Point

Some of the canyon walls seemed like they were molded in clay.

Mather Point golden hour at Grand Canyon

.

As full-time RVers we spent a lot of time at Grand Canyon’s North Rim, and we also took our RZR to a few of the overlooks that are outside Grand Canyon National Park on the north side.

We’ve always struggled, though, as everyone does, to try to capture the awe-inspiring beauty and vastness of the Grand Canyon in photos. It is so huge and so barren and so craggy, but too often the immensity and raw power of the place vanish in photographs. It’s hard to convey that wind-blown feeling of standing on the edge looking down 5,000 feet and across to the far side 9 miles away.

The light constantly changes too, especially at the beginnings and ends of each day as the sun plays along the horizon.

I found a beautiful little tree growing alongside a spectacular view and took a photo at the peak of the golden hour when the cliffs were lit up in full glory. Twenty minutes later I rushed back to that spot to catch the same view in the pink glow of sunset. What a startling difference. I couldn’t decide which one I liked better!

Grand Canyon Mather Point golden hour graceful tree

I loved the jaunty look of this little tree.

Grand Canyon Mather Point graceful tree at sunset

All dressed up in pink.

Ken Burns National Parks DVD Set

There were lots of beautiful trees all along the Rim Trail, each one unique, twisting and curving in unusual ways.

Grand Canyon view under a tree at Mather Point

Some trees live on the edge.

Grand Canyon tree on the Rim Trail

.

The sunlight and shadows played with each other on the distant Canyon peaks as we wandered between Yavapai Point and Mather Point.

Sunset at Mather Point at the Grand Canyon

.

Grand Canyon view from the Rim Trail

.

Although you can catch a glimpse of the Grand Canyon with just one step to the edge (and you’ll leave forever changed after taking in that view), we’ve been fortunate on this trip to have been able to return again and again, checking out different overlooks and going back to favorite spots where we see new things on each repeated visit.

Hiking Grand Canyon

The town of Tusayan is just a few miles south of the Grand Canyon South Rim, and we stopped at the Chocolate Factory there one day for a yummy ice cream. The walls were adorned with metal prints of incredibly stunning photos of Grand Canyon, and we studied each one as we savored our treats.

Grand Canyon Chocolate Factory in Tusayan Arizona

When you get your chocolate or ice cream treat here, check out the beautiful photos on the walls!

One of our favorites had been taken somewhere at Mather Point. We were so enamored of the photo, we went back to Mather Point to see if we could find where the photographer had stood.

Grand Canyon Mather Point at sunset

The photo we liked was taken near here.

Sure enough, we found the spot. A huge tree is growing there now, and we had to lean into the branches to get the same shot. But it was worth the extra effort and we were pleased with the outcome, both before the sunset and during.

Grand Canyon Mather Point sunset

This is the spot!

Grand Canyon sunset at Mather Point

And again during the peak of sunset.

Taking the Rim Trail back to the parking lot, we saw the crowd at the Mather Point overlook. Their silhouettes looked really cool against the layered backdrop of the canyon walls and the vivid orange glow of sunset above the Grand Canyon’s North Rim plateau in the distance.

Sunset crowd at Yavapai Point in Grand Canyon National Park 1

.

Back at camp, Buddy’s inner puppy came out in spades as he frolicked in the grass, chasing lizards and mice around old logs and exploring every nook and cranny of our campsite. He’s really loving this summer’s RV adventure — and so are we!

Puppy peeks at his RV at the campsite

“That was really fun. What’s next?”

RV hose Water Bandit

Subscribe
Never miss a post — it’s free!

More info about the Grand Canyon South Rim:

Honda EU2200i portable gas generator

Blog posts from our previous RV trips in the Grand Canyon area:

Blog posts from the National Parks & Monuments and World Heritage Sites we’ve visited:

Articles from our adventures in Red Rock country:

Our most recent posts:

More of our Latest Posts are in the MENU.   New to this site? Visit RVers Start Here to find where we keep all the good stuff. Also check out our COOL NEW GEAR STORE!! *** CLICK HERE *** to see it!

<-Previous || Next->

xx

Willow Lake (& more) around the Granite Dells in Prescott AZ

Willow Lake is like the quiet, hands-in-his-pockets, unassuming brother to its neighbor, the more popular, vibrant and beloved Watson Lake. Both lakes are situated on the edge of Prescott, Arizona, and they share the wonders of the stunning rock formations known as the Granite Dells. Willow Lake is on the west side of the Dells and Watson Lake is on the east side, and miles of hiking trails roam through the vast acreage of boulders between them.

Willow Lake Arizona & More!

.

After taking in lots of “WOW” sunset moments at Watson Lake, we finally went over to Willow Lake to see what was there. It was midday and the light was harsh, but what a beautiful place it turned out to be. We wished we’d gone there earlier in our Prescott RV trip!

We started at the Willow Lake boat ramp on the north shore and were surprised to see waves incessantly lapping the shore and the trees trunks! The lake level was very high and the wind was strong that day.

Willow Lake Arizona boat ramp

High water on a windy day at Willow Lake.

Along the shore of Willow Lake there were huge expanses of boulders, and we were soon hopping from one to another. There were fabulous patterns in the rocks, like veins running all through them.

Willow Lake Arizona Patterns in the Dells at Willow Lake Arizona

Colorful veins meander through these rocks by Willow Lake.

Buddy was on the lookout for any stray ground squirrels that might be scampering about. Mark caught him up on his lookout perch from below.

Willow Lake Arizona It's a long ways down!

“Is there a squirrel down there?”

Willow Lake Arizona Photographer and pupppy

I see you!

Arizona Delorme Atlas

Some of the rocks in the Dells had quite a bit of color.

Willow Lake Granite Dells in Arizona

.

Suddenly we heard the familiar haunting cry of a Gambel’s quail. I just love the way these guys dress up with very dapper trim on their bodies and faces and that wonderful little topknot on their heads.

721 Gambel Quail at Willow Lake Arizona

All dressed up and ready to go!

Gambel Quail at Willow Lake Arizona 2

“Are you taking my picture? I wasn’t ready yet!”

We noticed a young man expertly navigating the crazy boulder formations and discovered he’s a local who hikes around the Dells around Willow Lake all the time. He highly recommended that we follow a trail that headed to the north and east past an RV park on the edge of the Dells, and he mentioned intriguing things we’d see, including a red bench and a bridge.

This sounded like fun, so off we went.

Hiking at Willow Lake Arizona

“C’mon, Dad, let’s go find that red bench!”

As we hiked away from Willow Lake, we saw some wonderful old trees and lots of massive expanses of boulders.

Tree and shadow at Willow Lake Arizona

.

Willow Lake Arizona granite dells

.

We came to a sign with a large map on it and could clearly see the trail that went to the red bench. Woo hoo! This was definitely a really cool area. We hiked along the trail for quite a while.

But then the trail suddenly went straight up a boulder hill. Mark stayed below while Buddy and I checked it out. At the top it seemed like we were standing in a sea of boulders, but I sure didn’t see a red bench or a bridge anywhere.

Willow Lake hike through the Granite Dells in Arizona

.

On the way down we met a couple hiking the Willow Lake trails with a dog. After the pups introduced themselves with a few sniffs, I asked the couple where the heck the red bench was. It turned out we’d missed a fork in the trail and had taken the Ascent Trail instead of the Red Bench Trail. Oops!

Oh well. What we saw was still cool and it was a beautiful day to be out hiking.

Suddenly, a mountain biker rode over the boulders past us. Wow! Then his friend appeared and the two of them rode up and down the boulders like experts. What fun!

Granite Dells at Willow Lake Arizona mountain biking

Don’t try this at home!

Mountain biker in the Granite Dells at Willow Lake Arizona

These mountain bikers at Willow Lake made it look so easy.

Granite Dells mountain biking at Willow Lake Arizona

Weeeee!

Arizona Highways Scenic Drives

Buddy watched the mountain bikers for a moment, but he was much more interested in athletes of the rodent kind.

Regal pup

“Not just rodents, Mom. I’ll chase anything that moves. Lizards are good!”

Willow Lake is definitely worth a visit, and we’ll be back at sunrise or sunset next time to add a dash of color to our photos. In the meantime, we found a few more photos of the Granite Dells at Watson Lake buried in our computers along with some more lovely shots of Lynx Lake that we thought you’d enjoy.

Here you go — the Granite Dells and cactus flowers at Watson Lake:

Granite Dells at Watson Lake Arizona

Granite Dells at Watson Lake (next door to Willow Lake).

Full moon at the Watson Lake Granite Dells in Arizona

Granite Dells under a full moon.

Red cactus flowers at the Watson Lake Granite Dells Arizona

Red cactus flowers in the Dells.

Red cactus flowers in Arizona

Happy cactus flowers smiling at the world.

Red cactus flowers at the Watson Lake Granite Dells Arizona

Look for these red beauties in the springtime!

And here’s the southeastern corner of Lynx Lake where the water trickles into the lake and forms wonderful shallow pools on its way:

A trickle of water flows into Lynx Lake in Arizona

The pools of water in the southeast corner of Lynx Lake are as clear as glass.

A glorious sunset reflected at Lynx Lake, Arizona

Tree reflections at Lynx Lake Arizona

A reflected archway in the lake.

Lynx Lake Sunset

Goodnight!

We really enjoyed our brief RV trip to explore the lakes in the area around Prescott Arizona. There are actually even more lakes nearby that were on our list but we didn’t get to…so now we have to go back, and we will!

Puppy fur blown by gentle breezes

Buddy is looking forward to exploring the Prescott area some more.

Subscribe
Never miss a post — it’s free!

More info about Prescott and the Granite Dells:

Other blog posts about the lakes near Prescott, Arizona:

More fun articles from the cool pines in Arizona:

Our most recent posts:

More of our Latest Posts are in the MENU.   New to this site? Visit RVers Start Here to find where we keep all the good stuff. Also check out our COOL NEW GEAR STORE!! *** CLICK HERE *** to see it!

<-Previous || Next->

Granite Dells at Watson Lake near Prescott AZ – SPECTACULAR!

May 2023 – The Granite Dells at Watson Lake near Prescott, Arizona, are a spectacular moonscape of rounded granite boulders that beg to be climbed on and explored. These gorgeous rocks line the shore of the lake and pop up out of the water here and there, forming mini islands. The views from every vantage point are magnificent.

Watson Lake Granite Dells in Prescott Arizona

.

We have seen The Dells from a distance many times, catching brief glimpses of them as they appeared on the horizon for a split second while we drove to or from Prescott’s historic Courthouse Square.

This year, on an RV trip to nearby Lynx Lake, we had a chance to get a closer look at Watson Lake’s Granite Dells, and what a rewarding experience that turned out to be!

Granite Dells at Watson Lake near Prescott AZ

The Granite Dells are a magnificent moonscape of rounded boulders on the shores of Watson Lake.

Kayak at the Granite Dells at Watson Lake near Prescott AZ

The Dells are a fabulous place to explore on foot — or by boat!

We climbed and scrambled and followed the narrow hiking trails along the edges of Watson Lake. The trails dodged between the boulders and sometimes vanished to become just white dots painted on the rocks until the trail resumed on the other side of the boulders. It made for fun and easy route finding and gave each hike an amusing twist!

Hiking trail through the Granite Dells at Watson Lake near Prescott Arizona

The hiking trails were gravel in some places but became white dots painted on the rocks in others!

Storage ottoman bench for RV

Buddy was totally in his element and scampered over the rocks in sheer delight!

Climbing the boulders at the Granite Dells at Watson Lake near Prescott AZ

Buddy was in his element. We were too!

Hiking the boulders at the Granite Dells at Watson Lake near Prescott AZ

All smiles!

We made a point to go to Watson Lake at dusk on several afternoons, hoping to catch the Granite Dells in the beautiful soft golden light of late afternoon and then watch a stunning sunset. Mother Nature has its own agenda for sunsets, however!

The boulders seemed to glow as the last rays of sun hit the Dells.

The Dells at Watson Lake in Prescott Arizona

Golden glow.

Sunset at Watson Lake Granite Dells Prescott Arizona

What a place!

As I began setting up for a shot, I noticed my shadow on the rocks. How cool is that?!

Photography at the Granite Dells and Watson Lake Prescott Arizona

A ghostly figure under a full moon across from me was busy taking photos of the incredible landscape!

Watson Lake is very popular with kayakers, and we saw lots of them out on the water. As the sun began to sink low in the sky, the kayaks came in from all directions to return to the boat ramp.

Kayaking on Watson Lake between the Dells in Prescott Arizona

Exploring the hiking trails was great, but checking out the views from a kayak might be even better!

Kayaking past the Granite Dells at Watson Lake in Prescott Arizona

Kayaks returned to the boat ramp at the end of the day.

Kayak at Watson Lake Granite Dells in Prescott Arizona at dusk

A kayaker navigates the island Dells to return to shore after a nice ride.

Every direction we looked we saw a stunning view, and we wandered happily from one dazzling photo op to the next. Some of the trees were standing in the water. They looked quite peaceful and very much at home!

Granite Dells at Watson Lake near Prescott Arizona

Heavy rains this year raised the water level until the trees were immersed.

Granite Dells at Watson Lake in Prescott Arizona

The trees didn’t seem to mind this extra drink one bit.

Flashlight

When the sun slipped over the horizon, Mark caught a starburst between the tree branches. Just as he hit the shutter button, Buddy walked right into the picture! But we both love how it turned out.

Puppy at the Dells in Prescott Arizona Watson Lake

Buddy photo-bombed this photo at just the right moment.

Buddy then took a seat so as not to photo-bomb any more images, and he kept a close eye on us.

Puppy resting in the Granite Dells at Watson Lake near Prescott AZ

Buddy patiently waited and watched as we took endless photos.

One night, the sunset was more subdued than we would have wished, but the setting was so glorious it didn’t matter. Such beauty!

Watson Lake Dells near Prescott Arizona the Granite Dells

The Granite Dells at dusk.

Watson Lake Granite Dells near Prescott AZ

Magnificent!

On another night, the brilliant colors in the sky we’d hoped for never appeared at all. But we were in seventh heaven anyway, crawling around on these rocks and savoring the gorgeous views.

The Granite Dells at Watson Lake near Prescott Arizona plus a puppy

I noticed this wonderful dead tree by the side of the trail and Buddy watched me as I got set up. Behind him, Mark was busy creating another beautiful composition.

Watson Lake Granite Dells near Prescott Arizona

Watson Lake and the Granite Dells are such a surprise in the high desert and pine forests of Prescott AZ.

Watson Lake Granite Dells in Prescott AZ

.

At last we got a sunset to remember. The sky and its reflections in the water went from bright orange to peachy pink to a rich pink and blue.

Granite Dells at Watson Lake Prescott AZ

Lots of people come out to Watson Lake to watch the sunset, and when the sky first lit up on fire, we heard a roar of cheers from somewhere high up in the rocks!

Sunset behind the Granite Dells at Watson Lake near Prescott Arizona

Then the sky turned peach and pink.

Granite Dells at Watson Lake near Prescott Arizona

.

over

And then it settled into a rich pink and blue. Ahhhh!

Granite Dells at Watson Lake Prescott AZ.jpg

“That was such a rush, I’ve gotta rest for a while!”

We will always remember that afternoon!

If you visit Prescott, Arizona, be sure to wander down to Watson Lake Park and explore the Granite Dells. There are lots of trails to choose from. We stayed close to the shore but the Dells fill a huge area that extends all the way from Watson Lake to neighboring Willow Lake a few miles away.

Watson Lake is popular with both locals and visitors, and you’ll have plenty of company to share the experience with. But everyone around you will be grinning from ear to ear and will be very happy to be there. It’s that kind of place!

Subscribe
Never miss a post — it’s free!

Location of The Dells – Google Maps

Other blog posts about the lakes near Prescott, Arizona:

More cool blog posts from rocky areas that are fun to explore:

Our most recent posts:

More of our Latest Posts are in the MENU.   New to this site? Visit RVers Start Here to find where we keep all the good stuff. Also check out our COOL NEW GEAR STORE!! *** CLICK HERE *** to see it!

<-Previous || Next->

Lynx Lake, Arizona – Great RV Camping Near Prescott!

Lynx Lake, Arizona, and the nearby attractions around Prescott proved to be a great place for a week-long RV camping shakedown cruise in our toy hauler. This trip gave us a chance to do some exploring and test our solar power upgrade and generator repair before we headed out on our summer travels.

Lynx Lake Arizona sunset

A fiery sunset at Lynx Lake’s South Shore.


Lynx Lake is a quiet spot in the higher elevations of north-central Arizona that is known for great fishing. Sitting at 5,500′ altitude, it is cooler than the Verde Valley and Sonoran Desert parts of Arizona.

We were hoping to get some nice photos, and we played a lot with bracketing our photos (taking identical shots at different exposures) and HDR (combining those images to get the most out of the highlights and shadows).

Sunset at Lynx Lake Arizona

Lynx Lake at dusk.

Lynx Lake is manmade and has two recreational areas, one at the north end near the dam and the other at the south end. The South Shore Day Use area is a wonderful spot with picnic areas and lots of places to fish. That’s where we spent most of our time.

Picnic Day Use area at Lynx Lake Arizona

The day use area at the South Shore of Lynx Lake is beautifully outfitted with picnic areas and grills.

Lynx Lake is known for good fishing and it’s well stocked! There were fishermen along the shore and trolling in boats at every time of day.

Fishing at Lynx Lake Arizona

People were fishing all along the shoreline.

Fishing and trolling at Lynx Lake Arizona

Fishermen were trolling in boats too!

Arizona Delorme Atlas

We followed the shoreline to the far southeast corner where we found a large gravel beach that was perfect for kids and dogs to play in the shallow water.

Shoreline of Lynx Lake Arizona

There’s a beach with shallow water that’s idea for kids and dogs.

A stream ran through a small craggy canyon to the lake. I suspect this area is usually dry or just a trickle, but because of the heavy winter and spring rains, the water spread out into marvelous shallow pools that mirrored their surroundings.

Stream leading to Lynx Lake Arizona

We followed a craggy canyon upstream at the southeast end of the lake.

We caught the trees making lacy shadows in the water.

Tree shadows at Lynx Lake Arizona

Leafy patterns in the water.

Buddy just loved this part of the lake. He loves going in the water, but only up to his armpits! The water was the perfect depth, and he and a few other dogs had fun chasing sticks.

Happy puppy

Buddy and other dogs had fun playing in the water.

A slightly overgrown trail followed these pools far back into the canyon and took us to a surprise manmade waterfall. It was wonderful to be here when there was so much water flowing.

Manmade waterfall at the South Shore of Lynx Lake Arizona

We came across a manmade waterfall that was flowing really well after the heavy winter and spring rains.

At dusk, we wandered back through the canyon along the stream to the main part of the lake where the sun was beginning to do its magic.

Lynx Lake Arizona southeast tip

Peace at twilight.

Lynx Lake Arizona peaceful shoreline

.

After all that fresh air and fun at the lake Buddy crashed when we got back to the RV!

Tired pup after a day at the lake

Buddy was dog tired after all that!

There are two campgrounds at Lynx Lake: Lynx Lake Campground and Hilltop Campground.

Lynx Lake Campground has hookups and the sites are better suited to larger RVs. It’s also located halfway between the two main access points to Lynx Lake — the North Shore and the South Shore.

Hilltop Campground is near the South Shore and is better suited to smaller RVs and tents. It is dry camping only. Campsites at both campgrounds can be reserved.

Renogy 200 watt solar panel

We decided to take our chances on squeezing into a site at Hilltop Campground. Some campsites are first come-first serve, which we prefer because you can see what you’re getting yourself into. But with busier campgrounds these days, and not knowing how busy Hilltop Campground might be, we opted to reserve a campsite ahead of time.

We chose a campsite the USFS website said was suitable for a trailer up to 40’ long. Since ours is only 33’ we thought it would be fine. Not!

As we stood there scratching our heads trying to figure out how to shoe-horn our rig into the sloped and tightly curved pull-through campsite, the campground host showed up in his golf cart and kindly offered to put us in a big former campground host site that he kept available for people in a bind like we were. Phew! It was plenty long enough and didn’t have any weird sharp turns.

RV Camping at Hilltop Campground Lynx Lake Arizona

We had a wonderful stay at Hilltop Campground.

Many sites at Hilltop Campground are called pull-through sites, but they are really just pullouts along the campground loop road. You’re basically just pulled over on the side of the road. We would have fit into several of those but they were full.

campsite at Hilltop Campground at Lynx Lake Arizona

Most pull-through campsites at Hilltop Campground are simply pull-outs from the campground loop road.

The campground pads in the campsites themselves are beautifully constructed, however. It’s a very hilly area, and each site has a large tent pad, picnic table and fire ring, often at different levels and facing into the woods.

Campsite at Hilltop Campground at Lynx Lake Arizona hiking trails

The campground pads are nicely constructed. Many are multi-level and there’s always a large tent pad and area around the picnic table and fire ring. Plenty of room to spread out!

There are wonderful hiking trails running all through ponderosa woods around Hilltop Campground and down to the lake. These would be ideal for mountain biking. We didn’t bring any bikes with us, but we walked these trails every day. Well, Buddy ran them at full speed sometimes! We were always the only ones on the trail.

Hilltop Campground at Lynx Lake Arizona hiking trails

The hiking trails around the campground were fabulous and rarely used.

We love ponderosa pine woods because the trees are spaced wide apart, creating a natural park-like atmosphere. You don’t feel closed in by the trees and have lots of open areas between them strewn with soft pine needles.

Ponderosa pine forest at Lynx Lake Arizona

A natural alley in the ponderosa pines.

Happy Camper Holding Tank Treatment

Each evening we wandered down to the lake to catch the sunset.

Lynx Lake Arizona at sunset

.

A pretty sunset was reflected in the lake’s surface.

There is a hiking trail that goes all the way around the lake. On the eastern shoreline it is a narrow trail that is very lightly used. On the western shore it is a paved walking path that is very popular. We liked the intimacy of the eastern shoreline trail.

Hiking trail on the eastern shore of Lynx Lake Arizona

The hiking trail along the eastern shore of the lake is narrow and has very few hikers on it.

Park bench on the eastern shore of Lynx Lake

At one point on the eastern shoreline trail we came across a park bench with a pretty view.

The sunsets were lovely. The week we were there was windy, but on a few evenings the wind quieted down completely and all the ripples in the water disappeared.

Lynx Lake Arizona at sunset

The water was perfectly still as the sun set.

Sunset at Lynx Lake Arizona

The sky lit up just as the sun sank behind the distant trees.

It is amazing how much we relax when we’re out in our RV. As soon as we set up camp, we both let out a huge sigh of relief.

It’s not that our conventional home-based lifestyle is stressful, but somehow there’s always a lot to do that keeps us busy all the time. Also, the focus is very much inward and homeward.

On the road, the focus of the RV lifestyle is outward and full of curiosity about what lies around the next corner. The “busy-ness” of day-to-day living slips away. When we’re camping in the woods, our to do list dwindles to the simplest things: eat, sleep, smell the fresh air, hike, ride the side-by-side, take photos and relax. Napping sneaks in here and there too!

Napping in a toy hauler

Buddy and Mark love napping in the upper bunk bed!

Our newly upgraded solar power system worked great. The batteries never dipped below 12.5 volts. We also had a chance to run the generator, and it purred like a kitten. Yay!

But our real reason for this trip — besides doing a shakedown and exploring Lynx Lake — was to spend some time at nearby Watson Lake and Willow Lake, home to the spectacular Granite Dells.

Here’s a sampler of what’s over there — with lots more to come!

Watson Lake Granite Dells in Prescott Arizona

The Granite Dells at Watson Lake were fabulous — more pics coming!

Subscribe
Never miss a post — it’s free!

More info about Lynx Lake:

Other blog posts about the lakes near Prescott, Arizona:

More fun articles about Arizona’s many lakes:

Other special campgrounds we’ve enjoyed:

Our most recent posts:

More of our Latest Posts are in the MENU.   New to this site? Visit RVers Start Here to find where we keep all the good stuff. Also check out our COOL NEW GEAR STORE!! *** CLICK HERE *** to see it!

<-Previous || Next->

How to Fix a Car or Truck Key Fob in Minutes!

Vehicle key fobs are insanely expensive, but when ours died, we found out how to fix a car or truck key fob in just a few minutes…for next to nothing! What a relief (and surprise) it was to get our key fob working again rather than buying a new one!

How to fix a car or truck key fob in minutes!

Our car key fob died a slow death. First it couldn’t open the doors while standing or approaching the car on the passenger’s side. Then the problem migrated to the driver’s side too. Ugh!

We tried standing closer to the car and further away. We tried holding the key fob higher in the air, holding it lower, and aiming it in different directions. We opened the car key fob up and cleaned all the electrical contacts and changed the battery. But it was all to no avail. Nothing we tried would make the car key fob work reliably, and eventually the key fob stopped working all together.

The only way to unlock the car was to use the key, and the only key lock on the whole car was located on the driver’s door.

Oh my! Talk about inconvenience! Now we had to walk up to the driver’s side door to unlock all the doors and then walk all the way around the car to the other side if we wanted to access the seats on the passenger’s side! How on earth did our moms live without remote car key fobs in their day, what with bunches of kids running around, carrying groceries and all?

We didn’t want to spend hundreds of dollars to get a new key fob, so we dug around on the internet and found a really easy fix!

All that was required was an ordinary paper hole punch, a strip of aluminum foil, some tweezers and some glue! And we had these things already!

What happens with some key fobs as they age is that the electrical contacts under the buttons on the shell of the fob wear away. The idea with this fix is to replace that conductive material with a tiny piece of aluminum foil.

Our key fob has three buttons: Lock, Unlock and Trunk. So, we punched out 3 holes in the aluminum foil and set the small round pieces aside.

How to fix a car or truck key fob using aper hole punch and aluminum foil

Using an ordinary paper hole punch, punch 3 holes in a piece of aluminum foil and keep the tiny round pieces.

Then we removed the little electronic board from the key fob and, using a toothpick, put a tiny dab of glue on the rubber at each of the three contact points under the key fob buttons. Then, delicately holding each piece of aluminum foil with tweezers, we placed the foil on the three contact points in the key fob. We made sure to use just enough glue to hold each piece in place without affecting the connectivity between the electrical contact and the aluminum foil.

Car key fob opened up with the electrical contacts exposed

Glue the pieces of aluminum foil onto the electrical contact points in the key fob.

How to fix a car or truck key fob using a hole punch and aluminum foil

Closer view: aluminum foil pieces glued on contact points in the key fob.

We put the car key fob back together again, and BINGO!! The key fob worked perfectly locking and unlocking the doors and unlocking the trunk every single time, no matter where we stood or how high or low we held the darn thing!!

Paper Hole PunchAluminum foil

So…if you have a car or truck key fob that isn’t working right, even after changing the battery and cleaning the electrical contacts, grab a hole punch, some aluminum foil and some tweezers and try glueing the foil onto the contact points under the key fob buttons!

Not every vehicle key fob can be opened and repaired in this way, but you may be in luck just like we were!

Subscribe
Never miss a post — it’s free!

More tech tips for trucks:

Our most recent posts:

More of our Latest Posts are in the MENU.   New to this site? Visit RVers Start Here to find where we keep all the good stuff. Also check out our COOL NEW GEAR STORE!! *** CLICK HERE *** to see it!

RV Keyless Entry Door Lock Problems? Try this quick fix!

Do you have one of those groovy RV keyless entry door locks on your rig? Our Genesis Supreme toy hauler came with one, and we weren’t sure we’d like it until we started using it. Then we loved it! But after a while it started having problems and acting up.

RV Keyless Entry Door Lock Repair & Quick Fix

The way these keyless entry door locks work is you punch in a secret code on the keypad and then it sings a little jingle. When you are unlocking the door, the notes in the tune ascend to a higher pitch. When you are locking it, the notes descend to a lower pitch. Kinda makes sense for opening and locking the door. Sing up and it opens, sing down and it locks.

One day when we went to unlock the door, the tune wasn’t so friendly — it made a nasty noise with two notes. Right after the nasty tune it made the sound of locking the door…but we were unlocking it!

RV keyless entry door lock

An RV keyless entry door lock is awesome — until it starts acting up!

For the next few months, every time we locked or unlocked the door we heard the nasty error message tune followed by the opposite sound for what we were doing. Unlocking the door gave the sound of locking the door, and locking it gave the sound of unlocking the door.

Every time we locked and unlocked the rig, we each thought, “We’ve gotta look up these weird sounds in the manual!” But we never did. The door still locked and unlocked, it just made weird noises. We lived with it.

RV keyless entry door lock

You enter the code and then press the “lock” or “unlock” button. It’s magic!

RV Keyless entry door lock

Finally, the other day, Mark decided enough was enough, and he opened up the battery compartment on the back side of the keyless entry keypad (on the inside of the entry door).

Back of RV keyless entry door lock

The battery compartment is accessed by removing these two screws.

The problem was immediately obvious: the batteries had leaked battery juice all over the place and they were dying a slow death.

Insides of an RV keyless entry door lock

Mark removed the cover and saw dried white fluid from the batteries.

Leaky Duracell AA batteries from an RV keyless entry door lock

The batteries were covered with yuck.

He cleaned out the little compartment that holds the batteries, put in a new set of four AA batteries, and POOF! The RV keyless entry door lock worked like a charm. No error code tune, and the locking and unlocking sounds matched what we were doing.

Duracell AA Batteries

So, if you have an RV keyless entry door lock on your rig, and it starts making unexpected sounds when you lock and unlock the door, you might need new batteries. Take the cover off the keypad and check them out. And keep some spare AA batteries on hand!

Subscribe
Never miss a post — it’s free!

We had battery problems on our sailboat in Mexico too:

If you are intrigued by locks and keys, check out this incredible YouTube channel:

Other RV Tips:

Our most recent posts:

More of our Latest Posts are in the MENU.   New to this site? Visit RVers Start Here to find where we keep all the good stuff. Also check out our COOL NEW GEAR STORE!! *** CLICK HERE *** to see it!

Fossil Creek Waterfall – A Pretty Hike to a Scenic Cascade

November 2022 – The Fossil Creek Waterfall in Arizona’s Verde Valley is a scenic cascade at the end of a pretty hike through the woods. It’s especially beautiful when there’s a bit of fall color!

Fossil Creek Waterfall in Arizona a pretty hike to a scenic cascade

.

The whole Fossil Creek area was closed for several years due to wildfire erosion damage. When it reopened, lots of people jumped at the chance to hike in this beautiful area once again, and we were among the the very first who showed up the day it opened!

The trailhead is accessed via Fossil Creek Road. One end of this road intersects with AZ Route 260 about 8 miles east of Camp Verde and the other end rolls into the west side of the town of Strawberry.

Arizona Delorme Atlas

Coming from the west, Fossil Creek Road is a dirt road, and since we were unsure what condition it might be in, we thought it would be fun to drive our Polaris RZR side-by-side instead of our truck. The road turned out to be well graded and the drive was easy, even for a passenger car.

Riding a side-by-side to Fossil Creek Arizona

The RZR made getting to the trailhead a lot of fun!

The area near the trailhead had sustained quite a bit of damage. Fortunately, another pair of hikers who knew the area well were parking their car just as we arrived, and they helped us find the start of the trail to the Fossil Creek Waterfall.

Buddy, our little Trail Scout, was excited to lead the way after that!

Dog on the trail at Fossil Creek in Arizona

Buddy loves his job as Trail Scout!

It was autumn and some of the trees were wearing their finest fall colors.

A tree lights up with fall color on the Fossil Creek Waterfall trail in Arizona

Quite a few trees were outfitted in their Fall Finest.

We walked slowly and savored the pretty autumn colors around us. It wasn’t as dazzling as the fall foliage along Colorado’s San Juan Highway or in Michigan’s Upper Peninsula, but it was lovely nonetheless.

Fall foliage at Fossil Creek in Arizona

We saw some yellow…

Fall color at Fossil Creek in Arizona

…and some red.

Arizona Highways Scenic Drives
Autumn leaves in Arizona

.

The trail was a little rocky in some spots and there were a few small water crossings too. Someone had built a bridge across the creek, although it was probably easier to hop over the thin stream of water since it wasn’t very high!

The trail took us across a small bridge

It was easier to jump over the tiny creek, but I took the rickety bridge instead!

Suddenly, we heard rushing water in the distance ahead of us. Some hikers who had done the hike before noticed us staring at it hopefully as they passed. “That’s not the waterfall!” one said with a wink.

We spotted the first cascade at Fossil Creek in the distance

We spotted a small waterfall in the distance.

This little cascade was very pretty, though, and we hung out for a while, sitting under the canopy of trees listening to the sounds of the water tumbling over the rocks.

Fossil Creek Arizona has many waterfalls

We found ourselves in a lovely grotto next to the rushing water.

Fossil Creek Arizona waterfall cascade

.

Buddy found his happy place up on a rock and watched us as we took photos.

Beautiful dog at Fossil Creek in Arizona

Buddy surveyed the scene from up on a rock.

We finally tore ourselves away from this lovely little oasis and continued our delightfully shaded hike.

Hike to the Fossil Creek Waterfall in Arizona

The hike to the Fossil Creek Waterfall has plenty of shade.

Fossil Creek Arizona in autumn with fall foliage

.

The sounds of the little cascade faded away and were soon replaced with the growing roar of the Fossil Creek Waterfall ahead of us.

Suddenly, the waterfall came into view. Wow!

Fossil Creek Waterfall in Arizona in autumn with fall color

And there it was…beautiful!

A small group of people arrived shortly after us. Some jumped in the water for a swim and made their way over to the waterfall, clambering up on the rock shelf beneath it and going behind the spray to peek out from behind the wall of water.

Swimmers dive into the water at Fossil Creek Waterfall in Arizona

Fossil Creek is a popular swimming hole!

Swimmers stand behind Fossil Creek Waterfall in Arizona

They made it!

We sat down for a while, enjoying the pretty surroundings while hikers and swimmers came and went. We learned that Fossil Creek is so popular in the summertime that you have to get a permit and only a small number of permits are given out each day.

We felt fortunate because it was the off-season and the area had just opened (without fanfare), so we didn’t have to get a permit, and there weren’t any crowds.

Fossil Creek waterfall in Arizona

Seeing Fossil Creek Waterfall is a great reward at the end of this pretty hike.

If you find yourself in Arizona’s Verde Valley, and Fossil Creek is open, we highly recommend you do the hike to the waterfall!

Subscribe
Never miss a post — it’s free!

More info:

Other blog posts from the Verde Valley area in Arizona:

Beautiful waterfalls we’ve seen in our travels:

Our most recent posts:

More of our Latest Posts are in the MENU.   New to this site? Visit RVers Start Here to find where we keep all the good stuff. Also check out our COOL NEW GEAR STORE!! *** CLICK HERE *** to see it!

<-Previous || Next->

RV Solar Upgrade with Renogy and Go Power – QUICK & CHEAP!

We recently did an RV solar upgrade project that proved to be quick, easy and cheap. We spent just $480 to jump from 190 watts of power to 570 watts, more than enough for our boondocking off-the-grid RV lifestyle. PLUS it took less than three hours to install. What a great bang for the buck!

RV Solar Upgrade - CHEAP & EASY with Go Power + Renogy

.

Our Genesis Supreme 28CRT fifth wheel toy hauler came with a small factory-installed Go Power RV solar power system that included a single 190 watt solar panel, a 1500 watt pure sine wave inverter and a 30 amp PWM solar charge controller connected to four dealer-installed Group 24 12-volt wet cell batteries with a capacity of 280 amp-hours.

Factory-installed RV solar power systems like this one are now a common option on many new RVs, and Go Power (a subsidiary of Dometic) is often the brand that RV manufacturers use.

Although none of the components in the system are “best of breed,” the Go Power system worked fine for us as we boondocked every night for four months last summer. As the months wore on towards the Fall (and away from the summer solistice), however, the batteries struggled more and more each day to reach full charge. In the last few weeks in late August and September they never did.

Fortunately, the Go Power 30 amp solar charge controller that came with this system can handle up to 600 watts of solar panels, so an RV solar upgrade was possible without replacing the charge controller!

As we contemplated doing an RV solar upgrade all last summer, the debate was: do we ditch the whole factory installed system and replace it with top of the line components or do we simply add some more panels to the existing system?


How much solar power do you really need when you live in an RV?

Answering that question is really important because it’s incredibly easy to end up installing a far bigger and fancier system than you actually need after hearing people discussing their mammoth systems around the campfire.

Just because a friend has a huge system doesn’t mean it will make sense for you to break the bank to install one too!

How big an RV solar power system you need depends entirely on how much power you use in your day-to-day RV lifestyle and how often your boondock.

We boondock every night, but we don’t use much power. Also, since we are now seasonal travelers instead of the full-timers as we used to be, we travel primarily in the summertime when the sun is high in the sky at a good angle for the solar panels and the days are long, allowing the solar panels to work for a few extra hours.

Our primary power use is our two laptops (which we use a lot), the water pump, and the interior lights for an hour at night (we go to bed early). We don’t watch TV and we rarely use the microwave or hair dryer.

Running the air conditioning on battery power is not possible for any but the most massive RV solar power charging systems and battery banks, so it’s not part of the equation for most people. We rely on the generator for running our a/c.

With our traveling lifestyle of minimal power use, we happily lived on 480 watts and 555 watts in our trailer and sailboat respectivlely for 13 years. That was plenty of power for us except in the dead of winter when the sun was low in the sky (poor angle to the solar panels) and the days were short.

RV solar panel installation using Go Power and Renogy panels

Our toy hauler had one factory installed solar panel (center).
An easy RV solar upgrade with two more panels tripled our battery charging capacity!

When we did those installations in 2008 and 2010, they were considered to be sizable for a boat or an RV. Seeing a rig with 1,000 watts on the roof in those days made everyone’s head turn while they mouthed the word, “WOW!”

However, by today’s standards, we had small systems on both our RV and sailboat! The third owner of our boat Groovy upgraded the solar panels to 930 total watts instead of the original 555 watts.

Last year, we met a full-timing family who had 3,500 watts of solar power on the roof of their 44′ toy hauler. They also had two huge Victron solar charge controllers (the panels were wired in two separate arrays) and they had a massive bank of lithium-ion batteries in the basement.

They could run their air conditioning on battery power all day and they had a full-size residential refrigerator to boot. They liked to keep their TV on all day long and the kids spent hours watching videos on their iPads. The kids also did homework on their laptops and everyone in the family had had phones and laptops to charge. They also had several internet access devices that gave them a total of 500 GB of data each month. They used it all and sometimes fell a little short by month’s end!

So, the size of the system you need depends entirely on how you live your RV lifestyle.

We knew when we bought our toy hauler last year that 190 watts wouldn’t be enough for us long term, but we didn’t have time to fuss with and do an RV solar upgrade before starting our summer journey. We were also curious to see how it performed right from the factory.

The solar charge controller is a lower end PWM unit (Pulse Width Modulation) rather an MPPT (Maximum Power Point Tracker) type of controller that eeks out more power from the panels. We wondered if the system would work at all. We were pleasantly surprised that it worked quite well and did the job all summer long, although our batteries did get down to 11.9 or 12.0 volts on quite a few colder mornings at summer’s end, much lower than we’ve ever seen our house batteries before.

Go Power 30 amp PWM solar charge controller

Go Power 30 amp PWM solar charge controller mounted on a wall inside the rig.

Ultimately, we decided the simplest and most stress-free RV solar upgrade we could do would be to add more solar panels and leave all the other components alone.

RV Solar Upgrade – Adding New Solar Panels – Wired in Parallel or in Series?

The Go Power solar panel that came with the rig is a 12 volt 190 watt panel. Although the Go Power 30 amp solar charge controller can handle 600 watts of power coming from the panels, it is unable to operate on anything but 12 volts. Fancier charge controllers can work with the panels at 24, 36 or 48 volts and then step down the voltage to 12 volts to charge the batteries.

This limitation meant we didn’t have the option of using 24 volt panels which are generally cheaper per watt. Also, it meant that the new panels would have to be wired in parallel with the existing panel to keep them all at 12 volts rather than having the option of wiring them in series because it would put the solar array at 36 volts.

As a side note, even though we didn’t have a choice in this case, the decision whether to wire the solar panels in parallel versus in series is a matter of how much shade the panels might encounter and how long the cable runs will be versus the guage of the wire.

When solar panels are wired in series, if one panel gets shaded, all the panels reduce their power output dramatically. Also, the voltage of the panels is cumulative while the current stays the same. That is, three 12-volt panels will be at 36 volts but the current running in the wires will be the nominal current of a single panel, for instance, 10 amps.

When solar panels are wired in parallel, if one panel gets shaded, the others continue to produce power at their normal rate. So, in a three panel array, if one panel drops out you still get 2/3 of the power because the other two panels are still working. Also, the voltage of the panels remains the same but the current is cumulative. That is, three 12-volt panels will be at 12 volts but the current will be additive, or 30 amps.

The more current there is in a wire, the shorter that wire has to be before some of the current dissipates as heat, leaving you less current for charging the batteries. A heavier guage wire will retain more current over a longer distance, but it is harder to work with during the installation and it is more expensive.

For reference, we wired the panels on our old full-timing fifth in series, and that worked fine because we almost always parked in full sun and rarely had any kind of shade on the panels. However, we wired the panels on our sailboat in parallel because the mast and boom cast a huge moving shadow across the panels as the boat swung at anchor, so one or another of the panels was frequently knocked out of the system.

New Solar Panels – What Size?

Whether the panels were wired in series or in parallel, any new panels we added to our system would produce the same watts as the existing panel: 190 watts. Even if the new panels were bigger than 190 watts, they would match the lower wattage of the existing panel.

There weren’t many 190 watt 12 volt panels available, except the same model Go Power panel we already had on the roof, and their panel is very expensive.

Go Power 190 watt solar expansion kit

Instead, we got two Renogy 200 watt 12 volt panels, and these seem to be good quality. Because the new panels will drop down to 190 watts to match the existing panel in the system, this RV solar upgrade will give us 570 watts of total power (3 x 190).

570 watts is more than either our boat or our full-time trailer, so it should be more than enough!

Renogy 200 watt solar panel

As for the batteries, we don’t have room for more batteries, and the existing batteries haven’t died yet (to my surprise!). So, we’ve decided to hold off on swapping out the batteries until another season.


RV Solar Upgrade: Installation

The total cost of the solar power upgrade was about $480 which included:

The tools required to do this RV solar upgrade project were:

The installation was straight forward.

On the back of each panel — both the existing one on the roof and the two new ones — there is a junction box with two 10 AWG leads (positive and negative). They are about 18 inches long and have MC4 connectors on the ends.

Renogy solar panel junction box and MC4 connectors

Most solar panels have a junction box and short leads with MC4 connectors on the ends, one positive and one negative.

On the existing solar panel, the MC4 connectors at the ends of these cables were connected to two other cables that ran from the roof of the RV down to the solar charge controller inside the rig.

All of this cabling was invisible as you looked at the face of the solar panel on the roof because it was all underneath it. Also, beneath the solar panel, there were two holes in the roof where the cables went into the interior of the rig down to the solar charge controller.

Renogy solar panel MC4 wires and junction box

Most solar panels have a junction box and two leads with MC4 connectors on the ends.

Here is a rough diagram showing the solar panel with its junction box and two 10 AWG cables with their MC4 connectors. These connectors are attached to two MC4 connectors on the ends of a long length of 10 AWG cable that goes through a hole in the roof (the blue circle) down to the solar charge controller in the interior of the rig (not shown).

The holes in the roof are actually under the panel, but this drawing shows the holes being above the panel so the diagram isn’t too messy!

Diagram of single solar panel with MC4 connectors on an RV roof

Our factory installed solar panel had two leads, positive and negative, that attached to wires coming up through the roof from the charge controller inside the rig. The holes in the roof (blue circles) are actually located under the panel.

We purchased two 3-to-1 branch adapters that would make it super easy to wire the three panels in parallel. The adapters look like bird feet with three toes (one for each solar panel), and a leg that would attach to the cable that went through the roof into the rig.

One adapter would be connected to the positive side of the system and one would be connected to the negative side. That is, all three positive leads, one from each panel, would connect to the three toes on one bird foot (the “positive” 3-to-1 branch connector) and all three negative leads, one from each panel, would connect to the three toes on the other bird foot (the “negative” 3-to-1 branch connector).

We also bought two 6′ lengths of 10 AWG cable with MC4 connectors pre-installedat each end. These were essentially extension cables that would connect to the MC4 connectors on the cables coming up through the roof from the charge controller down in the rig.

They were color coded, so the red one would connect to the positive cable coming up through the roof and the black one would connect to the negative cable coming up from the charge controller.

Fortunately, Genesis Supreme had labeled the cables coming up from the charge controller so we could tell which one was positive and which was negative.

MC4 solar panel wire connectors for an RV installation

We got two 3-to-1 branch connector (“bird feet”) and one 6′ pair of 10 AWG cables with MC4 connectors pre-installed on the ends.

Here is a rough diagram showing the layout of the cables. As in the previous diagram, the two blue circles are the holes in the roof which are actually located beneath the original solar panel in the middle. However, for simplicity in showing how the cables connect, the “holes in the roof” are located above the panels in this diagram and the 6′ extension cables are really short!

Diagram of RV solar power upgrade from 1 panel to 3 panels in parallel

Our 2 new panels would be wired in parallel with the existing panel, connecting all the positives together on one 3-to-1 branch connector and all the negatives on the other. The extension cables would connect to the wires coming up through the holes in the roof (blue circles). Note that the holes in the roof are actually under the center panel and the 6′ extension cables are drawn super short.

Our mission was to :

  1. Lift the existing solar panel so we could access the cabling underneath
  2. Disconnect the MC4 connectors on the panel’s leads from the MC4 connectors on the cables that come up from the solar charge controller in the rig
  3. Reconnect the cables coming from the charge controller to the new 6′ “extension” cables
  4. Connect the “extension” cables to the legs of the 3-to-1 branch connectors which would designate one as “positive” and one as “negative”
  5. Connect each panel’s positive cable to the “positive” 3-to-1 branch connectors
  6. Connect each panel’s negative cable to the “negative” 3-to-1 branch connectors

All of this would be done by snapping the MC4 connectors together, simply inserting one end into the other and pressing it together. So easy!

There’s a special tool for disconnecting MC4 connectors, but you can also disconnect them with your fingers by keeping the tab on one side depressed as you pull the two pieces apart.

Connecting MC4 connectors in an RV solar panel installation

MC4 connectors snap together.

To get at the cables under the existing Go power solar panel, Mark removed the hardened sealant that was covering each of the mounting brackets. He used a screwdriver but a narrow and rigid putty knife would work too.

Removing a Go Power solar panel from an RV roof

First step was to lift up the existing panel which required removing the sealant on the mounting bracket screws and then unscrewing the screws.

Then he unscrewed each of the screws holding the mounting brackets in place.

We bought a wonderful cordless power screwdriver last year that we BOTH absolutely LOVE! It makes screwing and unscrewing things infinitely easier than doing it by hand, and it’s much less bulky than a cordless drill.

Ryobi cordless screwdriver
Removing a Go Power solar panel from an RV roof

Unscrewing the screws.
The cordless screwdriver is one of our favorite tools!

He unscrewed all four feet and then lifted up one side to get at the cables underneath.

Changing the wiring under a Go Power solar panel under an RV roof

Working under the existing solar panel.

A positive (red) and negative (black) cable came up through the roof from the interior of the rig where they were connected to the solar charge controller and were connected directly to the solar panel. Mark disconnected each cable from the solar panel and then reconnected them to the two 6′ extension cables we had purchased.

Changing the wiring under a solar panel on an RV roof

The positive and negative extension cables go between the 3-to-1 branch connectors and the cables coming up through the roof from the charge controller inside the rig.

Then he connected the extension cables to the “legs” of each of the two 3-to-1 MC4 branch connectors (bird feet) and connected the solar panel’s negative and positve leads to the “toes” of the 3-to-1 branch connectors.

RV solar panel MC4 connector wiring on an RV roof

The original panel (black leads going to the middle “toes”) and the solar charge controller (red and black extension cables going to the “legs”) are now wired into the 3-to-1 branch connectors. We ran into the rig to verify everything looked okay and we saw the float voltage of 13.5 volts on the charge controller display.

Next, we needed to get the two new Renogy solar panels onto the roof of the RV, place them on either side of the existing panel, and then connect their positive and negative leads to the positive and negative 3-to-1 branch connectors.

Before that, though, we needed to figure out how to get the panels up onto the roof which is 13.5 feet in the air! We opened the patio of the toy hauler and put a ladder on it. This was much more secure than carrying a heavy solar panel one handed up the ladder attached to the side of the rig!

Ladder roof access on a toy hauler RV patio

The most solid way to get the panels up to the roof was to put a ladder on the patio!

Lifting a solar panel onto an RV roof

Here comes the first one!

Once we got both panels up on the roof, we attached the MC4 connectors on the two new panels’ leads to the outer “toes” of the two 3-to-1 branch connectors, positive to positive and negative to negative.

Now all three panels were completely wired up in parallel.

Three solar panels wired with MC4 connectors on an RV roof

.

The next step was to mount the solar panels on the roof.

The roof is just wide enough (it’s an 8.5′ “widebody” trailer) that we could place the three panels side by side, leaving enough space between them so we could walk beyond them to the far end of the rig.

First Mark screwed the original Go Power panel’s mounting brackets back into the roof.

Then we used the Renogy mounting Z brackets to mount the new Renogy solar panels. The Renogy mounting brackets came with very handy hex head self-tapping screws.

Self-tapping screws for installing a Renogy solar panel on an RV roof

Self-tapping screws. So easy!

Then Mark used a scratch awl to make a starter hole for the self-tapping screws. Pounding a nail in a little ways would have worked too.

Mounting an RV solar panel on the roof

Mark made a starter hole for the screws with a scratch awl.

Then he used a cordless drill with a hex head bit to screw them in all the way.

RV solar panel installation- attaching the solar panels to the roof

The mounting Z brackets got screwed into the roof.

Solar panel mounting brackets screw directly into the RV roof

Done.

Last of all, he used Dicor Self-Leveling Lap Sealant in a caulk gun to cover all the screws and seal all the edges of the mounting brackets. This will ensure that no water can find its way through the roof!

Sealing the holes in an RV roof after mounting a solar panel

Dicor Self-Leveling Lap Sealant seals the whole mounting bracket so water can’t leak in.

Dicor Lap Sealant on a solar panel mounting bracket

After the Dicor Lap Sealant had leveled out, it completely surrounded and covered the mounting bracket

Ta da! The finished product looked great!

RV solar upgrade cheap and easy with Go Power and Renogy

.

I couldn’t believe how easy this project turned out to be. Of course, the hardest parts were already done for us: running the cables from the roof down into the interior of the rig, wiring up the solar charge controller and wiring up the inverter. All we had to do was add two more panels and wire them up with the handy MC4 connectors.

If you have purchased a rig that has a “starter” solar power system like the Go Power system on our toy hauler, it’s not difficult to upgrade it like we did so you have the maximum amount of solar panel wattage that the charge controller can accept.

One thing to consider before buying any solar gear, especially from an online retailer, is to buy each piece individually rather than in a big kit. The problem with a kit is that if one item in the kit doesn’t work and needs to be returned, online retailers, like Amazon, may require you to return the entire kit. If the failed element is a solar panel and you’ve already installed the other panels in the kit and they are working fine, it may be a hassle to get approval to return just the one broken panel. I’ve read of cases where the entire system had to be dismantled and reboxed and sent back. For that reason, we opted to buy each piece separately just in case.

Subscribe
Never miss a post — it’s free!

Further reading…

SOLAR POWER OVERVIEW and TUTORIAL

BATTERIES and BATTERY CHARGING SYSTEMS

LIVING ON 12 VOLTS

ARTICLES ABOUT OUR GENESIS SUPREME TOY HAULER

REFERENCES

Our most recent posts:

More of our Latest Posts are in the MENU.   New to this site? Visit RVers Start Here to find where we keep all the good stuff. Also check out our COOL NEW GEAR STORE!! *** CLICK HERE *** to see it!

Where to See WILDFLOWERS (especially POPPIES) in Arizona 2023!

March 2023 — Arizona has received a glorious deluge of rain and snow this winter, and the rivers, streams and lakes are flowing fast and filling up quickly. Yay!

As if in celebration of this divine gift of a long drink for a thirsty land, many parts of the desert are now ablaze in shades of yellow as Arizona’s wild Mexican gold poppies pop their heads out of the ground and point their smiling faces towards the sun.

But where is the best place to see wildflowers — especially poppies! — in Arizona this spring?

Mexican Gold Poppies and California Poppies in Fields of Gold near Phoenix Arizona

.

We had a roundabout opportunity to see the poppies when special friends of ours invited us to their winter digs in Apache Junction which is home to Lost Dutchman State Park, a gorgeous spot known for its springtime wildflower display.

The official reason for our visit was to get some troubleshooting help on our Onan 4000 gas generator which has been giving us all kinds of grief since our first night in the trailer last year.

So, what better way to make our sour generator “lemons” into sweet wildflower “lemonade” than to get the machine repaired and upgraded and then go play in the flowers?! (We’ll share the details about the generator, its repair and upgrade in another post).

But first, we had to get there — and on our way we saw the remnants of the recent March blizzard that had buried parts of northern Arizona in several feet of snow!

Winter storm clouds on a northern Arizona road

US-87 north of Strawberry still had plenty of snow on the ground.

As we drove into Apache Junction, the roads were still wet from yet another dose of life-giving rain, and the Superstitions rose up under stormy skies in the distance.

Storm clouds over the Superstition Mountains in Apache Junction Arizona

The Supestition Mountains — where we hoped to see wildflowers — looked impressive and imposing as we approached after a rain storm.

At a stop light in the middle of town, at the intersection of Meridian and Brown, we glanced to the right and our jaws dropped at the sight of a vast field of yellow and orange daisies. We quickly parked and jumped out of the truck to take pics.

What was this place and how did these flowers get here?

It turned out that this huge field is owned by a local farmer who works his land with vintage 1960s tractors and farm equipment. He planted this field of daisies and it attracts visitors from far and wide every spring when the field erupts in vibrant color.

Field of Daisies Apache Junction Arizona

A large back yard in Apache Junction is filled with yellow and orange daisies.

As gorgeous as that field was, we wanted to see true wildflowers. So, as soon as the generator repair was completed, we did a hike in Lost Dutchman State Park. Unfortunately, the famous yellow poppies weren’t blooming where we hiked.

We did find one small collection of poppies, though, and it was lovely. But it wasn’t quite what we had in mind.

Wildflowers Mexican Gold poppies Superstition Mountains

The poppies weren’t in their full glory at Lost Dutchman State Park just yet, but we did find a small patch.

Photographing poppies in Lost Dutchman State Park

.


Even so, the Superstitions are glorious, and we got some satisfying pics of chain-link cholla cactus against the rugged mountain backdrop. But we were still in search of desert gold!

Chain link cholla cactus Superstition Mountains Arizona

A chain link cholla cactus in the Superstition Mountains..

Here’s a book about finding and photographing Arizona wildflowers that we just love:

We decided to take a drive on the Bush Highway, one of Central Arizona’s most scenic drives (blog post HERE).

The Bush Highway winds up and down and around the steep, rugged and gorgeous Sonoran Desert terrain, passing by lovely Saguaro Lake on its way.

We turned off at the Butcher Jones Recreation Area where there’s a small beach, and as cold and forbidding as the stormy and snowy mountain passes had been on our way here, this place was teeming with summertime beach activity.

Saguaro Lake Butcher Jones Beach Arizona

Saguaro Lake, a man-made lake on the Salt River, is lined with saguaro cactus!

People in bathing suits were drifting around on stand-up paddle boards and kayaks, and families were gathered around coolers on beach blankets and in camp chairs.

It was Spring Break and everyone was whooping it up!!

Butcher Jones Recreation Area Beach at Saguaro Lake Arizona

The Butcher Jones Recreation Area was hopping with happy spring breakers playing on the water.

But we were still on the hunt for massive blooms of poppies. Down at our feet we saw a beautiful bouquet of flowers poking up out of the gravel and sand.

Natural bouquet of beautiful wildflowers in Arizona

A natural bouquet of wildflowers blooms in the sand.

Another pocket of poppies was in full glory near the shore of the lake.

Mexican gold poppies at Saguaro Lake Butcher Jones Beach

We weren’t the only photographers to grab a pic of these poppies!

All of this was fantastic, and the excitement of the Spring Breakers was contagious, but we still weren’t seeing the poppy photo ops we’d hoped for.

We got back in the truck and drove another few miles north on the Bush Highway.

Suddenly, there it was, all around us, about halfway between the lake and US-87.

Mexican Gold Poppies and California Poppies near Saguaro Lake Arizona

Poppies!

The hillsides on either side of the highway were bursting with color, blanketed in vivid yellow poppies!

Mexican Gold Poppies on the Bush Highway in Arizona-2

.

Hillsides covered with Mexican Gold poppies near Saguaro Lake Arizona

The desert comes alive.

On either side of the road as far as the eye could see, drivers had parked their cars on the dirt shoulder and people were getting out for a closer look at the spectacle.

Everyone was grinning, cell phone or camera in hand, and excited exclamations and comments filled the air. We all stared at the magnificent scenery in awe.

“Wow!”
“Incredible!”
“I’ve never seen anything like this!”
“Can you believe it?”

Mexican Gold Poppies and California Poppies near Saguaro Lake Arizona

Even though these poppies aren’t the kind that Dorothy walked through in the Wizard of Oz, I kept thinking of that refrain, “Poppies…poppies…poppies!”

We tip-toed between the flowers and found a dirt wash we could walk and were soon immersed in pretty yellow poppies.

Stop and smell the Mexican Gold poppies and California poppies near Saguaro Lake in Arizona

Stop and smell the flowers!

We’ve only seen vast fields of wildflowers where the flowers go on far into the distance a few times, by the side of I-40 in North Carolina (blog posts HERE), by a forest road near Cody Wyoming (see HERE) and at Cedar Breaks in Utah (HERE).

But this display was the biggest and boldest we’d ever seen. Fields of gold…and popping poppies!

21 721 Mexican Gold poppies and Calfironia poppies near Saguaro Lake Arizona

.

Fields of Gold with Mexican Gold poppies and California poppies near Saguaro Lake

.

Fields of Mexican gold poppies with Weaver's Needle in Arizona

On the Bush Highway, between US-87 and Saguaro Lake, there is stretch of about a mile or two where the rolling hills are covered in poppies right now.

We thought that these were Arizona poppies. After all, they were blooming in Arizona! But Arizona poppies bloom in July and this was mid-March.

Once we were back in our trailer that evening, we poked around online and discovered that these stunning flowers were Mexican Gold Poppies a subspecies of poppy closely related to the California Poppy (which is California’s state flower!).

Back in 1816, German physician and naturalist Johann Friedrich Eschscholtz (1793 – 1831) discovered the poppy genus in the San Francisco area.

Mexican Gold poppies

.

Mexican Gold Poppies on the Bush Highway in Arizona

.

Poppies in Arizona

.

Poppies love dry desert soil and they bloom profusely when they get a long drink during the wintertime. They are sun worshippers too, opening up in bright sunlight and closing their petals tightly when the skies are overcast or gray (and at dawn and dusk which makes them hard to capture in a photo with a sunrise or sunset!).

Mexican Gold Poppies on Arizona Bush Highway

.

On the fringes of the rolling hills of brilliant yellow, we found a few poppies standing side by side with other flowers.

Wildflowers smile up at the sun in Arizona

.

And, of course, in other places in the desert, especially along the highways, we found lots of other beautiful wildflowers too.

Wildflower in the Sonoran Desert

.

Wildflower in Apache Junction Arizona

.

Wildflower in the Superstition Mountains Arizona

.

Lupine wildflowers in Arizona

.

If you visit the Sonoran Desert between late February and early April, you can catch these delightful flowers brightening up the landscape. These pics were taken just a few days ago on March 17, 2023, so if you are there now, be sure to take a drive to see this extraordinary display.

There are wild horses roaming in the area too, another special treat!

Wild horses and poppies on the Salt River in Arizona

The Wild Horses of the Salt River are a beloved herd.

Pup in the flowers

Subscribe
Never miss a post — it’s free!

More info about these poppies:

Other blog posts featuring wildflowers:

More blog posts from this part of Arizona:

Our most recent posts:

More of our Latest Posts are in the MENU.   New to this site? Visit RVers Start Here to find where we keep all the good stuff. Also check out our COOL NEW GEAR STORE!! *** CLICK HERE *** to see it!

<-Previous || Next->