RV Boondocking – Tips for Living Off the Grid in an RV

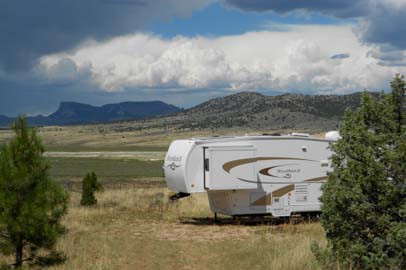
Camping out in nature on beautiful public lands and living off the grid in our RV are the very foundation of our lives today. Other than the weeks we spent transitioning on and off of our sailboat during the years we sailed Mexico’s west coast, we have lived exclusively on solar power and self-contained plumbing in our trailers and sailboat since we started this crazy full-time traveling lifestyle in 2007.

Free camping in an RV in Utah

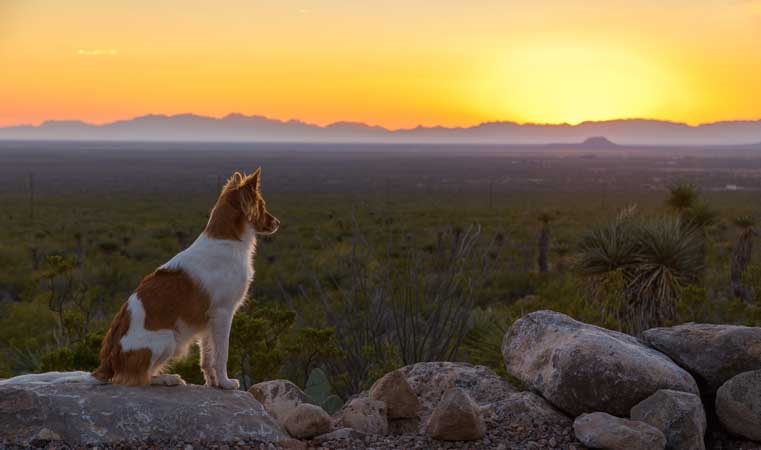
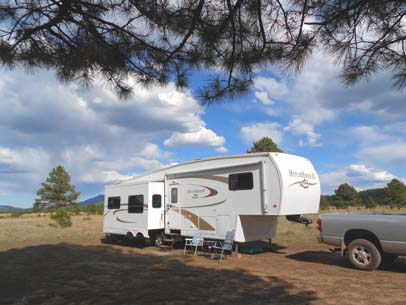
Enjoying nature out in the boondocks

Since we started in 2007, as of June 2020, we have spent over 4,300 nights living off the grid in our RV and sailboat. We’ve lived within the electrical constraints of a house battery bank and dealt with funky RV and marine toilets that flush into holding tanks.

In the process, we have learned a lot about “dry camping” (or “boondocking” or “wild camping” or “free camping” or “dispersed camping”) as well as “anchoring out.”  And we’ve figured out how to do it comfortably.

Is it fun to live this way, even though there are limits on electricity and water consumption? OMG – yes! We have no plans to return to a life on the grid anytime soon.

Is it hard or primitive? Not at all. We don’t feel we have to compromise any aspect of our lives to live this way.

This page explains how we have lived this very independent and free spirited lifestyle.

For tips on how to find free camping spots, see our page: Boondocking – How to find Free RV Campsites. And if your love of adventure is enticing you further into the outback, you’ll find great tips for overlanding at: Overland Site.

This is a long post and you can use the following links to skip further down the page:

1. Electricity Basics
2. How to Conserve Electricity
3. Water Capacity and How to Conserve Water
4. Waste Water Tanks, Propane and Communications
5. Safety

ELECTRICITY BASICS

Return to top

Solar Power – The Foundation of RV Boondocking

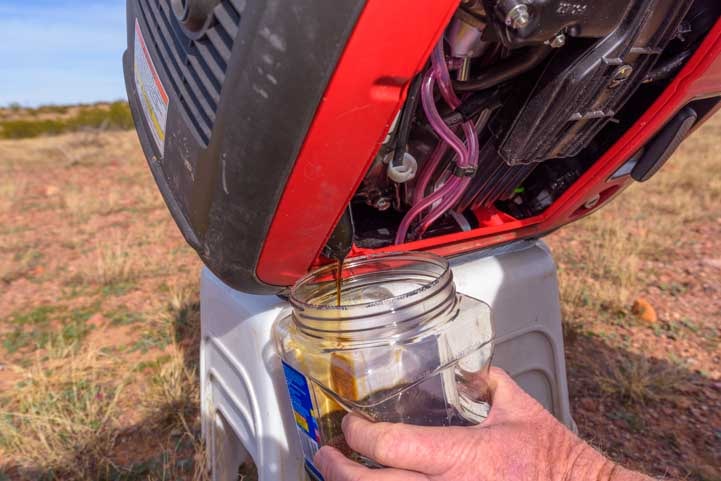
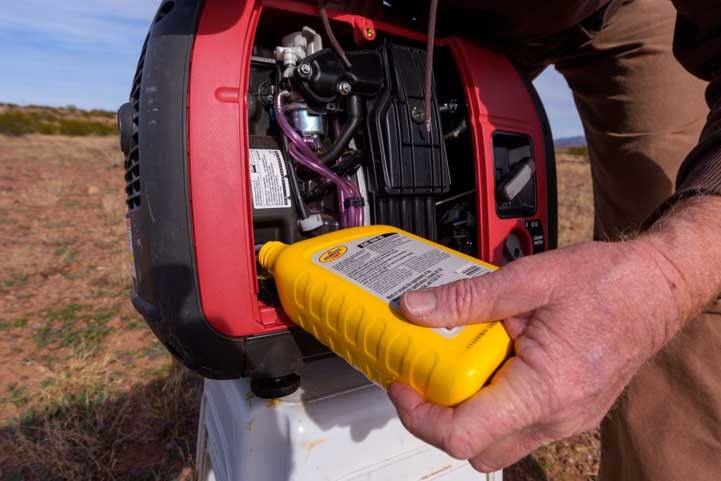
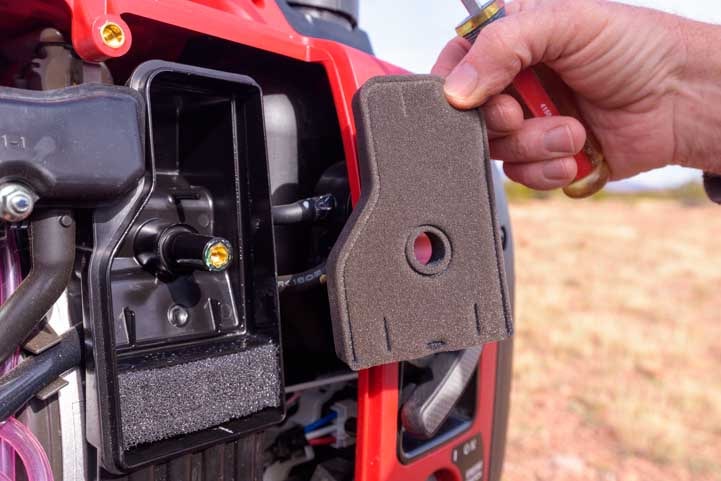
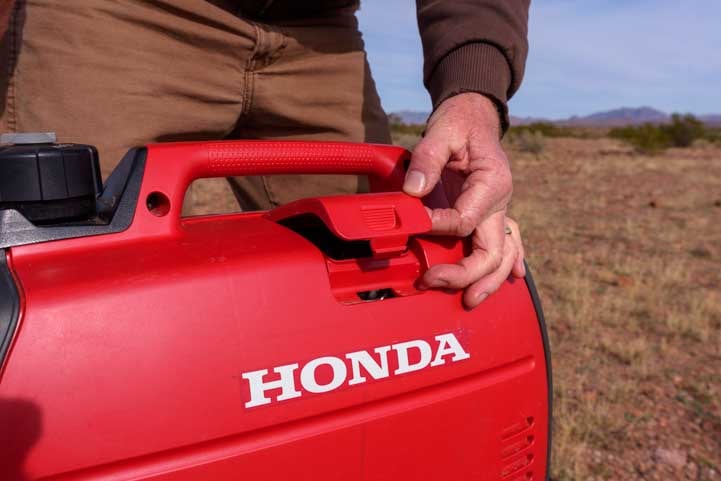
In order to boondock efficiently, you need to equip your rig to supply its own electrical power for extended periods. A generator is okay if your stay is going to be just a few days or even a week or two once in a while. However, generators require fuel, and it won’t take long to run up a big fuel bill. They are also noisy, they require maintenance, and they insist that you stay home when you operate them. We carry a Yamaha 2400i portable gas generator, but we use it only 5-10 times a year, if that.

00 601 Motorhome with four solar panels on the roog

Solar power makes it easy to life off the grid in comfort.

A solar power system is silent, doesn’t need expensive or messy fuel to run, doesn’t need any kind of maintenance, and works all day long, whether you are out sightseeing or shopping or hiking or at home taking a nap. Solar power is also very affordable, and for the same approximate cost as a similarly sized generator, you can put solar power on your rig.


We have lots of pages on this site that explain the components and parts that make up a solar power system. We show you how to design a system to suit your needs, and offer pointers on installation. These pages are all accessible at this link:

Solar Power Articles for RVs and Boats.

For an easy-to-read overview of how to install solar power on an RV, visit this link:

RV Solar Power Made Simple!

While we have always installed a custom solar power installation on our rigs that connects solar panels on the roof to batteries and an inverter in the basement, another option is to connect the panels to a solar generator.

Understanding Electricity – Counting Amps

Before we get into the details of how to conserve electricity, it helps to understand just a little about terms like “amps” and “bulk charge state.” This section and the next cover that. You don’t have to know anything about electricity or weird terms like these to conserve and live off the grid. However, I reference them a few times in this post, and I don’t want to lose you, so here are some quickie notes.

  • An “amp” is a measure of electrical current flow
  • An “amp-hour” is one amp of current flowing for one hour
MacBook Pro at the RV window

Picture in a picture on the laptop!

As a reference, here are the approximate amps required to run some common appliances.  For more specific numbers, check your owner’s manual spec sheet for the number of watts an appliance uses and divide by 10 to get the approximate number of amps the batteries will have to deliver to run the appliance.

Some of these appliances fluctuate or turn on and off as they operate, so these numbers are very rough.  Multiply the amps by how many hours you use each item to find out how many amp-hours the batteries will have to provide for them each day:

  • Laptop running => 3 to 6 amps
  • 36″ LED TV => 5 to 7
  • RV furnace blower => 10
  • Coffee maker => 10
  • Microwave (small) => 10

But who wants to do all that math? Here are two more little facts:

  • Most full-time RV off-the-grid households use 80-200 amp-hours per day
  • It is possible to live on much less (we lived on 30 amp-hours per day for a year)

Understanding Batteries – Battery Charging Stages

When living off the grid, it helps to know a little about the stages the batteries go through as they get charged.

Starting with tired, worn out, “discharged” batteries, a solar charge controller (or a generator or a converter or an inverter/charger or an alternator) gets things rolling by putting the batteries into a Bulk charging state. In the Bulk state, the charge controller allows a maximum amount of current to flow into the batteries (from whatever source — from the solar panels, from shore power, from the motorhome engine).

This slowly raises the battery voltage up to 14.4 – 14.8 volts (the amount depends on the type of battery; more sophisticated charge controllers let you program the value, otherwise a default of 14.4 is typical).

Once the batteries reach that voltage, they enter the Absorption charging state, and the charge controller changes its charging strategy. Rather than allowing a maximum amount of current to flow into the batteries, it allows just enough current to flow to keep the batteries at the Absorption voltage for a specified amount of time (usually 3 hours by factory default — again, sometimes programmable).

During this Absorption period, as the voltage is held constant, less and less current needs to flow into the batteries to keep them there while they slowly get charged.

At the end of the specified Absorption time, the charge controller enters the Float charging state. Now it holds the batteries at a lower voltage (13.3 – 13.8 volts, depending on battery type), gradually reducing the amount of current flowing from the panels into the batteries even further. When the batteries are in the “Float” stage, they are considered to have become fully charged.

For more details on battery charging, click here:

RV and MARINE BATTERY CHARGING BASICS

Free camping in Utah

Enjoying the views in Utah


HOW TO CONSERVE ELECTRICITY

Return to top

If your battery bank and solar power array are big enough, you don’t have to scale back at all in your use of electricity. However, there may be times when you need to conserve a little if you don’t have a generator for backup, or if you don’t want to drag it out and set it up. When a big storm rolls in and darkens the skies for a few days, or in January when the days are short and the sun is low in the sky, you may decide to conserve a bit for a day or two.

Monitor Your Batteries

There are many ways to stay on top of how your batteries are doing, and there are all kinds of price tags for getting this info. At the cheap end, for a few dollars, you can get a simple car battery volt meter that plugs into a cigarette lighter in the coach. We have one of these and it’s a good quick-and-dirty way to see what’s going on. Ours reads a consistent 0.1 volts low, compared to a better quality meter, so we just keep that in mind when we use it.

Outback FlexMax FM60 MPPT Charge Controller Display

Outback FlexMax FM60 MPPT charge controller on our RV
Batteries at 14.5 volts with 28.7 amps going to them.

Another method is to look at the battery voltage being reported on your solar charge controller, if the display shows it.

Our Outback FlexMax FM60 MPPT charge controller in our trailer has a four line LCD display that shows the battery voltage and current going to the batteries from the panels.

Our Xantrex XW-MPPT60-150 charge controller in our boat has a one line display you can scroll through.

The Morningstar TriStar TS-60 solar charge controller doesn’t have an LCD display on it. However, you can purchase an additional display module for it which has 2 lines of text.

Xantrex XW MPPT 60-150 Solar Charge Controller in a sailboat

Our Xantrex XW MPPT60-150 charge controller on our sailboat

Another method is to get a clamp-on current meter. We use ours from Sperry Instruments all the time.

The most elaborate method is to install a dedicated battery monitor in the coach somewhere so you can see what’s going on without making too much effort.

[As a side note, although some folks consider a battery monitor mandatory equipment for boondocking or anchoring out without shore power, we have never installed a battery monitor in any of our rolling or floating homes.]

All of these are valid methods that get you an approximation of what’s going on with your batteries. But none are scientifically “perfect,” because the “real” state of charge of the batteries is not indicated by its current voltage.

Sperry Clamp-on current meter

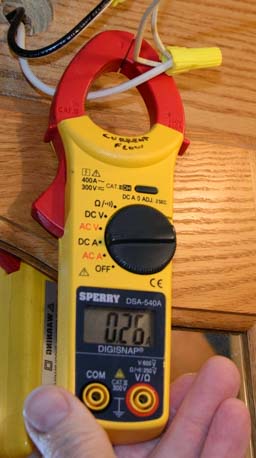
Checking the DC current flow on our new LED light bulbs.

For instance, when the panels are charging the batteries, they are held at an artificially high voltage of 14.4 to 14.8 volts during the Absorption stage. Even after the sun goes down, if there’s nothing using electricity in the motorhome or trailer, they have a “surface charge” that keeps them at an elevated voltage. Likewise, at night, when the TV is blaring, the computers are going and a bunch of lights are on, the voltage will be drawn down artificially low because of the temporary load from all these appliances.

If you really care about the exact status of the batteries, and you have wet cell batteries, monitor them with a battery hydrometer.

But scientific precision doesn’t really matter. You just need to know if you’re okay or not.

We simply check the batteries in the morning before the solar panels start raising the voltage. If they are on the low side (12.2 – 12.3 volts or less), then we check again in the afternoon to see if they are in the Float stage.

If they are really low in the morning and clouds are predicted, or if they don’t reach the Float stage for a few days in a row, then we think about using the generator to get them fully charged up again.

Can a Generator Work with Solar?

Utah camping in an RV

A summer storm rolls in

We have used solar power in conjunction with both our generator and our boat’s engine 100 amp alternator, and in both cases, the two charging systems worked fine together and shared the load.

On our boat, we used our clamp-on current meter to measure the current going from both the solar charge controller to the batteries and from the alternator to the batteries. As soon as we turned on the engine, the current from the solar charge controller dropped from 20 amps to 6, while the current from the alternator jumped from 0 amps to 14. So a total of 20 amps was still going to the batteries, but the solar system backed off and let the alternator do the lion’s share of the work.

Similarly, on our trailer we have seen the generator and solar panels trade off the load as heavy clouds came and went..

Bottom line: They work it out between themselves.

For a detailed explanation of how a solar charge controller works in conjunction with shore power, see this link:

Solar Power and Shore Power Combined – What Happens?

Pick the Best Time to give the Solar Panels a Generator Boost

When the solar panels aren’t quite keeping up with their task of charging the batteries, you’ll have to use a generator to get the batteries back into a fully charged state (or go to an RV park or campground to plug in). You can run the generator at any time, but if you are looking to run it as little as possible, running it in the morning is best.

Why? Because first thing in the morning the sun is very low in the sky, greatly limiting the panels’ ability to produce power. So, even though the charge controller puts the batteries in a Bulk charge state at dawn, the panels just can’t deliver.

A generator, however, can. It will produce maximum current flow to the batteries as soon as it is plugged in. In our case, we’ll see 20 amps going from the generator to the batteries at sunrise. After a little while, sun will be higher in the sky and the solar panels can take over and bring the batteries all the way through the Absorption stage to the Float stage by afternoon.

If you wait to use the generator until the end of the day, however, the batteries will already be fairly well charged from the panels working all day. When you turn on the generator, it will quickly switch from the Bulk stage to the Absorption stage and begin reducing the amount of current it puts into the batteries.

In our case, it will drop from 20 amps to 10 or less in about 5 minutes, and it will then slowly drop (and “trickle charge”) for hours as it wraps up the Absorption stage and goes into Float.

RV camping in Utah

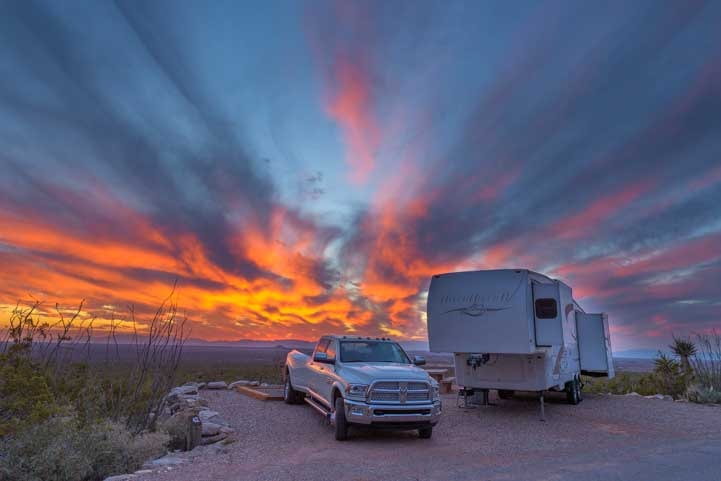
Beautiful afternoon light

To make this clearer, say the ticket to getting the batteries fully charged on a given day is about 20 amp-hours.

If you run the genny at dawn, they’ll get that in an hour. If you run it in the evening, it may take two or three hours. That’s wasted fuel — not a huge amount, but it’s still wasted.

How do you know you need another 20 amp-hours to get to full charge? It doesn’t take long to get a feel for what your daily consumption is. On the days the batteries reach full charge, you’ll see how much the solar panels delivered for the day. Then you’ll be able to compare one day to the next as you use your favorite appliances more or less.

We have an entire series of articles that covers every aspect of BATTERIES and BATTERY CHARGING:

Replace incandescent and halogen bulbs with LED bulbs or fluorescent lights

New rigs are being built with LED lighting, however in older rigs, it is helpful to swap out the most frequently used bulbs for modern, efficient ones. Both fluorescent and LED lights are energy efficient. Fluorescent lights are cheap. LED bulbs can run from $6 to $18 apiece, so pick and choose which ones to replace.

Fluorescent overhead light in a fifth wheel RV

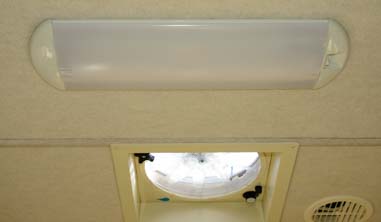
We use our fluorescent lights overhead lights the most.

Our 2007 Hitchhiker fifth wheel came with three very large fluorescent lights in our kitchen and living area, so we did not replace any incandescent bulbs with LED bulbs for the first six years we owned it. We boondocked all that time with no problem.

We did replace a few 120 volt AC sconce bulbs with LED bulbs early on, but the light was so dim and cold that we ended up never using those lights!

The technology has come a very long way since then, however, and we recently swapped out those old LED sconce bulbs for new ones that cast a wonderful warm light. Now we use those sconce lights a lot for soft evening lighting!

So, think about which lights you want to use and where it makes sense to spend money on LED bulbs. There’s no no need to drain your bank account replacing every bulb in your RV with LEDs!
.

Choosing the Right LED Bulb

There are a gazillion LED lightbulbs on the market, and it is dizzying to figure out what to buy. In the end, there are just 3 things to consider:

LED lights

Different types of 12v LED bulbs

1. The style and base of the bulb
2. The brightness
3. The color (warmth or coolness)

A great resource for buying LED lights is superbrightleds.com, but you may be happiest buying from a place where you can take your old bulbs in for comparison and keep trying different bulbs until you get the exact kind of lighting in your RV that you want.

Bulb Base Type and Shape

120 volt AC bulbs have either a standard screw on base or a narrow one like you find in chandelier and sconce bulbs.

12 volt DC bulbs come in more shapes and sizes. There may be two long prongs, or a bayonet mount with two nubs sticking out of a cylindrical base, or there may be a “wedge” base.  Most incandescent DC bulbs have a number on them, and you look for an equivalent replacement LED bulb that references that number.

Besides the base, the other consideration is the overall shape of the bulb. If the light fixture casts light 360 degrees around it, then a cylindrical shape is good. If it is an overhead light that only casts light downwards, then a flat panel with LED pads only on one side makes more sense.

Brightness

Historically, light bulbs have been rated in terms of watts, and we all have a “feel” for what kind of light a 25 watt, 40 watt or 60 watt bulb produces. LED bulbs are rated in terms of lumens, which is a measure of brightness. Where it gets confusing is that both incadescent bulbs and LED bulbs require a certain amount of watts (power) to run. The difference is that incandescent bulbs require many more watts than LED bulbs for the same degree of brightness.

So, for a given amount of brightness (lumens) how many watts does an LED bulb require versus an incandescent bulb? We haven’t found a strict mathematical relationship given anywhere.

Ceiling Fan LED Lightbulbs

We put LED bulbs in our AC (120v) ceiling fan.

The Department of Energy has a Lumens and Lighting Fact Sheet that shows:

Incandescent -> LED
60 watts -> 800 lumens
40 watts -> 450 lumens

Manufacturers put widely varying claims on their packaging about incandescent bulb watts and their own LED bulb equivalent. But all that really matters in an RV is how much light you get per amp of drain on the batteries.

In terms of brightness, we have found:

  • A single 300-350 lumen bulb is “mood lighting” or “accent lighting”
  • A pair of 300-350 lumens bulbs generates enough to “see well”
  • A total of 800 lumens or more is what we want for bright overhead lighting.
Double 12 volt light fixture

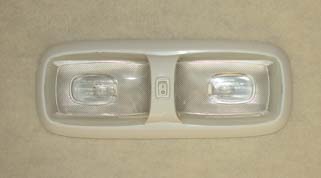
For overhead lighting, two 400+ lumen LED bulbs (or one 800 lumen bulb) works well
in this fixture.

We measured the amps used by both the DC and AC LED bulbs we have installed in our trailer. The very rough relationship we found between lumens and amps turned out to be:

It takes ~1 amp DC to get ~1000 lumens of light

So, a 300 lumen bulb will use roughly 0.3 amps DC, and a pair of bulbs totaling 700 lumens will use approximately 0.7 amps DC.

Color (Warmth)

Perhaps the most important factor with LED bulbs is the color, or warmth, of the light they produce. There is nothing worse than that harsh blue-white light so many LED bulbs generate.

The warmth is is given in degrees Kelvin. Higher numbers are cooler. We’ve found the following:

  • 2700-3200K is a good number for a bulb that will match the warmth, or yellowness, of an incandescent bulb
  • 4,000 is just a little too white for our personal taste (although we have a few)
  • >4,500 starts getting into the glaring blue-white range

Use LED Rope Lights

Another fun lighting idea is to use LED rope lights. A bright white variety can be strung across the ceiling for overhead lighting. A warm white variety can be strung behind the crown molding on the slide-outs to create indirect mood lighting (great for watching TV).

More Mood Lighting Ideas that don’t use the House Batteries

There are several ways to get wonderfully romantic mood lighting at night. During our first year of minimal solar power in our travel trailer, we relied on hurricane oil lamps at night. We hung them from the slide-out trim molding using long decorative s-hooks. I loved those!

A sailing friend of ours introduced us to an even better idea using LED Pillar Candles that are flame free. These are made of wax and they flicker, so they look and feel like a real candle.  She places them in teak drink holders that gave her boat’s cabin a fantastically nautical flare.  I’ve used mine every night in our boat and trailer for five years! The batteries in them last about two years.

I place them on the tops of our window valences and carry them around. If one of us goes to bed before the other, we leave this flameless LED candle flickering in the bedroom to make it easier for the other person to find their way into bed without tripping in the dark! They also work really nicely as background lighting when we’re watching TV/videos or are on our computers at night.

Use lights only where you need them

The more lights you have running, the more juice you’re using. The pesky ones are the ones in places you can’t see. Make sure you turn off the lights in the basement areas and closets. We’ve accidentally left lights on overnight. It’s not a big deal, but it is wasted electricity!

Operate laptops on their own battery power. Charge them when not in use.

We each have a 13″ Macbook Pro laptop that uses about 1.6 amps when turned off and charging. However, these laptops use anywhere from 3 to 8 amps apiece when they are turned on and running, depending on what applications we are using and whether we are accessing large, powered external hard drives.

Laptop

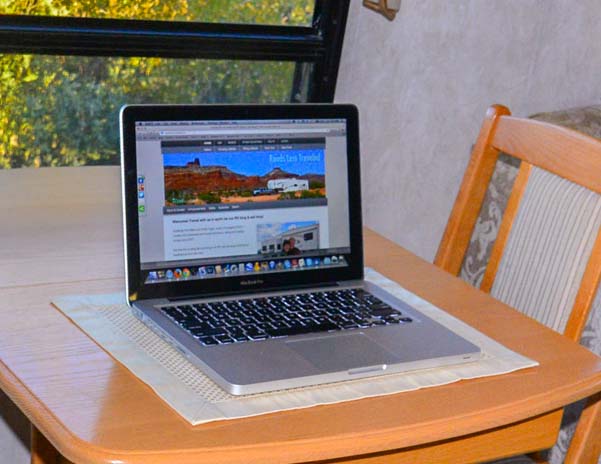
Run laptops on their own batteries.

They average about 5 amps or so when in use, and they can run for 3-5 hours on battery power before they need to be charged up again.

It takes the same length of time to charge up the laptops whether they are closed and turned off or turned on and actively in use. So, it is more energy efficient to charge them when they are turned off and to run them on their own batteries.

For instance: if one laptop runs on battery power for 3 hours and is charged later, it uses a total of 4.8 amp-hours for that 3 hours of use (3 hours x 1.6 amps).

However, if it is plugged in for 3 hours as we use it, it gobbles up around 15 amp-hours (3 hours x 5 amps)!

Multiply that computer activity by two people using their laptops for 3 hours, and the consumption can be as low as 10 amp-hours if we’re conservative, or 30 amp-hours if we’re not. That’s a huge difference!

Make coffee manually

Making coffee by hand with a Melitta coffee filter

Great coffee without a coffee maker.
(Mug: “Home is where the Heart is!”)

Rather than using an electric coffee maker, which can draw 10 amps or more, we use a plastic Melitta coffee filter with cone filter inserts to brew coffee. Coffee aficionados actually consider this method to be the best way to make coffee!

The overall process is similar to a coffee maker, but you manually pour near-boiling water over the grounds to make drip coffee rather than relying on a machine to do the work for you. There is no mess, and it is very easy and quick.

If you are patient, the best method is to moisten the grounds with the hot water first, and let them soak up the water for a minute. Then pour the rest of the water over the grounds slowly. A lot of times, though, I’m not that patient, and I just pour and go!

Mark doesn’t drink coffee, so I use a single-cup Melitta coffee filter (and paper cone insert) to pour my own drip coffee, one fresh cup at a time.

A bigger version of this filter (and cone inserts) is perfect for brewing two cups of coffee at once.

Another non-electric alternative is a French Press. This method has the advantage of preserving the bean oils in the coffee. The only difficulty in the RV lifestyle is that you have to dispose of the grounds before washing the French press so they don’t go down the drain. It can be a challenge to get all those tiny grounds out with limited water. I used a French press when I lived on a boat at a dock in New England years ago, and it was easy to rinse out the grounds over the side of the boat in the ocean (brrrrr in January!). But that’s not possible in an RV. I find it’s much easier to lift out the paper cone filter and toss it.

Keep the volume down on the TV/DVD and stereo

We don’t watch much TV, but we’ve found that the volume makes a huge difference in the amount of current it draws. We measured a difference of 1.5-2.0 amps on a 19″ LCD TV if we turned the volume way up. A TV attached to a large sub-woofer and a four speaker surround-sound system is going to have an even bigger difference at high versus low volume.

Free camping on the beach in Floria

Life’s a Beach in Florida

Of course, you’ve gotta be happy too, and watching an action flick at low volume just doesn’t cut it. That’s where more batteries and more solar power makes life better.


Use small inverters, and charge more than one item when you turn an inverter on

150 watt inverter

150 watt portable inverter

Inverters convert 12 volt DC power (battery power) to 120 volt AC power (like the power in a house). They come in all sizes. Most RV boondockers have one big inverter that supplies power to all the AC outlets in the rig. We also have a few small portable inverters.

All inverters use battery power just to run. This is noted as the “no load draw” on the specs. A few examples of small portable inverters we’ve measured:

Our Exeltech XP 1100 watt pure sine wave inverter that powers all our AC outlets in our RV uses 2 amps to run!

Some of the larger pure sine wave inverters, like the Exeltech XP 2000 and Xantrex ProWatt 2000 have a “no load” draw of less than an amp. This must be due to an increased efficiency in the design of the larger size inverters. Check your specs!

As long as any inverter is on, you might as well make the most of it and charge everything up at once, from toothbrushes to power tools to cameras and phones, so you don’t have to keep it turned on for as long.

For an amusing tale of inverter use gone awry, check out our post, How Much Inverter Is Enough?

Charge laptops and other devices in the car or truck when you do errands

If you really want to conserve, another option is to plug a cheap, small inverter into the cigarette lighter of your car or truck and to charge everything up as you drive around town doing errands or going on sightseeing excursions.

We don’t do this any more, because we don’t have to be that frugal with our electricity, but during our first year in our travel trailer we had a small solar power system — 130 watts of solar power and 220 amp-hours of battery capacity — and we frequently chauffeured our electronic devices around town as we did errands so they could get charged up! (See our page RV Solar Power Made Simple to learn more about the solar power installations we have done on our RVs).


WATER CAPACITY and HOW TO CONSERVE WATER

Return to top

Holding Tank Capacities

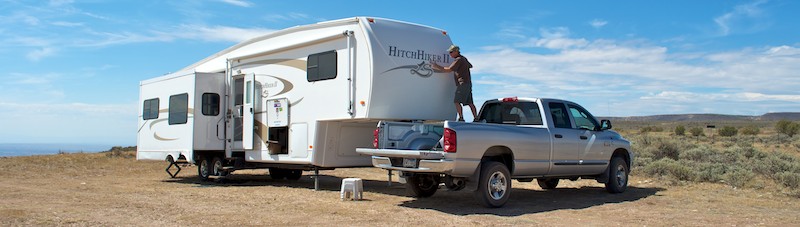
Larger rigs can carry bigger holding tanks, making boondocking easier. Our fifth wheel trailer’s tank capacities are the following:

Holding tanks in a 5th wheel RV frame

Holding tanks in a 5th wheel frame at the factory.

Fresh Water: 70 gallons of water, including the 10 gallon hot water heater
Gray Water: 78 gallons
Black Water: 50 gallons

Plus:

4 6-gallon jugs of fresh water in the bed of the truck.
10 1-gallon bottles of filtered drinking water under the kitchen sink.

This gives us a total of 106 gallons of fresh water capacity.

How Much Do You Have To Conserve Your Water?

The thing to keep in mind with water conservation is that you can be as conservative or wasteful as you want, depending entirely on when you next plan to dump/refill. The day before a dump/refill run is a great time to take a long shower. If we arrive somewhere and stay for two days days and then decide to leave (and dump/refill) in two more days, we no longer need to conserve. Bring on the long showers and truck washing project! We typically dump/refill about once every 7-10 days, but we’ve been known to do it after just 2 or 3 days too.

Driving – Tanks Full or Empty?

Camping in an RV in Utah

We love camping in the red rocks.

We like to arrive at a new location with everything ready to go so we can enjoy our stay and not have to look for water right away.

When we leave a place, we dump the waste water tanks and fill the fresh water tanks. We do all our towing to new locations with full fresh water tanks and empty waste tanks.

At 8.3 lbs per gallon, that is about 900 lbs of water — quite a drag on our gas mileage! But that is one of the trade-offs we are happy to make, as it means we can always begin enjoying our new location without worrying about the status of the tanks.

Topping off the Water Tanks

If we stay in one spot for a while, we top off the fresh water tanks using the 6-gallon jerry jugs. We keep a drinking water hose in the back seat of the pickup so we can refill our water jugs any time we find a spigot, if we need to. We refill our fresh water tanks whenever we go to an RV dump station, which is usually once every 3 days to 3 weeks (we don’t drink the water from our fresh water holding tanks).

Pouring water into the RV

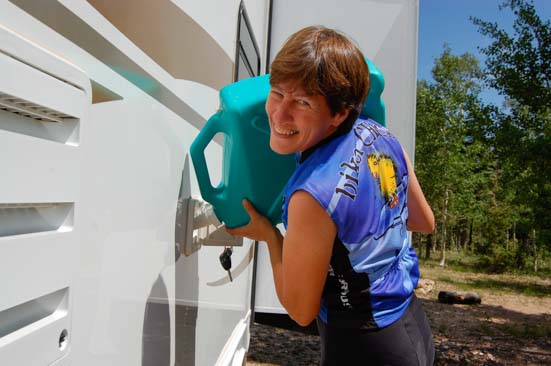
Adding water to the trailer is a good upper body workout!

We used the Reliance water bottles for years. Other water jerry jugs are made by Igloo and Scepter.

We replaced these bottles every other year because they deteriorated from the sun’s UV rays as they sat in the bed of the truck. The plastic seams would split.

In February, 2016, we switched to Reliance Rhino 5.5 gallon Bottles. The spout is the same, but the plastic on the body is thicker, so they are much more rugged and should last longer. They have a better air hole for breathing as they pour, and they lock together when standing side by side.

Some people get a huge 55-gallon water tank (or even larger) that they keep in the bed of the pickup. They use a12 volt water pump to pump the water from the tank to the fresh water intake on the trailer.

The positioning of the fresh water intake on your rig may make it impossible to pour jugs of water into the tanks, so the water pump system may be the best option in that case. For us, so far we don’t mind getting a bit of an upper body workout using our individual water jugs and manual pouring system!

Drinking Water

We fill our 1-gallon drinking water bottles at reverse-osmosis water kiosks or water stores. These are usually found outside supermarkets, and the cost is typically 15 to 40 cents a gallon. When we are in areas that don’t have these filtered water stations, we use an inline water filter to filter the water at a regular water spigot.

Deset camping in an RV

Reverse osmosis water has been stripped of the trace minerals that drinking water usually contains. We often add trace minerals to our 1 gallon water jugs of drinking water to put those minerals back into the water to be healthy.

Some people drink the water from their fresh water holding tanks. They may install a water filtration system on the kitchen faucet, and/or use either an inline filter or larger water filter (with cartridges) to filter all the water they put into the trailer’s holding tanks from wherever they get their water (RV dump station, RV park, or city park water spigot).

For a few years we carried two 7-gallon plastic water jugs to carry filtered drinking water in the bed of the truck. Eventually we stopped using that method, as it was easier just to load up the individual gallon jugs we keep under the kitchen sink.

Water Usage – Conserving Water

We use a total of about 9-11 gallons of water a day. The rough breakdown is:

  • Drinking water: 1-2 gallons (I cook with it too)
  • Showers: 4-5 gallons
  • Washing dishes: 2-3 gallons
  • Bathroom vanity: 1 gallon
  • Toilet: 1 gallon
Rinsing dishes with low water flow while dry camping

Wash dishes in a thin stream of water!

Some folks are concerned that flushing the toilet wastes a lot of water, and some even install a composting toilet to save water. We find that our toilet uses too small a percentage of our fresh water capacity (~10%) to warrant such a big expense and installation project. Here are a few more things to consider when installing a composting toilet in an RV.

Our biggest trick to conserving water is not to run the faucets at full blast and not to leave them running unless we are actively using the water.
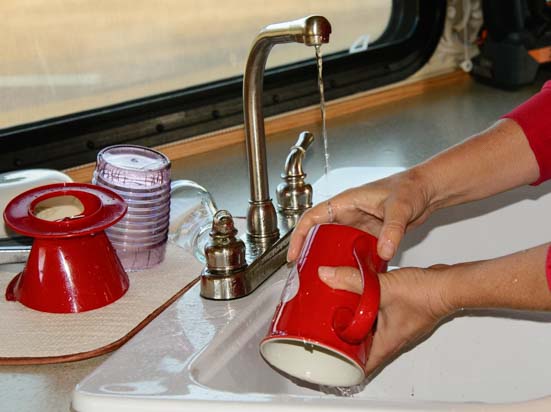
Washing Dishes

Rather than filling the whole sink with water, fill a bowl or small washtub with water. Make sure the dish detergent is well mixed with the water so no soapy residue is left on the dishes that requires a lot of water to rinse off. Use just a fine trickle of water to rinse.

We often leave a little sudsy water in the sink so we can wash our hands easily later in the day without turning on the faucet, except to rinse.

13-03-27

If you think showering in an RV is tough, try Showering on a Boat…

Showering

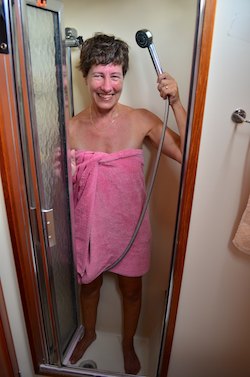
This may sound silly, but if you’re wondering how to live for years on 2 gallon showers, here’s what we do:

Since the water comes out cold at first, start by washing your feet and lower legs which can handle the cold. If you and your spouse can shower back to back, the second person gets warm water right away. Then go from the top down, shampooing first. Use the button on the shower wand to turn off the water when you lather up.

Again, like the other faucets. we keep the water pressure low in the shower. We can hear the surges of the water pump as it cycles on and off, and that gives us a sense of how much water we’re using. If the water pump starts going non-stop, then we know we’re using water up too quickly.

There are special shower wands that claim to use less water because they infuse the water with air. We tried one and found that it didn’t work well at the low water pressures we use, so it actually forced us to use more water for showering than we usually do.

Friends of ours who use hookups all the time love that shower wand, so we gave it to them. We use the simple shower wand that came with the rig because it has a nice flow that works well at low pressure.

If you need a laugh, check out our post on what it’s like to shower on a sailboat at sea!!

Washing the Rig

Just like learning to shower in 2 gallons of water, we’ve learned to wash the truck and trailer in about 10 gallons each. We go into a little detail about that in this post: How to wash your RV in the boondocks.

For a giggle, check out this post: What To Do in the Rain While Boondocking? Wash the Rig!

Washing your RV while boondocking

Chores in the boonies! See our posts: How to Wash your RV in the Boondocks and Wash with Rain Water!


WASTE WATER TANK MANAGEMENT

Return to top

If you are dry camping continuously, without going to an RV park in between that has sewer hookups, then you’ll need to empty the holding tanks at an RV dump station. There are RV dump stations in many different kinds of places: state and regional parks, rest areas, truck stops, gas stations and RV parks. Some are free, some cost anywhere from $5 to $10. We find RV dump stations using sanidumps.com and rvdumps.com.

To learn our secrets for easy and painless RV dumping, click on this link RV Dump Station Procedures and Waste Tank Tips. For hints on what the Wifey can do while the Hubby is fighting with the sewer hose, see our post: What’s A Girl To Do at the RV Dump Stataion?

Many people ask us about composting toilets. Here are our thoughts about whether you should install a composting toilet in your RV.


PROPANE

Many things in an RV run on propane, although it varies a lot from rig to rig. The more you boondock, the more you will appreciate the appliances that run on propane, because if those appliances ran on electricity, you would burn through your battery capacity far faster than you could replenish it with solar power.

Electric refrigerators are the most challenging culprits, because they have to run 24/7. We had an electric fridge on our boat, and at just 3.75 cubic feet, it consumed as much as half of our solar charging capacity each day.

Propane appliances in a 5th wheel trailer RV

Propane appliances: fridge, stove/oven & vent-free heater.
RV furnace and hot water heater not shown!

The propane appliances in our rig are:

  • Refrigerator
  • Hot water heater
  • Stove/oven
  • RV furnace
  • Vent-free propane heater

Our fifth wheel has two 7 gallon (30 lb.) propane tanks that are connected to each other with a valve that automatically switches from one tank to the other when one tank is empty. This way the fridge doesn’t quit working whenever a propane tank is empty. We monitor the tanks each day, so we see when one tank is empty and needs to be filled.

We generally find that in the summertime we have to refill one of the propane tanks every three weeks. In the coldest part of winter, we have to refill a tank once every 7-10 days.

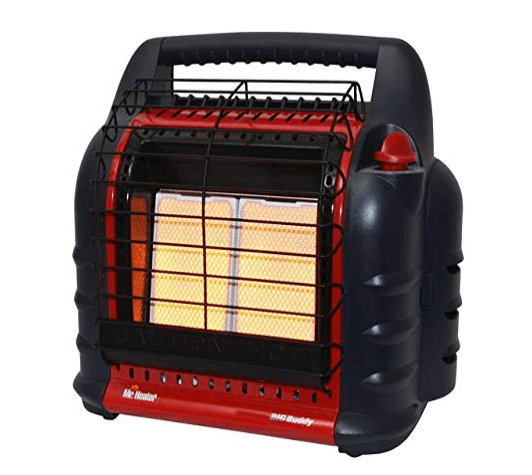
Install a Vent-Free Propane Heater

Long-term boondockers usually install some kind of vent-free propane heater because they use propane so much more efficiently than a conventional RV furnace. For more information, visit the page: Vent-Free Propane Heater Installation.

Insulate the Hot Water Heater

Cover the hot water heater with insulation and wrap all the hot water pipes with pipe foam (wherever you can reach). This helps keep the water in the hot water tank warmer for longer.

Turn on the hot water heater only once a day

Heat up the water in the hot water tank right before you shower. Depending on how hot you like your water, you can turn the hot water heater off before it turns off on its own. We shower in the afternoon which gives us hot water for washing the dinner dishes. When the overnight lows stay above about 40 degrees, we still have warm water in the morning for breakfast dishes.

Heat Water on the Stove

If you need to heat water just to wash dishes, rather than heating the whole hot water tank, put a quart or half gallon of water on the stove and heat it for a minute until it’s the right temperature for you. If you use the hot water faucet to fill the pot and there is still warm water in the hot water tank, doing this will skim off the cold water that was in the RVs pipes. You’ll then have warm water from the tank to rinse the dishes without having to let it run first.

When cooking, put a lid on the pot. Things cook faster when covered. Of course if the recipe says to simmer uncovered, it’s more important to put food on the table that’s cooked right than to mess it up just to save some propane!


COMMUNICATIONS – INTERNET and PHONE ACCESS

There are many techniques for maintaining contact via internet and phone when you are out in the boonies. For more info, visit our page: RV Communications – internet and phone access on the road.


SAFETY

Return to top

Camping on your own without the company of other RVers or a camp host may seem like it might be fraught with danger. From theft to bears, questions about the safety of boondocking are among the most frequent queries we receive.

5th wheel RV camping in Arizona

I dunno, does this look safe to you?

Crime

People in this world are nicer than they get credit for, and we have not had any bad encounters.

That being said, we weren’t born yesterday, and we are cautious. For starters, we travel to places that are not crime-ridden, and we seek out places to stay overnight that feel safe. We follow our hunches, and if a place doesn’t have a good vibe, we don’t stay.

Once we set up camp, we pay attention to our surroundings. Mark, in particular, is very attuned to the goings-on around us, and he is quick to notice a car that has driven by twice or to recognize a person that he saw in the area three days ago.

Theft

Everything in the bed of our truck is locked to the truck with a cable lock. The bikes are covered and locked to the bike rack on our trailer. The bike rack itself is locked to the trailer as well. (Learn more about our bike rack here).

King pin hitch lock

A king pin lock prevents the trailer from being stolen.

We also use a king pin lock so no one can tow the trailer away while we’re gone.

When we leave our campsite, if we have the barbecue out, we lock it to a fifth wheel leg with a cable lock. The bikes are covered and locked to the bike rack. If we need to use the generator in an area where there are other people around, we lock it to a fifth wheel landing leg with a cable lock.

However, if we are out on our own with no one around, which is usually the case, we are much more relaxed about these things.


Guns

For the first ten years of our travels we never carried a gun. Mark used to love target shooting as a boy and often commented that he wished he had something with him for target practice as a pastime. In our eleventh year of travel he picked up a .22 rifle and now gets a lot of pleasure out of plinking.

We’ve never felt remotely threatened by anything. Most people we meet are very friendly and wild animals don’t approach our trailer.

RV Camping in Arizona

Bears

We have camped in bear country quite a bit, but we have never seen or heard a bear while boondocking. In general, if you keep your campsite clean (no tempting food scraps lying around), bears will leave you alone.

The Good Stuff

We find that living off the grid — boondocking and free camping in our RV — is the most fulfilling, beautiful and satisfying lifestyle we have ever tried.

Rather than being frightened in our rig, we have been enchanted.

We have been woken up in the middle of the night by the sounds of elks bugling as they ran past, by coyotes howling, owls hooting, wild horses whinnying, cattle mooing, and on our boat, by whales singing.

To us, that is the beauty of living out in nature, and that is why we choose to live this way.

Subscribe
Never miss a post — it’s free!

Below are some of our most POPULAR POSTS (also in the MENUS above)

Buddy - A Journey in Spirit - The story of an event that changed our lives forever.

ARTICLE INDEXES
  • RV Tech Tips Articles - A one page index of links to all our RV Tech Tips, RV Upgrades & RV Maintenance articles.
  • RV Lifestyle Tip Articles - An index of links to all our RV Lifestyle Tips (finances, boondocking, major repairs, work/jobs, etc.)
  • Solar Power Articles - Overview and tutorial articles for how to design and install solar power on an RV or boat
  • Product Reviews - An index of links to all of our Product Reviews
RV UPGRADES, SYSTEMS & TIPS MONEY FULL-TIME RV LIFESTYLE GEAR STORE
  • Gear Store - A list of the goodies, equipment and gear we've found useful in our RV lifestyle!
 

More tips for boondocking:

Our most recent posts:

Cross-Country Highlights on an RV trip from Indiana to Texas

November 2018 – After we left the RV/MH Hall of Fame in Elkhart, Indiana, it was late fall and high time to head to the southwest to warm up and dry off. Buddy has written about our stay in New Mexico, but there were some highlights before that I’d like to fill in.

Fifth wheel RV at sunset-min

A beautiful sunset filled the sky as we headed west and south.

The first was along I-70 between Indianapolis and St. Louis. Most interstate rest areas are nothing to write home about, but we’ve found a few in our travels that are unique, and such was the case at the Cumberland Road Rest Area in Marshall, Illinois.

Cumberland Road Rest Area Marshall Illinois-min

Cumberland Road Rest Area in Marshall, Illinois

As we walked towards the building we noticed a small group of people staring at something on the ground right by the entrance door — with smiles on their faces. When we got closer we realized they were all looking at a beautiful black cat.

Ghost rest area cat Cumberland Road Rest Area Marshall Illinois-min

A small crowd by the entrance was admiring this beautiful black cat.

The cat was just sitting there by the door, blinking slowly in the bright morning sunlight. People were wondering aloud if he was a lost pet or a runaway or if he was waiting for his owner to finish up in the bathroom.

Ghost the Rest Area Employee at Cumberland Road in Marshall Illinois-min

He seemed very calm and quietly sat there blinking in the bright morning sun.

Then a fellow joined the group and explained that as a trucker who had come to the rest area many times before, he knew this beautiful feline.

His name was Ghost, the Rest Area Cat. Just like the trucker, the cat had a regular route, going from one farm house to the next in the area.

But he seemed to like the digs (and mice) at the rest area best, so he hung around the rest area a lot and made friends with the regulars and the transients. His human friends kept a good eye on him, though, and gave him a collar and a very cool nametag.

Ghost the Rest Area Cat Cumberland Road Rest Area Marshall Illinois-min

His nametag says: “Ghost – Rest Area Employee.”

If your travels ever take you on I-70 westbound, stop at the rest area that’s about 10 miles west of Terre Haute and say hello to Ghost!

We got back on the interstate and the scenery buzzed by our windows in a blur. We all got white line fever and the places we drove by all began to blend together.

But a brief stop at Fort Gibson Lake in Oklahoma stood out. This is a popular boating and fishing spot for local sailors and anglers and it’s a lovely spot for photography.

In the midst of enjoying the views, we suddenly heard the whoosh of madly flapping wings and rapidly slapping webbed feet on the water. We looked up to see a huge flock of cormorants flying in from around the point and landing in the bay in front of us.

Wave upon wave of cormorants kept flying around the point and splash landing in the water. We’ve never seen so many cormorants in a single flock.

For at least five minutes the birds kept coming, until the whole bay in front of us was completely filled with birds bobbing in the water.

And then after another vigorous round of splashing and flapping, they flew off and the water became calm again!

Cormorant Rush Fort Gibson Lake Oklahoma-min

Throngs of cormorants flew into the bay. This is just a few of them!

We got off the interstate and traveled on a slew of secondary roads that took us through lots of small towns. As we approached Albany, Texas, we decided to have a look around. What a neat little find this town turned out to be!

We’d crossed a few states since leaving Indiana, but we knew we were in Texas when we saw the big Texas star on the side of a building.

The building turned out to be the Whitney Theater, home of the Dance Theater Company. Albany is a small town in size but it is big into the arts!

Texas star in Albany Texas-min

The Texas star!

Whitney Theater in Albany Texas RV trip-min

Whitney Theater, home of the Dance Theater Company.

The old jail house in Albany is now a modern art museum with a renowned collection. Outside the Old Jail Art Center there were lots of interesting sculptures. One was “Tex the Roustabout.” He got Buddy’s attention!

Tex the Roustabout sculpture Albany Texas Jail Museum-min

The Old Jail House Art Center has a well renowned collection of modern art. Tex the Roustabout stood outside, pipe wrench in hand.

Albany is is the county seat for Shackleford County and has a pretty courthouse.

Shackleford County Courthouse in Albany Texas-min

The county courthouse for Shackleford County is in Albany, Texas.

Our favorite spot in Albany was Sander’s Drug Store. As we walked across the antique mosaic sign on the ground, we felt like we were walking into another era.

Entrance to Sander's Drug Store in Albany Texas-min

Sander’s Drug Store was the highlight of our visit and gave us a glimpse of another time.

Inside there were people enjoying refreshments at tables and the antique looking pharmacy was out back.

Inside Sander's Drug Store Albany Texas RV trip-min

.

Pharmacy counter Sander's Drug Store Albany Texas RV trip-min

Not just “Prescriptions” but “Radio Phonographs” too!

We got a latte and took a seat outside the store to watch the world go by on Main Street. The couple at the next table started chatting with us and telling us how much they love this little town and that it’s their favorite weekend getaway spot from their home in Abilene 35 miles away.

Sitting outside Sander's Drug Store Albany Texas RV trip-min

A nice spot out front to while away the hours.

Albany may be a cute and artsy town today, but its roots are in cattle and oil. High up on a wall inside Sander’s Drug Store a Texas Longhorn looked down at us.

Texas Longhorn at Sander's Drug Store Albany Texas RV trip-min

A Texas Longhorn.

When we began wandering the streets of town again we found a metal sculpture of a Texas longhorn too as well as a plaque memorializing the Texas Cattle Trails of 1875 to 1890. Cattle herds from Texas were driven up to the railheads in Kansas along these routes.

Texas Longhorn sculpture Albany Texas RV trip-min

The arts in Albany pay homage to the Texas Cattle Trail history of the area.

Petroleum production was the other big industry in the area and still is. A replica oil pump outside an oilfield services office sported the high school Albany Lions football team helmet.

Oil pumper Albany Texas RV trip-min

An oil services company has a huge oil pumper out front with a football helmet on top!

As we walked around town we came to a stand of trees that had dropped the most enormous acorns we had ever seen. These things were huuuuge!

Well, as they say, everything is bigger in Texas, even the acorns!

Huge acorns Albany Texas RV trip-min

Everything is bigger in Texas!

Even though we blasted across a few states to get back to the warm and dry southwest quickly, these few stops along the way made for some great memories.

RV camping in Oklahoma-min

We scooted along pretty quickly for a thousand miles, but we’ll remember these special places and moments!

Subscribe
Never miss a post — it’s free!

A little more info:

Our RV travels in Oklahoma and Texas


Our most recent posts:

More of our Latest Posts are in the MENU.   New to this site? Visit RVers Start Here to find where we keep all the good stuff. Also check out our COOL NEW GEAR STORE!! *** CLICK HERE *** to see it!

<-Previous || Next->

Honda EU2200i Generator Review + Oil Change and Maintenance Tips

We have been loving the heck out of our Honda EU2200i generator for the last seven months and have already put about 150 hours on it. We live in our RV off the grid on solar power 24/7, and we rely on the sun for 98% of our power needs. However, in the last few months we have experienced an extraordinary amount of wildfire smoke and rain in our RV travels, and that trusty old orb in the sky was nowhere to be seen for weeks on end.

Honda EU2200i generator RV camping

Honda EU2200i generator

Why A Honda EU2200i generator?

In the past we have used a generator only for a few days in mid-winter when the days are really short and storms blow in for a week at a time, limiting the amount of power our solar panels could produce, or for just a few days in mid-summer when the interior temp of our trailer shoots into the 90s and we run our air conditioner to cool down.

Honda EU2200i Generator back side-min

The back side of the Honda EU2200i generator.

When we decided to get one of Honda’s new and easily carried 2200 watt generators in early May, we didn’t think we’d put it to use right away. We were headed to the cool mountains for a month or so, and we doubted we’d need our air conditioner.

But our longer range plans were to go to the Upper Peninsula of Michigan and hang out along Lake Superior where we knew we’d be camping in shady spots under tall trees.

Honda EU2200i portable generator RV camping top view 1-min

.

Honda EU2200i portable generator RV camping top view 2-min

.

Honda EU2200i generator RV camping outlets side view-min

The “business end” of the Honda EU2200i generator

Honda EU2200i generator RV camping exhaust side view-min

The exhaust end

Ironically, within a few weeks of getting our new 2200 watt Honda generator, wildfire smoke filled the mountain air, obscuring the sun and preventing our solar panels from being as effective as usual.

The wildfire smoke was followed by weeks-long rain storms for the next few months as we traveled from the mountain states to Lake Superior. Oh my, were we happy it was so easy to set up our new little generator to keep our batteries nicely charged despite the dark skies.

RV camping in a fifth wheel trailer under stormy skies-min

Solar power is great until a storm like this sweeps in!

At one point we had to ask ourselves if we had inadvertently done a rain dance by getting this new generator!

Just like how one of us always get really sick whenever we put a new bottle of Nyquil in our medicine chest, we wondered if the deluge of smoke and rains came because we now had an easy access generator that could power our lives on a moment’s notice!

Fifth wheel RV camping with Honda EU2200i generator-min

When storms blew in we got the generator out — and it was easy!

The Honda EU2200i is light and easy to Carry!

The Honda EU2200i generator is a new and improved version of the much beloved Honda 2000i generator that has been powering the lives of RVers for many years. If you wander through the desert in Quartzsite, Arizona, in January, you’ll see the popular red generators outside of many RVs.

It weights just 46.5 lbs., holds just under a gallon of gas and delivers 2,200 watts of peak surge power and 1,800 watts of continuous power.

We have had a Yamaha 2400i generator with us since we started full-time RVing eleven years ago, and although it is a great generator, it is unwieldy to store, maneuver and set up. Too often we have looked at each other and said, “We really should get the generator out,” only to decide against it because neither of us felt like going through the hassle.

However, the light little Honda EU2200i generator has proven to be so darn easy to grab and set up that we often end up running it in circumstances where we wouldn’t have before.

For the moment, it is living in the back of our truck right next to the bigger generator. Either one of us can pick it up with one hand and lift it out of the truck, even while gingerly stepping around the fifth wheel hitch and the rest of the obstacle course in the bed of our truck. Not so with its big brother.

Starting the Honda EU2200i generator!

We like to start the Honda EU2200i generator without having it plugged into the RV so it can get a little warmed up before we put any loads on it. The shore power cord is plugged into the trailer, but we don’t plug the other end into the generator until the generator is actually humming along.

Since our trailer is a 50 amp trailer and the generator outlets are 15 amps, we use two adapters plus the shore power cord to get between the 15 amp female outlets on the generator and the male 50 amp outlet on our trailer:

We keep these two adapters on hand because it gives us the flexibility to connect the RV’s shorepower outlet to either a 15 amp power source or a 30 amp power source. However, you can also go directly from the 50 amp outlet on the RV to the 15 amp outlet on the generator and skip dragging out the heavy shore power cord by using a 15 amp Male to 50 amp Male adapter.

To start the Honda EU2200i generator there are three easy steps:

  • 1. Open the gas cap vent so a vacuum doesn’t build up inside the tank
  • 2. Close the choke (move the switch to the right)
  • 3. Set the generator switch to ON

Then pull the pull start cable and away you go.

Gas cap vent on Honda EU2200i generator-min

First point the gray dial to “On” to vent the gas cap.
Mark painted the “On” and “Off” labels to make them easier to see.

Honda EU2200i Generator front side-min

Then close the choke and set the generator switch to “On.” Now you’re ready to pull the start cord.

Starting the Honda EU2200i portable generator-min

Instant power!

Shortly after the generator roars to life, slowly open the choke (move the switch to the left).

We like to position the generator so the exhaust goes away from the trailer. If there are other people camped in the vicinity, we also like to place it somewhere in our campsite that it is as far from their campsite as possible so we don’t annoy them when we run it.

If it is raining out, we put it under one of the slide-outs so it doesn’t get wet.

Sometimes these locations are not optimal for pulling the start cord and getting the generator going (especially crawling under a slide-out!). But this little Honda generator is so light it is easy to maneuver it to wherever we want to place it, even after it is running.

RV camping in a fifth wheel trailer with Honda EU2200i generator-min

All set up and purring away.

RV camping with a Honda EU2200i Generator-min

Buddy jumps for joy!

Using Eco Throttle for Greater Efficiency and Less Noise

One of the really nifty features on the Honda EU2200i generator is the Eco Throttle. This is located on the “business end” of the generator in the upper left corner.

Turning it on lowers the RPMs of the generator so it doesn’t use as much gas and runs more quietly.

If we are going to run the generator for a number of hours primarily to charge the batteries and do other things that put just a small load on the generator like using our laptops, running the lights at night, or watching a movie on TV, we keep the Eco throttle turned on.

We tested the generator to see how long it would run if we filled the 0.95 gallon gas tank before it ran out of gas. We had it in Eco mode and used our laptops and other small things while it was running.

It ran for 9.5 hours!

We don’t usually run the generator for nearly that long.

As I’ve described in our article about what happens when you run solar power and shore power simultaneously, the best time for solar powered RVs to run a generator is in the morning hours. This helps get the batteries sufficiently charged so they can easily reach their charging (Absorb) voltage under solar power alone once the generator is turned off. This gives them more daylight hours to complete the Absorb stage before the sun goes down.

Outlets and switches Honda EU2200i Generator-min

The Eco Throttle switch allows the generator to run more efficiently and quietly when loads are light.

Eco mode is our default with this generator, both to save gas and to hear the generator’s quiet purr instead of its louder roar. In Eco mode it is as quiet as our Yamaha 2400i generator, but when it is not in Eco mode it is a little louder.

If you suddenly place a big load on the generator when it is in Eco mode, it will temporarily go into higher RPMs to provide the required power.

If we turn on the toaster while in Eco mode (our toaster is an 800 watt model), we can hear the generator rev up while the toaster is making toast. As soon as the toast pops up, the generator idles back down. If we do the same thing in non-Eco mode, the generator is already humming along at a fast pace, and it doesn’t need much of a surge to operate the toaster.

Honda EU2200i Generator for RV battery charging-min

We camped under thick canopies of trees in the rain in Michigan’s Upper Peninsula

If the generator is in Eco mode and we use the microwave (ours is an 1100 watt model), the generator has a slight lag time as it first senses the heavy load and then revs up to provide the necessary power.

There is an audible drop in tone and dimming of the lights on the microwave for a second or two before the generator roars to meet the challenge. We’re not sure this momentary dip in power is good for the microwave, so if we plan to use it we prefer to have the generator running in non-Eco mode first.

Can it power an RV air conditioner?

We have a 15,000 BTU air conditioner on our 36′ fifth wheel trailer. With some coaxing (i.e., warming up the generator, then turning on the Coleman air conditioner’s fan and finally turning on the air conditioner itself), our Yamaha 2400i generator can handle the air conditioner’s initial power surge and run it for hours on end without a hitch.

We were hoping the much lighter and smaller Honda EU2200i might be able to run it too. However, the generator’s 2200 watts max power is not quite enough to handle the surge when the air conditioner starts. It is likely it could power a 13,500 btu air conditioner (standard on smaller RVs) just fine.

The Honda EU2200i generator is designed to work in parallel with a twin generator and connector cables, giving you 4,400 watts of peak power, more than enough to run a 15k BTU air conditioner. You can probably run the microwave at the same time with that kind of juice! The wonderful thing about this setup is that the two generators are a lot smaller than one big 4.4kw generator would be.

Honda EU2200i and EU2200ic Companion Generator Parallel Combo Kit-min

Honda EU2200i + EU2200ic Companion Generator Parallel Combo Kit with covers for each.

Putting Gas in the Honda EU2200i Generator

The hardest part about putting gas in a generator is fiddling with the child-proof, spill-proof, idiot-proof gas can. Government regulators have obviously never used a gas can in their lives, and we’re quite sure a lot more gas has been spilled on our precious environment because of the newfangled user-unfriendly spouts than ever was spilled using the trusty old gas can spouts of days gone by.

Putting the spout on a plastic gas can-min

Good luck with the gas can spout!

Putting gas in a Honda EU2200i Generator-min

Easy access on the top of the generator for gassing it up.

We’ve been adding Seafoam Motor Treatment to the gas in the generator. This fuel stabilizer cleans the carburetor, keeps the engine clean, and we find it makes it easier to start.

If you’re looking for affordable parts or tools to keep your generator in top condition, you can check out this parts geek coupon code for discounts on various items. It’s always handy to save while ensuring your gear stays in great shape!

When we cruised Mexico in our sailboat, we used it in the outboard motor for our dinghy and were very pleased with the results.

Honda EU2200i Generator Maintenance Tips – Changing the Oil

Changing the oil on the Honda EU2200i generator is a snap. First find a pleasant place to do it. Mark likes to elevate the generator onto some kind of platform so it is easy to drain the old oil out of the bottom.

As always, Buddy likes to supervise.

Changing the oil in a Honda EU2200i Generator-min

Changing the oil doesn’t take long, but doing it in a pretty place makes it more fun.

You’ll need the following:

  • A flat head screwdriver
  • A sealable 14 oz. or larger container for the old oil
  • A quart of SAE 10W-30 oil
  • Rags to clean up drips and wipe your hands
  • Optional: Rubber gloves

The first step is to unscrew the single screw that holds the front panel on the front of the generator and remove the panel so you have full access to the heart of the machine.

Opening a Honda EU2200i Generator to change the oil-min

Access the heart of the generator via the side panel on the front.

Opening a Honda EU2200i Generator to change the oil-min

Once it’s unscrewed, the side panel lifts off easily.

To check or change the oil, simply unscrew the dipstick in the lower left corner.

If you are just checking the oil, make sure the oil level fills the spout and is clear. Honda recomments changing it every six months or 100 hours of use (keep track of the hours of use in a log book).

Inside a Honda EU2200i Portable Generator-min

The dipstick is in the lower left corner.

Check the oil with the dipstick on a Honda EU2200i Generator-min

Unscrew the dipstick to check the oil and/or to change it.

When changing the oil, hold a container of some kind below the spout.

Any container that can hold 14 ounces of liquid is fine. Or you can drain the oil into an oil drain pan and then, after the new oil has been put into the generator, pour the old oil into the container that held the new oil.

In the case pictured here, Mark used an old plastic peanut jar with a screw top lid.

Drain the oil from a Honda EU2200i Generator-min

Drain the oil into an easily sealed container that holds at least 14 ounces.

To get all the oil out, tip the generator slightly towards you.

Drain all the oil from a Honda EU2200i portable Generator-min

Tip the generator towards you to get out every last drop.

The Honda EU2200i generator uses SAE 10W-30 oil.

Honda EU2200i Generator uses SAE 10W-30 oil-min

The generator uses SAE 10W-30 oil

Once the old oil is completely drained out, pour the new oil in.

Change the oil on a Honda EU2200i Generator-min

Pour the new oil in

The oil reserve is properly filled when the oil comes right to the edge (with the generator sitting level). Once it’s full, screw the dipstick back in and tidy up any drips with the rags.

Oil change on a Honda EU2200i Generator-min

The oil is full when it is level with the spout

The generator takes 14 ounces of oil and, of course, oil is sold in 32 ounce bottles. You can save the last two ounces for other odd jobs around your RV in one of these classic oil cans. Grandpa will be proud!

Honda EU2200i Generator Maintenance Tips – Cleaning / Replacing the Air Filters

Since the front panel of the generator is off, now is a good time to inspect the air filters. To access the air filters, unscrew the screw holding the access panel in place.

Inside a Honda EU2200i Portable Generator-min

The air filters are in the upper right area of the front of the generator

Open air filter compartment on a Honda EU2200i Generator-min

Remove the air filter cover

There are two small air filters inside. Each one is a small piece of foam. If they’re dusty and dirty you can clean and re-oil them. If they are brittle and have started to fall apart, you can replace them with Honda’s air filter replacement kit.

Air filter on a Honda EU2200i portable Generator-min

There are two air filters inside, one above and one below

Honda EU2200i Generator Air filter-min

.

Honda EU2200i portable generator Air filter-min

.

Honda EU2200i Generator Maintenance Tips – Inspecting / Replacing the Spark Plug

Once the front panel on the generator is buttoned up again, this is a good time to check the spark plug.

The Honda EU2200i generator’s spark plug is located in a small compartment on the top next to the handle. The cover slides off easily.

Open spark plug compartment Honda EU2200i portable generator-min

The spark plug has its own compartment on the top of the generator

Inside, the spark plug is covered by a spark plug cap. Simply pull the cap off to reveal the spark plug underneath.

Spark plug compartment Honda EU2200i Generator-min

Pull off the spark plug cap to reveal the spark plug underneath

To remove the spark plub, use a 5/8″ spark plug socket and ratchet plus 3/8″ drive extension. The spark plug is quite close to the generator handle, so a 5//8″ spark plug socket with an integral 3/8″ drive on a swivel extension could be very handy.

Remove spark plug from Honda EU2200i Generator-min

Use a 5/8″ socket and extension to remove the spark plug

The spark plug is the NGK CR5HSB.

Honda EU2200i Generator spark plug-min

NGK CR5HSB spark plug

Inspect it with a spark plug gap tool. The gap should be 0.24 to 0.28 inches which is equivalent to 0.6 to 0.7 mm.

Check spark plug gap with feeler guage on Honda EU2200i portable Generator-min

The spark plug gap should be between 0.24 and 0.28 inches (0.6 to 0.7 mm)

Before placing the spark plug back in the generator, spread a thin layer of high temperature anti-seize lubricant on the spark plug threads.

Apply anti-seize lubricant to spark plug for Honda EU2200i Generator-min

Apply a thin layer of high temp anti-seize lubricant to the threads

Anti-seize lubricant applied to Honda EU2200i Generator spark plug-min

.

And that’s it!

Honda EU2200i Generator charges batteries while RV camping-min

Happy campers!

If you are looking for a lightweight generator that can run for many hours on end and power all of the appliances in your RV that require less than 2200 watts to operate (in our case, this is everything except our 15k BTU air conditioner), the new Honda EU2200i generator is a great choice.

Hopefully if you buy one, you won’t inadvertently inspire the rain gods to dump weeks of rain on you like we did!!

Note added March 24, 2019 – 200,000 Honda 2200i units have been recalled for a leak in the fuel valve. You can schedule a free repair at a Honda authorized dealer. There is more detailed info from Honda about the specific units affected at this link.

Where to buy the Honda EU2200i generator and accessories:

RV Power Adapters and Dogbones:

Generator Maintenance Goodies:

Subscribe
Never miss a post — it’s free!

Related articles:

Our most recent posts:

More of our Latest Posts are in the MENU.   New to this site? Visit RVers Start Here to find where we keep all the good stuff. Also check out our COOL NEW GEAR STORE!! *** CLICK HERE *** to see it!

Oliver Lee Memorial State Park, New Mexico – A Dog’s Eye View!

November 2018 – Hi Everyone. This is Buddy here.

I’m writing our blog post this week because Emily (she’s Mumma to me) has been very busy all week long working on a project for something called Tail or Life!

Puppy writes an RV blog post-min

She left her chair and her laptop, so I’m blogging this week!

Oh, wait. She just made a face at me and is saying something really slowly.

Oops! Ahem. It’s for something called Trailer Life.

Anyway, she has been glued to her computer for days to get it done, and she says she doesn’t want to sit in her chair or stare at her computer any more for a while.

But we recently spent a week at a really nice state park that you’ve just gotta go see. It’s called Oliver Lee Memorial State Park and it is about 12 miles southeast of Alamagordo in New Mexico, kinda near White Sands National Monument.

So, I want to tell you about it.

Riparian nature trail Oliver Lee State Park New Mexico-min

The Riparian Nature Trail in Oliver Lee State Park

The best part about this park is that the main attraction — a beautiful hiking trail — goes into a place called Dog Canyon.

Oliver Lee State Park New Mexico Riparian Nature Trail-min

Dog Canyon is made for dogs!

If you run (or hike) past the picnic table that seems to be the end of the trail, you’ll find some fabulous rocks and a little stream that flows through them all. We didn’t find it the first time we ran this trail because we didn’t know the trail went beyond that picnic table, but it does. So don’t miss it!

Water in ravine Riparian Nature Trail Oliver Lee State Park New Mexico-min

There’s a trickle of a stream in this pretty ravine.

One time we hiked this trail we saw a huge tarantula crawling around on the rocks. We found out later that the tarantulas were in their mating season, so they were on the prowl trying to find each other.

Mark takes a photo of a tarantula-min

A tarantula!

tarantula in Oliver Lee Memorial State Park New Mexico

Looking for love!

Photo shoot Oliver Lee State Park New Mexico Riparian Nature Trail-min

I’m more lovable than a tarantula.

This is such a great trail. Every dog that visits Oliver Lee Memorial State Park loves it. And why not? It’s Dog Canyon!

Puppy on Riparian Nature Trail Oliver Lee State Park New Mexico-min

We hiked this trail everyday.

The other hiking trail goes up the side of a huge mountain. There are lots of switchbacks and some really fun scrambles. You can see the campground from some of the lookouts.

View on mountain hike Oliver Lee State Park New Mexico-min

The hike up the mountain is steep and can be hot — bring water — but the view is wonderful!

About 0.6 miles into the hike the map said there was a place called the “First Bench.” So we went looking all over for a park bench. Little did we know that the “bench” was just a quarter mile long plateau with a fabulous view looking into Dog Canyon!

Canyon view on mountain hike Oliver Lee State Park New Mexico-min

A dog’s eye view of Dog Canyon.

One day when we were out walking we came across a big snake.

Puppy sees a rattlesnake Oliver Lee State Park New Mexico-min

A snake!!

While I was looking at it I cast my shadow across him.

Puppy sees a snake Oliver Lee State Park New Mexico-min

What does that snake think of my shadow?!

If you go to Oliver Lee Memorial State Park in November, it can be warm and it can be very cold too. On the cold days I hung out in my fort.

Puppy plays house in RV-min

We had some rainy days and even got a dusting of snow. So I played house inside.

And sometimes I played peekaboo.

Peekaboo

Peekaboo!

Sometimes in the morning it was only 42 degrees inside. So Mumma made me a special superman outfit from an old sweatshirt to keep me warm all night long.

Cold nights puppy wears superman outfit-min

My superman outfit keeps me warm on those cold nights.

One of the best things at the end of the day was watching the sunsets. They were spectacular.

Sunset over RV Oliver Lee State Park New Mexico-min

We saw some incredible sunsets.

Puppy watches sunset Oliver Lee State Park New Mexico-min

I like watching the sun go down.

Sunset over RV campground Oliver Lee State Park New Mexico-min

Fire in the sky!

In the very early morning, the whole desert would glow pink and blue. Smoke from big wildfires in California arrived just as the moon got full, making it hazy near the horizon.

Full moon in California wildfire smoke Oliver Lee State Park New Mexico-min

We had a full moon and it set just as the sky did its pink-and-blue magic in the early morning.

Full moon with wildfire smoke Oliver Lee State Park New Mexico-min

The skies had been totally clear, but wildfire smoke that blew in made the moon a little hazy.

Desert sunset skyline Oliver Lee State Park New Mexico-min

The New Mexico desert at dawn.

I’ve heard there was a famous photographer named Ansel Adams who took a photo in New Mexico that he called Moonrise over Hernandez. I don’t know where Hernandez is, but Dada got a cool shot of Moonrise over Alamagordo.

Moonrise over Alamagordo New Mexico

Moonrise over Alamagordo New Mexico

When the moon rose the next night it was huge and you could see lots of detail.

Full moon Oliver Lee Memorial State Park New Mexico-min

I’ve heard the moon is made of cheese… maybe so!

I’m a little bit of a fussy eater, and we have a huge bag of dog food I don’t like. One night I was told if I wasn’t going to eat it then it would go to someone else who would.

In the pitch dark I heard something outside and I woofed a little to let them know that the “someone” had showed up to eat my food.

It was a gray fox!

She didn’t stop eating, even with a flashlight on her. Later on in the night we went outside and I sniffed around and found out she had tiny baby cubs in the rocks on the edge of our campsite.

I’ve been told I look like a fox. I don’t know about that, but her cubs looked just like her, only much smaller.

Gray Fox at Oliver Lee State Park New Mexico-min

We found out a gray fox lived in our campsite and had some really cute cubs in the rocks!

Well, that’s my story. I hope you liked it.

I’m going to take a nap now!

Puppy sleeping

Thanks for reading!

Subscribe
Never miss a post — it’s free!

More info about Oliver Lee State Park in New Mexico:

More blog posts about Buddy:

Other blog posts from New Mexico:

Other great RV campgrounds:


Our most recent posts:

More of our Latest Posts are in the MENU.   New to this site? Visit RVers Start Here to find where we keep all the good stuff. Also check out our COOL NEW GEAR STORE!! *** CLICK HERE *** to see it!

<-Previous || Next->

RV Roof Repair – Rubber Roof Patch + Holding Tank Vent Cap Replacement!

We recently repaired some rips and tears in our RV’s rubber roof, and we also replaced the roof vent cap for our trailer’s black wastewater holding tank. These are easy projects for anyone to do. This article shows the steps we followed to complete these repairs.

RV Roof Repair patching a rubber roof and replacing a black water tank vent cap

RV Roof Repairs — Patching a rubber roof and replacing a black water tank vent cap

We were in a hurry as we tackled these jobs because a days-long rain storm threatened to begin at any moment. Also, our “ten year” RV rubber roof is now nearly twelve years old, so it is overdue for replacement. With these things in mind, our goals were speed of installation and watertightness that would hold for a few months.

In this article we’ll point out the few shortcuts we took just in case you ripped your RV roof or knocked a holding tank vent cap off when your rig was years out from needing a new roof!

RV Holding Tank Vent Cap Replacement

We boondock all the time, and this kind of travel takes our trailer into some gnarly situations where it gets scraped by tree branches on the exterior walls and roof. The sidewalls of our rig bear the tell-tale pin-stripe scars from tree branches, and our RV roof, well, the tallest items have taken the brunt of the damage.

The black wastewater holding tank vent pipe has a cap on it to keep rain and creatures out, but ours got sheared right off when we accidentally dragged on an unforgiving tree branch.

The first task in the repair was to remove the screws holding the cap onto the roof. These were easy to locate because there was a dollop of Dicor Lap Sealant covering each one.

RV black tank roof vent broken-min

The black tank vent cap was knocked off by low hanging tree branches.
In this photo Mark has already removed a few screws that attach the cap flange to the roof.

The next task was to lift the entire vent cap flange off of the black tank vent pipe.

Remove the old vent cap flange

Remove the old vent cap flange

This revealed the black tank vent pipe. A small piece of the top of the black tank vent pipe had broken off, but the damage was merely cosmetic. The new black tank vent cap would cover it.

The next step was to clear away the old Dicor Lap Sealant that formed a ring around the old black tank vent cap so the roof was smooth instead of having a crusty ring of old sealant.

RV black tank roof vent removed and waiting for new replacement-min

Scrape away old Dicor Lap Sealant

The key to this RV roof repair is making sure the new black tank vent cap has a watertight seal with the roof so there won’t be any leaks. A generous spread of Dicor Lap Sealant does the trick. It comes in a tube and is applied with a caulk gun. Before placing it in the caulk gun, Mark clipped off the tip so the Lap Sealant could flow out.

Remove tip of Dicor Lap Sealant tube-min

Prepare new tube of Dicor Lap Sealant and then lay a thick layer around the vent pipe.

Then he spread a thick bead of Dicor Lap Sealant around the vent where the screws would attach the cap, and then screwed in the screws.

Screwing an RV black tank roof vent onto a fifth wheel trailer roof-min

Screw the new vent cap onto the roof.

A final screw went into the top of the cap. The old black tank vent cap may not have had this screw right from the factory, and that may be why it was knocked off so easily. We don’t know because we never looked at the old cap that closely!

RV black tank roof vent-min

Be sure to screw the cap itself onto the base.

Then Mark spread generous bead of Dicor Lap Sealant around the outside of the vent cap, leaving a nice dollop on each screw head, including the one on the top of the cap.

Sealing the RV black tank roof vent with Dicor Lap Sealant-min

Put a thick layer of Dicor Lap Sealant around the base with a dollop on each screw head.

Here’s how it looked a few months after the job was completed. If you’ve been wondering about the wire next to the vent, it is the cable that connects our four solar panels together in series on our roof.

RV roof black tank vent repair completed-min

.

Down on the ground far below us, our little project supervisor wondered how it was all going.

Project supervisor for RV rubber roof repair-min

The project supervisor asks how the vent cap replacement is going.

RV Rubber Roof Repair Patch

Our other RV roof repair was to fix a tear in the thin rubber sheet that covers our RV’s roof.

This job is so quick to do that the first time Mark did it in a location on the roof of one of our slide-outs, I didn’t even know he had started the job when he bounded in the door announcing he had just finished it.

“But I wanted to take pics!” I said.

“Ya gotta be faster next time!” He joked.

So, this time around, when I heard him mumble something about fixing a tear in the roof, I jumped up and ran for my camera and made sure I followed him up the ladder right away so I wouldn’t miss anything.

Tear in RV rubber roof needs repair-min

As rubber roofs age, they become more and more susceptible to rips and tears from low lying branches and other obstacles dragging as you drive underneath.

All that is needed to patch an RV rubber roof is a cleanser that can clean the crud off the roof around the tear, some scissors and some repair tape.

The preferred repair tape is EternaBond Tape. Unfortunately, we didn’t have a roll with us and there were no RV supply stores within 100 miles or so. But the local hardware store carried Flex Tape, and that worked just fine.

Tools needed for RV rubber roof repair-min

Applying a patch requires just a cleanser, some patch tape and scissors.

Mark cleaned the area throughly so the tape would stick well. He used a glass cleaner to cut any grease.

Clean the RV roof tear area before repairing-min

Clean the area thoroughly so the new patch tape will adhere well.

Wipe down RV roof tear before repair-min

Wipe off the cleanser.

Then he felt under the torn area to see if there was any lumpy debris in there. Sure enough, he pulled out a twig!

Check for debris under rip in RV roof_-min

Check to be sure nothing is lodged under the rubber roofing material.

Twig found under RV rubber roof tear-min

A twig was hiding under there!

This was a serious tear, but once he got the wound cleaned up it was ready to for a field dressing.

Rubber RV roof tear ready for a patch-min

The thin rubber roofing sheet is all that protects the underlying plywood from the elements.

RV roof tear ready for a patch-min

All cleaned up and ready for the patch.

He cut a piece of Flex Tape big enough to cover the tear. Then he pressed it in place, first with his hands and then with the back of his scissors.

Place patch on RV roof tear-min

Cut a piece of tape that is generously wider than the tear.

Press patch on tear in rubber RV roof-min

Press the patch into place.

Seal the Patch repair of RV rubber roof tear-min

Seal it and make sure there are no air bubbles by pressing something flat on it.

As an aside, Mark really likes these heavy duty Fiskar shears. They have a wire cutting notch on the back and they come with a sheath and a clip for hanging them from a belt loop.

Patch repair of RV rubber roof tear completed-min

Done! If we weren’t hurrying, the corners would be rounded and the tape wouldn’t rest on the old Dicor.

So, the job was done in just a few minutes.

A better way to cut the patch is to round the corners so they aren’t inclined to peel up. Also, sizing the patch so it is attached only to the rubber roofing material and not the lap sealant on the front cap would have been a better technique. But, as I said, rain was on its way in a few moments and a new roof was on its way in a few months.

Here is a pic from the other roof patch he did on the roof of one of the slide-outs several months ago.

RV roof repair for torn RV rubber roof-min

Another patch about 6 months after completion on the roof of one of our slide-outs.

Not long afterwards, the wild rain storm rolled in. Fortunately, the RV roof repairs were good and we were snug and dry in our trailer.

Puppy looks at a stunning sunset-min

The project supervisor was satisfied with the work, and we were warm and dry when the rains came.

Subscribe
Never miss a post — it’s free!

Tools and goodies needed for these repairs:

Holding Tank Vent Cap Replacement:

RV Rubber Roof Patch

Related Articles:

Below are some of our most POPULAR POSTS (also in the MENUS above)

Buddy - A Journey in Spirit - The story of an event that changed our lives forever.

ARTICLE INDEXES
  • RV Tech Tips Articles - A one page index of links to all our RV Tech Tips, RV Upgrades & RV Maintenance articles.
  • RV Lifestyle Tip Articles - An index of links to all our RV Lifestyle Tips (finances, boondocking, major repairs, work/jobs, etc.)
  • Solar Power Articles - Overview and tutorial articles for how to design and install solar power on an RV or boat
  • Product Reviews - An index of links to all of our Product Reviews
RV UPGRADES, SYSTEMS & TIPS MONEY FULL-TIME RV LIFESTYLE GEAR STORE
  • Gear Store - A list of the goodies, equipment and gear we've found useful in our RV lifestyle!
 

Our most recent posts:

More of our Latest Posts are in the MENU.   New to this site? Visit RVers Start Here to find where we keep all the good stuff. Also check out our COOL NEW GEAR STORE!! *** CLICK HERE *** to see it!

101 MORE Great RV Gift Ideas for RVers, Campers & Outdoor Lovers!

The other day when we were at a hardware store we heard Christmas music playing. Yikes! The holidays are on their way and it’s time to start finding meaningful gifts for our loved ones.

The fun thing about buying for RVers is that there are so many super cute RV themed goodies out there!

Last year I wrote the blog post “50 RV Gifts” which was chock full of wonderful suggestions for gifts. This year I’ve done a little more digging and put together a lineup of 101 more great RV gift ideas for you. Click on any image or text link to see more detailed info about each one.

Many of these items are things we use in our day-to-day RV lifestyle and others are things that look enticing and have received great reviews and might end up in our RV sometime soon!

The first one is special to us because it is a 2019 Arizona wall calendar that features a gorgeous photo Mark took in Canyon de Chelly. His photo appears both on the cover of the calendar and on the January page.

We often choose the places we want to visit based on photos we have seen, so what better way to get inspired for next year’s RV travels than to flip through a book of beautiful photos from the National Parks. National Geographic’s National Parks Illustrated History is a good one, as is the book Treasured Lands – An Odyssey Through the National Parks.

If you are looking for travel tips for visiting the National Parks, the Fodor’s Complete Guide to the National Parks of the West is a excellent.

One of our favorite things in our RV travels is enjoying the many stunning scenic drives that zig-zag all over the country. To find out where the best scenic roads are, check out National Geographic’s Guide to Scenic Highways and Byways.

There are 120 more spectacular road trips in the book The Most Scenic Drives in America.

Gorgeous coffee table books are wonderful, but if you want to share the experience and get inspired over popcorn with your life partner, how about watching the Ken Burns video, “The National Parks – America’s Best Idea (download)” (DVD).

As long as you and your sweetie are plopped down in front of the TV, you might get a kick out of some old westerns. After we’d been traveling the west for a while we began noticing that we recognized the locations where many westerns were filmed, and it’s great fun to guess and then check the credits or the internet after watching the movie to see if you got it right!

We especially love the old John Wayne and Clint Eastwood westerns, and these two collections have many of our all-time favorites: the John Wayne Western Collection and the Clint Eastwood Collection and Double Feature combo.

We love to have low lighting in the rig when we’re watching a movie at night or to give the rig a romantic and relaxing atmosphere. We’ve had a set of flameless LED wax candles for many years now, and we love them.

A cute welcome mat at the door is a delightful way to welcome guests into your rolling home or to put a smile on your face when you come home from a day of errands.

If you’re in your RV for the holidays, one lovely way to decorate for the season is with a small tabletop battery operated Christmas tree.

If you don’t want to store a tree during the rest of the year, then a small vintage trailer that lights up and plays music might be a nice choice.

For RVers who have a regular size tree, a sweet RV Christmas ornament will bring back memories of happy times on the road.

A throw pillow or two on your couch or bed can make your rolling home even more homey. If you swap out just the pillowcase on a single pillow you can rotate the decorations so they don’t get old.

Next time you take a shower, why not dry off with a Happy Camper towel??!!

And when you’re ready for bed, you can slip into a soft set of “RV There Yet?” pajamas for women or camping PJs for men.

As the winter nights get cold, how nice to snuggle up with a unique camper-under-the-moon throw blanket (comes in various sizes).

Or wrap the fuzzy side of a throw blanket close around you as you drift into dreams of hitting the road in a cool retro RV.

If you spend winters in your RV, no matter where you are in the country there will be some chilly nights. Nothing beats a down comforter for staying toasty warm under the covers!

We’ve got lots of tips for staying warm in an RV over the winter (check them out here, here and here).

One of the simplest tips for RVs that don’t have a winterizing option on the screen door is to cover the door’s screens with a shrink-wrap film. This transforms the door from delivering icy blasts of cold air to bringing in the warm sunshine without a frosty bite, and it takes just an hour to install (step-by-step instructions with photos here).

A vent-free propane heater can heat your rig in minutes. If you’re intimidated by the process of installing one, a portable Mr. Buddy heater will deliver just as much heat as one that’s permanently installed without being connected to the RV’s gas lines.

Tips for how to install a vent-free propane heater here.

Fortunately, we have our own very special Mr. Buddy to cuddle with under the blankets. He’s a great little portable heater!

Puppy cuddles up in a blanket-min

Our own little portable Mr. Buddy heater 🙂

If you’re outfitting a new-to-you RV, you can transform the interior on a cold blustery night with a blue flame fireplace. Rather than an industrial looking blue flame in a metal box, this fireplace comes complete with logs, yellow flames that deliver a lot of heat, and a pretty wooden mantel.

Friends of ours installed the arched propane fireplace insert without the wooden mantel in their 2005 Alpenlite fifth wheel and then trimmed it out with ceramic tile. This created a wonderfully cozy and inviting addition to their living space!

We will definitely do this if we ever get another rig. One tip: install the fireplace insert so it sticks out about 3″ or so from anything above it like cabinets or a TV. Heat rises straight up, so just a few inches is enough to keep the blue flame heater from heating anything above it, but if you install the insert so the front of it is flush with the cabinetry above, the cabinets will get warm.

More about vent-free propane heaters here.

And, of course, the simplest way to add the romance of a fireplace to your RV is to play the Fireplace DVD on your TV. Whenever we do this, we find that the person sitting closest to the TV gets warm on that side. There’s something about those pretty flames and crackling log noises…

No matter how you heat your RV or house in the winter, you’ll be reaching for sweaters and sweatshirts when Jack Frost comes around. Here’s a fun sweatshirt for your sweetie.

She might want to peel off the sweatshirt sitting around a toasty campfire. But, of course, what happens at the campfire stays at the campfire!

And if you’re out and about in sunny places and need a good cover, there’s a Happy Camper ballcap for you!

A wonderful stocking stuffer for your best gal might be a pair of RV earrings or here’s another style here.

Or a cell phone ring holder (just as long she’s not married to her phone!).

Now, when you’re out RVing with the family, you can prevent any unexpected rainy days from dampening the experience if you bring along the National Parks edition of Monopoly.

If the rain persists and you’re stuck in the RV for a long time, another game, Trekking the National Parks, would also be a welcome diversion.

For kids (and kids at heart) who love coloring, a National Parks Coloring Book is a nice way to get to know a little about all the different Parks (there are others here and here).

And for anyone doing the National Parks Junior Ranger program (kids or adults!), the Junior Ranger Activity Book could be a nice complement to the National Parks program.

Parents who read aloud to their little ones or that are helping young readers learn to read will love the book “A Camping Spree with Mr. Magee.

While the kids are busy playing games, coloring and reading, the baker in the family might pop some freshly made cookies out of the oven. How nice to have an oven mitt and pot holder specially made for RVers.

And whoever gets dish washing duty will enjoy the job a lot more if there’s a cute RV dish drying mat to lay the dishes on!

One kitchen goodie we LOVE and have had ever since we cruised Mexico on our sailboat is a set of Magma Nesting Cookware. These pots and pans fit neatly inside of each other and are heavy and durable. They are ideal in any kitchen where shelf space is at a premium, from vans to Class C’s to truck campers to teardrop trailers to popup tent trailers.

Another kitchen gadget we use every day is our Melitta pour-over filter cone and paper filters. I’ve been making coffee this way for 45 years. Simply place the filter cone on top of your coffee mug, boil water in a kettle and pour the water over the grounds in the filter and let it dribble into the cup below.

It makes a gourmet cup in minutes, the cleanup is a cinch, it takes up minimal storage space, and it doesn’t require electricity to operate.

Once you hit the road again after the holidays are over, the navigator in the family will appreciate the 2019 Rand McNally Road Atlas (we have several of these from various years!).

If you will be taking your RV over any mountain passes, both the navigator AND the driver will appreciate the Mountain Directories for RV and Truck Drivers. There are two volumes (for East and West), and we have turned to these books dozens of times before tackling a mountain pass.

Every pass is described in detail for traversing it in both directions, so you’ll know ahead of time what the grades will be and for how many miles and also how sharp the hairpin turns will be as well (i.e., 15 mph curves, 25 mph curves, etc.). Once you “know” what an 8% grade for 3 miles feels like or how your RV (and you) react to navigating a 10 mph uphill turn, these books will be immensely helpful in route planning.

Here are some tips for driving an RV in the mountains too.

Another trip planning tool we use a lot are the DeLorme Atlas & Gazetteer map books. Each one lists the highlights and hot spots in every state in an easy summary form, and the various public land borders are clearly marked.

We have one of these atlas books for every state we’ve visited. Another similar atlas series is by Benchmark and we have a few of those too!

A nice combination of travel destination ideas and RV maintenance tips and new RV reviews can be found in Trailer Life Magazine and Motorhome Magazine. I’ve been fortunate to have had many articles appear in both magazines, and a subscription can make a nice gift (we’ve given several over the years!).

Most full-time and seasonal RVers belong to Escapees RV Club, and a one-year membership makes a great gift.

Membership includes an excellent bi-monthly magazine that is written by RVers for RVers. There are also a myriad of other terrific offerings, from discounts on camping to Bootcamps for new RVers to webinars and an online RV University to elder care for RVers who have hung up their keys to a division dedicated to Gen-X and Millenial RVers to mail forwarding services and many RV campsite ownership possibilities.

We’ve been members since 2008. If you decide to join (here), please let them know “Roads Less Traveled” sent you!

If you love to write, as I do, as soon as you start adventuring you will want to begin recording all you’ve seen and done. And even though typing is faster than handwriting for a lot of us, taking a moment at the end of each day to make a few notes with pen on paper is very rewarding.

There are several excellent Camper’s Journals, Camping Log Books and RVing Journals available:

Even if you’re not a writer, it’s nice to have a visual display of the places you’ve visited, and an RV state sticker map is a fun thing to put on the RV door or wall.

While it’s fun to tick off where you’ve been and what you’ve seen, the essence of RVing to many is simply living in the moment and enjoying the blessings of life without responsibility or even accountability. Where better way to do that than in a hammock strung between two trees in your campsite?!

We met a fellow a few weeks ago who has a hammock in the garage of his toy hauler. He loves to open the ramp door to a beautiful view somewhere and swing quietly til he falls asleep.

Swinging in a hammock is also a great way to enjoy the wildlife that wanders in and out of a campsite, and hanging up a bird feeder or putting out a shallow tray of water is a good way to lure the critters in.

We love hanging a hummingbird feeder on the RV window vy our dining table. It attaches to the window with suction cups and we can sit inside and watch the antics of the hummers as they come and go at the feeder.

A simple solution of 1 part regular table sugar (no the fancy stuff) to 4 parts water makes a perfect nectar for these little acrobats.

If the antics of the hummers isn’t entertaining enough, then a game of Corn Hole will keep the folks at your campsite and even the folks at the neighbor’s occupied.

If you want to dress up your campsite, an RV themed tablecloth is a nice way to add some class to the picnic table.

And a pretty patio mat extends your outdoor space a lot. This 8 x 20 mat is a neat dimension that runs much of the length of the RV.

An outdoor grill is an absolute must for every RV, and there are dozens to choose from.

We still use the modest little “Sidekick” grill that came with our popup tent trailer. It is designed to be hung on an RV wall if you install the hanging bracket, or to stand up off the ground. Mark has barbecued many an outstanding meal on this grill and it’s still going strong after 13 years of very frequent use!

If you hang around outside a lot at night, it’s nice to have a lantern to hang in a tree or on the RV awning brackets. A battery operated Coleman LED lantern or solar powered lantern is a great way to go.

When we first started boondocking, we used kerosene lamps rather than burn precious electricity with our RV’s interior lighting. Hanging one or two of these lanterns inside at night would have been a whole lot brighter!

Many gadgets like this lantern are battery operated. Have you tried rechargeable batteries yet? In the last year or so we’ve switched to rechargeable batteries rather than buying new batteries each time the old ones run down, and we like them a lot.

Getting out in an RV is all about enjoying the outdoors, and a fun and romantic way to savor the fresh air and great views in some remote spot is with a picnic. There are lots of fancy picnic baskets on the market, but how about a picnic basket that is built into a backpack so you can hike with it comfortably, hands free?!

We use 100 oz. hydration packs when we do longer hikes, and we’ve like packs that hold a big camera, a tripod hung on the outside, and a light jacket and snacks. The Camelbak Fourteener series are great packs for this purpose.

Good quality hiking shoes are also important and we get new ones every year. We’ve both been wearing Oboz hiking shoes for the last few years and Mark loves his waterproof Oboz boots. He found them especially handy when we were trudging around in the rain and mud in Michigan’s Upper Peninsula recently to photograph the fall colors.

Along with hiking boots, we both keep a variety of high quality, toasty warm jackets in our coat closet. We prefer water-resistant fabric and we like high collars and good sized pockets too. You can usually find a North Face or Columbia jackets sale most times of the year, but the savings are typically better as winter transitions into spring.

One of the best ways to enjoy the outdoors is kayaking on a lake or river. The Hobie inflatable kayaks are FABULOUS and they can be rolled up and put away in an RV storage compartment.

Our Hobie inflatable tandem was a blast in both our RV and sailing lifestyles.

The beauty of these kayaks is that if you find yourself up a creek without a paddle it doesn’t matter: the kayak is driven by foot pedals and a rudder at the back.

This means you cruise along about twice as fast as an ordinary kayak totally hands free, and you can use your binoculars or camera as you go. (Read my full review here).

We also found that ours was as stable as a rock. I could stand up in it and wax the hull of our sailboat!

If your sweetie is a kayaker who dreams of the ideal ride, this is a gift he or she will love.

A while ago we bought a kit of cordless power tools by Rigid that included an impact driver and power drill.

Mark uses the impact driver for removing and replacing a wheel’s lug nuts on a flat tire (and we’ve had lots), and we both use the cordless drill to raise and lower our stabilizing jacks every time we set up or break down camp.

Rigid makes a lot of other tools that are all operated on the same lithium-ion battery packs as these two drills, and we recently got their little portable cordless vacuum cleaner. What a fantastic little vacuum! Because we now live with a puppy who hasn’t yet learned to wipe his paws when he comes in the door, I use this vacuum in the main living area almost every day.

The vacuum takes a bit more power than the drills, so we also bought an upgraded battery pack that has 5 amp-hours of capacity rather than the standard 1.5 ah. Even vaccuming as frequently as as I do, this big battery pack requires charging just once a month or so.

We highly recommend the Rigid kit even though it is considered a second tier brand. Dewalt has a similar kit too.

Another little “around the house” gadget we rely on a lot is our two-way radio set.

We use these to back up the trailer and also to find each other when we go on photo shoots. It also helps us stay in touch when one of us goes on a hike or walks the dog without the other.

Obviously, cell phones do this too, but these radios work everywhere we go regardless of cell tower proximity. We have the “36 mile” GMRS two-way radios which usually have excellent reception up to about 3 miles.

There are lots of great stocking stuffers for RVers, and one is a Leatherman tool that has a million tools neatly folded into a small pocket-sized package. Mark has the Leatherman Surge tool here:

Mark always carries a pocket knife too, and he has a collection of Gerber knives in drawers throughout our trailer as well as in his pocket! These are two of his favorites: Gerber Freeman Guide Drop Point and the tiny Gerber Ultralight.

He recently picked up another pocket knife made by Leatherman that is his latest favorite, the Leatherman Crater C33LX. It has a serrated edge and a caribiner that can attach the knife to a beltloop or keychain. The caribiner can also serve as an all important bottle opener come Beer Time!

Mark’s pockets are always brimming with goodies, and besides a pocket knife he usually carries a flashlight too. He likes the Lumintop brand and now has five different Lumintop LED flashlights and loves them all.

We’ve written detailed reviews of some of their models (the 4000 lumen tactical light here and two pocket flashlights here).

Here are two more, the Lumintop ODF30C 3500 lumen flashlight and the Lumintop AA 2.0 pocket flashlight.

Getting our heads out of the tool box and back out into nature, another outstanding gift that says “I love you” in a most heartfelt way is a brand new DSLR camera.

Nikons are the best rated DLSRs these days and the Nikon D3500 is an outstanding camera to start with. The Nikon D3500 kit that comes with two lenses is a great value.

If your sweetie already has a great camera, a fabulous gift that he or she will LOVE is the Hoodman Loupe.

This little device shrouds the image on the back of the camera so you can see the picture well in any light, and the optics are adjustable so no matter how good or poor your vision is, you can adjust it so the image is tack sharp.

We rely on our Hoodman Loupes to ensure that our images are in focus, our composition is what we want, and the exposure is correct.

Another wonderful gift for someone who loves photography is a high quality tripod. The Benro Travel Angel II tripod is light and easy to set up and has worked well for me, especially hiking, for several years. An easy-to-use tripod makes it possible to blur waterfalls and to take photos of the Milky Way and is also a wonderful tool for taking selfies.

The photographer in your life might also really enjoy some books that explain the nitty gritty about how to take beautiful photos.

Three books that have taught us a lot are Brenda Tharpe’s Creative Nature and Outdoor Photography, Tim Fitzharris’ Landscape Photography and Steve Perry’s Secrets to Stunning Wildlife Photography.

We’ve got loads more tips for learning how to take great photos here.

Sometimes the best way to get really beautiful photos of nature is to camp right out in it for long periods of time.

If your spouse has been pressing you to upgrade your RV with solar power so you can boondock for a while but you’ve felt a bit overwhelmed by the complexity or the cost of installing a system, a folding solar power suitcase can provide a lot of charging capacity and give you some excellent hands-on experience without requiring a scary big financial commitment or a search for an installer. And you can always sell the solar power suitcase at a later date. Other models are here and here.

If you’re ready to invest in a “full-time” solar power solution, the major components will be these four things:

This is essentially what has powered our lives every day for 11 years, and we have loads of articles on this website about solar power (here) and batteries (here)).

Getting up on the roof to do things like install solar panels is fine with the built-in RV roof ladder. However, we also use a secondary lightweight telescoping aluminum ladder so we can reach the highest parts of the exterior walls and the front cap since those spots are all out of reach of the built-in ladder.

This ladder can be set up in a jiffy, is stable, and can be folded up to fit in a small storage space!

Our puppy Buddy just came over to see what I was up to on my laptop here, and he wanted me to add a few things for our furry readers. One is a Happy Camper dog shirt with a vintage RV on it. The RV window is a heart!

Another is his favorite dog food. He loves the Orijen and Acana brands, and Regional Red is his all-time favorite.

Put a paw over your eyes so you don’t see the price, but do read the ingredients. I honestly think this stuff should be served under glass on a linen tablecloth…

Last is a set of rubber whistler balls. These rugged, flexible balls can withstand any amount of chewing and have small holes in the sides that make them whistle as they fly.

We hope these pics and links have given you some fresh new ideas of special things to give your loved ones.

Anything you put in your shopping cart right after clicking a link here (even if you end up doing some searching to find something else) results in a small commission to us at no cost to you, a win-win all around. Thank you!!

If you’re still searching for that ideal gift for someone special, check out these 50 Great RV Gifts here!

Subscribe
Never miss a post — it’s free!

Below are some of our most POPULAR POSTS (also in the MENUS above)

Buddy - A Journey in Spirit - The story of an event that changed our lives forever.

ARTICLE INDEXES
  • RV Tech Tips Articles - A one page index of links to all our RV Tech Tips, RV Upgrades & RV Maintenance articles.
  • RV Lifestyle Tip Articles - An index of links to all our RV Lifestyle Tips (finances, boondocking, major repairs, work/jobs, etc.)
  • Solar Power Articles - Overview and tutorial articles for how to design and install solar power on an RV or boat
  • Product Reviews - An index of links to all of our Product Reviews
RV UPGRADES, SYSTEMS & TIPS MONEY FULL-TIME RV LIFESTYLE GEAR STORE
  • Gear Store - A list of the goodies, equipment and gear we've found useful in our RV lifestyle!
 

Our most recent posts:

More of our Latest Posts are in the MENU.   New to this site? Visit RVers Start Here to find where we keep all the good stuff. Also check out our COOL NEW GEAR STORE!! *** CLICK HERE *** to see it!

RVing Through History – 80 Years of RV Travel!

October 2018 – While the most famous and beloved part of the RV/MH Hall of Fame and Museum in Elkhart, Indiana, is the fabulous display of antique trailers and motorhomes downstairs, the library upstairs is an equally outstanding (if less flashy) gem.

RV-MH Hall of Fame Elkhart Indiana-min

The RV/MH Hall of Fame and Museum antique trailer display downstairs is fabulous.
But you’ve gotta check out the library upstairs too!

Every year notable people in the RV and Manufactured Housing industries are inducted into the Hall of Fame, and when you head upstairs in the museum you can find walls filled with plaques commemorating the work of each inductee.

RV-MH Hall of Fame Inductees Elkhart Indiana-min

The “Hall of Fame” dignitaries in the RV and Manufactured Home industries.

Around the bend there is a library that is open to all visitors. This sizeable room is filled with several rows of bookshelves that house all the periodicals and publications in the RV and Manufactured Housing industries since its inception.

There’s bit of whimsy in this library: the tops of the bookshelves are decorated with toy RVs!

RV-MH Hall of Fame Library Elkhart Indiana-min

The library upstairs is a wonderful place to kick back and learn a little history.

I find the history of RVing very interesting because it is a hobby and a lifestyle that has rolled through our nation’s history for over a century, a time that has included two world wars, economic booms and depressions, baby booms and boomlets, energy crises and more.

As a columnist for and avid reader of Trailer Life Magazine, I was especially eager to look at some of the earliest editions of its predecessor publication, Trailer Travel Magazine.

High up on a bookshelf I found a row of the earliest Trailer Travel magazines the museum owns, all nicely bound by year.

Woodall's Trailer Travel Magazine 1930s and 1940s issues RV-MH Hall of Fame and Museum Library Elkhart Indiana-min

Bound volumes of Trailer Travel Magazine from the 1930s to the 1960s

I randomly took one volume down and flipped it open to the January 1959 issue. The little girl in diapers could have been an older sister of mine or a younger sister of Mark’s. How fun!

Woodall's Trailer Travel Magazine Cover January 1959 RV-MH Hall of Fame and Museum-min

Trailer Travel Magazine – January 1959 – 25 cents an issue

Flipping the magazine open to a random page, I found a fantastic two page advertisement for Airstream trailers called “Land Yachting.” The accompanying photo showed a motor yacht tied up at a dock where an Airstream was parked. Very cool!

Land Yachting Woodall's Trailer Travel Magazine Cover January 1959 RV-MH Hall of Fame and Museum-min

Awesome!

Thumbing through a little more, I found an article about a fellow who loved the trailer lifestyle so much he had built a custom home that he could back his trailer into. While the house had a full kitchen, living room, bedrooms and bathrooms, he could also use all of the trailers amenities when it was parked inside the house!

This fellow had been involved in the RV industry for a long time, towing trailers since 1924, and he confessed that he and his wife preferred the bedroom in the trailer to any of the bedrooms in the house!

Have Trailer Will Travel Woodall's Trailer Travel Magazine Cover January 1959 RV-MH Hall of Fame and Museum-min

This guy liked to back his trailer right into his custom home and use it inside the house!

I picked up the volume for the 1937 issues of Trailer Travel (the magazine started in 1935 but I didn’t see that volume there).

The January 1937 issue cost just 15 cents and it featured a photo of a palm tree lined street on the cover and the promise of an article about “Trailing Through the Land of Thrills” inside.

Trailer Travel Magazine 1937 Cover photo RV-MH Hall of Fame and Museum Elkhart IN-min

Trailer Travel Magazine – January 1937 – 15 cents an issue

Like today’s Trailer Life, the magazine was filled with advertisements. Of course, as with any media publication, including this website, the ads make it possible to pay the bills. But I loved each and every one of the ads because they said so much about the life and times and interest and concerns of the RV industry back in 1937.

We had seen several Covered Wagon trailers in the museum downstairs, and here was an ad for the 1937 model. By the looks of the lady in her evening gown, this was a trailer for the well-to-do. Boasting “superb perfection of design” and “eight years of quality trailer building,” this rolling home would set you back $1,295.

Trailer Travel Magazine 1937 Covered Wagon Ad RV-MH Hall of Fame and Museum Elkhart IN-min

At $1,295, this trailer must have been quite a luxury during the Great Depression.

In 1937 America was still deep in the throes of the Great Depression, and $1,295 was an exorbitant amount of money. No wonder the lady was in such an elegant gown as she prepared for a night on the town. She was a woman of means who had somehow escaped the worst of the economic woes that the Great Depression wrought.

Trailer Travel Magazine 1937 Silver Dome Ad RV-MH Hall of Fame and Museum Elkhart IN-min

The Silver Dome had a caster type wheel under the hitch pin.

It struck me that owning a trailer was not something that was probably possible for most families, as many families didn’t have a car in 1937. “Trailerites,” as the early RVers were called, must have been a fairly exclusive crowd, especially when the country was in the grip of the Great Depression.

1937 Trailer Travel Magazine Club Car Ad RV-MH Hall of Fame and Museum Elkhart IN-min

.

1937 Trailer Travel Magazine Royal Coach Ad RV-MH Hall of Fame and Museum Elkhart IN-min

.

But there were trailer builders out there who were aiming at a more budget oriented crowd. The 17′ Indian “Scout” started at a mere $395, just 1/3 of the cost of that fancy 22′ Covered Wagon model.

1937 Trailer Travel Magazine RV-MH Hall of Fame and Museum Elkhart IN Indian Scout Trailer Ad-min

A smaller, simpler trailer for just $395.

Another big surprise was that many of the trailers in 1937 (model year 1938) offered most of the household comforts we have built into our trailers today, from water tanks to kitchen stoves to insulation and more.

One ad for the Bender Travel Mansion boasted air conditioning and heat which they said marked “a new era in trailer life!”

Not only did the 1937 Bender Travel Mansion feature climate control, it also had a hot and cold water shower, a flush toilet and an automatic electric and marine water system. The foundation was the Bender Tandem Axle and Spring suspension system, and the interior was walnut.

All this for a base price of just $447.

Trailer Travel Magazine 1937 Bender Travel Mansion Ad RV-MH Hall of Fame and Museum Elkhart IN-min

Air conditioning, heat, hot and cold shower and flush toilet — in 1937!

I was also surprised that most trailer ads stressed that their units were all steel construction. This didn’t mean just the frame, as it does today. The studs and rafters were welded steel too.

When we had looked at the units in the museum downstairs, Mark had noted that even the aluminum sided models of the early years had tack welds rather than rivets.

These early trailers were solidly built and heavy!

Trailer Travel Magazine 1937 Hayes Ad RV-MH Hall of Fame and Museum Elkhart IN-min

These trailers were super rugged and all steel.

The 1938 Hayes trailer featured not only a complete steel cage — chassis, frame, sides, roof were all “electric welded into one rigid piece” — but it also had five kinds of insulating materials.

One insulating material mentioned was “Reflect-O-Cel aluminum air cell insulation” used in the roof.

This sounded a lot like our modern product Reflectix that many RVers use to block heat and cold in their RV windows. It also sounded a little like the “radiant barrier” that trailer manufacturers use today (although some radiant barriers we saw on factory tours resembled aluminum foil while others were a foil product that had some kind padding).

1937 Trailer Travel Magazine 1938 Hayes Trailer Ad RV-MH Hall of Fame and Museum Elkhart IN-min

A steel cage frame and 5 materials for insulation including “Reflect-O-Cel.”

I was intrigued that while today there are many industry publications for people who work in the RV industry and a few magazines geared towards consumers who buy RVs, the early Trailer Travel magazine had a very wide audience that included not only the manufacturers but the “trailerites” who bought them, the campground and trailer park owners who were hosting them and the dealerships who were selling the manufacturers’ products.

So, there were ads for everything from Coleman stoves to trailer windows, a new folding trailer step, Foreman trailer axles, Bendix power brakes and a Red Top Gas-O-Lectric AC/DC Power Plant to give the trailer electricity when it was parked off the grid.

Coleman Stove Ad 1937 Trailer Travel Magazine RV-MH Hall of Fame and Museum Elkhart IN-min

1937 Coleman stoves.

Trailer Window Ad 1937 Trailer Travel Magazine RV-MH Hall of Fame and Museum Elkhart IN-min

Trailer windows… not very different from today.

Folding Trailer Step Ad 1937 Trailer Travel Magazine RV-MH Hall of Fame and Museum Elkhart IN-min

A fold-out step!

Foreman Trailer Axles Ad 1937 Trailer Travel Magazine RV-MH Hall of Fame and Museum Elkhart IN-min

Trailer axles.

Bendix Trailer Brakes Ad Foreman Trailer Axles Ad 1937 Trailer Travel Magazine RV-MH Hall of Fame and Museum Elkhart IN-min

Bendix Power Brakes save your car’s brakes…same thing today!

Red Top Gas-O-Lectric Power Plant Ad Foreman Trailer Axles Ad 1937 Trailer Travel Magazine RV-MH Hall of Fame and Museum Elkhart IN-min

AC and DC power for the trailer when it’s not plugged in.

I was also fascinated to see that companies had emerged to rent out trailers to folks on vacation. Western Trailways Service offered trailers for $5 a day for one or two people or $6.50 for three or four people. Why spend $400 or more buying a trailer when you could rent one for a weeklong honeymoon for just $35?

1937 Trailer Travel Magazine Ad RV-MH Hall of Fame and Museum Elkhart IN Western Trailways Rental Plan-min

Why not rent a trailer for a week before going all in and buying one?

Just as fascinating, or perhaps even more so, was reading the articles about where people took their trailers in 1937. An ad for Covered Wagon explaining their sales method of selling a base model plus options showed a young couple dressed up for camping in nature.

It was a different era!

Covered Wagon Pacemaker Trailer Ad 1937 Trailer Travel Magazine RV-MH Hall of Fame and Museum Elkhart IN-min

Camping in style.

One photo showed several riders on horseback and a trailer parked on the side of a dirt road, a glimpse of the transition still taking place in the 1930s in the most rural areas from horse to motorized travel.

Trailer and horseback riders Durango Colorado Foreman Trailer Axles Ad 1937 Trailer Travel Magazine RV-MH Hall of Fame and Museum Elkhart IN-min

Old and new modes of transportation on the dirt road to Durango Colorado

An article entitled, “Yellowstone Parking – A Trailer Travel Thrill!” described a trailer trip to Yellowstone National Park.

Some things have changed quite a bit since 1937. A photo showed a black bear eyeing up a car towing a trailer. In those days feeding the bears was a popular activity at Yellowstone. Fortunately, from what I understand, grizzlies were extremely rare in the Park back then since they were not a protected species.

Trailer driving past Bear in Yellowstone National Park 1937 Trailer Travel Magazine RV-MH Hall of Fame and Museum Elkhart IN-min

It was common practice to feed the bears at Yellowstone back in 1937

But the fishing on Fire Hole River (“Fire Hole” was two words in those days) seems like it was much the same, excellent both then and now.

Fire Hole River with trailer at Yellowstone National Park 1937 Trailer Travel Magazine RV-MH Hall of Fame and Museum Elkhart IN-min

Fire Hole River in Yellowstone.

And photography was as important to Yellowstone visitors in 1937 as it is to all of us today.

Photography with trailer 1937 Trailer Travel Magazine RV-MH Hall of Fame and Museum Elkhart IN-min

A “trailerite” family enjoys a meal together in their campsite while dad snaps a pic.

As I perused the January 1937 issue, I discovered that the feature article, “Trailing Through the Land of Thrills,” was all about taking your trailer on a fabulous adventure down to Mexico City.

The new 1,000 mile long international highway had been completed in July, 1936, and Americans were taking their cars and trailers down the highway and loving it.

Interestingly, that was not the only travel destination feature article about going to Mexico in 1937. In the August issue of Trailer Travel Magazine there was an article about taking your trailer down to the fabulous tropical destination of Acapulco!

Mark and I spent some time in Acapulco on our sailboat, and although Acapulco is sadly very dangerous in many areas today, it was easy to see how extraordinarily charming it must have been years ago.

When we anchored there we heard whales singing in the water around our hull at night, and we saw a seahorse attached to our anchor chain when we hauled the anchor up. The water just outside the populated area was the bluest blue we’d ever seen, and at night Acapulco Bay looked like a bowl full of diamonds as all the homes on the steep hills around the bay lit up.

I can only imagine how exotic it would have been to take a trailer down to Acapulco for a tropical winter vacation in 1937.

Acapulco Mexico Town Beach

Acapulco’s town beach

Another fascinating article was entitled, “What is Happening to the Trailer Industry?”

Apparently for the first half of 1937 trailers flew off the shelves, so the manufacturers ratcheted production up to high gear. By May, however, trailers had stopped moving and there were surpluses everywhere.

The article pondered whether the sudden slowdown was because President Roosevelt had tampered with the Supreme Court as he tried to push through his New Deal legislation. Or perhaps the Housing Act of 1937 (Wagner Act) which provided government funding for public housing agencies to assist low income families was the cultprit.

The writer also mused that the problem might be plain old competition. He noted that for every one trailer being built by a manufacturer in 1937, four were being built at home. I guess in 1937 “trailerites” were looking for affordable trailers that were customized to their own needs and preferences.

Boy, does that sound familiar!

Trailer Travel Magazine September 1937 What is Happening to the Trailer Industry?

The RV industry has always been cyclical,
but even so, a sudden downturn in 1937 prompted some soul searching.

On the positive side, another article in the January 1937 issue discussed how Hollywood was becoming more and more enamored of using trailers on movie sets.

Downstairs in the museum of antique trailers we’d seen a fabulous House Car on display that belonged to Mae West. However, it wasn’t until the 1930s that the stars in Hollywood routinely began to use luxury trailers as mobile dressing rooms and places to relax on set.

One article entitled “Trailer Trails to Health: Water” discussed the importance of finding good drinking water in your travels. The article opened with a cute reference to Samuel Coleridge’s poem in which the Ancient Mariner lamented, “Water, water everywhere and not a drop to drink.”

Today we all rely on bottled water that is in abundant supply everywhere, but in 1937 the only choices were city water, which was filtered, chlorinated if necessary, and approved by the State Department of Health, and well water or spring water which was a gamble.

“Trailerites” were advised to seek out city water supplies and to use spring or well water only if it had a certificate on it from the State Board of Health.

Trailer Travel magazine 1937 Trailer Trails to Health - Water-min

Finding safe drinking water was a big concern for “trailerites” in 1937

I grabbed the Trailer Travel volume for 1940 and flipped through a few issues.

The price of the magazine had dropped from 15 cents in 1937 to 10 cents in 1940, and it was now called Automobile & Trailer Travel Magazine.

Automobile and Trailer Travel Magazine 1940-min

Automobile & Trailer Travel Magazine – August 1940 – Now 10 cents an issue!

What a neat surprise it was when I saw an ad for a 4.8 cubic foot electric refrigerator!

This RV fridge was a combination electric refrigerator and ice box. When you took your trailer off grid, rather than relying on propane, which came later, you could pack 50 lbs. of ice in the ice box and still enjoy a cold beer.

In 1940 there were still rural folks who didn’t have running water or electricity, but the finest trailers had electric refrigeration!

Marvel Trailer 4.8 cubic foot Ice and Electric refrigerator ad from 1940 Trailer Travel Magazine-min

A 4.8 cubic foot electric fridge with a big ice box for off-grid camping.

The October 1940 issue featured an article, “How To Use Your Camera,” that explained how to take advantage of different film speeds. Of course, film cameras have gone the way of the ice box!

Trailer Travel magazine 1940 How to Use Your Camera-min

Photography and travel have always gone hand-in-hand, whether the camera is film or digital.

I jumped ahead a few shelves and pulled out the March 1977 issue. The magazine was now called Woodall’s Trailer & RV Travel, and the cover showed a pop-top van as one of the best new designs of the year.

Water was still covered in this issue in 1977, but the focus in this particular article was on how the RV’s water system works and what to do when it doesn’t.

March 1977 Woodall's Trailer and RV Travel Magazine RV-MH Hall of Fame and Museum Elkhart IN-min

Woodall’s Trailer & RV Travel – March 1977

My jaw just about hit the floor, however, when I opened another issue from 1977 and discovered that finding safe drinking water was just as big a concern in 1977 as it had been 40 years prior in 1937.

Not only did the article, “The Traveler’s Guide to Water,” warn RVers not to trust random wells and springs for drinking water, but it also opened with the same quote from Coleridge’s poem The Ancient Mariner: “Water, water everywhere and not a drop to drink.”

How funny.

Ironically, when I wrote an article for Cruising World Magazine a few years ago about our sailboat’s water desalination system that converted ocean water to drinking water, the editors titled it, “Water, water everywhere…”

Coleridge’s Ancient Mariner is timeless!

Trailer Travel magazine 1977 The Traveler's Guide to Water-min

Finding safe drinking water was still a big concern in 1977, some 40 years later!

In 1977 there was also a lot of concern about the safety of taking an RV into Mexico. Several articles discussed rising crime in Mexico, but the writers expressed hope that it was a temporary problem that might abate in the near future.

John and the motorhome

Camping on the beach in Mexico!

When we were in Puerto Vallarta, Mexico, on our sailboat, we were very fortunate to meet a young German man who had been raised in a Class C motorhome by his adventurous parents as they traveled all over North America. While showing us his photo albums of family photos, he described camping on the beach in Mexico as a kid in the 1980s. How fun!

At one point, his dad had gotten the clever idea to ask a train conductor heading through Copper Canyon if they could put their motorhome on one of the empty flatbed train cars. Soon, a whole generation of adventurous RVers were riding flatbed cars on that train and enjoying a trip of a lifetime.

Blog posts about meeting this special fellow here and here.

Another big topic of concern in Woodall’s Trailer & RV Travel in the late 1970’s was the future of the Alaskan wilderness. The public land debate goes back over a century and is very complex, but the Alaska Pipeline spawned much debate in the late 1970s, and Woodall’s Trailer and RV Travel weighed in with their thoughts.

Who Gets the Alaskan Wilderness 1977 Trailer Travel Magazine RV-MH Hall of Fame and Museum Elkhart IN-min

Public land debates were as hot in 1977 as they are today.

Alaskan Wilderness quote 1977 Trailer Travel Magazine RV-MH Hall of Fame and Museum Elkhart IN-min

Interesting to look back on this comment 40 years later.

By the 1970s, Woodall’s Trailer and RV Travel Magazine was published solely for RVers — the consumer side of the RV industry — and was no longer a trade magazine for the RV industry itself. But one amusing business-oriented article headline caught my eye: “Renting Your RV – It Could Put 10 Grand in your pocket.”

There has been an effort in recent years to put potential RV renters together with people who’d like to make a little side income from renting out there RV. I had no idea that this business model dated back 40 years, but there it was in 1977!!

Renting Your RV 1977 Trailer Travel Magazine RV-MH Hall of Fame and Museum Elkhart IN-min

Renting your RV is not a new concept. Heck, folks were putting 10 grand in their pockets doing it in 1977!

I had a hard time leaving the RV/MH Hall of Fame Library and could easily have stayed a few more hours. But the volunteer at the front desk downstairs came up to me at closing time and told me very kindly that she was going to shut off the lights in a few minutes!

She let me hunt down one last magazine from August 2010, an issue of Good Sam Club’s Highways Magazine. The cover of this magazine featured our little buggy in a streamside setting. She smiled as I snapped a photo of the cover and told her that the very same trailer was parked out in their parking lot right now.

Looking at the Highways Magazine cover more closely a little later, I noticed that besides my article about Idaho’s Sawtooth Mountains, there were articles on water filtration and brakes and there was even a photo contest.

So many themes in RVing have stayed the same, all the way from 1937 to now.

August 2010 Highways Magazine Cover 1977 Trailer Travel Magazine RV-MH Hall of Fame and Museum Elkhart IN-min

Water, brakes and photography were all in this issue too!

If you have a chance to visit the RV/MH Hall of Fame and Museum, allow a little extra time to sit in one of the comfy chairs upstairs in the library and thumb through a few RVing magazines of yesteryear. It is a heartwarming journey.

You can subscribe to the modern day Trailer Life Magazine here and see our photos and stories in its pages almost every month!

More info about the RV/MH Hall of Fame Museum and Library:

Subscribe
Never miss a post — it’s free!

Other blog posts from Indiana and the RV/MH Hall of Fame Museum:

Our most recent posts:

More of our Latest Posts are in the MENU.   New to this site? Visit RVers Start Here to find where we keep all the good stuff. Also check out our COOL NEW GEAR STORE!! *** CLICK HERE *** to see it!

<-Previous || Next->

RV/MH Hall of Fame + Elkhart (RV Heart) Indiana

October 2018 – The region around Elkhart, Goshen and Shipshewana in the northern part of Indiana is the heart of the RV industry, and a trip there is a must for everyone who loves RVing. One of the coolest things to see is the RV/MH Hall of Fame and Museum (“MH stands for Manufactured Housing, not “Motor Home”).

RV-MH Hall of Fame tells RV History about RVing industry in Elkhart Indiana

The RV/MH Hall of Fame and Museum is at the heart of the RV industry’s heart in Elkhart Indiana

We visited Elkhart, Indiana, back in 2009. That visit was during the very dark days of the recession, and the entire RV industry was in total free fall as it plunged to miserable depths in a very steep nose dive. RV manufacturers that had been around for as long as forty or fifty years were dropping like flies.

At that point, unfortunately, darker days were still to come. It was hard to imagine when or how the economy, especially the RV manufacturing industry, would ever recover.

So, what a marvelous shock it was this year to arrive in Elkhart and find the place absolutely humming with activity. The economic rocketship ride has taken Elkhart and the RV industry by storm, and there were help wanted signs in front of every manufacturing plant and on every street corner.

Elkhart Indiana is hiring in economic boom-min

There were jobs aplenty in Elkhart, Indiana

Hiring signs in Elkhart Indiana as economy booms-min

We saw hiring signs in front of every business.

When the RV manufacturers are running at full tilt, everything around them takes off at a sprint too.

There were RV transport trucks towing sparkling new trailers everywhere we turned. Each transporter was embarking on a trip to haul the attached trailer to a dealership in some far corner of the country, and every RV manufacturer’s lot was filled with rows and rows of rigs waiting their turn to be shipped out.

Jobs jobs jobs and hiring in Elkhart indiana-min

RV transporters were busy busy busy!

Now hiring in Elkhart Indiana during economic recovery-min

Warehouse – Yes! Sewers, not so much.

The mood was almost giddy, and there were help wanted signs at all the supermarkets, restaurants and fast food joints. I don’t think there was a company anywhere that was suffering. One coffee company even cracked a joke about needing new hires right on their sign.

Of course we are hiring who is not-min

Of course… Who isn’t??

Wages were ticking upwards too. One small manufacturer of specialty trailers told us the starting wage for assembly line workers at their plant — once they’ve proven themselves for a month — is $27 per hour. Wow!!

But besides the exuberantly happy mood we felt around town, we were having a blast just being right smack in the heart of the RV industry where something like 90% of the RV-related corporations have their headquarters. Every direction we looked we saw a familiar brand of something.

Lippert Components freight truck in Elkhart Indiana-min

Lippert Components… we have a lot of their stuff… Hey, is that a help wanted ad on their truck?!

Keystone Drive Elkhart Indiana-min

You can’t get far from the RV industry here.

The manufacturing plants go on for miles, and all the big corporations have many many plants.

LCI Plant 85 Elkhart Indiana-min

The various plants for the big manufacturers go on for miles and miles.

R-Pod Plant 37 Elkhart Indiana heart of RV industry-min

R-Pod too.

The companies and the residents are all very much tied in with each other, so it was no surprise to see familiar names on the Adopt-A-Highway signs too.

Adopt-a-Highway Lippert Components Inc Elkhart Indiana-min

.

XLR toy hauler plant Elkhart Indiana RV industry-min

Drive a block and see another familiar manufacturer’s plant!

XLR Thunderbolt toy haulers lined up in Elkhart Indiana RV plant-min

Ready for outdoor adventure.

Every RV manufacturer offers factory tours of some kind, and we made it a point to do quite a few. But just driving around Elkhart, Goshen, Shipshewana, Middlebury and Nappannee, it was amazing to discover how enormous this industry is and how vast its many manufacturing plants are.

Keystone RV Company Headquarters Goshen Indiana-min

.

Of course, lots of other kinds of vehicles are made in the Elkhart area too. How cool to see a zillion shuttle buses hot off the assembly line out gleaming in the sun.

Shuttle buses lined up in Elkhart Indiana-min

This region makes more than just RVs.

Much of this area is Amish country, and every so often we would come across signs letting us know their horses and buggies were in the area. How fun to see the horse tie-ups at the supermarkets and to see the horses and buggies waiting patiently outside various businesses. We saw the Amish working in the plants too.

Goshen and Shipshewana Indiana are Amish country-min

Something old and something new – Rooftop solar panels, horses and buggies and electronic controls.

It was also the peak of fall. At a cider mill the pumpkins were stacked high and the cider was selling fast (yum!).

Pumpkin display Elkhart Indiana-min

Fall was in the air and the cider was delicious!

Even though we had visited the RV/MH Hall of Fame Museum the last time we were here back in 2009, we wanted to see it again this time. It is unusual for an industry to celebrate itself and its products with so fabulous a showcase in such an impressive building.

Don’t miss it if you drive by on I-90 (you can see it from the highway!).

RV-MH Hall of Fame Museum-min

Buddy couldn’t wait to visit the museum!

Out in front of RV/MH Hall of Fame Museum there’s a statue of a star spangled elk. He’s decorated with the painting of an RV, and very close to his heart is the RV’s front door. Perfect!

The RV industry is the heart of Elkhart Indiana-min

The heart of Elkhart is the RV industry, and the heart of the RV industry is Elkhart.

There is a lot to see inside the museum, but the coolest attraction is the Go RVing Hall which houses an incredible collection of vintage RVs.

Entering the GoRVing Hall in RV-MH Hall of Fame Museum-min

.

The RVs are lined up along a road that is painted on the floor, and this road winds all around a huge room and even goes over a small bridge. At the beginning of the road the RVs are arrayed in more-or-less chronological order, so you can see how the RV industry developed as you move from one rig to the next.

One of the first rigs is a 1913 Ford Model T towing a 1913 Earl Trailer.

1913 Model T Ford and Earl Travel Trailer-min

1913 Model T Ford towing an Earl Travel Trailer

Another early rig was a “Collapsible Automobile Camping Outfit” that could be attached or detached from any roadster.

1916 Telescoping camping unit on a roadster at RV:MH Hall of Fame and Museum Elkhart Indiana

1916 Telescoping camping unit on a roadster

The museum shows a page from the May 1916 issue of Popular Mechanics Magazine that has photos of this inventive contraption in action. Note that they’d already figured out how to get hot water for showers… over a century ago!

Popular Mechanics May 1916 Telescoping roadster attachment

Popular Mechanics Magazine, May 1916

The early days of RVing was a time of enormous creativity as people tried building all kinds of crazy contraptions to get themselves up off the ground while camping and have a little storage space for clothes and food as well.

Some were simple popup (folding) tent trailers that were obvious precursors to today’s popups. Others were very high end and fancy “house cars” that were early versions of motorhomes for the wealthy.

1931 Model AA Ford House Car-min

1931 Model AA Ford House Car

Some of those early companies were wildly successful. Covered Wagon was one of the most successful. At their peak they turned out 40-50 trailers every day.

World War II put a quick end to that success, however, and by the end of the war the RV industry had virtually collapsed. Almost every manufacturer went out of business, including Covered Wagon.

1935 Covered Wagon Travel Trailer-min

1935 Covered Wagon Travel Trailer

Interior 1935 Covered Wagon Travel Trailer-min

Interior of the 1935 Covered Wagon Travel Trailer

1937 Hunt Housecar-min

The very cool 1937 Hunt Housecar

That meteoric rise and sudden crash of the RV industry seemed eerily familiar to what we saw happen after 2008, especially in the trailer industry.

All of the wonderful trailer manufacturers that had built good quality, solid trailers for a modest price for decades up until 2008 were gone by 2015. The rest consolidated under two main conglomerates. At the same time, all the suppliers save a few also consolidated under a single conglomerate.

Sadly, this has left the current trailer customer with a million different models of trailers to choose from that are all extremely similar except for the graphics and the name on the outside of the trailer.

But so go the wheels of invention and maturity in every industry. The great fun of the RV/MH Hall of Fame Museum is seeing things like the first trailer that Fleetwood built in 1950. Since then, Fleetwood has introduced all kinds of RV innovations, from enhanced safety features to advanced entertainment systems and even custom windshield wipers for your Fleetwood.

1950 Fleetwood Sporter travel trailer first Fleetwood built-min

The 1950 Fleetwood Sporter travel trailer was the first Fleetwood RV ever built

Interior 1950 Fleetwood Sporter travel trailer first Fleetwood built-min

Interior of the 1950 Fleetwood Sporter travel trailer

And an elegant trailer by Yellowstone Trailer built in 1954.

1954 Yellowstone Travel Trailer-min

1954 Yellowstone Travel Trailer

Early trailers had all kinds of interesting shapes. The 1967 FAN trailer had a flip tail at the back end.

1967 FAN Luxury Liner travel trailer RV-MH Hall of Fame Museum Elkhart Indiana-min

1967 FAN Luxury Liner travel trailer

Underneath the trailer, tucked between the two wheels, was an early version of MORryde’s rubber equalizer system. When we toured the MORryde plant we learned that they had spray painted the equalizer on this trailer silver to match the trailer and to make sure people could see it.

1967 FAN Luxury Liner MORryde equalizer early version-min

One of the first MORryde equalizers on a 1967 FAN Luxury Liner travel trailer.

We savored every minute in the museum, and I went back again a second time for more.

Mark loved the early mechanical systems — imagine a regular shower head screwed onto the outside of your trailer or an air-hose system to pump air into the water tank to pressurize it — and I loved imagining people of an earlier era taking these fun and crazy travel pods out to the National Parks to breathe the fresh air and see the wonders there.

I’ll have more for you from this trip to the RV/MH Hall of Fame Museum. In the meantime you can see more cool antique RVs in our 2009 blog post about the museum. They’ve moved a few rigs around, but they are all still there.

Most important, if you are planning a trip that will take you anywhere near Elkhart, Indiana, check your favorite RV manufacturer’s website for their factory tour schedule, and be sure to visit to this special museum.

A walk back in time at RV-MH Hall of Fame Museum Elkhart Indiana-min

A walk back in time at the RV-MH Hall of Fame and Museum

Subscribe
Never miss a post — it’s free!

More info about the Elkhart Area and RV/MH Hall of Fame aand Museum:

Other blog posts from our RV travels in Indiana:

Our most recent posts:

More of our Latest Posts are in the MENU.   New to this site? Visit RVers Start Here to find where we keep all the good stuff. Also check out our COOL NEW GEAR STORE!! *** CLICK HERE *** to see it!

<-Previous || Next->

Halloween Camping – RV Witches & Goblins at Michigan State Parks!

October 2018 – After enjoying several weeks of waterfalls and fall foliage in Michigan’s Upper Peninsula and a delightful day on Mackinac Island, we stopped to camp at Metamora-Hadley Recreation Area in the Lower Peninsula. Despite cold rain and drizzle in mid-October, we were shocked to see that the campground was packed to the gills when we arrived on a Sunday morning. It turned out that the State Park campgrounds in Michigan celebrate Halloween each weekend in late September and October, and the festivities were in full swing.

RV halloween camping-min

Ghouls and goblins pose for a selfie in front of their trailer home!

Families were shivering in the rain and huddled around the campfires, but nothing could dampen their spirits as they showed off their wild Halloween campsite decorations.

Campsite decorate for Halloween-min

Grrrrr….Happy Halloween!

Camping Halloween travel trailer RV with pumpkin decoration-min

Smile for the camera!

After we quickly set up camp, we walked around the campground loops and were floored by how elaborate the campsite decorations were.

Campground Halloween decorations-min

Some folks set up their displays under easy-up shelters!

RV Campsite decorate for Halloween-min

Some were arranged under the fifth wheel overhang too.

Families had gone all out with witches riding broomsticks, ghosts twisting in the wind, pumpkins grinning wickedly and skeletons perched on everything.

Fifth wheel RV Halloween decorations-min

Witches and skeletons hang out on a camper’s fifth wheel.

Motorhome campsite with Halloween decorations-min

A skeleton couple took over the picnic table at this motorhome’s campsite.

The night before we got there, all of the displays had been lit up. There were power cords running every this way and that between the campsites and the displays. But even in the bitter morning air without any glow-in-the-dark spookiness, we still caught Halloween fever as we walked the campground loops and admired the decorations.

RV camper with Halloween pumpkins-min

One RV was sitting in a pumpkin patch.

Pumpkin spilling its guts at Halloween-min

This pumpkin partied too much last night and got sick.

Every Saturday night in September/October at all the Michigan State Park campgrounds — and in many other midwest campgrounds too — the kids get dressed up in Halloween costumes and go from campsite door to campsite door all around the campground trick-or-treating.

Camping Halloween travel trailer RV with pumpkin decoration-min

An evil looking Mickey Mouse greets trick-or-treaters at the back door of an RV.

Home Sweet Haunted Home RV door-min

What evil lurks inside??

I don’t know who loves it more, the kids or the parents and grandparents. One older fellow told us he went Halloween camping every year for 15 or so years as he raised his kids (the youngest was now 24!), but he still comes out because it is so much fun to see the kids in their costumes and give out candy.

Ghosts pumpkins skeletons camping at an RV campground-min

A ghost’s eyes lit up red as we go by.

Travel trailer RV with Halloween ghost-min

Spooky!

He kinda laughed as he told me that if you time it right, you can hit all six State Park campgrounds in this area from late September through October and experience the fun over and over in different settings!

Popup tent trailer at Halloween-min

Dead babies… is that Alice Cooper‘s popup tent trailer?

Halloween cemetery at an RV campsite-min

A trailer’s front yard turned into a graveyard.

Every campsite had decorations, and some were very complex. Pumpkins and ghosts were popular themes, but it was the carefully laid out headstones in the Halloween graveyards that caught our attention!

Fifth wheel RV campsite with Halloween cemetery-min

Gravestones and skulls, a good Halloween combo!

Graveyard campground campsite Halloween decorations-min

Fresh graves – keep out! Folks who come to this trailer wind up under headstones!

The front end of a travel trailer is an ideal place to set a few ornaments, and sure enough we found skeletons and ghosts and pumpkins aplenty.

Trailer propane bottle with Halloween trick-or-treat decorations-min

The trailer’s hitch and propane tanks make good perches for ghoulish things.

Ghosts and pumpkins with RV at campground on Halloween-min

.

There were lots of skeletons hanging around too.

Pumpkins and skeletons on a travel trailer RV-min

Skeletons hanging around everywhere!

Campground campsite Halloween decorations-min

A skeleton hangs in a tree.

Other skeletons sat in kayaks and cackled as they paddled and fished alongside their toy hauler.

Skeletons in kayaks Halloween Toy hauler campsite decorations-min

Skeletons laugh ghoulishly as they fish from their kayaks.

Halloween skeleton in kayak at toy hauler RV campsite-min

Catch of the day – a fish skeleton!

One campsite had a big skeleton of an animal standing out in front of a cute retro trailer.

Retro trailer camper and horse skeleton at Halloween-min

What kind of creature is this?

Upon closer inspection we realized it was the skeleton of a horse pulling a carriage. Inside the carriage were the skeletons of a bride and groom.

Campground RV campsite with retro trailer and skeleton horse and buggy-min

A horse skeleton pulling a buggy with a bride and groom skeleton inside.

Another campsite featured a skeleton bride and groom getting married in the grass under a trellis.

Halloween skeleton wedding camping in a travel trailer-min

Newlywed skeletons.

The bodies of a pair of old retired skeletons had given up the ghost. All that remained was their skulls which peered out of the front windshield of a motorhome.

Skulls in motorhome on halloween in a campground-min

Retiree skulls in a motorhome.

As I walked around the campground loop taking photos, Buddy did his usual sniffing and socializing. Suddenly, I felt him stiffen at the end of his leash. I looked down and he was staring at a corpse sticking halfway out of the ground. He crouched really low and gingerly sniffed at the corpse. Suddenly, he jumped back in fright. Then he slowly crept in and got another sniff.

Puppy spooked by scary Halloween monster-min

Buddy jumped when he saw this bloody corpse in the grass.

We had missed the big trick-or-treat night, so we never saw the kids in their costumes. But what a super fun way for families to celebrate Halloween and extend their camping season past the end of summer.

Spooky Halloween decorations at RV campground-min

Witch skeletons hang from a tree.

Lots of families knew each other from previous years and there was a fantastic spirit of celebration everywhere as kids ran between the trailers and parents and grandparents unwound by the campfire.

Spiders ghosts and goblins at RV campground campsite-min

Spiders, ghosts and goblin eyes.

Metamora-Hadley Recreation Area campground is a wonderful place to camp that sits on the shores of a small lake.

Fall leaves at Metamora campground in Michigan-min

Beautiful fall colors across the lake made a great backdrop for the campground festivities.

Happy Halloween!

Spooky Halloween night shadows at the lake-min

Walk softly out there and watch out for things that go bump in the night!

Subscribe
Never miss a post — it’s free!

More info about Michigan State Parks:

Related blog posts:

Christmas Camping with an RV in Arizona

Our most recent posts:

More of our Latest Posts are in the MENU.   New to this site? Visit RVers Start Here to find where we keep all the good stuff. Also check out our COOL NEW GEAR STORE!! *** CLICK HERE *** to see it!

<-Previous || Next->

Mackinac Island, Michigan – A Precious Walk Back in Time!

October 2018 – After enjoying some wonderful fall foliage in Michigan’s Upper Peninsula, we made our way to the town of St. Ignace that peers over the Mackinac Bridge at Michigan’s Lower Peninsua.

Mackinac Bridge at sunset RV trip-min

Mackinac Bridge at sunset.

The Mackinac Bridge is a beautiful suspension bridge that sits between Lake Michigan on one side and Lake Huron on the other side. On a hunch we headed out at sunset to see if we could get some pics as the sky changed color and the lights on the bridge were lit.

Using slow shutter speeds we captured the traffic crawling across the bridge.

Mackinac Bridge at night Michigan RV trip-min

.

During our RV travels this year we managed to hit Michigan’s Upper Peninsula during a three week long spate of miserable rainy cold days, and a look at the forecast showed more thunderstorms, rain and cold for the next week. But there was one day that had a mere 20% chance of rain, so we decided to hop on Sheppler’s Ferry and head out to Mackinac Island for a day. (“Mackinac” is pronounced “Mackinaw” by the way).

Sheppler's Ferry arrives Mackinac Island Michigan-min

Sheppler’s Ferry brings tourists to Mackinac Island.

The surf was up and big waves hit the side of the ferry in blasts of spray. The captain took us over to the Mackinac Bridge so we could let Lake Michigan’s waves lap the hull for a moment, and then we headed over to Mackinac Island which sits in Lake Huron.

Sheppler's Ferry under the Mackinac Bridge in a storm-min

Water from the waves rolled off the ferry windows as we slipped under Mackinac Bridge.

Mackinac Island Michigan lighthouse-min

The water calmed down a bit when we passed the lighthouse marking the harbor entrance.

As the ferry pulled into the dock at Mackinac Island we got our first glimpse of the pretty buildings by the shore.

First view of Mackinac Island from the Sheppler's Ferry-min

The pretty Victorian buildings of Mackinac Island came into view as we pulled into the harbor.

Mackinac Island is unique because even though the island has lots of paved roads, there are no cars or motorized vehicles allowed anywhere. So, as we stepped off the ferry we were greeted by horses and carriages waiting to take passengers to their hotel destinations or on a ride around town.

Grand Hotel chauffeur Mackinac Island Michigan-min

An old time horse and carriage waits to take arriving passengers to the Grand Hotel.

Mackinac Island horse drawn wagon in Michigan-min

Horse drawn buggies were everywhere.

Mark had been to Mackinac Island many times before, but this was my first visit, and the quaint charm of the horses and buggies all around us captivated me. I could barely walk down the street for all the photos I was snapping of the teams of horses carrying tourists here and there.

Horse drawn wagon Mackinac Island Michigan-min

These buggy rides are the local taxis!

Quaint horse drawn wagon Mackinac Island Michigan-min

.

Horse drawn wagon on Mackinac Island Michigan main street-min

.

Returning horse drawn wagon Mackinac Island Michigan-min

Heading home… Wow!

Even though it was cold and wet and miserable out, the mood on the street was festive and we quickly got into tourist mode.

Tourist at Mackinac Island Michigan fudge shop-min

We quickly got into tourist mode at the fudge shop!

When we poked our heads into an ice cream shop, we noticed that ice cream wasn’t selling quite as well as it does on hot summer days.

Ice cream line begins here fudge shop Mackinac Island Michigan-min

“Line begins here” … no line today!

We walked down the main drag and watched the comings and goings of the community. Mackinac Island has been a tourist destination since the Victorian era, and the behind-the-scenes work of serving tourists hums along smoothly. Peering down a back alley, we saw an open horse drawn wagon that was hauling some cargo. How neat to have a community where goods are carried by horses and wagons!

Working horses and wagon Mackinac Island Michigan-min

A team of horses pulls a wagon of cargo.

Working horse drawn wagon Mackinac Island Michigan-min

Images like this gave us a glimpse of yesteryear.

If you ride a horse around town you can tie him up at a little post with a horse head on top. Folks with bikes like to lock them to these posts too.

Bike stand like horse head on Mackinac Island Michigan-min

A decorative place to tie up your horse or your bike.

Bicycles are the most popular means of individual transportation, and there were cyclists, bicycles for rent and parked bikes absolutely everywhere.

Horse drawn wagons and bicycles on Mackinac Island Michigan-min

Bicycles were as common as horses, even in the cold weather.

Bicycles everywhere Mackinac Island Michigan-min

Bicycles were parked all over the place.

Bikes on Mackinac Island Michigan main street-min

.

Main Street Mackinac Island Michigan-min

No fear of cars here!

Mackinac Island is a destination for cruise ships too, and we saw one pulled up to the dock.

Cruise ship under storm clouds Mackinac Island Michigan-min

A cruise ship waits at the dock.

We wandered beyond the downtown area and found some gorgeous mansions. Standing in front of one with an ornate roof, we were soon deep in conversation with the gray haired owner of the place. It turned out his dad had picked up the property when it was condemned in the 1960s, and he had spent his childhood summers living in this picturesque house just steps from the beach.

Decorative roof on Mackinac Island Michigan-min

We met the man who spent summers in this beautiful house as a kid. Now he operates it as a B&B.

Private residence mansion Mackinac Island Michigan-min

A nice summer cottage!

Elegant house Mackinac Island Michigan-min

Beautiful (with Buddy streaking past)

Bike in the yard Mackinac Island Michigan-min

Tranquility — even on a blustery day.

Some of the homes are perched right on the edge of Lake Huron. Walking a little further on, we found a huge resort that has a slew of Adirondack chairs set out on a lawn facing the lake.

Summer chairs under storm clouds Mackinac Island Michigan-min

A spot to watch the sunset — when there is one!

Mackinac Island State Park Michigan stormy day-min

.

Mackinac Island must be a true delight in July, but we were getting a big kick out of it on this dreary October day too. The wind was whipping and the waves were pounding.

Storm clouds and waves Mackinac Island Michigan-min

Storm and fury on Lake Huron.

Wandering back into town, we came across Lady Liberty and some pretty churches.

Mackinac Island statue of liberty in Michigan-min

.

Church at Mackinac Island Michigan-min

.

But it was the horse drawn wagons and buggies that captured my imagination all day long. How wonderful that there is a place where motorized vehicles aren’t allowed and visitors can experience a vivid immersion in another era.

Fall color and horse drawn wagon Mackinac Island Michigan-min

We couldn’t stop taking pics of the horse drawn wagons.

Carriage ride Mackinac Island Michigan-min

.

Mackinac Island would be a fantastic place to spend a few days during the holidays! Even though the ferry ride might be rough, the island has ongoing celebrations throughout the holiday season, and some of the hotels and restaurants remain open.

Horse drawn wagon Mackinac Island Michigan-min

.

We won’t be there when the snow flies, but we loved our day trip to Mackinac Island in October!

Carriage Ride Mackinac Island Michigan-min

.

If your RV travels take you to Michigan’s Upper Peninsula (or the northern tip of the Lower Peninsula), set aside a day to spend on Mackinac Island. No matter what the weather forecast is, it’s a very fun excursion!

Subscribe
Never miss a post — it’s free!

More info about Mackinac Island:

More from our travels in Michigan:

Other small communities we’ve enjoyed:

Our most recent posts:

More of our Latest Posts are in the MENU.   New to this site? Visit RVers Start Here to find where we keep all the good stuff. Also check out our COOL NEW GEAR STORE!! *** CLICK HERE *** to see it!

<-Previous || Next->