Blue Mesa Trail – Lavender Beauty in Petrified Forest National Park

April 2017 – When we visited Petrified Forest National Park a few weeks ago with our RV, we discovered two true jewels in the park: Jasper Forest and Blue Mesa Trail.

Ready to hike Blue Mesa Trail Petrified Forest National Park Arizona

Ready to hike Blue Mesa Trail in Petrified Forest National Park, Arizona

It is really easy to blast through Petrified Forest National Park at 50 mph and miss it all, and we’ve made that mistake in the past. We’ve also done the less spectacular hikes and later wondered where all the petrified wood was! How funny!

As seen in our last post about Jasper Forest, there are some breathtaking landscapes where petrified logs are in stunning abundance.

Blue Mesa is another fabulous region in the National Park where rolling hills are beautifully striped in shades of purple and lavender. There is a wonderful and very easy hike on a paved path at Blue Mesa that wanders through all these hills.

Blue Mesa Overlook Petrified Forest National Park Arizona

The overlook at Blue Mesa in Petrified Forest National Park

At the start of the hike, high up on a plateau overlooking a vast expanse of exotic beauty, we saw a pretty spray of yellow spring flowers and spent a few minutes admiring them.

Yellow wildflowers Blue Mesa Trail Petrified Forest National Park Arizona

A vibrant sign of spring greeted us right away.

Mark took advantage of the “Color sketch” option in his Nikon camera to get a very cool effect from this photo:

Color sketch Yellow wildflowers Blue Mesa Trail Petrified Forest National Park Arizona

The “color sketch” option is available in most Nikon DSLR’s. Fun!

The Blue Mesa trail begins with a wonderful plunge down to the valley floor, and we got a few shots of the spectacular purple/blue landscape as we descended.

Descending on the Blue Mesa Trail Petrified Forest National Park Arizona

Blue Mesa trail took us down to the valley floor right away.

As we made our way along the pretty, winding trail, the breathtaking views of these colorful hills surrounded us.

Blue and purple on Blue Mesa Trail Petrified Forest National Park Arizona

The purple stripes were magnificent!

Rock striations Blue Mesa Trail Petrified Forest National Park Arizona

Nature has a wonderful artistic flair!

But where was all the petrified wood? It didn’t take long for us to find the gorgeous rock logs spilling down the gullies between the hills.

Falling petrified logs Blue Mesa Trail Petrified Forest National Park Arizona

Did a woodsman just cut down a tree?
No! Nature did this over 200 million years ago!!

Every crevice between the hills was loaded with perfectly hewn petrified logs. Incredible!

Petrified log pile Blue Mesa Trail Petrified Forest National Park Arizona

Solid rock logs that look for all the world like they are wood!

Petrified logs Blue Mesa Trail Petrified Forest National Park Arizona

Every crevice between the hills was filled with stone logs.

We couldn’t help but scurry up a ways to get different perspectives on these logs. Suddenly, I lost my balance and slipped. I brushed myself off and looked around, a little embarrassed and wondering if anyone had seen me fall. Luckily I was the only witness.

That is, I was the only witness until I saw what my camera did when my finger hit the shutter button on my way down!

Falling on hiking trail at Blue Mesa Petrified Forest National Park Arizona

Oops!

I don’t think I could have staged that shot more perfectly!

Blue Mesa trail was largely surrounded with waves of gravelly hills that are horizontally striped in lavender hues. But a few of the hillsides and cracks were gray, and these were strewn with exquisite crystallized tree stumps too.

Tumbling petrified logs Blue Mesa Trail Petrified Forest National Park Arizona

.

Pile of petrified wood logs Blue Mesa Trail Petrified Forest National Park Arizona

.

Surprisingly, even though this was peak season for visiting Petrified Forest National Park, with absolutely perfect sunny, dry, warm weather, there were very few people on the Blue Mesa trail. Every so often, though, we caught sight of someone in the distance.

Tumbling logs Petrified Forest National Park Arizona Jasper Forest

We shared Blue Mesa with very few other hikers.

Petrified Forest National Park has several “Off the Beaten Path” hikes, and there is one that originates at Blue Mesa trail and heads out to the Tee Pees formations. I had hoped to hike at least some of that trail because we had enjoyed the Off the Beaten Path trail at Jasper Forest so much.

Hiking Blue Mesa Trail Petrified Forest National Park Arizona

.

But I was so caught up in admiring the awe-inspiring views surrounding us on all sides that I forgot to double check the page of notes the ranger had given us to see where the gravel trail intersected the paved trail we were on. I think I’d kind of expected it to be obvious when we got there.

Hikers and petrified logs on Blue Mesa Trail Petrified Forest National Park Arizona

.

The National Park Service is a little coy with these special Off the Beaten Path hikes.

First, I’d only learned about them when I asked a ranger to recommend some areas for photography and then watched wide-eyed as he pulled a huge 3-ring binder full of photocopied trail notes off a low shelf behind the counter. More importantly, though, the trail intersection itself isn’t marked with a sign!

Blue skies on the Blue Mesa Trail Petrified Forest National Park Arizona

Somewhere out here there’s a neat unpaved hiking trail!

I learned later that the intersection is to the right of the one plaque that is out on the paved trail at Blue Mesa, and unfortunately, we’d walked right by it. Argh!

Purple striations at Blue Mesa Trail Petrified Forest National Park Arizona

Lavender shades all around.

Oh well, it’s a good reason for us to come back to Petrified Forest National Park another time!

Hiker Blue Mesa Trail Petrified Forest National Park Arizona

Purple haze…

If you take your RV to Petrified Forest National Park, don’t miss the Blue Mesa trail, and keep an eye out for that plaque and head out on the adjoining “Off the Beaten Path” hike! I suspect there are some cool views back there.

RV at Blue Mesa Overlook Petrified Forest National Park Arizona

A cute teardrop trailer at the top of the Blue Mesa overlook.

Subscribe
Never miss a post — it’s free!

More info about Petrified Forest National Park:

Other blog posts from our travels in Northeastern Arizona:

National Parks and World Heritage Sites – by RV, sailboat, and airplane!

Our most recent posts:

More of our Latest Posts are in the MENU.
New to this site? Visit RVers Start Here to find where we keep all the good stuff!!

<-Previous || Next->

B&W Companion Hitch Performance in a Fifth Wheel Trailer Rollover Accident

The April 2017 issue of Trailer Life magazine featured our article on the new Companion OEM fifth wheel hitch from B&W Trailer Hitches. Ironically, just as that issue came out, a reader emailed us the harrowing tale of his recent fifth wheel trailer rollover accident.

Trailer Life Magazine Latch and Release B&W Companion OEM Fifth Wheel Hitch article

Trailer Life Magazine, April 2017.
Text and photos by Emily Fagan.
Installation by Mark Fagan and Mark Graika.

Like most RVers, we installed our hitch without giving much thought to rollover accidents, and we have been very happy with it.

The B&W Companion OEM fifth wheel hitch is special because it is designed to fit into the new puck sytems that the diesel truck manufacturers are now making available in the beds of their pickup trucks.

This makes it easy to install the hitch in the truck without having to take the truck to a shop.

Mark was able to install it in our truck with a friend’s help in about an hour, using minimal tools, and that included opening the boxes and reading the instructions. A step-by-step guide for how to install the B&W Companion OEM hitch are at this link:

B&W Companion OEM Hitch Installation Guide

The other fabulous thing about the B&W Companion OEM hitch is that not only is it easy to install but it is easy to remove from the truck.

Anytime you want to use the bed of your truck to haul something big like lumber, fire wood or furniture, it is a very straight forward process to take the hitch out of the truck.

The best part is that there are no hitch rails in the bed of the truck, so once the hitch is removed, the bed of the truck is totally flat.

These features are not part of the design of conventional fifth wheel hitches, like the conventional rails-based B&W Companion hitch (not an “OEM” model), so it’s a worthwhile to consider buying a truck with the optional puck system on it if you are considering buying a late model diesel truck.

When buying a truck/trailer combination, not only are the quality of the truck and trailer important, but the hitch is really important too, and not just for its ability to tow a heavy load…

We were shocked when full-time RVers Mark and Doran Gipson sent us photos of their terrifying rollover accident with their fifth wheel. They were towing their home, a 2007 32′ Hitchhiker Discover America fifth wheel, with a 2008 Dodge Ram 2500, and they were hitched together with B&W Companion hitch.

While driving at 60 mph on I-10 outside in El Paso in February, two very inconsiderate drivers suddenly cut them off in a series of swerves right in front of them.

Here is Mark’s description of what happened:

“We were going 60 mph and were cut off by two vehicles who decided to not exit on loop 375. They dove back into our lane within 2 car lengths. With no time to brake, I swerved to the inside lane only to have the second vehicle also move into that lane as well. I lost the trailer when I swerved back to miss the concrete median.”

The result was that the trailer went over on the driver’s side at 60 mph, slid 150 feet and hit its roof on the concrete median.

Hitchhiker trailer wheel trailer RV rollover accident

The Hitchhiker fifth wheel hit the pavement at 60 mph and slid 150 feet.
Most trailers would have splintered on impact.

Fortunately, as the trailer went over on its side, the B&W hitch — which comes in two pieces: a base on the bottom and a coupler on the top — separated in two. The coupler stayed attached to the trailer’s king pin as the trailer toppled over while the base stayed in the bed of the truck, allowing the truck to remain upright.

Hitchhiker fifith wheel trailer rollover accident with B&W fifth wheel hitch coupler still attached

The upper half of the fifth wheel hitch — the coupler — remained attached to the trailer
as it rolled over on the driver’s side.

So, while Mark and Doran came to a skidding stop in their truck, sitting upright in their seats, the trailer rolled over, detached and slid to a stop on its side.

Truck damage from fifth wheel trailer rollover accident

As the trailer went over, the fifth wheel overhang crushed the driver’s side of the truck bed.

If the truck had rolled over too, Mark and Doran could have easily been very badly injured or even killed. However, because the truck stayed upright, they walked away unscathed. Thank heavens!!

With the truck badly damaged and the trailer on its side on I-10, Mark called for help and a wrecking crew arrived. As he wrote to me:

“The wrecker driver came with two trucks and a trailer because he had not gotten to a 5th wheel rollover without the truck also on its side and the trailer in pieces. He said that it would collapse when he tried to pick it up. But he put it on its wheels and towed it to his shop and still can’t believe how well built it was.

“Things were tumbled around inside but we virtually lost none of our possessions.”

Fifth wheel trailer damage from RV rollover accident with Hitchhiker 5th wheel trailer

The wrecking crew righted the trailer and were amazed that it stood up just fine on its own wheels.
The damage to the trailer was cosmetic except for a roof rafter.

“We tested the slides and everything worked. The major damage was cosmetic on the side that slid and possibly a broken roof rafter where the AC unit came against the concrete barrier. Though everything was scrambled inside, nothing was broken. We lost almost nothing of our possessions including TV and computers.”

My husband Mark and I saw a trailer accident on the highway once, and the entire trailer was in splinters. That is what usually happens in trailer accidents and that’s why the wrecker driver arrived at the accident scene prepared to pick up a million pieces off the highway.

Hitchhiker fifth wheel trailer sustained little damage in 5th wheel trailer rollover accident

The wrecking crew expected the trailer to fall apart when it was righted, but it stood right up.
They towed it away on its own wheels just fine.

It is quite a testament to the way the Hitchhiker Discover America trailers were built that one could fall over on its side at 60 mph and still be intact with the slide-out mechanisms still functioning and only cosmetic damage on the side that skidded on the asphalt.

Unfortunately, Hitchhiker (NuWa Industries) stopped building fifth wheel trailers in 2013, but used models of all ages can still be found. Our blog posts from our visits to NuWa in Chanute, Kansas, can be found at the following links:

B&W Trailer Hitches is located just a few miles away from the NuWa plant (NuWa is now called Kansas RV Center) in Humboldt, Kansas, and we enjoyed a wonderful factory tour and a unique American heartland small town celebration that was sponsored in part by B&W Trailer Hitches two years ago (blog post here).

For Mark and Doran, the key to their truck staying upright during their rollover accident was the way the pivot arm on the base of the B&W Companion hitch bent sideways and let the coupler break free as the trailer toppled over.

Bent pivot arm on B&W fifth wheel hitch after 5th wheel trailer rollover accident

Looking forward towards the cab of the truck, the pivot arm on the driver’s side bent outwards allowing the coupler to break free (with some small broken parts inside) while the entire hitch base stayed planted in the bed of the truck. This kept the truck upright.

B&W fifth wheel hitch bent pivot arm after 5th wheel trailer rollover accident

Bent pivot arm on the fifth wheel hitch base.

It is impressive that the B&W hitch allowed for the hitch coupler and hitch base to separate completely once one of the pivot arms on the hitch base began to bend as the trailer went over. As the wrecker driver noted, usually both the truck and the trailer roll over together because once the trailer starts to go over the hitch forces the truck over too.

B&W Fifth wheel hitch coupler after trailer rollover accident

The coupler stayed attached to the trailer’s king pin.
In this photo it has been removed from the king pin and laid in the bed of the truck for inspection.

B&W Companion hitch coupler after rollover accident broken pieces inside

The coupler is flipped upside down here to reveal the broken pieces inside.

Broken pieces inside the B&W Companion fifth wheel hitch after a rollover accident

.

In the end, Mark and Doran decided to replace both their truck (a 2008 Dodge Ram 2500) and their trailer (a 2007 32′ Hitchhiker Discover America) as well as their slightly damaged B&W Companion hitch with a new set: a 2012 3500 Ram dually truck, 2012 36′ Hitchhiker Discover America and a new B&W Companion hitch!

We feel very blessed to have towed our fifth wheel trailer so many tens of thousands of miles and seen so many beautiful places in nearly 10 years of full-time travel. We’ve had our share of near misses, especially in our trip back east two years ago where traffic is blindingly fast on very crowded and confusing highways, and we’ve seen our share of accidents too.

One RV upgrade we did that has made a massive difference for us in dealing with sudden stops at high speed while towing our 36′ 14k lb. fifth wheel trailer was a trailer disc brake conversion where we upgraded from standard trailer drum brakes to electric over hydraulic disc brakes. This is a pricey upgrade, but one we highly recommend doing.

Hitchhiker fifth wheel RV with B&W Companion OEM fifth wheel hitch under sunny skies

RVing in a fifth wheel trailer is so much fun, especially in gorgeous places far from the open road.
But accidents do happen and good equipment — from truck to trailer, hitch and brakes — can make a huge difference in the outcome when things go wrong.

Subscribe
Never miss a post — it’s free!

Dodge Ram Truck Owners — Please note:
Late model Dodge Ram 1500, 2500 and 3500 trucks have been recalled (beginning 6/23/17) for side airbag problems in a rollover accident. See this article for details: Dodge Ram Side Airbag Recall

More about B&W Trailer Hitches:

Other blog posts about trucks, trailers and hitches:

More about Trailer Life Magazine:

Our most recent posts:

More of our Latest Posts are in the MENU.   New to this site? Visit RVers Start Here to find where we keep all the good stuff. Also check out our COOL NEW GEAR STORE!! *** CLICK HERE *** to see it!

Petrified Forest National Park RV Trip – Magic in Jasper Forest

April 2017 – One of the highlights on Route 66 is the Petrified Forest National Park where the enormous trunks of 200 million year old trees have turned to stone.

Photography at Petrified Forest National Park Arizona Jasper Forest

The solid stone tree stumps at Petrified Forest National Park are truly impressive!

We have been to Petrified Forest National Park twice before, but it was on this trip that we finally found the true magic there.

Stumps Petrified Forest National Park Arizona Jasper Forest

Those tree stumps are solid rock, through and through!

We knew that the best way to see Petrified Forest National Park, like all the National Parks, is to get out on the hiking trails away from the crowds.

Jasper Forest petrified logs Petrified Forest National Park Arizona

We loved seeing how the logs split over millenia, due to the pressures of moisture and ice,
and revealing the tree rings — still perfectly intact — inside.

But it wasn’t until this visit that we discovered which hiking trails are the most stunning.

Logs Petrified Forest National Park Arizona Jasper Forest

Was the woodsman just here with his ax?

On our first foray into the Park on this trip we explored the area called Crystal Forest.

Logs Petrified Forest National Park Crystal Forest

The logs were scattered everywhere. But there wasn’t a living tree to be seen anywhere!

In every direction we saw the enormous trunks of trees that had been growing millions of years ago.

These trees had toppled over during torrential rains millenia ago, and had floated downstream only to end up in a deep and muddy logjam where they slowly and very gradually crystallized.

Over time, the pressure of moisture and ice within the logs broke them into segments.

Out on the vast treeless plain, we saw countless tree trunks that looked like a lumberjack had just sliced them up with a chainsaw in preparation for splitting them into firewood!

Petrified log Petrified Forest National Park Crystal Forest

We saw many 50+ foot long logs lying on the grass and split into sections.

Here and there, the stump of a tree trunk stuck up from the ground and looked for all the world like the tree had just been felled.

Wildflowers with petrified wood tree stump Petrified Forest National Park Arizona Jasper Forest

A rock and a wildflower.

All the tree rings were perfectly visible in a rainbow of crystalline colors.

Tree rings Petrified Forest National Park Jasper Forest

Brilliantly colored minerals have crystallized the tree rings in this ancient tree.

The logs lay scattered all over the place, and in between were beautiful shards of petrified wood.

Colorful agate Petrified Forest National Park Jasper Forest

There were exquisite shards of rock EVERYWHERE as far as the eye could see in all directions.


Some logs had been split so the tree rings were visible while others had been severed lengthwise showing vertical striations from the interior of the log.

Colorful agate Petrified Forest National Park Jasper Forest-2

.

In one area the shards that surrounded the logs look like woodchips. It was as if the lumberjack had just laid down his ax! These pale wood chips were very thin, just like ordinary wood chips, but these slivers of rock tinkled like a bell when dropped on each other!

Petrified wood chips at Petrified Forest National Park Jasper Forest

The light colored “wood chips” on the ground were brittle rock shards that sounded like bells
when they fell on each other.

We had wandered out at the “golden hour” about an hour before sunset, and as the sun sank below the horizon we were blessed with a beautiful sunset over these exotic rocks.

Sunset at Jasper Forest Petrified Forest National Park Arizona

Sunset in Petrified Forest National Park.

Even better than Crystal Forest, however, is Jasper Forest which is just a little further north. The overlook takes in a sweeping view.

Jasper Forest Overlook Petrified Forest National Park Arizon

Jasper Forest overlook has an incredible view — see the logs below? — and the trail to the plain below took us down among thousands of logs.

In the distance, far below the Jasper Forest overlook, boulders and petrified logs intermingled.

Overlook at Jasper Forest Petrified Forest National Park Arizona

Huge waves of eroded rock formations were littered with tumbled boulders and petrified logs.

When we stopped at the Visitors Center to find out where the best collections of petrified wood were in the Park, the ranger took out a large 3-ring binder labeled “Off The Beaten Path Trails.” He took out the trail directions, complete with photos, for a few trails and handed them to us. One set was for Jasper Forest.

Sitting on petrified logs Petrified Forest National Park Arizona Jasper Forest

Down among the petrified logs at Jasper Forest.

The trail directions were a bit confusing, but they are actually very easy:

  • Go to the north end of the Jasper Overlook parking lot and look for a narrow trail heading north from the last parking space in the lot.
  • Follow this trail north and then west onto the wide plain that stretches out below the Jasper Forest overlook.
Petrified logs Petrified Forest National Park Arizona Jasper Forest

Two faces from the same log reveal gorgeous tree rings.

From there you can go in any direction you want, and we quickly ran off in opposite directions!

Log with a knot Petrified Forest National Park Arizona Jasper Forest

The “bark” on this 200 million year old log even had a knot in it.

We were there in the harsh light of noon, so even though the rock logs were mind boggling, we knew they would be even more beautiful in the rich light of late afternoon.

Petrified logs Petrified Forest National Park Arizona Jasper Forest

.

Petrified wood logs Petrified Forest National Park Arizona Jasper Forest

.

So, we returned a little later with our cameras, and suddenly the logs came alive in vivid shades.

Petrified tree stump Petrified Forest National Park Arizona Jasper Forest

At the “golden hour” an hour before sunset,
all the logs began to glow.

The skies were darkly overcast but the sun snuck through underneath and cast a brilliant light on all the stone tree logs.

Storm clouds Petrified Forest National Park Arizona

Storm clouds darkened the skies while the sun peeked through.

Golden light at Jasper Forest Petrified Forest National Park Arizona

Looking at the tree root ends of the logs — in rich light.

As the sun sank towards the horizon, we were in awe of the beauty around us. We were also frantically running around trying to capture it as best we could while the sun teased us mercilessly!

At one moment the sun would pierce through the clouds and light everything up in bright orange and yellow, and at the next moment it would disappear all together behind the clouds!

Petrified logs at Jasper Forest Petrified Forest National Park Arizona

.

The clouds were flying across the sky, making an ideal opportunity to use long shutter speeds to make them blur dramatically just as the sun set in a starburst.

Sunset at Jasper Forest Petrified Forest National Park Arizona

Drama in the sky above an ancient world of stones.

Wild skies at Jasper Forest Petrified Forest National Park Arizona

.

Dramatic clouds at Jasper Forest Petrified Forest National Park Arizona 2

.

Petrified Forest National Park is a great place to go with an RV, and it is surrounded by many of the most spectacular natural wonders of America’s southwest.

RV motorhome in Petrified Forest National Park Crystal Forest

A motorhome passes the Crystal Forest turnoff.

Subscribe
Never miss a post — it’s free!

More info about Petrified Forest National Park:

Other blog posts from our travels in Northeastern Arizona:

National Parks and World Heritage Sites – by RV, sailboat, and airplane!

Our most recent posts:

More of our Latest Posts are in the MENU.
New to this site? Visit RVers Start Here to find where we keep all the good stuff!!

<-Previous || Next->

Getting Our Kicks on Route 66 by RV in AZ – Cool Springs, Winslow & Holbrook

April 2017 – Back in the 1930’s to the 1960’s, Route 66 was a 2,448 mile long road from Chicago, Illinois, to Los Angeles, California, that passed through Missouri, Kansas, Oklahoma, Texas, New Mexico and Arizona. It was established in 1926 but was gradually replaced with the US Interstate highway system starting in 1956.

RV on Route 66 Arizona

We’ve been getting our kicks on Route 66!

Portions of it still remain, and we have been bumping into it in our RV travels through Arizona.

RV on Route 66 Arizona

Cool Springs Station Museum on Route 66 between Kingman and Oatman

Route 66 is memorialized in all kinds of songs and folklore, and one of the most iconic songs was (Get Your Kicks) on Route 66 written by Bobby Troup in 1946.

Cool Springs cabins antique Mobil gas station Route 66 in Arizona

Antique gas pumps and an old Mobil Oil sign at Cool Springs Station Museum near Kingman

We’ve been getting our kicks on Route 66 lately starting with a stop we made at the Cool Springs Station Museum between Kingman and Oatman, Arizona last fall.

Antique Mobil Gas station Route 66 in Arizona

What luck – A retro Royal Enfield motorcycle pulled in and parked next to the antique gas pumps while we were there!

This is a cute stone building that has big antique gas pumps out front that will be familiar to our older readers and Mobil Oil signs that were familiar to us from our childhoods.

Inside we found all kinds of charming memorabilia from decades ago, and outside we saw several antique cars that at one time might have rolled down this famous American highway.

Mobil Lubrication or Mobil Oil Antique wooden sign Route 66

.

Route 66 chair in Arizona

.

Antique car on Route 66 in Arizona

Ready to roll…in a bygone era

Cool Springs Station is in the northwest part of Arizona near Kingman. Way over on the northeast side of the state we stopped in at the town of Winslow in northeastern Arizona a few weeks ago.

Standin' on the corner in Winslow Arizona Route 66

Route 66 goes through Winslow Arizona

Winslow sits on old Route 66 but it is much more famous for the song Take It Easy, which was written by Jackson Browne and Glenn Frey and recorded by the Eagles, and features the very memorable lyrics:

Well, I’m a standing on a corner
in Winslow, Arizona,
and such a fine sight to see:
It’s a girl, my Lord, in a flatbed
Ford slowin’ down to take a look at me.

Standin' on the corner in Winslow Arizona Route 66

Winslow has memorialized the Eagles song “Take It Easy.”

Standin' on the corner in Winslow Arizona Route 66

A painted mural reflection and the real thing:
“It’s a girl, my Lord, in a flat bed Ford, slowing down to take a look at me!”

This corner is now a favorite tourist attraction. Every year the town hosts a huge “Standin’ on the Corner” festival. This year’s event is on May 6, 2017 (link at the bottom of the page).

Five years ago on our way back to our boat in Chiapas Mexico we zipped through Winslow and got a selfie at the corner. This year the corner was a little busy with other people getting selfies, so we’ll just go with the old pic!

Standin' on the corner in Winslow Arizona

From the archives back in 2012!

Nearby, Mark found an electric guitar…

Route 66 Guitar corner Winslow Arizona

.

The opposite corner is dressed up with a vintage coffee and soda shop that has old fashioned seating on stools at the counter inside.

The other corner Route 66 Standin' on the corner in Winslow Arizona

.

This building won the Good Job Award in 2004. I like a town that gives out Good Job Awards!

Good Job Award sign Standin' on the corner in Winslow Arizona

The world needs more Good Job Awards!

Although Winslow sits on Route 66 it was also an important train depot for the Santa Fe Railroad.

Eagle on Route 66 sign Winslow Arizona

.

Wandering around town, we came across La Posada Hotel and Gardens which is a meticulously and lovingly restored Grand Hotel from the heyday of the railroad era, built by Fred Harvey for Santa Fe Railroad and designed by Mary Colter.

Entrance La Posada Hotel Winslow Arizona Route 66

La Posada Hotel and Gardens in Winslow, Arizona

Built in 1929 to the tune of $60 million (in today’s dollars), La Posada Hotel and Gardens gave tourists a reason to take the train to Winslow. They could stay in an elegant hotel home base and visit Arizona’s many very cool sights that lie within a day’s chauffeured drive from town.

Balcony La Posada Hotel Winslow Arizona Route 66

La Posada was southwestern elegance at its best in the 1930’s and 40’s.

The hotel was beloved by the well-to-do from its opening in May of 1930 until it closed in 1957. When it closed, all of the museum quality furnishing were sold off, and the building was turned into offices for the Santa Fe railroad. Over the next 40 years it was slated to be demolished several times.

La Posada Hotel Winslow Arizona Route 66

The restoration has been lovingly done.

Chessboard table La Posada Hotel Winslow Arizona

Visitors can watch a fantastic video that explains the details of the original design and restoration.

Fortunately, when the Santa Fe Railroad planned to abandon the hotel, news of the its uncertain fate made its way to Allan Affeldt. After three years of negotiations with the railroad, in 1997 he moved in with his wife, Tina Mion and they began a $12 million restoration.

Hallway La Posada Hotel Winslow Arizona Route 66

.

We knew none of this when we walked in the door, but we were smitten with the beautiful renovations and artsy decorations in every room.

Elegant La Posada Hotel Winslow Arizona

There are endless common areas where guests can relax and socialize.

The windows and French doors were thrown wide in every room, letting the warm air from outside flow in, and we wandered around the property enchanted by all we saw.

Room with a view La Posada Hotel Winslow Arizona

Room with a view.

Balcony overlooking courtyard La Posada Hotel Winslow Arizona Route 66

Let the outside in!

La Posada Hotel and Gardens is a fully functioning hotel today and there is a very popular restaurant that was packed to the gills when we stopped by. We didn’t stay to eat, but unusual goodies drew us to every corner of every room in the hotel.

Piano in La Posada hotel Winslow Arizona Route 66

.

Turning a corner, we came across a “hall of mirrors” which is part of the hotel’s gift shop.

Hall of Mirrors La Posada Hotel Winslow Arizona Route 66

Beautiful mirrors are for sale in the gift shop.

The gift shop had all sorts of things for sale, but the ones that really caught our eye were the adorable antique trailer bird houses!

Trailer bird house

A bird house for the RV crowd!!

Not far from Winslow, Arizona, we drove through Holbrook, Arizona, and just had to stop at the Wigwam Motel.

Wigwam Motel Route 66 Holbrook Arizona

Wigwam Motel in Hobrook Arizona – A Classic Route 66 stopover.

Unlike the very upscale La Posada Hotel and Gardens in Winslow, this is a fabulous Route 66 motel that reflects the funky and slightly cheesy tourist traps that filled Route 66 in its day.

Wigwam Motel antique cars Route 66 Holbrook Arizona

Have you slept in a wigwam lately?

The wigwams still rent out each night, and we saw people loading and unloading their bags for a night’s stay.

Antique cars and tee-pees at Wigwam Motel Holbrook Arizona Route 66

Modern travelers come in modern cars, but antique cars were parked in front of each wigwam!

The motel’s owners have parked antique cars in front of each wigwam, lending an authentic air to this classic Route 66 stopover.

Antique cars Wigwam Motel Holbrook Arizona Route 66

.

Wigwam and antique cars Wigwam Motel Hobrook Arizona Route 66

.

Antique car Wigwam Motel Holbrook Arizona Route 66

.

Of course, there’s plenty of room for Wigwam Motel guests to park their modern cars by the front office, but part of the mystique of sleeping in one of these wigwams is the fun historical context of being immersed in early American car travel on old Route 66.

Antique Ford at Wigwam Motel Holbrook Arizona Route 66

.

Studebaker truck at Wigwam Motel Holbrook Arizona Route 66

.

If you are traveling east-west in northern Arizona, in the neighborhood of I-40, take a detour off the freeway to one of these stops near Kingman, Winslow and Holbrook and get your kicks on Route 66!

RV on Route 66 in Holbrook Arizona

A service shop from yesteryear… Luckily we didn’t need a new muffler or garage mechanic!

Subscribe
Never miss a post — it’s free!

More info about Route 66, Cool Springs Station, Winslow, La Posada Hotel & Gardens and Wigwam Motel:

Other blog posts from the vicinity:

Our most recent posts:

More of our Latest Posts are in the MENU.
New to this site? Visit RVers Start Here to find where we keep all the good stuff!!

<-Previous || Next->

RV Camping with the Rock Art Petroglyphs in Gila Bend, AZ

For years we’ve driven back and forth between San Diego and Phoenix on I-8, zipping by the exit for Painted Rock Petroglyph Site. I’d always look out the window thinking wistfully, “Oooh, that must be so interesting!” but it is a ways off the interstate and we were always on a mission to get wherever we were going and didn’t have time to stop.

Painted Rock Petroglyphs Gila Bend Arizona

Sunset at Painted Rock Petroglyph Site near Gila Bend in Arizona

On a recent trip we decided to make Painted Rock Petroglyph Site our destination, and we scooted off the freeway onto a paved side road that wandered off into the desert.

Painted Rock Petroglyphs Gila Bend Arizona

Petroglyphs cover all the rocks and boulders at this site.

In a few short miles we arrived at the site and were delighted with what we found.

Painted Rock Petroglyphs Gila Bend Arizona

Some images are recognizable like the double parallel squiggly lines that probably indicate there’s water nearby.

The sun was setting and it cast a wonderful pink glow across the desert and the pile of rocks that is the centerpiece of the site.

Painted Rock Petroglyphs Gila Bend AZ

Sunset on a sun rock!

Following a trail around the rock pile, we found that petroglyphs literally covered almost every boulder, rock and small stone.

Unlike so many petroglyph sites where the rock art is located high up on a wall or far across a canyon, these petroglyphs were right there in plain site at our feet.

Painted Rock Petroglyphs Gila Bend Arizona

.

On one side of the huge rock pile there’s a dry camping campground with lovely widely spaced sites. A few of the campsites are right alongside the trail where campers can have a view of petroglyph covered rocks right from the RV window!

The next day we wandered further and were amazed at the wide variety of patterns, designs and images we saw on these petroglyph adorned rocks.

Patterns Painted Rock Petroglyphs Gila Bend Arizona

A saguaro cactus stands watch over some petroglyphs.

Some of the designs were easy to decipher, like parallel squiggly lines that surely describe the water sources that can be found nearby in the Gila River.

Painted Rock Petroglyphs Gila Bend Arizona

.

Others were just crazy designs that seem indecipherable.

Painted Rock Petroglyphs Gila Bend Arizona

Crazy patterns!

Almost every face of every rock had at least one design on it.

Pattern Painted Rock Petroglyphs Gila Bend Arizona

.

There were also lizards with tails — very similar to the little guys we saw scurrying between the rocks — and some images of people too.

Bullseye Painted Rock Petroglyphs Gila Bend Arizona

.

Bullseye Painted Rock Petroglyphs Gila Bend Arizona

A lizard and a bullseye.

It was also intriguing that there were quite a few bullseye types of designs. Some were concentric rings.

Man and Bullseye Painted Rock Petroglyphs Gila Bend Arizona

.

Bullseyes and animals Painted Rock Petroglyphs Gila Bend Arizona

Concentric circles form two bullseyes.

And some were spirals. Was this accidental or did the two styles of circular designs have different meanings? Or were these things just random doodles after all?

Spiral Painted Rock Petroglyphs Gila Bend Arizona

A spiral pattern.

It is thought that these petroglyphs were pecked out of these rocks by the Hohokam people who lived in this area between 350 AD and 1400 AD, the same time frame spanning the Mayans in Central America and the ancient Khmer in Cambodia and Thailand.

There are ancient dwellings and rock art sites all over the southwest and they are impossible to protect from roaming vandals. Sometimes they bear scars from bullets or spray paint and sometimes an over eager collector has cut the entire face of the rock off to take elsewhere.

Navajo pattern Painted Rock Petroglyphs Gila Bend Arizona

A cool and complex pattern defaced with bullet marks.

Stealing defacing petroglyphs Painted Rock Petroglyphs Gila Bend Arizona

Someone chiseled the whole surface of the rock off to take elsewhere.

But there are still thousands of pristine images carved on rocks all over this area that have survived as much as 1,000 years or more in the hot desert sun. Staring at them stirred my imagination as I pondered what motivated the ancient people to leave this legacy of art work strewn across the massive expanse of barren and inhospitable landscapes that makes up this part of the Sonoran desert.

If you find yourself traveling on I-8 with your RV about 18 miles west of Gila Bend, Arizona, take a detour off the highway and check out the Painted Rock Petroglyph Site!

More links below.

RV camping boondocking Arizona

Painted Rock Petroglyph Site is a little gem for RVers about 90 miles southwest of Phoenix, Arizona!

Subscribe
Never miss a post — it’s free!

More info about Painted Rock Petroglyph Site near Gila Bend, Arizona:

Other blog posts about rock art, petroglyphs, pictographs and other ancient glyphs:

More great campgrounds we’ve loved:

Our most recent posts:

More of our Latest Posts are in the MENU.
New to this site? Visit RVers Start Here to find where we keep all the good stuff!!

<-Previous || Next->

Is RV Solar Affordable? 3 Solar Power Solutions for RVs and Boats

Is RV solar power affordable? Or is installing a solar power system on a motorhome or trailer — or even on a sailboat — just too darn expensive to be cost effective? We never thought this question would be hard to answer until recently.

This article outlines three different RV solar power solutions and lists all the parts (and costs) of everything you need to buy:

1. A Small, Expandable Rooftop RV Solar Power Solution – For weekends and vacations
2. A Portable RV Solar Power Solution – To get you up and running effortlessly
3. A Big Rooftop RV Solar Power Solution – For full-time RVing

Solar panels on a fifth wheel trailer

Can a solar power installation on an RV or sailboat pay for itself?

Ever since we installed our first (very small) solar power system on our first full-time RV nearly ten years ago, we’ve been excitedly telling people it is a very affordable do-it-yourself project for anyone with some mechanical and electrical knowledge. And for those who can’t turn a wrench, it shouldn’t be that much more.

Our first 130 watt solar power system cost us about twice as much as the same system would today, but even at that high price, we felt it was dollar-for-dollar an equal value to buying a Yamaha or Honda 1000 generator. Best of all, once a little system like that was installed, it was a whole lot less noisy, expensive to operate and complicated to use than a generator would be.

At today’s super cheap solar prices, that little solar power system is even more valuable compared to one of those nice Japanese portable gas generators than it was 10 years ago!

Installing solar panels on a motorhome RV

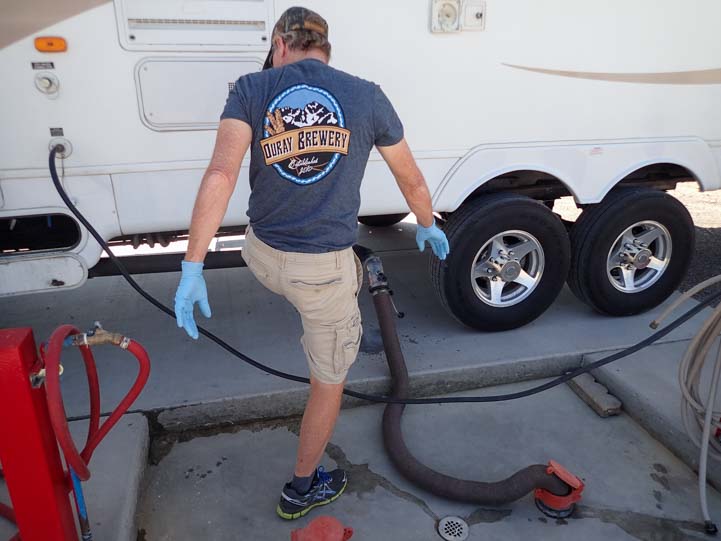
Installing solar power can be a DIY project if you’re handy.

Recently, however, we’ve heard some crazy prices being quoted for installing solar power systems on RVs. We met one couple with a gorgeous brand new DRV Suites fifth wheel who were quoted $13,000 for a solar power installation. Not long after that, we read an article in a popular RV magazine describing a $12,000 solar power installation on a fifth wheel.

Yikes!! These are outrageous prices!!

We sure hope no one is finding they have to spend that kind of crazy money to get a solar power system installed on their trailer or motorhome or sailboat.

We’ve got oodles of articles on this website that go into the nitty gritty details of things to consider when designing and installing a solar power system on an RV or a boat (located HERE). However, all that theory aside, it’s not all that complicated.

Here are three solar power “packages” — with approximate prices — that will do the trick whether you’re a part-timer or full-time RVer.

Although it is possible to buy “pre-packaged RV solar power kits” online, we suggest hand selecting the components you want so that just in case any individual item has a problem it can be returned easily.

We’ve heard of cases where people bought a pre-packaged solar power kit online and then had problems returning a broken part because they had to return the entire kit — solar panels, charge controller, cables and all — just because the one item wasn’t working right.


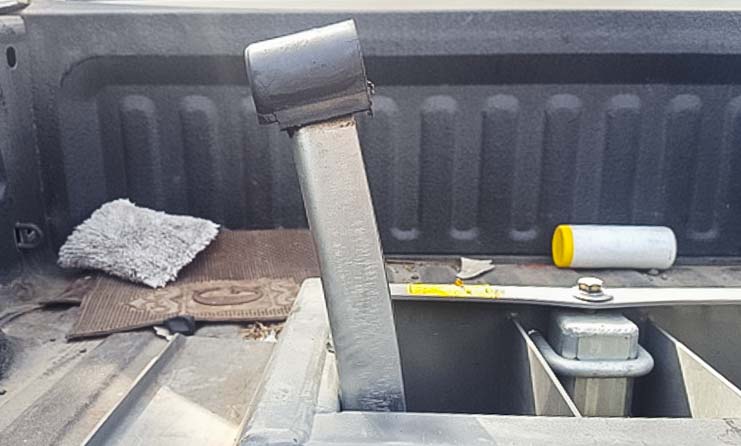
SMALL ROOFTOP RV SOLAR POWER SYSTEM – 150 WATT SYSTEM

Affordable solar panel with a popup tent trailer

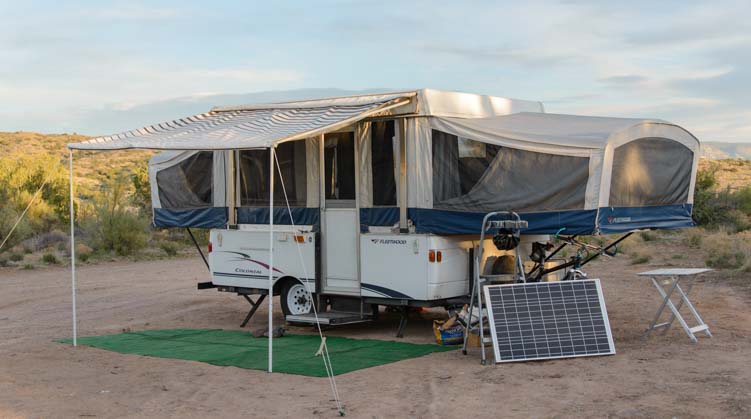
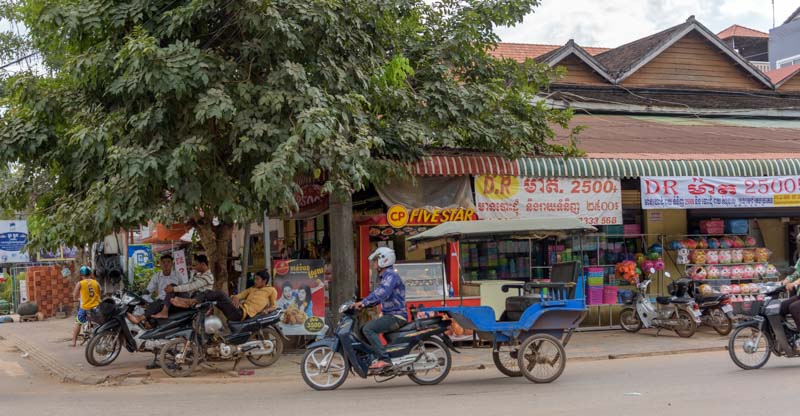
For part-time RVers, installing solar on the roof isn’t a requirement.

The following is essentially what we put on our roof and what we camped with off the grid every night for a year when we started.

The brands are not exactly the same, but these components are highly rated and will do the trick for anyone that wants a roof-mounted solar power system on their motorhome or trailer.

This kit includes both a solar battery charging component and an 110 volt AC power component provided by an inverter. If you don’t understand the distinction, please see our post: RV Solar Power Made Simple.

The simplest inverter installation is to connect the inverter to the batteries using heavy duty cables and then to run an ordinary (but long) power strip (or two) from the inverter to somewhere convenient inside the rig.

Rather than using the wall outlets in the rig, just plug the AC appliances into the power strip as needed, taking care not to operate too many things at once and overload the inverter.

Prices always change, so check the links to see the current prices.

The nice thing about this kit is that it is easily expandable. If a second or third solar panel is eventually desired (to double or triple the size of the system to 300 or 450 watts, for another $200 or $400), those panels can be purchased at a later date. At that point the solar charge controller can also be replaced with a bigger and more sophisticated charge controller (for $600).


PORTABLE FOLDING SOLAR POWER KIT SUITCASE – 120 WATT SYSTEM

Portable folding solar panel suitcase for RV and motorhome use

A portable solar power kit that folds up and can be carried like a suitcase is an awesome solution for weekenders, vacationers and seasonal RVers.

A really nifty alternative for anyone that isn’t super skilled with tools or that’s a bit spooked by electrical things, is a portable solar power kit that folds into a suitcase. These come with two matching solar panels, battery cables with alligator clips, and a panel-mounted solar charge controller. The solar panels are hinged together and can be folded towards each other. A handle on the side of one of them makes the whole thing easy to carry and store like a suitcase.

These portable folding suitcase solar panel kits come in all sizes. A good size is anywhere from 120 to 200 watts:

The advantage of a portable suitcase solar kit like this is that it is self-contained. If you think you might upgrade to a different RV soon, then there’s no loss in investment when one RV is sold and another is purchased. Also, if you decide to install a roof-mounted system at a later date, the suitcase solar panel kit can be sold to another RVer.

As for the inverter, heavy duty cables and power strip, they are included here just to round out the package so you have AC power in the rig as well as the ability to charge the batteries just like the “small solar power kit” described above.


Affordable solar power on a motorhome

Installing solar panels on tilting brackets is popular, but only necessary in mid-winter. We’ve never done it.

With a big RV solar power installation, it is likely that the RV’s house battery bank will need to be upgraded or replaced too, so this package includes a “replacement” AGM battery bank.

The Magnum inverter is an inverter/charger that has a built in transfer switch, making it very straight forward to wire the inverter into the house AC wiring system so you can use the standard wall outlets in the rig rather than plugging things into a power strip.

We’ve been living exclusively on solar power since we started this crazy traveling lifestyle in 2007, and this system is larger than any system we’ve ever had on a boat or trailer. So it ought to work just fine for anyone who wants to RV full-time and do a lot of boondocking.


INSTALLATION COSTS

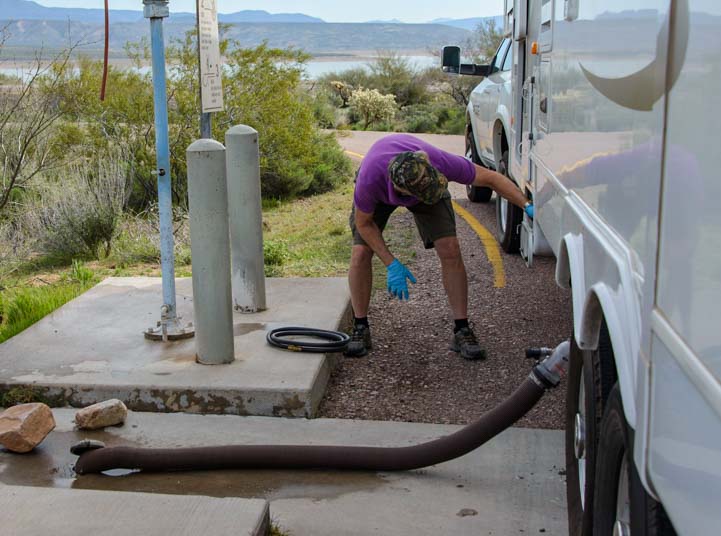
If you are not a DIY RVer, you’ll need to budget for the installation labor too. As a very rough estimate, I would allow for $500-$1,000 for a small system installation and $1,500-$2,500 for a big system installation. The variations in labor costs will depend on how difficult it is to work in your rig, how hard it is to mount the various components and run the wires from roof to basement, and whether or not you choose to have the batteries upgraded or replaced.


RETURN ON INVESTMENT

RV park and campground prices are all over the map, but assuming that the average cost is $25 per night for a site with hookups if you don’t take advantage of monthly discounts or $15 per night if you do, these systems can pay for themselves in anywhere from 18 camping days to 14 months, depending on what size system you buy, whether or not you do the installation yourself, and how you typically camp. Of course, this assumes the rig is equipped with a refrigerator that can run on propane and that if air conditioning is needed an alternative power source like a generator is used.

As with everything in the RVing world, starting small and cheap is the best way to go.


BIG and COMPLEX SOLAR POWER INSTALLATIONS

Solar panel arch with solar panels on sailboat transom

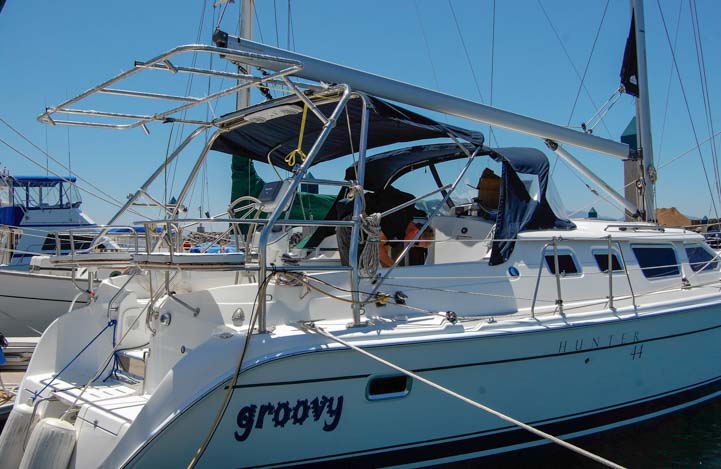
Installing solar power on a sailboat has its own set of challenges.

We have installed three different RV solar power systems and one solar power system on a sailboat.

We published an article in the February 2017 issue of Cruising World Magazine (one of the top magazines in the sailing industry) describing the solar power system we installed on our sailboat Groovy back in 2010. This system gave us all the power we needed to “anchor out” in bays and coves away from electrical hookups in marinas for 750 nights during our cruise of Mexico.

Cruising World has posted the article online here:

Sunny Disposition – Adding Solar Power – Cruising World Magazine, February, 2017

Installing solar power on a sailboat is very similar to installing it in an RV, but there is an added complexity because there isn’t a big flat roof to lay the panels on. Instead, we had to construct a stainless steel arch to support the panels. Fortunately, our boat, a 2008 Hunter 44DS, had a factory installed stainless steel arch over the cockpit already. So, we hired a brilliant Mexican metal fabricator named Alejandro Ulloa, to create our solar panel arch in Ensenada, Mexico.

Solar power installation on sailboat Hunter 44

We turned to Alejandro Ulloa of Ensenada, Mexico, for our solar panel arch
He can be contracted the=rough Baja Naval.

Solar panel arch installation on Hunter 44 sailboat

Alejandro is an artist. He wrapped the arch in plastic to prevent scratches until it was permanently mounted on our boat!

Solar panel arch on sailboat Hunter 44

The arch went back to Alejandro’s workshop for tweaking after this measuring session.

Solar panel arch on sailboat Hunter 44 installed by Alejandro Ulloa

Dimensions now perfect, Alejandro mounts the arch permanently.

Getting the 185 watt 24 volt solar panels up onto the arch was a challenge. Getting solar panels up onto an RV roof is tricky too!

Affordable marine Solar panel installation on sailboat Hunter 44

Getting the solar panels onto the roof of an RV or up onto this arch takes two people (at least!)

Installing solar panels on an arch on sailboat (Hunter 44) with Alejandro Ulloa Baja Naval Ensenada Mexico

The second of the three panels gets installed.

The solar panel arch was going to double as a “dinghy davit” system with telescoping rods that extended out over the transom. These davits supported a pulley system to hoist the dinghy up out of the water. So once the solar panels were mounted on the arch, we had to be sure it could handle the weight of the dinghy.

Our dinghy weighed a lot less than the combined weight of Mark and Alejandro!

Strong solar panel arch and dinghy davit extension

Alejandro and Mark test the arch to be sure it can support the dinghy (which weighed half what they do).

The solar panels were wired in parallel because they would be subjected to shade constantly shifting on and off the panels at certain times of the day as the boat swung at anchor.

Wiring solar panels on a sailboat (Hunter 44) marine solar power installation

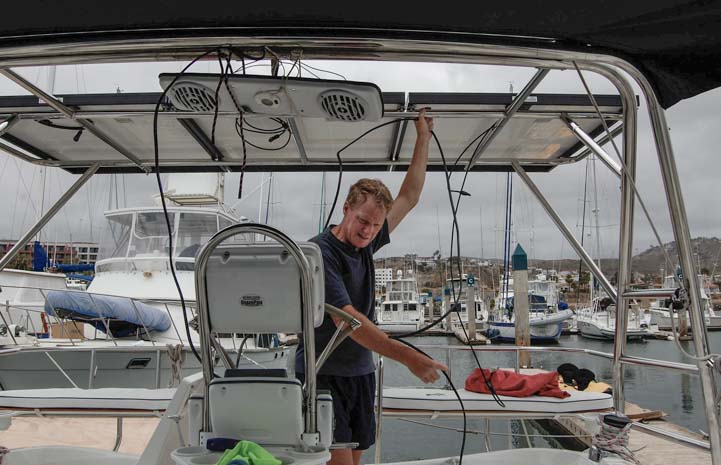
Mark wires up the panels in parallel.

Affordable solar panel installation on a sailboat

.

Solar panel arch with dinghy davit extension supporting affordable solar power on sailboat

A beautiful, clean installation with wire loom covering the exposed cabling and the rest snaked down inside the tubes of the Hunter arch. The davit extensions for hoisting the dinghy are clearly visible under the panels.

Solar panels installed on arch on Hunter 44 sailboat

Nice!

Down below the cockpit inside a huge locker in the transom, Mark mounted a combiner box that brought three cables in from the three panels and then sent out one cable to the solar charge controller.

Emily and Mark Fagan aboard sailboat Groovy

The transom locker in our Hunter 44DS sailboat was very large!

Combiner box for solar panel parallel wiring on a sailboat

A combiner box brings the wires from the three panels together before a single run goes to the solar charge controller (this is optional and not at all necessary).

The solar charge controller was installed in the cabin inside a hanging locker in the master stateroom.

Xantrex solar charge controller installed in sailboat locker

We have an Outback FlexMax charge controller on our trailer but chose a Xantrex controller for our boat because there were no moving parts. We compare the two HERE.

The solar charge controller was located about 8 feet from the near end of the battery bank which spanned a ~14 foot distance under the floorboards in the bilge.

Two 4D AGM batteries in bilge of sailboat

We had four 160 amp-hour 4D AGM batteries for the house bank and a Group 27 AGM start battery installed under the floorboards in the bilge.
One 4D house battery and the Group 27 start battery are seen here

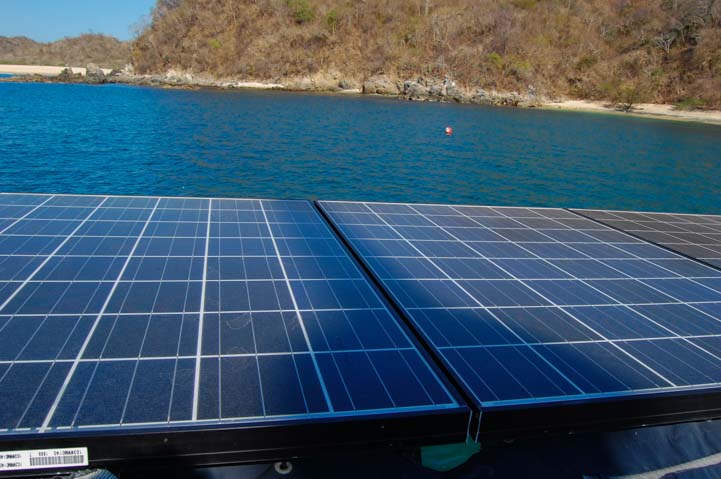
This 555 watt solar power system, which charged a 640 amp-hour house bank of 4D AGM batteries, supplied all of our electrical needs, including powering our under-counter electric refrigerator.

Usually our engine alternator provided backup battery charging whenever we ran the engine. However, at one point our alternator died, and we were without it for 10 straight weeks while we waited for a replacement alternator.

Why such a long wait for a simple replacement part? Getting boat parts in Mexico requires either paying exorbitant shipping fees and import taxes or waiting for a friend to bring the part with them in their backpack when they fly from the US to Mexico.

During that long wait our solar power system supplied all our electricity without a backup while we were anchored in a beautiful bay. Diesel engines don’t require an alternator to run, so we moved the boat around and went sailing etc., and lived our normal lives during our wait.

Solar panel arch and dinghy davit extension with solar panels installed on sailboat

View from the water — cool!

The dinghy davit extensions on the solar panel arch made it easy to raise and lower the dinghy from the water and also to raise and lower the 6 horsepower outboard engine.

Solar panel arch and dinghy davit extension on sailboat

A pulley system on the davit extensions made hoisting the outboard and dinghy a cinch for either of us to do singlehandedly.

Solar panel arch and solar panels on sailboat transom

For 7 months we left our boat at the dock in Chiapas, unplugged from shorepower, and let the solar panels keep the batteries topped off. Everyday during that time they put 19 amp-hours into the batteries which was essentially the power required to operate the solar charge controller!

At anchor, sometimes the solar panels were in full sun all day long if the current and wind and the pattern of the sun crossing the sky allowed the boat to move around without the sun coming forward of the beam of the boat.

However, whenever the sun was forward of the beam, the shadow of the mast and the radome fell on the panels. We could watch the current production from the panels go from full on, to two-thirds, to one-third and back again as the shadow crossed one panel and then two at once, and then one and then none, etc, as the boat swung back and forth at anchor.

Mast and radome cast shade on solar panels on sailboat

RV solar installations have to avoid shade from air conditions and open vent hatches.
On boats the shade from the mast and radome is often unavoidable.

Mast and radome cast shade on pair of sailboat solar panels

When the shadow fell across two 185 watt panels at once, it knocked both of them out of the system so only one of the three solar panels was actually producing power.

The coolest and most unexpected benefit of having our solar panels mounted on an arch over the cockpit was the shade that they provided. The sun in Mexico is very intense, especially out on the water, and it was wonderful to have two huge forward facing jump seats at the back of the cockpit that fully shade as we sailed!

Under the shade of solar panels and a solar panel arch on a sailboat

Made in the shade — What a life that was!!

We have more solar power related articles at these links:

SOLAR POWER OVERVIEW and TUTORIAL

BATTERIES and BATTERY CHARGING SYSTEMS

LIVING ON 12 VOLTS

Our technical articles in Cruising World magazine can be found here:

Do We Miss Our Boat “Groovy” and Sailing?

We describe our thrilling — and heart wrenching — first and last days on our wonderful sailboat in the following posts. It is very true that the happiest days of a boater’s life are the day the boat is bought and the day it’s sold!

Our most recent posts:

More of our Latest Posts are in the MENU.   New to this site? Visit RVers Start Here to find where we keep all the good stuff. Also check out our COOL NEW GEAR STORE!! *** CLICK HERE *** to see it!

Subscribe
Never miss a post — it’s free!

Ta Prohm Temple – Exotic Ancient Ruins at Angkor Wat Cambodia

February 2017 – When we began planning our trip to Thailand, our friend that inspired us to go sent me an email saying, “As long as you’re going that far, make sure you go see Angkor Wat in Cambodia.”

As soon as I saw images of the fabulous and mysterious ancient Khmer ruins that dot the landscape deep in the jungle at this breathtaking UNESCO World Heritage Site I was hooked and made plans for us to fly from Bangkok, Thailand, to the town of Siem Reap in Cambodia.

When we arrived in Siem Reap we were astonished by what we found.

Tuk-tuk driver with passengers at Angkor Wat in SIem Reap Cambodia

A tuk-tuk driver takes tourists to the ancient Khmer ruins at Angkor Archaeological Park in Cambodia.

Siem Reap hums with life and the streets are filled with people on motorbikes and tuk-tuks going about their daily business. We took a walk to the heart of town from our hotel and couldn’t believe the crazy traffic in the street as one motorbike or tuk-tuk after another whizzed by.

Motorbikes in Siem Reap Cambodia

Families scoot around town on their motorbikes.

Whole families climbed aboard their motorbikes to get around town, often with mom, dad, the kids, and maybe even the baby all hanging on as the family zipped around town doing their errands. Sometimes even a teddy bear got to come along for the ride!

Family on motorbike with teddy bear Siem Reap Cambodia

Even Teddy gets a ride on the back!

Cars mingled with the busy two-wheeled traffic, and we saw little buggies of all kinds that weren’t familiar to us. We couldn’t stop our cameras from clicking constantly as we tried to capture the wild scene.

Little minibus Siem Reap Cambodia

We saw some cool vehicles we don’t see back home.

Standing on an insanely busy street corner where four streets came together and crammed themselves into one before going over a bridge, I took my camera down from my face and closed my eyes to listen. Small engines and narrow tires whooshed past in a constant stream, but the air was filled with life and there was a peacefulness to it, a happiness and contentment I couldn’t put my finger on.

Tuk-tuk drivers in Siem Reap Angkor Cambodia

Tuk-tuk drivers and motorbikes in Siem Reap, Cambodia

The rare toot of a horn was just a notice of “I’m here,” rather than an angry honk yelling “You’re in my way!” and everyone seemed to zig-zag around each other and get to where they needed to be without pushing or shoving or being mean.

Tuk-tuks and motorbikes Siem Reap Cambodia

The traffic was insanely busy and non-stop.

I looked over at Mark to say something about this to him, and noticed he was no longer taking photos either and was in the same kind of trance I was in. “It’s like flowing water,” he said, mesmerized.

We began to stroll along the river and suddenly saw bunches of schoolkids walking home from school, smartly dressed and carrying huge backpacks on their backs. A group of boys raced each other and bounced around on the sidewalk, laughing and teasing each other, and then they swung themselves into a tree to dangle from the thick vines in total glee.

What a cool place and what a great vibe!

Cambodian school children playing in Siem Reap

Schoolkids walking home from school stopped to take a quick swing on the vines.

The traffic of motorbikes and tuk-tuks continued to flow past us endlessly, and we saw vendors going about their business selling their wares from bikes and carts.

Bicycle with a heavy load in Siem Reap Cambodia

.

Rolling cart in Siem Reap Angkor Cambodia

Junior gets a ride underneath!

And if anyone had a heavy load to carry but relied on a motorbike to get around town, well they just strapped it onto the back of the bike! Where there’s a will there’s a way!

Motorbike carrying a large cannister Siem Reap Angkor Cambodia

Wide load!

Our friend who had suggested we go to Siem Reap and Angkor Wat had emailed me the most enchanting story of when he had hired a tuk-tuk driver to take him around town and show him the sights. I loved this idea and hunted around online for a tuk-tuk driver.

I found the website of a very sincere sounding young man of 25 that had started his own tuk-tuk business by investing in one of these unusual rigs and hanging out his shingle online as a driver (website here).

Tuk-tuk driver in Angkor Wat Siem Reap Cambodia

Mark with our tuk-tuk driver Pisal Rom.

His name was Pisal, and I emailed him a few weeks before our trip. I was tickled to get an email right back with a quote for his services. It would be about $20 a day to have him chauffeur us around town and take us to any of the temples we wanted all day long. Signing up with him was a no brainer, and a few email exchanges later we had worked out the days and times and which temples we would go see.

Siem Reap tuk-tuk driver for Angkor Wat in Cambodia Pisal Rom

Being a tuk-tuk driver is an entrepreneurial and independent business venture in Siem Reap, Cambodia.

He even came to the airport to greet us, and because I had sent him a link to our website he recognized us right off the bat! This was very handy because at least 50 cab drivers and tuk-tuk drivers greeted our plane holding up signs with names on them. All of us tourists were in a daze after going through customs and getting fingerprinted electronically (thumb and then all four fingers of each hand), and we stood there lamely trying to find our names in the sea of signs!

Tuk-tuk driver in Angkor Wat Siem Reap Cambodia Pisal Rom

Pisal picked us up at the airport when we arrived and took us to our hotel.

The next morning he picked us up at our hotel and took us to the Visitors Center where we bought tickets to the Angkor Archaeological Park. Just like the very formal process we had gone through at the airport where we had been fingerprinted in order to obtain printed visas in our passports to enter the country, our one day tickets to Ankor Archaelogical Park were adorned with our mug shots!

Angkor Wat National Park entrance tickets Cambodia

Our one-day tickets for the Angkor Archaeological Park had our photos on them!

We hopped in the back seat of the tuk-tuk and enjoyed a quick ride to our first temple of the day. Almost all the vehicles on the road were tuk-tuks like ours with tourists sitting in the back. In various spots we saw groups of tuk-tuks parked, waiting to take someone for a ride.

Hammock in a tuk-tuk at Angkor Wat temple Siem Reap Angkor Cambodia

One tuk-tuk driver we saw had an ingenious way to relax between customers!

And then we arrived at Ta Prohm temple, a magnificent group of structures built in 1186 by the ancient Khmer king Jayavarman VII.

Entrance to Ta Prohm temple Siem Reap Angkor Cambodia

Entrance to Ta Prohm temple

Like most of the ancient Khmer ruins, the buildings are carefully positioned and laid out. Ta Prohm has entrance gates facing in each direction of the compass.

Ta Prohm ruins Siem Reap Angkor Cambodia

.

I hadn’t fussed over the history of these ruins before our arrival, preferring instead to let the experience of seeing them wash over me as if I were an archeologist discovering them for the first time.

Courtyard Ta Prohm temple Siem Reap Angkor Angkor Cambodia

.

As we looked down a hallway with columns on one side opening into a courtyard, I was struck by how the shape of the arches was identical to that of the Mayan ruins we had visited at Palenque in Chiapas, Mexico.

The ancient Khmer temples were built about three hundred years after the Mayan empire fell, so who knows! Certainly, many aspects of the ruins reminded me of the Mayan ruins at Yaxchilan.

Hallway in Ta Prohm Angkor Wat ancient Khmer ruins Siem Reap Angkor Cambodia

The shape of these arches reminded us of the arches in the Mayan ruins in Mexico.

Doorway Ta Prohm Temple Angkor Cambodia

.

We found all kinds of nooks and crannies to explore.

Ta Prohm temple columns Angkor Siem Reap Cambodia

.

One of the things that is most impressive at Ta Prohm temple is that almost every stone used in its creation was carved with decorations. The carvings are on doorways, lintels, windows and in every corner.

Dancers stone carvings Ta Prohm temple Siem Reap Angkor Cambodia

Almost all the stones on the walls, windows and doors were carved with wonderful sculptures.

I wandered down one hallway and found myself standing next to a wall that was intricately carved with a floral pattern from floor to ceiling.

Intricate stone carving Ta Prohm ruins Siem Reap Angkor Cambodia 2

This pattern was repeated, floor to ceiling and a few feet wide. Ancient wall paper!

Stepping outside, I noticed that the outer wall of one building had carved sculptures inset into the entire length of the wall.

Wall carvings Ta Prohm Angkor Siem Reap Cambodia

The outer walls had statuary built in.

Stone carving Ta Prohm Angkor Siem Reap Cambodia

The ancient Khmer people were Hindus when the temples were built and later changed to Buddhism.

Stone carving Ta Prohm Angkor Siem Reap Cambodia

.

The more we looked, both outside and inside, the more carvings we saw.

Elaborate carving at Ta Prohm Angkor Siem Reap Cambodia

Every inch has elaborate carvings!

The doorways — and there were dozens — were truly ornate.

Ta Prohm ancient Khmer ruins Siem Reap Angkor Cambodia

The dozens of doorways were all similar but no two were exactly the same!

Oddly, the entire Ta Prohm temple ruin was strewn with enormous boulders that had once formed the walls and ceilings and floors of rooms that were no longer standing.

Doorway and fallen blocks Ta Prohm temple Angkor Siem Reap Cambodia

Both outside and inside the temple buildings were rubble piles of large stones that had fallen. These piles were often waist high or more!

Ta Prohm temple ruins Angkor SIem Reap Cambodia

Wonderful columns — and lots of rubble, including a column piece to the left.

Rubble at Ta Prohm Temple Ruins Angkor Siem Reap Cambodia

Beautiful – but what a mess!

Looking closely at the rubble, we could see stones that had been carved.

Carvings on blocks at Ta Prohm temple Siem Reap Angkor Cambodia

Many stones in the rubble had carvings on them.

It was like an enormous jigsaw puzzle that just begged to be put back together again.

Ruins and fallen blocks at Ta Prohm temple Siem Reap Angkor Cambodia

Sometimes it was easy to see how the stones had gone together before the wall or roof collapsed.

Carved stone rubble Ta Prohm ruins Siem Reap Angkor Cambodia 2

.

But what Ta Prohm temple is actually known for is the gargantuan trees that have enveloped the ruins with their roots. It is known as a “Jungle Temple” because it has truly been engulfed by the jungle.

Walking along the outer wall of the temple, we saw the most incredible tree and root system snaking over the wall.

Giant tree roots engulf wall at Ta Prohm temple Siem Reap Angkor Cambodia

Ta Prohm temple is known for the Invasion of the Giant Trees.

If this looks like a modest tree and a knee high wall, look again:

Enormous tree covers wall at Ta Prohm temple Siem Reap Angkor Cambodia

Yes… the Giant Trees!

Trees like this were all over the place, their gnarly roots reaching out across the walls and buildings.

Tree roots covering wall at Ta Prohm temple Siem Reap Angkor Cambodia

.

Huge tree roots engulf wall Ta Prohm ruins Siem Reap Angkor Cambodia 2

.

Jungle temple Ta Prohm Angkor Siem Reap Cambodia

.

In some places it seemed like the roots were flowing from the tree down across the temple buildings.

Tree roots on doorway Ta Prohm Angkor Siem Reap Cambodia

A waterfall of roots!

Roots on wall at Ta Prohm Angkor Siem Reap Cambodia

.

I turned one corner and noticed the head of a sculpture peeking out at me from between the tree roots!!

Face in tree Ta Prohm Angkor Siem Reap Cambodia

Hey… there’s a face in there!

Everywhere we turned, the trees and roots had taken over the temple.

Tree and roots engulf ruins at Ta Prohm Angkor Siem Reap Cambodia

.

The temple of Ta Prohm was used as a location in the movie Tomb Raider starring Angelina Jolie, and some of the places were recognizable to tourists and were favorite spots for selfies.

Tourists at jungle temple Ta Prohm Angkor Siem Reap Cambodia

.

Ta Prohm is undergoing renovation and construction to put various bits back together again and to make it easier for tourists to get around, and we saw construction crews here and there with hard hats and cranes.

Reconstruction at Ta Prohm ruins Siem Reap Angkor Cambodia 2

Construction workers in hard hats watch a stone being lifted to the roof.

Eventually we wound our way back to the entrance gate where the crowds were growing ever bigger.

Tourists at entrance to Ta Prohm Angkor Siem Reap Cambodia

When we returned to the entrance there were lots of tourists coming in.

We spotted a sign suggesting we slow down a bit.

Cambodia sign to Slow Down

Cambodian letters are not from the Roman alphabet.
But they’re not Thai letters either!


Nearby we saw lots of tourists who had been approaching Temple Sightseeing Overload (which is easy to do in this part of the world where Ta Prohm is just one of dozens of exotic ruins). They were taking a load off in the shade.

Resting at Ta Prohm Angkor Siem Reap Cambodia

Time for a break!

But we were still fired up. We found Pisal waiting for us and hopped in the back of his tuk-tuk for more temple adventures!

Fabulous ancient Khmer ruin Angkor Siem Reap Cambodia

This area is so rich with ancient Khmer ruins it would take many months to see them all.

We’ve seen quite a few ancient ruins in our travels now, and I found it fascinating to put together a timeline of who was building and living in which places at various times in history.

The meso-American ruins of Mexico and Central America predate all the others by a few hundred years. Interestingly, the ancient Khmer temples and kingdoms of southeast Asia were built about the same time as the cliff dwellings of America’s southwest!

  • 600 BC – 850 AD – Monte Alban – Zapotec step pyramids near Oaxaca, Mexico
  • 100 – 650 AD – Mitla – Zapotec ruins close to Monte Alban near Oaxaca, Mexico
  • 359 – 808 AD – Yaxchilan – Mayan pyramids on the river between Mexico and Guatemala
  • 431 – 800 AD – Palenque – Mayan pyramids in Chiapas, Mexico. One of Central America’s major Mayan sites
  • 580 – 800 AD – Bonampak – Mayan site in Chiapas, Mexico, with truly evocative fresco paintings depicting battles and coronations
  • 921 AD – Koh Kher – Ancient Khmer temples (upcoming post)
  • 1113 – 1145 AD – Angkor Wat – Ancient Khmer temples (upcoming post)
  • 1182-1225 AD – Wupatki Pueblo – Sinagua People multistory stone dwellings north of Flagstaff, Arizona
  • 1186 AD – Ta Prohm – Ancient Khmer temple described on this page
  • 1190-1300 AD – Mesa Verde Cliff Dwellings – Ancestral Puebloan cliff dwellings in southwestern Colorado
  • 1200 AD – Angkor Thom – Ancient Khmer temple (upcoming post)
  • 1330-1450 AD – Tonto Cliff Dwellings – Salado People in central Arizona

Subscribe
Never miss a post — it’s free!

More info about Ta Prohm, our tuk-tuk driver and our accommodations:

Other blog posts from our travels in Thailand:

More Glimpses of National Parks through our eyes:

National Parks and UNESCO World Heritage Sites – North America and SE Asia

Our most recent posts:

More of our Latest Posts are in the MENU.
New to this site? Visit RVers Start Here to find where we keep all the good stuff!!

<-Previous || Next->

Spring in Sarasota FL + Bryce Canyon’s Night Skies – in Trailer Life

We are very proud to announce that the March 2017 issue of Trailer Life Magazine features our article about beautiful Sarasota, Florida, plus a back page column about hiking Bryce Canyon National Park under the stars.

Sarasota's Three-Ring Circus Trailer Life Magazine

Trailer Life Magazine, March 2017
Text by Emily Fagan, Photos by Emily & Mark Fagan

Sarasota, Florida, is a fabulous place to visit in April, and we enjoyed five wonderful weeks there. For RVers that are heading north these days from the hotter parts of southern Florida, a stopover in Sarasota is a true delight.

Venice Beach Sarasota Florida

Venice Beach just south of Sarasota, Florida.

We have been fortunate to visit tropical beaches all over the world, most recently in Thailand but also in many parts of southern Mexico, Hawaii and the Caribbean. Frankly, not one of them has sand that is quite as pure white and fluffy soft as Siesta Beach in Sarasota. It is the texture of confectioner’s sugar! And the turquoise water is ever so inviting too.

Siesta Beach Sarasota Florida

Siesta Beach — Where the sand is like confectioner’s sugar!

But what surprised us was the many other things Sarasota has to offer. A century ago it was just a small fishing village, but the Ringling Brothers decided to settle in the town and make it the home base for their circus, and that changed it forever.

The Ringling mansion Sarasota Florida

The Ringling – Former home of the founders of the circus

Now, The Ringling is a fabulous museum that offers so much for tourists to see that you can get a three day pass — and you need it if you want to see it all.

Ringling Mansion Ca-Dzan Sarasota Florida copy

Ornamentation galore!

The Ringling estate’s mansion is a phenomenal building that is loaded with decorative arches, fanciful cornices, and an altogether fairy tale type of air.

Tourists at The Ringling mansion Sarasota Florida

The Ringling is a “do not miss” Sarasota excursion!

Out front there is a fabulous and enormous rock tile deck that looks out on Sarasota Bay. Standing there I tried to imagine what it was like back in the day when John and Mabel Ringling held parties there. Oh my!

Tile deck at The Ringling mansion Sarasota Florida

Even the deck is absolutely stunning, with inlaid colorful stone tiles.

The Ringling also has a museum that houses the stunning collection of European art that John Ringling collected. Mondays are “free admission day,” and when we got inside we were blown away by this immense art collection.

The Ringling Art Museum Sarasota Florida

The Ringling art museum is free on Mondays and is home to a stunning collection of European masters.

Out back there is a rose garden that was the pride and joy of Mabel Ringling as well as a gargantuan banyan tree.

Banyan tree The Ringling gardens Sarasota Florida

Out back we found a massive banyan tree shading a very cool bar!

Sarasota is one place where it would take a whole season of outings to run out of things to do. One excursion we really enjoyed was going to Jungle Gardens.

This is a zoo of sorts whose welcoming committee is a flock of pink flamingos who go out of their way to say, “Hello!”

Flamingo and photographer Jungle Gardens Sarasota Florida

At Jungle Gardens they hire pink flamingos to be the greeters!

They are extremely friendly birds, and even though they had plenty of natural spaces to stand around and do their flamingo thing in the water and under the tropical trees, one flamingo took a particular liking to Mark and rubbed his beak all over him!

Flamingo Jungle Gardens Sarasota Florida

True love… for the flamingo at least!

Jungle Gardens also has a wonderful bird show, and we were delighted by the antics of the various parrots. One parrot, a 79 year old cockatoo named Snowflake, was a seasoned professional when it came to performing. He was so old that he had appeared on the Ed Sullivan Show before I was born!

He can still do great tricks, though, and we watched him ride a bike on a tightrope while a buddy macaw perched on a swing and went for a free ride below him.

Snowflake rides a unicycle with Andy riding underneath copy

Snowflake’s still got it at 79 years old!

There are lots of parks in the Sarasota area, and we got a huge kick out of watching native birds fishing, swimming and flying by us in some of these parks.

Great Blue Heron Sarasota Florida

The native wild birds are a sight to behold in many parks around town.

Sandhill cranes like Sarasota as much as people do, and to our utter delight and complete surprise, a pair of sandhill cranes had a nest with two eggs near a pond at a strip mall.

Sandhill crane with chick in nest Sarasota Florida

A sandhilll crane mom checks on her brand new chick.

On the day that they were due to hatch a large group of fascinated birders and photographers gathered near the nest and began to watch the arrival of the baby chicks through huge telephoto lenses and binoculars.

Sandhill chick and egg in nest Sarasota Florida

“Yawn…It was a lot of work getting out of that egg!”

This little guy was absolutely adorable.

Sandhill crane with chick in nest Sarasota Florida

“Oopsie!”

And the first little one was soon joined by its sibling while the parents pushed the egg shells aside.

Two sandhill cranes in nest Sarasota Florida

“Are you my brother?!”

Sarasota has lots of quirky charm, and there is a mascot that adorns many homes and businesses around town. Nicknamed the Tube Dude, this guy can be seen holding a toothbrush in front of the dentist’s office, wearing a baker’s hat in front of the bakery and sitting in a Kayak at the local surf and kayak shop. What fun!

The Tube Dude in Sarasota Florida

The Tube Dude at a coffee shop with a water bowl for his dog.

Trailer Life has posted our article on their website and you can read it here:

Sarasota’s Three-Ring Circus – Trailer Life Magazine, March 2017

Flipping to the back of the March issue, there is a photo of a wonderfully starry night taken from the Mossy Cove trail at Bryce Canyon National Park. We spent quite a bit of time at Bryce Canyon last summer, which gave us a chance to get out on the trails in the dark several times.

Stars over Fairytale Canyon Bryce Canyon National Park

Hiking Bryce Canyon under the stars is very rewarding.

It is a little eerie hiking in the pitch dark with a flashlight, but we managed not to fall over the edge and we saw some really cool skies.

Fairy Tale Canyon Bryce Canyon National Park Night Stars

.

Bryce Canyon doesn’t have super dark skies, so there is always a big of a glow on the horizon from nearby towns, but even so, the stars jumped out of the heavens.

Fairy Tale Hike Bryce Canyon National Park Night Stars

We ventured out into Fairytale Canyon

We were there fairly late in the season, in September, so catching the Milky Way was a little tricky as we had to get out into Bryce Canyon’s amphitheater of hoodoos in order to look back up towards the rim to see it. But we caught it sailing across the sky on several occaisions between 3:00 and 5:30 in the morning.

Milky Way Bryce Canyon National Park Fairytale Canyon

The Milky Way is easiest to see in late spring and early summer.

Milky Way and tree silhouette Bryce Canyon National Park

.

Milky Way Bryce Canyon National Park

.

Of course, we stayed out so long on these crazy midnight hikes that by the time we got back to our trailer the morning sky was just beginning to lighten into rich shades of blue. And sure enough, there was the Orion constellation hanging over our rig!

Orion constellation over RV Utah

Orion sails high above our trailer.

Trailer Life is an excellent magazine, and we were subscribers for years before we became writers and photographers for them. Whether you are a new RVer or have many years under your belt, if you own a towable RV like we do, you might enjoy subscribing for a year. You can subscribe to Trailer Life here:

Trailer Life Subscription

It’s not expensive, and what I like is that it is professionally edited by terrific editors and it is professionally laid out by a graphic artist which gives it a polish in the print edition that just doesn’t exist online, whether on magazine websites or on folksy blogs like this one.

Subscribe
Never miss a post — it’s free!

Interested in visiting Sarasota? Here are our blog posts from our stay there:

More Blog Posts from Florida

Curious about Bryce Canyon and/or Hiking Under the Stars? Check out these posts:

Night Skies in Waterton Lakes + All Night Timelapse of the Milky Way07/31/16

A Few of the Other Articles We’ve Published in Trailer Life:

Trailer Life Articles by Emily & Mark Fagan

Our most recent posts:

More of our Latest Posts are in the MENU.
New to this site? Visit RVers Start Here to find where we keep all the good stuff!!

Snorkeling Ko Rok with Dive & Relax – Underwater Magic in Thailand!

January 2017 – Thailand is a tropical country known for its stunning, palm tree lined, white sand beaches and exquisitely colorful reefs, and during our stay on the island of Ko Lanta in the southern part of the country, we took a fabulous snorkeling tour with Dive & Relax Tours to snorkel with the fish at Ko Rok in Mu Ko Lanta National Park.

Dive & Relax Snorkeling Tour to Ko Rok on Ko Lanta Thailand

Hi there!

The Andaman Sea on Thailand’s southwestern shore is strewn with gorgeous islands. Each has a personality of its own, from busy tourist islands to crazy party islands. The island of Ko Lanta is known to be a quieter island, and it has nine huge beaches to explore.

Ko Lanta Thailand

Ko Lanta – An island of beaches.

Just offshore of Ko Lanta lies one of the best snorkeling and diving destinations in the country: the tiny uninhabited pair of islands known as “Ko Rok,” or more specifically, “Ko Rok Yai” (the more northern island) and “Ko Rok Noi” (its southern neighbor).

Because we would be renting our snorkeling gear as part of the tour, we visited the Dive & Relax office a few days prior to our tour to get fitted for the masks and fins we would be using. They’re located right on Long Beach (Pra-Ae Beach)!

Dive and Relax Dive and Snorkeling Tours Ko Lanta Thailand

The relaxing side of Dive & Relax!

On the morning of our tour they sent a shuttle over to our hotel to pick us up, and before we knew it we were on the Dive & Relax power boat headed out to Ko Rok. It felt awesome to be out on the water.

Boat ride Dive and Relax Snorkeling Tour to Ko Rok in Ko Lanta Thailand

It was a blast zipping out to the Ko Rok islands on their speedboat.

Unlike many diving and snorkeling outfits on Ko Lanta, Dive & Relax specializes in intimate tours with small groups of snorkelers and divers. Our group had six divers and four snorkelers. To accompany our group of ten tourists there were three professional dive masters, the captain of our boat and an assistant.

A few years ago Ko Rok was relatively undiscovered as a diving and snorkeling destination, but it is such a phenomenal spot that it has recently become quite popular. However, these folks know the hidden spots around the island where they can tuck into a bay and be the only boat there.

After about 45 minutes of speeding along through the water, we arrived at Ko Rok Noi and our captain tied the boat to a mooring provided by Mu Ko Lanta National Park in a gorgeous bay. There wasn’t anything around us but the beautifully rugged shore and the shockingly clear aquamarine water.

The divers all climbed into their gear, and one by one they jumped off the back of the boat and were joined by two dive masters.

Diver jumps off boat Dive & Relax Ko Rok Snorkeling Tour Ko Lanta Thailand

One by one, the divers jumped in.

Then it was our turn to jump in. The water was wonderfully warm.

Snorkeler on Dive and Relax Ko Rok Snorkeling Tour Ko Lanta Thailand

Big fish!

Almost immediately we began to see fish all around us.

Snorkeling with fish Dive & Relax Snorkeling Tour to Ko Rok in Ko Lanta Thailand

We saw beautiful fish within seconds of hitting the water.

Reef Fish Dive and Relax Snorkeling Tour Ko Rok in Ko Lanta Thailand

These guys were everywhere.

Reef Fish Dive & Relax Snorkeling Tour Ko Rok in Ko Lanta Thailand

Big fish, small fish, red fish, blue fish!

Our dive master kept us together and pointed out unusual things as we drifted slowly over the colorful spectacle below us.

Snorkeler on Dive and Relax Snorkeling Tour Ko Rok in Ko Lanta Thailand

Our snorkeling dive master free dove to the reef to point out special sightings.

First she pointed out a sea cucumber, something I never would have noticed on my own.

Sea cucumber Dive & Relax Snorkeling Tour Ko Rok in Ko Lanta Thailand

A sea cucumber!

Then she pointed at a fantastic giant clam with ruffled purple lips.

Purple clam Dive and Relax Snorkeling Tour Ko Rok in Ko Lanta Thailand

Wow… A giant purple clam!

Purple Clam Dive & Relax Snorkeling Tour Ko Rok in Ko Lanta Thailand

.

After about an hour in the water, we returned to the boat, and as we munched on pastries the captain took us around to the channel that separates the two islands, Ko Rok Noi and Ko Rok Yai. The water was breathtakingly clear and inviting.

Clear water Dive and Relax Snorkeling Tour Ko Rok in Ko Lanta Thailand

How gorgeous is that?!!

Clear water Dive & Relax Snorkeling Tour Ko Rok in Ko Lanta Thailand

.

The captain anchored our boat and we all climbed down the ladder off the back and waded onto the soft sand of this hidden tropical beach in paradise. I looked around and had to smile when I realized that ours were the only footprints in the sand.

On the beach with Dive and Relax Snorkeling Tour Ko Rok in Ko Lanta Thailand

We are the only ones on this remote beach.

Ko Rok beach Dive & Relax Snorkeling Tour Ko Lanta Thailand

.

Suddenly the three dive masters spread out a blanket and brought out a collection of coolers that were filled with a yummy Thai lunch. We had all worked up an appetite after an hour in the water and we chowed down!

Thai lunch break Dive and Relax Snorkeling Tour Ko Rok in Ko Lanta Thailand

Our three dive masters set up a fabulous hot lunch for us on the beach.

As we explored this uninhabited beach, seeking shade under the trees, we got chatting with the other divers and snorkelers who hailed from all over the world. A German mother/daugher pair were our companion snorkelers, and our snorkeling dive master was a Japanese woman who has spent the last few years chasing seasonal dive master positions in all the most sought after tropical locations in the world.

What intrigued us most, however, was when we learned that two of the divers were a Swedish couple that had sailed across the Pacific with their kids twenty years ago in a 35 foot boat. They now had a 43 footer back in Sweden, and they were gearing up to go on a round-the-world cruise!

One couple was very seasoned divers who had come to Thailand for a few weeks specifically to go diving every day. They had signed up for just about every diving tour that Dive & Relax offers, and she even had a tattoo of a sea turtle on her foot!

Sea turtle tattoo Dive & Relax Snorkeling Tour Ko Rok in Ko Lanta Thailand

Talk about being a diving enthusiast —
One of the divers in our group had a sea turtle tattooed on her foot!

Soon it was time to go to our second snorkeling site and our captain started up the engine and took us around the bend. He dropped us off and we spent an hour slowly sightseeing along the reef and making our way into the next cove where he anchored the boat and waited for us.

Diving Dive and Relax Snorkeling Tour Ko Rok in Ko Lanta Thailand

Underwater sightseeing.

Ko Rok snorkeling Dive & Relax Snorkeling Tour in Ko Lanta Thailand

Mark loves free diving.

We saw all kinds of marine life and coral that we had never seen before.

Ko Rok reef coral Dive and Relax Snorkeling Tour in Ko Lanta Thailand

Fabulous coral is home to all kinds of pretty fish.

Coral reef at Ko Rok Dive & Relax Snorkeling Tour in Ko Lanta Thailand

.

Suddenly I spotted the most exotic looking purple sea star in the distance.

Purple Sea Star Dive and Relax Snorkeling Tour of Ko Rok in Ko Lanta Thailand

A purple sea star!

Mark grabbed the camera and free dove down towards it to get a closer look. Wow!

Purple Sea Star Dive & Relax Snorkeling Tour of Ko Rok in Ko Lanta Thailand

.

A little further on we saw a sea anenome. And who was peeking out of the gently waving tendrils but Nemo!

Nemo clown fish Dive and Relax Snorkeling Tour of Ko Rok in Ko Lanta Thailand

Hey… We found Nemo!!

Nemo wasn’t alone in this anenome. The soft tendrils swayed and a few more clown fish emerged.

Nemo clown fish Dive & Relax Snorkeling Tour of Ko Rok in Ko Lanta Thailand

Clown fish swim around their anemone home.

During our lunch break the dive masters had been very excited because the water was especially clear on this day.

Reef fish Dive and Relax Snorkeling Tour of Ko Rok in Ko Lanta Thailand

.

As we entered the next cove we saw our companion divers deep below us. While we floated about twenty feet above them, their bubbles rose up from the bottom.

Divers Dive & Relax Snorkeling Tour of Ko Rok in Ko Lanta Thailand

Suddenly we saw the divers in our group below us.

Eventually we all reached the Dive & Relax boat and we gathered around the swim ladder — all smiles — and made our way back onto the boat and out of our gear.

As we zipped back to Ko Lanta, the dive masters made sure we not only had cold water and fruit juice to sip on, but they brought out a fantastic tropical fruit plate too.

Fruit snack aboard Dive and Relax snorkel tour boat Ko Lanta Thailand

A smorgasbord of tropical fruit!

We are both certified divers, but we loved the ease and simplicity of snorkeling on this trip and not worrying about the complexities of diving. I just wish we’d signed on for another tour with Dive & Relax, as there are many islands and reefs near Ko Lanta that they visit.

Dive & Relax Ko Rok snorkeling tour near Ko Lanta Thailand

Next time we’ll sign up for more than one tour!!

Subscribe
Never miss a post — it’s free!

More info:

Other blog posts from our travels in Thailand:

Our snorkeling adventures in Mexico:

Sea Turtles and Eagle Rays in the Bays of Huatulco 01/13/13

Our most recent posts:

More of our Latest Posts are in the MENU.
New to this site? Visit RVers Start Here to find where we keep all the good stuff!!

<-Previous || Next->

What’s A Girl To Do at the RV Dump Station?

Dumping the RV holding tanks is a nasty little job, but it’s part of the fun of traveling around in an RV, and we’ve all gotta do it. It’s really not all that bad when it’s a shared job, but of course that’s easy for us gals to say, because it’s usually our male partners-in-love-and-life who get to do the bulk of the dirty work.

RV dump station tips for women RVers-2

Despite lots of progress over the years for the types of work women can do, emptying an RV’s waste water holding tanks is a job many women are just as happy to leave to their better half.

Sometimes, when we go to an RV dump station, I am amazed to see a woman remain in the passenger’s seat of her truck or motorhome for the whole duration of the job. I’m not sure how these women have negotiated that arrangement with their significant other, but I figure they must be incredibly good cooks to be able to chat with a friend on the phone or check the latest on Facebook while their hubby is grinding it out with the sewer hose, the splashing water, and all that muck and mire.

RV dump station tips for RVing women

Mark looks like he’s having so much fun. Can I get away with doing nothing?

I wish my skills were so awesome in the kitchen that I could be exempt from doing anything at the RV dump station. But alas, in our marriage, I need to be a participant in this dirtiest of deeds to win brownie points for other aspects of our life together. Nonetheless, it took me a few years to find things to do while we were at the RV dump station that were truly useful and helpful.

We have a full set of “blue” RV dump station procedural tips below — but they don’t say much about the “pink” side of the job:

Dirty Little Secrets from the RV dump station

Too often at the beginning of our RVing lives I found my best efforts to help with setting up the RV sewer hose or screwing in the water hose ended up with me underfoot and in the way of the general flow of things. Mark had his methods, and I couldn’t read his mind as to what came next.

Few people are in truly sunny and radiant moods when they don their rubber gloves at the RV dump, and too often I found that my most valiant attempts to be helpful resulted in tensions rising between us.

RV dump station tips for women RVers

I think he’s trying to tell me something.

Then one day I discovered a way that I can be of significant help and get some important jobs done at the same time.

GIVE THE BLACK TANK A BOOST FLUSH

For starters, I fill two 5-gallon water buckets with water and carry them into the rig to dump them down the toilet after the black tank has been emptied. Even if an RV has a black water flush system like ours does, it is still surprising just how many little bits of gunk and human waste solids get flushed out when two 5-gallon buckets of water are poured down the toilet.

I fill the buckets while Mark gets the sewer hose out and attaches the clear elbow so he can see when the holding tanks are fully drained. Then I can scoot out of the way and carry the buckets around to our RV’s door before he begins attaching the black water flush hose between the rig and the water spigot. This way we don’t end up stepping on each when we first start working at the RV dump station.

RV dump station tips flushing black tank with buckets of water in toilet

We have two buckets and I fill each one with water to give the toilet and sewer pipes an extra flush.

The buckets are heavy to carry around to our trailer’s front door, but I don’t mind a little bit of a shoulder and arm workout, and I take them one at a time. Maneuvering a heavy bucket of water up stairs is excellent exercise for both balance and strength.

I grab the inside of the doorway with my left hand for extra balance, tighten my abs so I don’t throw my back out with the uneven weight distribution of carrying a heavy bucket, and I leverage myself up and set the pails down inside in the kitchen.

RV dump station tip flush black tank with buckets of water in toilet

The buckets are heavy, but I take my time and grab the door frame to keep my balance as I go up the stairs.

For those who can’t carry the buckets, your partner will likely be happy to carry them for you since this really helps ensure the black tank and toilet get a complete flush. Also, filling the buckets only half way or three quarters of the way can help not only lighten the load but keep the water from splashing all over the place and all over you.

CLEAN THE BATHROOM

The other task I tackle is cleaning the toilet room from top to bottom and cleaning the bathroom vanity and kitchen sink. I figure that if my sweet hubby is dealing with the darker side of RVing outside at the RV dump station, I can deal with the same stuff on the inside..

This insures the bathroom gets cleaned on a regular basis and also means that when we arrive at our next campsite not only are the holding tanks empty but our bathroom is sparkling clean and smells fresh.

So, once I get the water buckets inside the rig, I begin assembling the things I will need to clean the toilet and the bathroom. When I hear Mark’s knock on the wall, I know he has finished emptying the black tank and it is time to dump the buckets of water down the toilet.

RV dump station tips flush black tank

I pour one bucket at a time and Mark watches the flow in the sewer hose to make sure the water eventually runs clear.

Since the buckets are just inside the RV door, it takes me a minute to grab one and empty it. Then it takes a few minutes more to go grab the other one and empty it too. Having a few minutes between flushes is helpful because then Mark can monitor whether the water from the second bucket is running clear or is still flushing solids out. If there are still chunks coming out, then, depending on whether anyone is waiting to use the RV dump after us, I’ll fill another bucket or two with water and dump them down the toilet.

Sometimes I have the water pump turned on as I dump the buckets of water down the toilet and sometimes it’s turned off. Having it turned on means even more water flushes down, which is great, but it also uses up water from the fresh water tank. So, whether or not I have the water pump turned on depends on whether there are people waiting behind us at the dump station, as it will take a little longer for us to fill the fresh water tank if we flush a few extra gallons down the toilet as part of the dumping process.

Now that the black tank is completely flushed, Mark begins emptying our kitchen gray tank. We have two gray tanks, one for the kitchen and one for the shower. We empty the kitchen tank first because it is dirtier and has more things in it (like broccoli bits) than the shower gray tank which is just sudsy water.

While he works on emptying the two gray tanks, I get to work cleaning the toilet.

RV dump station tip woman cleans toilet and bathroom

If Mark is mucking around in gross stuff outside, the least I can do is muck around in gross stuff inside. This also gives us a clean bathroom when we set up camp.

Since we have a hatch in the toilet room that we leave open a lot, the toilet lid and the floor often get dusty in just a few days. So I remove everything from the toilet room and clean everything, including the floor.

Over the years we’ve found that the toilet bowl — more so than the black tank itself — can be a big source of foul odors. Unlike household toilets, RV toilet bowls are basically dry except during flushing, so urine can end up drying in the bowl and producing an odor.

Also, the flow of the flushing water doesn’t necessarily rinse every inch of the bowl, so some areas simply don’t get rinsed all that well, even when using the toilet’s spray nozzle. So, I go to town on the inside of the bowl as well as everything else.

We use two enzyme/bacteria based RV holding tank treatment products: Happy Campers RV holding tank treatment has worked best for us in extreme temperatures (very cold and very hot) and for controlling tank odors. RV Digest-It holding tank treatment has worked best for us in moderate temperatures to break down the solids in the tank.

Because these are both basically solutions of living critters, the toilet cleaning products we use can’t be too toxic or the colonies of feces-eating bacteria can’t get established and become self-perpetuating. I’ve been using Murphy’s Oil Soap for the last few years with good results.

This is the soap that is recommended for cleaning the rubber roofs on the tops of RV’s, which is why we had it on hand to try on the toilet a few years ago. In addition to being biodegradable, what we like about it for cleaning the toilet is that it assists in keeping both the seals in the toilet bowl and on the black holding tank valve lubricated. I used white vinegar for cleaning the toilet for a while, and after a few months the black tank valve got really sticky. Since switching to Murphy’s Oil Soap a few years ago, that valve hasn’t gotten gummed up.

Periodically, we’ve found the seals in the toilet bowl have stopped holding water which meant the bowl drained completely dry between flushes. This allowed foul odors to come up from the black water tank. This problem is usually due to mineral and gunk build-ups on the seal.

So, I give that seal a really good cleaning too. The critical areas are on both the top and bottom surfaces of the rubber seal, that is, between the seal and the toilet bowl (the top side) and underneath the seal where the dome flapper (the “waste ball”) closes up against it.

RV toilet assembly and flapper valve installation

A disassembled RV toilet shows what the rubber toilet seal looks like without the toilet bowl sitting on it. To prevent it from leaking and draining the toilet between flushes, I scrub both top and bottom of the rubber seal.

I make sure the water pump is off at this point and hold the toilet flush lever down so I can get at the underside of the seal.

Often, the build-up is due to having hard water in the fresh water tanks which is very common in Arizona and other western states where the fresh water comes from deep, mineral rich aquifers.

RV toilet flapper cleaning tips

The seal needs to be completely free of mineral deposits on both the top and bottom, so I clean the area between the seal and the bowl on the top (red arrow) and below the seal on the bottom (the backside of the seal in this view).

At this point, depending on what Mark is up to outside, I’ll move on to other cleaning projects. If we have nearly emptied our fresh water tanks prior to coming to the RV dump station, it may take 10 minutes to refill them. Also, sometimes the potable water spigot is a little ways beyond the waste water dump area, requiring Mark to move the whole rig a few feet forward.

So, if there is time, I will clean the bathroom vanity sink and then move on to the kitchen sink. Depending on our plans for the next few days and depending on how much time I have at the RV dump, I may also add the holding tank treatment to the black tank, via the toilet, and add it to the gray tanks via the bathroom sink, shower and kitchen sink.

Sometimes, however, I prefer to wait two or three days until those tanks have some liquids in them before adding the holding tank treatment. And sometimes I add just a half tank’s worth of holding tank treatment at the RV dump station and then add the other half a few days later once the holding tanks have become partially full.

Of course, we add a capful of bleach to our fresh water tanks every few months, and that totally obliterates any colonies of anything that have started to grow in any of the holding tanks (including the fresh water tank) as the bleach water works its way through our plumbing system from the fresh water tank to the gray and black waste water tanks.

So, for us, creating fully self-sustaining communities of healthy organisms in any waste water tank is not 100% doable. But by using non-toxic cleansers we can help them along in between bleach blasts.

So, all in all, there is a LOT a girl can do at the RV dump station. We find we are both much happier about the whole process when we each have a set of tasks to do when we get there that are not only similarly grungy but are equally important and that take place in different parts of the RV.

The best part is that when we leave the RV dump station to go set up camp in a new, beautiful location, not only do we have empty waste water tanks but our bathroom is clean and fresh too.

Happy cleaning!!

Subscribe
Never miss a post — it’s free!

Goodies I use for my jobs at the RV Dump Station:

More RV tips and Tricks:

Our most recent posts:

More of our Latest Posts are in the MENU.
New to this site? Visit RVers Start Here to find where we keep all the good stuff!!