July 2018 – We have been floating around northern Wyoming and the Black Hills of South Dakota for the past few weeks, an area that is prone to wild hail storms. The other day, while we were away from the trailer in town, a horrific hail storm came through our campsite and wreaked havoc on our RV roof.

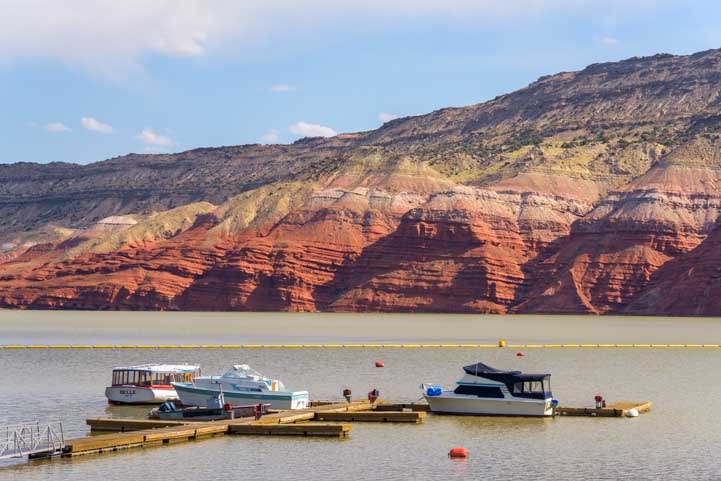
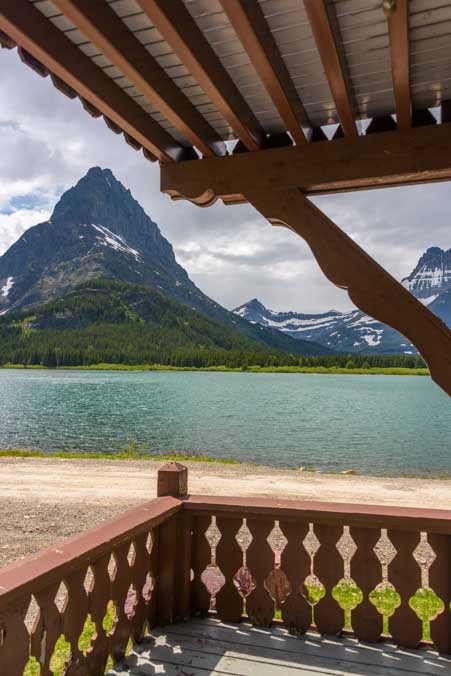
Will these gathering storm clouds dump hail on us?
We didn’t know this was happening while we were gallivanting around town, sipping lattes, running errands and chatting with the locals. It was nice there!
But we got a hint about what had happened (that we didn’t understand at first) as we drove back to our campsite when we saw a fifth wheel trailer going by us on the highway with a wildly flapping tarp strapped down over its roof.
When we got back to our trailer we noticed some large clumps of ice in the grass and began to wonder.

At least half an hour or more after the storm ended, big chunks of hail were still on the ground.
We’ve been through hail storms before, most notably at Bryce Canyon and at Cedar Breaks National Monument, but the hail has always been about the size of a pea. Even at that, the thunderous sound on the trailer roof is astonishing.
But this time, considering the storm must have ended at least 30 minutes or even an hour or more before we got back to the trailer (the ground wasn’t very wet), these ice chunks were still pretty big despite melting fast. Suddenly it hit us, “Uh oh. Are the solar panels okay?” Mark quickly climbed up on the roof to find out.
As he yelled, “Oh, WOW!” from the rooftop I noticed that another storm was darkening the sky and was on its way.
Mark surveys the hail damage on our roof while another storm threatens…
Luckily, there was no damage to our solar panels. However, the hail storm had smashed two of our RV roof vents!
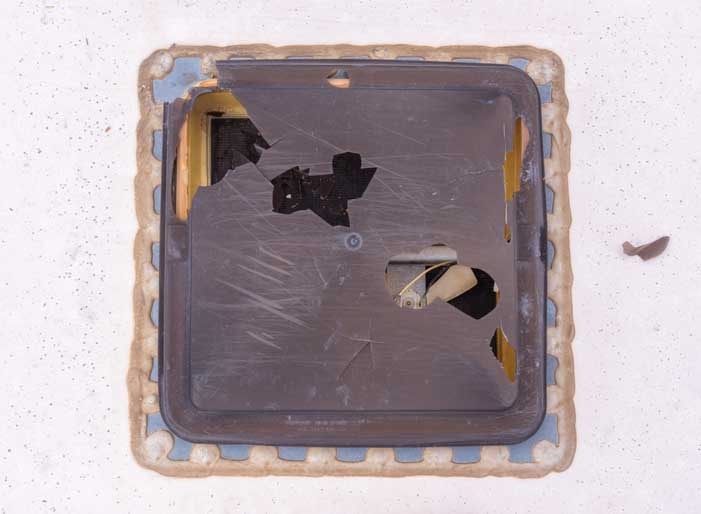
These were basic RV roof vents with small 12 volt fans, one located in the toilet room and one in the shower stall, and the damage to each one was severe.
Yikes!

And more yikes!
Not only were the RV roof vent dome lids broken in multiple places but the fan blades above the screens had been broken off too!
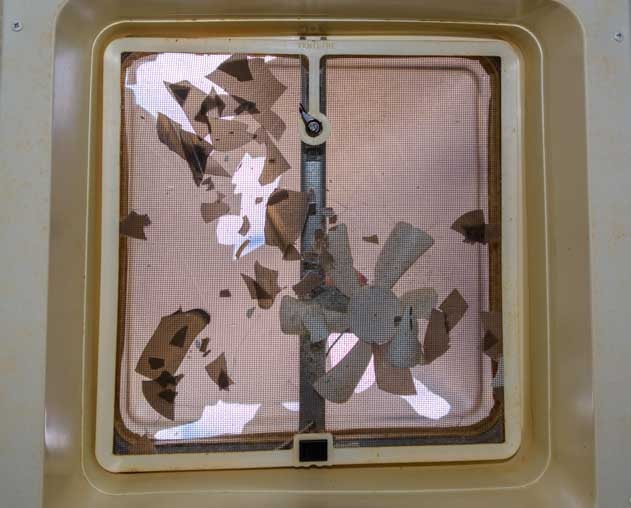
Not only did the lid get broken but some 12 volt fan blades broke too!

The other vent fared no better!
Interestingly, our two Fantastic Fan RV roof vents were still 100% intact and sustained no damage. That’s an especially good thing because they are over our bed and over our recliners which would have all gotten soaked.
We had little time to puzzle over it all because another storm was on its way and would be dumping either rain or hail or both on us again momentarily. If we didn’t fix the vents in the next 10 minutes or so, our shower and toilet room would get drenched inside once again. That wouldn’t be a disaster, but who would want to sop up the mess twice?
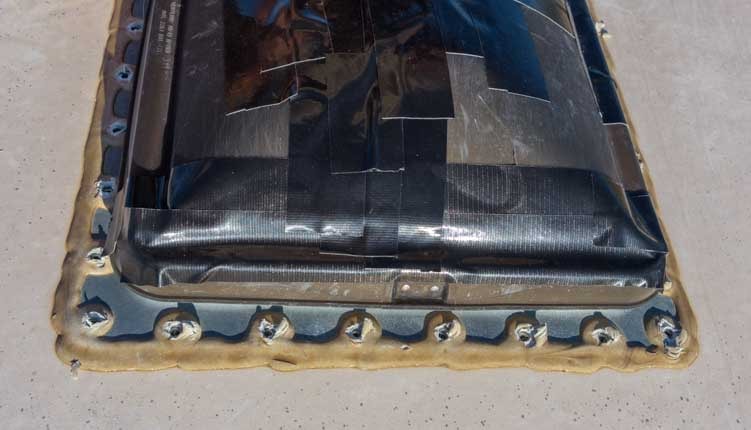
Mark surveyed the damage and decided the best way to fix the RV roof vents for the short term — until we could get some replacement RV roof vents — was to tape them up with Gorilla tape.

A quickie repair job with Gorilla Tape was enough to withstand a few more violent storms!
The storm arrived with a vengeance and we were pelted with rain. Then another two storms passed over us in the next 12 hours. Not much hail fell, but one storm pounded us with a deluge of rain for over two hours.

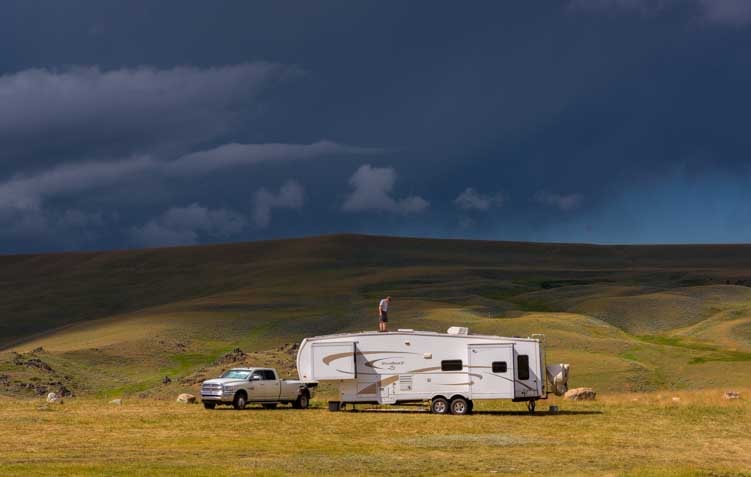
As I clicked the shutter on this eerie landscape I saw a flash of lightning through the view finder. What luck!
Gorilla tape is amazing stuff, and not one drop of water leaked through the broken roof vents in all that rain. So, if you’re ever in a bind like this, it doesn’t hurt to have a roll of Gorilla Tape on hand!
Insurance? Warranty??
We debated whether to file an insurance claim, but the cost of this repair would barely meet our deductible. We also debated whether to try using our RV extended warranty since it had worked so well for us in the past when we needed some truly major equipment replacements (axle, fridge, suspension, toilet and plumbing). But warranties cover system failures, not accidents or acts of God (like hail).
So, this would be a DIY job without any outside financial assistance.
The next day we picked up two replacement RV roof vents (Ventline V2094 units by Dexter) at a local RV dealership and parts store. We didn’t get there until the afternoon, and we were amazed to find that there had been a run on RV roof vents that morning. They had just one left. The other had to be brought in from a partner store in the next town!
We also picked up a bunch of tubes of Dicor Lap Sealant, and then Mark got out the tools needed for the job and went to work.
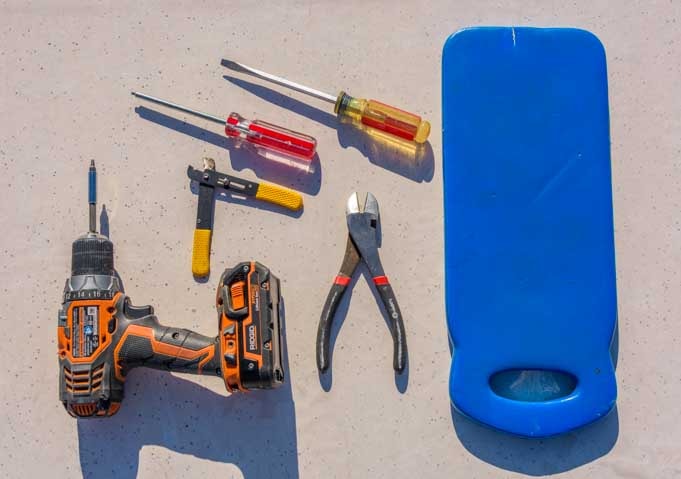
Tools for the job: Screwdrivers, drill, wire cutters and a knee pad. Not shown: a caulk gun.
First, he used a flathead screwdriver to get the old Dicor Lap Sealant off of all the screw heads holding the damaged roof vent to the roof of the trailer.

First, scrape off the old Dicor Lap Sealant to reveal the screw heads.
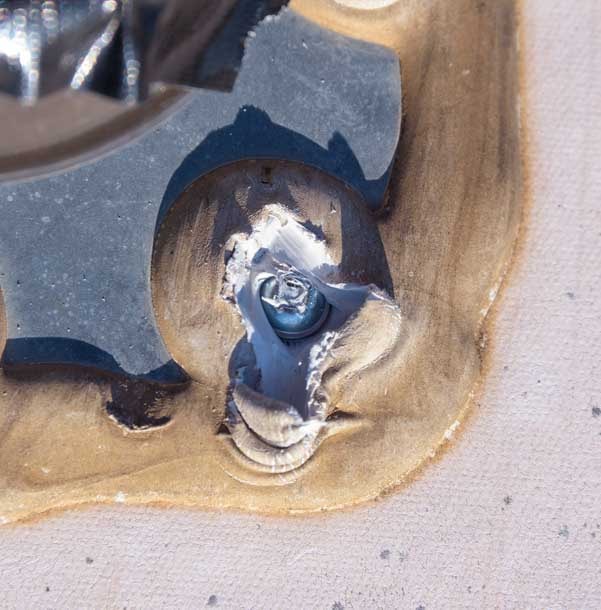
All the screws are #2 square heads.
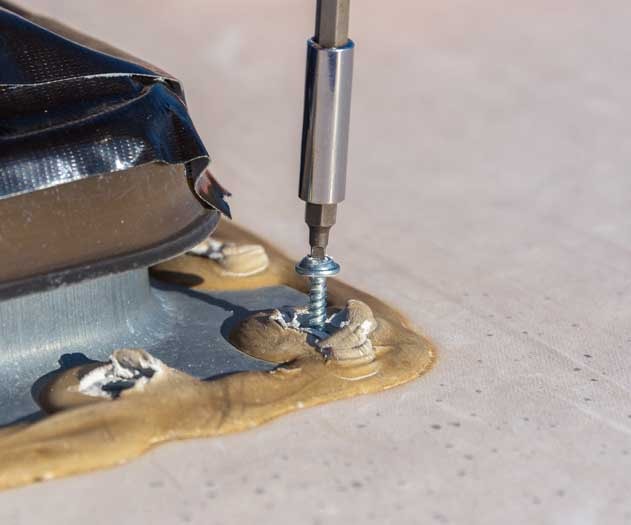
Unscrew the screws using a #2 square drill bit in a cordless drill.
Then he used a #2 square bit in our Rigid cordless drill to unscrew all the screws.
All the screws have been removed.
Then he used the flathead screwdriver to remove the Dicor Lap Sealant from the top of the RV roof vent flange.

Scrape the Dicor Lap Sealant off the flange so the RV roof vent can be removed.

The old RV roof vent was now ready to be pulled off of the roof all together. However, the wires for its 12 volt fan were still attached, so he clipped those off with diagonal cutting pliers.
The old RV roof vent is ready to be removed except for the 12 volt fan wires.

.

Cut the wires leaving plenty of wire remaining for the new RV roof installation.
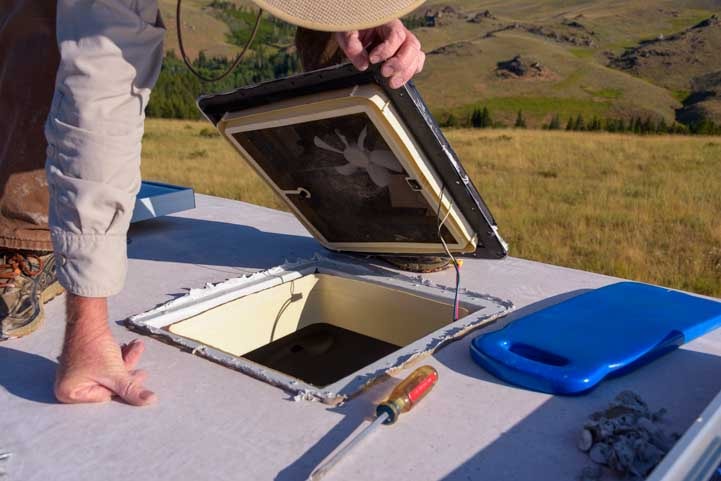
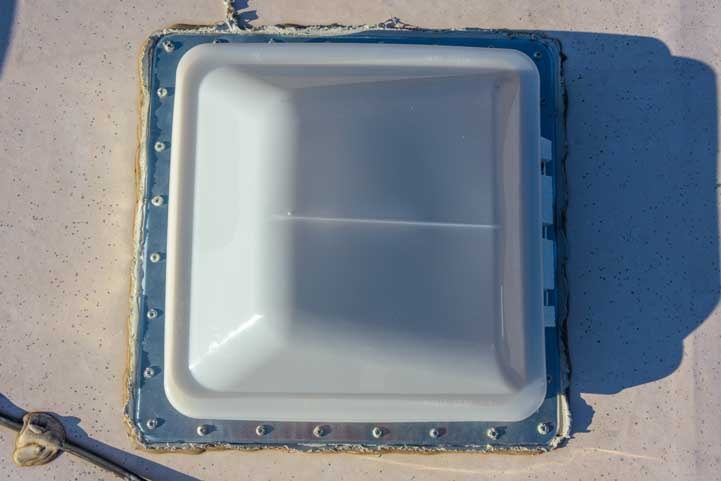
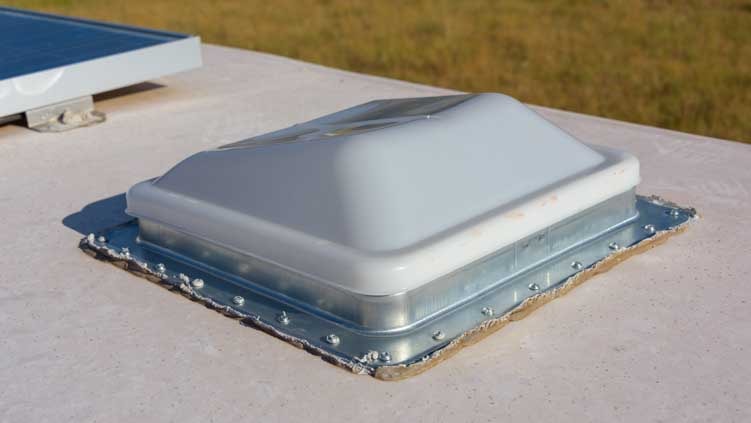
At last the old RV roof vent was completely removed leaving just the gaping hole into our shower stall below.

Ready for the new RV roof vent.
The next step was to prep the new RV roof vent for installation. Mark unrolled some putty tape, which is sticky on both sides, and pressed it onto the bottom side of the flange of the new RV roof vent. Then he cut it to the proper length and peeled off the protective strip to expose the sticky part.

Place strips of putty tape on the bottom side of the flanges on the roof vent. This is double sided sticky tape.

Cut the tape.

Remove the protective strip to expose the sticky side of the putty tape.
At the end there was a tiny gap in one corner. He rolled a small bit of the putty tape into a ball and pressed it into the gap.

If you end up with a gap, ball up a little putty tape and press it in the gap.

.
One of the interesting things about these RV roof vents is that the lids are flexible. Our old ones were heavily scraped from going under low hanging branches (as you can see in the first pictures of the broken vents near the top of this article), and they are designed to flex when something presses on them.
We didn’t want to demonstrate this with the new RV roof vents, but Mark pushed his shoe into the old vent so you could see. Obviously, the lid is weakened by the taped up holes, but it still has huge amount of flex to it.

The dome lids on these RV roof vents are very flexible which helps when you hit low hanging branches.
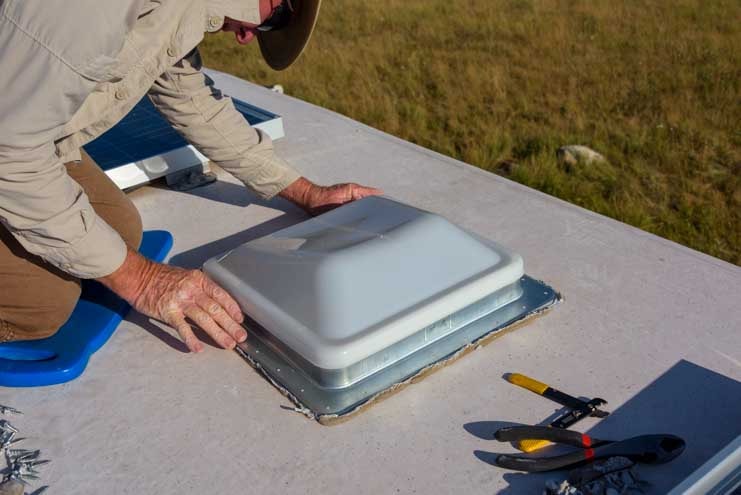
The next task was to get the RV roof vent installed on our trailer roof. We often pass things up to and down from the roof via the slide-out next to our front steps. This is much easier than climbing the ladder with one hand while holding something in the other.
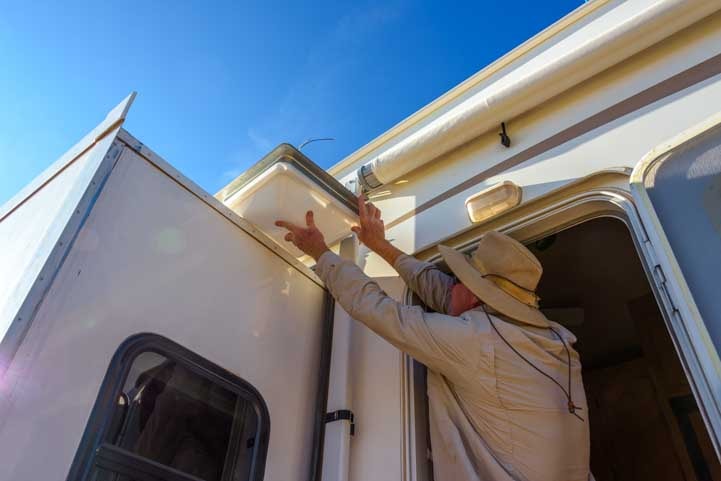
The new RV roof vent goes up on the roof.
The Ventline RV roof vents had embossed labels showing how to orient them on the roof. The idea is to install the RV roof vent so it opens to the rear of the RV. That way, if you accidentally leave it open and drive off, the hinges won’t be fighting 65 mph winds on the highway that could rip the lid off.

Be sure to orient the RV roof vent so it opens towards the back of the rig.
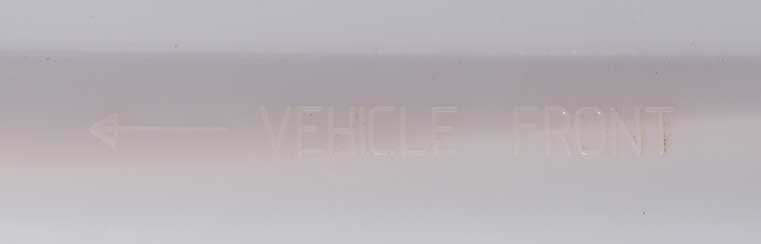
It says “Vehicle Front” with an arrow. You may need to feel around to find the lettering!
The new RV roof vent is in position.
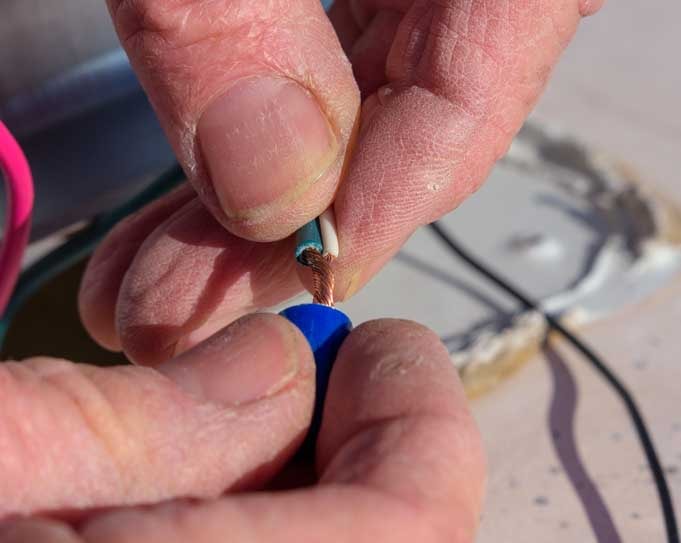
Before securing the RV roof vent in place, Mark wired up the 12 volt fan. First he made a note of which color pairs had been wired together before and then cut off the crimp-on barrel connectors from each pair of wires. Then he used wire strippers to strip off a little bit of the outer casing of each wire to reveal the copper strands inside. Some errant strands were sticking out of the group so he he twisted all the copper strands together.

Note how the fan is wired, remove the existing barrel connectors and strip the casing from the wires.

Twist all the strands so no stray ones stick out.
After doing this to all four wires he twisted the two pairs of wires together and screwed on new wire nuts.
Twist the pairs of wires together and screw on the wire nut.
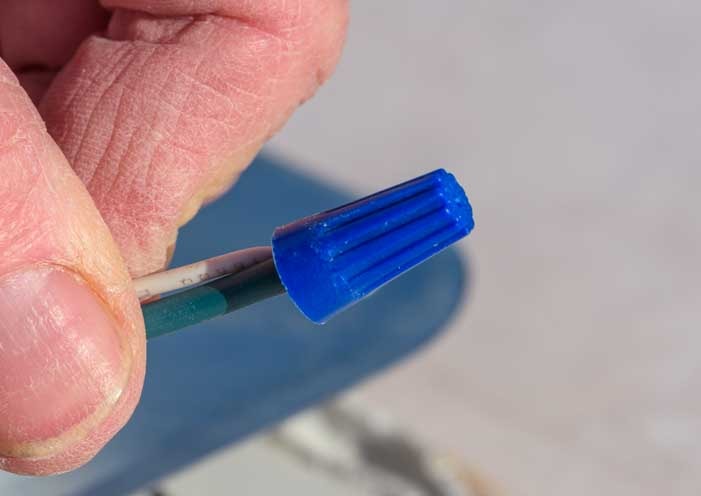
The last squeeze.
At this point he turned on the 12 volt fan just to be sure that it not only was wired correctly but also rotated in the right direction to exhaust air out of the RV. If he’d reversed the pairs of wires by accident, the fan would have run backwards, forcing air into the RV instead of exhausting it out.

Test the fan to be sure it turns on and spins in the right direction.
Then he tucked the wires in and closed the lid so he could screw it onto the RV roof.
Then tuck the wires in and position the RV roof vent so the screw holes line up.
Using the #2 square bit on his cordless drill, he screwed down the four corner screws first.

Screw in the four corners first.
Then, to ensure the RV roof vent would seal evenly on all sides, he placed all the screws in their positions around the edges of the vent and screwed them in using a star pattern in the same way that lug nuts get tightened when changing a tire.

After placing all the screws in the holes, use a star pattern to screw them in evenly.

Done.
The next task was to cover all the screws with a thick layer of Dicor Lap Sealant. Mark had tackled this project in the early morning so he wouldn’t have to sweat it out on the RV roof at midday, but this meant the Lap Sealant was still quite cold and wouldn’t flow well. So, he took a break and left the tubes of Lap Sealant out in the sun to warm up for a while.
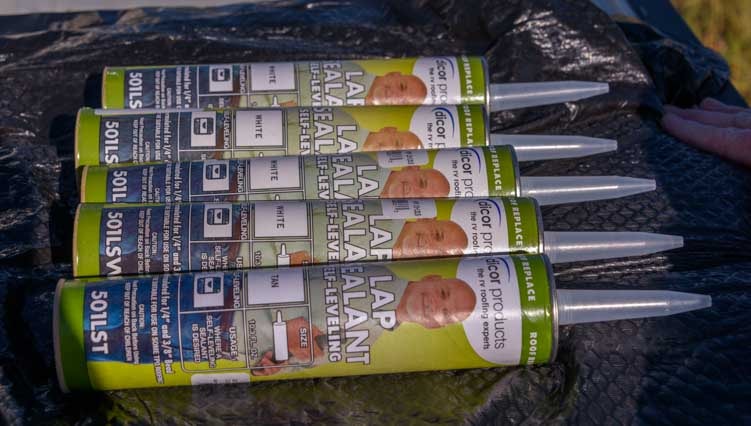
Dicor Lap Sealant has to flow, so make sure it is warm enough that it will flow smoothly.
When the Lap Sealant was finally warm enough to flow, he clipped off the end of a Dicor Lap Sealant tube and set it in his caulk gun. He wryly joked with me that if you don’t invest in a quality caulk gun at the outset, you’ll keep throwing them out until you do!

Cut the end off the Lap Sealant tube and place it in the caulk gun.
Then he flowed the Lap Sealant along the edges of the RV roof vent flange, flowing a little over each screw head as he went. It took almost two tubes of Dicor Lap Sealant per RV roof vent.
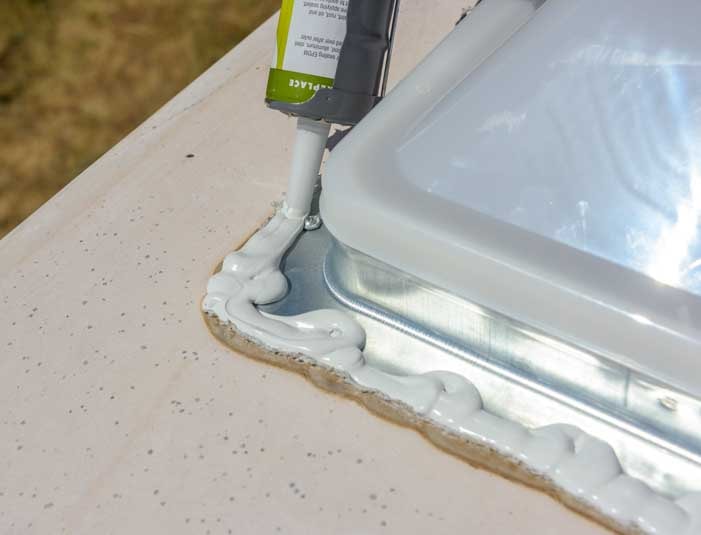
Flow the Lap Sealant along the flange and over each screw head.
And Ta Da — he was finished!
This installation project took about 45 minutes per roof vent.

Done.
Our old RV roof vents had been installed at the NuWa factory in 2007 when our trailer was built, and they had worked flawlessly right up until this hail storm in 2018.
We were intrigued to discover that the old RV roof vents had been tinted a dark shade. The new ones were pure white, and what a difference that made inside! The first time I used the toilet room I opened the door and wondered why the light was on because it was so bright!
These lighter colored RV roof vents may let in a lot more heat, but vent insulators can help with that on the hottest days.
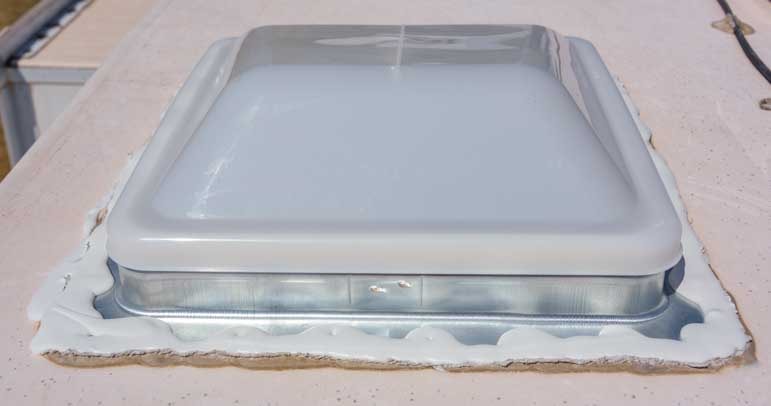
One RV roof vent finished and one to go. After that, time for a beer!
Mark did some other RV roof repairs while he was up there, but I’ll save those projects for a future article!

Subscribe
Never miss a post — it’s free!
Goodies we used for this job are available at these links:
- Gorilla Tape
- RV roof vent with a 12 volt fan
- Putty Tape
- Flat head screw driver
- #2 square head screwdriver
- #2 square head drill bit
- Rigid cordless drill & impact driver kit with battery & radio – We got the kit and love the cordless drill, impact driver & radio too!
- Or Rigid cordless drill and rechargeable battery
- Diagonal cutting pliers
- Wire strippers or a fancier adjustable one
- Caulk gun
- Dicor Lap Sealant
- Kneeling pad
More RV “tech tips”
Index of RV Tech Tips Articles on this website
Index of RV Lifestype Tips Articles on this website
Popular RV tech articles:
- 5th Wheel Trailer Suspension Failure – Replaced with our RV Warranty!
- B&W Companion Hitch Performance in a Fifth Wheel Trailer Rollover Accident
- B&W Companion OEM Fifth Wheel Hitch Installation – Easy!
- Basic RV Tool Kit – Essential Tools & Supplies for Rvers
- CargoBuckle Retractable Ratchet Tie-Downs – SO EASY!
- Demco 21K Recon Fifth Wheel Hitch Review and Installation
- Dirty Little Secrets from the RV Dump Station – RV Dumping Tips + Composting Toilets
- Dodge Ram 3500 Dually Truck – Best RV Fifth Wheel Trailer Towing
- Edge Amp’d Throttle Booster Installation and Review
- Edge Engine Tuner => Max Truck Power!! (Escapees Mag Feature!)
- Edge Evolution CS Tuner Review – Peak Truck Performance!
- Goldline RV Cover – Winter protection for our new trailer!
- Hitch Tighteners – Anti-Rattle Hitch Clamps Stop the Creaks & Wiggles!
- Honda EU2200i Generator Review + Oil Change and Maintenance Tips
- How much inverter is enough?
- How To Change The Inner Rear Tire on a Dually Truck
- How to Defrost an RV Refrigerator in 20 Minutes!
- How to Fix a Car or Truck Key Fob in Minutes!
- How to Heat an RV in Cold Weather and Winter Snow Storms
- How to Install Starlink Gen 3 in an RV? Use the Speedmount!
- How to Put DEF (Diesel Exhaust Fluid) in a Truck & Which is Cheapest?
- How to Replace Electric Fifth Wheel Landing Legs – Easy DIY!
- How To STAY WARM in an RV – Survival Tips for Winter RVing!
- Is Forest River a Good RV? Well Built? Here’s Our Experience
- Is RV Solar Affordable? 3 Solar Power Solutions for RVs and Boats
- MORryde SRE 4000 Installation & Review – Smooth Trailer Towing
- One Ton Towing Machines and 75 Years of Trailer Life
- Photography – Cameras, Gear, Tips and Resources
- Pocket Flashlight Review – Lumintop EDC25 & Lumintop SD26 Flashlights
- Power Inverters – Exeltech’s Pure Sine Wave Excellence
- Quick Release Pull Pins for Fifth Wheel Landing Jacks – YES!
- Reese Goose Box Review: 20K Gen 3 TESTED + How to Hitch
- Repacking and Inspecting Fifth Wheel RV Wheel Bearings
- Repairing and Replacing RV Roof Vents After a Hail Storm!
- Royal Flush! – A Surprise RV Toilet Replacement…Under Warranty 🙂
- RV / Marine Battery Charging – Solar & Shore Power Combined!
- RV and Marine Battery Charging Basics
- RV Awning Installation and Repair – Replacing the Awning Fabric
- RV Converter, Inverter/Charger, and Alternator Battery Charging Systems
- RV Electrical System Overhaul – New Batteries, Inverter & Converter!
- RV Keyless Entry Door Lock Problems? Try this quick fix!
- RV Mountain Driving: How to drive your RV safely on mountain roads
- RV Plumbing Tips – Cleaning RV Faucets, Sink Drains & Shower Wands
- RV Screen Door Modifications & Upgrades
- RV Solar Panels – Flexible or Rigid? 12 or 24 volt? Mono or Poly? Yikes!
- RV Solar Power Made Simple
- RV Solar Upgrade with Renogy and Go Power – QUICK & CHEAP!
- RV Storage Tip – Making Space & Getting Organized in an RV
- RV Tips – Cleaning Tips for Washing your RV
- RV Tips and Tricks – Make RVing EASY and FUN!
- Solar Charge Controllers – Optimizing RV Battery Charging
- Toy Hauler Life – What’s It Like Living in a Toy Hauler?
- Trailer Suspension Nuts & Bolts – RV Blues on Rough Roads!
- Truck Camper Pros and Cons – The Good, The Bad and The Ugly!
- Wet Cell vs. AGM Batteries & Wiring Tips for Installation on an RV or Boat!
- What are the Most Important Features in a Full-time Fifth Wheel Trailer?!
- What’s A Girl To Do at the RV Dump Station?
Our most recent posts:
- Buckskin Mountain State Park – Fun on the Colorado River! 01/31/26
- How to Install Starlink Gen 3 in an RV? Use the Speedmount! 08/07/25
- Escape to Paradise – Rocky Mountain Magic! 08/01/25
- Is Forest River a Good RV? Well Built? Here’s Our Experience 06/20/25
- Sunset Crater Nat’l Monument – Lava & Camels at Bonito CG! 06/06/25
More of our Latest Posts are in the MENU.
New to this site?
Visit RVers Start Here to find where we keep all the good stuff. Also check out our COOL NEW GEAR STORE!! *** CLICK HERE *** to see it!