There are a lot of decisions to make when you install solar panels on an RV or boat. Some of the most basic are: what size solar panels to buy, whether to go with flexible solar panels or aluminum framed rigid panels, whether the solar cells should be monocrystalline or polycrystalline, and whether to install nominal 12 volt or 24 volt panels.
We have done several RV and marine solar panel installations, and we have used not only 12 volt and 24 volt panels of various sizes but we have also used both aluminum framed rigid solar panels and the newer semi-flexible solar panels. We have also worked with both monocrystalline and polycrystalline solar panels. This article outlines the pros and cons of the various types and sizes of solar panels and offers some things to think about when you are deciding which solar panels to buy for your RV or boat.

.
Our article RV Solar Power Made Simple explains how to determine the overall wattage for an RV solar power installation. In general, a weekend / vacation RV can get by with 200 watts or less while a full-time solar power system is best with 500 watts or more.
SOLAR PANEL SIZE and PLACEMENT
Once you decide on overall capacity for your solar panel array, the next thing to think about is solar panel placement and wiring. The panels should be a matched set of identical or nearly identical panels. If you have a lot of real estate on the RV roof, then you can get a few big panels. If you have a truck camper or your RV roof is cluttered with a lot of things on it already (hatches, vents, antennas, etc.), then you may need to go with smaller panels that can be squeezed in and around everything else.

Our fifth wheel trailer is powered by four 120 & 130 watt 12 volt rigid polycrystalline solar panels wired in series
WHAT VOLTAGE IS THAT SOLAR PANEL?
Solar panels are constructed internally with DC wiring, and they are sized to work on 12 or 24 volt circuits. So, they are commonly referred to as 12 or 24 volt solar panels. What’s confusing is that while the nominal voltage of a solar panel may be 12 or 24 volts, the open circuit voltage is higher. So, for a nominal 12 volt solar panel that is 100 watts, the open circuit voltage (“Voc“) will be 17 or 18 volts. Likewise, for a nominal 24 volt panel, the Voc will be 34 to 36 volts.
Also, smaller solar panels (both physically and in terms of watts) are typically nominal 12 volt panels while larger panels are typically 24 volts. Solar panels under about 150 watts in size are usually 12 volt panels. Solar panels over about 150 watts are usually 24 volt panels.

For nearly four years, we sailed our boat on Mexico’s coast relying on three 185 watt 24 volt
polycrystalline rigid solar panels, wired in parallel, for all our electrical needs.
Solar panels work best when they are a matched set. The electrical characteristics of all the solar panels in the array need to be very similar, preferably identical. When upgrading a solar power array this can make things complicated as you try to mix and match old small panels with new big ones.
One technique for upgrading is to wire two 12 volt solar panels in series to work on a 24 volt circuit. For instance, if you have two 100 watt 12 volt panels and you are buying a 200 watt 24 volt panel, you can wire the two 100 watt panels in series and then wire that pair in parallel with the new 200 watt solar panel.
This will work as long as the electrical characteristics of the pair of solar panels in series match the electrical characteristics of the single panel that is wired in parallel with them.
THE EFFECT OF SHADE ON SOLAR PANELS
Shade is the biggest enemy of any solar power installation. Unbelievable as it seems, a tiny bit of shade will effectively shut down a solar panel. The impact is dramatic: a few square inches of shade can drop a solar panels current production down from 8 amps to 2 amps. A few more square inches of shade can drop the current production to 0.
Before deciding on the size of the panels, it is worthwhile to take some time to study the various things that might cast shade across them once they are in place. A closed hatch may cause little shade, but when it is open on a hot day, depending on where the sun is in the sky, it might cast a big shadow across a nearby solar panel. Satellite dishes, air conditioners and even holding tank vents can cast sizable shadows as well.
We put a book in one corner of a 120 watt 12 volt panel and discovered that even though it was a small percentage of the surface area of the panel, that 8.5″ x 11″ book was enough to knock down the current production of a 120 watt solar panel by 80%. Rather than producing 7 amps, it produced a measly 1.4 amps. Egads!
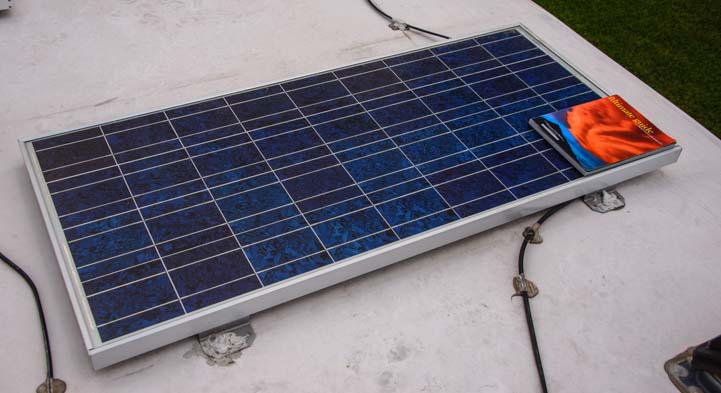
Just 8.5″ x 11″ of shade from this book reduced current production by 80%!
Similarly, shade wreaked havoc on our three185 watt 24 volt panels on our sailboat. The shade from our mast traveled across the panels as the boat swung at anchor, and the current production dropped by 1/3 and then by 2/3 as the shade first crossed one of the three panels and then straddled two of them. It did this over and over, with the current rising and falling repeatedly, as the boat slowly swung back and forth at anchor.
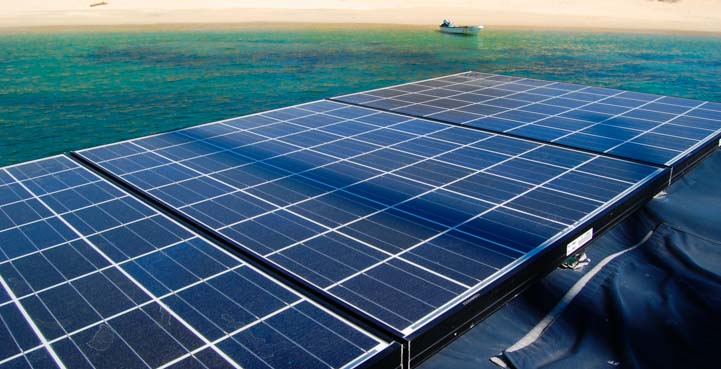
A line of shade from the mast on our sailboat reduced our solar panel array to 65% and then 35% of its capacity as it traveled across the panels and occasionally straddled two of them.
Shade is a huge concern in the solar power industry, and there are several white papers (here’e one) about the impact of shade on commercial solar panel installations. The gist is the importance of spacing the rows of commercial solar panel arrays in such a way that one row of panels doesn’t accidentally shade the bottom inch or so of the next row behind it when the sun is low in the sky.
If it does, the second row of panels shuts down. If there are rows and rows of solar panels spaced like this, none of the panels except the ones in the first row can function until the sun rises a little higher in the sky.
Solar panels are most sensitive to shade along the longest part of the panel, so in the case of our sailboat, when the sun was over our bow, the mast would shade the panels in a strip that had a maximum impact on current production (as you can see in the above photo)!
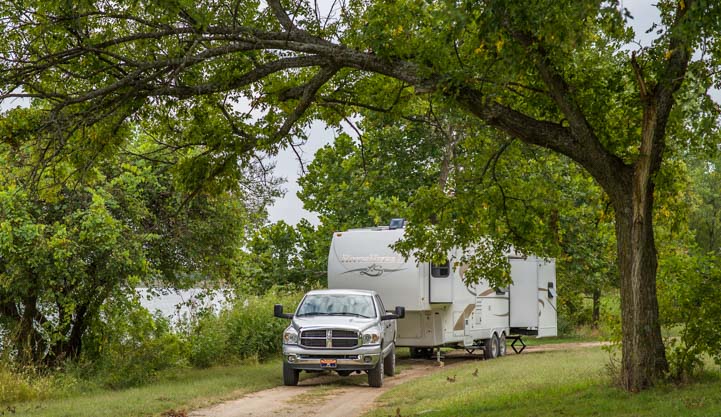
For RVers, besides rooftop obstructions, shade comes into play primarily if you park near a building or trees. Snowbirds boondocking in the southwest deserts of Arizona and California during the wintertime have little concern with shade from trees and buildings. But summertime RV travelers who boondock in wooded areas need to be cognizant of where the shade from the trees will fall during the course of the day.
WIRING SOLAR PANELS IN PARALLEL vs. IN SERIES
One of the big decisions for a solar power installation on an RV or boat is whether to wire the solar panels in series or in parallel. There are several things to consider when making this decision.
When the solar panels are wired in series, then the developed voltage across all the panels is additive while the current remains constant from panel to panel. That is, if there were four 120 watt 12 volt panels producing 7 amps each, then the developed voltage across all the panels would be 48 volts (12 x 4) while the current would be just 7 amps.
In contrast, when the solar panels are wired in parallel, then the voltage of the panels remains constant through the circuit while the current is additive from panel to panel. For instance, for those same four panels, the developed voltage across them would be 12 volts but the current would be 28 amps (7 x 4).
The solar charge controller takes care of balancing everything out by ensuring the circuit between it and the batteries is 12 volts. In the case of the above solar panels wired in series, the solar charge controller steps down the voltage from 48 volts to 12 volts (if they are 12 volt batteries). The current then increases from 7 amps to 28 amps in the wire run going between the solar charge controller and the batteries.
In the case of the above solar panels wired in parallel, the voltage is already 12 volts, so the solar charge controller does not need to step it down for the batteries.
SHADE EFFECTS on SOLAR PANELS WIRED IN SERIES vs. WIRED IN PARALLEL
When solar panels are wired in series, if shade hits one panel and shuts it down (caused by that solar panel’s internal circuitry building up a massive amount of resistance), then the entire string of solar panels shuts down. For instance, if a tree shaded 1/3 of one solar panel in the string of four panels given above, wired in series, the current production of the entire array of four panels would be reduced to to 0 amps, even though the three other solar panels were in full sun.
In contrast, if the panels are wired in parallel, when shade knocks one panel out, the other panels are unaffected. So, even if 1/3 of one solar panel were shaded, reducing it to 0 amps of current production, the other three would be working just fine. The total current production would be 3/4 of what it could be if that one panel were in full sun (in this case, 21 amps), rather than 0 amps.
So, it would seem that the best way to wire solar panels is in parallel.
Unfortunately, it’s not that easy, and here’s why:
CURRENT and WIRE SIZE in a SOLAR PANEL INSTALLATION
The more amps of current there are flowing in a circuit, the thicker the wire needs to be to ensure that no energy is lost to heat. Unfortunately, thicker, heavier gauge wire is a pain to work with. It’s stiff and doesn’t bend around corners easily. It is hard to tighten down in the solar charge controller connections and it’s hard to crimp ring terminals onto. It is also more expensive per foot.
So, when the solar panels are wired in series, a thinner gauge wire can be used for a given distance than when they are wired in parallel.
Of course, the thickness of the wire is also dependent on the length of the wire. The longer a wire is, the more energy is lost along its length. So, if you are installing the solar panels high on an arch off the aft end of a 50′ sailboat and the batteries are located at the bottom of the hull over the keel, the wire must be a lot heavier gauge than if you are installing the panels on an RV roof directly above the battery compartment.
What is the price difference in the cable? We like to use Ancor Marine Cable because it is tinned and it is very supple (the copper is fine stranded). Here are the price differences for 25′ of 2 gauge wire as compared to 25′ of 10 gauge wire.
Ultimately, there is a dilemma: Is it better to go for thinner, cheaper wire and an easier installation, and wire the panels in series, risking that the whole array will shut down whenever a corner of one panel is shaded by a nearby tree? Or is it better to pay the extra bucks for heavier gauge wire and endure a more challenging installation but have a system that will be more tolerant of partial shade?
What to do?
SOLAR PANEL VOLTAGE and WIRE SIZE
Luckily, there is another option: higher voltage solar panels can be wired with thinner gauge wire. Remember, Watts = Current x Voltage. So, for the same number of watts in a panel, a higher voltage panel will produce a smaller amount of current.
Rather than using four 120 watt 12 volt panels wired in parallel that would produce 28 amps at 12 volts, you can use two 240 watt 24 volt panels wired in parallel that produce 14 amps at 24 volts. The net effect on the battery bank will be the same, but the bigger panels can be wired with smaller gauge wire.
As mentioned above, the wiring that is most affected by these solar panel choices is the wiring that runs from the solar panels to the solar charge controller. The wiring from the solar charge controller to the batteries is the same in either configuration, as the same amount of current will be flowing in that wire regardless of how the solar panels are wired. In the case of solar panels wired in parallel, the voltage will be stepped down in the solar charge controller. So, in our example, the solar charge controller will step down the voltage from 48 volts to 12 volts, ensuring that the circuitry between the solar charge controller and the batteries is at operating at 12 volts.
CHOOSING THE OPTIMAL WIRE GAUGE
The thickness of the wire, or wire gauge, depends entirely on how long the wire is going to be. That is, the wire gauge is determined by how far apart the solar panels and the solar charge controller and the batteries are.
Why is this? The more current that flows in a wire, the more the conductor in the wire will warm up. The more it warms up, the more energy is lost to heat. Eventually, this becomes measurable as a voltage loss between the two end points.
When wiring solar power circuits, you can choose how much voltage loss you are willing to have. Somewhere between 2.5% and 5% is typically considered okay. There are voltage loss tables that will help you decide on the proper wire gauge size for the distance you are spanning between the solar panels and the solar charge controller and between there and the batteries. Here’s a good one:
AWG Voltage Loss Table
An Example: 480 watts of solar power located 27′ from the batteries
- Say we have four 120 watt 12 volt panels wired in series. If the distance is going to be 27′, then by looking at the third chart at the above link (the 12 volt chart) and going to the line for 8 amps flowing in the wire, it shows a wire run of up to 27′ can be done with 10 gauge wire.
- Now, imagine putting those same panels in parallel. 32 amps will flow at 12 volts. For that same 27′ distance you’ll need 2 gauge wire.
- Lastly, instead of using four 120 watt 12 volt panels, use two 240 watt 24 volt panels wired in parallel. For this you use the 2nd chart down (24 volt chart). There will be 16 amps flowing in the wire at 24 volts. You will be able use 8 gauge wire.
Of course, due to the nature of multi-stage battery charging and the changing position (and angle) of the sun in the sky, the solar panels will be operating at full tilt for a very short time each day. They may produce max current for 30 minutes near noon as they wrap up the Bulk Stage, however, as the Absorb stage takes over and continues in the afternoon, the solar charge controller will gradually hold the panels back so they produce far less than max current.
With less than peak current flowing in the wires, less energy will be lost to heat.
If this is confusing, see our articles:
RV and Marine Battery Charging Basics
How Solar Charge Controllers Work
So, although it may seem dire that you’re wiring is on the hairy edge size-wise, it is only that way for a little while each day. Depending on the overall size of the solar power array, the size of the battery bank, and the state of discharge when the batteries wake up in the morning, your system may not even hit the theoretical maximum current production or even come close.
MULTIPLE SOLAR CHARGE CONTROLLERS
Another method of keeping the wire size down is to install more than one big solar charge controller. For instance, you might install several smaller charge controllers for each pair of panels wired in series, or perhaps even one for each panel. Of course, this adds complexity and expense, and you will probably buy less sophisticated solar charge controllers that have fewer programming options than a single big one.
You must run more wires between the RV roof and the location in the coach where the solar charge controllers are installed (preferably next to the batteries), and so you must not only pay for additional solar charge controllers, but you must buy more wire and install it all. However, this design option does deserve mention and consideration.
TILTING THE SOLAR PANELS
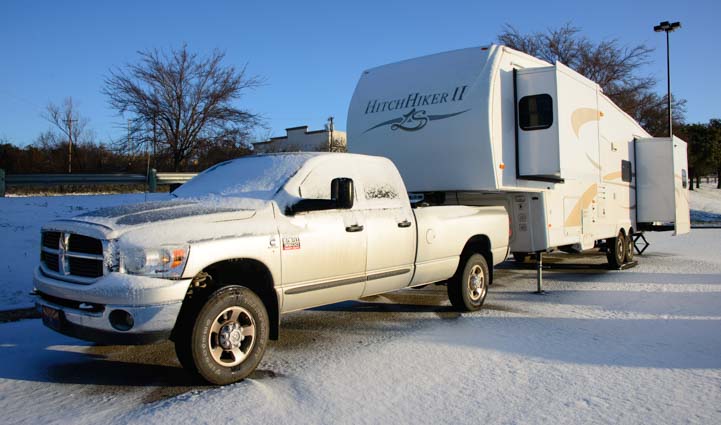
Solar panels perform a whole lot better in the summer than in the winter. This is because the sun rides much higher in the sky and its rays hit the panels at a nearly perpendicular angle in the summertime. The days are also a whole lot longer. In the winter, the sun’s rays hit the panels at an angle and the sun is only out for a short while.
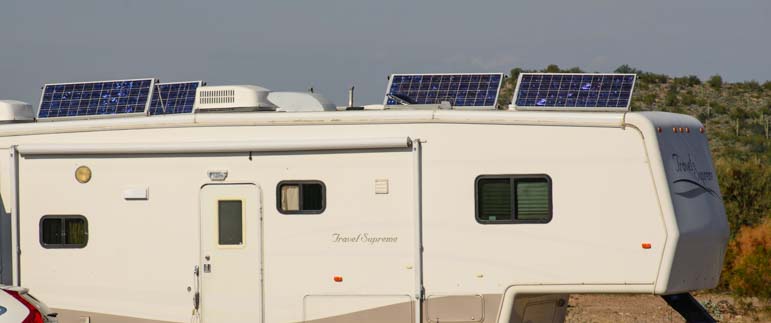
Tilting solar panels in winter can improve current production by 30%
Or…install more panels and save yourself from climbing up and down the RV ladder!
To get around this, rather than using ordinary Z-brackets to mount their solar panels on the roof, many RVers use tilting brackets. By tilting the panels towards the sun at about a 45 degree angle (technically, at the angle of your latitude), then the sun’s rays hit the panels at a nice 90 degree angle if they are oriented to face south. This can increase the overall power production by about 30% on a sunny winter day.
The only problem is that you have to climb up on the roof to tilt the panels each time you set up camp and then climb up again later to lay them flat when you are packing up before you drive away. We’ve seen many a winter snowbird driving their RV around with the solar panels still raised.
An alternative is simply to install more solar panels and to keep them lying flat all the time. This is easy for a big RV that has a huge roof but is not so easy for a little trailer with a small roof. We have not installed tilting brackets on our trailers.
MONOCRYSTALLINE vs. POLYCRYSTALLINE SOLAR CELLS
Monocrystalline
solar panel
There are lots of different kinds of solar panels on the market today. There are two primary types of solar cells used in the manufacture of solar panels: monocrystalline and polycrystalline.
Monocrystalline solar panels are more efficient and more expensive, but they are also extremely intolerant of shade. Polycrystalline panels are slightly less efficient and less expensive, but they handle partial shade just a smidge better.
The way to tell if a solar panel is monocrystalline or polycrystalline is to look at the pattern of rectangles on the panel itself.
If the circuitry between the rectangles has large silver diamond shapes, it is monocrystalline. If the pattern of rectangles is just intersecting lines, it is polycrystalline.

Polycrystalline
solar panel
Examples of popular monocrystalline solar panels are here:
Examples of popular polycrystalline solar panels are here:
RIGID ALUMINUM FRAMED SOLAR PANELS vs. SEMI-FLEXIBLE SOLAR PANELS

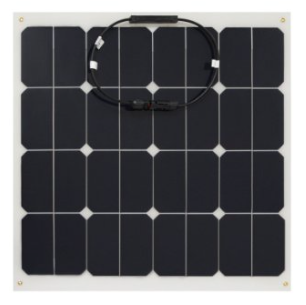
Flexible solar panel
Solar panels can also be rigid or flexible.
Rigid panels are built with an aluminum frame surrounding tempered glass that covers the solar cells.
Flexible solar panels are built with the solar collecting material impregnated into a thin mylar film that is affixed to an aluminum substrate.
Flexible solar panels are not flimsy, they are simply bendable up to about 30 degrees.
There are a number of manufacturers selling flexible solar panels:
FLEXIBLE SOLAR PANEL ADVANTAGES
Flexible solar panels have several advantages over rigid panels. They are a little lighter than framed solar panels and you can glue them onto an RV roof using Dicor Lap Sealant, or something similar. This saves you from the complexity of drilling holes into a perfectly watertight roof and risking creating leaks. This is especially helpful with a fiberglass roof. It takes just a few minutes with a caulk gun to attach these panels to the RV roof.
Another nice feature is that on a rounded roof, like an Airstream travel trailer or Casita travel trailer, the panels can bend to follow the contour of the roof.

Mark uses Dicor Lap Sealant to affix flexible solar panels to a friend’s fiberglass roof.
One of the most important things for solar panels to work well is heat dissipation. Rigid aluminum framed solar panels stand up off the roof of the RV by about an inch, allowing air to flow underneath and for heat to dissipate. Air can’t flow underneath flexible solar panels. The aluminum substrate serves to dissipate the heat instead. This may or may not be as efficient a method of heat dissipation, and I have heard of a case where all the flexible solar panels on a sailboat had to be replaced after two years because they did not dissipate the heat sufficiently in the tropics and the panels self-destructed.
FLEXIBLE SOLAR PANEL CONSTRUCTION and INSTALLATION
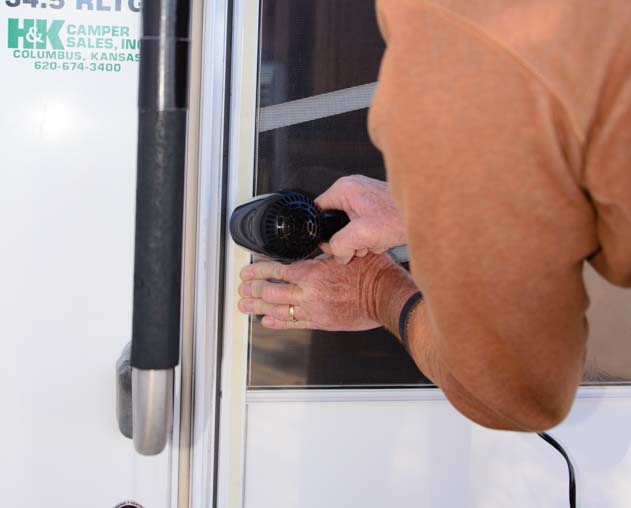
Our RVing friends Dick & Katie asked us to install six 100 watt 12 volt flexible solar panels made by Eco-Worthy on the roof of their motorhome, along with all the other projects involved in an RV solar power installation. Ironically, the hardest part of the entire installation was removing the plastic protection from the aluminum substrate of each panel (it kept ripping!). We all ended up working on this together.

We had a tough time getting the plastic off the back of the Eco-Worthy flexible solar panels
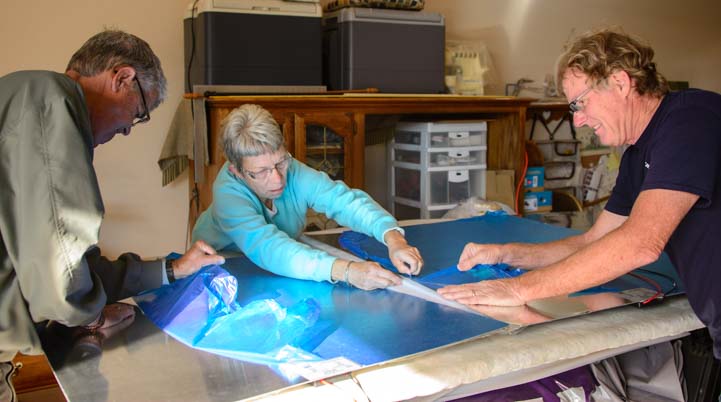
With all of us working together, we got the job done!
Once we got up on the roof, and got past a cute warning from Winnebego, the installation was straight forward.
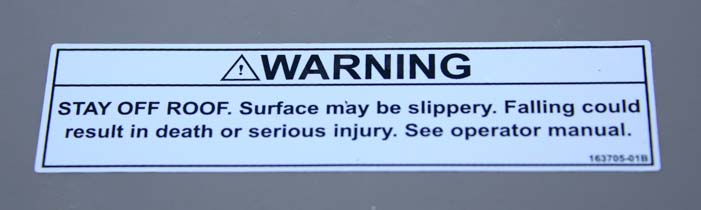
Hmmm…I wonder what sage advice the manual suggests for this problem?
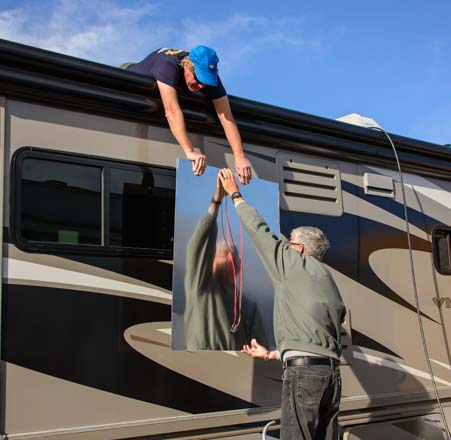
Flexible solar panels are lighter than their rigid counterparts
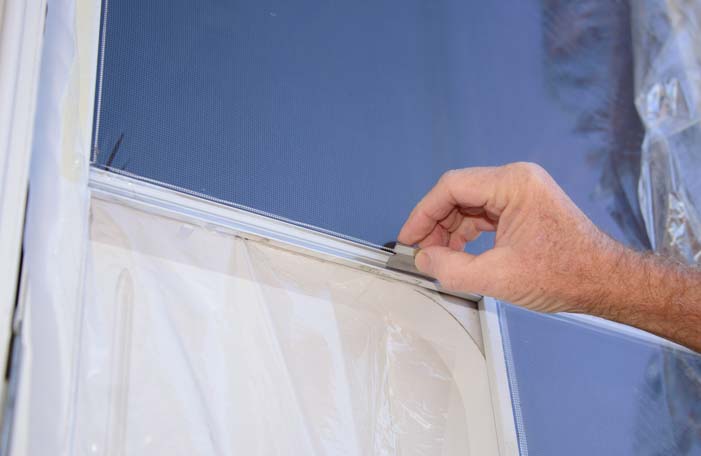
The plastic protection needed to be removed from the face of the panels as well. Interestingly, at one point Mark found himself picking at the corner of the mylar that has the solar collection circuitry embedded in it and almost began to peel that whole layer off the aluminum substrate! But once he got a hold of just the most superficial layer of plastic, it came off easily.
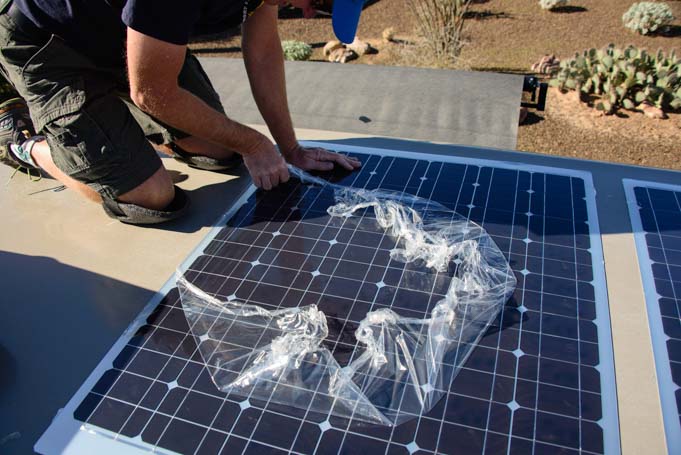
Mark removes the plastic from the face of the flexible solar panels
He used Dicor Lap Sealant to tack down the corners of the panels and then ran a bead around each side of each panel.
FLEXIBLE SOLAR PANEL DISADVANTAGES
Flexible solar panels are less efficient than rigid aluminum framed solar panels, which means you may want to get a few more total watts of solar panels than you would if you were buying framed panels. Bendable panels also can’t be installed on tilting brackets. So, again, buying more total watts may be the best solution.
Flexible solar panels are not as rugged as rigid aluminum framed solar panels built with tempered glass. Overhanging branches can scratch them. This is important for anyone that will be boondocking or dry camping a lot on public lands and in rustic public campgrounds, as it is often impossible to get in or out of a site without ducking under some low lying tree branches.
Some RVers have found that flexible solar panels installed on flat motorhome roofs tend to pool water when it rains. This can lead to debris building up and taking root and damaging the panels.
Perhaps for all these reasons, flexible solar panels are sold with a much shorter warranty than rigid solar panels. Whereas many solar panel manufacturers warranty their tempered glass aluminum framed rigid solar panels for 25 or 30 years, bendable solar panel manufacturers generally warranty their panels for 5 years or less.
This may or may not be relevant for RVers, as the fine print in almost every solar panel manufacturer’s warranty states that their solar panels are not warrantied for use on mobile vehicles.
Also, there has been a huge problem across the entire solar power industry with rigid solar panels failing prematurely in large numbers in big commercial installations (see a May 2013 NY Times article here). Apparently, just because those lovely rigid solar panels are warrantied for decades doesn’t mean they will last that long. We have already had a failure of one of our framed solar panels that was warrantied for 25 years, and we discovered the manufacturer’s warranty did not apply to RV installations.
However, as a general rule, when manufacturers warranty a product for 5 years versus 30 years, it says something about how they think their product will hold up over time.
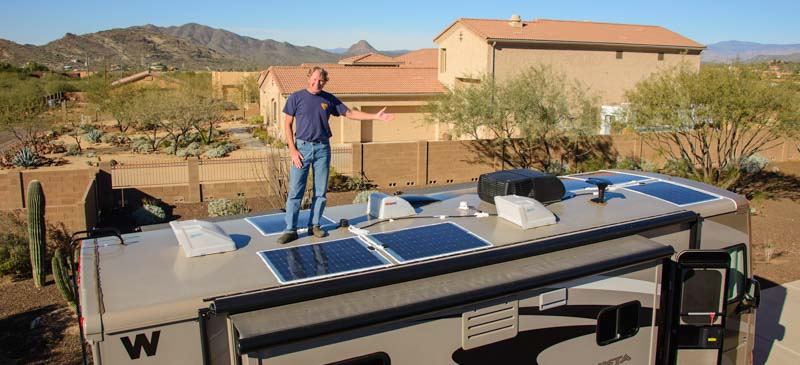
Nice job! (but don’t fall off that roof!)
CONCLUSION
There are many ways to go about installing solar power on an RV roof, and the solar panels that work best in one installation may not be the same as those that are best for another. Not only is every RV roof different, but every RVer’s needs are different.
If you have loads of space on a big motorhome roof or fifth wheel trailer roof, and you are setting it up for full-time use, you may be best off with three or four 200+ watt 24 volt rigid solar panels wired in parallel. If you have a little tear drop camper you use on weekends and store in the garage, a single flexible 100 watt 12 volt panel may be just the ticket for you.
Subscribe
Never miss a post — it’s free!
Related articles about Solar Power on RVs and Boats:
Related articles about Batteries and Battery Charging:
Our most recent posts:
More of our Latest Posts are in the top MENU above.
RVers Jason and Nikki Wynn have written about the condition of their flexible solar panels after a year of use HERE