Repacking and Inspecting Fifth Wheel RV Wheel Bearings

Repacking the wheel bearings is an important annual maintenance task for a fifth wheel trailer, especially one that is lived in full-time like ours. This is also a good time to inspect the bearings and brakes.

The first step is to jack up the trailer and remove the wheels.

Remove wheel from fifth wheel to grease wheel bearings-min

After jacking up the trailer, remove the wheels.

A few years ago we did a disk brake conversion on our fifth wheel trailer, upgrading from the factory installed electric drum brakes to electric over hydraulic disk brakes (you can read the details about what was involved in doing this phenomenal and highly recommended upgrade here). So, behind each of our wheels is the disk brake rotor and brake caliper.

Disc and rotor on fifth wheel trailer-min

Inspect the rotor and disc brake pads.

The first step for repacking the wheel bearings was to remove the brake caliper and inspect the brake pads and check out the braking surface on the rotor. All looked good. Then the brake caliper was moved out of the way.

Next, the grease cap and cotter pin were removed. Then the castle nut holding the bearings and the disk rotor in place was unscrewed. Gently pulling the rotor out about an inch and then pushing it back in released the outer bearing so it could be removed. Then the rotor was pulled off the axle spindle which revealed the inner bearing, allowing it to be slid off the axle spindle.

Remove castle nut and cotter pin from fifth wheel trailer hug to grease wheel bearings-min

Remove the cotter pin and castle nut, then the inner and outer wheel bearings and then pull the rotor off the axle spindle.

Greasy spindle on fifth wheel trailer axle-min

The axle spindle is full of grease.

Using shop towels, the grease was wiped off the axle spindle.

Clean spindle on fifth wheel trailer axle-min

Wipe the old grease off the axle spindle.

The inner and outer bearings, D-shaped spindle washer, castle nut and grease cap were then wiped clean of grease.

Inner and outer bearings fifth wheel trailer hub grease wheel bearings-min

Wipe off and inspect the outer and inner bearings, the D-shaped spindle washer, the castle nut and the grease cap.

It turned out that one of our wheel bearings was slightly scored, showing early signs of wear. We decided to replace it. Wheel bearings come in a bearing and race assembly, so the race would be replaced too.

Finding worn parts before they become a problem is one of the reasons that greasing the wheel bearings is an important annual task. Even if a trailer has EZ-Lube bearings, it is still important to remove the bearings periodically to inspect them so they can be replaced before they fail on the road.

Trailer wheel bearing damaged with scoring marks-min

One of our wheel bearings showed signs of wear — light scoring marks on each bearing.

First, the grease needed to be removed from the inside of the hub. It was scraped out and then wiped out with a shop towel.

Remove old grease from fifth wheel trailer disc brake hub-min

Remove the old grease from the rotor.

Greasing wheel bearings on fifth wheel trailer remove old grease-min

After scraping the grease out, wipe the area down with a shop cloth.

Remove old grease from fifth wheel trailer disc brake hub-min

Grease removed.

Then the old race was knocked out with a mallet and the new race was set in place.

Knock out the old bearing race.

Knock out the old bearing race.

Put new wheel bearings into fifth wheel trailer disk brake hub-min

Set the new race in place.

The race was lightly tapped in place to make sure it was square. Then, using a race setter, the race was tapped securely into place.

Tap in the wheel bearings into fifth wheel trailer disk brake hub-min

Tap in the new race.

Press new wheel bearings into fifth wheel trailer disk brake hub-min

.

Next, the rotor with the greased inner bearing was mounted back on the spindle.

Place fifth wheel disk brake hub back onto axle spindle

Place the rotor back on the axle spindle.

Put new grease around wheel bearings on fifth wheel trailer disk brake hub

Newly greased bearings and spindle.

Then the castle nut was screwed on and hand-tightened.

Place greased castle nut in fifth wheel trailer disk brake rotor hub-min

Hand-tighten the castle nut.

Adjust greased castle nut in fifth wheel trailer disk brake rotor hub-min

Adjust the castle nut.

A new cotter pin was put in place and bent over to hold everything securely.

Place cotter pin in greased fifth wheel trailer disk brake rotor hub-min

Put a new cotter pin in place and bend it over.

Then the grease cap was screwed back on.

Screw in grease cap on fifth wheel trailer disk brake hub-min

Screw in the grease cap.

Completed grease wheel bearing job on fifth wheel trailer disk brake hub-min

Presto. Three more wheels to go!

Subscribe
Never miss a post — it’s free!

Below are some of our most POPULAR POSTS (also in the MENUS above)

Buddy - A Journey in Spirit - The story of an event that changed our lives forever.

ARTICLE INDEXES
  • RV Tech Tips Articles - A one page index of links to all our RV Tech Tips, RV Upgrades & RV Maintenance articles.
  • RV Lifestyle Tip Articles - An index of links to all our RV Lifestyle Tips (finances, boondocking, major repairs, work/jobs, etc.)
  • Solar Power Articles - Overview and tutorial articles for how to design and install solar power on an RV or boat
  • Product Reviews - An index of links to all of our Product Reviews
RV UPGRADES, SYSTEMS & TIPS MONEY FULL-TIME RV LIFESTYLE GEAR STORE
  • Gear Store - A list of the goodies, equipment and gear we've found useful in our RV lifestyle!
 

Our most recent posts:

More of our Latest Posts are in the MENU.   New to this site? Visit RVers Start Here to find where we keep all the good stuff. Also check out our COOL NEW GEAR STORE!! *** CLICK HERE *** to see it!

What are the Most Important Features in a Full-time Fifth Wheel Trailer?!

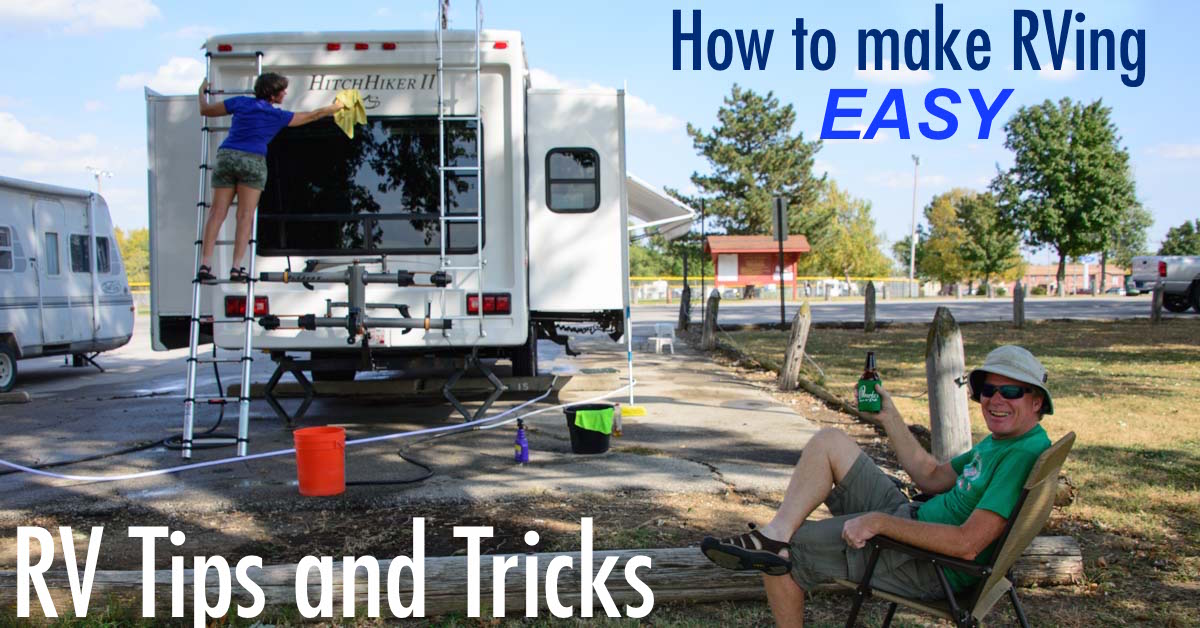
What features are most important in a fifth wheel trailer you’ll be living in full-time? That’s a big and interesting question, and Trailer Life Magazine recently assigned me the very fun task of surveying the fifth wheels on the market today and selecting twelve models that would make a good home on the road.

The results of my review are featured as the cover story of the October 2017 edition of Trailer Life Magazine.

Full-time Fifth Wheels Trailer Life Magazine October 2017

Trailer Life Magazine, October, 2017. Article by Emily Fagan

As I mentioned in my blog post about what to look for in a full-time RV, whether it’s a trailer or a motorhome, choosing a rolling home is an incredibly personal decision. There is no ideal rig for all RVers. The most important thing is that you walk inside, look around, and say, “Ahhh, this is home!”

But you’ve also gotta look at the nuts and bolts underneath the rig, and that’s what this blog post is about.

Whatever fifth wheel you buy, there is no need to break the bank. Obviously, higher quality trailers cost a lot more than lower quality trailers do, but life on the road is a thrill no matter what kind of rig you live in, and if you can’t afford the top of the line, you’ll still have just as much fun as those who can.

Also, sometimes going with a used trailer, especially at the outset, beats buying new. There are lots of used fifth wheels of all ages for sale all over the country.

A great resource for viewing a variety of rigs and comparing prices of specific models is RVTrader.com. Another excellent resource, especially for Canadians, is RVDealers.ca.

We have met a couple and a single fellow living full-time in older fifth wheel trailers that cost them less than $5,000. They were very happy with their rolling homes and were thrilled to have the freedom of a life on the road.

Likewise, we met a couple who had lived in a popup tent trailer for four years, a couple who had lived in a tiny half-ton pickup camper for two years and we met a young pair of mountain bikers who had just moved out of their tent home of the last 18 months and into a 17′ travel trailer a few weeks before we camped near them.

If you can’t afford the latest and greatest, it is still very possible to be a full-time RVer and live a champagne lifestyle on a beer budget!

However, my Trailer Life assignment was to look over the many brand new fifth wheels on the market, find twelve models that spoke to me, and highlight some of the things that I think are important when shopping for an RV that will be lived in 24/7/365.

You can read the article here: Full-timing Fifth Wheel Trailers in Trailer Life Magazine

For reference, we have pics and specs and a description of the fifth wheel trailer we live in at this link.

LEARN BY DOING

If you haven’t done much RVing yet and you are planning to move out of your current home and set off on a life of adventure on the road, the best way to figure out what features you need and want in your full-time fifth wheel is to get some practice RVing first.

I can’t state strongly enough the value of buying a cheap little RV and going and having some fun on weekends and vacations before jumping into the full-time RV lifestyle. This is especially true if you’ve got a year or more to go before you will actually start full-timing.

Nothing is better than hands-on experience, and you can use the little rig as a trade-in on your full-time RV. The minimal amount of depreciation is a great investment in your own personal education in the RV lifestyle! Here is a blog post about that.

So what DO you look for in an RV when you are replacing your sticks-and-bricks house? After all, the the most important factor is no longer Location, Location Location! Different folks look for different things, but here’s what we look for whenever we check out a new fifth wheel at a dealership (which we do frequently!).

Full-time Fifth Wheels Trailer Life Magazine October 2017-min

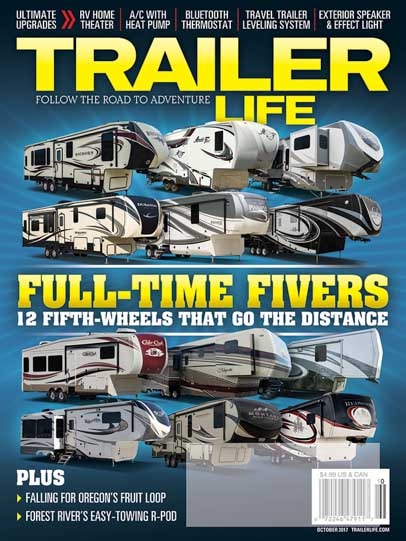
A survey of fifth wheels for full-timing by Emily Fagan
Trailer Life Magazine Cover – October 2017

CARGO CARRYING CAPACITY

The first thing we look at is the trailer’s Cargo Carrying Capacity. This is the amount of weight the trailer is designed to carry safely and legally. Trailer manufacturers are required to post a sticker on the exterior of the front end of the trailer on the driver’s side that indicates what the CCC is.

Surprisingly, there is a lot of confusion about exactly how the CCC is calculated and whether or not the fresh water or the propane in the tanks is considered cargo or part of the Unloaded Vehicle Weight (UVW). The official definition, according to certain RV standards groups and the National Highway Traffic Safety Administration is:

CCC = GVWR – (UVW + propane weight)

That is, the Cargo Carrying Capacity is the Gross Vehicle Weight Rating less the sum of the Unloaded Vehicle Weight and the propane weight.

However, it is much more common for manufacturers to calculate CCC as simply the GVWR less UVW and not count the propane weight as part of the equation. This is also known as the NCC (Net Carrying Capacity).

NCC = GVWR – UVW

The propane weight is only 40, 60 or 80 lbs, depending on whether the two propane tanks are 20 lb., 30 lb., or 40 lb. tanks, so it is not that important whether it is included in the calculation of CCC or not, and it is easy to see why the terms CCC and NCC are often confused and used interchangeably.

In addition to stating the CCC on a sticker on the trailer, the manufacturers are also required to have a sticker indicating how much the fresh water in the trailer weighs when the fresh water tanks are full. One gallon of water weighs about 8.35 lbs. or 3.785 kg.

Fresh water is officially considered to be cargo, so if the trailer is towed with its tanks full, then the CCC available for everything else (food, clothes, tools, barbecue, bikes etc.) is reduced by the weight of the fresh water weight as stated on the sticker.

Cyclone Toy Hauler Fifth Wheel RV cargo carrying capacity 2

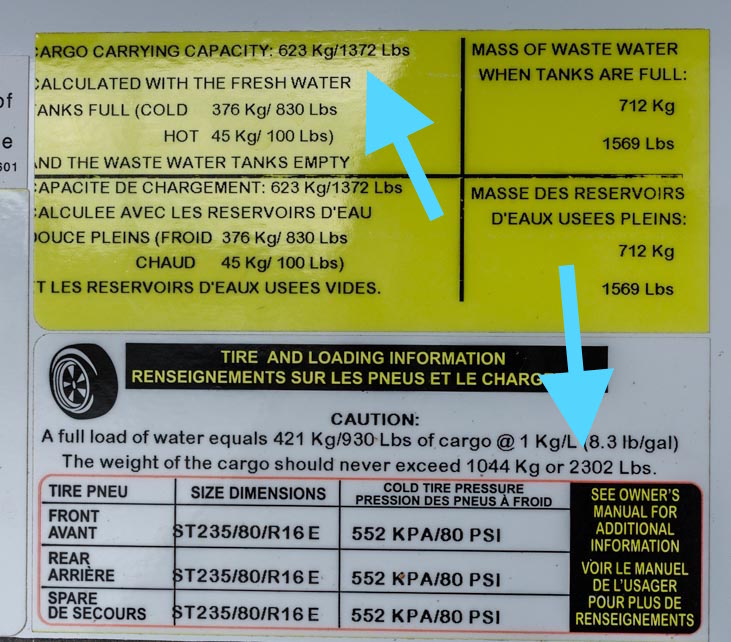
This detailed sticker shows the weight of the fresh water tanks when full (830 lbs in the fresh water tanks and 100 lbs in the hot water tank) PLUS it shows the weight of the Black and Gray waste tanks (1,569 lbs.) AND it shows the cargo carrying capacity of the trailer with water tanks both full (1,372 lbs) and empty (2,302 lbs).

If the trailer doesn’t have the official CCC stated on a sticker, it’s usually possible to find the GVWR and UVW values on a spec sheet and simply subtract UVW from GVWR. This simple calculation of GVWR – UVW is the easiest way to compare the carrying capacity from one trailer to the next, so that is what we like to go by when we are making a direct comparison.

So how much should the Cargo Carrying Capacity be for a fifth wheel trailer that’s used as a full-time home? In our experience, the nearly 3,500 lbs. of CCC on our trailer is barely enough. Because we boondock all the time, we travel with our fresh water tank and hot water tank full and our gray and black tanks empty so we can stay a maximum length of time at our next destination.

Other folks may find they can get away with less, but to us, if you are shopping for a big trailer to live in full-time, a CCC of less than 3,000 lbs. is going to be insufficient in the long run. If you are shopping for a fifth wheel toy hauler, then you’ll need 3,500 lbs. for your stuff plus more for the weight of your toy(s).

Interestingly, the manufacturers often provide a lot more storage space in their fifth wheel trailers than the CCC of their trailer can reasonably support. Our cabinets and shelves aren’t even full, and we are still at the maximum limit for CCC in our trailer.

Redwood Fifth Wheel Cargo Carrying Capacity 1

A much simpler sticker on another trailer shows a Cargo Carrying Capacity of 1,876 lbs.
By implication this does not include any water weights because all liquids in the tanks are cargo.

So, just because a trailer you are looking at has voluminous shelving, a big pantry, and two huge closets, you won’t necessarily be able to fill all that space and still remain at or below the CCC of the trailer.

Another surprise is that smaller trailers frequently have larger carrying capacities. This can be seen in a single product line when a manufacturer uses the same frame for several models. The smallest and lightest model built on that frame will obviously have more carrying capacity than the largest and heaviest one.

We also saw it in dramatic fashion when we compared a tear drop trailer and a toy hauler on a dealership lot once (blog post here).

One caveat to keep in mind if you overload your trailer is that you risk being found liable if you are in an accident with a fatality and it is discovered your rig was over its weight limit. This is true both if the truck is too small for the trailer and/or if the trailer itself is loaded beyond its capacity.

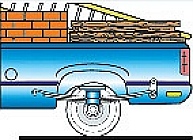
FOUNDATION – FRAME, AXLES, TIRES. SUSPENSION, LANDING JACKS & BRAKES

The foundation underlying a fifth wheel trailer consists of the frame, axles, tires, suspension, landing jacks and brakes, and although this is not the glamorous part of the trailer, it is arguably the most important.

It is possible to upgrade some of these components to improve the overall unofficial GVWR and CCC of a trailer and to improve its stopping power as well. The axles, tires and suspension can all be replaced with beefier parts, and if the trailer has electric drum brakes, these can be upgraded to electric over hydraulic disc brakes (described in detail here).

RVers are encouraged to weigh their rigs on a regular basis to ensure that they are staying within the official GVWR for their unit. We weigh ours every year or two. Escapees offers the very thorough SmartWeigh program at several of their RV parks across the country, and we describe our experience with that program at this link: “Making Weight” With Your RV.

Weighing a fifth wheel trailer with Escapees SmartWeigh program

Weighing a fifth wheel trailer with the Escapees SmartWeigh program

It is important to note, however, that just because you’ve got bigger axles, better rated tires and beefier suspension, you won’t “officially” have a new GVWR. The trailer will support its payload better, but in the case of a horrific accident, if the GVWR value is referenced and your trailer is somehow found to have been over that weight, you may be considered liable.

Frame

The next thing we look at in a trailer is the frame and axles. Almost all trailers are assembled on frames built by Lippert Components. A few manufacturers build their own frames in-house.

Axles

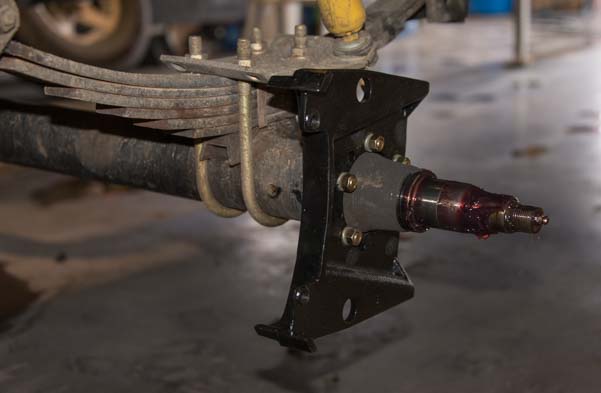
Most fifth wheels are also built on Lippert axles. The highest end fifth wheels are built with axles made by Dexter. They advertise the fact and consider it to be a premium feature. In some cases Dexter axles are an option, and some buyers simply replace their axles after making their purchase.

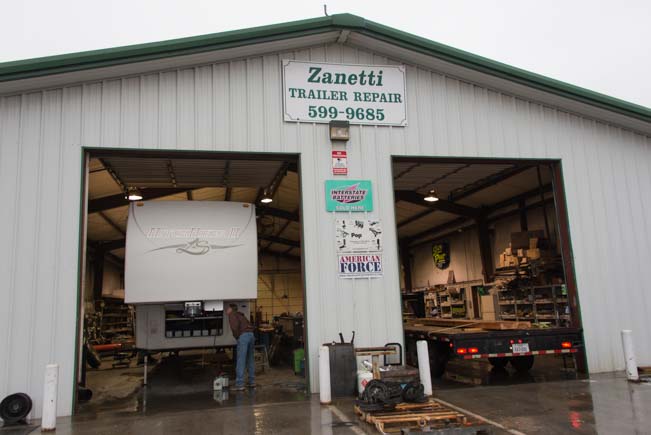
Both of our Lippert axles have failed. The first time was in Nova Scotia. We could tell because our tires began wearing very strangely and very very fast. We limped to Maine to have the rear axle replaced with another Lippert axle.

New RV axle installed on fifth wheel trailer-min

We replaced one of our trailer axles in Bangor Maine.

Fortunately, our extended RV warranty saved the day financially, but the time lost and overall frustration of having a big failure on the road was not fun. (Blog post about that experience here).

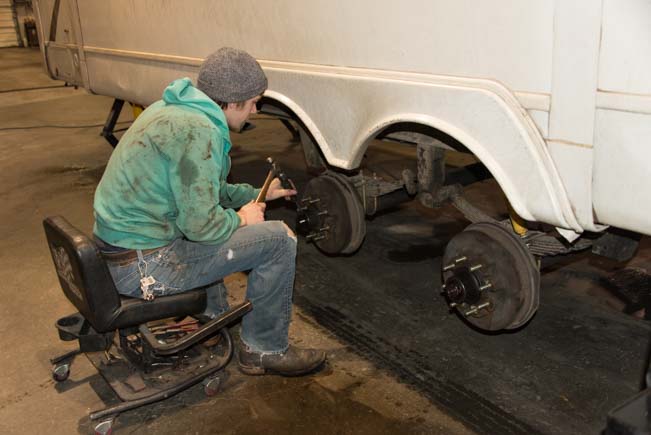
The second time was when our front axle failed in Arizona, and again, the tell-tale sign was bizarre tire wear on the trailer tires. This time we decided to replace both axles with the Dexter brand. Unfortunately, our extended RV warranty did not bail us out on this occasion, but the $3,000 expense of having both axles replaced and correctly aligned with Dexter axles was well worth it, as our tires have been wearing very evenly ever since.

Suspension

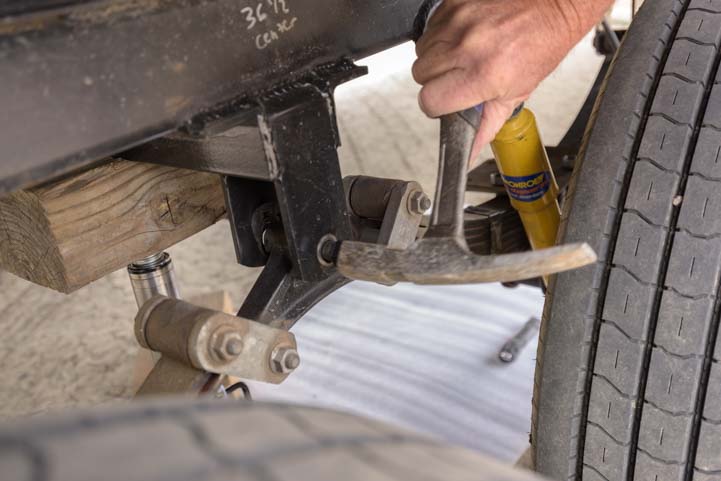
In addition to axle failures, our fifth wheel trailer’s suspension failed upon our approach to Arizona from New Mexico. We had the entire suspension overhauled, and fortunately our extended trailer warranty covered the repair (blog post about that experience here). This experience made us realize just how important the suspension is on a trailer.

New fifth wheel trailer suspension installation-min

We replaced our failed fifth wheel suspension system in Arizona.

Most fifth wheel trailers come with a conventional leaf spring and gas shock suspension system. However, some fifth wheels come with an axle-less rubber suspension system from Mor/Ryde. Many people love and swear by the soft ride of this suspension. Over time, however the rubber does wear out and needs to be replaced (as do conventional shocks).

Tires

The weight rating on the tires is an important aspect of the overall GVWR rating of a trailer, and upgrading the tires is an easy way to boost the GVWR and increase the CCC. Of course, the legal rating for the trailer will always depend on how the trailer was built at the factory, but by upgrading the tires you can quickly give the trailer much needed support if you are approaching the limit.

Tire ratings vary on most fifth wheels between E-rated (10 ply) tires for lighter trailer to G-rated (14-ply) for the heavier ones. Some of the heaviest trailers have H-rated (16-ply) tires but those require wheels that can handle higher air pressure.

Check the tire ratings on a prospective full-time fifth wheel as well as the axle brand and axle weight ratings. If they are already big and beefy, you will save yourself needing to upgrade them later. On the other hand, if you love the trailer but those things are a little skimpy, budget in an upgrade when you contemplate the purchase price and its impact on your bank account.

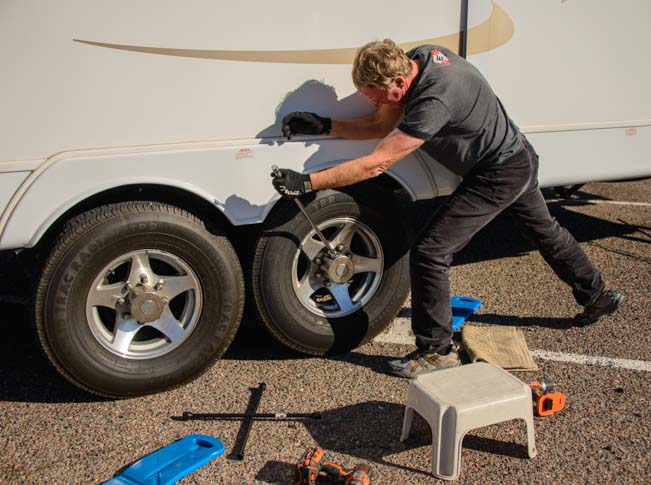
We upgraded the E-rated (10-ply) tires that came on our trailer with G-rated (14-ply) tires. When we swapped axle brands, we stayed with the 7,000 lb. axle rating because we had upgraded our trailer’s electric hub brakes to electric over hydraulic disk brakes, and the bigger 8,000 lb. axles required different brakes.

Brakes

Most fifth wheel trailers come with electric drum brakes. The stopping power is so-so. More expensive brands of fifth wheels offer electric over hydraulic disk brakes as an option. You can also replace the electric drum brakes with electric over hydraulic disk brakes at a later date.

We upgraded our electric drum brakes with electric over hydraulic disk brakes, and what a massive difference in stopping power! The upgrade costs about $3,000 or so, but we felt it was worth every penny. Our blog post about that upgrade is here.

Fifth wheel electric over hydraulic disk brake conversion-min

We upgraded our standard electric trailer drum brakes to electric over hydraulic disc brakes in Texas

If you think you might upgrade the entire under carriage of your trailer — axles, brakes and tires — because you are at the outer limit of its CCC, you might consider going to the next size axle. We did our upgrades piece-meal as things broke or ore out, but if we’d done it all at once we might have gone with 8,000 lb. axles and corresponding brakes.
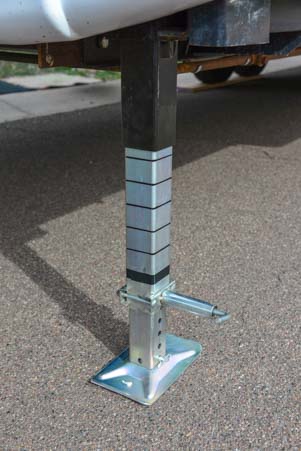
Landing Jacks

Conventional electric landing jacks on the front of the trailer are less expensive than hydraulic self-leveling jacks, and they are more commonly found on the more affordable brands of fifth wheel trailers. Hydraulic leveling jacks appear on higher end fifth wheels as standard features or as an option.

We have been happy with our electric landing jacks over the years, and even though we did have to replace them at one time, it was a relatively easy DIY job that Mark was able to do while boondocking in the desert!

Operating the electric landing jacks on a fifth wheel trailer-min

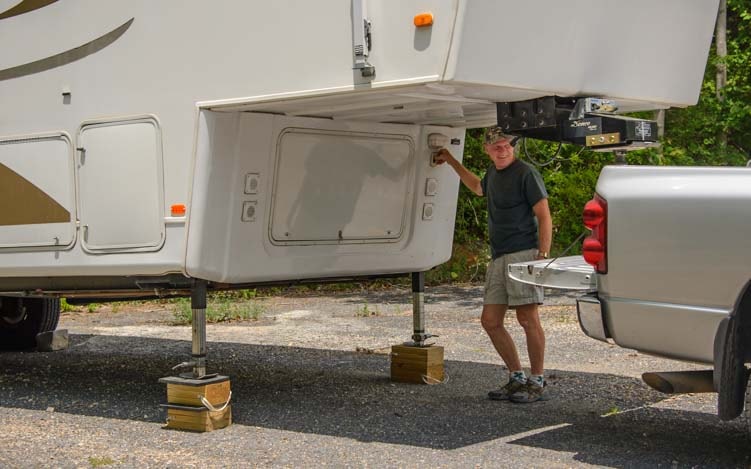
Without a hydraulic leveling system, on extremely unlevel ground we put blocks under the landing legs.

The disadvantage of electric landing jacks is that the side-to-side leveling of the trailer has to be done by sliding something under the wheels to prop up one side of the trailer, and sometimes we have to prop up the front end of the trailer too. We carry 5′ x 1′ x 1″ strips of a sliced up heavy duty rubber mat for this purpose. We used to carry 5′ long 1×8 pine boards. Lots of folks carry the plastic leveling platforms.

Hydraulic leveling jacks can do most or all of the leveling without the need for anything being placed under the tires. Just hit the button and watch the trailer level itself. In the most off-level situations it may still be necessary to prop up one side of the trailer with something under the wheels.

Leveling boards under a fifth wheel trailer-min

Usually all we need is one or two mats under our wheels. In rare cases we have to stack higher!

Another great benefit of hydraulic leveling jacks is that if you need to jack up one side of the trailer to work on the tires, wheels or suspension, you can use the hydraulic leveling jacks instead of a portable jack placed under an axle. It’s safer and easier.

The only disadvantage of hydraulic leveling jacks is simply that they are complex and might fail. Occasionally (though extremely rarely) the legs have been known to fall down while the trailer is being towed. Of course, technology improves with every year, so these kinds of problems are less and less common.

“FOUR SEASON” – INSULATION and R-FACTORS

Lots of trailers are billed as “Four Season,” but in reality, you can’t compare living in an elevated box with 2″ to 3.5″ walls with living in a house that stands on a foundation and whose thick walls are built with layers of drywall, Tyvek, plywood and siding.

That being said, “Four Season” coaches are generally better insulated than others. Just don’t expect to be totally warm and cozy and free of condensation when there’s a blizzard and temps stay below 0 F for a few days!

Fifth wheel trailer RV in snow blizzard-min

We have experienced several blizzards in our trailer,
but RVs are not really made to be “four season” the way that houses are.

RV Insulation

Some folks have toughed it out in an RV through real winters in the northern states, but the majority of full-time RVers spend their winters in mild climates where overnight temps in the teens are a rare and cold exception. We have tips for keeping a rig warm during the winter months and keeping it cool during the summer months in these blog posts:

Winter RVing tips – Staying Warm!

More Winter RVing tips – How to heat an RV in Winter Weather

Installing a vent-free propane heater in an RV

Summer RVing tips – How to Beat the Heat and Stay Cool When It’s HOT!

There are various ways to insulate an RV and there are pros and cons to the different types of insulation that RV manufacturers use.

Some higher end fifth wheels are built with conventional wooden studs and fiberglass insulation as this may provide greater insulation.

Wooden studs are less apt to conduct warm air to the outside than aluminum framing is. On a cold winter morning it is easy to see where the aluminum framing is on an RV if you go outside because you can see the outline of the aluminum framing on the trailer wall.

RV windows dripping with condensation in winter-min

Condensation forms inside our windows on a particularly moist and freezing winter day.

However, fiberglass insulation has been known to fall down off the studs over the years, leaving the tops of the walls uninsulated. Usually, the front and end cap and the areas between the roof trusses are all insulated with fiberglass insulation as well.

Most fifth wheels are insulated with styrofoam, and the styrofoam used varies in quality. The use of “blue board” polystyrene styrofoam made by Dow Chemical was one of the big selling points in the NuWa Hitchhiker brand of fifth wheels like ours (NuWa no longer builds trailers). We’ve also heard this product referred to as “Blue Dow” foam.

When we did a factory tour at NuWa before we bought our trailer, we were told that the folks there had tested the strength of the blue board by driving a truck over a piece that was suspended by its two sides, and it didn’t break. We were also each handed a piece and challenged to break it. We couldn’t.

Interestingly, it may be this very strong styrofoam in the walls that kept a Hitchhiker fifth wheel intact recently when it rolled over at 60 mph on the interstate (blog post about that here).

Besides providing strength to the fifth wheel frame, Dow blue board foam has a very high R-factor.

A few high end fifth wheels are built with this kind of insulation nowadays. Most, however, are built with a weaker and less insulating kind of styrofoam.

R-Factors

When looking at the insulation R-factors that are advertised by the RV manufacturers for the walls and roof of a fifth wheel, it’s worthwhile to keep in mind that the number may be for the most heavily insulated part of the wall or roof. RV windows, doors and roof hatch vents have very low R-factors for insulation, and that is where most of the heat is lost.

How much heat is lost through RV windows? Just look at what percentage of a fifth wheel wall is actually windows!

Also, some fifth wheel slide-outs are built with thinner walls and less insulated roofs than the main body of the fifth wheel. Ours is. Again, what percentage of the fifth wheel’s walls and roof are part of the main structure and what percentage are slide-outs?

EXTERIOR WALL and ROOF MATERIAL and MAINTENANCE

Exterior Walls

Fifth wheel trailers are built with various materials as the exterior surface of the walls and roof. Lower end trailers have an exterior fiberglass finish of filon. This is what was on our first full-time travel trailer. It doesn’t shine and is a little harder to keep looking spiffy.

Waxing a fifth wheel trailer front cap-min

Maintenance, like washing and waxing the massive exterior of a big RV, is just part of the lifestyle.

The next level up is a fiberglass gelcoat exterior. This is shiny and can be maintained to a glossy finish by waxing the trailer twice a year. Unfortunately, the pretty swirly stickers that give fifth wheel trailers their colorful look will begin peeling off after about 4-5 years.

The highest level finish for a fifth wheel trailer is automotive paint. This is an extremely durable finish and the swirling paint patterns will never peel off. It is also very expensive (figure on about $10k) and is found only on the highest end fifth wheel trailers.

Roofs

Most fifth wheel roofs are “rubber” roofs. These usually come with a ten year warranty, and they are pretty much ready for replacement at the end of ten years! Fiberglass roofs are more durable. If you are going to install solar panels on the roof, you may need to be a little more careful with a fiberglass roof to be sure you don’t crack it when you drill into it.

Rubber roofs can be made of EPDM or TPO. As EPDM roofs begin to age, they start shedding a lot of dust, and every time it rains this creates streaks down the sides of the trailer. Cleaning the roof often helps reduce the streaking, but it’s very hard to eliminate the problem all together once the roof begins to deteriorate a few years into its lifespan. TPO roofs do not have this problem.
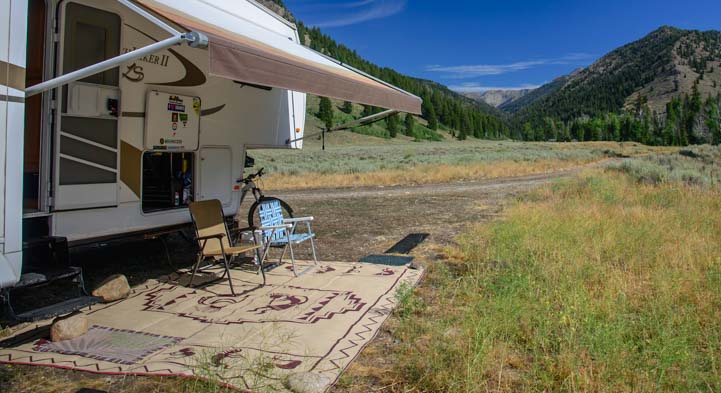
CAMPING STYLE

Other than these basic structural features, the rest of the decision is pure fun fluff stuff. The most important thing to ponder when you’re shopping for your new rolling home is how you anticipate living and traveling in it. What is your camping style? That is, how do you want to camp and where will you travel?

Roads are bigger and straighter in the western states than in the eastern states, so bigger rigs are easier to travel in out west.

Many privately owned RV parks accommodate “big rigs” across the whole country. However if you are more into “camping” in natural settings, the sizes of campsites in government run campgrounds vary a lot.

Boondocking in an RV-min

Some RVers love boondocking. Others don’t.
Knowing your own personal camping style helps a lot when it comes to buying a full-time rig.

States Park campsites are often quite large and frequently come with hookups, but they can be pricey too and there are rarely discounts for seniors or for long stays. Campsites in the National Parks and National Forests are often very small, often have no hookups, and may therefore be slightly cheaper, especially for holders of the Federal Lands Senior Pass.

Holding Tank Capacities

So, will you be dry camping a lot or will you get hookups most of the time? This makes a difference in what kinds of holding tank capacities you’ll need.

If you’ll be getting hookups most of the time, then there is no need for big holding tanks. However, if you’ll be dry camping a lot, then big holding tanks will mean you can stay put a little longer before you have to go to an RV dump station .

Our fresh water tanks and hot water heater are 70 gallons combined, our two gray water tanks are 78 gallons combined, and our black tank is 50 gallons. This has worked well for us dry camping every night for the better part of ten years.

We do carry 25 gallons of fresh water in the back of our truck in jerry jugs, but we don’t often need to use that water since we typically stay in places for less than two weeks before moving on, which is about how long our holding tanks last.

One nice feature if you are going to boondock a lot is to have an easy way to refill the fresh water tanks. We have a gravity fed fresh water intake that we can fill from a fresh water hose or from our jerry jugs.

Refilling RV fresh water tanks-min

We have a gravity based fresh water intake on the side of our trailer.
Unfortunately, it is rather high up (and it doesn’t need to be!).

The handy thing about this is that with our trailer the ratio of fresh water capacity to gray and black capacity means that we run out of fresh water before we fill up the gray or black water tanks. Being able to top off the fresh water lets us camp in one spot a little longer before we have to pack it up to go to an RV dump station.

“SOLAR READY” and SOLAR POWER

If you are going to be dry camping a lot, you may want to consider installing a solar power system, and there are a few things to keep in mind about that as you shop for a full-time fifth wheel.

We have a ton of info about solar power on this website. An index of links to our many articles is here:

Solar Power for RVs and Boats

Solar power doesn’t have to be a big, expensive and difficult thing to add to an RV (here’s an article summarizing several types of RV solar power systems).

A portable solar power suitcase that includes a pair of solar panels and a solar charge controller and cables to connect to the batteries all in one package is a nifty way to have solar power available without installing a permanent system on the roof and in the RV basement.

Simply set up the panels on the ground and connect them to the trailer batteries whenever you need to charge the batteries up. The “suitcase” feature makes it easy to stow the system when not in use.

However, most folks who live in their RV full-time and also boondock frequently prefer to install solar panels on the roof permanently and install a solar charge controller near the batteries and install a big pure sine wave inverter too.

Solar panels on a fifth wheel roof-min

Full-time RVers who dry camp a lot usually end up installing solar panels on the roof.

If this is in the back of your mind, you might get excited when you see a fifth wheel (or other RV) advertised as “solar ready.” Unfortunately, in many cases this is a very misleading term. A solar power system that will let you live without electric hookups for days on end will be at least 200 watts and more likely 500 watts or more. The cabling necessary to carry the currents these panels produce is generally 8 or 10 gauge wire.

If a rig is billed as “solar ready,” find out how many watts the prospective solar system could support and check out the size of the cable that goes to the roof. “Solar ready” may simply mean that a skinny cable has been run from the batteries to the roof to support a 50 watt panel. This is great if the batteries are fully charged and you are leaving the rig in storage outdoors for a few months. However, it is not sufficient to live on comfortably.

Also, if you plan to install a full-timer solar power system, check the battery compartment. How many batteries are there? What size are they (Group 24? Group 27?)? How many batteries can you add in the compartment?

Fifth wheel battery compartment-min

We had the battery compartment customized to support four golf-cart sized batteries.

A good sized battery bank for boondocking for long periods is four 6-volt golf cart sized batteries (Group GC2). If the battery box in the fifth wheel you are looking at can’t hold that many batteries, think about where else you might put them and whether there is ample support (they are heavy) and venting (wet cell batteries need to be vented).

Of course, a basement compartment can be beefed up with a piece of angle iron welded onto the frame and/or vents and conduit going to the battery boxes.

We have a series of articles explaining how RV batteries work, how to charge them, different battery types on the market and more at this link:

RV Battery Charging Systems

ACCESS TO SYSTEMS THAT MIGHT NEED REPAIR

While you are crawling around the basements of prospective new rolling homes, try to find all the major components that might fail and might need to be replaced.

If you are a DIY RVer, this is critically important. However, even if you are going to hire out the repair jobs to various RV shops around the country, their jobs will be much easier and cheaper if the systems are easy to access.

Easy access water pump under sink of fifth wheel trailer RV-min

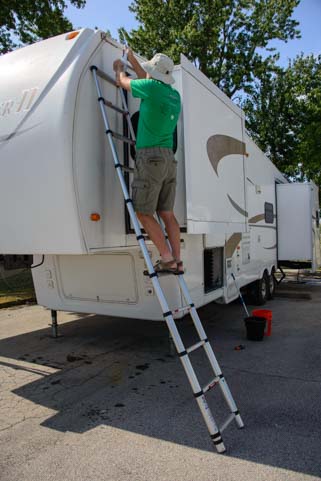
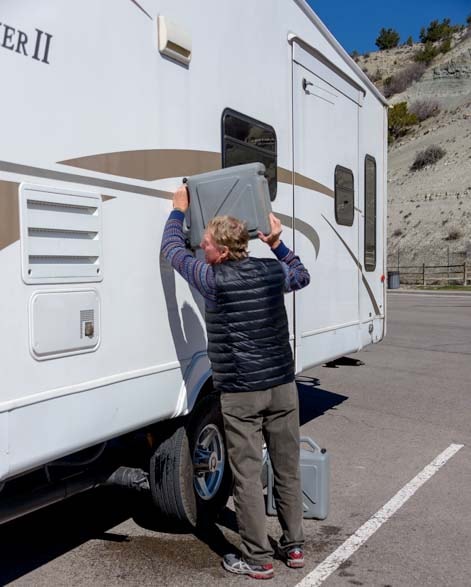
It isn’t “pretty” but it sure is nice to have easy access when it’s time to replace the water pump!
Mark replaced it so fast he’d finished the job before I got pics of his work!

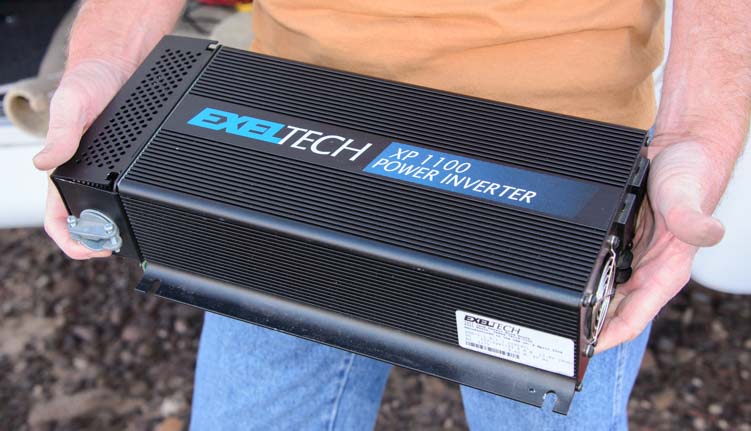
For instance, see if you can find the water pump, hot water heater, power converter, inverter (if there is one), etc.

We once met a fellow with a beautiful brand new travel trailer, and Mark spent an hour with the guy trying to find the power converter. It was hidden behind a fixed wall somewhere and they never did find it!

CREATURE COMFORTS and LIVABILITY

When you give up the luxuries of hearth and home in a stick-built house to wander around the country in an RV, you want to be comfortable. Even though you may be just fine with “roughing it” when you go camping on week-long vacations, it is different when you don’t have a “real” home to go home to.

For us, the move up from our vacation-purposed popup tent trailer to our full-time 27′ travel trailer was such a big step that the travel trailer looked truly luxurious. It had a sofa, dinette and bed in the living area, all of which were good places for relaxing. It seemed just dandy. However, after spending many long hours in it during our first winter, we realized that we wished we had true recliners to relax in. That simple desire is what spurred us to hunt for (and find) our fifth wheel trailer!

Beds

If you have been sleeping in a king size bed at home, switching to a queen bed on the road may be a big challenge. It was for us! It’s a shock to find out the love of your life has so many arms and legs!

Beds in RVs are often slightly smaller in one dimension or another than their residential counterparts, and those lost inches do count. For your reference, here are the standard residential bed sizes, width by length, in inches:

Queen: 60″ x 80″
King: 76″ x 80″

Here are some of the sizes that we’ve seen in fifth wheel trailers, width by length:

Queen: 60″ x 74.5″ (shorter than residential)
King: 70″ x 80″ or 72″ x 80″ (narrower than residential)

We have never seen a full width king size bed in a fifth wheel trailer except in a custom design. This is something to keep in mind if you think you might upgrade your trailer’s factory installed king mattress sometime down the road. Will the new residential king mattress, which is wider than the old mattress that came with the rig, fit on the platform without being squished?

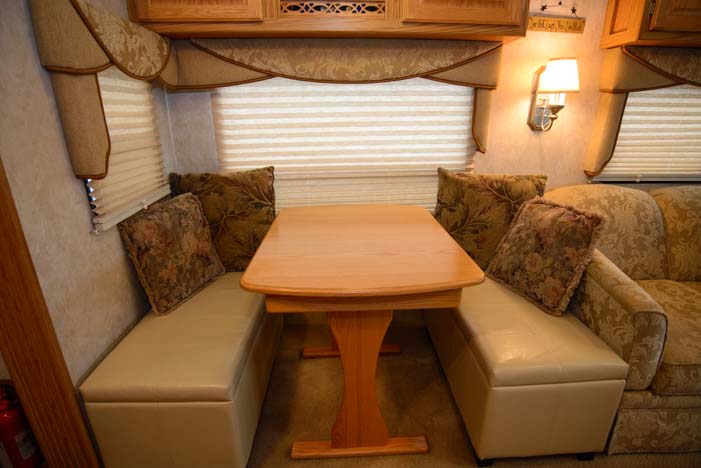
Floorplan and Functionality with Slide-outs Closed

One of the things that we tend to think about when we stand in a beautiful, spacious fifth wheel trailer on a dealership lot is how functional the rig will be when all the slide-outs are closed. Some folks never go in their trailers without opening the slide-outs, but we do it all the time at rest stops and at the grocery store.

Ask the salesman to close the slide-outs on your prospective new full-time fifth wheel and find out which things in the kitchen, living room and bedroom you can no longer access.

NuWa Hitchhiker II LS 34.5 RLTG Fifth Wheel Trailer Flooplan-min

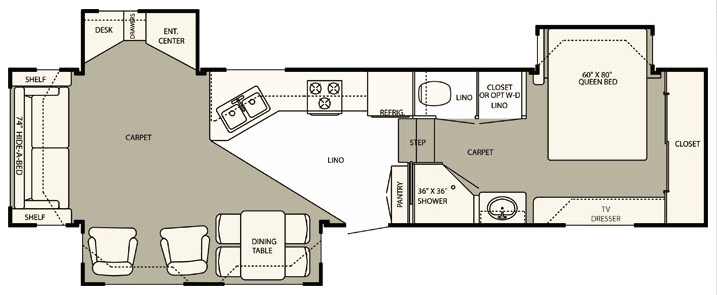
The open floorplan of our ’07 NuWa Hitchhiker II LS 34.5 RLTG Fifth Wheel trailer.

Can you get into the fridge for a beer? Can you access the pantry for goodies to make a sandwich? Can you microwave something or boil water in a teapot on the stove? Can you wash the dishes after lunch? Can you use the bathroom? Can you get into the bed? Can you sit on a chair in the living room or at your dinette?

These may sound like goofy questions, but when you live in an RV full-time it is surprising how often you may want to use the rig without having to open the slide-outs.

If you roll a shopping cart loaded with groceries up to your front door at the supermarket, can you put them all away without opening the slide-outs? If you visit a friend and park your rig in front of their house for a few days, can you access your clothes and bed so you don’t have to stay in their spare bedroom?

Fresh bread baked in an RV oven-min

We can bake bread when the slides are closed.
Not crucial, but it’s nice to have access to the entire kitchen.

We are fortunate with our fifth wheel’s floorplan because we can access almost everything without opening any of the slide-outs. The only things we can’t get to are the two recliners in the back of the rig and our dresser drawers (opening the bedroom slide 6 inches is enough to get into those drawers). We have actually lived in our trailer with the slide-outs closed for several weeks at a time. It’s skinny, but it’s doable.

Unfortunately, the super popular island kitchen floorplan designs generally don’t allow for full use of the kitchen when the slide-outs are closed. However, there are loads of open floorplan designs that were popular a decade ago, like ours, that the RV designers may eventually revive. After all, there are only so many possible floorplans for a fifth wheel trailer!

Residential Refrigerator vs. RV Fridge

RV refrigerators that run on both 120 volt AC power and propane gas are being replaced in many fifth wheel trailers with residential refrigerators that run exclusively on 120 volt AC power. With some fifth wheel brands you can order the rig with either type of refrigerator. In other cases you can only order it one way and you would need to do the replacement yourself after you’ve bought the rig.

RV refrigerators are wonderful because you can dry camp in your RV for months or years on end and have refrigerated food the whole time. All you need to do is keep the propane tanks filled. Our 8 cubic foot RV refrigerator uses about 30 lbs (or 7 gallons) of propane every three weeks.

RV refrigerators have a few negatives, however.

One downside to RV refrigerators is that they are not self-defrosting. You need to defrost them. After decades of living with a frost-free refrigerator, it is a shock to go back to the olden days (if you were around then) of having to defrost the RV fridge every month or so.

However, my amazing hubby Mark has perfected the art of defrosting and he can now pull it off in about 20 minutes. So, it’s not that bad a chore if you stay on top of it (and if you have a wonderful partner who is willing to do it for you!). See the blog post about quickie fridge defrosting here.

Defrosting an RV refrigerator-min

Mark has simplified the refrigerator defrosting process so much it takes him only 20 minutes. Lucky me!

Another disadvantage is that they don’t modulate the temperature in the fridge with much precision and they aren’t particularly well insulated or energy efficient. We keep a small thermometer in the fridge so we have a feeling for what’s going on. The temp inside varies greatly depending on whether the wall behind the fridge is in the sun or shade and whether the temp inside our rig is 40 degrees, as it is on some winter mornings, or 90 degrees as it is on some summer afternoons.

Our fridge is usually on level 4 or 5 (the coldest two settings) because we like our beer to be ice cold. However I do sometimes find my yogurt has frozen a bit on the edges.

RV refrigerators also have a shelf life. It is about 8 years!

We found that out the hard way when our RV refrigerator died and we had to get it replaced. Luckily the replacement was straight forward and was covered by our extended RV warranty (blog post about it here).

New RV refrigerator is fork lifter through the trailer window-min

Our new RV refrigerator is slid through our dining room window on a fork lift.

The biggest surprise when we got our RV fridge replaced was we found out the warranty companies expect those fridges to last only 8 years. Of course, they figure that into the cost of the warranty, as they should. So, even though we were shocked that ours died, our warranty company wasn’t surprised at all.

Perhaps the most damning thing about RV refrigerators is that they run on propane and they have been known to catch fire and torch entire RVs. A burning RV burns to the ground in seconds because of the propane tanks and manufacturing materials. There was a rash of RV refrigerator fires about a decade or so ago which is part of what pushed the industry towards building RVs with residential electric refrigerators instead.

However, RV life isn’t totally rosy with residential refrigerators either, especially if you want to boondock or dry camp for extended periods of time.

While a residential refrigerator may be a highly efficient Energy Star appliance, it may not have a solid locking mechanism to keep the doors closed in transit or rails to keep the food on the shelves while in transit (check on that). And it will require a lot of power to run while the rig is not plugged into a power pedestal.

A 12 to 14 cubic foot residential refrigerator requires a little over 300 kwh per year to run. This is about 0.8 kwh per day, or, very roughly, about 80 amp-hours per day.

In the winter months when the sun rides low in the sky and is up for a short period of time, an RV will need about 400 to 500 watts of solar panels and 450 amp-hours of batteries just to run the refrigerator. This is about what it takes to run everything else in the RV! An 18 to 22 cubic foot refrigerator will require even more.

This is not to say that it is impossible to install a big enough solar power system to run a residential refrigerator — we’ve had readers contact us to say that they have done it and they’re loving it! — but the expense and weight of the batteries and of the solar panels is something to consider before signing on the dotted line for that beautiful new fifth wheel trailer with its residential fridge.

Also, even if boondocking is not your style, be sure that the battery bank and the inverter that support the residential refrigerator when not hooked up to electrical power are sufficiently big enough to keep the fridge running as you drive. We have heard of 1,500 watt inverters just not making the grade with a big residential fridge (2,000 watts was needed). Or, just turn the fridge off and keep it closed until you get where you are going. Of course, residential refrigerators are not designed to be turned on and off frequently.

Lastly, the fabulous thing about a big, shiny, 22 cubic foot stainless steel residential refrigerator is that it can hold a ton of food. There will be no more turf wars between the beer and the veggies (gosh, would we ever love that!).

However, all that food weighs a lot, and big fridges often become storage places for old containers of food you’ll never eat. If you are buying a full-time fifth wheel that is skinny on its Cargo Carrying Capacity, then a huge refrigerator that can hold lots of food may push you into possession wars between food, tools and clothes in the closet.

On the bright side, a residential refrigerator is much less prone to failure than an RV fridge, and in the rare event that you have to replace one, it could easily cost thousands less than an RV fridge.

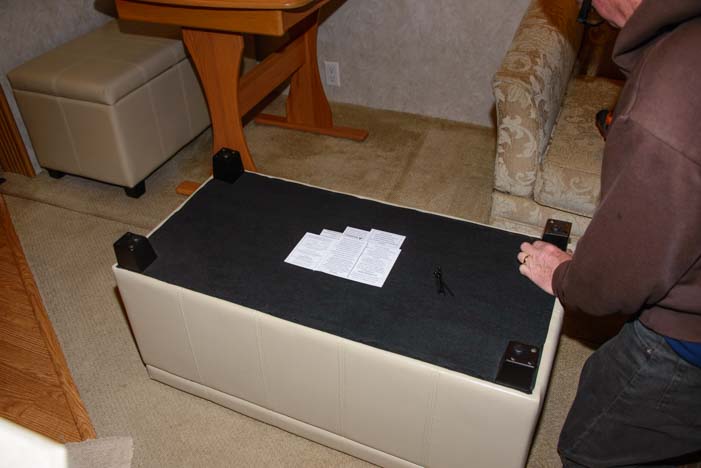
I Like the Fifth Wheel But I Don’t Really Like That Couch!

While it’s ideal to find a rig that has furniture you totally love, a fifth wheel trailer is just a box — floor, walls and ceiling — and any residential furniture can be put in that box. We have replaced both our dinette chairs and our recliners in the course of living in our fifth wheel all these years, and last week we replaced the couch!

Storage benches in RV dinette add comfort and storage space-min

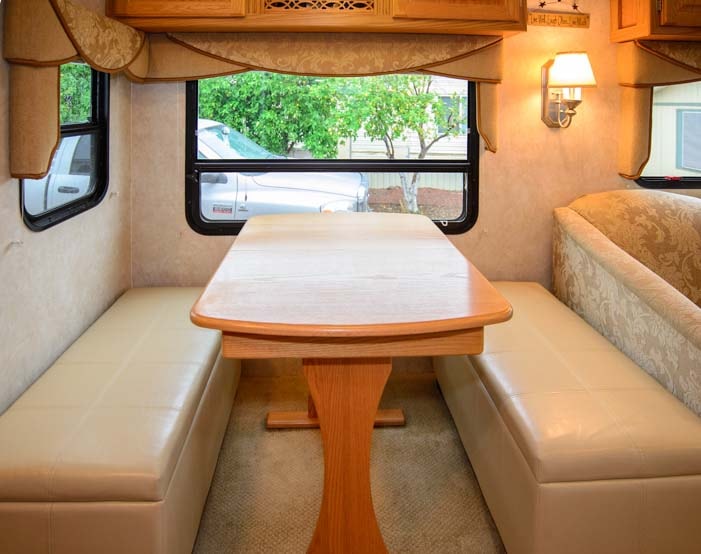
The old chairs were elegant, but these cushy benches are much more comfortable.
Plus they give us more storage space!

Here are blog posts about some of the changes we’ve made to our furnishings:

Add Storage and Seating Capacity at your RV Dinette!

Can You Sell Old Stuff on Craigslist in the RV Lifestyle? Replacing our Recliners!

We also replaced our mattress with a fancy Simmons Beautyrest mattress.

RV DEPRECIATION

After all this discussion of what to look for in a fifth wheel trailer for full-time living, it is important to remember that the brand new fifth wheel you buy today will be worth about half of what you paid for it ten years from now. If it is well maintained it might be worth a smidge more. If it isn’t, it may be worth less.

What’s worse, the fact that it was lived in full-time rather than kept in a garage and never touched will turn many prospective buyers away or make them hit you up with a low offer.

RV Depreciation over time

Hmmm…. An RV’s value declines with time.

On the flip side, going RVing full-time is a dream, and it’s hard and maybe even unfair to put a price on your dreams.

If you have the funds and you can spend a lot on a rapidly depreciating fifth wheel trailer without crippling your finances later in life, definitely go for it.

What could be better than casting off on a dreamy new lifestyle in a dreamy new RV?

No matter what you buy, negotiate hard. You are in the driver’s seat — until you are in the driver’s seat! Many mass-market manufacturers anticipate selling for about 70% of MSRP. Others are closer to 80%.

If you go custom, well, you’re be paying for the very finest of the finest. So, the focus will be on getting exactly what you want rather than haggling over the price. With a custom rig you get what you ask for… so be knowledgeable and smart about what you ask for!

If you aren’t sure of you future finances, and you aren’t sure if you’ll like the full-time RV lifestyle, and/or you aren’t sure if you’d prefer a fifth wheel or a Class A motorhome as your house on wheels, consider getting a cheaper model or a used trailer to start.

We understand this dilemma well. We would LOVE to have a new trailer now. After all, ours is ten years old and shows a lot of wear. But…

WHERE DO YOU WANT TO TRAVEL?

The rig you live in is just part of the equation of putting together that champagne lifestyle of full-time RV travel. The real reason most folks run away in an RV is because they want to get out and see something of this continent, get to know the different regions of our country and of our neighbors’ countries, and knock a few travel destinations off their bucket list.

Appalachian Mountains RV Trip Coast to Coast Magazine Summer 2017-min

Our cover photo for our Coast to Coast magazine article about the Appalachian Mountains
Summer 2017 issue

The options of places to visit are limitless, and we’ve got 10 years worth of travel tales on this website that tell the stories of what we’ve seen and where we’ve been since 2007.

I’ve also written a lot of articles for Trailer Life Magazine showcasing different parts of the country that make for an enjoyable RV destination.

Georgia On Their Minds Trailer Life Magazine September 2017-min

The Antebellum Trail in Georgia is a terrific RV route for folks heading north/south through Georgia.
Trailer Life Magazine – September 2017. Article by Emily & Mark Fagan

A few of these feature articles have turned up in Trailer Life over the past few months and can be read at these links: Georgia on Their Minds, The Quaint Side of Canada, and Downeast Maine. Images of the first two pages of each article are below.

I also have a bi-monthly column on the back page of Trailer Life that showcases a beautiful photo of a gorgeous spot along with a few words about what makes that place special. My most recent columns have focused on: The Rocky Mountain Beach Town of McCall Idaho and a Forest on Fire – Fall Colors in Colorado.

Trailer Life Magazine is a monthly national magazine and it offers not only mouth-watering photos and stories of places to take your trailer, but it also devotes a lot of pages to technical issues that trailer owners face.

Nova Scotia RV Trip Trailer Life Magazine July 2017-min

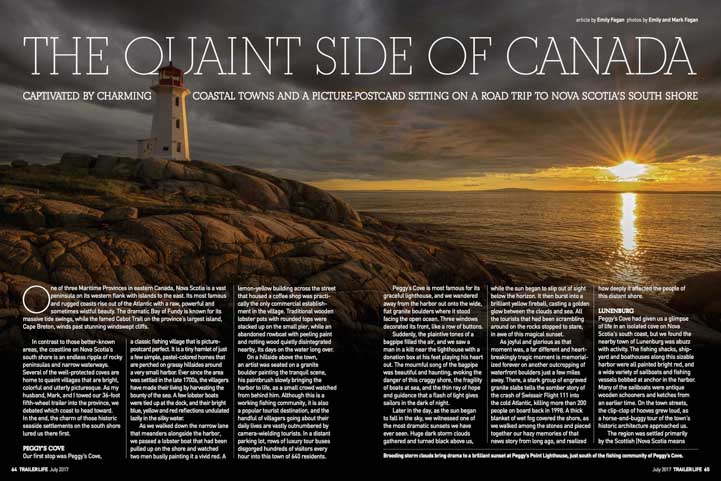
Nova Scotia’s Cape Breton Island is tops on many RVers’ lists
Trailer Life Magazine – July 2017, Article by Emily & Mark Fagan

The technical editorial staff at Trailer Life is both very knowledgeable and very meticulous about ensuring what they discuss and review is accurate.

I have written a lot of technical articles for Trailer Life, from discussing RV roof maintenance to RV dump station tips to an article about the 2016 Dodge Ram 3500 dually truck and one about the new puck based OEM fifth wheel hitch from B&W Trailer Hitches.

Downeast Maine RV Trip Trailer Life Magazine June 2017-min

Downeast Maine is a hidden jewel north and east of famous Acadia National Park
Trailer Life Magazine – June 2017, Article by Emily & Mark Fagan

I have always been amazed at the extensive review process and discussion process that each of these technical article has undergone. Every little minute detail is reviewed for accuracy, sometimes spawning some lively debates.

There are a gazillion RV blogs out there that make for super fun reading and research and learning, but there is something to be said for a magazine that has been in print for over 75 years. Some people on the team have been with the magazine nearly half that time!

Trailer Life is hard to find on newsstands these days. New Camping World members receive a few issues as part of their membership (or they can get Motorhome Magazine if driveable RVs are more to their liking). If you get an annual subscription at the link below, you’ll see the article I’m working on about “first-timer” fifth wheels when it comes out!

Subscribe to Trailer Life Magazine

Have you been shopping for a full-timing fifth wheel? We’d love to hear your thoughts!

Boondocking in an RV-min

There are loads of fifth wheels on the market that would make a fine full-time home. Enjoy the search!

Subscribe
Never miss a post — it’s free!

If you found this article useful, please help support us by making a contribution using the Donate button below or by using any of our links to Amazon the next time you shop for anything online!

Here are index pages with links to more articles on this blog and in Trailer Life Magazine:

Here is a video with tips for choosing an RV dealership and an RV salesman:

Below are some of our most POPULAR POSTS (also in the MENUS above)

Buddy - A Journey in Spirit - The story of an event that changed our lives forever.

ARTICLE INDEXES
  • RV Tech Tips Articles - A one page index of links to all our RV Tech Tips, RV Upgrades & RV Maintenance articles.
  • RV Lifestyle Tip Articles - An index of links to all our RV Lifestyle Tips (finances, boondocking, major repairs, work/jobs, etc.)
  • Solar Power Articles - Overview and tutorial articles for how to design and install solar power on an RV or boat
  • Product Reviews - An index of links to all of our Product Reviews
RV UPGRADES, SYSTEMS & TIPS MONEY FULL-TIME RV LIFESTYLE GEAR STORE
  • Gear Store - A list of the goodies, equipment and gear we've found useful in our RV lifestyle!
 

Our most recent posts:

More of our Latest Posts are in the MENU.   New to this site? Visit RVers Start Here to find where we keep all the good stuff. Also check out our COOL NEW GEAR STORE!! *** CLICK HERE *** to see it!

Trailer Suspension Nuts & Bolts – RV Blues on Rough Roads!

Lots of full-time RVers with big rigs are very sensible and stick to traveling on paved roads. But we like to get off the beaten path, and sometimes that puts us on crazy, rough and rugged dirt roads.

On our recent trip to Bisti Badlands in northwestern New Mexico, a 45 minute drive down three miles of extremely washboarded, nasty dirt road wreaked havoc with our trailer’s suspension.

Equalizer bolt walks out of fifth wheel suspension

Hmmm…. That center bolt on the equalizer doesn’t look right!

As we were hitching up to leave, Mark did his usual walk around our trailer to make sure nothing was about to fall off and that everything was secure. To his shock, he noticed that the long bolt that goes through the equalizer on our trailer’s leaf spring suspension system had walked almost all the way out!

Fifth wheel suspension Equalizer bolt unscrews itself on rough road

Yikes!

Holy Smokes! Our 14,000 lb. 36′ fifth wheel trailer was about to lose the bolt holding this vital piece of gear together!

We were miles from nowhere, and I immediately began scenario building in my head to plan various ways we might get out of this mess.

While I theorized, Mark calmly set about getting out his tools and tackling the problem right there in the dirt. His first task was to raise the trailer up so he could get the bolt properly aligned horizontally and tap it back into place with a hammer.

So, out came the 12 ton bottle jack.

Raise fifth wheel trailer with bottle jack for suspension repair

First things first:
Raise the wheels totally off the ground with our 12 ton bottle jack.

He needed to raise the trailer up quite high to relieve all the pressure on that bolt, so he took a piece of wood we sometimes use under the fifth wheel landing legs and put it under the bottle jack to raise it higher. Then he took a second block of wood and put it on top of the bottle jack to span the c-channel tube that runs the width of the trailer.

Pumping away on the bottle jack, he finally got the wheels entirely off the ground and began tapping the bolt through the two sides of the hanger with a small hammer.

Hammer fifth wheel equalizer bolt pack in place in suspension repair

With the pressure off, Mark taps the bolt back into place.

It took a little finagling to get the bolt to line up and go through the second hole on the back side of the hanger.

Fifth wheel equalizer bolt holds suspension together

At first, the bolt didn’t want to go through the second hole on the axle hanger.

But he was able to get it aligned and he got it to go through.

Equalizer bolt in position for fifth wheel suspension hanger assembly

All the way through. Yay!

The bigger problem, though, was figuring out what had happened to the nut that had been holding this bolt in place. It was nowhere to be found and undoubtedly was somewhere out on that nasty 3 mile dirt road.

So, now what?

Mark is a really amazing mechanic, and he keeps a magic container of potential spare parts in his Man Cave in the basement of our trailer. This magical container is a lot like the carpet bag that Mary Poppins carried.

Remember how Mary Poppins pulled all kinds of surprising things out of that bag, to the sheer delight and amazement of Jane and Michael Banks? Among other things, she pulled out a hat rack, a potted plant and a full-size standing lamp while Michael searched under the table to try to figure how she did it.

Well, that’s just the way Mark’s magic box of spare parts tricks works. When he needs a special little gizmo to make things right again, he fishes around in the box and finds just the thing while I scratch my head wondering how such a little container could always produce exactly what he needs.

A few months back we’d replaced the tires on our fifth wheel trailer and decided to replace the original lug nuts with locking lug nuts. A few of the original lug nuts also had cosmetic cracks on them which didn’t look attractive, so the new locking lug nuts were much nicer all around. Mark had decided to put a few of the old lug nuts in his magic box of tricks.

5th wheel trailer wheel lug nuts

A few months back we had replaced all the lug nuts on our trailer wheels.

So, as he fished around for an appropriately sized nut, lo and behold, it turned out those lug nuts were the exact diameter he needed!

Fifth wheel trailer lug nut_

This old lug nut is exactly the right diameter for our wayward bolt!

The thread pitch on the lug nut was not quite right, but the threads on the bolt had been damaged anyway as it walked itself out of the hanger.

While I held the bolt in place with a wrench on one side, Mark ratcheted the lug nut on the other side. He was able to jam the nut on the bolt and re-groove the bolt’s threads enough to make a super tight connection.

In no time we were back up and running and towing our fifth wheel trailer back down that crazy 3 mile road to the paved highway to go see other new and exciting destinations.

As I mentioned in my post about Bisti Badlands, it’s okay for a passenger car or van, but I would leave a bigger RV in Farmington and drive the tow vehicle or toad to Bisti instead!

Ratcheting 5th wheel equalizer suspension bolt in place

With some force, we secure the lug nut on the bolt. What a terrific temporary fix!

Who would’ve ever thunk that a rough road could loosen the nut on a big fifth wheel trailer’s suspension and walk the bolt that holds the equalizer in position almost all the way out?!

And who would’ve ever thunk that a lug nut from the trailer’s wheels would give us such a great temporary fix to get us back on the road?!

Other blog posts about our fifth wheel trailer suspension:

Subscribe
Never miss a post — it’s free!

Other tech tips for RVs:

Our most recent posts:

More of our Latest Posts are in the MENU.   New to this site? Visit RVers Start Here to find where we keep all the good stuff. Also check out our COOL NEW GEAR STORE!! *** CLICK HERE *** to see it!

RV Plumbing Tips – Cleaning RV Faucets, Sink Drains & Shower Wands

The effects of hard water on RV sinks, faucets and drains can be an ongoing problem for RVers. This page describes a few tips for how we remove these pesky mineral deposit buildups from our bathroom and kitchen sinks in our fifth wheel trailer and keep the water flowing smoothly in our shower wand and RV toilet rinse sprayer.

RV plumbing tips for cleaning RV faucets and drains and removing mineral deposits

RV plumbing tips for removing mineral deposits and cleaning RV faucets and drains.

We like the water to flow freely in our RV vanity sink faucet, kitchen sink faucet and in the shower and RV toilet sprayer wands, however, periodically these faucets begin to spray water in weird directions because their inner workings have gotten clogged up by mineral deposits from the hard water.

In our bathroom vanity, our first step is to remove and clean the screen filter in the faucet. Sometimes the faucet tip can be unscrewed by hand, but if we’ve let it go too long, we have to use a pair of pliers to break the faucet tip free due to corrosion that makes it impossible to unscrew.

Remove RV faucet screen with pliers

Remove the RV faucet screen (with pliers if it’s stuck!)

Then we unscrew the entire screen assembly from the faucet.

Disassemble RV faucet

The faucet tip unscrews from the faucet.

Dirty RV faucet screen

Ugh… the screen is pretty dirty. No wonder the water comes out funny!

This time the screen was very corroded. We remove the corrosion and mineral buildup by putting all the pieces in a bath of white vinegar for 20-30 minutes or so.

Prior to putting the pieces in the white vinegar bath, it is a good idea to make note of the order that these parts go into the faucet assembly!

Soak RV faucet parts in white vinegar

After noting how the pieces go together, soak them in white vinegar.

After the bath, the bits of corrosion can be seen in the white vinegar!

RV faucet parts get cleaned with white vinegar

Here are all the pieces. You can see the dirt that came off in the vinegar bath!

Using an old toothbrush, we scrub each piece until it is clean.

Use toothbrush to clean RV faucet screen

Use a toothbrush to get the screen totally clean.

RV faucet cleaning with toothbrush and white vinegar

Scrub all the parts with the toothbrush.

Then we reassemble the pieces in the correct order and orientation.

Reassemble RV faucet after cleaning 2

.

Reassemble RV faucet after cleaning 1

Reassemble the pieces.

Put RV faucet together after cleaning it 2

.

Put RV faucet together after cleaning it

.

To make it easier to remove the faucet tip the next time we do this job, it helps to grease the threads with a marine PTEF lubricant prior to screwing the assembly back onto the faucet.

Lubricate RV faucet with PTEF lubricant grease

Lubricating the threads makes it easier to unscrew next time!

Lubricate RV faucet after cleaning

.

Reassemble RV faucet

Screw it back into the faucet.

RV faucet cleaned and lubricated

Ta da! Now the flow will be smooth and full.

Our trailer has white plastic sinks in the bathroom and kitchen, and these sinks often develop a skanky brown ring around the sink drain. For years, we relied on Comet to clean these sinks. We sprinkled it on the entire sink, let it sit for a bit, and then scrubbed.

We recently discovered that Baking Soda is just as effective!! The fantastic thing about Baking Soda is that it is non-toxic. This is wonderful not only for our gray water holding tanks but also for the RV dump stations as well as the septic fields and municipal waste water treatment systems that are downstream from them.

It’s also really cheap!

Tips for cleaning an RV sink drain

White plastic RV sinks are prone to getting ugly stains.

Dirty RV sink drain

Yuck!

We simply sprinkle it on the sink and then scrub the sink with a damp Scotch-Brite scrubbing pad.

RV sink drain cleaning with baking soda

Sprinkle the baking soda in the sink and scrub the stains with a damp scrubby pad.

What a great result — a wonderfully squeaky clean sink!

RV sink drain is sparkling clean

Sparkling!

The drain plug also gets gummy, and we use an old toothbrush to scrub it clean with either baking soda and/or Murphy’s Oil Soap (a handy all around biodegradable cleanser).

In an RV that is used for dry camping a lot, like ours, the bathroom vanity sink drain can get really gross really quickly because in an effort to conserve fresh water not much clean water gets flushed down the drain.

This can result in foul odors in the sink drain, and it’s pretty unsightly too.

So, we do two things.

First, we scrub the inside of the bathroom sink drain with an old toothbrush. To get a longer reach down the drain, we taped our toothbrush to an old tent stake we had lying around. Anything long and narrow will work.

Toothbrush and extension rod to clean RV sink drain

Tape an old toothbrush to a long stick to reach deep down the RV sink drain.

Cleaning an RV sink drain

Scrub inside the sink drain.

We also scrub the sink drain plug.

Second, to keep the RV bathroom sink drain fresh smelling, we use Happy Camper Holding Tank Treatment which we’ve found is a particularly good deodorizer. We put scoop of powder in an old water bottle, fill it up with water and shake it well (the bottle gets warm as the enzymes get activated!), and then pour it down the drain.

Most of it goes into the gray water tank, but a small amount stays in the bathroom sink drain p-trap and does its magic there, killing off the offensive odors.

Use toothbrush to scrub RV sink drain plut

Scrub the sink drain plug with a toothbrush.

To keep our RV shower in tip-top shape, we clean the drain there as well. The biggest problem in our RV shower drain isn’t foul odors, because the shower drain gets flushed with lots of water everyday. Instead, the challenge with the RV shower drain is accumulated hair.

In a house, it’s easy enough to use a powerful cleanser like Drano to clean out any clogs caused by hair, but we don’t want strong chemicals like that sitting in our gray wastewater holding tank. Afterall, we want the enzymes and bacteria in the Happy Camper and Unique RV Digest-It holding tank treatment products we use to thrive and go to work breaking things down!

So, we use a long spring hook (and flashlight) to pull the hair out. It just takes a few minutes and then the drain is clear.

Some RV shower stalls may have drain components that can be removed for cleaning. Ours doesn’t.

Cleaning hair from an RV shower drain

Use a spring hook to pull hair out of the RV shower drain.

Periodically, the RV shower wand gets crudded up with mineral deposits just like our RV sink faucets do. Again, we rely on white vinegar to clean up the deposits clogging the spray holes in the shower nozzle.

First, we pour the white vinegar through the shower wand to let it soak from the inside.

Tips for cleaning an RV shower wand

The RV shower wand can be cleaned with white vinegar.

Then we soak the shower wand’s face in a bath of white vinegar.

Tips for cleaning an RV shower wand

Put the RV shower wand face down in a white vinegar bath to clean all the little holes.

If we’ve let a little too much time pass, we’ll also use a toothpick to clean out each hole in the shower head. We use bamboo toothpicks because they hold up well in water. Ordinary wooden toothpicks tend to disintegrate when they get wet. A scribe also works well.

The before-and-after difference in the flow of water through the shower wand is startling. When half of the little holes are blocked from mineral deposits and the other half have an impeded flow, the water can feel like needles on your skin. After cleaning the wand, it is more like a waterfall.

Clean each hole in an RV shower wand with a toothpick or scribe

Use a toothpick or scribe to clean each hole in the shower wand.

Lots of RVers love the Oxygenics RV shower head. We don’t use it because it doesn’t work well with the low water pressure we use to conserve water since we dry camp every night, but for RVers who get water hookups a lot, these shower heads are extremely popular. Of course, in hard water areas, these shower heads will need periodic cleaning as well.

The RV toilet bowl rinsing wand is also subject to corrosion from mineral deposits, and after a while when we go to rinse the toilet bowl we find the water flow from the sprayer is restricted and funky.

RV toilet sprayer wand cleaning

The RV toilet sprayer wand gets clogged with minerals too.

Again, it’s easy to unscrew the end of the toilet spay wand, put it in a white vinegar for 20-30 minutes, scrub it a bit with a toothbrush, and then put it back on the wand.

RV toilet rinse wand cleaning

Unscrew the tip of the toilet rinsing wand and soak it in white vinegar to clean the holes.

As an aside, if you have energy leftover after cleaning all your RV sinks, faucets, drains and spray nozzles, a spray bottle filled with a water and white vinegar mixture is super for washing the windows. As I wrote this, some flies got in our trailer and Mark started spraying them when they landed on the window next to him using a spray bottle filled with water and white vinegar. Besides slowing them down and killing them, he was really impressed with how clean the window was when he finished!

So, these are a few of the things we do to keep our sinks and drains flowing smoothly in our life on the road in our RV.

We hope they help you too!

Subscribe
Never miss a post — it’s free!

A recap of some of the goodies mentioned in this post:

Below are some of our most POPULAR POSTS (also in the MENUS above)

Buddy - A Journey in Spirit - The story of an event that changed our lives forever.

ARTICLE INDEXES
  • RV Tech Tips Articles - A one page index of links to all our RV Tech Tips, RV Upgrades & RV Maintenance articles.
  • RV Lifestyle Tip Articles - An index of links to all our RV Lifestyle Tips (finances, boondocking, major repairs, work/jobs, etc.)
  • Solar Power Articles - Overview and tutorial articles for how to design and install solar power on an RV or boat
  • Product Reviews - An index of links to all of our Product Reviews
RV UPGRADES, SYSTEMS & TIPS MONEY FULL-TIME RV LIFESTYLE GEAR STORE
  • Gear Store - A list of the goodies, equipment and gear we've found useful in our RV lifestyle!
 

Our most recent posts:

More of our Latest Posts are in the MENU.   New to this site? Visit RVers Start Here to find where we keep all the good stuff. Also check out our COOL NEW GEAR STORE!! *** CLICK HERE *** to see it!

Hitch Tighteners – Anti-Rattle Hitch Clamps Stop the Creaks & Wiggles!

We carry our bicycles on the back of our 36′ fifth wheel trailer with a Kuat NV bike rack inserted into the trailer’s hitch receiver (we reviewed the Kuat bike rack here). We installed this bike rack in 2012 and it has been great for the past five years of our full-time RV travels.

Kuat NV Bike Rack on back of fifth wheel trailer RV

We carry our mountain bikes on the back of our 5th wheel with a Kuat NV Bike Rack

To keep the bike rack from dragging on the ground in crazy places like steep gas station ramps or deep gulleys on small roads, we had a “Z” shaped “hi-low” hitch riser made. This raises the rack up quite high, so now the first thing to hit the ground is the hitch receiver itself rather than the bike rack.

Hitch extension with Kuat NV bike rack

A “Z” shaped “hi-low” hitch riser raised the bike rack so it can’t drag on the ground in a gully or dip.

As is often the case with hitch receivers, the bike rack isn’t a perfectly tight fit in the hitch receiver riser, and the bottom of the riser isn’t a perfect fit in the trailer’s hitch receiver either. So, the whole bike rack tends to wiggle.

We’ve used various shims to make it all tight, but too often they would wiggle loose over time, and eventually the bikes would be jiggling all over the place on the rack again.

Using a shim in a bumper hitch

We wedged shims in to tighten things up, but it wasn’t an ideal solution

Last fall we stopped in at JM Custom Welding in Blanding, Utah, to talk with Jack, the man who had made our “Z” hitch riser (more info about it here). We wondered if he had any tricks up his sleeve for making our bike rack arrangement less wobbly.

JM Custom Welding Blanding Utah

Mark and Jack of JM Custom Welding in Blanding, Utah

It turns out that he had solved this very problem for other customers by making a hitch tightener. This is essentially a hitch clamp that fits over the end of the hitch receiver and snugs up whatever is inserted into the receiver with some lock washers and nuts.

Bumper hitch tightener for car or RV hitch

Jack put this nifty hitch tightener on our hitch receiver.

Bumper hitch tightener for bike rack

.

So, we got two of them, one for the top and one for the bottom of our “Z” shaped hi-low hitch riser extension.

Hitch tightener on RV for bike rack

He put a second hitch tightener on the trailer’s receiver as well.

The difference in the amount of movement of the bikes was absolutely astonishing. They were rock solid now!

Hitch tightener for bike rack mounted in bumper hitch

Looking down at both hitch tighteners on our hitch extension.

After installing the hitch tighteners, which was just a matter of tightening the nuts, Mark drove the rig around the JM Custom Welding dirt lot while I walked behind and watched the bikes, and they were steady as could be.

Hitch tighteners on bumper hitch mounted bike rack

Hitch tighteners at the top and bottom of the hi-low hitch riser extension.

Hitch tightener for bike rack mounted in bumper hitch

.

But unlike the shim solution we’d used before, these hitch tighteners have stayed tight without needing any adjusting or fuss for several months and several thousand miles of driving on all kinds of roads.

Kuat NV BIke rack and bike rack extension and hitch tightener

The whole system is completely rigid now and has not needed any adjustments in six months of use.

The hitch tighteners do make for some extra steps if we want to move the bike rack from the hitch receiver on the trailer to the hitch receiver on our truck. However, we’ve started hauling our bikes in our truck in a different way using a furniture blanket, so there’s no need to take the bike rack off the trailer any more.

Mountain bikes on truck rather than a bike rack

An easy way to get the bikes from the trailer to the trail head!

Jack makes these hitch tighteners in batches, so if you are passing through Blanding, Utah, perhaps on your way to or from the beautiful Natural Bridges National Monument, just a mile or so south of Blanding you can stop by JM Custom Welding and pick one up! In 2016 the were $38 apiece.

We discovered later that hitch tighteners of various kinds are also commercially available. So, if Blanding, Utah, isn’t in your sights, you can choose from many different kinds of hitch clamps online.

However, a visit to Jack’s welding shop is very worthwhile, especially if you need any kind of custom metal fabrication done on your RV. He is very creative and does excellent work.

While we were in Jack’s office, we noticed a display of his for a folding storage solution for the beds of pickup trucks he’s created that fits right behind the truck cab. He calls it the “Jack Pack” and it is essentially a framed canvas storage bag the width of the truck bed that is easily opened to throw your bags of groceries into and then easily folded away when you need to haul lumber or fill the truck bed with something else.

If we didn’t have that part of our truck filled up with extra water jugs, we would have snagged one of those from him at the same time!

We’ve got a few more links below.

Subscribe
Never miss a post — it’s free!

Info on hitch tighteners and hitch clamps:

There are many brands of hitch tighteners on the market. These are a few:

There’s also a “Z” shaped hi-low hitch riser available:

If you need custom metal fabrication work done:

Related Posts:

Our most recent posts:

More of our Latest Posts are in the MENU.   New to this site? Visit RVers Start Here to find where we keep all the good stuff. Also check out our COOL NEW GEAR STORE!! *** CLICK HERE *** to see it!

Power Inverters – Exeltech’s Pure Sine Wave Excellence

An inverter, sometimes called a “power inverter,” is a piece of electronic gear that converts DC power to AC power, and it is what enables RVers to use regular household appliances in an RV without hookups to an RV park power pedestal relying on a generator.

The September/October 2016 issue of Escapees Magazine features our detailed article about inverters: what they are, how they are sized, what flavors they come in and how to wire one into an RV.

Power inverter for an RV - an Exeltech XPX 2000 watt inverter

.

For RVers who enjoy dry camping in public campgrounds or boondocking on public land, an inverter is the key piece of the puzzle that gives their RV traditional 110 volt AC power — like the power in the wall outlets of a house — without plugging the RV into a power pedestal at an RV park or a noisy gas-hungry generator.

WHAT IS AN INVERTER?

For beginning RVers, it is easy to confuse a converter with an inverter, because the words are so much alike. The difference is actually very straight forward:

  • A converter converts the 110 volt AC power coming out of a wall outlet, RV park power pedestal or generator into 12 volt DC power, and charges the RV’s 12 volt battery bank.
  • An inverter converts the batteries’ 12 volt DC power into 110 volt AC power so household appliances like the TV, blender, microwave and vacuum can run.
Exeltech XPX 2000 watt pure sine wave inverter living off the grid in an RV

Our “house” inverter – an Exeltech XPX 2000 watt inverter.

RV FACTORY INSTALLED CONVERTERS

Most trailers and some smaller motorhomes come with a factory installed converter. Frequently, these factory installed converters are inexpensive units that are not multi-stage chargers. So, for RVers who want to dry camp a lot and keep their batteries in tip-top shape, or charge them up efficiently with a generator while dry camping, it is a good idea to replace the factory installed converter with a better quality converter (we did).

More info on upgrading an RV power converter here: Converters and Inverters in an RV

RV FACTORY INSTALLED INVERTERS and INVERTER/CHARGERS

A few high end trailers and most higher end motorhomes come with a factory installed inverter.

In many cases, especially high end trailers, the inverter is dedicated to powering a residential refrigerator that runs exclusively off of 110 volt AC power (unlike an RV refrigerator that can run on propane). The inverter is there so the fridge can continue to run off the batteries while the rig is being driven from one RV park to another without a connection to 110 volt AC electricity. This inverter is sized to support the refrigerator and is not intended to be used for any other purpose in the rig.

So, for most trailer owners that want to do a lot of camping without hookups, an inverter is an extra piece of gear that must be installed.

In contrast, many higher end motorhomes come with a factory installed inverter/charger that can do two things: 1) provide the RV with household 110 volt AC power at the wall outlets via the batteries while dry camping and 2) charge the batteries when the RV is getting its 110 volt AC power from an RV park power pedestal or a generator. These inverter/chargers essentially do the work of both a converter (charging the batteries from shore power) and an inverter (providing AC power via the batteries while dry camping).

So, for folks with a higher end motorhome, an inverter is usually already installed in the motorhome at the factory in the form of an inverter/charger, and it does not need to be added later. However, it may not be a pure sine wave inverter (see below).

INVERTER SIZES

Inverters come in all shapes and sizes and all price ranges too, from little biddy ones that cost a few bucks to big beefy ones that cost a few thousand dollars.

They are rated by the number of watts they can produce. Small ones that can charge a pair of two-way radios or a toothbrush are in the 150 watt range. Huge ones that can run a microwave and hair dryer are in the 3,000 watt range.

  • Small inverters (400 watts or less) can be plugged into a cigarette lighter style DC outlet in the rig. Mark has one that he uses for his electric razor every morning.
  • Larger inverters (500 watts are more) must be wired directly to the batteries and require stout wires that are as short in length as possible.

Our RV has a “house” inverter that is 2,000 watts. It can run our microwave and hair dryer and vacuum comfortably (we don’t run those appliances all at the same time, however, as that would overload it). Our small portable inverter lives in our bedroom and gets used for a few minutes every day before we head downstairs:

RV power inverter with electric razo

Mark uses this small inverter to power his electric razor every morning!

MODIFIED SINE WAVE vs. PURE SINE WAVE INVERTERS

Inverters also come in two flavors:

Modified sine wave inverters are cheaper than pure sine wave inverters and are the most common type of inverter sold in auto parts stores, Walmart and truck stops. Many inverter/chargers on the market are modified sine wave inverters.

Our sailboat came with a 2,500 watt inverter/charger that produced a modifed sine wave. It was wired into the boat’s wall outlets, including the microwave outlet. We used this inverter when we wanted to run the microwave but not for anything else (we preferred using a pure sine wave inverter instead).

Some vehicles now ship with an inverter installed in the dashboard. Our truck has a small modified sine wave inverter in the dashboard, and I use it all the time to plug in our MiFi Jetpack and get an internet signal for my laptop as we drive.

Exeltech XP 1100 Inverter

Our first pure sine wave inverter: an Exeltech XP 1100 watt inverter. We keep it now as a backup.

WIRING AN INVERTER INTO AN RV – DC SIDE

As mentioned above, small inverters can plug into a DC outlet in the RV wall (these outlets look like the old cigarette lighters found in cars).

Large inverters must be wired directly to the batteries. The wire gauge must be very heavy duty battery cable and short to support the big DC currents that will flow through it. If possible, the length should be less than four feet. A wire gauge chart gives the correct gauge of wire to use for the current that will flow and the length the wire will be.

To determine the maximum possible DC current that might flow through these wires, simply divide the maximum wattage the inverter is rated for by the lowest voltage the inverter can operate at. In our case, we divided our inverter’s maximum 2,000 watts by the minimum 10.5 volts it will operate at before it shuts off. This yields 190 amps DC. Our cable connecting our inverter to the batteries is 2 feet long. So the proper wire size is 2/0 gauge (“double ought”) and can be purchased here: High quality Ancor Battery Cable.

Heavy duty battery cable on Exeltech XPX 2000 inverter in an RV

We used 2/0 Gauge Ancor Battery Cable to wire the DC side of our inverter.

WIRING AN INVERTER INTO AN RV – AC SIDE

All inverters have at least one household style female 110 volt AC outlet. Usually they have two. These outlets look like ordinary household wall outlets.

One very simple way to wire the AC side of the inverter is to plug an appliance directly into it, for instance, plug the power cord of the TV into the inverter. We did this with a 300 watt inverter and our 19″ TV in our first trailer. The inverter was plugged into a DC outlet on the trailer’s wall, and the TV was plugged into the inverter right behind where it sat on our countertop.

If you want to plug more than two appliances into the inverter at once, then plugging a power strip into one or both of the inverter’s AC outlets is one way to go. We did this on our sailboat. We had a 600 watt pure sine wave inverter on the boat. Plugged into one of the inverter’s AC outlets, we had a power strip supporting our TV and DVD player. Plugged into the other AC outlet, we had a power strip supporting everything else: two-way radios, toothbrush, and laptop charging cords and camera battery chargers.

Exeltech XPX 2000 inverter and Trojan Reliant AGM Batteries in an RV

Our inverter is placed as close to the batteries as possible by being suspended above them.

Obviously, you have to be careful not to run too many things at once, or they will overload the inverter. Most inverters will shut down when overloaded or sound a beeping alarm if your appliances demand more from it than it can give. We ran into that a lot when we lived on our portable inverter for a few days while our house inverter was being repaired.

A more sophisticated way to wire an inverter’s AC side so it supplies power to all the wall outlets in the RV is to wire it into the rig’s AC wiring using a transfer switch.

WHICH INVERTER TO BUY for a BIG INSTALLATION?

Because we live off the grid and never plug our RV into a power pedestal (we’ve lived this way for nine years and hope to do so for many more), we rely on our trailer’s house inverter to run all of the AC appliances we own, every single day.

For this reason, we invested in the highest quality inverter we could find on the market: an Exeltech XP 2000 watt pure sine wave inverter. This is a very pricey unit, but it is our sole source of AC power day in and day out. It is the brand that was selected for both the American and Russian sides of the International Space Station, and its signal is pure enough to run extremely sensitive medical equipment.

Exeltech power inverter manufacturing

We visited the Exeltech manufacturing plant in Texas and saw first-hand how meticulously these inverters are made and tested prior to shipping.

Exeltech is a family run company with electrical engineering PhDs heading up their R&D department. All manufacturing is done in-house at their headquarters in Fort Worth, Texas. They have phenomenal tech support and an excellent warranty.

When our beautiful new Exeltech XP 2000 inverter was inadvertently blown up by a welding snafu at a trailer suspension shop during our trailer’s suspension overhual (the plastic sheathing on a bundle of AC wires got melted onto the trailer’s frame, bonding the wires to the frame and creating an electrical short — ouch), they got it repaired and back to us very quickly.

And thanks to our RV warranty, our failing suspension was rebuilt completely at no cost to us, and has worked flawlessly for 12 months now.

Power inverter

This high quality Exeltech inverter is a serious piece of electronic gear!

Many RVers like the Magnum brand of inverters. These inverters have a built-in transfer switch which makes them easy to wire into the RV’s AC wiring system.

There are many other brands on the market from Schneider Electric / Xantrex to Go Power, Power Bright and others. If you are going to dry camp a lot, then installing a high quality and expensive pure sine wave inverter makes sense. But if you are going to dry camp for just a few days, week or month here and there, then a cheaper one may make more sense.

MORE INFO ABOUT INVERTERS and SOLAR POWER

All of this info and more is covered detail in our feature article in this month’s Escapees Magazine. We also have loads of other info about inverters, converters right here on our website. Links to our many RV electricity related articles are at the bottom of this page.

ESCAPEES MAGAZINE and RV CLUB

RV Power Inverters

Inverters – AC Power from DC Batteries
Escapees Magazine Sep/Oct 2016
By Emily Fagan

Our five page article on inverters in this month’s issue of Escapees Magazine is typical of the kind of detailed technical articles the magazine publishes.

I have been publishing articles like this in Escapees Magazine since 2008, and I have written about anything and everything we’ve learned in our full-time RVing lives, from solar power to photography to batteries to the importance of fulfillling our dreams.

What makes Escapees Magazine unique is that it is written by RVers for RVers.

The magazine article topics come from real life experiences that RVers have encountered in their lives on the road.

Just as my article in this issue of Escapees Magazine is about what we’ve learned about inverters since we started RVing (and believe me, back in 2007, I was the one asking trailer salesmen what the difference was between inverters and converters, and I got some wacky, wild and very wrong answers!), other RVers write articles for Escapees Magazine about things they have learned.

When I sat down to read the September/October issue, I was impressed — as I am with every issue — by the quality of both the articles and the presentation.

Besides including some cool travel articles about RVing Alaska via the Alaska Marina Highway ferry system, and visiting the Very Large Array that listens to the cosmos in New Mexico, and traveling on the Natchez Trace in Mississippi, this issue has two wonderful profiles of full-time RVers doing intriguing things as part of their RV lifestyle.

RV by ferry on the Alaska Marine Highway

RV Alaska by Ferry!
Escapees Magazine Sep/Oct 2016

One article this month is about a full-time RVer who lives in an Airstream trailer and has dedicated himself to ensuring that the original silkscreen art prints created by the WPA artists in the 1930’s for the National Parks remain in the public domain, owned by the NPS rather than private collectors. It is a fascinating tale, written by Rene Agredano who has been full-timing since 2007 and writes the very informative blog Live, Work, Dream, a terrific resource for anyone who wants to learn the ins and outs of work camping.

Another article this month shares the stories of three very long term (10+ years) full-time RVers who have flourished as artists on the road. One RVer/artist specializes in watercolors and has held many exhibitions of her work around the country. Another RVer/artist discovered the fun craft of decorating gourds and teaches classes at her home RV park. A third RVer/artist has self-published a photojournal about her travels specifically for her grandchildren. This insipring Escapees Magazine article is written by full-time RVer Sandra Haven who shares the same home base RV park as the artists.

There is also a detailed article written by a lawyer on what it takes to establish a legal domicile and register to vote when you’re a full-time RVer without a sticks-and-bricks home built on a foundation that stays in one place.

These kinds of articles aren’t found in most RV industry publications!

Full-time RV traveler artist

RVers take their art on the road
Escapees Magazine Sep/Oct 2016

And what’s neat for would-be writers and photographers who are Escapees RV Club members is that the magazine’s editorial staff is always eager for new material from members…click here!.

Escapees Magazine is just a tiny part of the overall Escapees RV Club, however.

Founded by full-time RVing pioneers Joe and Kay Peterson, the Escapees Club strives to serve the varied interests of all RVers and to alert RVers to changes in government policies or the RV industry itself that might affect us as consumers of RVs, RV and camping products and RV overnight accommodations.

They also work as tireless advocates on behalf of all RVers at both the local and national levels.

RVers BootCamp at Escapees RV Club

RVers BootCamp – A training program for new RVers

One of the most interesting articles in this month’s magazine alerts members to corporate consolidations in the industry that will affect our choices as RV consumers in years to come. It also reveals that the Escapees advocacy group is investigating possible changes at the Bureau of Land Management that will affect RVers ability to use their RVs on BLM land nationwide.

In addition to the magazine, the Club offers discounts for RV parks, regional chapter groups, national rallies, bootcamp training programs for new RVers, and assisted living for retired RVers who are ready to hang up their keys but not ready to give up living in their RV.

One of the most charming articles in this month’s magazine is about Nedra, a woman in her mid-80’s who was once an avid RVer but now lives at CARE, the Escapees assisted living facility in Livingston Texas. I had the good fortune to meet Nedra when we visited the Escapees headquarters at Rainbow’s End, and she took me on a fun tour of the CARE facilities. Escapees is like a big extended family, and it was very heartwarming to see her story in this month’s issue.

We’ve been members of Escapees RV Club since 2008 and highly recommend joining if you are a current or future RVer, whether you plan to travel full-time or just occasionally. Supporting their advocacy work benefits everyone who owns an RV and ensures we consumers and hobbyists have a voice in this very large industry.

You can join Escapees (or Xscapers, the branch of Escapees dedicated to younger, working age RVers) here:

Join Escapees RV Club

If you mention this blog, Roads Less Traveled, when you join, they put a little something in our tip jar. We began recommending Escapees RV Club to our readers many years ago, and this friendly gesture from Escapees is a brand new development in the last few months. So, this is not a sales pitch from us to earn tips, by any means. We simply believe in the work Escapees RV Club does to support RV consumers and hobbyists and hope you do too!

Subscribe
Never miss a post — it’s free!

SOLAR POWER OVERVIEW and TUTORIAL

BATTERIES and BATTERY CHARGING SYSTEMS

LIVING ON 12 VOLTS

Our most recent posts:

More of our Latest Posts are in the MENU.   New to this site? Visit RVers Start Here to find where we keep all the good stuff. Also check out our COOL NEW GEAR STORE!! *** CLICK HERE *** to see it!

RV Tips and Tricks – Make RVing EASY and FUN!

There are a million RV tips and tricks to make the RV life easier, and this page offers some little jewels we’ve discovered since we started RVing full-time in our fifth wheel trailer in 2007. We’ve broken them down into:

RV Tips and Tricks for making RVing and the RV Life easy

.

OUTDOOR RV TIPS and TRICKS

High Powered “Search” Flashlight

We often camp in areas that are quite remote, and getting to and from and around the rig at night is much easier with a very high powered flashlight!

Lumintop SD75 LED flashlight

Lumintop SD75 Flashlight compared to a pocket Maglite

We have a Lumintop SD75 Flashlight which is downright phenomenal. We have hiked Bryce Canyon and the Grand Canyon at night to photograph the stars and the Milky Way, and this flashlight is literally like holding a car headlight in your hand.

Here is more info about this flashlight:

Lumintop SD75 Flashlight Review

Getting Parked Without Damaging Anything

The most basic element in RVing is learning to hitch up and unhitch, whether you are driving a car pulling a popup, a diesel truck towing a fifth wheel or a Class A motorhome towing a car. Of course, lots of people have loads of fun in their motorhomes without towing a car behind, but getting hitched up and unhitched is part and parcel of the RV lifestyle for an awful lot of us.

The most important thing for the driver and the person standing outside of the rig is to stay in eye contact with each other. This is entirely up to the person running around outside. If you can see the driver’s face in the rear view mirrors, you are golden. If you can’t, then any kind of gesture you make, including jumping up and down and waving your arms because the driver is about to drive the rig right off a cliff, will never be seen.

We use two-way radios to give us a way to talk to each other and to lessen the impact if I inadvertently end up in a position where Mark can’t see me in the rearview mirror. We use the longest distance radios we can get, to make sure the signal is decent. Right now we have 36 mile GMRS radios, which are realistically good to about 3-5 miles. We used these on our boat (a godsend when anchoring) and we’ve used them ever since we started RVing. We’ve gone through three sets so far, because the salt air ate up two pairs during our cruising years.

Two-way radios for backing up an RV

We use our two-way radios all the time…

Besides the radios, it’s really helpful to have good hand signals. I indicate the distance until disaster by spreading my arms wide and then bringing my hands closer and closer together until I give a “halt” sign (palms forward). Shaking my head and waving my hands and giving a few slices to the neck can help too if it starts to look really bad.

Midland 36 mile GMRS radios

36 mile GMRS radios

It is royally embarrassing to make all these gestures when you’ve got an audience of people watching, but I’ve learned that there’s no ego in getting the rig parked well. Every RVer who has been around a while has made a huge blunder of some kind while parking, and they’ve all lived through it. So a few members of your giggling audience will probably be very sympathetic to whatever mistakes you have up your sleeve.

My worst gaffe was in front of two very special friends we hadn’t seen since we’d moved into our fifth wheel a year earlier. They had come out to camp with us, and we were all excited. I had just finished telling them (with great pride) that we didn’t need their help parking because we parked our rig all the time, we had a system, and we had gotten pretty darn good at it.

Mark began to back up as our friends watched, and I began to warn him that he needed to go more towards the driver’s side to avoid a tree. He adjusted, but again, I told him, he needed to go more towards the driver’s side! I kept repeating my instructions louder and louder as our good friends watched in bewilderment. When Mark was just about to cream the tree, we all started shouting STOP!!! Mark got out of the truck, calmly assessed the situation, and then said to me: “Ahem…. which side does the driver sit on?”

Our friends smiled weakly and I looked for the nearest rock to crawl under…

So, don’t be embarrassed and don’t be shy. Make your gestures big and strong, and remember which side of the rig the driver sits on!

Hitching and Unhitching a Fifth Wheel Trailer

Some folks drive their RVs solo, and although I can’t say much about hitching and unhitching a motorhome and car combo, our good friend Bob has found a great way to hitch and unhitch a fifth wheel trailer solo. He marked the front landing leg that’s near the extend/retract button at regular intervals all the way up and down the leg.

Fifth wheel landing leg marked with hash marks

Hash marks on a landing leg help get the rig back to the right height before hitching up.

Then he numbered each hash mark. He keeps a pad and pen in the hatch near the landing legs button. When unhitching, once he’s raised the trailer to where he can drive the truck out from under it, he jots down the hash mark number that is visible on the leg. Then he drives out, parks, and returns to the trailer and raises or lowers the landing legs as necessary to get the trailer level.

When he hitches up again to leave, he adjusts the trailer height to the exact position where he unhitched. That way, when he gets in the truck to hitch up, he knows the trailer will be at the correct height as he backs the truck up into the hitch pin (and he doesn’t have to get in and out of the truck several times to check and adjust the height of the trailer).

We marked our landing legs at 1.5″ intervals and have not numbered them. There are only 6 hash marks, and I make a mental note of what mark we were at when we unhitched. Frequently, by the time we leave, I’ve forgotten where we were at before we leveled the trailer, but I’ve developed a good eye for knowing how much to raise or lower the rig as Mark backs the truck towards the trailer.

We also marked the centerline of the fifth wheel pin box and pin plate so it is easy for Mark to line up the hitch with the pin box and king pin when he is backing the truck into the trailer.

Leveling the Trailer

There are many methods for getting a trailer level, and hydraulic leveling is a blessing that takes all the excitement out of it. For those without hydraulic leveling, we found in our early years that with two 5′ lengths of 2″x8″ board and one 5′ length of 1″x8″ board we could always find a combination that worked to get the trailer level from side to side. A 5′ board is relatively easy to drive onto and provides a solid platform for the trailer’s wheels.

We store the boards in the bed of the pickup. When using two boards, we stagger them a few inches so the trailer is driven first onto one level and then up a step to the next. We have to remember to back up when coming off stacked boards or the upper one will tip up and hit the bottom of the trailer while driving off it (think of a sailor walking the plank).

Leveling boards fifth wheel RV trailer

This was an extremely unlevel spot where we used quite a few boards and strips of horse stall mat.

If you don’t like the idea of hauling long boards around in your truck, there are nifty plastic leveling board kits (here’s another type) that are very popular.

We also use plastic wheel chocks whenever we park on a steep incline to prevent the trailer from rolling, especially while unhitching and hitching up.

Our friend Ken introduced us to using a sliced up horse stall mat rather than pine boards. We cut a 4’x6′ sheet of horse stall mat into five 1×5 strips and four 1×1 squares, and those have worked really well for us. They hold up to the elements really well and they roll along with the contour of whatever crazy surface we might park on. It is also possible to drive off of them either forwards or backwards because they don’t slap the underside of the trailer.

The only disadvantage is that they are much heavier than pine boards, but we can drag them around and they don’t disintegrate. We use the 1’x1′ squares under the landing legs and scissor jacks for cushioning.

We also have four large blocks made of three 1′ lengths of 2″x8″ boards screwed together. We put handles on the ends to make them easy to lug around. In a really unlevel site in the Smoky Mountains we had to stack them on top of each other AND extend the jack legs all the way!

RV fifth wheel landing legs

A very unlevel spot that required two blocks plus all the leg length.

What Is Level and How Do You Know?

Determining what constitutes “level” inside an imperfectly constructed RV is an interesting trick. We used a carpenter’s level on our kitchen floor, in several directions, and on our table, and on the bedroom floor. Of course, none agreed! But we found a good compromise and then mounted some RV levels on the outside of the rig to give us a reasonable guess when we’re setting up.

There are two different types of levels: Bubble Levels that have an air bubble that floats to the high side, and Ball Levels that have a ball that drops to the low side. Bubble levels are more responsive (the bubble moves more quickly as the RV moves). Ball levels take a few seconds to react. If you use both types, you can get confused because they move in opposite directions.

We have a large Level Master level on the fifth wheel pin box that is easy to see from inside the truck. We also have two small bubble levels on the trailer on the corner by the landing jack power button, one facing forward (for left to right leveling) and one facing sideways (for front to back leveling).

RV Fifth wheel hitch level and center mark

The ball style level (visible from inside the truck) shows which side of the rig is low.
We painted a line on the pin box to help with hitching up.

Our pin box mounted Level Master, a ball level, is easy to see from inside the truck. When the trailer is higher on one side than the other, the Level Master ball falls to the low side.

Our smaller levels on the front corner of the fifth wheel are bubble levels, so the one on the front of the rig showing the side-to-side level has a bubble that rises to the high side. This is the opposite of the ball level on the pin box, and sometimes, when we are struggling with white line fever from hours on the road, this messes us up.

RV bubble levels on a fifth wheel trailer

Small bubble levels show left/right and front/rear level near the landing jack power button on our fifth wheel.

I’d recommend sticking to either ball levels or bubble levels and not mixing and matching like we did! A good solution might be to mount a ball level like this on both the pin box and on the front of the trailer near the landing jack power button.

Why do you need two side-to-side levels? When I’m running around placing the boards in line with the wheels for Mark to drive onto, I want to see a level on the fiver easily myself, and the front of the pin box is impossible to see from the side of the truck when we’re hitched up.

However, lots of folks rely on a single pin box mounted level that has both side-to-side and forward-back levels in it. There are a few from Camco and Hopkins that are very popular.

You can forego all this nonsense with a slick hydraulic leveling system. However, this does introduce a complicated and expensive system into your life, and we’ve heard many stories of the jacks falling down while driving, or not retracting properly and systems failing in other ways. On the plus side, though, you can easily jack up the trailer to change a flat!


Cordless Drill for Easy Jack Setup

We don’t have electric stabilizer jacks on our fifth wheel trailer (nor did we on our travel trailer). However, we use an 18 volt cordless drill, and it’s very easy.

Cordless drill set up for RV stabilizer jacks

Ready for action with the drill, extension and socket for the stabilizer jacks

We use the following setup to crank the scissor jacks:

We keep the 1/4″ Hex to 3/8″ Socket Adapter in the drill. Mark glued the extension and 3/4″ socket together with JB Weld, making it ultra easy to grab the extension, jam it in the drill and go.

18 volt cordless drill, 8" extension and socket for RV scissor jacks

18 volt cordless drill, extension, socket and adapters for RV scissor stabilizer jacks

This setup worked on both the four stab-jacks on our travel trailer and the two rear scissor jacks on our fifth wheel. We keep the drill right inside a basement hatch door so it’s easy to find during both setup and breakdown of the trailer.

RV stabilizer jacks with cordless drill

Raising and lowering the jacks takes 2 seconds!

Rigid Drill Set Radio

This goofy radio is in the Rigid Drill Kit (along with an impact driver & regular drill & lithium ion batteries and charger). We love it even more than the other stuff!

Camco makes a special Leveling Scissors Jack Socket that replaces those three pieces, but there is no 8″ extension. Personally, I like the long extension because you don’t have to crawl in so far to make contact with the scissor jacks.

Last year we bought a Rigid drill kit which includes a regular 18 volt drill, an impact driver (awesome for the lug nuts when changing a tire) and a radio as well as two rechargeable lithium-ion batteries and a charger.

After going through three different 18 volt drills during our years of RVing and sailing, we’ve been really impressed with this Rigid kit. The Lithium-Ion battery charges up in about 15-20 minutes and it’s good for a really long time.

The kit comes with two batteries, so we use one for the drill and one for the radio. And what a hoot it is to have a portable radio. In this day and age of slick electronics, we’ve gotten such a kick out of this thing…


Cleaning the RV

No matter where we park, the slide roofs need attention before we bring them in. Either they are dusty, in the desert, or they are covered with twigs and leaves, in the woods, or they are wet from rain. Slide toppers might help with this, although I have heard that they tend to make noise in high winds, sag over time, and sometimes end up with leaves and twigs trapped underneath.

Mark has a long handled squeegee he uses to get the water off, a broom for the leaves and branches, and a California Duster and/or broom for the dust. Getting up on the roof is also useful for checking out all the rooftop items like hatches, TV antenna, solar panels and wiring. His favorite cleaning tool for all this is a telescoping scrub brush that we used for cleaning our boat.

Scrub brush on RV roof

Our telescoping brush from our boat is a favorite for cleaning the rig.

He just loves this soft bristled brush. Murphy’s Oil Soap mixed with water is a good solution to wash the roof. To get rid of black scuff marks on the outside of the rig, he uses Mr. Clean Magic Eraser sponges.

Telescoping Ladder

Telescoping ladder on an RV

A second ladder is really helpful!

Telescoping ladder

.

The first trailer we lived in full-time didn’t have a walk-on roof, and the signature of an RV without a walk-on roof is that it doesn’t have a built-in ladder.

We got a telescoping ladder so we could get up on the roof, and we have kept that ladder and used it ever since, even though our fifth wheel has a built-in ladder.

You may not think you need a second ladder when you’ve got one on the rig already, but polishing the front cap is one job where you do.

Washing or working on any part of the rig that is high up and out of reach of the ladder on the back is much easier with a second ladder, including the high corner of the rear end opposite the built-in ladder!


RV Patio Mats

A beautiful patio mat extends your living space and defines your outdoor area in an elegant way, and we love ours.

RV Patio mat defines outdoor space while camping

A classy patio mat extends your living space into the outdoors.

But they can be pricey if you’re just getting started with weekend RVing. An alternative is to get some green indoor/outdoor carpeting. We had this with our popup tent trailer, and it fit the bill perfectly (and our friends who now own our popup still use it!).

Popup tent trailer indoor-outdoor carpet patio mat

Save a few bucks and use green indoor/outdoor carpeting!

Waxing the Fifth Wheel Cap

Unfortunately, there’s no quick fix for getting the fifth wheel cap to have a deep shine. It’s made of ABS plastic and shows every swirl mark of a first-pass at waxing. The only way to bring back the luster it had when it was new is to use an orbital buffer and fiberglass polish and a whole lot of elbow grease.

Polished front cap on RV fifth wheel trailer

An orbital buffer and 3M Marine Cleaner Wax give the front cap a nice shine
but leave Mark’s shirt speckled with white spots!

Mark likes the 3M Marine Cleaner & Wax that we used on our sailboat. Unfortunately, you’ve gotta do this a bunch of times, and the worse condition the front cap is in, the more times it takes. But eventually you can get the shine back. Just be sure you keep the buffer moving lightly across the surface at all times so you don’t dig a hole in the plastic!

We have more cleaning tips for giving an RV that extra shine while boondocking here: Tips for Washing an RV While Boondocking


Truck Overloads

Timbren SES Suspension System for truck

Timbren SES Suspension

Our 14,000 lb. fifth wheel was right at the weight limit of what our 2007 Dodge 3500 could tow, and the pin weight of the trailer along with all the things we carry in our truck loaded down the bed of that truck quite a bit.

When hitched up, although the rig looked quite level, the truck sagged a bit, leaving the front wheels a little light and giving the truck a tendency to wander.

To alleviate this, we installed a Timbren Suspension Enhancement System between the axles and leaf springs of the truck. These are solid rubber donuts (not airbags) that fit between the axle and the leaf springs. That made the truck sit better and wander less.

We had that setup for eight years. In 2016 we purchased a 2016 Dodge Ram 3500 dually truck which had a much higher weight capacity in the truck bed and could handle the pin weight of the trailer along with the additional weight of the water jugs and leveling boards we carry in the bed of the truck much better.

How to Put Diesel Exhaust Fluid (DEF) in a Truck

Our 2016 Dodge Ram 3500 has a five gallon Diesel Exhaust Fluid tank which needs to be refilled every thousand miles or so. We’ve got some tips for where to get this stuff cheap and how to get it in the truck without spilling here:

How to Put Diesel Exhaust Fluid (DEF) in a Truck and Which Brand is Cheapest

How to put Diesel Exhaust Fluid (DEF) in a truck without spilling

Putting DEF in a diesel truck is a new necessary evil, but there are tricks to make it cheap and easy…

RV Grill Operating on the RV’s Propane Tanks

Mark loves to barbecue, and ever since our first popup trailer, we’ve had a wonderful, small RV barbecue, the “RV sidekick grill.” It comes with a mounting kit to hang it on the side of an RV. Flipped sideways, this same kit becomes legs so the grill can stand up off the ground.

RV grill attached to fifth wheel trailer

The RV sidekick grill is designed to hang on the side of an RV or stand on its own.

We had this grill installed on the side of both our popup tent trailer and travel trailer, but with the fifth wheel, Mark installed an extra gas line and valve coming from the RV’s propane tanks so it can run from them. A quick disconnect LP gas hose goes from the grill to this gas line.

RV grill gas pipe connection

An extra gas line and valve lets the grill runs from the trailer’s propane tanks.

We’ve had this little grill since 2005 and it still makes a great meal!


RV Water Toys – Water Spigot Connections

In many dry camping campgrounds where there are water spigots available but no water hookups at the campsites, the water spigots don’t have threads. We’ve found a water bandit makes it possible to thread our water hose onto the spigot so we can fill up with water easily.

Water Bandit spigot adapter for RV fresh water at campgrounds

The water bandit makes it possible to connect a fresh water hose when there are no threads on the spigot.

In cases where we get water hookups and leave the water hose connected to the trailer, we screw a 90 degree elbow onto the trailer so the hose can hang straight down rather than come out of the our city water connection horizontally and then droop down towards the ground, putting pressure on the connection and potentially causing drips. We discovered this nifty little elbow when we lived on our boat in a marina before our cruise.

In addition, a water pressure regulator keeps the water pressure down to a level inside the rig that prevents any unexpected damage or leaks. A quick release makes it easy to connect and disconnect the fresh water hose. Mark also keeps a Y valve in his water hose arsenal. This is handy if the rig is connected to city water and we want to fill pails with water for washing the truck, or if an RV dump station has only one water spigot and we want to fill our fresh water tanks and run the black water flush at the same time.

Lots of folks like to attach a water filter as well. We used various filters at first, but no longer use any, although we periodically add a cap full of bleach to the fresh water tank. When we got a new fresh water tank, we were surprised that there was no sludge of any kind inside the old tank, even after 7 years of use.

Changing the Inner Rear Tire on a Dually Truck

We have a Dodge Ram 3500 dually truck with a B&W fifth wheel hitch, and wouldn’t you know it, the first time we had to change a tire on it, it was the inner rear tire. Ugh!

We had always wondered exactly how you went about doing this, and we found out. Here is a blog post that explains the entire process:

How to Change the Inner Rear Tire on a Dually Truck


INDOOR RV TIPS and TRICKS

Creating STORAGE SPACE with Seating for Four in the Dinette

We replaced the two chairs in our dining area with two wonderful storage ottoman benches, and this has increased our storage space by quite a bit. The storage ottomans we chose have a nice faux leather padded top that is really comfy to sit on, and they have voluminous storage space inside.

Storage benches in RV dinette

Our dining area – lots of storage and seating for four.

We have his-and-hers benches, and we keep our camera gear in them. The great thing is it got rid of all our clutter and gave us a place that is low down in the trailer and slightly ahead of the trailer’s axles (a smoother ride) where we could make custom padded storage for this delicate gear.

For more info and more pics of our benches, see this blog post about our setup: Making STORAGE SPACE in an RV.

You can buy the storage ottomans we purchased HERE, and you can get ideas of other brands and sizes of storage ottomans on the market HERE.

Protecting the Carpets Under the Slide-Outs

The carpets take a beating as the slide-outs roll in and out. Some slide-outs aren’t quite square and one wall or the other presses particularly hard on the floor while driving. You can buy fancy carpet protectors that fit under the slides. We went a cheaper route and bought a package of four flexible plastic cutting boards.

RV tips - cutting boards under RV slide-out

Flexible cutting boards taped together protect the carpet under the slide-outs.

We used packing tape to tape two of these together, end-to-end, and each pair fits under the slide-out walls perfectly yet are thick enough to protect the carpets. I keep one pair under one slide-out wall while driving, because that slide is crooked and its one wall gets wedged against the floor pretty tightly. The other slide-out walls hover above the carpet as we drive, so I pull the plastic cutting boards out from under them so they don’t get lost underneath while in transit.

Keeping the Cabinets Closed

After having a cabinet door fly open while driving over a bumpy road, causing two unbreakable Corelle bowls to fly across the trailer and break in half, we now latch every cabinet door with 6″ bungee balls. For drawers we use mini 10″ bungee cords with a hook at each end, hooking the top and bottom drawer handles.

RV tips bungee balls and bungee cord on RV cabinet doors and drawers

Bungee balls and bungee cords ensures the cabinets and drawers all stay closed.

Rolled up Carpets

We have a large pots-and-pans drawer that occasionally likes to open. We roll up our throw rugs and place them so they can’t unroll in front of the drawer to keep it closed.

How to keep RV drawer closed in kitchen

Rolled up throw rugs keep this big pots and pans drawer closed while driving.

Rubber Shelf Liners

Rubber Shelf liners are invaluable, keeping everything in its place on each shelf as we travel. We try to make sure no plates, mugs or glasses are touching each other when we set out.

Shelf liner for RV shelves

Shelf liner keeps things in place when we drive

Closet Organization with Plastic Drawers

Our bedroom has a marvelous 8′ wide closet with sliding doors on it, but the interior is just open space with a rod for hangers. We don’t use it as a hanging closet (we have a different closet for that). Instead, we put stacked plastic drawers inside to give us more drawer space as well as a horizontal surface on the top.

RV closet plastic drawer organizer

We created more drawer space in one closet with lightweight, inexpensive plastic drawers.

These drawers don’t latch closed, so Mark drilled a hole through each drawer and the frame, and we simply slip a screw through each hole to keep it closed as we drive.

How to keep RV drawers closed

A screw through each drawer keeps it from opening in transit

Book Organization with Special Bins

We like to keep our heaviest items, like books, on the floor, as shelving in an RV tends to be quite flimsy. I found an awesome line of Rubbermaid “All Access” bins that have a clear plastic latching door on the front. Ours fits neatly under our desk (which we never use as a desk, so it’s wasted space). We can move the whole thing easily, can load it from the top easily and can get at the books from the front easily.

Rubbermaid All Access storage in RV

Rubbermaid’s “All Access” bins have clear front opening doors!

Dish Drying Mat

We do several small loads of dishes everyday, and I just love our little dish drying mat. It soaks up all the water, and once I move the dishes off of it I can hang it up to dry. Every so often I throw it in the laundry with the dish towels, and it comes out just fine.

RV dish drying mat

A dish drying mat sops up water, can be hung out to dry and thrown in the laundry.

How to Defrost an RV Refrigerator in 20 Minutes!

Propane RV refrigerators build up a lot of frost very quickly. After trying many different methods for defrosting our fridge over the years, we’ve outlined the steps we use to get this job done quickly:

How to Defrost an RV Refrigerator in 20 Minutes!

How to defrost an RV refrigerator

Defrosting the fridge doesn’t have to be a big nasty chore…

LED Wax Pillar Candles

I love romantic lighting, and there’s nothing like candles for that. But having an open flame isn’t great. Sailing friends of ours introduced us to pillar shaped LED candles made of real wax, and they are delightful. We’ve had ours for five years now, and we’ve had to change the batteries just once. They are wonderful for dim lighting in the pre-dawn hours or late at night, and they are a nice light around the rig when we watch a movie. The best part is they really look and feel like real candles, but you don’t have the risk that comes with an open flame.

RV tips LED flameless wax pillar candles in RV

LED pillar candles add warmth and create romantic mood lighting

Departure Checklist

RV Departure Checklist

All our mistakes on one page
with the worst ones underlined!

We thought we could memorize all the things that need to be done when we pack up the rig for towing, but a few mishaps taught us otherwise.

We now have a checklist taped inside the same cabinet that houses the main slide-out controls.

A quick glance before we leave ensures us that indeed all the hatches are closed, the shower door is latched, the window-mounted hummingbird feeder is not stuck on a window somewhere, etc.

This list is a comedy of errors made over several years of RVing. I’m sure more items will be added in the future!


Simmons Beautyrest Mattress

An RV can be outfitted with ordinary residential furniture, and we have upgraded our recliners to comfy La-Z-Boys.

More important for full-time RVers, there is no need to sleep on some funky RV mattress every night. We upgraded our mattress to a Simmons Beautyrest and just love it.

One important note is that many RV mattresses are non-standard sizes. An “RV Queen” is shorter than a standard Queen, and an “RV King” is narrower than a standard King. Here’s a chart showing the differences:

Standard “RV” Size
Queen 60″ x 80″ 60″ x 74″
King 76″ x 80″ 72″ x 80″
Simmons Beautyrest Plush Pillowtop mattress for RV

A good night’s rest…

In most rigs that have a Queen bed, the floorplan clearly states whether it is an RV Queen or a regular Queen. However, in virtually all RVs that have a king bed, it is an RV king. If you are buying an RV with a king bed and think you might want to upgrade to a residential mattress someday, make sure there are 4″ of extra width on the sides so the mattress can fit, even if it hangs over a little.


Laptop Lap Insulator

I mentioned that we don’t use our desk, and that’s because we use our dining room table for writing things out by hand and we use our laptops on our laps in our recliners. To keep from frying our legs with our laptops, we each have a laptop sized thin piece of foam that was part of the packaging of a solar panel. If you don’t have that handy, there are laptop lap insulators that can do the trick.

Laptop on thin foam insulation

A thin piece of foam keeps our legs from cooking under our laptops

Cleaning the Ceiling

We have a fabric ceiling liner and twice we’ve had to clean a stain from it. Each time we used spray bleach and the results were miraculous. You couldn’t see where the stain had been. Just make sure you cover everything nearby before spraying bleach in the air or you’ll have not just a clean ceiling but white spots on the rugs and upholstery too.


HEALTH and COMFORT in the RV LIFE

Living in an RV is not all that different than living in a stick-built house, so anything you enjoy in a conventional life is more than likely going to be something you can enjoy in your RV life. Here are some goodies that we use everyday, that have made a significant difference in our lives, and that we will continue to use daily no matter what kind of home we live in:

Amazing Grass

Amazing Grass powdered wheat grass drink

Helps keep fair haired people with thin skin from bleeding!

Mark has found that when he works around the rig, it is really easy for him to get little cuts and blood spots on the backs of his hand his hands. This turns out to be common with fair haired (red haired) formerly freckle-faced guys over 50. After some research, we found that the remedy is bunches of Vitamin K, and it turns out that wheat grass is loaded with Vitamin K! It has lots of other beneficial nutrients as well.

As long as Mark drinks a small dose of wheat grass everyday, his hands are as tough as when he was 20. But miss that wheat grass for a few days, and the next time he does any work around the rig, the slightest flick of his hand against something breaks the skin and he’s bleeding again. The best brand we’ve found is Amazing Grass.

Sound weird or too good to be true? We’ve suggested this crazy remedy to formerly red-haired friends, and they are now big believers and wheat grass connoisseurs too. Mark mixes it with fruit juice and actually loves the flavor! For those who don’t like veggies, the claim is that a spoonful of this wheatgrass powder is akin to a bushel basket of veggies. I don’t believe that myself, and I keep putting broccoli on our plates, but I think this stuff is worth its weight in gold when it comes to toughening up thin skin.

Hand-held Electric Massager

As former athletes, we’ve both spent a lot of time looking for ways to soothe aching muscles. We’ve owned a lot of different hand-held massaging tools over the years, including the very popular massager, and they’ve all been okay. But many of them ultimately wound up in yard sales because they had bad habits of pinching skin or were awkward to use.

 electric massager

electric massager

We’ve found that the hand-held massager is really fantastic. Because it has just one ball head on it (rather than the more common and goofy twin ball heads), you can place it over any sore spot and get instant relief. Rub it slowly on your leg muscles after a hike or bike ride or rub it on that weird spot in your neck after you sleep funny and wake up unable to turn your head, and you’ll feel better right away.

This massager was a lifesaver for me after a bad cycling accident I had years ago that messed up my shoulders and collar bone for a very long time, and Mark recently relied on it heavily when he wrenched his back. We’ve never had it pinch our skin at all.

The neat thing about these massagers is that they increase the blood and fluid flow in the sore area, which is really helpful for getting nutrients into the injured spot and getting waste fluids out. You don’t need to press hard on it — just place it on the sore area and you’ll feel the muscle relax instantly.

We have had ours for four years now, and we used it both on the boat and in our RV. It’s amazing just how kinked up you can get living in a small space, and it is so helpful to be able to get unkinked in a matter of minutes. We keep it in our living room so it’s always handy.

Sonicare Toothbrush

Sonicare toothbrush

Sonicare toothbrush

If only these Sonicare toothbrushes (and toothbrush heads) had been around when we were kids! It may seem ridiculous to spend a bunch of money on an electric toothbrush, but brushing your teeth with one of these makes your mouth feel like you just came from a cleaning at the dentist’s office. I’ve used a Sonicare toothbrush for 13 years now, and what a difference it has made in the overall health of my teeth.

One note for boondockers and off-the-grid RVers living on solar power, Phillips, the manufacturer of Sonicare toothbrushes has noted that the rechargeable batteries do not like modified sine wave inverters very much. I read this years ago, and have always charged ours on our pure sine wave inverter. Perhaps the batteries are better in newer models, I don’t know.

Also, for tech junkies who like to collect tech goodies, the magnet inside the Sonicare toothbrush heads is incredibly strong. Mark has saved a few of the magnets from our discarded Sonicare toothbrush heads and has found all kinds of interesting uses for them, including gluing one onto a long stick to retrieve tiny metal objects from hard to reach spots in the bowels of something.

Other RV Tips & Tricks

We have loads of other tips and tricks for RVers on this website. Many of the links can be found here:

RV Tech Tips and Product Reviews

A small sampling is below:

A wonderful website dedicated to RVing tips and tricks is RVtravel.com

Subscribe
Never miss a post — it’s free!

Our most recent posts:

More of our Latest Posts are in the MENU.   New to this site? Visit RVers Start Here to find where we keep all the good stuff. Also check out our COOL NEW GEAR STORE!! *** CLICK HERE *** to see it!

Below are some of our most POPULAR POSTS (also in the MENUS above)

Buddy - A Journey in Spirit - The story of an event that changed our lives forever.

ARTICLE INDEXES
  • RV Tech Tips Articles - A one page index of links to all our RV Tech Tips, RV Upgrades & RV Maintenance articles.
  • RV Lifestyle Tip Articles - An index of links to all our RV Lifestyle Tips (finances, boondocking, major repairs, work/jobs, etc.)
  • Solar Power Articles - Overview and tutorial articles for how to design and install solar power on an RV or boat
  • Product Reviews - An index of links to all of our Product Reviews
RV UPGRADES, SYSTEMS & TIPS MONEY FULL-TIME RV LIFESTYLE GEAR STORE
  • Gear Store - A list of the goodies, equipment and gear we've found useful in our RV lifestyle!
 

How to Defrost an RV Refrigerator in 20 Minutes!

Defrosting an RV refrigerator is a surprisingly easy job. We’ve been living with a propane RV refrigerator for many years now, and they always need defrosting after a few weeks or months. Being meticulous about not leaving the refrigerator door open unnecessarily can help, but when you find yourself living in a hot and humid environment or if you have the refrigerator side of your trailer or motorhome facing the blazing hot summer sun all afternoon, the frost is going to build up over time.

All you need to defrost an RV refrigerator is:

Over the years, we’ve tried several different techniques for defrosting our RV fridge, and in the old days this was a big job that, with some methods, could take well over an hour. We now have it down to a super fast method that makes this pesky job a cinch. The last time we did it, I made a note of the time on the clock as we went through each step. From start to finish, it took 20 minutes.

The first step is to turn off the refrigerator and empty the contents of the freezer into cooler bags or a cooler of some kind. Since these things will be out of the freezer for just 20 minutes, they won’t defrost and the ice cream won’t melt. If your RV is hot inside, covering the cooler bags with blankets for extra insulation can help.

Defrost RV refrigerator remove food from freezer

9:17 a.m. – Turn off fridge and unload freezer into cooler bags

We used to unload the whole refrigerator and empty it out completely, but that isn’t necessary and it takes a lot of time. An awful lot of what is in the refrigerator can handle warming up slightly as you keep the refrigerator door open to defrost it.

Instead, just unload the most temperature sensitive items — milk, yogurt, lunch meats, mayonaise, etc., into an insulated cooler bag or a cooler. Most of the fruits, veggies, bread, cheese, condiments, etc., can remain right where they are in the fridge for the 20 minutes it takes to defrost it.

How to defrost an RV fridge with food in cooler bag

Set the cooler bags aside. Covering them with blankets will keep everything even cooler.

Next, put a super absorbant chamois towel in the bottom of the freezer compartment to absorb the water from the melting ice, and use a hair dryer to thaw the walls of the freezer.

Defrosting RV refrigerator hair dryer on freezer with towels

9:22 a.m. – Use a hair dryer to thaw out the freezer.

We live exclusively on solar power, and our 2,000 watt pure sine wave inverter is what powers all our AC appliances, including the hair dryer. So, we have a low wattage travel hair dryer that draws just 800 watts (available here).

We put it on the high setting and keep a distance of about 8″ between the hair dryer and the walls of the freezer. A higher wattage hair dryer may need to be put on the low heat setting. Hold your hand about 8″ from the hair dryer and see how hot it feels.

Be sure you keep the hair dryer from heating up the plastic walls or they will crack from being cold and then getting hot. Keep the hair dryer moving and test the temp of the plastic walls with your hands.

After thawing the walls of the freezer a little, move down to the cooling fins in the refrigerator compartment. Keep the hair dryer in constant motion, sweeping it back and forth from side to side.

Defrost RV refrigerator hair dryer on cooling fins

Slowly wave the hair dryer in front of the cooling fins.

Alternate working on the freezer compartment and the refrigerator compartment.

How to defrost an RV refrigerator hair dryer in freezer

Alternate between the cooling fins in the refrigerator compartment and the freezer compartment.

Defrosting RV refrigerator hair dryer on fridge cooling fins

At the beginning, when the cooling fins are caked in ice, the hair dryer can be closer to them.

Little ice sheets will begin to fall off the refrigerator cooling fins into the drip tray underneath. As the thawing process continues, increase the distance between the hair dryer and the cooling fins.

How to defrost an RV fridge melting ice with hair dryer

As ice drops and the cooling fins thaw, move the hair dryer back a little.

Don’t chisel the ice off the fins or the freezer walls with a tool. If you pierce the metal base behind the cooling fins or the walls of the freezer, the refrigerant (ammonia) will leak out. We don’t use any chiseling device. We simply assist the thawing process with the hair dryer.

Check beneath the cooling fins and you’ll see the bits of ice dropping into the drip tray.

How to defrost an RV refrigerator ice dropping from fridge cooling fins

Check below the cooling fins where the ice drops off in chunks.

If you go outside, on the back of the RV you’ll see water seeping out of the refrigerator vent.

How to defrost an RV fridge water dripping from refrigerator vent on outside of trailer

Outside the rig, water will be seeping from the refrigerator vent.

How to defrost an RV refrigerator water dripping down fridge vent outside trailer

A little trickle of water flows down.

Once all the ice has fallen off the cooling fins, pull out the drip tray and dump the ice in the sink.

Ice in RV refrigerator drip tray

9:34 a.m. – Once all the ice has dropped off the cooling fins, empty the tray of ice into the sink.

Up in the freezer compartment, the chamois towel is now fairly wet with water that has dripped down off the walls. Wring it out and use it to wipe down the freezer and the fridge.

Wet Chamois towel from defrosting RV refrigerator

9:35 a.m. – The chamois towel in the freezer is pretty wet. Use it to wipe down the fridge and freezer.

Load the food from the cooler bags back into the refrigerator and freezer compartments, and you’re done! Put the fridge at max temp for a few hours to help it cool back down, and then set it to the temperature setting you normally use.

Defrosted RV refrigerator

9:37 a.m. – After loading the food back in the refrigerator, turn it back on. Done!

Other RV Refrigerator Tips

The key to having an RV refrigerator work optimally is having the air circulate inside well. Overstuffing the fridge with food makes this difficult for it. We have used a little RV refrigerator airator fan that’s designed to keep the air flowing. We’ve had mixed results with this, and when it died we didn’t replace it. I think this would work well if there were space between all the food, but our fridge is usually packed (the turf wars between the beer and the veggies can be brutal…sometimes we can hear them battling it out in there!).

As a maintenance item, we keep the door seals clean, wiping them down periodically.

We use simple refrigerator thermometers to monitor the temperatures in the fridge and freezer. It has a built in hook, and we hang it from one of the rungs in the top shelf in the refrigerator. The one in the freezer rests against one wall.

We were surprised to learn that RV refrigerators have an expected lifespan of about 8 to 10 years. A classic sign of impending failure is the appearance of yellow dust in the refrigerator vent area behind the fridge (go outside and take the vent cover off and look around with a flashlight). Click the following link to read the funny story of our RV refrigerator replacement and see how an RV fridge replacement is done.

Because of the shorter lifespan, higher price, and use of propane in RV refrigerators, many (most) “full-time” level fifth wheels and motorhomes are now being built with residential refrigerators that run on AC power only (a dedicated inverter is installed so it can run from the batteries while in transit). For folks that have plans to dry camp and boondock a lot in their RV life, a residential refrigerator will require a much bigger battery bank and solar panel array than would otherwise be needed. We discuss that in more detail at this link in our introductory solar power article.

If our hair dryer method of defrosting an RV fridge seems unorthodox to you, believe me, we have tried many other methods. We tried opening the fridge and freezer doors and letting the fridge thaw out on its own. We tried doing that and “helping it along” by chiseling the ice off with a small plastic scraper. We tried putting a bowl of hot water in the fridge to help it warm up.

All of these methods were adequate, but they were time consuming. We’ve been using our current method with the mini travel hair dryer for a few years now and really, really like it.

Subscribe
Never miss a post — it’s free!

Below are some of our most POPULAR POSTS (also in the MENUS above)

Buddy - A Journey in Spirit - The story of an event that changed our lives forever.

ARTICLE INDEXES
  • RV Tech Tips Articles - A one page index of links to all our RV Tech Tips, RV Upgrades & RV Maintenance articles.
  • RV Lifestyle Tip Articles - An index of links to all our RV Lifestyle Tips (finances, boondocking, major repairs, work/jobs, etc.)
  • Solar Power Articles - Overview and tutorial articles for how to design and install solar power on an RV or boat
  • Product Reviews - An index of links to all of our Product Reviews
RV UPGRADES, SYSTEMS & TIPS MONEY FULL-TIME RV LIFESTYLE GEAR STORE
  • Gear Store - A list of the goodies, equipment and gear we've found useful in our RV lifestyle!
 

Our most recent posts:

More of our Latest Posts are in the MENU.   New to this site? Visit RVers Start Here to find where we keep all the good stuff. Also check out our COOL NEW GEAR STORE!! *** CLICK HERE *** to see it!

RV Storage Tip – Making Space & Getting Organized in an RV

No matter how big an RV you get, if you live in it long enough, eventually you will begin to fill it up with stuff. This has happened to us and our 36′ fifth wheel trailer. When it was new and we first moved in years ago, it was so big that half our cabinets were empty.

Since then, especially after consolidating back into our fifth wheel after living on our sailboat for nearly four years of cruising Mexico, our lives have changed a lot. We have found a new passion — photography — and all that camera gear has wound up taking over our living space.

Fifth wheel RV dinette with table and chairs

Our old dining area – no storage and seating for two.

We began storing lenses in a drawer with dish towels (soft padding) and we had four camera bags that lived on our desk and under our dining room table. Camera bodies were always strewn across the sofa, fanny packs got piled on the desk, and tripods often got stuck on top of the subwoofer under our TV. Tucking everything away for safe passage while driving was a real pain. We needed to get this stuff organized!

Mark had a brilliant idea one morning — replace our dining room chairs with big storage ottoman benches!

Storage benches in RV dinette

Our new dining area – lots of storage and seating for four.

We began researching storage benches and ottomans and found the perfect thing from Simpli Home Furnishings. They are made of a nice faux leather, and there are no decorative buttons on the top, so the plush, padded top is very comfortable for sitting on (here’s more info).

Simpli Home Furnishings rectangular storage ottoman

These storage ottomans are 36″ wide by 18″ tall and 18″ deep.

The outside dimensions are 36′ long by 18″ high by 18″ deep. The inside dimensions are 33.25″ long by 11.5″ high by 15.5″ deep.

Simpli Home Furnishings storage ottoman

Our new storage ottomans have voluminous interior space.

We bought them sight unseen from Amazon and couldn’t be happier. They come with four short legs, with three screws each, which were easy to attach.

Attach legs to Simpli Home Furnishings storage ottoman

The only assembly is attaching the four legs.

Some customers have complained that the screws are too long and coming up through the floor of the box, but the legs simply need to be oriented correctly with the three screw holes aligned with the outside edges of the ottoman.

Ottoman leg assembly

Be sure to align the screw holes with the outer edges of the ottoman.

The legs were attached in just a few minutes using our cordless drill.

Screwing legs into ottoman with cordless drill

A cordless drill makes this a quick job!

The end result is much more comfortable seating at our table and a whole bunch more storage space for our camera gear.

RV dinette with storage benches instead of chairs

Ta da!

The tricky thing about storage space in an RV is that anything located behind the coach’s rear wheels is going to bounce around a whole lot as you drive down the road. That’s why most RVs don’t have the kitchen in the rear.

Our new storage ottomans sit just slightly forward of the trailer’s axles.

Increase RV storage with ottoman bench storage in dinette

The box tops easily clear the table when they open.

Another tricky thing with storage space in an RV is that in many coaches, like ours, the shelving is very flimsy. We prefer not to put anything heavy into the wall cabinets (except in the kitchen where our cabinets are more sturdily built). But it doesn’t take long to run out of storage space down near the floor.

This new storage space is solid.

RV dinette storage bench ottoman

A few throw pillows makes these pretty darn comfortable for lounging!

We put some throw pillows on our new benches and now we’ve got not only a great place to keep our camera gear organized and a nice, new, clean look to our dining area, but we can kick back after a meal, prop our legs up on the benches and chit chat for a while. It’s fun to sit there together and get a new perspective on our little rolling home and on life!

Sitting on storage ottoman benches in RV dinette.jpg

We never used to hang out after meals on our old chairs… but this is fun!

The storage ottomans we bought are the Dover rectangular storage ottomans from Simpli Home Furnishings.
We bought them from Amazon at this link HERE.

These benches are ideal for us, but Amazon sells lots of other similar storage ottomans of different sizes and shapes too and you can find all kinds of storage benches for sale at Amazon at this link HERE).

If you find the benches are a little low, one good way to raise them up is with the plastic rug protectors made for furniture legs. We also removed the feet from our table to bring it down a smidge.

Subscribe
Never miss a post — it’s free!

Other Tips for the RV Lifestyle:

Our most recent posts:

More of our Latest Posts are in the MENU.   New to this site? Visit RVers Start Here to find where we keep all the good stuff. Also check out our COOL NEW GEAR STORE!! *** CLICK HERE *** to see it!

Trailer Disc Brake Conversion – Electric Over Hydraulic Disc Brakes – WOW!

There are several types of braking systems available on bumper pull travel trailers and fifth wheel trailers today. Two of the most common are electric drum brakes, a less expensive system, and electric over hydraulic disc brakes which are a bit more costly. We recently converted our 36′ fifth wheel trailer’s braking system from factory installed electric drum brakes to electric over hydraulic disc brakes. What an incredible improvement this upgrade has made in our stopping power and personal safety. The difference is like night and day!!

This page outlines our reasons behind doing this upgrade and the components we chose for our brake conversion. It also gives a pictorial overview of the installation process.

Trailer hydraulic disc brake and caliper installed on an RV wheel

The disc (or rotor) and caliper with red brake pads peeks out from inside our trailer wheel.

This is a long post. You can skip down to the different sections using the following links:

HOW TRAILER BRAKES WORK

Return to top

Electric drum trailer brakes and electric over hydraulic disc brakes function very differently.

To engage electric drum brakes in a trailer, when the driver depresses the brake pedal in the tow vehicle, an electrical signal is sent to the trailer’s brakes via a brake control unit in the truck. The brake control may be factory installed or it may be an external unit that is installed by the owner. The electrical signal engages an electromagnet on the trailer’s wheels that expands the brake shoes as the current gets stronger, creating friction on the wheel and slowing it down.

Brake Pedal -> Electrical Signal via Brake Control -> Trailer Brakes

To engage electric over hydraulic disc brakes on a trailer, when the driver depresses the brake pedal in the tow vehicle, an electrical signal is sent to a brake actuator unit in the trailer via the brake control unit in the truck. The brake actuator in the trailer then pumps hydraulic disc fluid through a line to the disc brake calipers on the trailer’s wheels. The build-up of fluid pressure actuates the brake calipers which, in turn, squeeze the brake pads against the disc, slowing the trailer down.

Brake Pedal -> Electrical Signal via Brake Control -> Brake Hydraulic Fluid Pumped by Brake Actuator -> Trailer Brakes

Drum brakes are an older technology. However, RV trailer manufacturers continue to install electric drum brakes to this day because it is far less expensive than installing electric over hydraulic disc brakes. The highest end full-time fifth wheel trailers are frequently offered with an option for electric over hydraulic disc brakes, but they are rarely provided as standard equipment.

Besides greatly increasing overall braking power, one of the biggest advantages of hydraulic brakes is that it is much easier to modulate the brakes for smoother stopping. In contrast, electric drum brakes on trailers can be very jerky, as the brakes are either ON or OFF. We often used to feel the trailer bump into the back of our truck as we stopped, hitting us with a jolt.

TRAILER ELECTRIC OVER HYDRAULIC DISC BRAKES versus CAR HYDRAULIC BRAKES

Cars are manufactured with hydraulic brakes, sometimes with disc brakes in the front and hydraulic drum brakes in the back. Many high end bicycles are even built with hydraulic disc brakes! Electric over hydraulic trailer disc brakes are slightly more complex than car hydraulic brakes, but they provide trailers with the same smooth stopping power that we enjoy in our cars.

The difference between the way hydraulic disc brakes on cars and electric over hydraulic disc brakes on trailers function is that there is no electrical signal involved in a car’s braking system. This is because the car is a single vehicle. No signal needs to be passed from one vehicle to another, as it does with a truck and trailer combo. The tricky part about a truck/trailer is that the brake pedal is in the front of the truck by the driver’s foot while the trailer’s brakes are way behind the driver at the back end of the trailer. Also, in a car, the hydraulic fluid is located under the hood in a master cylinder which performs the same function as the brake actuator that is located in the trailer.

Again, in a car, when the brake pedal is depressed, hydraulic fluid flows directly to the brakes to engage them. In a truck and trailer combo, an electrical signal has to be passed from the truck to the trailer to activate the hydraulic disc brakes in the trailer via the brake actuator.

ON THE ROAD COMPARISON OF TRAILER BRAKING SYSTEMS:
Electric Drum versus Electric Over Hydraulic Disc Brakes

Our fifth wheel trailer, a 36′ 2007 NuWa Hitchhiker II, came with factory installed electric drum brakes. We towed it, with that braking system, behind our 2007 Dodge RAM 3500 truck for the first six years we owned it, for a total of about 40,000 miles. When we upgraded to electric over hydraulic disk brakes, we were stunned by what a massive improvement in braking power and safety that simple upgrade provided!

We have now towed our trailer over 1,200 miles since the brake system upgrade, traveling on interstate freeways, maneuvering around tight gas stations and campgrounds, and driving in gnarly stop-and-go-traffic in slick, rainy weather. All we can say is:

“We should have done this a long time ago — probably on Day 1!”

The differences we experienced between the electric drum brakes and the electric over hydraulic disc brakes can be summed up as follows:

DRIVING AND STOPPING COMPARISON

Electric Drum Brakes Electric over Hydraulic Disc Brakes
The truck felt like it was stopping the trailer The truck and trailer stop together evenly without one stopping the other
Braking was either ON or OFF, resulting in a jerky motion Braking is proportional to your speed and is very smooth
Had to mess with the brake control every time we changed between highway and gas station speeds Haven’t touched the brake control since the upgrade was installed
As brakes age, braking power decreases As brakes age, braking power does not change


MAINTENANCE COMPARISON

Electric Drum Brakes Electric over Hydraulic Disc Brakes
Have to remove wheel and brake hub to inspect brake pads
  • Easy to inspect disc pads without removing the wheels to see if they are worn (use a mirror if they are hard to see)
  • Periodically have to adjust the drums Never have to adjust the discs
    Have to have drums turned OR replace the drums and backing plate with magnet, shoes, springs and cables Easy to replace brake pads with standard GM brake pads from an auto parts store if rotors are okay
    Removing trailer tires to grease the wheel brearings

    Mark removes the trailer wheels to grease the wheel bearings.


    DECIDING TO UPGRADE THE TRAILER BRAKING SYSTEM

    Return to top

    We decided to do this brake system upgrade after Mark inspected the condition of the electric drum brakes that had been factory installed on our fifth wheel when we bought it new seven years ago. He was greasing the trailer’s wheel bearings, and while he had one of the wheels disassembled, he inspected the brake assemby inside.

    Greased wheelbearings on a trailer

    Mark used a Zerk gun to grease the trailer’s wheel bearings.

    He was dismayed to find that both the magnet and the braking surface were basically shot. He completed the wheel bearing lube job, but after he got the wheels mounted back on the trailer, we weighed our options for the brakes.

    Inside a trailer brake drum

    The inside of the trailer wheel and electromagnet at the bottom.

    Electromagnet inside an RV trailer brake drum

    Lots of wear on the electromagnet that controls the electric drum braking mechanism.

    As mentioned above, besides providing inferior braking power all together, one of the disadvantages of electric drum brakes is that, as the brakes age, the braking power gets progressively worse. Not only does the braking surface wear down but the electromagnet gets worn as well.

    In recent months, Mark had been noticing that the trailer brakes were not working as well as when the trailer was new, although he was shocked to see just what poor shape they were in when he disassembled the wheels!

    It is possible to have trailer brake drums turned. “Turning” involves putting the brake drums on a lathe and grinding the surface down to get rid of ridges and make it smooth. However, while a car’s drum brakes can be turned at an auto parts store, trailer brakes need to be taken to a machine shop. This is because they have to be turned not only on the braking surface that the brake pads ride on, but on the electromagnet surface as well. One of the disadvantages of turning the drums, however, is that it makes the braking surfaces thinner and weaker.

    When we began investigating the cost of having the drums turned, we found that it would not be that much less than the cost of replacing the brakes all together which would be somewhere in the neighborhood of $500.

    An alternative to turning the drums or replacing the brake assemblies would be to upgrade the trailer’s entire braking system to electric over hydraulic disc brakes. This is an expensive endeavor, on the order of $3,200, but the more we thought about our personal safety on the road, the more it seemed like it was a wise choice to do the brake conversion.

    THE COMPONENT PARTS OF AN ELECTRIC OVER HYDRAULIC DISC BRAKE SYSTEM

    There are three components involved in the installation of electric over hydraulic disc brakes:

    • Brake Control in the truck
    • Brake Actuator in the trailer
    • Hydraulic Disc Brakes on the trailer wheels

    In between these components there is both wiring and high pressure line:

    • The Brake Control must be wired into the truck (late model trucks have factory-installed brake controls).
    • The Brake Actuator must be wired into the 7-pin connector on the trailer that the truck plugs into.
    • High pressure lines must be installed between the Brake Actuator and the Disc Brake assembly on each wheel

    Our first job was to determine which components to install. Reading many reviews and talking at length with each manufacturer and visiting several booths at the Quartzsite Arizona RV Show, we chose:

    Kodiak Hydraulic Disc Brakes

    The heart of the electric over hydraulic disc brake system is the disc brake assembly itself, and Kodiak makes superior quality brakes.

    Kodiak has been making disc brake assemblies for over twenty years and is very highly regarded. Kodiak originated as a parts manufacturer for boat trailers, and their brakes are extremely popular in the boat trailer market.

    Kodiak dIsc brake rotor and caliper assembly for RV electric over hydraulic disc brakes

    Kodiak disc brake assembly
    Rotor and caliper installed on the axle.

    Since many boaters launch their boats in the ocean, Kodiak hydraulic disc brake assemblies are offered with dacromet coating and stainless steel options so they can withstand the continuous and highly corrosive drenching they get when boaters launch their boats on and off their trailers in salt water.

    Kodiak disc brakes are also very popular in the horse trailer industry, especially on the largest, heaviest horse trailers that carry multiple horses and have living quarters as well.

    To see the parts included in a Kodiak disc brake assembly, click here.

    Hydrastar Brake Actuator

    The brake actuator is the key middleman in the trailer braking system, and the Hydrastar Electric over Hydraulic Disc Brake Actuator from Cargo Towing Solutions has an excellent reputation as being extremely durable and rugged, even when mounted on the tongue of a travel trailer.

    The role this unit plays is vital, as it is the part of the system that receives the electrical signal coming from the brake control in the truck and, in turn, pumps the hydraulic fluid out to the disc brakes on the trailer’s wheels.

    Hydrastar electric over hydraulic disc brake actuator from Cargo Towing Solutions

    Hydrastar electric over hydraulic disc brake actuator.

    Like Kodiak, the the Hydrastar electric over hydraulic brake actuator is engineered for the salt water boat trailer market where water and corrosion are everyday challenges. The Hydrastar brake actuator is sealed extraordinarily well so it can be mounted on the tongue of a travel trailer. The whole circuit board is covered in epoxy and can function perfectly well when submerged under water. One of their most popular trade show demonstrations is to show the Hydrastar brake actuator working while suspended inside an aquarium full of water.

    Prodigy P3 Brake Control

    We have had an older generation Prodigy brake control in our truck since we purchased our first 27′ 2007 Fleetwood Lynx Travel Trailer, however, it does not work with electric over hydraulic disc brakes. We were delighted to find that there is a much better Prodigy brake control on the market now.

    Prodigy P3 Brake Controller

    Tekonsha Prodigy P3 Brake Control

    The Prodigy P3 is portable and has been designed for people who use many different tow vehicles to tow many different trailers. Not only can it be moved from truck to truck easily, it can memorize its programmed settings for different trailers. It can even be programmed for one trailer that has different characteristics at different times, for instance, a 7-horse trailer that may be loaded with 7 horses or may be empty.

    Best of all, we could swap out the old Prodigy for the new P3 easily because the new unit used the same wiring harness as the old one.


    INSTALLING ELECTRIC OVER HYDRAULIC DISC BRAKES ON A TRAILER

    Return to top

    Mark was confident he could do the upgrade himself. However, he was not sure he wanted to tackle running the high pressure hydraulic lines. He did that kind of work when we installed the engine-driven ocean water desalination system on our sailboat, and it was challenging getting the lines cut and getting the fittings installed on the cut line. He decided he would prefer to have professionals install this system, and we did a search to find a company that has done hundreds of trailer brake system upgrades.

    Trailer brake upgrade at Zanetti Trailer Repair

    Our buggy gets set up in a repair bay at Zanetti Trailer.

    Zanetti Trailer Repair is located just west of Fort Worth, Texas, in the town of Weatherford, and they do this kind of brake conversion frequently. Considered a horse trailer guru, Pete Zanetti started the company in 1980, and it is still a family operated business.

    Texas doesn’t have the best winter weather, and when we arrived after driving through the remnants of a horrific ice storm, our trailer was covered with a thick layer of road grime, but our gleaming new parts were ready and waiting.

    Electric over hydraulic disc brake upgrade parts

    The disc brakes, brake actuator and brake control are ready to be installed on our trailer.

    A team of three mechanics jumped on the job. To our amazement, within three hours they had completed the entire installation!

    Below is a summary of the steps they took to do the brake system upgrade.

    First, after jacking up the trailer, the wheels were removed.

    Removing wheels from a 5th wheel trailer

    Our buggy’s wheels are removed once again.

    Wheels removed from fifth wheel trailer RV

    Right down to the axles and spindles.

    Then the backing plates for the disc brakes were installed on the axles.

    Disc brake backing plate on a trailer axle and spindle

    The disc brake backing plate is mounted on the axle.

    On a table to the side, the four sets of brake assemblies and bearings were laid out, ready to be greased and put together.

    Hydraulic disc brake components- calipers, rotors and bearings

    The four rotors and calipers will be put together in assembly-line fashion.

    Here’s a closeup of the brake calipers with the red brake pads inside. The red brake pads will need to be replaced when the indented brake surface material wears away.

    Kodiak disc brake caliper with brake shoes

    The Kodiak disc brake caliper.

    Kodiak trailer disc brake caliper with brake shoes

    The brake pads are red, and when worn down to the indent, they will need replacing.

    The wheel bearings and seals were laid out, ready to be inserted in the brake rotor.

    Wheel bearings for Kodiak trailer disc brakes

    New wheel bearings ready to be lubed up and installed.

    Mark had just finished greasing the old wheel bearings on our trailer using a zerk gun. What a surprise it was to see a huge trash barrel filled with wheel bearing grease!

    Barrel of wheel bearing grease

    A Barrel O’ Grease — wow!
    They used an extremely sticky grease.

    The rotors were greased and then the new bearings were pressed in.

    Greasing the rotor on RV hydraulic disc brakes

    Greasing the inside of the rotor.

    Pressing the wheel bearings into the rotor on trailer disc brakes

    Pressing grease into a wheel bearing.

    Then the brake rotors were installed on the axles, and the brake calipers were installed on the rotors.

    Trailer disc brake rotors installed

    The brake rotors are installed on the axles. A brake caliper waits its turn on the ground.

    Kodiak dIsc brake rotor and caliper assembly for RV electric over hydraulic disc brakes

    Kodiak disc brake assembly with rotor and caliper mounted on the trailer’s axle.

    Outside (in the rain!) the old brake hubs had been discarded.

    Old trailer electric drum brakes in the trash heap

    We won’t need these any more!

    Meanwhile, the installers got busy installing the Hydrastar brake actuator in the trailer and wiring it to the fifth wheel pin box. To test the installation, they used a special electronic unit to simulate a person pressing on the brake pedal in the truck.

    Installing the Hydrastar brake actuator on a fifth wheel trailer

    Wiring the Hydrastar brake actuator into the
    fifth wheel pin box.

    Then they unrolled and straightened the stainless steel brake line tubing…

    Measuring and cutting electrical wire for trailer disc brake actuator installation

    Unrolling and straightening the stainless steel brake line tubing.

    … and ran the electrical wires from the pin box into the fifth wheel basement

    Wiring in electrical cable for disc brake actuator in a 5th wheel trailer RV

    Feeding the electrical wire through to the fifth wheel basement.

    The Hydrastar brake actuator unit found a home just inside one of the basement side access doors.

    Hydrastar disc brake actuator from Cargo Towing Solutions

    Hydrastar disc brake actuator installed in the fifth wheel basement.

    Hydrastar hydraulic trailer disc brake actuator from Cargo Towing Solutions

    The Hydrastar disc brake actuator is close to a side hatch for easy access.

    On the underside of the trailer and along the trailer axles, they did a superior job of dressing the hydraulic brake line and connections.

    Hydraulic brake line dressed on bottom of RV

    Looking up at the bottom of the trailer, the hydraulic lines run underneath the trailer, neatly dressed.

    And then they bled the brake lines.

    Bleeding the hydraulic brakes on an RV

    Bleeding the hydraulic brakes. A special box simulated a person depressing the brake pedal in the truck.

    Then it was time to put the Prodigy P3 Brake Control into the truck. This is a portable unit that comes with a carrying pouch. We have only one truck, so we won’t be carrying the brake control from one truck to another. Mark later found the little pouch was perfect for his pocket camera!

    Prodigy P3 Brake Control from Tekonsha

    The Prodigy P3 Brake Control is a nifty portable unit that can be moved
    from one tow vehicle to another.

    The brake control is on the lower right side of the dashboard under the steering wheel.

    Prodigy P3 Brake Control installed on a Dodge RAM 3500_

    Prodigy P3 Brake Control mounted below our Dodge RAM 3500 dashboard

    We were astonished that all this had taken just under three hours, and the installers were almost finished. Wrapping up the job, the wheels were mounted back on the trailer and the trailer was taken off the jacks.

    Replacing the wheels on a fifth wheel trailer

    The wheels get mounted back on the trailer axles.

    The new disc brakes looked very spiffy peeking through our dirty wheels!

    Dirty Wheels and new electric over hydraulic trailer disc brakes

    Oh gosh — sure wish we’d cleaned those wheels before this installation!
    But the brand new disc and caliper look great in there…

    It was time to hitch up the trailer and hit the road with our new brakes. I loved the little painted stone outside the office door.

    Zanetti Trailer - We'll Fix Your Wagon

    Zanetti Trailer’s motto is “We’ll Fix Your Wagon” !!


    SUMMARY

    Return to top

    Mark was blown away when we got the trailer out on the highway. On the Prodigy P3 Brake Control, he experimented with a few settings and settled on a boost of “B2” and 8.5 volts. As we eased onto the highway, he commented, “It feels like I’m driving a car!”

    During the next three weeks we made our way from central Texas to the Florida coast, driving in all kinds of conditions, from remote back roads, to many miles on the I-10 Interstate freeway. We sat for hours in massive stop-and-go traffic jams around big cities, and Mark coped with tricky driving situations on small downtown city roads with lots of stop lights.

    In the past, if a traffic light turned yellow at the wrong moment as we approached, we just had to keep going and cross our fingers that it wouldn’t turn red while we were crossing the intersection, because we just couldn’t stop the trailer in such a short distance. No more!! On many occasions, as we came to an intersection, the light turned yellow on our approach, and Mark was able to stop the truck and trailer in time in a nicely controlled manner.

    In Fort Worth, TX, and again around Baton Rouge, LA, we found ourselves in amazingly congested traffic. Mark was able to relax in the heat of the battle, completely confident that he could stop the trailer in a very short distance if need be.

    Fifth wheel trailer RV in Florida at sunset

    Sometimes the best improvements are not something you can see on the surface!

    When we got into Sarasota, Florida, we came across some astonishingly aggressive drivers. One driver cut us off with just an inch to spare, instantly coming to a complete stop directly in front of us. It was a heart stopping moment that all RVers dread. Mark slammed on the brakes with a force I have never seen him use, either in a car or in our truck pulling our home.

    All the tires of the truck and trailer squealed as we came to a shockingly abrupt stop, leaving lots of rubber on the road behind us. We were both stunned that the trailer stopped in such a short distance. There is no doubt that if we had had our old electric drum brakes, we would have rear-ended the car in front of us and had a really bad — and possibly life threatening — accident.

    Believe me, the irony that we had just replaced our brakes, and had jokingly said we needed to test just how good they were, was not lost on us. But we never would have lurched our house like that just to see if the brakes worked!!

    This brake conversion is an upgrade that Mark dreamed of doing for ages, ever since our RVing mentors Bob and Donna Lea had told us about how differently their electric over hydraulic disc brakes performed on their 33′ fifth wheel compared to the electric drum brakes they’d had on other trailers.

    In the end, it was totally painless and very easy to do, and looking back, we realize we should have just bitten the bullet the first year we owned our trailer and gotten it done right away.

    Subscribe
    Never miss a post — it’s free!

    More info and links:

    Related posts about our TRUCK and TRAILER upgrades:

    Below are some of our most POPULAR POSTS (also in the MENUS above)

    Buddy - A Journey in Spirit - The story of an event that changed our lives forever.

    ARTICLE INDEXES
    • RV Tech Tips Articles - A one page index of links to all our RV Tech Tips, RV Upgrades & RV Maintenance articles.
    • RV Lifestyle Tip Articles - An index of links to all our RV Lifestyle Tips (finances, boondocking, major repairs, work/jobs, etc.)
    • Solar Power Articles - Overview and tutorial articles for how to design and install solar power on an RV or boat
    • Product Reviews - An index of links to all of our Product Reviews
    RV UPGRADES, SYSTEMS & TIPS MONEY FULL-TIME RV LIFESTYLE GEAR STORE
    • Gear Store - A list of the goodies, equipment and gear we've found useful in our RV lifestyle!
     

    Our most recent posts:

    More of our Latest Posts are in the MENU.   New to this site? Visit RVers Start Here to find where we keep all the good stuff. Also check out our COOL NEW GEAR STORE!! *** CLICK HERE *** to see it!