Escapees Magazine Feature Article: RV Solar Power

The May/June 2015 issue of Escapees Magazine is featuring our article on the basics of RV solar power.

Installing a solar power system is an awesome upgrade for any RV, whether you are using it for weekend and vacation travel or are living in it full-time as we do. Yet there is a mystique about solar power that sometimes makes it seem like a much bigger deal than it really is.

RV Solar Power Escapees Magazine May-Jun 2015

Escapees Magazine May/June 2015
Article and photos by Emily & Mark Fagan

In this article I wanted to make the whole theory behind getting electrical power into an RV without electrical hookups as straight forward and easy to understand as possible.

It just isn’t as complicated as it seems!

So, if you aren’t a techie, I hope this article gives you some visuals and explanations that make sense!

The editors at Escapees Magazine have kindly allowed me share the article with you here:

RV Solar Power – System Components and Design

A future article will go into the details of selecting components and installing them. In the meantime, we have lots of pages on this website dedicated to solar power if you wish to learn more. Links for all the solar power pages on this site can all be found here:

Solar power for RVs and Boats

As for the magazine this article is appearing in, it is the club magazine for Escapees RV Club, an incredibly diverse club that caters to the widely varying needs of all RVers — whether young, old, rich, poor, single, family, traveling or parked!

Two months ago we stayed at their huge headquarters campus in Livingston, Texas. If you aren’t familiar with the club, the following link is a fun way to learn about some of the unusual ways that Escapees takes care of us all in our lives on the road:

Escapees RV Club Headquarters in Livingston, Texas – Rainbow’s End

If you are an Escapees member and you haven’t checked out their website recently, it is worth a look. The links are here:

Subscribe
Never miss a post — it’s free!

Find more of our published magazine articles and cover photos on our Press Room page

.

Our most recent posts:

More of our Latest Posts and Quick Pics are in the top MENU above.

Jungle Gardens in Sarasota Florida – It’s for the Birds!

April, 2015 – A vacation to Florida wouldn’t be complete without a trip to a tropical garden with exotic birds, and even though we weren’t exactly “on vacation” (well, maybe this was a “vacation from our vacation” ??), during our stay in Sarasota we just had to go to Jungle Gardens.

Zoo trips to kiddie parks may seem to be all alike and not really appropriate for the 50+ set if you don’t have grandkids in tow, but this place held some special treats for us. When we arrived, we were greeted by a beautiful albino peacock who looked like a princess ballerina emerging from the bushes.

Peacock ballerina princess at Jungle Gardens Sarasota Florida

A ballerina princess makes “her” entrance from the bushes

The flamingos were nearby, walking all around us, and we watched them vie with the seagulls for the free food handouts that people were grabbing from little dispensers around the grounds.

Flamingos and seagull at Jungle Gardens

The food is for the flamingos but the seagulls don’t miss a trick.

I’d never stood next to a flamingo before, and I was quite surprised — these guys are really tall!

Flamingo with me at Jungle Gardens Sarasota Florida

Seeing eye to eye.

One came over and suddenly became very interested in Mark’s shoes.

Curious flamingo inspects shoes

“What’s that on your shoe?”

I looked away, and when I looked again, Mark had squatted down to take some photos and this flamingo had marched right over to him and was resting his chin on Mark’s head!

Flamingo checks out a hat

“Can I climb on you?”

Then this big pink creature got really interested in something on Mark’s neck.

Flamingo really likes hat

“You’ve got something yummy on your neck…”

Mark turned towards him, and he just kept on poking around, rubbing his beak all over Mark’s back. Crazy bird!!

Crazy flamingo

What’s he looking for anyway?!

These curious flamingos kept us occupied for quite some time, but we finally moved on to check out some of the other exotics in the park. There was an iguana…

Iguana face up close at Jungle Gardens in Sarasota Florida

A face only a mother could love.

…and an allligator pen nearby.

Alligator tank at Jungle Gardens Sarasota Florida

Wait til these guys grow up!

This is a “garden” and we saw some lovely plants. I especially liked the red and green leaves on a bush Mark found.

Jungle Leaves in the Garden

Despite all these animals, it is a Garden, after all!

But it was the birds that charmed us the most. There is a big group of parrots at Jungle Gardens, and they come in all colors, from light blue to bright orange.

Ring Neck Parakeet and Conure at Jungle Gardens Sarasota Florida

Pretty colors: a ring neck parakeet and a conure.

Some colors are even “made up” like this hybrid of a green wing macaw (which is red and green) and a blue and gold macaw (which is blue and yellow). The result — orange and green and blue!

Hybrid Macaw at Jungle Gardens Sarasota Florida

What do you get when you cross red and green and blue and yellow?

But my favorite parrot of all is Frosty. He’s a greater sulphur crested cockatoo that is 79 years old. And if you look at him closely, you can’t tell that he’s a day over 3. He’s in perfect shape.

Greater sulphur crested cockatoo Frosty at Jungle Gardens in Sarasota Florida

The star of the show — at 79.

There’s a very fun bird show at Jungle Gardens, and we watched two Macaws, Andy and Cracker, doing the ring toss.

Two green wing macaws do ring toss at Jungle Gardens in Sarasota Florida

Cracker and Andy do the ring toss while a buddy looks on.

Then the trainer introduced Frosty to do his tricks. We were amazed when she told us he had performed on the Ed Sullivan Show. He rode a unicycle on TV for Ed Sullivan — and he did the same trick for us! One of the macaws got a ride on a swing underneath him as he pedaled across a tightrope. How cool is that?! He’s been performing every day for decades. What a champ!

Frosty rides a unicycle with Andy riding underneath

Frosty takes a buddy for a ride.

Afterwards all the kids lined up to get their photos taken with the birds of their choice on their heads and arms.

Little boy with two macaws on his head and arms

“Mom…!!!”

I was the only person over 10 standing in line to get my pic taken with a bird on my arm, but Mark nudged me and said he’d take a photo of me with Frosty. My day was made!!

Frosty at Jungle Gardens Sarasota Florida

Holding a 79 year old bird makes me feel like a kid!

Going to Jungle Gardens with kids or grandkids is probably the best way to do it, but if you don’t have any to take with you, it’s still a blast to go and be a kid yourself for a little while…

Subscribe
Never miss a post — it’s free!

Our most recent posts:

More of our Latest Posts are in the top MENU above.

For more info:

Plus… more posts from our RV travels in Florida…

Other posts from Sarasota:

<-Previous || Next->

Solar Tutorial Part IV – Solar Panel Selection and Wiring

<- Solar Tutorial Part III – Full-timer Kits                                                         Solar Tutorial Part V – Battery & Inverter Selection ->

The two sample systems described in Part III of our Solar Power Tutorial series are essentially the same systems we have installed on our RV and sailboat.  The RV system is pretty standard for full-time RVers (four 120-140 watt 12-volt panels and 440 amp-hour battery bank).  The sailboat system is bigger than many cruisers carry (three 185 watt 24-volt panels and 710 amp-hour battery bank).

Cruisers often install less solar power and rely on additional charging methods via engine alternator, and wind/gas/diesel generators.  However, we have found our solar power alone is sufficient to live an ordinary house-like lifestyle on our boat (if we don’t use our standalone DC freezer).  We lived for 10 mid-winter weeks in southern Mexico on solar power alone, without using the alternator once (it was broken), and still used two laptops, the TV/DVD, stereo, microwave, chartplotter, autopilot, anchor windlass and vacuum as much as we wanted.

Our rationale for having enough solar power to live comfortably without alternative charging methods was:  we didn’t want to store a lot of gasoline to power a gas generator; we had found that boats with wind generators often suffered from the whirring noise and vibration; and we didn’t want the added cost, installation work and maintenance of an inboard diesel generator.  Solar power has been a great solution for us on both the boat and the fifth wheel.

Part III described these two basic full-timer systems with just a cursory comparison of the solar panel choices.  This page goes into more detail about the various options for sizing solar panels and suggests different ways to wire them.

Wiring in Series versus in Parallel and Wire Gauge Size

There are quite a few choices for solar panel configurations, each with its own pros and cons.  But before choosing a panel configuration it’s worthwhile to consider how to deal with the large current that will be flowing through the wires.  As much as 35 amps or more might be flowing from the panels to the charge controller and then from the charge controller into the batteries.  This requires heavier gauge wire which is more difficult to work with and is expensive.  However, there are several ways to reduce the amount of current in the wires.

If the panels are wired in parallel, the amps produced by each panel are additive while the volts remain constant (Ohm’s law).  Therefore, the cable leading from the connection point of all the panels to the charge controller and then on to the batteries will carry the full current load, or potentially as much as 35 or 40 amps at 12 volts DC.  Heavier gauge wire must be installed to handle this large current load throughout the system.

If there is too much current on a cable, then it will get warm (or hot), and lose some of its precious amperage to heat.  In other words, if the wire gauge is too small, not all the power produced by the panels will make it to the batteries.  It will dissipate as heat loss along the way.  And at the extreme, there’s the risk of melting the shielding off the cable (highly unlikely).

Larger wire is more expensive and is more difficult to handle because it is stiffer.  “Larger” generally means 6 or 8 gauge wire and “smaller” is generally 10 gauge.  The size is dependent on the current flowing through the wire and the length of the wiring run.  A detailed chart for selecting wire gauge is given here.  Note that some charge controllers can’t accommodate wire heavier than 4 or 6 gauge.

If the panels are wired in series, the amps produced by each panel stay constant while the voltage is additive (also Ohm’s law).  Therefore, the cable leading from the connection point of the panels to the charge controller will carry just the amperage produced by a single panel (7-9 amps) at 48 volts DC (if four 12 volt panels are installed in series), rather than the 25-35 amps at 12 volts DC that would flow when wired in parallel.  Because there is less current, thinner gauge wire can be used throughout the system.

In practical terms, most solar power systems on RVs and boats never reach their full potential current load.  During the morning hours, before the sun gets high and powerful in the sky, the batteries get quite a bit of charge.  Usually, by the time the sun is really cranking out maximum energy at noon — the time when the system could be producing max amps — the batteries have already gotten pretty well charged and are starting to ask for less and less current.  So the charge controller has already begun to throttle the panels back a bit and less current is flowing through the system.

Also, solar panels are rated for operating with the sun perpendicular to their surface, and anything other than a perpendicular orientation reduces their output significantly.  In all months except May-July, the sun doesn’t ride all that high in the sky.  We have rarely seen much more than 25-30 amps on either of our full-timer systems, although they are capable of 30 and 36 amps respectively.

Another important consideration is that when a small fraction of a solar panel is shaded — as little as a 4 square inch area on a 2′ x 5′ panel — the entire panel stops producing power.  That is because internally the panel is “wired” in series.  When there is resistance, caused by shade, in just one portion of it the panel’s internal circuitry, current can’t flow through any of it.

By extension, if the panels are all wired in series, when one panel shuts down due to a palm-sized bit of shade, then the entire array of panels shuts down.  A tree branch or part of a boat’s standing rigging or mast/boom can cause the entire array to shut down if it is wired in series.

marine solar panels on hunter 44ds sailboat

Shade from the mast and shrouds on our three 185 watt panels.

If the panels are all wired in parallel, a small amount of shade on one panel will only shut down that individual panel.  Current will still flow through the rest of the panels and then through the rest of the system.

We were persuaded by our solar panel vendor to wire our trailer’s panels in series so we could use small gauge wire throughout the system.  We have experimented with shading a small corner of one of the four panels and were stunned to see the entire array quit working!  However, almost everywhere we boondock we are in full sun.  So, in the end, it doesn’t matter for us. Wiring our RV’s solar panels in series has worked out just fine.   If, however, you anticipate camping under trees on a regular basis and you want to maximize the panels’ chances of getting access to the sun, wire the panels in parallel and use heavier gauge wire.

On a boat, this series versus parallel decision is much more critical than on the roof of an RV.  The mast, boom and shrouds often shade portions of the panels as the boat swings at anchor.  Under sail the shading can be even worse.  So the best wiring option on a boat is to wire the panels in parallel.  However, the cable runs in a boat can be much longer than in a comparably sized RV.  On our sailboat the wiring running from one end of the system to the other — panels-controller-batteries — is 45′.  Why so long?  The panels are high in the air on an arch at the back end of the boat, the batteries are at the bottom of the hull in the middle of the boat, and the all the wiring is routed so as not to be seen.

12 volt versus 24 volt panels

Another way to tackle this issue of having a lot of current flowing through the system is to use 24 volt solar panels instead of 12 volt panels.  When the voltage is doubled like this (24 versus 12 volts), the current is halved.  So the current produced by 24 volt panels is half that of equivalent wattage 12 volt panels (the watts don’t change whether the panels are 12 volts or 24 volts).  We chose to go this route on our sailboat, using three 185 watt 24 volt panels wired in parallel.

Since the batteries are 12 volt batteries, the input side of the charge controller coming from the solar panels is 24 volts while the output side going to the batteries is 12 volts.  Most large capacity charge controllers allow this kind of configuration.  This means that the current flowing between the panels and the charge controller is half that flowing between the charge controller and the batteries.  So, while the panels may be producing 14 amps at 24 volts, and those 14 amps may be flowing from the panels to the charge controller, the current will double to 28 amps at 12 volts when it flows from the charge controller to the battieries.

While the wiring run between the panels and the charge controller can be smaller gauge (less current flows in that portion of the system), the last wire run between the charge controller and the batteries needs to be as short as possible and wired with heavier gauge wire to accommodate the larger amount of current.

We made the mistake of placing the charge controller 25′ from the batteries at first and using 10 gauge wire (I suspect we didn’t explain our situation to the salesmen at the solar panel store well enough when we asked him for guidelines).  When the panels were running at full power we lost about 10-15% of the power they were producing.  Once we moved the charge controller to within 10′ of the batteries and replaced the 10 gauge wire with 8 gauge wire, we lost just 1.5% of the power between the charge controller and the batteries, which is considered acceptable.

Tilting Brackets

Tilting brackets make a lot of sense on an RV because an RV is parked in a stationary position.  In wintertime it is possible to tilt the panels towards the sun (tilt them about 45 degrees).  Most folks align the panels with the length of the RV and tilt them on their sides.  This means that either the driver side or passenger side of the RV will be situated to face due south and the panels will be tilted in that direction.  In most boondocking locations we find we can orient the rig any way we want to because there is so much space around us.

In experiments one December with RVing neighbors who had tilting brackets, we found that their solar power system produced about 40% more amp-hours throughout the day.  Their system was fully charged and their batteries were floating in the afternoon, while ours never reached the Float stage.  Some of that may have had to do with their batteries being better charged to begin with in the morning (we have no idea if they were or weren’t), but it is a pretty dramatic difference nonetheless.

RV solar panels on fifth wheel trailer

Four 120-130 watt panels on our fifth wheel’s roof

However, to get the advantage of tilting brackets, you have to get on the roof to tilt each panel every time you set up camp, and then remember to return them to their flat position before breaking camp and driving off. 

An alternative is to keep the panels flat in all but the most dire circumstances (a week of cloudy winter days), but have one more panel in your system than necessary.  Or don’t even bother installing tilting brackets at all. The trade-off is a few hundred dollars for an extra panel versus climbing up and down your RV ladder and fussing with the panels, as well as the risk that you might drive off with them raised up (we’ve seen plenty of people do that).

Tilting brackets don’t make much sense on a boat because boats move around so much at anchor.  Ours swings back and forth in a 90 degree arc.  Also, the tilting mechanism for a lot of boats introduces shade across the panels at certain angles.  On a boat, it is best to mount the panels as far from the mast and boom as possible and to focus on keeping the shade off the panels as much as possible by forcing the boom off to one side or the other while at anchor.  A fixed, flat mounting position works best.

 For more information about how to select the best solar panels for your installations, see this article:

Which Solar Panels To Buy – Flexible or Rigid? 12 or 24 volt? Monocrystalline or Polycrystalline?


Most of the components for an RV or marine solar power installation can be purchased at Amazon.

Shown here is a complete full-timer's kit (far left), a big charge controller (middle) and a big inverter (right). More comprehensive listings of each component type can be found at the following links:

Purchases at any of our Amazon links help cover our out-of-pocket costs for operating this site -- thanks!


This is the end of our solar power tutorial series.
We have lots of other info about solar power on this website. See the pages listed below to learn more.

Subscribe
Never miss a post — it’s free!

FURTHER READING and RELATED ARTICLES

SOLAR POWER OVERVIEW and TUTORIAL

BATTERIES and BATTERY CHARGING SYSTEMS

LIVING ON 12 VOLTS


Our most recent posts:

More of our Latest Posts are in the MENU.   New to this site? Visit RVers Start Here to find where we keep all the good stuff. Also check out our COOL NEW GEAR STORE!! *** CLICK HERE *** to see it!

Sarasota, Florida – Life on the Waterfront

April, 2015 – Sarasota, Florida, is a oceanfront city, and The Ringling is an exquisite spot to enjoy Sarasota’s shores. During our stay, we soon discovered that this pretty city has lots of other wonderful public places on the waterfront, too.

Beautiful colors at Venice Beach Florida

Sarasota’s waterfront is sweet.

Centennial Park is an older waterfront park, but the views across the water of the city skyline are lovely.

Couple on Sarasota Florida waterfront

Looking out on the bay from Sarasota’s Centennial Park

Out in the bay, people on boats were enjoying a different perspective on this magnificent waterfront. Sailboats and powerboats filled the bay, and while some folks were on their own boat, others were enjoying a fishing charter as part of their vacation.

Boats seen from Centennial Park Sarasota Florida

Boats on Sarasota Bay

At one end of Centennial Park, the Van Wezel Performing Arts Hall backs right up to the shoreline, and it has a deck where we were told theater goers can enjoy a snack with a view at intermission. How fun!

Van Wezel Performing Arts Hall Sarasota Florida

The Van Wezel Performing Arts Hall is located right on the bay — a nice spot for drinks at intermission!

Sarasota is perhaps most famous for its divine sugar sand beach called Siesta Beach. I don’t know if I was more enchanted by the powdery soft sand or the vivid colors of the beach umbrellas and the turquoise water — it was all gorgeous.

We learned that Siesta Beach was rated the #1 beach in America in 2011, and there are lots of proud “#1 Beach” signs all around town. Interestingly, Siesta Beach was followed closely by Coronado Beach in San Diego…another beauty!

Beach umbrellas Siesta Beach Sarasota Florida

Siesta Beach — #1 American Beach in 2011

Marina Jack is the downtown waterfront area in Sarasota, and we were surprised to find another connection to San Diego when we saw the enormous sculpture “Unconditional Surrender.” We discovered that both sculptures were created by artist Seward Johnson and that the one in Sarasota was constructed first, back in 2005!.

Undonditional Surrender WWII sculpture Sarasota Florida

“Unconditional Surrender”
A sister-sculpture to the one in San Diego.

Marina Jack is a large marina with lots of boats of all sizes. Next to it there’s a lovely little walking path that goes around a peninsula called the Marina Jack Trail.

Marina Jack walking path Sarasota Florida

Views from the Marina Jack Trail in downtown Sarasota

A little dinghy pulled up on shore made a perfect photo op. We took turns with some other people getting portraits of each other perched on the dink with pretty Sarasota Bay in the background.

Marina Jack walking path Sarasota Florida

Pausing for a photo op on Marina Jack Trail downtown

A few streets back from the waterfront we enjoyed a wonderful farmer’s market one Saturday morning. This was a sizable market with lots of fresh and beautiful veggies and other goodies.

Farmer's Market Sarasota Florida

The Saturday Farmer’s Market is just a few streets in from the water.

On another day we drove a little south of Sarasota to Venice where we found yet another wonderful beach. Of course this whole coast is loaded with great beaches, but when we got to Venice Beach it seemed like the population of the whole coast had decided to join us there! And how funny to find another California connection in the name “Venice Beach.”

Picnic areas Venice Beach Florida

Picnic areas on the boardwalks in Venice

The beach in Venice has some unique picnic areas that are built into wooden walkways so you are slightly elevated above the vegetation. We hadn’t brought a picnic, but many of these little picnic spots were in use by knowledgeable locals who had staked them out for the day.

Venice Fishing Pier Florida

The Venice Fishing Pier

The Venice Fishing Pier extends well out into the ocean and is popular with fishermen.

Fisherman on Venice FIshing Pier Florida

Gone fishing…

It’s also a great vantage point for getting a look at this super popular beach. On one side of the pier the beach was overflowing with crowds of sun worshippers.

Sunbathers at Venice Beach Florida

The beach scene on one side of the Venice Fishing Pier…

Due to construction going on at the pier, looking over the rail at the stretch of beach on the other side, we saw crowds of another sort…

Seagulls at Venice Beach Florida

…The beach scene on the other side of the Venice Fishing Pier!

Sarasota has freshwater waterfronts too. Payne Park is a tiny downtown city park with some small man-made ponds that have lovely water lilies and a lively collection of unusual birds floating around.

Waterlily

Sarasota has fresh water shores too

A few miles east of there, the Celery Fields park has some wonderful fresh water birding habitats for long legged herons and egrets.

Heron flying over water

A heron flies in at the Celery Fields

Heron walking in water_

Stalking dinner in the shallows

Sandhill cranes are very common in Sarasota (as we found out when we saw some adorable hatchlings) and they are much beloved by birding enthusiasts. Someone had even built them a park bench to sit on, although we didn’t see any sandhill cranes using it.

Sandhill crane park bench

A park bench just for sandhill cranes…

The purple martin boxes were definitely getting lots of use, however, and we watched a pair of them hanging out on their front stoop.

Pair of birds on Purple Martin box_

Home Tweet Home

Nearby, a little ground squirrel had grabbed a discarded piece of bread and he’d run away with it to the safety of a tree branch.

Squirrel eating bread in yellow flowers

Sarasota has lots of wildlife…and most of them have street smarts!

There are dozens more waterfront spots and there’s lots more wildlife to be seen in and around Sarasota, but these are a few of the glimpses we got during our visit there…

Subscribe
Never miss a post — it’s free!

Our most recent posts:

More of our Latest Posts are in the top MENU above.

More info about Sarasota, Florida:

More Posts from Sarasota, Florida:

Additional posts from other parts of Florida are HERE!

<-Previous || Next->

The Ringling – The Art of the Circus in Sarasota, Florida

April, 2015 – We made our way from Pensacola Beach to Sarasota, Florida, with two big missions on our minds: first, to overhaul the electrical system on our RV and second, for me to zip off to New England for a family reunion. But during our stay in the pretty beach town of Sarasota we squeezed in a little sightseeing and discovered some wonderful gems.

John and Mable Ringling Mansion Sarasota Florida

“The Ringling” in Sarasota is an impressive estate that once belonged to the founder of Ringling Brothers’ Circus.

Who knew that Sarasota’s roots are intertwined with the circus?? Back at the turn of the twentieth century, Sarasota became home to John Ringling, the sixth of seven Ringling Brothers, five of whom founded the Ringling Brothers Circus in 1884. Drawn to the small fishing village of Sarasota in 1911, John began using his immense circus fortune to buy up real estate. At one time he and his brother Charles owned 25% of Sarasota.

Ringling Museum entrance Sarasota Florida

Entrance to The Ringling

John was the advance man for the circus, handling bookings and promotion, but he was a savvy invester as well. His holdings were very diverse and included things like railroads and Madison Square Garden. A lover of European art, he also invested heavily in artwork from the middle ages through the 19th century.

Entrance to the John and Mable Ringling Museum of Art Sarasota Florida

One ring circus.

When he died in 1936, despite having seen his fortune crumble in the face of the Great Depression, his massive ornate waterfront estate and his sumptuous art collection were both still intact, and he bequeathed the whole lot to the State of Florida.

Artwork on the walls of the Ringling Museum of Art

The Ringling Museum of Art is a world class collection of European art covering 600 years.

Today, the mansion and art museum and beautifully landscaped grounds make for a fabulous tour. Upon entering the Ringling Museum of Art, we were blown away to see a room full of massive paintings by the Flemish Baroque master of the 16th and 17th centuries, Peter Paul Rubens.

Inside the John and Mable Ringling Museum of Art Sarasota Florida

From massive wall-size paintings to miniatures, every era of European art up to
the 1900’s is well represented.

Astonishingly, that is just s smattering of the immense collection of Ringling artwork which spans all of European artistic development from the middle ages through the 1800’s. What’s best is that the art museum is open to the public for free on Mondays.

Ringling Art Museum Courtyard Sarasota Florida

The grand courtyard of The Ringling Museum of Art.

The grounds of the entire Ringling estate are beautifully kept, and the courtyard behind the Museum of Art is sensational. An enormous, pillared courtyard surrounds a formal garden that is filled with statues.

Ringling Museum Courtyard Sarasota Florida

Statues grace the rooftops and the gardens.

Above the rows of arches lining the courtyard, there are legions of statues on the rooftop cornices as well.

08 431 Garden statues Ringling Art Museum Courtyard Sarasota FLorida

At one end a bronze replica of Michaelangelo’s statue of David presides over the gardens, surrounded by palm trees.

Replica of Michaelangelo David statue Ringling Museum

John Ringling commissioned a bronze replica of Michaelangelo’s David — to stand between palm trees!

Up on top of the helmeted head of one of the statues, a little songbird sang his heart out for us, filling the air with his melodious warbles.

Singing bird on statue in Ringling Art Museum Courtyard

A little songbird warbled a beautiful melody for us.

Awestruck by the immense scale of this personal collection of art, and trying to imagine what life was like as a circus tycoon a century ago, we were delighted to find a more down-to-earth treasure hidden between the wide banyon trees of the estate. A huge mulberry bush was covered from head to toe in delicious, ripe mulberries. This bush — or tree — was so huge that we could climb inside under its thick branches. There were enough berries in there to feed an army, and we feasted on them for quite some time!!

Eating mulberries in Florida

In between the huge banyan trees we found a massive mulberry bush filled with ripe mulberries!

The huge John and Mable Ringling Mansion is now a museum as well. A very long line of people was waiting outside to get tickets to see the interior rooms of the mansion, but we contented ourselves with wandering around the grounds. The mansion is called Cà D’Zan, which is said to be a Venetian dialect for “House of John.” It is also thought to mean “House of Zany,” and since “Zany” means “clownish,” it is also fitting. John Ringling’s first role with the circus was as a clown.

Ringling Mansion Ca-Dzan Sarasota Florida

These windows of the Ringling mansion look out onto the bay.

Ringling mansion and museum Sarasota Florida

Ornate windows in the Ringling mansion.

Ringling mansion and museum Sarasota Florida-2

What a place to spend the winter!

Ca-dzan Ringling Mansion Sarasota Florida

“Cà D’Zan” (“House of John”) is the name Ringling gave his unique winter bungalow.

The vast marble patio stretches on three sides of the house towards the water, and there is a huge boat dock right out front.

Marble patio Ringling Mansion Sarasota Florida

Colorful marble tiles stretch across the expansive patio.

There are several other museums on the Ringling estate, including a Circus Museum, and it is possible to get a discounted three day pass to see all the museums at leisure. We decided to save that in depth look at The Ringling for another visit, but we were enchanted when we met a longtime Sarasota resident who gave this unusual Sarasota circus connection a personal touch.

Ringling R insignia on metal gate

The Ringling “R” over a gate.

She remembered when the circus train would arrive in Sarasota for their winter break in the early 1950’s and depart again in the spring. Everyone from town would run down to wave at the performers who lived on the 100 car train during the touring season. She also remembered when a group of midgets lived in a nearby neighborhood of miniature homes. Many of the midgets had been cast as Munchkins in the Wizard of Oz in 1939.

How cool is that?!

Added later: Thanks to a heads up from reader Richard Daugherty, here is a YouTube video of child prodigy singer Jackie Evancho performing at the Ringling Museum of Art when she was 11. Check this out!!


Subscribe
Never miss a post — it’s free!

Our most recent posts:

More of our Latest Posts are in the top MENU above.

More about The Ringling in Sarasota:

Related posts:

<-Previous || Next->

Solar Tutorial Part III – Full-time RV & Cruising Solar Systems

<– Solar Tutorial Part II – Starter Kit
Solar Tutorial Part IV – Panels & Wiring –>

This page outlines the parts needed for two different solar power systems to be used for full-time “off the grid” living in a moveable home: one for an RV and one for a sailboat

If you are going to live in your RV full-time, year-round, you will need a much bigger system than the one described on the previous page.  You will likely be using your computer a lot, you’ll keep the lights on for many evening hours in the winter, you’ll be using the TV and stereo quite a bit, and you will want to use your microwave, hair dryer, vacuum and toaster on a regular basis. 

Compared to the small-medium sized systems described in our Solar Power Tutorial Part II, this will require more total wattage in the solar panels, a bigger and more sophisticated charge controller, more total amp-hours in the batteries and a better quality inverter that is wired into the RV’s AC wiring system.  At the very least, a full-timer’s system should have 400 watts of solar panels, a 40 amp charge controller, 400 amp-hours of battery capacity and a 1000 watt inverter.

Full-time RVers Solar Power System – 12 Volt

A sample full-time RVer’s solar power system consists of the following:

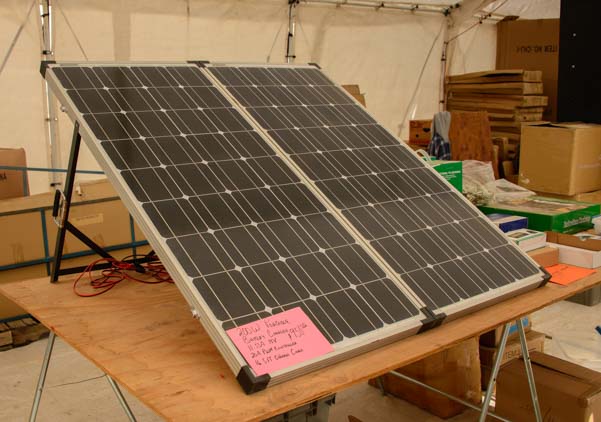
4 150 watt (12 volt) solar panels ($900)
1 Outback FlexMax FM60 MPPT charge controller ($550)
10 gauge wire rated for outdoor use (or 8 guage) ($100)
4 6-volt golf-cart style batteries ($1,050)
1 Go Power 2000 watt pure sine wave inverter ($850)

Total parts cost:  ~$4,000

Wild guess at an installer’s fee:  ~$1,500

* Additional parts may include MC4 connectors and transfer switch and Cable and DC circuit breaker for the inverter

Full-time RV solar panel installation

The 12-volt 120- to 130-watt panels are sized about right to fit between the many little things that stick up on our fifth wheel’s roof.

This system is rated to produce 600 watts at 12 volts and has a 440 amp-hour battery bank.  It is a little bit larger than the system that we have on our fifth wheel trailer. Ae have three 120 watt panels and one 130 watt panel (for a total of 490 watts), and our system cost a whole lot more back in 2008!

We can get as much as 170 amp-hours per day in summer, although more typically it is about 120 amp-hours.  There have been summer days/nights when we watched our 26″ TV for 15 hours (the Olympics), and there have been days/nights when we ran two laptops for 10 hours and then watched a movie (such couch potatoes!!).

In the dead of winter, around the winter Solstice (December 21), this system can produce about 80-100 amp-hours per day.  The only limitation in winter is when storms cloud the skies for three or more consecutive days.  Three cloudy winter days in a row where we get just 40-60 amp-hours makes us start thinking about supplemental charging or cutting back on our power use.

Our weird choices for solar panel sizes were due to what we already owned from our first solar panel installation (a 130 watt panel) and what was available in the store at the time of purchase (120 watt panels).  If we were buying today, we would have purchased four 150 watt panels as shown above.

This system will allow you to run everything inside your rig but the air conditioner and big power tools.  We have even used it to run a small compressor to change a flat tire on the rig (on four different occasions, ugh!).


RV Full-timer’s System Installation

Installation follows the same guidelines as the smaller systems described in our Solar Power Tutorial Part II, but is just a little more complicated.  An outline of the installation follows.

(1) Install the solar panels on the roof

We wired ours in series, but wiring in parallel may be preferable.  A discussion about the pros and cons of wiring the panels in parallel versus series comes on the next page of this tutorial along with a discussion of wire gauge sizes.  Run the wires down through the refrigerator vent to the battery compartment. If the fridge is in a slide-out, run the wires down the outside of the gray or black water vent pipe

(2) Install the batteries in the battery compartment

Not many RV’s have enough battery boxes for four 6-volt batteries, especially trailers.  Often the battery boxes are too short as well, since 6-volt batteries have the same footprint but are taller than the typical 12-volt Group 24 batteries that are shipped with RVs from the factory.  Here are example 6 volt battery boxes and Group 24 12 volt battery boxes.

If you haven’t purchased your RV yet, you may be able to get the manufacturer or dealer to modify the battery boxes for you as part of the deal (that’s what we did with NuWa on our fifth wheel).  Wire two pairs of the batteries in series to form two 12-volt batteries, and wire those two pairs in parallel.

RV Solar Panel Installation Outback Charge Controller

Outback 60 amp charge controller

(3) Install the solar charge controller near the battery compartment

Connect the wires that come from the solar panels to one side of the charge controller and wire the batteries to the other side.  It is best to crimp eyes on the ends of the cables.

(4) Install the inverter near the battery compartment

Wiring the inverter to the AC wiring system in the RV is complex.  The proper way to wire it is to place the inverter as close to the batteries as possible. Protect the DC side with a big fuse, and wire it to a transfer switch. We are not master electricians, and we took a short cut on our system that not everyone would be comfortable with but that works very well for us.

We positioned the inverter next to the DC to AC converter in the basement of the fifth wheel and wired it directly to the batteries.  The converter is located next to an AC outlet that it uses for power to run (the converter uses the AC power to charge the batteries). 

When we use shore power, we plug the converter into the AC outlet to allow the converter to do its normal job of charging the batteries.  However, we use shore power only a few nights a year, at most.

When we dry camp, which we do virtually 100% of the time, we unplug the converter from the AC outlet so it is totally dormant and not in use, and then we plug the inverter into the AC outlet instead.

The inverter and converter are never “on” at the same time.

The inverter draws its power from the batteries and converts that DC power into AC power. That is, it generates AC power which it supplies to the rig backwards through the AC outlet it is plugged into.

This is very non-standard and would be frowned upon by master electricians.  What would concern them is that when the rig is in this configuration, the shore power outlet on the outside of the trailer is live, with power coming out. Accidentally plugging the shore power cable into the shore power outlet on the outside of the RV while the inverter is turned on would be disastrous. However, because we almost never use our shore power cable and we rarely change our setup to switch between dry camping and hooking up (since we dry camp almost exclusively), this method has worked fine for us for over seven years.

This is not a recommended strategy if you plan to switch between dry camping and using electrical hookups frequently.

We also connect the two 50 amp AC legs of our 50 amp coach by plugging a modified extension cord with a male connector on each end into one outlet on each leg. We have two outlets next to each other in the bedroom, one on each of the 50 amp legs in the trailer, that are ideal for this purpose. We plug the “cheater” cord into each outlet, effectively connecting the two 50 amp halves of the RV together at that point.

It is handy to wire the inverter to a simple toggle switch located somewhere inside the RV so you can turn the inverter on and off from inside the rig without having to go outside to the battery compartment each time you want to turn on your AC power.

Liveaboard Cruiser’s Solar Power System – 24 Volt Solar Panels

Marine sailboat solar panel installation

A large arch installed off the back end makes it possible to use very big panels. Note the shade on the panels from the mast and shrouds. The panels are producing about 50% of their potential power right now!

A system like the above would work fine on a sailboat.  However, another style of design — which we ended up using — is the following.  Of course, this system could be used on an RV as well.

3 250 watt (24-volt) solar panels ($1200)
1 Outback FlexMax 80 MPPT charge controller ($650)
10 gauge wire rated for outdoor use ($200)
4 AGM 4D 12 volt batteries ($2,000)
1 Combiner Box & breakers ($180)
Go Power 3000 watt pure sine wave inverter ($550)

Total parts cost:  ~$4,800

Solar Panel Arch:  ~$2,000-$8,000

Wild guess at an installer’s fee:  ~$1,500-2,500

This system is rated to produce 750 watts at 24 volts and has a 650 amp-hour battery bank.

System Comparison – How do these two full-timer/liveaboard systems differ?”

The system we installed on our sailboat was bigger and more robust than the one we installed on our trailer. If we were to install a solar power system on our RV today, it would be what we put on our boat. Here are the differences between the two:

AGM versus Wet Cell Batteries

One basic difference between the sailboat design and the RV design is the use of AGM batteries rather than wet cell batteries. AGM batteries are not only maintenance free but they can be operated while lying on their sides, whereas wet cells prefer to be upright. They also charge up faster and discharge more slowly.

There is less need for expensive AGM batteries in an RV than on a sailboat since an RV never lies on its side the way a sailboat does while sailing. However, that said, gazillions of cruising boats have sailed around the world with wet cell batteries, through all kinds of storms and mayhem, with no problem, so AGM batteries are by no means required on sailboats. On the other hand, if you have the money and don’t want to be hassled with battery maintenance on your RV, go for AGM instead of wet cell!

 To learn more about AGM versus Wet Cell Batteries, see this article:

Wet Cell vs. AGM Batteries ~plus~ Wiring Tips

Physical Panel Size

The primary difference between the two systems is the size of the solar panels.  An RV has things sticking out of the roof that may hamper the installation of very big solar panels (hatches, fridge vents, air conditioning units, TV antenna, domes, etc.).  So the slightly smaller 150 watt panels may be easier to position on the roof than the big 250 watt panels. Going even smaller (120 watt or 100 watt) may be advantageous.

Finding a place for solar panels on a sailboat is challenging, but the best solution is often to build an arch over the back of the boat, as far behind the end of the boom as possible.  This arch can be designed to support large panels.  See our Sailboat Solar page for more details about our arch and panel installation.  If you are a west coast sailor, consider going to Baja Naval in Ensenada, Mexico, and having Alejandro Ulloa install your arch.  His stainless steel fabrication is by far the highest quality and most beautiful we have seen in all of the US West Coast and Mexico.

24-volt versus 12-volt

This sailboat system differs slightly from the first RV system shown above in that rather than being a strictly 12-volt system, one part of the circuitry is 24-volt (the portion between the panels and the charge controller), and one part of the circuitry is 12-volt (the portion between the charge controller and the batteries). 

Marine sailboat RV Solar Panel installation combiner box

The combiner box contains a breaker for each panel and combines the 3 wires from the panels into 1 for the charge controller.

The charge controller steps down the voltage from 24-volt to 12-volt (and correspondingly doubles the current).  Large panels aren’t available in 12-volt configurations.  Also, the wiring for 24-volt panels can be slightly thinner gauge, which is advantageous (discussed in more detail on the next page of this tutorial).

Combiner Box and breakers

The other difference is that this system uses a combiner box and circuit breakers.  This makes for a more professional installation and can be used on any/all solar power installations that use more than one panel in parallel.  The combiner box sits between the panels and the charge controller.  One of its purposes is to combine the three wires coming from the three panels into one wire that goes to the charge controller.  The other purpose is to provide a breaker for each solar panel so that if something goes wrong the panel can be shut down easily or will trip the breaker automatically.

Liveaboard Cruiser’s System Installation

Installation of a solar power system on a sailboat is more complicated that on an RV simply because the panels are flying out there on some crazy scaffolding in the sky and the batteries are scattered about the bilge of the boat somewhere. The solar panels and batteries are often separated from each other by a big distance.  Finding space for batteries, installing them so they will stay in place even if the boat flips upside down, and snaking wires down the inside of stainless steel tubing in an arch is not all that easy.

The things to keep in mind are simply:

– Install the panels so they get shaded as little as possible by the mast and boom
– Make the wire runs as short and direct as possible
– Install the charge controller as close to the batteries as possible

Our Experience on Our Sailboat

The system outlined here is basically the system we have on our sailboat, except we have three 185 watt panels instead of three 250 watt panels (we weren’t sure if the bigger panels would be physically too big.  In hindsight they would have probably fit fine).

We have anchored out over 750 nights, usually for months at a time.  In a typical day we use two laptop computers for about 4-8 hours and watch a movie on our 22″ TV/DVD (with power hogging sub-woofer & surround-sound) at night.

We get about 220 amp-hours (at 12 volts) per day in the summertime and about 165 amp-hours per day in the wintertime, provided the panels are unshaded all day.  We have found that the winter prevailing winds on the Pacific Mexican coast usually position the boat so the mast shades the panels for a few hours each afternoon, dropping our typical daily total to 150 amp-hours.

We have found that if we run both our DC refrigerator and our separate DC freezer (both of which both cycle on and off 24/7 — a very different load than a few hours of continuous computer or TV use — we come up a little short charging the batteries each day in winter. 

However, if we turn off the freezer (which uses about 50-70 amp-hours every 24 hours all by itself!), our batteries are fully charged and in “float” mode by mid-afternoon each day throughout the winter.  So — provided we can live without frozen meat and ice cubes (gasp!) — we can sit at anchor indefinitely without ever going into a marina or running the engine for supplemental charging from the alternator.  This is a good thing, because our fancy Balmar smart charger/alternator combo gave up the ghost in Huatulco, and we waited eight weeks at anchor for a replacement to come down with a friend from the US.  We don’t have any kind of generator on the boat.

Further Discussion

These two solar power systems have worked well for us in their different settings.  I’ve described them here without any background theory because they will do the job for most full-time RVers and cruisers just as they are.  However, there are lots of things to think about when choosing the different components that make up these two systems.  There is a more detailed discussion of those issues on the next page: 

Solar Tutorial Part IV – Panels & Wiring ->

Most of the components for an RV or marine solar power installation can be purchased at Amazon.

Shown here is a complete full-timer's kit (far left), a big charge controller (middle) and a big inverter (right). More comprehensive listings of each component type can be found at the following links:

Purchases at any of our Amazon links help cover our out-of-pocket costs for operating this site -- thanks!


Subscribe
Never miss a post — it’s free!

FURTHER READING – RELATED ARTICLES

SOLAR POWER OVERVIEW and TUTORIAL

BATTERIES and BATTERY CHARGING SYSTEMS

LIVING ON 12 VOLTS

Our most recent posts:

More of our Latest Posts are in the MENU.   New to this site? Visit RVers Start Here to find where we keep all the good stuff. Also check out our COOL NEW GEAR STORE!! *** CLICK HERE *** to see it!

Trailer Life Magazine Feature – The Sunny Side of Oregon!

The Sunny Side of Oregon Trailer Life Magazine May 2015

“Sunny Side of Oregon” by Emily & Mark Fagan
Trailer Life Magazine — May, 2015

The May, 2015, issue of Trailer Life Magazine is featuring our article, The Sunny Side of Oregon about the fun and pretty sights we saw on our RV travels in central Oregon.

Central Oregon is a fabulous area for RVing. The hip and trendy city of Bend is at the heart, and there are lots of things to see and do heading in every direction from town.

From the absolutely stunning royal blue vistas at Crater Lake National Park to hiking and rock climbing at Smith Rock State Park to seeing gorgeous waterfalls along the McKenzie River to riverside camping on the banks of the Lower Crooked River, the whole area is an outdoor lover’s paradise that is ideal for an RV roadtrip.

The article can be read here:

The Sunny Side of Oregon

Our blog posts from our RV travels in central Oregon are here:


The May issue of Trailer Life can be found on the magazine racks of big bookstores like Barnes & Noble and at camping and RV supply stores like Camping World. We are subscribers to Trailer Life, and a 12 month subscription can be purchased at this link.

Trailer Life Magazine is published by the Good Sam Club and offers not only travel destination stories like this one but lots of RVing tips and product reviews as well. We’ve been subscribers for many years!

Find more of our published magazine articles and cover photos in our Press Room page.


Subscribe
Never miss a post — it’s free!

Our most recent posts:

More of our Latest Posts and Quick Pics are in the top MENU above.

Solar Tutorial Part II – Small Upgradeable RV Solar Power Systems

<– Solar Tutorial Part I – Basic Concepts
Solar Tutorial Part III – Full-timer Kits –>

Designing a solar power system for your RV depends entirely on how you plan to use your RV.  Are you RVing in summer or winter, or both?  Are you staying in it for a week or two at a time or for several months at a time?  Do you want to use a laptop for an hour or so a day, or do you need to camp out on it for 4-8 hours at a time?  Do you hit the sack after an hour or so of watching TV or do you want to plunk down in front of it with a cocktail and stay planted there until after midnight?

RV solar panel on the ground

We didn’t install the panel on the roof at first. Silliness! Install it on the roof so you don’t have to think about it!

As a general rule, more solar power is better.  It is really awesome to have so much power that you never need to think about it.  If you are planning to live in your RV for extended periods of time, want to use big appliances a lot and don’t want to be dependent on electrical hookups, get a big full-timer’s system right off the bat.

However, if you are just weekending, vacationing, and living largely outdoors, get a small system.  You’ll quickly learn what you can and can’t do.  It is very easy to upgrade if you find you need more.  Upgrading is mostly a matter of adding more and bigger parts.  Not too many parts have to be swapped out.

RV solar panel installation - wiring the panel's junction box

Mark connected the cable to the panel’s junction box before hoisting the panel onto the roof.

This page describes a “starter solar setup” which is good enough for heading off into the woods for a month or two of simple living in the summer.  We used a system of this size for a full year, boondocking (dry camping) for months on end.  We typically used the laptop or TV or stereo just 1-2 hours a day.  We went to bed 2-3 hours after sunset.

In the summer it was fully adequate for those kinds of light electrical needs.  In the winter there was so little sun that we had to be very conservative.  We used oil lamps at night, and we supplied extra charging for laptop, toothbrush, camera batteries etc. by charging them in the truck while driving around, using a portable inverter plugged into the cigarette lighter in the truck.

A Small Solar Setup:  150 watts of solar power with portable 150 & 300 watt inverters

If you are going to dry camp in your RV in the summer, you don’t need an big solar power system.  You will be busy around the campfire at night rather than watching hours and hours of TV.  You will be using your RV when there is abundant sunshine, and you probably won’t spend too many hours on your computer.  Here is a very simple solution that will be sufficient for as much as a few months of simple living in summertime:

1 150 watt solar panel ($220)
1 Morningstar 10 amp charge controller ($60)
1 Portable 150-300 watt modified sign wave inverter ($30)
10 gauge wire that is rated for outdoor use ($150)
2 12-volt batteries wired in parallel ($150 for that second battery, as your RV should have a battery already)

Total cost:  ~$650
Wild guess at an installer’s fee:  ~$400

Installation

RV solar panel installation on a fifth wheel

Cardboard covers the panels (shown here on our big full-timer’s installation) so they aren’t live

Installation isn’t too difficult if you are willing to scramble around on the roof a bit:

(1)  Install the solar panel on the roof.

While working with the panel, keep it covered so it isn’t producing electricity.  One easy way to cover it is to cut part of its cardboard packaging to size and tape it on.

Mark drilled holes in the roof and used anchors for the screws in places where the panel couldn’t be screwed into a roof truss.  He jammed Dicor lap sealant into the holes before putting the anchors in, then ran the wire and then put more Dicor on the whole works after it was screwed down.

RV solar panel installation on a travel trailer

Mark used lots of Dicor roofing lap sealant

If there is a chance you might eventually want to use your RV in winter, install the panel on tilting brackets so you can tilt the panel towards the sun.  It isn’t necessary to tilt the panel in the summertime, but it can be a huge help in the winter when the sun rides very low in the sky and doesn’t shine down on the panel but actually shines kind of across it from just above the horizon.  Tilting the panel towards the sun might give you an extra 25% of total charge for the day in the wintertime.

When you have tilting brackets, you have to climb up on the roof to tilt the panel each time you set up camp — and you have to remember to climb back up again to lower it down before you drive off.  If you don’t think you want to do all that scrambling around on the roof, skip the brackets (and consider getting two panels instead, described in Part III of this tutorial).

(2)  Install the charge controller inside a hatch near the battery compartment.

(3)  Run the wires from the panel to the charge controller

Connect one end of the wire to the panel (there are screws in the junction box on the panel that you screw the wire to).  You can use duplex wire or two runs of single conductor wire for the positive and negative leads. If the refrigerator is not in a slide-out, run the wire down through the refrigerator vent to the battery compartment.  Otherwise, run the wire down along the outside of the grey or black water vent pipe.

Taping the wire to a metal snake and snaking it down behind the fridge really helps.  We snaked ours down inside a piece of PVC pipe that we used as a kind of conduit to keep the wire away from the back of the fridge.  If you do that, make sure the PVC pipe is quite a bit bigger than the thickness of the wire so you can get it through easily.

RV solar panel installation crawling on the roof

Our lightweight Lynx trailer did not have a “walk-on” roof, but Mark used a telescoping ladder and crawled around to install the panel

You can also use the MC4 connectors in the solar panel’s junction box and use solar power cable that has MC4 connectors pre-installed

At the charge controller, connect the wire coming down from the solar panel to the input side.  Run a second wire from the output side of the charge controller to the batteries.  It is best to crimp eyes on the ends of the cables.

(4)  Remove the cardboard from the panel.


You should see an LED light on the charge controller turn green to indicate that it is charging.

300 watt inverter for an RV solar panel installation

Use small, portable inverters plugged into the RV’s cigarette lighters for the TV, laptop, etc.

Now your panel will start charging your batteries all day every day.  It might even start charging them before you get out of bed in the morning!  They will charge faster if you are in full sun.  Just a little shade on the panel (like a single tree branch across one corner) will cause them to charge much more slowly.

(5)  Use your AC appliances

Plug your portable inverters into whatever available cigarette lighter outlets there are inside the RV.

Whenever you want to watch TV, DVD’s or use your laptop or charge your camera batteries or toothbrush or whatever, plug the appliance into an inverter, turn the inverter on, and use the appliance as you would at home!!

RV solar panel installation on a travel trailer - completed

A successful morning’s work – the panel is permanently installed!

(6)  Add a second 12-volt battery to your battery box (this could also be Step 1, it doesn’t matter). 

The battery is your energy storehouse.  You add energy to it when you charge the batteries and you remove energy from it when you use your appliances and lights.  Think of your batteries as being a big kitchen sink.  You fill the sink with water (charge the batteries) by turning on the faucet.  You drain the sink (when you use your appliances and lights) by removing the drain plug.  The goal is to keep the sink at least 2/3 full all the time.  After a day of sunshine, as the sun is setting, your sink should be full.  After an evening of watching TV and computer work, your sink should not be less than 2/3 full (batteries don’t like to be drained until they are empty).

Group 24 deep cycle 12 volt battery for use in an RV solar power system

Add a second Group 24 12-volt battery in parallel

So you have to balance the size of your faucet (the total wattage of the solar panels), the size of your sink (the total amp-hour capacity of your batteries) and your appliance usage (how often and for how long you remove the drain plug) to make sure you don’t drain out more than you can fill up on a sunny day.

Most RVs come with a single Group 24 12-volt battery.  These typically store about 70 amp-hours of energy.  Adding a second Group 24 12-volt battery will double the size of your “sink” to about 140 amp-hours of energy.  As a very general rule of thumb, the total watts of your solar panels should be comparable to the total amp-hour capacity of your batteries.  With 140 watts of solar panels in this system, it makes sense to have two 12-volt batteries to give you 140 amp-hours of battery capacity.

Make sure there is room in the battery compartment for a second battery, as some RVs don’t have room for one.  When shopping for an RV, if you plan to dry camp a lot, make sure the battery box can hold two 12-volt batteries.  Wire the two batteries together in parallel.

 To learn more about batteries and battery charging, read this article:

RV and Marine Battery Charging Basics

And that’s it for this whole system.  Very very simple.  The only limitation to this system is that you need to keep your TV/laptop usage fairly light and you cannot use your microwave, toaster, hair dryer, vacuum or air conditioning unit.  However, it is a great starter setup to get your feet wet and learn to live in a solar driven home on the road.

Monitoring Your Batteries

Fluke snap-on multimeter voltmeter

A multimeter can help you monitor the batteries

The easiest way to see how your batteries are faring is to use a multimeter and measure the voltage.  We use a Sperry clamp-on meter that has jaws that can wrap around wire so you can measure the amperage flowing through the wires, if need be. The Fluke meter is an even better unit because it is true RMS.

Monitoring the battery voltage with a multimeter is not scientifically accurate, because batteries have personalities and memories and only tell the truth about themselves when they have not been under load for a long time and have been cleaned of their surface charge.  However, checking your batteries’ health with a multimeter can still give you a good indication of how they are doing.

Early in the morning, before the sun has gotten over the horizon, measure the voltage between the battery terminals.  If it is 12.3 or higher, you’re okay.  If it is lower than that, go outside and play and leave the indoor appliances alone for a day or two (and hope for sunshine).  If that’s not possible, start thinking about finding a place to plug in.

Likewise, check out the voltage sometime right after sunset before you get the TV or laptop going.  If it is 12.6 or more, you are golden.  If not, then rethink your evening’s activities a bit.

A Portable Solution with NO INSTALLATION NEEDED!!

Folding RV 12 volt solar panel suitcase for_

Portable solar panel kit that folds into a hard shell suitcase!

One very slick option for adding a small solar power system to your RV without going through the trouble of installing the panels on the roof is to get a folding portable solar panel kit. These wonderful kits are pairs of panels that are hinged together on the long side, and they fold together to form a hard shell suitcase that has a handle for easy carrying.

The beauty is that the panels are naturally protected when you store them away, and they have built-in stands that support the panels at a tilted angle when they are set up, so you can aim them south for maximum efficiency.

They come with a small solar charge controller so the batteries don’t get overcharged, and they have alligator clips that make it easy to clip the leads onto the battery terminals.

This is not an upgradeable system, but if you are simply looking to enjoy some dry camping and boondocking in your RV and want a little solar boost for your batteries, this is an all-in-one 120 watt system that will get the job done!

Most portable suitcase kits don’t come with an inverter, so remember to buy that too!

Most of the components for an RV or marine solar power installation can be purchased at Amazon.

Shown here is a complete "weekender/vacationer" kit (far left), a small charge controller (middle) and a small inverter (right). More comprehensive listings of each component type can be found at the following links:

Purchases at any of our Amazon links help keep us going. But don't buy anything yet. Finish the tutorial first!


Part III of this tutorial describes ways this starter system can be upgraded to get a little more power. Return to Part I here.

Solar Tutorial Part III – Full-timer Systems –>

Subscribe
Never miss a post — it’s free!

FURTHER READING – RELATED ARTICLES

SOLAR POWER OVERVIEW and TUTORIAL

BATTERIES and BATTERY CHARGING SYSTEMS

LIVING ON 12 VOLTS


Our most recent posts:

More of our Latest Posts are in the MENU.   New to this site? Visit RVers Start Here to find where we keep all the good stuff. Also check out our COOL NEW GEAR STORE!! *** CLICK HERE *** to see it!

Gulf Islands National Seashore – Florida’s Emerald Coast!

March, 2015 — After a wonderful visit at the Escapees RV Club headquarters in Livingston, Texas, we huslted east on I-10, enjoying several really fun stops at the interstate rest areas along the way. We had endured more rain and crummy weather in the last few weeks in Texas than we had experienced anywhere in years, so the gorgeous sunshine that greeted us in Florida was especially welcome.

Dawn on Pensacola Beach in Florida

The beach at dawn — bliss!

Pensacola Beach and the Gulf Island National Seashore on Florida’s Emerald Coast are just gorgeous, with white sand and water the color of jade stretching for miles and miles.

Girl plays on Pensacola Beach in Florida

Pink bathing suits, sand castles and aquamarine water — what could be better?

We were told that we had arrived on the first really great days of the season, and everyone was out enjoying the beautiful weather. It was spring break, and kids were everywhere, playing frisbee, suntanning, flirthing and hanging out.

Kids play ball on Pensacola Beach in Florida

Play ball! Spring break in Florida!

Even the seagulls seemed to be getting into the playful spirit.

Seagull flies over Pensacola Beach in Florida

Checking out the beach scene from above!

Seagulls on the beach in Florida

“It wasn’t us!”

There is a paved path that goes along the Gulf Islands National Seashore for miles and miles, and we took our bikes out for a spin along the coast.

Riding bicycle on Gulf Islands National Seashore Florida

There are many miles of paved bike paths along the Gulf Island National Seashore.

The paved bike path parallels the Gulf Island National Seashore road, so you can walk, run, bike, drive or ride a motorcycle along this beautiful scenic drive.

Bicycle on white sand Gulf Islands National Seashore Florida

It’s like biking in a sugar bowl!

The sand in this part of Florida is blindingly white and sugary soft. Birds and other creatures leave tracks all over the place. We saw the tiny footprints of little sandpipers, the webbed tracings from gulls, and the huge footprints left by large herons.

Bird tracks in white sand Gulf Islands National Seashore Florida

Little birds leave tracks of all kinds in the sand.

And we also saw the birds themselves…

Seagull Gulf Islands National Seashore Florida

.

But it was the color of the water that just plain knocked us out. Wow!!

Gulf Islands National Seashore Florida

The Gulf Islands National Seashore on the Emerald Coast

There were loads of pretty seashells too.

Seashells in white sand Gulf Islands National Seashore Florida

Pretty seashells were strewn about.

This was all such a delight and such a huge change after the vast, inland landscapes of Big Bend Texas and the piney woods in east Texas. We were loving being on the coast again.

Happy Campers on the Florida Gulf Islands National Seashore

Happy campers!

As we were riding back from the Gulf Islands National Seashore to Pensacola Beach, we came across an outdoor bar in front of a resort. The bar tender had blenders lined up to make yummy frozen drinks. What a place!

Outdoor bar Pensacola Beach Florida

This is the land of Vacations and Parties!!

This whole area is totally geared towards tourists and beach life, and it was so great to change gears completely and get swept up into beach vacation mode.

Hot crabs and cold beer sign Florida

Get it here…!

Windsurfing on Pensacola Beach Florida

We were told we’d arrived on the first real beach day of the season.

Little girl on the beach in Florida

Is there anything better than a sunny day on the beach?

We breathed deep, walked the beach, and unwound for a few days.

Pink lilly flowers

I love the beach because there is always something going on, and sure enough, one day when we went to the beach we watched a fisherman reel in a shark, then two young gals in bikinis walked by with large snakes wrapped around their necks!

Colorful umbrella on Florida beach

The sunshine and colors were a true feast for the eyes after all that rain in Texas.

The funny cries of the laughing gulls filled the air and the sunsets and sunrises were exquisite.

Seagulls flying over people on Florida beach

Even the gulls were having a good time.

Seagull flying into camera

These guys laugh and laugh and laugh.

It had been a long hike to get from Texas to Florida, but we both agreed these wonderful beach days were well worth the drive!

Sunset at Pensacola Beach Florida

The colors at sunset and sunrise were beautiful.

RV at sunset

Subscribe
Never miss a post — it’s free!

Our most recent posts:

More of our Latest Posts are in the top MENU above.

More info about the area…

Related posts…

<-Previous || Next->

Solar Tutorial Part I – Understanding the Basics of RV & Marine Solar Power

This page is the first in a series of four posts that explain the nitty gritty details of RV (and sailboat) solar power. The intention is to demystify the subject of marine and RV solar power and make it understandable for all, regardless of how technical you are or how much you know about electricity. The pages are linked together with arrows at the bottom of each page.

Since we started traveling full-time in 2007, we have been living almost exclusively on solar power, first in a travel trailer, then a fifth wheel trailer and also in a sailboat.  We don’t stay in RV parks or campgrounds or marinas, and on the rare occasions that we do, we don’t hook up to shore power.  As of June 2019, we’ve spent over 4,000 nights living off the grid without electrical hookups in our rolling and floating homes.

A solar power installation in an RV gives you the freedom to have full electrical power anywhere and at any time: at a rest area, in a parking lot, or at a National Forest campground.  Likewise on a boat, you can anchor out for an unlimited time in bays and coves.  Solar power runs without using any gas, is silent, doesn’t smell, and doesn’t require any setup (those shore power cords are mighty ungainly).  Although we do have a gas generator in our trailer, we use it only when we want to run our 15,000 btu air conditioner, not for charging the batteries.  It is a Yamaha 2400i.

Wrapping your brain around solar power for a rolling or floating home can be confusing, but it is actually quite straight forward.  Here’s the whole thing in a nutshell (wherever it says “RV” you can also think “sailboat,” as the principles are the same).

RV Solar power instalation on a fifth wheel trailer

Mark finishes three days of installing our fifth wheel’s solar power system while boondocked in Flagstaff, AZ.

There are 2 functions that your rig needs to have if you want to live without electrical hookups:  

  •  A system to charge the batteries
  •  A system to create AC power for the rig so you can watch TV and use a vacuum

There are 3 components (or “parts”) used in an RV solar power installation to accomplish the two objectives listed above:

Now put it all together…

  1. To charge the batteries you need:  Solar Panels and a Charge Controller
  2. To use your batteries to generate AC power for your TV, computer, etc., you need:  An Inverter

That’s it!!   Very simple.  To flush it all out a little, here it is in more depth:

Solar Power Function #1 – Charging the Batteries

When an RV comes from the dealership, it usually has either a Converter or an Inverter/Charger in it so it can charge the batteries when it is plugged into shore power (via “hookups” or gas generator).  Converters are cheaper and are factory installed on most trailers.  Inverter/Chargers are expensive (because they are dual-purpose, see below) and are factory installed on higher-end motorhomes.

These appliances take the AC power coming in from the external source (hookups/generator) and use it to charge the batteries.  They usually have a 3-stage charge cycle that charges the batteries quickly at first and then drops to a trickle charge once the batteries are close to fully charged.

morningstar sunsaver 10 charge controller

A $45 charge controller for a small solar power installation

How do you charge the batteries when you don’t have shore power?  That is where solar power comes in.

When you install a solar power system in an RV, you add two things:  Solar Panels and a Charge Controller.  The solar panels are installed on the roof and they gather energy from the sun and pump it down to the charge controller.  The charge controller keeps an eye on the batteries and takes only as much power coming from the solar panels as the batteries can handle.

Outback Flex 60 MPPT Charge Controller

A $500 charge controller for a big solar power installation

Early in the day, the batteries are hungry and the charge controller passes everything it can to the batteries.  As the day wears on, the batteries become more fully charged and require less and less power.  By afternoon, if the system is sized right for the way the RV is being used, the batteries throw up their hands and say, “No More!!” and the charge controller puts them into “Float” mode, a fancy term for a trickle charge.

None of this has anything to do with running your TV or computer.  It is only about charging the batteries up after they become depleted from use the night before.

The solar panels will charge the batteries no matter where your RV is parked.  If you are out hiking, or shopping at Walmart, or taking a nap inside, the batteries will be getting charged all day long.  If you are at an RV park or marina with metered electricity, you can save a few dollars by not plugging in!!

If you park under a tree, and the panels are shaded, you will get dramatically less power from the sun.  A tiny bit of shade results in a huge decrease in how much the charge the batteries can get.  We always park in full sun.

Sailboats have a terrible time with unwanted shade from the mast and boom.  When at anchor, pulling the boom over with the traveler and forcing it further out with a preventer helps a lot, but the mast is always a problem when the sun comes from forward of the beam.  If you are sailing and heeled away from the sun or the panels are shaded by the sails, too bad!!  So, on a sailboat, install more solar panels (more total watts) than you think you’ll need!

100 watt portable inverter from Walmart

A 100 watt portable inverter ($15). Plugs into a cigarette lighter and has one AC outlet

Solar Power Function #2 — Generating AC Power to run the TV

When an RV comes from the dealership, it usually has a shore power cable so you can plug the rig into electrical hookups or into a gas generator.  The shore power cable takes the AC power from the source (“hookups” or generator) and passes it straight through to your AC outlets. 

In other words, when the rig is plugged in like this, all the AC outlets, including “built-ins” like the microwave, become “live,” and you can run your AC appliances like the TV, computer, toothbrush charger, electric razor, hair dryer, vacuum, etc.

If you want to have AC power without plugging into shore power, you have to have an Inverter.  An Inverter converts the DC power that is stored in the batteries into AC power so you can run your AC appliances like the TV and computer. 

However, the Inverter is not technically part of the RV solar power installation.  That is, it doesn’t connect to the solar panels in any way.  You can use an inverter and not have any solar panels installed.  However, unless you plug into shore power, your batteries will get run down by watching all that TV!  That is why Inverters are lumped into the overall notion of RV solar power installations.  They are a vital component if you want to dry camp.

You can buy small, portable inverters for under $25 that will run your laptop from a cigarette lighter.  These work on the cigarette lighters inside an RV just the same as they work on the cigarette lighter in a car.  No difference.  If you are puzzled by all this, get a little power inverter and try it out.  I was totally enlightened the first time I turned on a small inverter in a car and saw the “charging” light on my laptop light up.

300 watt portable inverter

A 300 watt portable inverter ($20) with cigarette lighter plug and 2 AC outlets

A small 300 watt portable Inverters can run small 19″ LED TV too.  Anywhere from 300-500 watts is fine for pretty much everything in an RV except the microwave, hair dryer, vacuum and air conditioner.  You need an inverter of 1000 watts or more to run a small microwave, hair dryer or vacuum.  You can’t run an air conditioning unit from an inverter unless you have a boatload of batteries, something that few RVs can support because of the weight. To run our air conditioning, we use a Yamaha 2400i generator.

A 2000 watt inverter is fine for most things you might use.  You just can’t run the big appliances (microwave, vacuum and hair dryer) simultaneously.  If you are content using these appliances one at a time, don’t bother with an inverter larger than 2000 watts.  We power everything on the boat except the microwave with a 600 watt inverter.  We power everything in the fifth wheel, including the microwave, with a 2000 watt inverter.

Some higher end motorhomes come with an Inverter/Charger (see above), so they don’t need to have an Inverter installed – they already have one.  Turn on the Inverter/Charger, and shazam – all the AC outlets in the rig are “live.”

Atwood converter

A converter – this was factory installed on our fifth wheel

Most trailers do not come with an Inverter/Charger.  They come with a Converter instead.  So if you have a trailer, you will need to get an Inverter to watch TV.

This terminology is unfortunate, as “Inverter” and “Converter” sound so much the same.  However, they are almost the opposite of each other.

  • A Converter charges the batteries, i.e., it takes AC power from an external source — hookups or generator — and puts that energy into the DC batteries to charge them up.
  •  

  • An Inverter takes the DC power from the batteries and creates AC power so you can watch TV.


Wait, what was all that, again??

So, to recap:  when you install Solar Power in your RV, you are tackling two problems:  ( 1 ) Charging the batteries, and ( 2 ) Generating AC power from your DC batteries so you can watch TV, surf the internet, and charge your camera batteries.

You need three types of components or “parts” to do all this:

  •  An Inverter to create AC power out of the DC power that is stored in your batteries so you can use the TV and computer.  You can use little portable ones that plug into cigarette lighter outlets and/or you can install a big one.

If your rig came with an Inverter/Charger, you are halfway there and need only to add the components for charging the batteries (Solar Panels and Charge Controller).

Next Up: What you need for a small RV solar installation that’s good enough for summer weekends, vacations, and simple living on an extended tour.

Solar Tutorial Part II – A “Starter” Installation –>

FURTHER READING and RELATED ARTICLES

SOLAR POWER OVERVIEW and TUTORIAL

BATTERIES and BATTERY CHARGING SYSTEMS

LIVING ON 12 VOLTS


Most of the components for an RV or marine solar power installation can be purchased at Amazon.

Shown here is a complete "weekender/vacationer" kit (far left), a small charge controller (middle) and a small inverter (right). More comprehensive listings of each component type can be found at the following links:

Purchases at any of our Amazon links help keep us going. But don't buy anything yet. Finish the tutorial first!


Subscribe
Never miss a post — it’s free!

Our most recent posts:

More of our Latest Posts are in the MENU.   New to this site? Visit RVers Start Here to find where we keep all the good stuff. Also check out our COOL NEW GEAR STORE!! *** CLICK HERE *** to see it!