There are several types of braking systems available on bumper pull travel trailers and fifth wheel trailers today. Two of the most common are electric drum brakes, a less expensive system, and electric over hydraulic disc brakes which are a bit more costly. We recently converted our 36′ fifth wheel trailer’s braking system from factory installed electric drum brakes to electric over hydraulic disc brakes. What an incredible improvement this upgrade has made in our stopping power and personal safety. The difference is like night and day!!
This page outlines our reasons behind doing this upgrade and the components we chose for our brake conversion. It also gives a pictorial overview of the installation process.

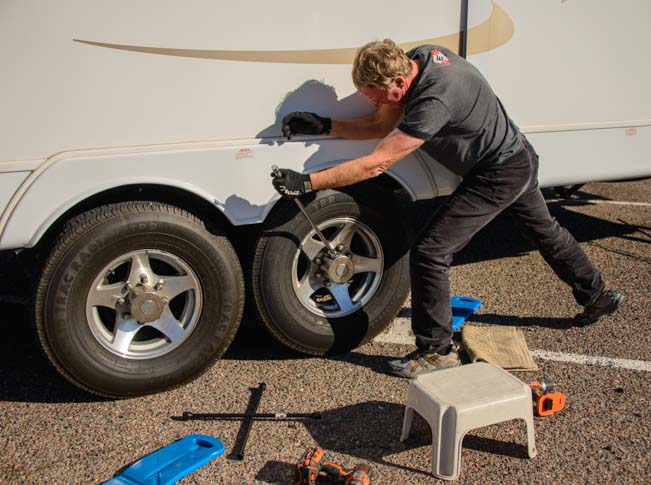
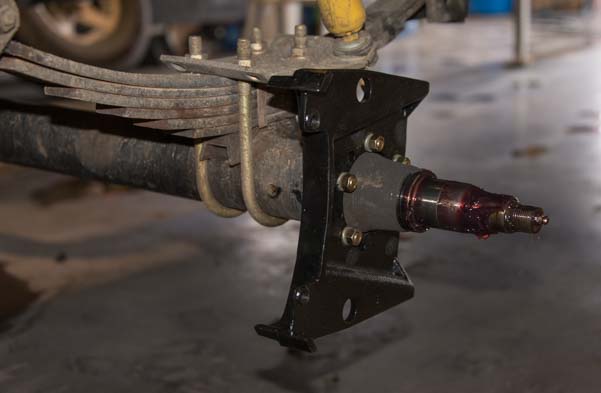
The disc (or rotor) and caliper with red brake pads peeks out from inside our trailer wheel.
This is a long post. You can skip down to the different sections using the following links:
HOW TRAILER BRAKES WORK
Return to top
Electric drum trailer brakes and electric over hydraulic disc brakes function very differently.
To engage electric drum brakes in a trailer, when the driver depresses the brake pedal in the tow vehicle, an electrical signal is sent to the trailer’s brakes via a brake control unit in the truck. The brake control may be factory installed or it may be an external unit that is installed by the owner. The electrical signal engages an electromagnet on the trailer’s wheels that expands the brake shoes as the current gets stronger, creating friction on the wheel and slowing it down.
Brake Pedal -> Electrical Signal via Brake Control -> Trailer Brakes
To engage electric over hydraulic disc brakes on a trailer, when the driver depresses the brake pedal in the tow vehicle, an electrical signal is sent to a brake actuator unit in the trailer via the brake control unit in the truck. The brake actuator in the trailer then pumps hydraulic disc fluid through a line to the disc brake calipers on the trailer’s wheels. The build-up of fluid pressure actuates the brake calipers which, in turn, squeeze the brake pads against the disc, slowing the trailer down.
Brake Pedal -> Electrical Signal via Brake Control -> Brake Hydraulic Fluid Pumped by Brake Actuator -> Trailer Brakes
Drum brakes are an older technology. However, RV trailer manufacturers continue to install electric drum brakes to this day because it is far less expensive than installing electric over hydraulic disc brakes. The highest end full-time fifth wheel trailers are frequently offered with an option for electric over hydraulic disc brakes, but they are rarely provided as standard equipment.
Besides greatly increasing overall braking power, one of the biggest advantages of hydraulic brakes is that it is much easier to modulate the brakes for smoother stopping. In contrast, electric drum brakes on trailers can be very jerky, as the brakes are either ON or OFF. We often used to feel the trailer bump into the back of our truck as we stopped, hitting us with a jolt.
TRAILER ELECTRIC OVER HYDRAULIC DISC BRAKES versus CAR HYDRAULIC BRAKES
Cars are manufactured with hydraulic brakes, sometimes with disc brakes in the front and hydraulic drum brakes in the back. Many high end bicycles are even built with hydraulic disc brakes! Electric over hydraulic trailer disc brakes are slightly more complex than car hydraulic brakes, but they provide trailers with the same smooth stopping power that we enjoy in our cars.
The difference between the way hydraulic disc brakes on cars and electric over hydraulic disc brakes on trailers function is that there is no electrical signal involved in a car’s braking system. This is because the car is a single vehicle. No signal needs to be passed from one vehicle to another, as it does with a truck and trailer combo. The tricky part about a truck/trailer is that the brake pedal is in the front of the truck by the driver’s foot while the trailer’s brakes are way behind the driver at the back end of the trailer. Also, in a car, the hydraulic fluid is located under the hood in a master cylinder which performs the same function as the brake actuator that is located in the trailer.
Again, in a car, when the brake pedal is depressed, hydraulic fluid flows directly to the brakes to engage them. In a truck and trailer combo, an electrical signal has to be passed from the truck to the trailer to activate the hydraulic disc brakes in the trailer via the brake actuator.
ON THE ROAD COMPARISON OF TRAILER BRAKING SYSTEMS:
Electric Drum versus Electric Over Hydraulic Disc Brakes
Our fifth wheel trailer, a 36′ 2007 NuWa Hitchhiker II, came with factory installed electric drum brakes. We towed it, with that braking system, behind our 2007 Dodge RAM 3500 truck for the first six years we owned it, for a total of about 40,000 miles. When we upgraded to electric over hydraulic disk brakes, we were stunned by what a massive improvement in braking power and safety that simple upgrade provided!
We have now towed our trailer over 1,200 miles since the brake system upgrade, traveling on interstate freeways, maneuvering around tight gas stations and campgrounds, and driving in gnarly stop-and-go-traffic in slick, rainy weather. All we can say is:
“We should have done this a long time ago — probably on Day 1!”
The differences we experienced between the electric drum brakes and the electric over hydraulic disc brakes can be summed up as follows:
DRIVING AND STOPPING COMPARISON
| Electric Drum Brakes |
Electric over Hydraulic Disc Brakes |
| The truck felt like it was stopping the trailer |
The truck and trailer stop together evenly without one stopping the other |
| Braking was either ON or OFF, resulting in a jerky motion |
Braking is proportional to your speed and is very smooth |
| Had to mess with the brake control every time we changed between highway and gas station speeds |
Haven’t touched the brake control since the upgrade was installed |
| As brakes age, braking power decreases |
As brakes age, braking power does not change |
MAINTENANCE COMPARISON
| Electric Drum Brakes |
Electric over Hydraulic Disc Brakes |
| Have to remove wheel and brake hub to inspect brake pads |
Easy to inspect disc pads without removing the wheels to see if they are worn (use a mirror if they are hard to see)
|
Periodically have to adjust the drums |
Never have to adjust the discs |
| Have to have drums turned OR replace the drums and backing plate with magnet, shoes, springs and cables |
Easy to replace brake pads with standard GM brake pads from an auto parts store if rotors are okay |
Mark removes the trailer wheels to grease the wheel bearings.
DECIDING TO UPGRADE THE TRAILER BRAKING SYSTEM
Return to top
We decided to do this brake system upgrade after Mark inspected the condition of the electric drum brakes that had been factory installed on our fifth wheel when we bought it new seven years ago. He was greasing the trailer’s wheel bearings, and while he had one of the wheels disassembled, he inspected the brake assemby inside.

Mark used a Zerk gun to grease the trailer’s wheel bearings.
He was dismayed to find that both the magnet and the braking surface were basically shot. He completed the wheel bearing lube job, but after he got the wheels mounted back on the trailer, we weighed our options for the brakes.

The inside of the trailer wheel and electromagnet at the bottom.

Lots of wear on the electromagnet that controls the electric drum braking mechanism.
As mentioned above, besides providing inferior braking power all together, one of the disadvantages of electric drum brakes is that, as the brakes age, the braking power gets progressively worse. Not only does the braking surface wear down but the electromagnet gets worn as well.
In recent months, Mark had been noticing that the trailer brakes were not working as well as when the trailer was new, although he was shocked to see just what poor shape they were in when he disassembled the wheels!
It is possible to have trailer brake drums turned. “Turning” involves putting the brake drums on a lathe and grinding the surface down to get rid of ridges and make it smooth. However, while a car’s drum brakes can be turned at an auto parts store, trailer brakes need to be taken to a machine shop. This is because they have to be turned not only on the braking surface that the brake pads ride on, but on the electromagnet surface as well. One of the disadvantages of turning the drums, however, is that it makes the braking surfaces thinner and weaker.
When we began investigating the cost of having the drums turned, we found that it would not be that much less than the cost of replacing the brakes all together which would be somewhere in the neighborhood of $500.
An alternative to turning the drums or replacing the brake assemblies would be to upgrade the trailer’s entire braking system to electric over hydraulic disc brakes. This is an expensive endeavor, on the order of $3,200, but the more we thought about our personal safety on the road, the more it seemed like it was a wise choice to do the brake conversion.

THE COMPONENT PARTS OF AN ELECTRIC OVER HYDRAULIC DISC BRAKE SYSTEM
There are three components involved in the installation of electric over hydraulic disc brakes:
- Brake Control in the truck
- Brake Actuator in the trailer
- Hydraulic Disc Brakes on the trailer wheels
In between these components there is both wiring and high pressure line:
- The Brake Control must be wired into the truck (late model trucks have factory-installed brake controls).
- The Brake Actuator must be wired into the 7-pin connector on the trailer that the truck plugs into.
- High pressure lines must be installed between the Brake Actuator and the Disc Brake assembly on each wheel
Our first job was to determine which components to install. Reading many reviews and talking at length with each manufacturer and visiting several booths at the Quartzsite Arizona RV Show, we chose:
The heart of the electric over hydraulic disc brake system is the disc brake assembly itself, and Kodiak makes superior quality brakes.
Kodiak has been making disc brake assemblies for over twenty years and is very highly regarded. Kodiak originated as a parts manufacturer for boat trailers, and their brakes are extremely popular in the boat trailer market.
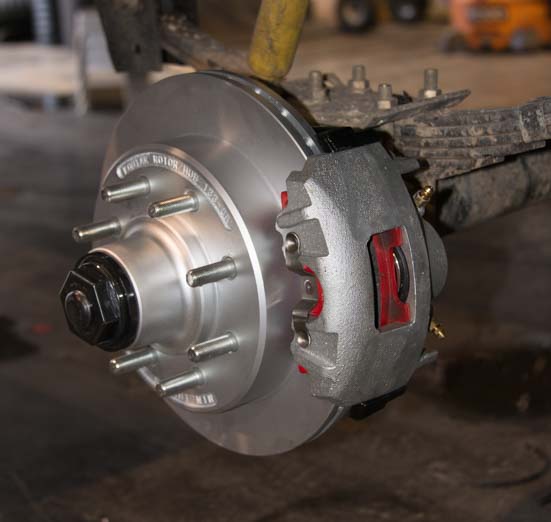
Kodiak disc brake assembly
Rotor and caliper installed on the axle.

Since many boaters launch their boats in the ocean, Kodiak hydraulic disc brake assemblies are offered with dacromet coating and stainless steel options so they can withstand the continuous and highly corrosive drenching they get when boaters launch their boats on and off their trailers in salt water.
Kodiak disc brakes are also very popular in the horse trailer industry, especially on the largest, heaviest horse trailers that carry multiple horses and have living quarters as well.
To see the parts included in a Kodiak disc brake assembly, click here.
The brake actuator is the key middleman in the trailer braking system, and the Hydrastar Electric over Hydraulic Disc Brake Actuator from Cargo Towing Solutions has an excellent reputation as being extremely durable and rugged, even when mounted on the tongue of a travel trailer.
The role this unit plays is vital, as it is the part of the system that receives the electrical signal coming from the brake control in the truck and, in turn, pumps the hydraulic fluid out to the disc brakes on the trailer’s wheels.

Hydrastar electric over hydraulic disc brake actuator.
Like Kodiak, the the Hydrastar electric over hydraulic brake actuator is engineered for the salt water boat trailer market where water and corrosion are everyday challenges. The Hydrastar brake actuator is sealed extraordinarily well so it can be mounted on the tongue of a travel trailer. The whole circuit board is covered in epoxy and can function perfectly well when submerged under water. One of their most popular trade show demonstrations is to show the Hydrastar brake actuator working while suspended inside an aquarium full of water.
We have had an older generation Prodigy brake control in our truck since we purchased our first 27′ 2007 Fleetwood Lynx Travel Trailer, however, it does not work with electric over hydraulic disc brakes. We were delighted to find that there is a much better Prodigy brake control on the market now.

Tekonsha Prodigy P3 Brake Control
The Prodigy P3 is portable and has been designed for people who use many different tow vehicles to tow many different trailers. Not only can it be moved from truck to truck easily, it can memorize its programmed settings for different trailers. It can even be programmed for one trailer that has different characteristics at different times, for instance, a 7-horse trailer that may be loaded with 7 horses or may be empty.
Best of all, we could swap out the old Prodigy for the new P3 easily because the new unit used the same wiring harness as the old one.
INSTALLING ELECTRIC OVER HYDRAULIC DISC BRAKES ON A TRAILER
Return to top
Mark was confident he could do the upgrade himself. However, he was not sure he wanted to tackle running the high pressure hydraulic lines. He did that kind of work when we installed the engine-driven ocean water desalination system on our sailboat, and it was challenging getting the lines cut and getting the fittings installed on the cut line. He decided he would prefer to have professionals install this system, and we did a search to find a company that has done hundreds of trailer brake system upgrades.
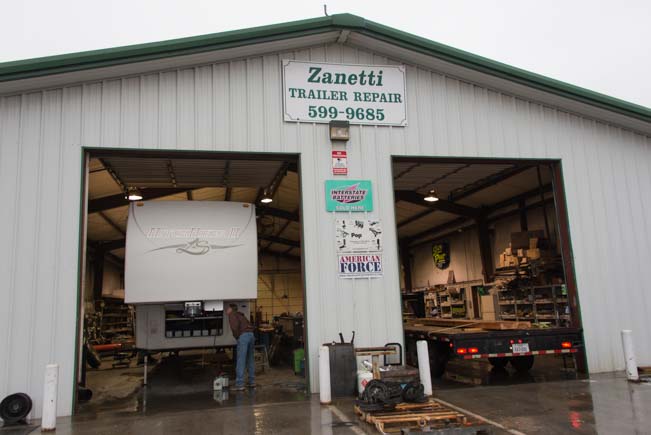
Our buggy gets set up in a repair bay at Zanetti Trailer.
Zanetti Trailer Repair is located just west of Fort Worth, Texas, in the town of Weatherford, and they do this kind of brake conversion frequently. Considered a horse trailer guru, Pete Zanetti started the company in 1980, and it is still a family operated business.
Texas doesn’t have the best winter weather, and when we arrived after driving through the remnants of a horrific ice storm, our trailer was covered with a thick layer of road grime, but our gleaming new parts were ready and waiting.

The disc brakes, brake actuator and brake control are ready to be installed on our trailer.
A team of three mechanics jumped on the job. To our amazement, within three hours they had completed the entire installation!
Below is a summary of the steps they took to do the brake system upgrade.
First, after jacking up the trailer, the wheels were removed.
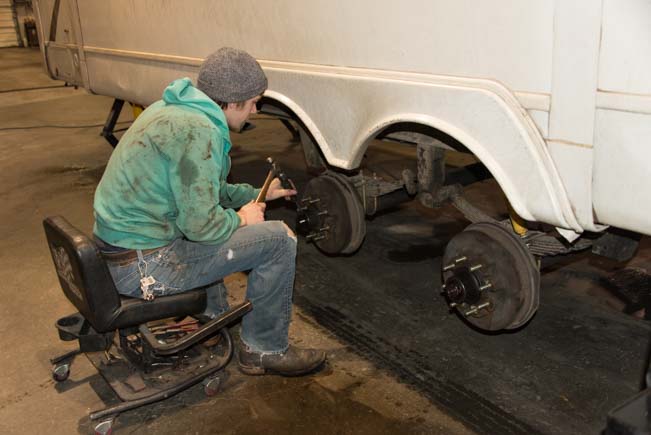
Our buggy’s wheels are removed once again.

Right down to the axles and spindles.
Then the backing plates for the disc brakes were installed on the axles.
The disc brake backing plate is mounted on the axle.
On a table to the side, the four sets of brake assemblies and bearings were laid out, ready to be greased and put together.

The four rotors and calipers will be put together in assembly-line fashion.
Here’s a closeup of the brake calipers with the red brake pads inside. The red brake pads will need to be replaced when the indented brake surface material wears away.

The Kodiak disc brake caliper.

The brake pads are red, and when worn down to the indent, they will need replacing.
The wheel bearings and seals were laid out, ready to be inserted in the brake rotor.

New wheel bearings ready to be lubed up and installed.
Mark had just finished greasing the old wheel bearings on our trailer using a zerk gun. What a surprise it was to see a huge trash barrel filled with wheel bearing grease!

A Barrel O’ Grease — wow!
They used an extremely sticky grease.
The rotors were greased and then the new bearings were pressed in.

Greasing the inside of the rotor.

Pressing grease into a wheel bearing.
Then the brake rotors were installed on the axles, and the brake calipers were installed on the rotors.

The brake rotors are installed on the axles. A brake caliper waits its turn on the ground.
Kodiak disc brake assembly with rotor and caliper mounted on the trailer’s axle.
Outside (in the rain!) the old brake hubs had been discarded.

We won’t need these any more!
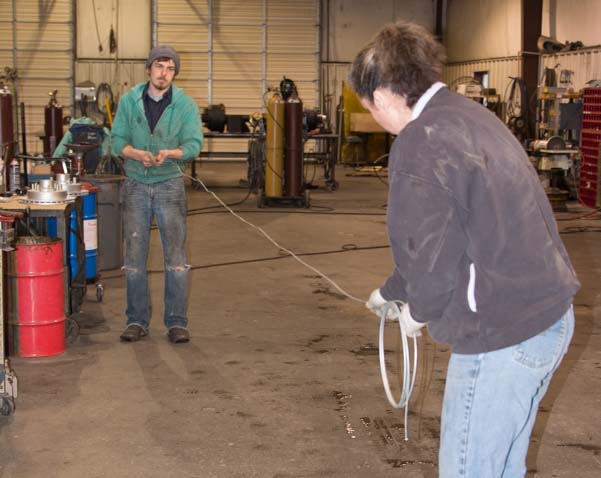
Meanwhile, the installers got busy installing the Hydrastar brake actuator in the trailer and wiring it to the fifth wheel pin box. To test the installation, they used a special electronic unit to simulate a person pressing on the brake pedal in the truck.

Wiring the Hydrastar brake actuator into thefifth wheel pin box.
Then they unrolled and straightened the stainless steel brake line tubing…
Unrolling and straightening the stainless steel brake line tubing.
… and ran the electrical wires from the pin box into the fifth wheel basement

Feeding the electrical wire through to the fifth wheel basement.
The Hydrastar brake actuator unit found a home just inside one of the basement side access doors.
Hydrastar disc brake actuator installed in the fifth wheel basement.

The Hydrastar disc brake actuator is close to a side hatch for easy access.

On the underside of the trailer and along the trailer axles, they did a superior job of dressing the hydraulic brake line and connections.

Looking up at the bottom of the trailer, the hydraulic lines run underneath the trailer, neatly dressed.
And then they bled the brake lines.
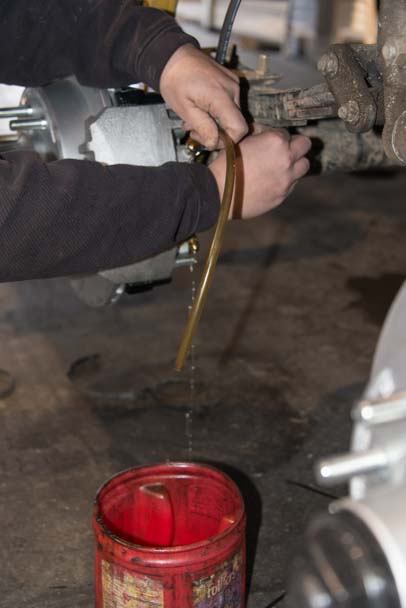
Bleeding the hydraulic brakes. A special box simulated a person depressing the brake pedal in the truck.
Then it was time to put the Prodigy P3 Brake Control into the truck. This is a portable unit that comes with a carrying pouch. We have only one truck, so we won’t be carrying the brake control from one truck to another. Mark later found the little pouch was perfect for his pocket camera!
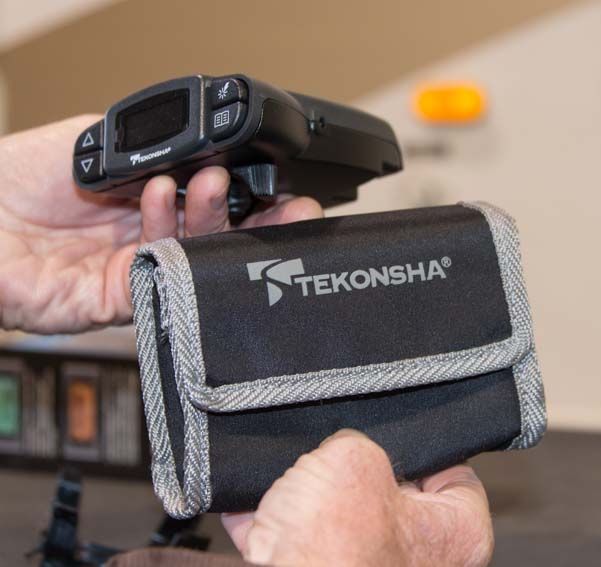
The Prodigy P3 Brake Control is a nifty portable unit that can be moved
from one tow vehicle to another.
The brake control is on the lower right side of the dashboard under the steering wheel.

Prodigy P3 Brake Control mounted below our Dodge RAM 3500 dashboard

We were astonished that all this had taken just under three hours, and the installers were almost finished. Wrapping up the job, the wheels were mounted back on the trailer and the trailer was taken off the jacks.

The wheels get mounted back on the trailer axles.
The new disc brakes looked very spiffy peeking through our dirty wheels!

Oh gosh — sure wish we’d cleaned those wheels before this installation!
But the brand new disc and caliper look great in there…
It was time to hitch up the trailer and hit the road with our new brakes. I loved the little painted stone outside the office door.

Zanetti Trailer’s motto is “We’ll Fix Your Wagon” !!
SUMMARY
Return to top
Mark was blown away when we got the trailer out on the highway. On the Prodigy P3 Brake Control, he experimented with a few settings and settled on a boost of “B2” and 8.5 volts. As we eased onto the highway, he commented, “It feels like I’m driving a car!”
During the next three weeks we made our way from central Texas to the Florida coast, driving in all kinds of conditions, from remote back roads, to many miles on the I-10 Interstate freeway. We sat for hours in massive stop-and-go traffic jams around big cities, and Mark coped with tricky driving situations on small downtown city roads with lots of stop lights.
In the past, if a traffic light turned yellow at the wrong moment as we approached, we just had to keep going and cross our fingers that it wouldn’t turn red while we were crossing the intersection, because we just couldn’t stop the trailer in such a short distance. No more!! On many occasions, as we came to an intersection, the light turned yellow on our approach, and Mark was able to stop the truck and trailer in time in a nicely controlled manner.
In Fort Worth, TX, and again around Baton Rouge, LA, we found ourselves in amazingly congested traffic. Mark was able to relax in the heat of the battle, completely confident that he could stop the trailer in a very short distance if need be.

Sometimes the best improvements are not something you can see on the surface!
When we got into Sarasota, Florida, we came across some astonishingly aggressive drivers. One driver cut us off with just an inch to spare, instantly coming to a complete stop directly in front of us. It was a heart stopping moment that all RVers dread. Mark slammed on the brakes with a force I have never seen him use, either in a car or in our truck pulling our home.
All the tires of the truck and trailer squealed as we came to a shockingly abrupt stop, leaving lots of rubber on the road behind us. We were both stunned that the trailer stopped in such a short distance. There is no doubt that if we had had our old electric drum brakes, we would have rear-ended the car in front of us and had a really bad — and possibly life threatening — accident.
Believe me, the irony that we had just replaced our brakes, and had jokingly said we needed to test just how good they were, was not lost on us. But we never would have lurched our house like that just to see if the brakes worked!!

This brake conversion is an upgrade that Mark dreamed of doing for ages, ever since our RVing mentors Bob and Donna Lea had told us about how differently their electric over hydraulic disc brakes performed on their 33′ fifth wheel compared to the electric drum brakes they’d had on other trailers.
In the end, it was totally painless and very easy to do, and looking back, we realize we should have just bitten the bullet the first year we owned our trailer and gotten it done right away.
Subscribe
Never miss a post — it’s free!
More info and links:
Related posts about our TRUCK and TRAILER upgrades:
Below are some of our most POPULAR POSTS (also in the MENUS above)
Buddy - A Journey in Spirit - The story of an event that changed our lives forever.
ARTICLE INDEXES
- RV Tech Tips Articles - A one page index of links to all our RV Tech Tips, RV Upgrades & RV Maintenance articles.
- RV Lifestyle Tip Articles - An index of links to all our RV Lifestyle Tips (finances, boondocking, major repairs, work/jobs, etc.)
- Solar Power Articles - Overview and tutorial articles for how to design and install solar power on an RV or boat
- Product Reviews - An index of links to all of our Product Reviews
RV UPGRADES, SYSTEMS & TIPS
MONEY
FULL-TIME RV LIFESTYLE
- RV Boondocking - Tips for how to live in an RV off the grid
- Which RV Is Best for Full-Time Living? - Transitioning from a house to an RV - Which RV makes the best home?
- Truck Camper Pros and Cons - The GOOD, the BAD and the UGLY!
- Full-time RV Lifestyle Tips - Full-time RVing Logistics - Mail, Domicile, Insurance, Warranties, Saving Money at RV Parks
- Toy Hauler Life - What's it like to live in an OPEN BOX Toy Hauler?
- What are the MOST IMPORTANT FEATURES in a Full-time Fifth Wheel? - For anyone planning to live in an RV!
- Internet & Phone Access for RVers - An inexpensive, minimalist solution for internet access on the road
- RV Dump Stations & Composting Toilets - How to do the dirty deed at the RV dump PLUS RV Composting Toilet tips
- Choosing a Trailer for Full-time RVing - Why the payload capacity is so important
- Learn RVing the Fun Way!! - Go Cheap, Go Small, Go NOW and have a blast in little RV!
- Free RV Campsites - Resources for locating campsites for boondocking
- Glimpses of the Full-time RV Life - Anecdotes from the road and essays about living the RV dream.
- Travel Photography Tips! - All the cameras, gear, books, blogs and tools we used to learn to take great pics!
GEAR STORE
- Gear Store - A list of the goodies, equipment and gear we've found useful in our RV lifestyle!
Our most recent posts:
More of our Latest Posts are in the MENU.
New to this site?
Visit RVers Start Here to find where we keep all the good stuff. Also check out our COOL NEW GEAR STORE!! *** CLICK HERE *** to see it!