RV Budget, Costs & Expenses – What does it cost to RV full-time?

The biggest question most people have before they run away to live in an RV full-time is: Can I afford it? To help you answer that question, this page outlines our living expenses for six months of RV travel in 2014, and it compares those costs to the costs we incurred during our first year of full-time RVing in 2007-08.

This is a long post. To read it in sections, the following links skip further down:

1. Is the Full-time RV Life Affordable?
2. Fixed Expenses
3. Variable Expenses
4. Cost Comparison: 2007 vs. 2014
5. Capital Costs & Depreciation

IS THE FULL-TIME RV LIFE AFFORDABLE?

Return to top

People enjoy the full-time RV lifestyle on all kinds of budgets, and the money full-timers have to work with comes in all kinds of forms. Some retirees have big pensions but not a lot of savings. Others have a nest egg of savings but no pension. Many younger full-time RVers work while they travel, either to cover all of their living expenses or to supplement other income streams.

The form your money is in makes a difference in how you RV and what your expenses will be. If you have a big income that comes from a limitless source (a pension and/or Social Security), then a large loan on a new luxury Class A motorhome may be just fine and the nightly expense of high-end RV parks won’t be a problem. However, if you are trying to make a small nest egg last to your dying day, and you are not even retirement age yet, you may be best off spending a portion of it to purchase your RV outright, rather than paying interest on a loan, and you will also be looking to save money on camping and overnight parking.

If you are planning to work camp in exchange for an RV campsite, or if you will be working part-time jobs as you travel, or working via the internet from your RV, your choice of overnight parking spots may be based more on your job’s requirements than on the whims of your travel interests, and your camping costs and the kind of work you do will subsequently be tightly linked.

The bottom line, however, is that if you can afford your current lifestyle in a stick-built home, you will probably be able to afford a more mobile lifestyle in an RV.

Full-time RV Costs are Very Personal, including ours!

Everyone has different priorities and lives differently, making budgeting a highly personal project. My numbers here reflect who we are. We have been frugal in our choices, and we have adjusted to a simple life.

In my former corporate life, I hit Starbucks most mornings and ate dinner out almost every night. We owned and maintained two cars, and we each had significant commutes. Now we eat dinner out very infrequently, and we limit our coffee shop splurges. We own just one vehicle and drive much less. Where we used to have property taxes, utilities and HOA fees, we have none of those things in our RV lifestyle. All in all, we spend about $500 less per month in our RV than we did in our house. But that huge savings is entirely a function of what our old lifestyle used to be and what our current lifestyle is now. Other full-time RVers might not see those same savings.

To cut to the chase, our living expenses for our six months of summer travel in 2014 came to $2,090 per month. But that’s a meaningless number until we uncover where it came from…

How We Travel

We have a 2007 Dodge RAM 3500 single wheel diesel truck that we bought new one month into our full-time RV lifestyle. It now has 84,000 miles on it. This truck tows a 2007 NuWa Hitchhiker 36′ fifth wheel trailer that we bought new at the end of our first year of full-timing in the spring of 2008.

We own our truck and trailer outright and do not carry any debt. This not only helps us keep our monthly expenses down but makes it easier to sleep at night. There is a lot to be said for the budget traveler’s creed: “Go cheap, go small, go now!”

To save money, we don’t have a cell phone. We estimate that since we started traveling this may have saved us about $50/month or as much as $4,500 all together. We have also equipped our trailer with solar panels and we camp for free virtually every night. These choices make us happy, but may not suit everyone. Here’s a description of our minimalist internet and communications solution and our tips for how to live off the grid in an RV.

What Will Your RV Budget Be?

Budgets for this lifestyle are both easy and difficult to anticipate. Your full-time RV lifestyle budget will be exactly what your stick-built-home budget is now, minus the expenses related to living in your current home, plus the expenses of living in your RV.

It’s that simple.

You already know what you typically spend at the supermarket, and that will stay the same when you travel in an RV. Look at your current bills and scratch off your mortgage/rent, utilities, property taxes, HOA, house maintenance costs and the gas/registration/insurance costs for your current vehicles that won’t be coming along on your adventure.

If you want help managing expenses and boosting rental income when your rig isn’t in use, RVManagement USA offers resources and support.

Then estimate your future lifestyle costs that you need to add in (the numbers we share below will help with that). These include your fuel costs and your vehicle insurance and registration fees for both vehicles that make up your rig, whether it is a motorhome/car combo or a truck/trailer combo. If you have chosen your domicile city/state, you can do very specific research to estimate your future vehicle insurance and registration fees. We have some notes on domicile selection on our full-time RVing page.

There are also maintenance, repair and upgrade costs for the rig and your own personal interests to consider as well.

Of course, the whims of the economy are beyond anyone’s control. In the spring of 2008 diesel fuel prices soared out of sight in just a few months. Half a year later the world economy fell apart. Yet, the full-time RVers that were on the road then just kept on going — like everyone else — finding ways to make the best of a grim situation. So, once you launch your full-time RV lifestyle, you will find yourself adapting as the world changes around you — just like you did at home.

A Look at our Expenses, Then and Now

Mickey Mouse Calculator

Mickey always makes this stuff more fun.

My plan before we started in 2007 was to spend about $1,800 per month. I estimated $500 per month for food and household items (which is what we had been spending at home); $500 per month for gas; $500 per month for campground fees; $100 per month for RV and truck insurance; and I left a slush of $200 per month for other things.

We ended up spending $1,672 per month during our first year on the road, beating our budget by a little. During those twelve months we saw diesel prices jump by almost 90% from $2.75 to $5.16 per gallon (in the places where we were buying diesel). At the same time, we also learned about boondocking and discovered that we didn’t need to spend anything on campgrounds. Those two unexpected events cancelled each other out!

Seven years later, we are now spending $2,090 a month. This is a 25% increase. Part of that is due to inflation which has raised consumer prices 14% between 2007 and 2014. The other reason for the increase is that we have changed our lifestyle a little bit, and we’ve become less stringent about splurging on things like eating out.

FULL-TIME RV EXPENSES BREAKDOWN

Return to top

RV Lifestyle expenses can be broken into “fixed costs” that you spend every month regardless of what happens worldwide or to you, and “variable costs” that depend on your activities.

FIXED COSTS – Six Months – May 1 to Oct 31, 2014

Our fixed costs for the six months between May and October of 2014 are shown in this chart. There is an explanation of what each category represents below that.

Expense Category Amount
Food & Household Items $582
Vehicle Insurance $135
Communications $88
Propane $50
Laundry $50
Miscellaneous $40
Mail & Postage $32
Vehicle Registration $29
Hair Care $15
RV Dumps $4
Health Insurance
Total $1,025

Food & Household Items – $582 / month
This item covers all supermarket purchases, including groceries, household cleansers, toiletries, laundry detergent, over-the-counter pharmaceuticals and anything else that can be found at Walmart, Safeway, Albertsons, Target and other places. Our rig is fully outfitted, but occasionally we get a small kitchen appliance or pick up a DVD. Those things get lumped into this number.

Vehicle Insurance – $135 / month
This includes both truck and full-time RV insurance for our 5th wheel trailer. We pay it annually, but the monthly cost is shown. If we had kept our Arizona home address, this line item would have been twice as much. There is more detailed info on the selection of a domicile (home address) and the implications that choice has on your vehicle insurance in the fulltiming section.

Communications – $88 / month
After five years of relying on free wifi signals for internet access and using pay phones for phone calls, we got a Verizon MiFi jetpack in 2012, and we now use it for all our communications, including phone calls. This figure includes both our Verizon account with 10 GB of data per month and our $2.99/month Skype account that lets us make unlimited phone calls to the US and Canada no matter where we are in the world (this was very helpful while we were on our sailboat in Mexico). We’ve gotten used to using the laptop as a phone on Skype. It’s a little weird because the person you are talking to ends up on speaker phone, which they may or may not appreciate, and some calls get dropped, but it works well enough.

Our complete communications strategy is described in detail HERE.

Propane – $50 / month
Prices for LP are all over the map, and we haven’t been very diligent about shopping around. We just buy it when we need it from whoever has it nearby. We’ve been paying anywhere from $2.59/gallon to a little over $4.00 a gallon in 2014. We use about 15 gallons per month: a little more in December/January/February when we use our vent-free propane heater to heat the trailer, and less in summer. RVers that stay in RV parks and campgrounds with electric hookups use a lot less propane than this, because they don’t run their refrigerator on propane 24/7. If you have hookups and don’t have metered electricity, you can save on propane costs in the winter by using an electric space heater.

Laundry – $50 / month
After a few years of messing with the little single-load washing machines at laundromats, we discovered that it is much better to use the biggest machines in the place because they are generally the newest machines, they do the best job, and they hold a heckuva lot. Dryers are usually 25 cents for a set period of time that ranges from 5 to 10 minutes, and we’ve found that most commercial dryers need about 35-40 minutes to get the job done. Washers and dryers at RV parks are usually much cheaper than those in the local laundromat.

Miscellaneous – $40 / month
My mom was a professional bookkeeper, and she taught me never to have a “miscellaneous” category because things get lost in there. However, I can’t ignore the $40 of cash we spend every month that is unaccounted for with receipts — little things like a coke and snacks from a convenience store on the road, or whatever.

Mail/Postage – $32 / month
This includes both our mail forwarding service and monthly mail delivery (discussed in more detail in the full-time RVing section) as well as postage we buy to send letters and packages.

Vehicle Registration – $29 / month
As with Vehicle Insurance, we pay this annually, but I show the monthly cost here. The cost is lessened by careful selection of a home address, discussed in more detail in the full-time RVing section.

Personal Care Services – $15 / month
For us, this is just hair cuts. Other full-timers may have other personal care services to consider like manicures, pedicures, massages, etc. (you never know!).

RV Dump – $4 / month
This item is here because it is a regular part of the boondocking lifestyle (you’ve gotta go every two to three weeks at a minimum). Many RV dump stations are free, but if you have to go to an RV park to dump the tanks because there aren’t any free ones nearby, it will generally cost anywhere from $5 to $15. Our RV dump station page has other tips and tricks related to managing the holding tanks.

Health Insurance —
Health insurance costs are totally individual, and the coverage for everyone is evolving. We do not have health insurance. Other younger full-time RVers have posted some terrific articles about health insurance and the impact on one’s choice of domicile state. Check out the excellent posts by Wheeling It and Interstellar Orchard. They both reference insurance agent Kyle Henson of RVer Health Insurance who is quickly becoming the go-to agent for all RVers’ health insurance needs.


VARIABLE COSTS – May 1 to Oct 31, 2014

Return to top

“Variable costs” are lifestyle expenses that are essentially optional — at least for a while. They can be deferred to a later month, foregone all together, or can make a fun splash in the current month. The great thing about these expenses is that they are controllable. If fuel costs skyrocket or you are short on funds, then stay put and save money! If you’ve got a more modest budget, consider staying in each location for a month or a full season to take advantage of the monthly or seasonal rates at RV parks. If you really want to skimp, boondock or at least stay in the dry camping sites at any RV park or campground that will allow it and has them available.

Expense Category Amount
Diesel $497
Upgrades* $163
Maintenance & Repair* $106
Restaurants $175
Entertainment $46
Clothes $37
Supplies & Tools $26
Memberships $15
Camping & Overnight Costs $0
Hobbies
Total $1,065
Grand Total Fixed + Variable $2,090

*These numbers are averaged since we started traveling. See descriptions below.

Diesel – $497 / month
Fuel costs are highly variable, both because they go up (and sometimes down) and also because you may drive more or less in any given month. Fuel can cost as little as $0 per month, if you stay in one place and ride your bike around town. Or fuel costs can dominate your budget if you decide to take your RV from Florida to Alaska and back via the scenic routes through New England and Southern California — in six months!

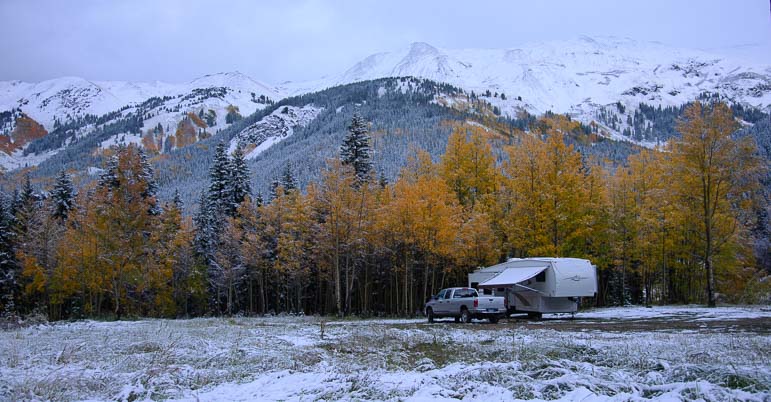
The figure here is our average monthly fuel cost for a six month summer season of travel. We drove a loop from Phoenix, Arizona through Nevada to Crater Lake in central Oregon and then went from northeastern Oregon to Sun Valley Idaho and Grand Teton National Park in Wyoming and finally dropping south through Ouray Colorado and into northern Arizona and back to Phoenix.

Our stats for this trip were as follow:

Total Driven: 9,092 miles Loop: AZ-OR-WY-AZ
Towing: 4,673 (47%)
Not Towing: 5,267 (53%)
Fuel Mileage: Towing: 10 mpg
Not Towing: 17 mpg
Gas Prices: Low: $3.59 (AZ)
High: $4.39 (NV)
Types of Roads: Interstates: 392 miles (3%)
State/Local: 9,573 miles (97%)
47 Stops Shortest Stay: 1 night (15 times)
Longest Stay: 22 nights
Average Stay: 4 nights

To show just how variable the fuel cost can be in the full-time RVing lifestyle, during the four months prior to this trip, from January to April of 2014, we stayed in the greater Phoenix, Arizona, area and had dramatically lower fuel costs. We towed the trailer very short distances (20-40 miles) every few weeks as we explored different places in a 50 mile radius of downtown. We drove the truck on its own only once every few days. During that time our average monthly fuel bill was $195. Our lowest fuel bill was $112 (in January). Diesel prices during that time ranged from $3.59 to $3.79 per gallon.

Maintenance & Repair – $106 / month

This item is hard to predict, but now that we have owned our truck and trailer all these years, we can provide an average of what we’ve spent so far on maintenance and repairs since we started full-timing.

This figure is an average of all our truck and trailer maintenance costs from 2007 to 2014 rather than being just the expenses we incurred over our six months of summer travels in 2014. We did not use the trailer when we lived on our sailboat, although we did use our truck when our boat was in San Diego and Ensenada at the beginning and end of our cruise, and all that is factored into this average.

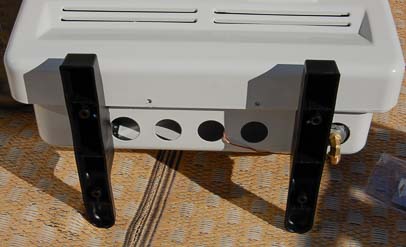
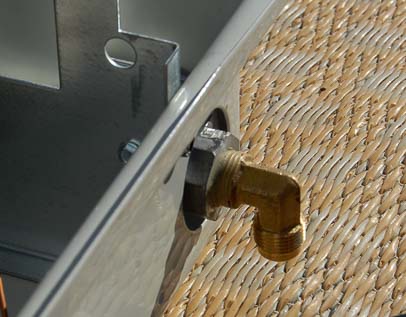
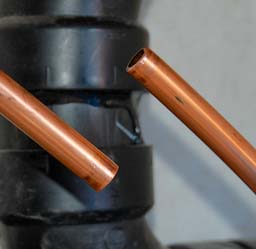
Mark is very handy, and he does a lot of the maintenance work himself (not the oil changes, though). He replaced both of the fifth wheel’s front landing jack legs and landing jack motor while we boondocked in Arizona (absolutely amazing to witness — I will write a post with step-by-step procedures and pics eventually!).

A summary of our maintenance and repair expenditures since we started (totaling $5,830) is the following:

  • Oil changes: $75 or so every ~5,000 miles on the truck
  • New Tires: 2 sets of new tires on the truck, one set on the trailer, $800 per set
  • New Brakes: Replaced front brakes on truck
  • 5th Wheel Landing Legs: Replaced the landing jacks and motor on the front of the 5th wheel
  • Engine Maintenance: We have performed all the maintenance (and minor repairs) required on the truck
  • Wash/Wax: We wash the rig regularly and wax once or twice a year

For budgeting reference, the maintenance and repairs on our rig have cost 0.128% of the purchase price of our truck and trailer per month since we bought them. That may be applicable to other truck/trailer combos. I am not sure it would be applicable to a motorhome/car combo, as motorhomes are inherently more complicated and expensive to maintain.

Note: In 2015, although all of our expenses were about the same as in 2014, we had several MAJOR and UNEXPECTED repairs as shown below. Luckily, our RV Extended Warranty covered the repairs:

Here's a summary of what our four year RV warranty through Wholesale Warranties cost, what our repairs WOULD HAVE cost, and what our warranty reimbursements have been to date:

Cost of Warranty $1,904
Total Cost of Repairs we've had done $7,834
Total Out of Pocket Costs for those repairs $1,145
Repair Reimbursements:
Trailer Axle Replacement $1,036
RV Refrigerator Replacement $1,647
Plumbing Issues & Window Leak $1,142
Suspension Replacement $2,550
RV Toilet Replacement $314
Total Repair Reimbursements $6,689

Our trailer warranty has paid for itself 3.5 times over!
Confused about the nitty gritty fine print buried in RV Extended Warranties? Here's an excellent detailed explanation!!

Upgrades – $163 / month
Unlike Maintenance & Repair costs which must be done (although some can be put off until you have the funds to do them), upgrades to the rig are entirely optional. The figure here is the average of all our improvement and upgrade costs on our truck and trailer since we bought them rather than just the upgrade costs we incurred during our six months of summer travel in 2014.

The upgrades we have done total $8,235 and include the following:

Restaurants – $175 / month
This is a hugely variable cost that has changed a lot in our lives over the years. The figure for these six months of summer travel in 2014 is way higher than ever before. Our biggest “eating out” cost comes from getting coffee and muffins at coffee bistros (so nice!). The rest is a combination of beers at cute brewpubs and meals at Subway and other fast food joints. For comparison, in the first four months of 2014 before this trip, from January to April, our monthly restaurant bill was $70. In those months we weren’t camping near many inviting places!

Entertainment – $46 / month
We don’t pay for entertainment often because we find so much great entertainment that is free. However, we do miss out on some museums and events that charge an entrance fee.

Clothes – $37 / month
We have a two-week rotation of clothes for both warm and cold weather, and since we started traveling we have replaced almost all of these garments. Commercial washing machines are hard on clothes and they wear out. Our biggest clothing expense is shoes. We replace our hiking shoes and running shoes regularly, and we buy high quality, expensive shoes. As a side note, if you get a credit card from Cabellas, REI or another outdoors store, and put all your living expenses on it, and pay it off each month to avoid interest charges, you can use the points each year to get your hiking shoes or other camping gear for free.

Supplies & Tools – $26 / month
This category includes all the tools and supplies we use to keep the rig in good shape. Mark loves to try new products and has a growing collection of tools in his toolbox. Before we left, he made the mistake of selling almost all of his tools. If you are handy and can work on your rig, don’t make that mistake too! He tried to “make do” with the bare minimum of tools for the first year, which is why this category didn’t used to exist for us, but now he regularly buys little goodies that make his maintenance tasks easier.

Memberships – $15 / month
This includes both annual memberships and magazine subscriptions. We belong to Join Escapees RV Club and Good Sam Club and we purchase an America the Beautiful Federal Lands Pass to the national parks each year. We also subscribe to several magazines.

Camping – $0 / month
Camping fees and overnight costs are extremely variable from one RVer to the next, because this is the very essence of the lifestyle. In addition, full-time RVers are a broad mix of people with a wide variety of tastes and preferences.

From May to October, 2014, we did not pay for any overnight camping, and that is the norm for us. However, although we did not pay for camping over the summer season (or in January, 2014), the months of February, March and April, 2014, were unusually expensive for us. Those three months averaged $83/month because we spent time at three different campgrounds visiting friends and chasing wildflowers at a state park (we were a little late for the flowers — rats!).

Many people boondock to save money, and we started that way too. However, we have found that it is by far our preferred way to camp. If we couldn’t boondock, we wouldn’t live in an RV.

That said, it is not for everyone. We have met very few full-time RVers who boondock as much as we do. Most people who enjoy boondocking, or “free camping,” do it from 25% to 75% of the time, at most. For full-timers who work, it is hard to find a boondocking location near most jobs, and you have to pack up and go to the RV dump station every 10 days to 2 weeks, disrupting your life. Even if your work is location independent, and you work out of your RV, finding good boondocking locations that have adequate internet access to do that is not easy. During the summer of 2014 we spent 5 weeks camping in places that were 10 miles or more from the nearest internet access. Now things are a lot easier, as you can type in on Google terms like “internet services near me” and when you do, you’ll be given lots of hotspots to choose from that offer free WiFi. You can also install Starlink on your RV and have good internet access everywhere, including while driving.

Overnight campsite and RV park fees with hookups typically range from $30 to $50 per night or more. That is $900 to $1,500 per month. However, a lot of full-timers avoid paying anywhere near that much and average closer to $500 to $900 per month. There are many ways to save money on overnight camping costs, and those are covered on our Full-time RV Lifestyle Tips page.

As a budget figure, if you are a future full-timer, and you are excited by the $0 figure here, and you plan to boondock a lot but haven’t don’t it much yet, include a “slush” camping fee figure of $350 per month in your budget until you find out if you really like it. Some folks plan to “free camp” all the time but find it isn’t practical for their lifestyle once they hit the road.

Hobbies —

An area I completely overlooked before we started full-timing was the cost of our personal interests and hobbies. This was an important oversight that we came to recognize only after we had been on the road for a few years.

Before starting a life of adventure, it may be hard to imagine that you will need or want to have any hobbies. Sightseeing ought to be enough! But it isn’t. After a while, you will want to have pursuits that complement your travels in one way or another or that perhaps are not even related to your travels at all. Our hobbies are photography, writing and mountain biking, and these all cost money.

Since we started full-timing, we have upgraded both of our DSLR cameras twice and upgraded both of our pocket cameras twice. As for biking, we started out with cyclo-cross bikes but sold those when we found we were almost always camped near very rugged dirt roads. We replaced them with mountain bikes in March, 2014. Bike maintenance isn’t a huge cost, but it’s there. We also upgraded our bike rack a few years ago. And back in 2008 we splurged on a fabulous Hobie inflatable kayak that we loved for several years but eventually sold because we needed more room in the basement.

Mountain BIking

All smiles mountain biking in Bend, Oregon

Even my writing has its expenses. Keeping a blog can be free, but hosting, backup services, firewall services and other things add up. Writing also requires a computer. When we started out, Mark and I shared a single MacBook Pro laptop. After four years, this became impossible because we always wanted to use it at the same time. So, we replaced that one MacBook Pro with two newer ones in 2011 and 2012. Then, in 2014 we replaced the older one of those with yet another newer one.

All of these expenses hit the bank account with a resounding thwang and can’t be ignored or wished away. You may not know exactly what your hobbies will be when you start full-timing, but put some kind of figure into your budget that allows for replacing your computer and phone as often as you have in the past (if you plan to use them as much) and for buying the various things that will make your favorite pastimes possible.


EVALUATION – COST COMPARISONS – Year 1 and Year 8 – Lifestyle Changes and Inflation

Return to top

Budgets and actual expenditures vary over time. Most fulltimers find that they spend a lot more in the first few months of travel than they do once they have been out for a while. It takes some time, and quite a few purchases, to make an RV a home, and most of those costs come at the beginning. These are things like patio mats, camping chairs and grills, tools your suddenly discover you need, area rugs, throw pillows, kitchen gadgets, campground directories, travel guide books, and all those funky gismos they sell at Camping World that are just so perfect for the RV lifestyle.

When budgeting for a fulltime RV lifestyle, it is probably wise to assume that the first three months will cost about 50% more than the target monthly figure. Make room in the budget for this, and you won’t panic when it happens.

5th wheel RV camper in the woods

Peace.

Also, it takes a while to figure out how you want to live this lifestyle. What kinds of campgrounds do you like? Are you okay with overnighting in a parking lot? How much do you want to drive each day? How long do you want to stay put in one spot?

Most new fulltimers dash all over the country in the first year, and we were no exception. The exhilaration of having the whole continent to yourself, with no one tapping their watch and expecting you home, is such a thrill that we all run around and try to see as much as possible. Only when we are utterly exhausted do we start to slow down.

It also takes a long time to let go of old living patterns and establish new ones. When we first started fulltiming we were accustomed to one- and two-week vacations, and we lived as though we were on vacation. It was only after a few months on the road that we began to realize, deep inside, that we didn’t have to see all the sights in three days. We could stay three weeks and see them only when it was sunny and when we were in the mood for sightseeing.

This change in the rhythm of life ultimately affects how you spend your money. You begin to realize that this is not a vacation, so you can’t spend money as if it were. You begin to slow down and appreciate the truly priceless pleasures, like a quiet morning reading a book, or an afternoon hike that has no other purpose than to smell the fresh air.

Over time, both lifestyle changes and inflation have affected our monthly expenses. Inflation has hovered at around 2% a year (which compounds to a gross jump of 14% between 2007 and 2014 — here’s a graph showing inflation trends) and food prices have increased by 20% in the same time period.

FIXED COST Comparison

Studying the expenses we published on this page after our first year of RVing as compared to the costs for the current year (2014), it seems that, as expected, our fixed costs were most influenced by inflation.

Expense Category 2007-08 2014
Food & Household Items $477 $582
Vehicle Insurance $108 $135
Communications $88
Propane $42 $50
Laundry $40 $50
Miscellaneous $36 $42
Mail & Postage $30 $32
Vehicle Registration $15 $29
Hair Care $15
RV Dump Stations $4
Total $746 $1,025

VARIABLE COST Comparison

Our variable costs have changed more due to changes in our lifestyle than anything else.

Expense Category 2007-08 2014
Diesel $482 $497
Upgrades $140 $163
Restaurants $175
Clothes $8 $37
Supplies & Tools $26
Memberships $15 $15
Camping $145 $0
Total $926 $1,065
Grand Total Fixed + Variable $1,672 $2,090

What’s amazing (and a big relief!) is that our “Upgrade” and “Maintenance” costs didn’t bring any unwanted or nasty surprises during the years we have been on the road, and they have remained much the same as they were in the first year, although there were plenty of years without any upgrades or big maintenance projects. As mentioned above, we barely ate out in the beginning and we splurged this past summer. We had mostly new clothes when we started and have replaced almost all of them, and we now see the importance of having the right tools and supplies for little “RV Owner” projects.

CAPITAL COSTS & DEPRECIATION

Return to top

The biggest difference in costs between living in an RV full-time and living in your own stick-built house is that the RV will depreciate very quickly while the house will appreciate over time. The recent real estate collapse notwithstanding, housing prices always increase as the decades go by. In contrast, RVs, cars and trucks quietly make their way to a value of $0 and eventually breathe their last breath in the crushing facility.

In a five year period, a brand new rig (that is, a motorhome/car combo or truck/trailer combo) will typically lose 30% to 50% of its value, and by the end of a decade it will be down to 25% to 40% of its original MSRP. The only way to know what the full-time RVing lifestyle really costs is to know both what you paid for your RV at the beginning and what you sold it for at the end. The difference, divided but the number of months you lived in it, is the true cost of ownership.

That figure doesn’t show up in a regular living expenses budget. However, for a brand new $150,000 rig that reaches the ripe old age of 10 years, you may be looking at “losing” around $75,000 or $625 a month while you own it. Of course, that doesn’t include the additional cost of interest on a loan if you have one.

I’ve had several eager 20-something future full-timers email me saying they wanted to live in an RV after college because they didn’t want to throw away money on rent and they didn’t think buying a house would be a good investment. Unfortunately, an RV involves “throwing away” lots of money too. In the end, the cost of owning an RV — from purchase to sale and through the thick and thin of all the maintenance and repairs in between, not to mention the cost of campgrounds and RV parks — probably adds up to the same amount as renting an apartment or paying a mortgage/taxes plus utilities.

No one should ever give up their dream of RVing full-time because an RV is a bad investment. At the same time, no one should go into RVing full-time because buying an RV is a good investment.

SUMMARY

I hope all this info helps you out as you plan your full-time RV adventures. Despite all the words on this page, your future full-time RVing costs can be approximated fairly easily, and planning your budget involves just three steps:

  1. Write down all your expenses now
  2. Subtract the ones that won’t apply when you start full-timing
    (property taxes, utilities, car expenses for cars you won’t own and commutes you won’t make, HOA fees, etc.)
  3. Add the new expenses you’ll incur in your new lifestyle
    (motorhome/car or truck/trailer insurance and expenses, camping costs, “fun” – restaurants, hobbies, entertainment)

Quite a few RV bloggers share their budgets and their thoughts about the costs of the RV lifestyle on their blogs. The following links offer itemized expense lists and excellent insights into creating a full-time RVing budget:

  • WheelingIt – Personal budget and analysis
  • Technomadia – Personal budget and analysis
  • Gone with the Wynns – Personal budget and analysis (reported by quarter — divide by 3 for monthly!)
  • RV Dreams – Three tiers of hypothetical sample budgets

A final note — I posted this image in a Quick Pic post the other day, but I think it bears repeating here:

If you are lucky enough to find a way of life that you love, you have to find the courage to live it.

Words to live by.

Don’t stress out about the numbers too much.
Spice up your life, take the plunge, and go have an unforgettable RVing adventure!

Subscribe

Never miss a post — it’s free!

Below are some of our most POPULAR POSTS (also in the MENUS above)

Buddy - A Journey in Spirit - The story of an event that changed our lives forever.

ARTICLE INDEXES
  • RV Tech Tips Articles - A one page index of links to all our RV Tech Tips, RV Upgrades & RV Maintenance articles.
  • RV Lifestyle Tip Articles - An index of links to all our RV Lifestyle Tips (finances, boondocking, major repairs, work/jobs, etc.)
  • Solar Power Articles - Overview and tutorial articles for how to design and install solar power on an RV or boat
  • Product Reviews - An index of links to all of our Product Reviews
RV UPGRADES, SYSTEMS & TIPS MONEY FULL-TIME RV LIFESTYLE GEAR STORE
  • Gear Store - A list of the goodies, equipment and gear we've found useful in our RV lifestyle!
 

Our most recent posts:

More of our Latest Posts are in the MENU.   New to this site? Visit RVers Start Here to find where we keep all the good stuff. Also check out our COOL NEW GEAR STORE!! *** CLICK HERE *** to see it!

RV Heater – How to Install a Vent-Free Propane Heater in Your RV

Installing a vent-free propane heater is one of the best upgrades you can do for your RV if you plan to be spending a lot of time in chilly places. This page reviews how ventless propane heaters operate in comparison to traditional RV furnaces, it discusses the different technologies used in the design of various types of vent-free gas heaters on the market today — including catalytic heaters, ceramic brick and plaque heaters, and blue flame heaters — and it presents a step-by-step guide for installing a vent-free propane heater in your RV or camper.

You can jump to the various sections of this page here:


This post was first written in January, 2009, but was completely overhauled and rewritten in October, 2014.

INTRODUCTION


Warming my hands over a vent-free blue flame propane heater in my 5th wheel camper RV

Happiness is… a vent-free propane heater!

We froze in our trailer during our first winter in Arizona. Morning temperatures in the kitchen were often 40+ degrees F, and although daytime temps could get as high as 70, as soon as evening came, the temps in our trailer dropped into the the 50’s.

Brrr! It’s hard to sit around in the evening in those kinds of temperatures. All modern motorhomes and campers (ours included) come equipped with a propane furnace. However, these loud, inefficient beasts use a lot of electricity, and can drain the batteries in one night.

During that first winter (2007-08) in our 27′ Fleetwood Travel Trailer, we discovered that the more experienced winter desert boondockers (both snowbird RVers and those living the full-time RV lifestyle) installed vent-free propane heaters in their rigs. These are wonderful little appliances that use far less propane than a furnace and no electricity at all. When we upgraded to our 36′ Hitchhiker 34.5 RLTG fifth wheel in May, 2008, we decided we would install one. All summer long we thought about the project, but never found ourselves in a town where there was a good selection of heaters to look at or anyone knowledgeable about installing them in RVs. So we dawdled.

As the nights got colder in late November, 2008, and we relied more and more on our trailer’s electricity-eating furnace, we found ourselves in the warm company of our good friends Bob and Donna Lea Jensen and their vent-free, electricity-free propane heater. Bob has installed quite a few of these little devils over the years, and he gave us some hints and loaned us two critical tools for the project: a pipe cutter and a flaring tool. We learned a lot through this process, and I thought it might be helpful, along with our other RV tips and tricks pages to include some notes here about our project.

There are several types of vent-free heaters on the market, and each has its pros and cons. In the end, we opted to buy a 20,000 BTU thermostatically controlled blue flame heater made by Vanguard. The night before the installation we laughed as we bundled ourselves into our recliners wearing multiple layers, buried under blankets for the last time. Mark’s face peaked out from under his hood as he read. The night after the installation, in shorts and t-shirt, I had to poke my nose out the window to get some cool air. In our excitement, we had inadvertently heated the bedroom to 85 degrees.

We have used and loved this heater year-round ever since, running it near sea-level in the southern states in the winter months and using in the cool mountains during the summer months!


COMPARISON OF RV FURNACES AND VENT-FREE HEATERS

RV PROPANE FURNACES

Propane uses oxygen as it burns and gives off moisture as a by-product. Therefore it has the potential to use up all the oxygen in an enclosed space and kill any living, breathing occupants while creating a layer of condensation on the insides of windows. Yikes! To accommodate these unpleasant aspects of propane heating, conventional RV propane furnaces use a large blower system to bring in outside, oxygen-rich air. In turn, they vent the moist, oxygen-depleted air from inside the rig to the outside. Circulating the air this way keeps the oxygen level in the air fairly constant and significantly reduces the build-up of condensation on the insides of the windows, as the moisture gets blown outside along with the exhausted air.

Atwood RV furnace
However, by blowing all this warm air outside, the furnace is effectively heating the outdoors. If you stand outside an RV next to the furnace vent on a really cold day, you can warm your hands and body quite nicely. Also, this blower requires electricity to run. RV furnaces are DC, so they do not require an inverter or generator in order to operate. However, the amount of power they use is astronomical (our 40,000 BTU furnace uses 11 amps DC). If you are boondocking, or dry camping in the desert as many winter Snowbird RVers do, you are then faced with a choice of either keeping the RV unacceptably cold, or using a generator to keep the batteries charged (even our big solar power installation on the Hitchhiker 5th wheel was not enough to keep up with the furnace blower during the winter).

Besides heating the outside air and running the batteries down, a major disadvantage of a standard RV propane furnaces is that the blower is really loud. There is nothing like being deeply absorbed in a really great movie and listening to some very profound dialog being exchanged in whispers, and having the furnace suddenly roar to life and drown out everything being said. Our furnace blower often woke us up out of a sound sleep too.

VENT-FREE PROPANE HEATERS

In contrast, vent-free propane heaters are silent and provide heat without using any battery power. This is because they rely on you to give them fresh air: you have to crack open a window while they run. All US-made vent-free heaters are built with an internal oxygen sensor that shuts off the heater if the oxygen level in the room becomes too depleted. In addition, most RVs come equipped with an LP gas detector that will sound alarms if the oxygen in the air drops too low or if an LP gas leak is detected and you can install a combo LP/CO detector as well to detect both LP gas and carbon monoxide. You may also need (or choose) to run a small fan to circulate the air. This will use some battery power, but you can decide how much or how little to use the fan.

Living without heat in an RV

Brrr… This was what life was like before we installed our vent-free propane heater!

So, in essence, when using a vent-free heater, you must find a happy balance between several variables. Determine which kind of heater will best suit your needs (see descriptions below), figure out where to place it in the RV, which window(s) to crack open, and how often to run a fan (if at all), and if so, which kind of fan to use (a little DC fan, like one used in a computer, a large AC ceiling fan that will require an inverter or generator to run, or an optional blower fan that can be purchased with the heater).

Heat rises, so in 5th wheel campers the heat tends to gather in the bedroom. Simply close the door to the bedroom, or crack it slightly open to control the movement of the warm air into that space. Likewise, if you use a ceiling fan, you can experiment with running it forward or backward, either to draw air up and move it out along the ceiling or to push the warm air down towards the floor.

Propane has a fixed capacity for providing heat. One gallon of propane contains 92,000 BTUs of potential heat, which means a 40,000 BTU RV furnace running full blast will burn through nearly a gallon of propane every two hours or so. During the coldest periods, it is a real pain in the neck to keep having to refill the propane tanks as you fly through propane trying to heat your rig.

Our Lynx travel trailer came with a 30,000 BTU furnace, and our Hitchhiker 5th wheel came with a 40,000 BTU furnace, both installed at the factory. These were sized appropriately for the square footage of each camper. However, we have found we can easily heat our big fifth wheel to higher temperatures in less time using our 20,000 BTU vent-free propane heater instead of the factory-installed 40k BTU RV furnace. So, a smaller vent-free heater that burns less propane per hour can effectively heat a given space more quickly than a traditional RV furnace that is twice its size.

Because of the inefficiency of RV furnaces in terms of propane use and battery power consumption, when we use the RV furnace alone for heat in 30+ degree F overnight temps and 40+ degree daytime temps, we find we have to keep our trailer at 50 degrees while sleeping at night and at just 60+ degrees during the day. Cold as that sounds, this uses up almost a gallon of propane a day and we can barely keep the batteries topped off using our 490 watts of solar panels alone. Worst of all, living like this is really uncomfortable.

Using our vent-free blue flame heater in the same conditions and burning the same one gallon of propane per day in those conditions, we can easily keep the 5th wheel at 76 degrees all day long. And we use almost no electricity.

To clarify, we have two 30 lb (7 gallon) propane tanks, and when outside highs are in the 50’s and lows are in the 20’s, we go through a tank of propane each week. When outside highs drop below freezing 24/7, we can go through a tank in 3 days.


WHICH IS THE BEST TYPE OF VENT-FREE HEATER?


When choosing a vent-free propane heater, there are a lot of products on the market. Catalytic and ceramic heaters produce infrared radiant heat which heats objects situated nearby much the same way the sun does. They create a warm, baking sensation on your skin, but if you move away (like moving into the shade outdoors), that sensation goes away. The air in the room warms up over time as the objects in the room warm up.

In contrast, blue flame heaters heat the air, rather than the objects in the room, providing a more even, uniform warmth. Gradually, the objects in the room heat up as the overall temperature of the air in the room rises.

All of these heaters come in different sizes, ranging from 5,000 to 30,000 BTUs, which are good for heating 100 square feet up to 1,000 square feet. Small ones can be hung on the wall, out of the way, while big ones that appear modest-sized in the show room suddenly become monster heat sources that dominate the floor space when you get them home to your RV.


CATALYTIC INFRARED RADIANT HEATERS

Olympian Wave-8 Catalytic infrared radiant heater for use in an RV
Catalytic heaters were the original vent-free heaters. The major brand is the Olympian Wave, manufactured by Camco, and their primary models are the Wave-3, Wave-6 and Wave-8 heaters. These provide 3,000, 6,000 and 8,000 BTUs of heat respectively.

Catalytic heaters provide infrared radiant heat by way of a large pad on the surface of the heater. A chemical reaction in the pad causes heat to radiate off the entire pad. If you stand in front of a catalytic heater, your skin will feel a nice baking warmth on it. The closer you sit, the more you will bake. This is a great feeling when you are chilled.

These heaters have been in use for years, and have an enthusiastic following. They are also quite expensive ($300-$430), often as much as double the cost per BTU as the other types of vent-free heaters. They do not have thermostats, just a “high” setting and a “low” setting, so you must manually turn them on and off or to high or low to regulate the temperature in the RV.

If the pad on these heaters becomes dirty, it is possible to replace it for about $100. A friend of ours tried to clean his by vacuuming it, and inadvertently ended up destroying the pad. Because the pads had changed slightly since he bought his unit five years earlier, he could not replace the pad and had to replace the entire heater instead.

You will need a brass elbow fitting from Camco for the installation. You may also want leg stands so the heater can stand on its own two feet and a dust cover to protect the catalytic pads when it is not in use.


CERAMIC (BRICK or PLAQUE) INFRARED RADIANT HEATERS

Mr. Heater Ceramic infrared radiant heater for use in an RV
Ceramic infrared heaters are a slightly newer technology that has been warming RVs for quite a few years. The most popular brand on the market is Mr. Heater. Other brands include Kozy World, Empire and ProCom. These are generally offered in one, two, three and five brick configurations providing 5,000, 10,000, 15,000/20,000 and 25,000/30,000 BTUs of heat.

Ceramic heaters provide the same infrared radiant heat as catalytic heaters. Across the front of the heater there are small ceramic “bricks” or “plaques” that heat up to a glowing orange/red color. Like a catalytic heater, standing in front of a brick (or plaque) ceramic heater will toast your toes to your thighs on the front of your legs. The heat from the bricks interacts with your skin and you will feel a wonderful tingly warmth.

These are extremely popular units and can be quite inexpensive ($130-$350). Most can be purchased with or without a thermostat. One big disadvantage is that the area directly in front of the bricks gets hot enough to burn things. Any flammable items that come too close to the bricks could catch on fire. If a cat or dog wanders past and flicks its tail against the bricks, it might get singed. If a toddler sticks its fingers in there, a trip to the hospital might ensue.


BLUE FLAME HEATERS

Mr. Heater Blue Flame vent-free propane heater for use in an RV
Blue flame heaters are the newest technology and provide a different kind of heat than the catalytic and ceramic heaters. Rather than radiating heat, blue flame heaters operate via convection (the principal that heat rises), drawing cool air in through vents at the bottom of the heater and emitting warm air out the vents in the top. This is a heating method that is much like central heating in a house. Once the air temperature has risen sufficiently, the objects warm up as well. If you keep your RV at a warm temperature all the time (especially at night), the objects in the room will never get cold.

Blue flame heaters draw cool air in from floor level through a row of vents at the bottom, heat it up, and emit the warm air out of vents at the top, relying on convection (the fact that heat rises) to move this air instead of using a blower. You can warm your hands and body by standing in front of one, but it is more of a warming sensation than a baking one. The area in front of the blue flame is covered by fireproof glass (it’s actually a ceramic material) and it is not burning hot. So, there is no risk of items immediately in front of the heater catching fire. Blue flame heaters are a good idea for people with pets or children.

The most popular brand is Mr. Heater. A few others include Empire Heating Systems and ProCom, the same makers of the ceramic brick heaters. These manufacturers produce both blue flame and brick heaters in the same chassis, so other than the appearance of the bricks or the flame, the unit itself has the same look whether it is the brick or blue flame version. The typical BTU range on these heaters is 5,000, 10,000, 20,000 and 30,000.

Blue flame heaters are as popular as the brick ceramic heaters, and are in the same price range of about $130-$350. They can also be purchased with or without a thermostat.

BLUE FLAME FIREPLACES !!

Pleasant Hearth Vent-Free Propane Fireplace 35 inch

.

There are some wonderful blue flame heaters that are designed to look like fireplaces, complete with logs, trim and beautiful wooden mantels. Manufacturers include Pleasant Hearth and ProCom.

These cost about $200-$300 more than the regular blue flame heaters, but what a beautiful addition to your RV. You can sit and watch the yellow flames dancing around the logs and warm your bones at the same time. I saw one of these units in an old travel trailer and was enchanted. The owner had built his own mantel out of an old coffee table, and it was lovely. I wanted one of those units so badly!!

The only place for a unit like that in our rig was along the backside of the “L” in the kitchen counter, which is just a few inches from the wall of the entertainment slide-out when it comes in. If we had the carpentry skills, we probably could have slipped a fireplace in there, recessed under the counter.

The only downside would have been that it might have gotten a little hot under the counter, and we would have had to be extra careful that the heater was fully cooled whenever we brought the slide-out in, or we would have cooked the gelcoat on the outer wall of the slide. Also, as it turned out, that particular location for the heater would not have provided the same warmth when we sat in our recliners as the heater does in its current spot in the kitchen in front of the oven (even though it would have been closer). It’s just the way the air flow circulates in our particular trailer.

PORTABLE HEATERS

Mr Buddy Portable vent-free propane heater

.

If you don’t want to hassle with installing a dedicated gas line for a vent-free propane heater in your RV, you can opt to get a portable unit instead. The portable ventless heaters are all infrared radiant heaters with bricks (plaques) that have air intake vents in the bottom for convection as well. They have built-in blowers that run on a 6 volt a/c adapter (sold separately) or on 4D batteries. They are very popular.

They are manufactured by Mr. Heater (with the brand name “Big Buddy”), and they come in sizes from 4,000 to 18,000 BTU. They run on the small Coleman style portable propane canisters but can also be connected to a larger BBQ style propane tank.

If you plan to run the heater from a large propane tank instead of the little propane canisters, Mr. Heater sells a companion flexible gas hose with a regulator and quick release connector on it for just that purpose. Mr. Heater make nice carrying cases for these heaters as well.


OPTIONAL EQUIPMENT for VENT-FREE PROPANE HEATERS

Thermostat

Usually this option is just $30-$50, and it is well worth the cost if you plan to be in your RV for extended periods of time. A manually controlled heater will have several heat settings (usually three), but you will need to monitor the heat in the room and adjust the settings as you get warmer or cooler. A thermostatically controlled heater will cycle on and off as its sensor detects changes in temperature. Ours typically cycles on and off in 5-10 minute increments, keeping the temperature within 2 degrees.

On our unit, the thermostat has a simple analog dial that can spin from “1” to “5.” These are arbitrary numbers rather than fixed fahrenheit degree markers. However, once you figure out how “1 1/4” or “2 1/2” relates to temperature, you can keep the temperature in the room tightly controlled by turning the dial to the setting you want. This is especially nice if you plan to keep the heater on all night, as the temperature in the RV will remain constant while the outside temperature drops.

Feet

Most units are designed to be hung on a wall, however most also have an optional stand so they can be placed on the floor. Most smaller units include the feet as an option (about $25) while most larger units come with the feet at no extra charge. The great advantage to hanging a unit on the wall is that it is always there, ready for use. If you use your RV during all four seasons, it is nice to know that if you suddenly find yourself in a chilly spot, you can simply flip the switch and have your heater working for you, rather than digging it out of the back of the closet (a lesson we learned after the fact!).

The advantage of having the unit standing on its own two feet is that you can move it around the rig. This is especially true if you don’t use a fan of some kind to move the warm air around the rig. If you go this route, make sure you have plenty of flexible gas hose so you get maximum range for placing the heater in different spots in the rig.

Blower

Most ventless gas heaters can be purchased with an optional blower. As soon as you start blowing the air around the RV, you are signing up to use the batteries to keep the rig warm, something the vent-free solution was aiming to avoid. However, the power consumption should be less overall than a furnace. Some blowers are thermostatically controlled, allowing them to cycle on and off as needed. This is efficient, as the blower and batteries won’t be in use all the time the heater is on. Rather than a built-in blower, many people opt to install a small DC fan which uses very little power. If your rig has a ceiling fan, that can also be an option, although it will require the inverter or generator to be turned on. In our case, our inverter is turned on from the moment we wake up until we go to bed, so running the ceiling fan when the heater is on during the day is no big deal.


HEATER PLACEMENT

When we installed our ventless propane heater, we tried placing it in several locations. We also tried turning our ceiling fan both on and off and running the fan both forwards and backwards (blowing towards the floor and towards the ceiling) before we settled on a final arrangement.

Kozy World Vent-Free Propane Heater connected to flexible gas hose

This ceramic heater has a flexible gas hose that allows it
to be moved around the RV.

We found that the best setup was to place the heater directly below our ceiling fan (in front of the oven at the base of the stairs in the kitchen) and to set the fan to blow towards the ceiling, drawing the warm air up and distributing it outwards throughout the RV. It was astonishing to find what a difference it made as we moved the heater to various places in the trailer and tried each placement with or without the ceiling fan, and blowing up versus blowing down.

Our RV is a “rear lounge” fifth wheel
, and we found that the area around the recliners was a significant cold air pocket. Doesn’t it figure! That’s where we like to be on cold evenings!! There are large windows surrounding the recliners, which make that area cold, while the warm air in the rig congregates high up on the ceiling just in front of the stairs leading to the bedroom (that is, if the bedroom door is closed. Otherwise the warm air settles in the bedroom itself).

We assumed that facing the heater towards the recliners just 5 feet in front of them would warm up this cold pocket. Wrong! No matter how high we set the thermostat, and no matter what we did with the ceiling fan (which is located 10 feet away right in front of the stairs leading to the bedroom), the recliners were still cold.

When we moved the heater to the base of the stairs leading to the bedroom, and turned the ceiling fan on “high” and set it to blow towards the ceiling, we could immediately feel the warm air encircling us as we sat in the recliners. Who woulda thunk??!!

Heater Sizes and Capacities

Most manufacturers state the square footage their various heaters are designed to heat. We decided that we’d rather buy a slightly larger unit (that is, one rated for a larger space than the interior of our fifth wheel), and simply keep the heater on a lower setting than to find ourselves unable to heat the buggy adequately. Our rig is 360 square feet, which put us somewhere between 10,000 and 20,000 BTUs. We ended up buying a 20,000 BTU heater, and we typically keep it set to 50% of maximum during the evenings/mornings and 25% of maximum at night when temps outside are in the 20’s and 30’s. If we had purchased a 10,000 BTU unit instead, I think it would have been cranking at max volume most of the time during the mornings and evenings and on stormy days. As a rough guide:

Vent-free heater BTU ratings and square footage
6,000 Up to 200 sf
10,000 Up to 300 sf
20,000 Up to 700 sf
30,000 Up to 1,000 sf

There are legal ratings for the sizes of vent-free heaters and the rooms they can be operated in. Less than 6,000 BTUs is okay for a bathroom, and less than 10,000 BTUs is okay for a bedroom. These are the ratings that are being referenced when you see a sticker on a larger unit saying “not designed to be used in a bedroom.” The idea is that a large unit operated at max volume in too small a space will use up too much oxygen in the room too quickly. Of course, such a scenario would have the occupants of the room running out the door because it would be way too hot for comfort.


SAFETY OF VENTLESS PROPANE HEATERS

Some people may worry that these kinds of ventless propane heaters aren’t safe, fearing that it might blow up the RV or suffocate them. These heaters are extraordinarily well regulated by various governing bodies, and designers have to meet stringent guidelines and submit their heaters to a battery of very challenging tests before they can be brought to market. Vent Free is the industry organization for all the vent-free gas heater manufacturers. Their website spells out all the testing, guidelines, state by state requirements, laws and safety record for these heaters. Through September 1, 2005, they claim that there had not been a documented death due to a vent-free propane heater (see that claim here). Visit their website at ventfree.org.

In addition, at the factory, RV manufacturers install a LP Gas Detector Alarm system (various brands are used) to detect LP gas leaks in the RV and alert anyone inside. These are installed because many RVs come equipped with propane-based appliances, including things like the stove, oven, hot water heater, refrigerator and RV furnace. All RV owners should be aware of where their LP gas detector is located. It is usually installed near the floor, as LP is a heavy gas that settles down low. Propane is found in highest concentrations near the floor.

Some RVers run their vent-free propane heater overnight as they sleep. We don’t do that. If the overnight low temps will be well below freezing (i.e., 25 degrees F or below), we run our RV furnace, set to 50 degrees, all night long to keep the plumbing from freezing, because the furnace is ducted throughout the basement.


OPERATION AT HIGH ELEVATION

Most of these heaters are sold with an official limit for operating altitude. The problem at higher altitudes is that there is not enough oxygen for the propane to burn properly. Some units are rated for use up to only 3,500 feet, while other manufacturers have a stated limit of as much as 5,000 feet.

Our blue flame vent-free propane heater is rated for use up to 4,500 feet, but we have used it extensively at altitudes up to 8,500 feet and have used three times for two week periods at 10,000 feet.

The key to operation at altitude is the Oxygen Detection Safety-pilot (ODS) sensor which has been standard equipment on all US-made vent-free heaters since the 1980’s. This sensor shuts off the gas to the heater when it detects the oxygen level has dropped to 18% (normal sea-level air is 21% oxygen). We find that whenever the ODS shuts our heater off, our stove and oven continue to run without a hitch. So, in reality, the stove and oven are actually more dangerous, as they do not have built-in ODS units to shut them off when the oxygen in the room gets too low.

5th wheel camper rv in the snow

A surprise autumn snowstorm at 10,000 feet elevation in Colorado during a two week stay taught us a lot
about how vent-free heaters function at high altitudes.

We use our heater all summer long as we travel through the western mountain states. We find that it works very well at 6,000 to 9,000 feet, taking the chill off cold mornings and raising the temperature inside the RV from a brisk low to mid-40’s to 75 degrees within an hour.

We have spent months at these altitudes. On occasion, if we have been running the stove and oven as well as the heater, the heater will unceremoniously turn itself off. This is no problem. We simply open the RV door to let some oxygen-rich air into the rig.

We have also spent several periods of 10 days to two or three weeks at 10,000 feet. Here we had more difficulty with our vent-free heater when the outdoor temps dropped into the high 20’s overnight (and we got two inches of snow on our roof!) and daytime highs were in the 40’s. The heater needed some coaxing to make it work. We tried two methods of combining the RV furnace and the ventless propane heater at this altitude. Neither was ideal, but this will give you a sense of what to expect and what to try:

1. Run the RV furnace all night long to keep the rig at 50 degrees overnight, and then use the RV furnace to raise the temp to about 60 in the morning. We found that this method used gobs of electricity and propane and didn’t make us very warm. What’s worse, when we tried to use the vent-free blue flame heater after running the furnace, the furnace would not have sufficiently replaced the interior air with exterior oxygenated air, so the vent-free heater could not run very long before it shut off due to having insufficient oxygen around it. So, in essence, using the RV furnace meant we couldn’t use the vent-free heater. We found we could run the RV furnace all day long but the temps in the rig would never exceed 61-62 degrees (the high temps outside were in the 40’s, lows in the mid-20’s).

2. Leave the furnace off overnight and run the ventless propane heater in the morning to warm up the rig. The temps inside our bedroom typically stay about 10 degrees above the outside temps if we don’t heat the RV overnight, so we woke up on some mornings to interior temps in the high 30’s. (We close our bedroom door at night to help keep the bedroom warm). The vent-free heater miraculously heated our indoor RV temps to 70 degrees within an hour of turning it on. At this point, around 70+ degrees, the heater would shut off. We could coax it to run a little more by opening the RV door and fanning the outside air into the rig, but it would shut off again after another 10 minutes or so. So then we would turn on the RV furnace.

Any sensible person would have gone and gotten electric hookups at a campground and run an electric ceramic heater, but we aren’t always very sensible. Camping at 10,000 feet in snowy weather is rather extreme. Most of the boondocking spots we stay at in the summer months are down around 6,000 to 9,000 feet, as I mentioned above, and the heater works beautiful at those altitudes. During the winter months we are typically at elevations of under 1,500 feet and the heater works like a champ without missing a beat.

Note: Since publishing this article, we have enjoyed yet another year of toasty warm heat from our blue flame vent-free heater in the mountains from spring through fall and at low desert elevations in the winter. We were also caught in another even bigger snowstorm on a mountaintop at 10,000 altitude once again and tried a different heating strategy that kept us warmer and dryer. Our article about that experience is here:

How to Heat an RV in Cold Weather and Winter Snowstorms


WHERE CAN YOU BUY A VENT-FREE PROPANE HEATER?

We had the worst time trying to find places to look at these heaters and find people knowledgeable about installing and using them in RVs. In some states it is illegal to sell these kinds of heaters (here’s a link to the state-by-state regulations for vent-free gas heaters from ventfree.org), and in mountain towns they are scarce because of their issues with operating at high altitudes. In four months of summer travel when we were looking to buy, we found just two propane gas companies selling vent-free heaters, one in Jackson, MS and one in Kanab, UT. We ended up learning the most from fellow desert boondockers in Arizona, Nevada and California during the winter months and from salespeople in mom-and-pop hardware and RV parts stores in Yuma and Quartzsite, Arizona.

If you know what you want, you can get a much better deal buying online, and Amazon sells all the major brands and accessories. We paid $290 plus $25 tax for our heater, a Vanguard 20,000 BTU blue flame with a thermostat and no blower (it came with feet). After buying, we found the same unit online with free shipping and no sales tax for $175 (Vanguard heaters are no longer made). Ace Hardware told us they could order a similar unit for us, shipped to their store in a week, for $215. So we paid a premium for our unit, but we did talk to a lot of sales people in the process and we saw a lot of the units (and warmed our hands over them), and knew exactly what we were buying.

Cost of installing a vent-free heater

Our entire project cost $385. The heater was $315 (including tax), and parts totaled $70. We were able to borrow the tools, but found they cost only about $15 to buy. We were quoted between $60 and $100 for the labor for the installation. As stated above, we also could have saved about $140 on the heater if we had purchased it online.


INSTALLATION OF A VENT-FREE PROPANE HEATER IN AN RV

Following is a pictorial step-by-step guide showing how we installed our vent-free propane heater in our RV.

Installing fIttings on the vent-free propane heater

The installation begins with work on the heater itself…

Working under the kitchen cabinets to install the new gas line for the heater

…however, the bulk of the installation involves tapping into an existing copper gas line to connect a new flexible gas line that goes to the heater.

The first step is to do a little work on the heater itself…

Installing the feet on our ventless blue flame propane heater

Attach the plastic feet so the unit can be freestanding and be moved around the trailer easily.

Installing the gas valve on the blue flame heater

Attach a brass elbow fitting at the base of the heater.
A flexible gas hose will eventually connect to this elbow.

Installing the thermometer on our ventless blue flame propane heater

Attach a thermistor (an electrical resistor type of thermometer) for the internal thermostat. This went on the lower back corner of the heater.


Our heater came with feet so it could be freestanding, and it also came with a thermistor, or resistor based thermometer, for the thermostat. These were attached before beginning the actual installation of the new gas line in our trailer.

The brass elbow did not come with our unit, but we found one with the right pitch, thread and diameter at the gas and electric supply store where we bought the other fittings for our project.

Second Step — Turn off the gas and tap into an existing copper gas line

The gas hose for the heater will tap into an existing copper line in a kitchen cabinet

The new flexible gas line for the heater will connect into the existing copper line.

We decided to tap into the copper gas pipe that runs between the refrigerator and the stove at the back of one of our lower kitchen cabinets. Mark measured the pipe and found it was 3/8″.

The goal was to cut the existing pipe and insert a series of fittings that would allow us to attach a flexible gas hose at that point, effectively creating a new leg of flexible gas line. This hose would then run out through a hole drilled at the base of the cabinet and attach to the heater. All of this is low-pressure pipe and fixtures.

Layout of all the gas fittings for installing the vent-free blue flame propane heater in our fifth wheel trailer RV

To create a new leg of flexible hose gas line requires a T-connector (to rejoin the severed pipe), F-F gender changer, On/Off valve and flexible gas hose with a stopper at the other end.

At a gas and electric supply store we picked up a male-male T-connector that would be inserted into the cut copper pipe.

The base of the T would connect to a female-female gender changing connector, and then to an on-off valve (which has male fittings at either end), and finally to a female connector on the end of the flexible gas hose.

Most of the year the heater would not be in use, so we bought a stopper for the end of the hose that goes to the heater.

pipe cutter for cutting gas pipe

Specialty tool #1: Pipe cutter

When the heater is disconnected, this stopper would be screwed into the end of the hose and the heater would be put in a closet.

However, we later discovered we wanted easy access to our heater during all four seasons, so the stopper never gets used!


The existing gas line is cut

The existing gas line is cut.

A universal gas appliance hookup kit manufactured by Mr. Heater includes all these parts except the T-connector!

Flaring tool showing both parts

Specialty tool #2: Flaring Tool.

The first step, after turning off the gas, was to cut the pipe. This requires a pipe-cutter, a small, inexpensive tool.

Once the pipe was cut, the next step was to connect the T-connector between the two severed ends of the copper pipe.

practice flare on scrap piece of copper pipe

Practice flare.

This would be done by first sliding a female connector onto each of the two pipe ends and then flaring the ends of the pipe with a flaring tool so the connectors couldn’t slide back off again.

The female connector is slid onto the pipe before the flare is done

The flare prevents the female connector from coming off the pipe.

The male-male T-connector would be screwed into this (and its companion) female fitting on either end of the pipe, rejoining the pipe and making a new connection available for the gas hose to go out to the heater.

flaring tool for flaring the end of a gas pipe

Flaring tool with scrap practice pipe in it.

Mark had never used a flaring tool to flare a pipe before, so he wanted to practice it first on a scrap piece of pipe.

Flaring the real pipe under the kitchen cabinet

Flaring the real pipe inside the cabinet.

He made the practice flare by inserting the scrap pipe into the appropriately sized hole in the tool and then screwing down both ends of the tool to snug the pipe into it — as if it were a bad guy in the old days having his head and hands put in the stocks in the town square!

One flare finished second flare beginning

One flare done, now do the other.

Then he inserted the pointed end of the flaring tool into the end of the pipe and twisted the crank, slowly flaring the end of the pipe as the point pressed further into it.

Two wrenches tighten T-connector in place

Tightening the T-connector with two wrenches

He slid the female connector onto a short piece of pipe and felt a snug fit between the pipe and the connector. The flare was just right. Now confident that he could flare a pipe properly, he contorted himself to get the flaring tool set up on the real copper pipe at the back of the cabinet.

T-connector with F-F gender changer

T-connector with F-F gender changer ready for the shut-off valve to be attached.

He began by sliding a female connector onto one end of the severed pipe under the cabinet and flaring the pipe’s end. Then he did the same thing to the other piece of the severed pipe. Then he screwed the male-male T-connector into the two female ends of the pipe to rejoin them, and he tightened the T-connector using two wrenches.

He attached a female-female connector to the base of the T, making it possible to screw the male-male valve into place. This valve would allow the gas to the heater to be turned on and off. After the valve, he attached the female end of the gas hose.

Connecting the flexible gas hose to the shut-off valve

The new flexible gas line connects to the shut-off valve.

Finally, he drilled a hole in the front base of the kitchen cabinet and ran the gas hose through the hole. The other end of the gas hose was attached to the elbow connector he had placed on the bottom of the heater.

Tightening all the connections with wrenches, and turning the gas to the trailer back on, the heater was now ready to be used.

Hole at base of the cabinet for the gas hose

The new flexible gas line will come through this hole and connect to the heater.

Mark checked for gas leaks using a tiny spritzer bottle filled with a few drops of Dawn dish soap and water. Spraying this mixture on each connection, he looked for bubbles to form which would indicate a gas leak.

To give us flexibility in moving the heater around the rig, we originally used two lengths of gas hose: a 3′ length for under the cabinet and a second 12′ length that attached to it with an inline male-male connector.

Vent-free blue flame propane heater installed in a 5th wheel trailer

What a great little heater!!

The idea was that the 12′ gas hose would give us lots of flexibility for moving the heater around the trailer. However, we found that it was too long and too bulky and the best position for the heater was close to the stove anyway. So we replaced the 12′ hose with a shorter 4′ one.

After the installation was finished, it didn’t seem like such a big project after all, and what a thrill it was to toast ourselves in our warm buggy. Our timing was perfect: the next week brought a big cold front, multiple days of rain, lows in the 30’s and highs in the fifties. We were snug as bugs in a rug while the winds howled outside.


There are tons of choices for installing a vent-free propane heater, but these four are among the most popular. If you buy a heater from Amazon, make sure it is PROPANE and not NATURAL GAS, as the pictures look the same. We receive a 4-6% commission for purchases made through any of our Amazon links (at no cost to you) which helps us maintain this site — thank you!

Good luck with your project, and stay warm!

Subscribe
Never miss a post — it’s free!

Disclaimer: This blog post describes our vent-free propane heater installation. We are not responsible for any installation other than the one in our own rig.

Below are some of our most POPULAR POSTS (also in the MENUS above)

Buddy - A Journey in Spirit - The story of an event that changed our lives forever.

ARTICLE INDEXES
  • RV Tech Tips Articles - A one page index of links to all our RV Tech Tips, RV Upgrades & RV Maintenance articles.
  • RV Lifestyle Tip Articles - An index of links to all our RV Lifestyle Tips (finances, boondocking, major repairs, work/jobs, etc.)
  • Solar Power Articles - Overview and tutorial articles for how to design and install solar power on an RV or boat
  • Product Reviews - An index of links to all of our Product Reviews
RV UPGRADES, SYSTEMS & TIPS MONEY FULL-TIME RV LIFESTYLE GEAR STORE
  • Gear Store - A list of the goodies, equipment and gear we've found useful in our RV lifestyle!
 

Our most recent posts:

More of our Latest Posts are in the MENU.   New to this site? Visit RVers Start Here to find where we keep all the good stuff. Also check out our COOL NEW GEAR STORE!! *** CLICK HERE *** to see it!

Published Work by Emily & Mark Fagan

We have published nearly 250 articles and 53 cover photos in the major RVing and cruising magazines, including:

RV Magazine Escapees Coast to Coast Family RVing Trailer Life Highways RV Journal RV Life
Cruising World
Sail Magazine Sailing Blue Water Sailing Latitude 38Motorhome

Below are some of the magazine cover photos we have published, listing the issue, location and the title of the accompanying feature article:

Family RVing Magazine Cover by Emily Fagan RV with puppy Nov/Dec 2025

November/December 2025
Photo: Our rig with Buddy
“RVing with Pets!”

Escapees Magazine cover by Emily Fagan July/Aug 202525 RV with a Polaris RZR side-by-side

July/August 2025
Photo: Arizona
“Waterfall Hunting”

Family RVing Magazine Cover by Emily Fagan Colorado Western Slope Sep-Oct 2025

Sep/Oct 2025
Photo: Colorado Rockiese
“Boondocking Tips!”


Escapees Magazine Cover by Emily Fagan Big Bend Texas Mar-Apr 2025

March/April 2025
Photo: Big Bend TX
“Big Bend National Park”

Escapees - Cover - Mar-Apr 25 - Buffalo WY

January/February 2025
Photo: Buffalo, Wyoming
“Counting Sheep”

Escapees - Cover Nov-Dec 2024 5th wheel with Christmas Tree

November/December 2024
Photo: Monte Vista RV Resort
“Arizona Copper Art Museum”


FMCA - Cover Nov-Dec 24 - Grand Teton NP

November/December 2024
Photo: Grand Teton NP
“Photography Tips”

Coast Magazine Cover Fall 2024

Fall 2024
North Rim Grand Canyon
“Grand Canyon North Rim”

Escapees Magazine Cover May/June 2024

May/June 2024
Photo: Cochiti Rec Area NM
“If Walls Could Talk”


FMCA - Tucson Arizona - Jan 24

January 2024
Photo: Catalina State Park AZ
“A Visit to the Old Pueblo”

Escapees Nov-Dec 2023 COVER Canadian Rockies

Nov/Dec 2023
Photo: Moraine Lake Alberta
“Rocky Mountain High”

Coast-to-Coast COVER - Summer 2023

Summer 2023
Photo: Watkins Glen NY
“NY Finger Lakes”


Escapees - Mar-Apr 23 - Buddy

Mar/Apr 2023
Photo: Big Horn Mountains, WY
“Buddy – A Journey in Spirit”

Jan/Feb 2023
Sun Valley, ID
“Cargo Buckle Ratchet Straps”

Fall 2022
Tucson, Arizona
“Tucson Delights”


Jul/Aug 2022
Quartzsite, Arizona
“Torklift Camper Tie-downs”

Escapees Cover May-June 2022

May/June 2022
Custer State Park, SD
“Where the Wild Things Are”

Escapees Magazine Cover

Nov/Dec 2021
Photo: Green River Overlook
“Flaming Gorge, UT”


Coast to Coast Magazine Cover - Fall 2021

Fall 2021
Photo: Banff National Park
“Canada’s National Parks”

Escapees Magazine Cover

Sep-Oct 2021
Michigan’s Upper Peninsula

Escapees Magazine Cover

July/August 2021
Photo: Big Wood River
“Sun Valley Idaho”


Spring 2021
Photo: Rockhound State Park
“New Mexico Road Trip”

Escapees Magazine cover photo

Mar-Apr 2021
Photo: Star Trails in UT

Trailer Life Magazine Cover

November 2020
Photo: Waterton-Glacier NP
“Crown of the Continent”


Escapees Magazine Cover

May/June 2020
Photo: Phoenix, Arizona

Spring 2020
Photo: Sedona Arizona
“Red Rockin’ Sedona”

Cover Photo Escapees Magazine

Jan/Feb 2020
Photo: Big Horn Mtns WY


Fall 2019
Photo: Upper Peninsula, MI
“Autumn Trip to the UP”

Cover photo Escapees Magazine

Nov/Dec 2019
Photo: Phoenix, AZ

Escapees Magazine Cover Jan-Feb 2019

Jan/Feb 2019
Photo: Superstition Mtns AZ
“Tucson AZ Highlights”


Coast to Coast Magazine Cover Idaho Summer 2018

Summer 2018
Photo: Mackay Idaho
“Idaho Road Trip”

Escapees RV Club Magazine Cover Mar-Apr 2018 Photo by Emily Fagan

Mar/Apr 2018
Photo: Asheville, NC
“Reflections on RV Life”

Coast to Coast Magazine Cover Maine Spring 2018

Spring 2018
Photo: Acadia National Park
“Downeast Maine”


Escapees RV Club Magazine Nov-Dec 2017 Cover Image

Nov/Dec 2017
Photo: Ridgway Colorado
“Winter RVing Tips”

Coast to Coast RV Magazine Summer 2017 Cover Image

Summer 2017
Photo: The Smokies NC
“Appalachian Mountains”

Coast to Coast Magazine Summer 2016 Eastern Oregon RV Travel

Fall 2016
Photo: Big Bend TX
“Exploring Oregon’s Quiet Side”


Escapees RV Magazine July 2016 Cover Photo

July/August 2016
Photo: Kanab, Utah
“Interview: Kay Peterson”

Coast to Coast Magazine Fall 2016 Cover Photo by Mark Fagan

Summer 2016
Photo: Eastern Oregon
“Splendid Isolation: Big Bend”

Escapees RV Club Travel Guide 2016 Cover

January 2016
Photo: Phoenix, Arizona


Coast to Coast Magazine Cover Fall 2015

Fall 2015
Photo: Ouray, Colorado
“Colorful Colorado”

Escapees Magazine Cover Sep-Oct 2015

September / October 2015
Photo: Ridgway CO
“RV Travel Photography”

Coast to Coast Magazine Cover Summer 2015

Summer 2015
Photo: Capital Reef Utah
“Driving Amid the Red Rocks”


2015 Escapees Travel Guide

January 2015
Photo: Apache Junction, AZ

Escapees Magazine Cover Jan-Feb 2015-210

Jan/Feb 2015
Photo: Apache Junction, AZ
“Stay the Course”

Phoenix Arizona Cover Story Coast to Coast Magazine Fall 2014

Fall, 2014
Photo: Phoenix Arizona
“A Walk on the Wild Side”


Escapees 2014 Travel Guide 210

January 2014
Photo: La Manzanilla, Mexico

Escapees Magazine Cover Sep/Oct 2013

Sep/Oct 2013
Photo: Flaming Gorge, Utah

Coast to Coast Cover Fall 2013

Fall 2013
Photo: Telluride, Colorado
“Legends of the Fall”


Coast to Coast Magazine Cover Summer 2013

Summer 2013
Photo: Red Canyon, Utah
“Beyond Bryce Canyon”

blue-water-sailing-cover-april-2013

April, 2013
Photo: Zihuatanejo, Mexico

RV Life Magazine Cover July 2013 Emily Fagan

July 2013
Photo: Flaming Gorge UT
“Chasing Rainbows”


coast-to-coast-magazine-cover-spring-2012

Spring 2012
Photo: Roosevelt Lake AZ
“Everything Under the Sun”

highways-magazine-cover-august-2010

September 2010
Photo: Parowan Utah
“Once Upon a Time in the West”

coast-to-coast-magazine-cover-summer-2010

Summer 2010
Photo: Valley of Fire, NV
“Embers of History”


highways-magazine-cover-september-2010

August 2010
Photo: Sun Valley, ID
“America’s Alps”

escapees=magazine-cover-jan-feb-2009

Jan/Feb 2009
Photo: Bryce Canyon, Utah

National Geographic National Parks Book

These are all great magazines, and we have been avid subscribers as well as contributors.

In case you don’t subscribe or didn’t catch a particular article of ours that interests you, you can read some of them from this page (below).

The articles are grouped by general category and are listed in reverse chronological order. The stories are written by me (Emily) and the photos are both mine and Mark’s.

You can navigate to the different groups of articles on this page by using the following links:

You can also read some of our articles online at the publishers’ websites:

WALL CALENDARS

Return to top

We have published photos in the following wall calendars. These are sold in boutique gift shops and online at Amazon:

Sedona Arizona after a snowstorm by Emily Fagan

2025 Sedona Arizona Wall Calendar
Sedona after a snowstorm
Emily Fagan

Bow Bridge in Idaho by Emily Fagan

2025 Idaho Wall Calendar
The Bow Bridge
Emily Fagan

The Granite Dells Prescott Arizona by Mark Fagan

2025 Arizona Calendar
The Granite Dells
Mark Fagan

Arizona Wall Calendar
Petrified Forest National Park
Mark Fagan

Idaho Falls by Mark Fagan

2025 Idaho Wall Calendar
Mormon Temple in Idaho Falls
Mark Fagan

2025 Idaho Wall Calendar
Selway River
Emily Fagan

2024 Sedona Wall Calendar
Month of August
West Fork Trail – Emily Fagan

2024 Northern Arizona Wall Calendar
Calendar Cover and Month of July
Canyon de Chelly National Park – Mark Fagan
.


2024 Sedona Wall Calendar
Month of December
Bell Rock Pathway – Mark Fagan

2024 Utah “Mighty 5” Wall Calendar
Month of February
Bryce Canyon National Park – Emily Fagan
.


2021 Lake Powell Wall Calendar
Month of November
Glen Canyon Dam – Mark Fagan

2021 Puppies Wall Calendar
Month of April
Buddy – Emily Fagan


2021 Yellowstone Wall Calendar
Month of February
Grand Teton National Park – Emily Fagan

2021 Sedona Wall Calendar
Month of March
Chapel of the Holy Cross – Emily Fagan


2021 Sedona Wall Calendar
Month of July
West Fork Trail – Emily Fagan

2020 Sedona Wall Calendar
Month of May
Courthouse Vista – Mark Fagan


2020 Colorado Wall Calendar
Month of November
Million Dollar Highway – Emily Fagan

2019 Arizona Wall Calendar
Calendar cover and month of January
Canyon de Chelly National Park – Mark Fagan

National Geographic National Parks Book

RV DESTINATION ARTICLES

Return to top

Counting Sheep! – Escapees Magazine, Jan/Feb 2025
What a delightful surprise it was to encounter shepherds tending huge flocks of sheep while boondocking in the Rockies

Arizona Copper Art Museum – Escapees Magazine, Nov/Dec 2024
The Arizona Copper Art Museum is a unique and classy museum that showcases the beauty utility and history of copper.

7 Fabulous Bike Rides – Family RVing, Nov/Dec 2024
These are some of our favorite bicycles rides we’ve done in our RV travels around North America.

Halloween Camping in the Midwest – Escapees Magazine, Sep/Oct 2024
Hardy midwesterners extend the summer camping season with exuberant Halloween celebrations in almost all the campgrounds.

Grand Canyon North Rim – An Intimate View of Grand Canyon – Coast to Coast Magazine, Fall 2024
Grand Canyon’s North Rim is much less visited than the South Rim and boasts a special air of intimacy

Maysville, Kentucky – Camaraderie and history on the Ohio River – Coast to Coast Magazine, Summer 2024
Of all the charming small towns we’ve visited in North America, Maysville Kentucky tops them all for its hospitality and history!

If Walls Could Talk – Cliff Dwellings and Pueblos of the Southwest – Escapess Magazine, May/Jun 2024
A visit to four wonderful ancient cliff dwellings and pueblos in Arizona and New Mexico that are a bit off the beaten path

Sarasota, Florida – An Artsy Beach Town with Flair – Coast to Coast Magazine, Spring 2024
Sarasota, Florida is not only a winter vacation paradise but was once the home base for the Ringling Brothers Circus.

Burro Days – Burro Racing? Llama Racing? See it all in Fairplay, Colorado! – Escapees Magazine, Mar/Apr 2024
We bumped into three days of burro races, llama races, outhouse races and all kinds of whimsy in FairPlay, Colorado

Sedona Arizona – Where the Red Rocks Rock! – Escapees Magazine, Jan/Feb 2024
Sedona is a charming, artsy and slightly funky town nestled in some of the most impressive red rock scenery in America!

A Visit to the Old Pueblo – Family RVing, January 2024
Tucson is a fun-filled destination for a winter escape, offering beautiful scenery, an active nightlife and a colorful historic district.

Rocky Mountain High in Canada’s National Parks – Escapees Magazine, Nov/Dec 2023
The towering Rocky Mountains are utterly breathtaking and an ideal destination for outdoors enthusiasts and nature lovers.

Washington Highlights – Coast to Coast Magazine, Fall 2023
From a Bach music festival to a boat-in village in the North Cascades to 4th of July in a Mexican farming town, Washington is a blast.

Downeast Maine – Escapees Magazine, Jul/Aug 2023
Downeast Maine is full of stately lighthouses, bucolic small harbors, quaint New England towns and Acadia National Park!

New York Fingerlakes – Coast to Coast Magazine, Summer 2023
Elegant wineries, quaint Amish communities and stunning Watkins Glen waterfalls make the Finger Lakes a great RV destination.

Stehekin Ferry in Washington – Escapees, Nov/Dec 2022
The Stehekin Ferry takes visitors back in time to a unique boat-in only destination in the North Cascades.

Tucson Delights – Affenctionately known at the “Old Pueblo” – Coast to Coast, Fall 2022
Tucson’s old neighborhoods and old mission church were highlights along with petroglyphs and wild animals in Saguaro National Park.

High Mountain Adventures – Hidden Gems in Colorado – RV Magazine, October 2022
Visiting wineries in Fuita, scaling red rock wonders in Colorado National Monument and touching dinosaur bones too!

Precious Jewels in Montana and Wyoming – Coast to Coast Magazine, Summer 2022
From Cody, Wyoming, to Red Lodge, Montana, there are spectacular sights just outside Yellowstone National Park.

Custer State Park, SD – Where the Wild Things Are! – Escapees Magazine, May/June 2022
Custer State Park in the Black Hills of South Dakota is teeming with wild and feral animals – great for kids and kids at heart!

Waterfalls – Splash into Summer! – RV Magazine, May 2022
A look at several different stunning waterfalls that we found across the US.

Pioche Nevada – A living ghost town – Escapees Magazine, March/April 2022
Pioche was a mining town until the early 1900s. Today descendents of the miners live in town and the museum is filled with history.

Quartzsite Arizona – Winter Home of the Fun and Funky – RV Magazine, May 2022
Quartzsite is the winter gathering place for RVers from all over. Rigs fill the desert and eager shoppers fill the Big Tent at the RV show.

Flaming Gorge Utah – Escapees Magazine, Novemeber/December 2021
The Green River has carved a stunning canyon through the red rocks in Utah, and big horn sheep roam through the campground!

Leaf Peeping in Michigan – RV Magazine, October 2021
The brilliant hues of autumn pop out everywhere in Michigan. Here are some spots where we found the best color.

Majestic Canadian Rockies – Coast to Coast Magazine, Summer 2021
Four adjacent National Parks show off the jaw-droppingly gorgeous towering mountains of the Canadian Rockies.

Sun Valley Idaho – America’s Alps – Escapees Magazine, July/August 2021
Nestled in the majestic Sawtooth Mountains, Sun Valley is a fabulous playground for the rich and famous and for regular folk too!

Dinosaur National Monument – Escapees Magazine, May/June 2021
If you want to touch real dinosaur bones still lodged in the earth, this is the place to go. And the campground is lovely!

A New Mexico Road Trip – Coast to Coast Magazine, Spring 2021
From the martians and aliens in Roswell to the cliff dwellings of Bandelier to a caldera near Los Alamos, New Mexico has lots to offer.

Spring Mountain Ranch in Nevada – Escapees Magazine, March/April 2021
Near the Las Vegas Strip, you find yourself a world apart at this historic ranch set on the edge of Nevada’s red rock beauty

Sedona is for Lovers – RV Magazine, February 2021
What better place to take your Valentine to celebrate your love than scenic and trendy Sedona Arizona?!

Historic Yuma Arizona – Escapees Magazine, January 2021
From the “Hell Hole of the West” territorial prison to the charming old town adobe houses, Yuma is a colorful destination for an RV trip

Utah Red Rocks – RV Magazine, January 2021
Southern Utah is a vast playground of dazzling red rocks that make it one of America’s best places to take an RV and visit for a while.

Wintertime at Grand Canyon and Bryce Canyon National Parks – Escapees Magazine, November/December 2020
Both Grand Canyon and Bryce Canyon take on a mystical aura during and after a winter blizzard.

Halloween Camping in Michigan’s State Parks – Trailer Life Magazine, November 2020
Michigan’s State Parks host wonderful Halloween events for campers. What a hoo hoo hoot!

Fall Foliage in Colorado – Escapees Magazine, September/October 2020
Southwestern Colorado explodes in shades of gold each fall. This is a spectacle not to be missed!

A Road Trip along Lake Superior’s South Shore – Trailer Life Magazine, September 2020
From warm sand beaches to cold and stormy seas to pretty lighthouses, Lake Superior shoreline is rugged yet beautiful

Glacier and Waterton Lakes National Parks in Montana and Alberta – Trailer Life, May 2020
Glaciers carved spectacular valleys between the craggy mountain peaks in this unique International Peace Park

South Dakota’s Black Hills – Coast to Coast, Summer, 2020
Waterfalls, bike trails, funny feral burros and a world famous motorcycle rally make for great memories in the Black Hills

Small towns of Wyoming – Trailer Life Magazine, July 2020
A road trip along some of Wyoming less traveled byways takes us from one charming western town to another

Stunning Sedona, Arizona – Coast to Coast Magazine, Spring, 2020
Sedona is an outdoor lovers paradise tucked into an exquisite red rock setting that’s worthy of many return visits!

Top Hikes in the National Parks – Trailer Life Magazine, January, 2020
The best way to see the National Parks is on foot. Here are some beautiful hikes.

Visiting the National Parks in Winter – Trailer Life Maggazine, December, 2019
Most folks visit the National Parks in summertime, but winter offers a fabulous, intimate and very different experience.

Crater Lake National Park in Oregon – Trailer Life Magazine, November, 2019
The eye popping royal blue water at Oregon’s Crater Lake National Park is stunning against the snowy landscape

Chasing Fall Color in Michigan’s Upper Peninsula – Coast to Coast Magazine, Fall, 2019
Some of America’s best fall foliage can be found in Hiawatha National Forest in Michigan.

Goblin Valley State Park in Utah – Trailer Life Magazine, September, 2019
This wonderland state park is full of red rock hoodoos and brings out the kid in everyone

Wyoming’s Glorious Grand Teton National Park – Trailer Life Magazine, July, 2019
The Tetons are a stunning mountain range, and this National Park is among the best in the nation.

Wyoming’s Big Horn Mountains – Coast to Coast Magazine, Summer 2019
Wyoming is most famous for Yellowstone and the Tetons, but the equally majestic Big Horn Mountains are quieter!

Beartooth and Chief Joseph Highways – Trailer Life Magazine, July 2019
The Beartooth and Chief Joseph Highways in Montana and Wyoming are knock-your-socks-off spectacular!

Ancient Indian Ruins of New Mexico – Coast to Coast Magazine, Spring 2019
Aztec Ruins National Monument and Bandelier National Monument take us bad to the days of the Ancients.

Canadian Rockies – Stunning National Parks! – Trailer Life Magazine, May 2019
Four glorious national parks abut each other in Canada; Famous Banff and Jasper are just two of them!

Tucson Arizona Highlights – Escapees Magazine, Jan/Feb 2019
From a colorful historic district to an ancient mission church, Tucson is a fun place to visit.

Hawaii Escape – Escapees Magazine, Dec/Jan 2018
We leave our trailer behind to explore the island of Oahu!

Santa Fe New Mexico Highlights – Escapees Magazine, Oct/Nov 2018
From a slot canyon to some fabulous ancient Indian ruins there’s lots to see near Santa Fe.

Back Roads of Idaho – Coast to Coast Magazine, Summer 2018
Traveling the back roads of Idaho, there are charming small towns and beautiful mountains at every turn.

RVing Downeast Maine – Coast to Coast Magazine, Spring 2018
From Bangor to Acadia National Park to the furthest east town of Lubec, Maine has lots to offer RVers.

Maysville, Kentucky – Trailer Life Magazine, February 2018
Maysville, Kentucky, enchanted us with its gregarious and friendly spirit and charming historic downtown.

Animals Encounters in Arizona – Motorhome Magazine, December 2017
Arizona is crawling with wildlife. Here are some great places to see the special critters of the southwest.

Georgia On Their Minds – Trailer Life Magazine, September 2017
The South is known for hospitality, and a wonderful glimpse of the gentility of yesteryear is best seen on the Antebellum Trail

The Spirit of the Sea – Motorhome Magazine, August 2017
Following Nova Scotia’s Cabot Trail on Cape Breton Island we see stunning seascapes and cute harbors.

Quaint Side of Canada – Trailer Life Magazine, July 2017
Coastal travels from the pretty lighthouse at Peggy’s Cove to picturesque Lunenburg and Mahone Bay.

Virginia Mountain Majesty – Motorhome Magazine, July 2017
Following the Blue Ridge Highway through Virginia, we find blue grass music, wineries and majestic mountains.

Downeast Maine – Trailer Life RV Magazine, June 2017
Few people venture to the far northeast corner of America, but the seaside villages and local color are not to be missed!

New York’s Finger Lakes – Motorhome Magazine, May 2017
We explore a lesser known Amish community and enjoy some wine tasting between Amish farm outings.

Sweet Sarasota Florida – Trailer Life Magazine, March, 2017
Sarasota Florida is a beach lover’s paradise, with sugar sand beaches and turquoise water. But there’s lots of high culture too…

Maine Course – Motorhome Magazine, September, 2016
From craggy shores to sweet harbors to Rockefeller’s network of “Carriage Roads,” Acadia National Park rocks!

Splendid Isolation: The Big Bend – Coast to Coast Magazine, Fall, 2016
Big Bend National Park is ruggedly beautiful, from the Rio Grande to mountaintops and desert rocks. A daytrip to Mexico is a must!

New Hampshire’s Little Engine That Could – Trailer Life Magazine, August, 2016
We take a trip up Mt. Washington on the historic and unique Cog Railway to the Weather Station up top.

Exporing Oregon’s Quiet Side – Coast to Coast Magazine, Summer, 2016
From the rivers east of Bend to the snowcapped peaks of the Wallowa Mountains, eastern Oregon is a little known paradise.

Jewels of Florida’s Northern Gulf Coast – Motorhome Magazine, July, 2016
The Northern Gulf Coast of Florida is often overlooked in favor of more famous southern spots, but it has a lot to offer

High Country Holiday – Trailer Life Magazine, May, 2016
A visit to North Carolina’s Great Smoky National Park and the southern part of the Blue Ridge Parkway

Deep in the Heart of West Texas – Trailer Life Magazine, February, 2016
Big Bend National Park has mountains, deserts and rivers as well as ghost towns and a taste of Mexico!

Adventures in Central Arizona – Motorhome Magazine, November, 2015
The hub of central Arizona is Phoenix, but just outside the city lies a treasure trove of natural beauty.

Out Yonder in Oregon – Trailer Life Magazine, October, 2015
Tucked into a far corner of Oregon, the Wallowa Mountains are one of the best kept secrets in the West.

Finding the COLOR in Colorado – Coast to Coast Magazine, Fall, 2015
An autumn RV trip to the adorable mountain towns of Ouray and Silverton, Colorado, makes for a stunning immersion in fall colors.

Under the Idaho Sun – Trailer Life Magazine, August, 2015
Sun Valley Idaho is an RVers paradise with camping galore and free concerts, gallery walks and performances everyday.

Grand Teton National Park – Motorhome Magazine, August, 2015
Grand Teton National Park is flanked by a jaw-dropping mountain range, but there are dozens of hidden treasures too.

Driving between the Red Rocks: A Utah Roadtrip – Coast to Coast Magazine, Summer, 2015
Driving the spectacular Bicentennial Highway through Glen Canyon to Natural Bridges Nat’l Monument and Capitol Reef Nat’l Park.

The Sunny Side of Oregon – Trailer Life Magazine, May, 2015
From Crater Lake to the Deschutes, McKenzie and Crooked Rivers, we discover the beauty of Central Oregon.

Arizona’s Red Rock Country – Trailer Life Magazine, December, 2014
Hiking, biking and thrill seeking amid the red rocks of artsy Sedona Arizona.

A Walk on the Wild Side in Phoenix Arizona – Coast to Coast Magazine, Fall 2014
Beyond the urban sprawl of Phoenix, Arizona, is a world teeming with natural beauty on lovely waterways and hiking trails.

Montana’s Ghost Towns! – Trailer Life, August, 2014
Montana’s Gold Rush was not as famous as the one in California, but the ghost towns are just as fascinating.

Enchanting Ensenada – Escapees Magazine, Nov/Dec 2013
Ensenada is a fabulous destination by RV or boat, and makes a perfect introduction to travel in Mexico.

Legends of the Fall – Coast-to-Coast, Fall 2013
The red rocks of Colorado National Monument and the fall foliage on the San Juan Mountains are kaleidescopic.

Dinosaurs and Much Much More – RV Life, September 2013
From fossilized dinosaur bones to ancient petroglyphs, Dinosaur National Monument is magnificent!

Flaming Gorge – Red Rocks, Aquamarine Water & Rainbows! – Trailer Life, August 2013
A rainbow-filled visit to the stunning cliffs, river and dam at Utah’s Flaming Gorge.

Chasing Rainbows in Flaming Gorge – RV Life, July 2013
The sweeping views, brilliant red rocks and friendly animals make Flaming Gorge perfect for the whole family.

Beyond Bryce Canyon – Coast-to-Coast, Summer 2013
Some of the best of Utah lies between the more famous National Parks at Bryce and Zion.

Everything Under the Sun – Coast-to-Coast Magazine, Spring, 2012
We visit two desert lakes near Phoenix Arizona, deep in the heart of the cactus-studded Tonto National Forest.

Summer Fun in Sun Valley – RV Journal – Summer, 2011
From free outdoor concerts to scenic bike paths to towering mountains to history and luxury, this town has it all.

Roads Back in Time – Highways Magazine – October, 2010
A trip down memory lane at the unique RV/MH Hall of Fame museum in Elkhart, Indiana.

Once Upon a Time in the West – Highways Magazine – September, 2010
Two wonderful small town Labor Day celebrations: a rodeo in Helmville, Montana and a fair in Parowan, Utah.

America’s Alps – Highways Magazine – August, 2010
Sun Valley Idaho has something for everyone: soaring mountains, glitz & glam, cute bistros and an unusual history.

Embers of History – Coast-to-Coast Magazine – Summer, 2010
Valley of Fire State Park outside Las Vegas, Nevada, offers up red rock vistas and geological and human history.

Amish Heritage Trail – Escapees Magazine – May/June, 2010
Describes the intriguing self-guided CD-based tour you can take through Amish Country in the Elkhart, Indiana area.

Nevada Ranch’s Colorful History – RV Life – April, 2010
Spring Mountain Ranch, outside of Las Vegas, Nevada, is full of history, intrigue and fun surprises.

RV/MH Hall of Fame – Escapees Magazine – March/April, 2010
We visit the unusual RV/MH Hall of Fame in Elkhart, Indiana:  library, museum, and home of kudos to the RV industry.

RV-Friendly Casinos – Escapees Magazine – November/December, 2009
Casinos offer RVers a lot besides gambling.  From horse racing to a dip in a pool, our favorite casinos are here.

Yuma’s Hidden Treasures – RV Life – November, 2009
Take a visit to the Yuma Territorial State Prison, explore the Old Town, and see a colorful balloon festival.

Reliving the Wild West – RV Life – September, 2009
Tiny Pioche, Nevada, was the wildest of the west’s wild towns, with the most murders and one really tough jail.

Where Animals Find Friends – RV Life – August, 2009
We visit the unique Best Friends Animal Sanctuary near Kanab, Utah, a beautiful & extremely well-funded sanctuary.

Land of Goblins – Escapees Magazine – September/October, 2008
Goblin Valley is a fantastic Utah state park full of red rock hoodoos.  Nearby is an easy & exciting slot canyon hike.

Renogy 200 watt solar panel

RV and CRUISING “HOW TO” ARTICLES

Return to top

Photography Tips – Family RVing Magazine, Nov/Dec 2024
Photography goes hand-in-hand with RV travel. Here are a few tips to help you take more engaging photos.

Reese Goose Box 5th Wheel Hitch – Escapees Magazine, July/August 2024
The Reese Goose Box is a game changer for towing a fifth wheel trailer: easy hitching, not hard to install and ultra smooth towing!

Demco Recon 21k 5th Wheel Hitch – RV Magazine, March 2023
This unusual hitch mounts on a gooseball in the truck bed, making it easy to install and remove, plus it’s truck brand independent.

Cargo Buckles – Escapees, Jan/Feb 2023
Cargo Buckle retractable ratchet straps are a game changer and time saver for tying down heavy items in a toy hauler or flat bed trailer.

Torklift Camper Tie-Downs and FastGuns – RV Magazine, January 2022
The Torklift Camper Tie-Downs are the best in the industry and the companion FastGuns make securing your truck camper a breeze

RV Awning Fabric Repair – RV Magazine, April 2021
RV awnings are ungainly and awkward and we found a few tricks for replacing the awning fabric.

Organizing and Defrosting a small RV Refrigerator – RV Magazine, March 2021
Here are some tips to make it easy to organize an RV fridge and defrost it quickly and painlessly

Portable Power – Honda EU2200i Generator – Escapees Magazine, Jul/Aug 2019
Honda’s new EU2200i portable generator packs a lot of punch into an easy-to-carry package.

How to Repair a manual RV Awning – Escapees Magazine, September/October 2019
Our manual awning suffered catastrophic UV damage from a life in the sun. Here’s an outline of what the repair entailed.

Shopping for a Toyhauler – Trailer Life Magazine, September 2019
There are a lot of things to consider when shopping for a toy hauler. Here are some tips to keep in mind.

Amp’d Up Throttle Booster – Escapees Magazine, May/Jun 2019
The “Amp’d Up” throttle booster from Edge Products fixes the “deal pedal” syndrome when towing.

MORryde SRE4000 Trailer Suspension Upgrade – Escapees Magazine, Jul/Aug 2018
Installing the MORryde SRE4000 equalizer on your trailer smooths out the ride and saves your dishes!.

Portable Generator Maintenance – Trailer Life Magazine, April 2018
Avid boondockers and casual dry campers need to keep their generators in good shape. Here are some tips.

Step-by-step installation of the B&W OEM Companion Hitch – Trailer Life Magazine, April, 2017
Truck manufacturers now provide “puck” systems for easy DIY installation of fifth wheel hitches. Here’s the B&W “puck” Hitch.

Cruising on Solar Power – Cruising World Magazine, February, 2017
How to design and install a solar power system on a sailboat that is robust enough for anchoring out all the time.

Power Inverters – Escapees Magazine, Sep/Oct 2016
Power inverters make it possible to run AC appliances on DC batteries when dry camping. Here’s the low down.

One Ton Trucks – Buying a Truck for Heavy Duty Towing – Trailer Life Magazine, July, 2016
What to look for when buying a heavy duty pickup truck to tow a big fifth wheel trailer.

Diesel Engine Tuners – Escapees Magazine, Mar/Apr 2016
Diesel engine tuners truly put the driver in the driver’s seat of the truck! Here’s a look at how they work.

RV Batteries: The Heart of the RV Power Plant – Escapees Magazine, Jan/Feb 2016
Hints for what to look for in RV house batteries (wet cell vs. AGM) and how best to wire them.

RV Solar Power: The Installation Process – Escapees Magazine, Nov/Dec 2015
Tips and tricks for installing solar panels on an RV roof and a solar charge controller in teh basement.

Winterizing Your Screen Door – Trailer Life Magazine, November, 2015
If you are planning on winter camping in your trailer, here’s an easy way to let the sun in and keep the cold out!

Hydraulic Disc Brake Conversion – Escapees Magazine, Jul/Aug, 2015
Upgrading a trailer’s brake system to electric over hydraulic disc brakes makes a radical difference in driving comfort and safety!

RV Solar Power Basics – Escapees Magazine, May/Jun, 2015
RV Solar Power is demystified with an easy-to-understand review of the basic components in a solar power installation.

Making Weight – How Heavy is Your Rig? – Escapees Magazine – Mar/Apr, 2015
Weighing your rig is an important safety measure, and the Smart-Weigh program makes it easy to do.

Installation of a High-Capacity Watermaker – Cruising World Magazine, February, 2015
A step-by-step description of the installation of the lifeblood of our cruise: a 60-gallon-per-hour engine-driven watermaker.

Installation of a Vent-Free Propane Heater – Escapees Magazine, Nov/Dec 2014
A step-by-step guide to selecting and installing a vent-free propane heater in an RV.

Keep It Clean – Tips for RV Sanitation Systems – Motorhome Magazine, July, 2014
Good Sam Club loved our article in Trailer Life so much (next listing) that they published it in MotorHome too!!

Keep It Clean – Tips for RV Sanitation Systems – Trailer Life, May, 2014
Tips and tricks for maintaining an RV’s holding tanks and recommended procedures for doing the dirty deed at the RV dump station.

Keeping Your RV Roof in Tip-Top Shape! – Trailer Life, September 2013
RV rubber roofs and fiberglass roofs each require special care to stay in good condition and remain watertight.

Boondocking: The Essential Ingredients – Escapees Magazine – January/February, 2012
Describes the tools and attitude necessary for an independent life of boondocking, or living “off the grid,” in an RV.

Shrink-Wrap Your Screen Door – Escapees Magazine – September/October, 2010
A step-by-step guide to shrink-wrapping your RV’s screen door for wintertime use.

Install Your Own Vent-free Propane Heater – Escapees Magazine – September/October, 2009
Instructions for installing a vent-free propane heater.  These heaters are superior to the furnaces installed in most RVs.

Punching Numbers – Escapees Magazine – May/June, 2009
A review of what it costs to go RVing full-time.

Shedding Light on Solar – Escapees Magazine – March/April, 2009
A presentation of the two solar power configurations we have had on our two trailers.

Happy Camper Holding Tank Treatment

CRUISING DESTINATION ARTICLES

Return to top

Cruising Mexico’s Sweet Costalegre – Sailing Magazine, June 2016
In between the more popular anchorages on Mexico’s mainland coast we discovered some gorgeous hidden coves.

Huatulco Mexico – In our Hearts Forever!Sailing Magazine, February, 2014
The Bays of Huatulco sparkle like jewels on the southern Pacific shores of Mexico and offer the best cruising in Mexico.

A Colorful Christmas in ZihuatanejoBlue Water Sailing, December, 2012
What could be better than Christmas in colorful, vibrant “Z-town” where the sun is bright and the setting tropical.

Baja “Aha” – Cruising World Magazine, Sep 2012
Our maiden sail down the Pacific coast of Baja from San Diego to Cabo San Lucas was full of beginner’s luck.

Mexico’s Costa Alegre – Blue Water Sailing, Apr 2012
The “Gold Coast” of Mexico is a collection of 10 or so unique and special anchorages on the Pacific coast.

Bewitching Baja – Sailing Magazine, March, 2012
A literary cruise through the Sea of Cortez with flashbacks to John Steinbeck’s hilarious book, Log from the Sea of Cortez

Wild Winds of the West – Sail Magazine, March, 2012
Describes the thrills awaiting charterers in the Sea of Cortez. Editors refer to Groovy as a “charter boat.” What next?

RV LIFESTYLE ARTICLES

Return to top

Toy Hauler Living – Escapees Magazine, May/June 2023
What is it like to live in a toy hauler, especially an open box design? The flexibility is fantastic and the patio can’t be beat!

Buddy – A Journey in Spirit – Escapees Magazine, March/April 2023
When our sweet pup ate a lethal dose of rat poison, the emergency hospital vets told us he’d never survive. God gave him a miracle and he recovered 100%.

Living the RV Dream – RV Magazine, August 2021
What are your innermost dreams and what does it take to make your dreams come true?

Keeping Cool in Summer – RV Magazine, July 2021
Summertime RVing is blast but it can get hot too. Here are some tips for beating the heat in your RV.

Is Full-time RVing in your Future? – RV Magazine, June 2021
Full-time RVing is a thrilling life changing adventure. Here are some things to ponder before jumping to this exciting new phase of life.

Travel Photography – Trailer Life Magazine, June 2019
Here are a few tips for RVers to make their travel photos come alive.

Fifth Wheel Toyhaulers – Trailer Life Magazine, Mar 2019
A sampling of 5th wheel toy haulers on the market with pros/cons of each!

RVing and Bicycling – Match Made in Heaven! – Trailer Life Magazine, February 2019
Bicycling is a great activity for RVers. Here are some tips and favorite cycling destinations.

Full-time RVing – Trailer Life Magazine, July 2018
We offer readers our tips and insights into the full-time RV lifestyle.

Reflections: Lessons Learned in the Full-time RV Lifestyle – Escapees, May 2018
On our 11th anniversary of full-time travel we look back at what we’ve learned along the way.

First-Timer Fifth Wheels – Trailer Life Magazine, May 2018
Here’s a look at a dozen great “first-timer” fifth wheels that are under $50k and shorter than 32′.

Stay Cozy Warm While RVing in Cold Weather – Escapees Magazine, January/February 2018
Here are some survival tips to help you make it through a cold winter season in your RV!

Full-timer Fifth Wheel Trailers – Trailer Life Magazine, October 2017
A review of twelve new fifth wheel trailer models suitable for full-time living.

Visiting the Dentist in Mexico – Escapees Magazine, November/December 2016
Mexican dentists do top quality work at rock bottom prices. Here are our personal experiences that have kept us smiling for 8 years.

An Interview with Kay Peterson – Escapees Magazine, Jul/Aug 2016
Kay Peterson and her husband Joe founded the unique Escapees RV Club. Her story is a thrill and an inspiration.

Leasing Your House To Go Full-time RVing – Escapees Magazine, May/Jun 2016
Most folks sell their house before they go full-time, but we leased ours and have been oh-so-happy that we did!

What is it Like to RV Full-time? – At Home on the Road – Motorhome Magazine, January, 2016
RVing full-time sounds like a dream, but the transition can be overwhelming. Here are some tips for how to get from here to there!

Getting The Most From Your Travel Photography – Escapees Magazine, Sep/Oct, 2015
What makes a great photo? Here’s some hints and tips for putting some zing in your travel photography?

Stay the Course – Escapees Magazine, Jan/Feb 2015
Inspiration for future full-timers who are overwhelmed by the challenges of starting a new and exotic life on the road.

A Full-time RVer’s Metamorphosis – Escapees Magazine, Sep/Oct 2014
An interview with two special Escapees members who have lived and worked in their RV full-time for 26 years.

Taking Your RV into the Mountains– Escapees Magazine, July/August 2013
Some hints and tips for taking a big rig into the mountains.

Pacing Your RV Travels – Escapees Magazine, May/June 2013
Finding a theme to guide your travels, and moving along at the right pace, keeps full-time travel exciting.

First Timer’s Guide to Mexico – Latitude 38 (Baja Ha-Ha Cruiser’s Rally) – September, 2012
A cruising guide full of tips for cruisers making their first voyage to Mexico: weather, navigation, provisioning, internet access, etc.

Life Afloat and On the Road – Escapees Magazine – September/October, 2012
Part II – What’s similar and what’s different about boondocking in an RV in the US versus anchoring out in a sailboat in Mexico?

RVing by Land and by Sea – Escapees Magazine – July/August, 2012
Part I – Written at the request of Escapees Magazine, this is a comparison of the full-time RVing and cruising lifestyles.

Leasing Your House – Escapees Magazine – May/June, 2012
A summary of the things we’ve learned to help us be both happy and profitable landlords.

Heart of a Dream – Escapees Magazine – January/February, 2011
An exploration of what this business of “Living the Dream” is all about and what its origins were for us.

A Mexican Crown – Escapee Magazine – January/February, 2010
We go south of the border from Yuma, AZ so Mark can get a new crown from a terrific Mexican dentist.

B&W fifth wheel hitch

TRAILER LIFE COLUMN – “ROADS TO ADVENTURE”

Return to top

Every other month between January 2017 and November 2020 we authored the back page column in Trailer Life Magazine called “Roads to Adventure.” This column focused on special RV destinations and featured a beautiful (and enticing!) photo.

Trailer Life Column: Sedona Red Rocks – Trailer Life Magazine, November 2020
Hiking among and between Sedona Arizona’s red rocks can’t be beat. When a storm darkens the sky it gets even better!

Trailer Life Column: Mackinac Bridge – Trailer Life Magazine, Sep 2020
The gateway to Michigan’s Upper Peninsula, this historic bridge lights up at night

Trailer Life Column: The Giants of Montana – Trailer Life Magazine, July 2020
The mammoth and ancient Ross Creek cedar trees are awe-inspiring to walk among and climb into.

Trailer Life Column: Mabry Mill on the Blue Ridge Parkway – Trailer Life, May, 2020
An old grist mill in Virginia offers a hands-on glimpse into America’s and Appalachia’s past

Trailer Life Column: Cedar Breaks National Monument – Trailer Life Magazine, March 2020
One of the lesser known National Parks in Utah, Cedar Breaks is a red rock wonderland!

Trailer Life Column: New Mexico’s White Sands National Monument – Trailer Life Magazine, January, 2020
How about sledding on a gypsum sand dune? White Sands is a playground for all ages!

Trailer Life Column: Glacier National Park in Montana – Trailer Life Magazine, May 2019
Towering snowcapped mountains and glassy alpine lakes make Glacier NP a treasured wonderland.

Trailer Life Column: Colorado’s Maroon Bells – Trailer Life Magazine, March 2019
We found beauty and romance at sunrise in gorgeous Maroon Bells.

Trailer Life Column: Florida Panhandle – Trailer Life Magazine, January 2019
Turquoise water and white sand beaches make the Florida Panhandle a stunning destination.

Trailer Life Column: Icefields Parkway in Canada – Trailer Life Magazine, November 2018
The Icefields Parkway between Banff and Jasper National Parks is out of this world!

Trailer Life Column: Autumn in Zion National Park – Trailer Life Magazine, September 2018
Zion National Park is known for its towering cliffs, but the fall foliage fills the canyon with vibrant color.

Trailer Life Column: 4th of July in Custer, South Dakota – Trailer Life Magazine, July 2018
Custer, South Dakota, is a small town with a big heart, and their 4th of July celebration is top notch.

Trailer Life Column: Rockport Massachusetts – Trailer Life Magazine, May 2018
Rockport, Massachusetts, is a cute seaside town whose history dates to the Revolution.

Trailer Life Column: Bandelier National Monument in New Mexico – Trailer Life Magazine, March 2018
At Bandelier National Monument we discovered quintessential cliff dwellings complete with ladders to the entrances.

Trailer Life Column: Petrified Forest National Park, Arizona – Trailer Life Magazine, January 2018
We found Petrified Forest National Park’s hidden jewels at Jasper Forest and Blue Mesa Trail.

Trailer Life Column: Moraine Lake, Alberta, Canada – Trailer Life Magazine, November, 2017
Deep in the Canadian Rockies, Moraine Lake is a vibrant turquoise lake tucked between snowcapped mountain peaks.

Trailer Life Column: San Juan Skyway, Colorado – Trailer Life Magazine, September, 2017
The San Juan Skyway loops through SW Colorado, and erupts in a fiery display of color during fall foliage season!

Trailer Life Column: McCall, Idaho – Trailer Life Magazine, July, 2017
McCall, Idaho, is a little known bona-fide beach town high up in the Rocky Mountains!

Trailer Life Column: Watkins Glen, New York – Trailer Life Magazine, May, 2017
Watkins Glen is a fabulous gorge, and a visit in the rain reveals a jaw-dropping waterfall.

Trailer Life Column: Bryce Canyon at Night – Trailer Life Magazine, March, 2017
Bryce Canyon is stunning by day, but at midnight the canyon is spanned by the Milky Way!

Trailer Life Column: Horseshoe Bend Arizona – Trailer Life Magazine, January, 2017
Horseshoe Bend in Page, Arizona, is a breathtaking overlook high above the Colorado River.

1000 Places to See Before You Die

PHOTOGRAPHY ARTICLES

Return to top

Grand Canyon Wildflower Image — Landscape Magazine, August 2023
Mark describes a special encounter with a beautiful wildflower in Kaibab National Forest.

Travel Photography – Trailer Life Magazine, June 2019
Here are a few tips for making travel photos come alive.

Getting The Most From Your Travel Photography – Escapees Magazine, Sep/Oct, 2015
What makes a great photo? Hints and tips for putting some zing in your travel photography

RV Hacks Book

PROFILES ABOUT US

Return to top

“Mark and Emily” YouTube Video (5+ minutes) — Camping World, March 2018
Camping World’s pro video crew spent 3 days with us creating this inspiring video (our blog post about the video shoot is here)

Mexico’s Natural Attractions — JetLine Cruise, APRIL 2018
JetLine Cruise interviewed us about visiting La Bufadora in Ensenada (our blog post about La Bufadora is here)

Podcast Interview (46 minutes) — Keep Your Daydream, June 2015
Keep Your Daydream adventure travel podcast interviewed us to learn how we launched our travel dream and how we keep it going.

Quitting Life to Hit the Road in an RV — Yahoo Travel, February 2015
Yahoo Travel feature story about us and other RVers who left convention behind to live in an RV full-time.

Blog Review of Roads Less Traveled – Belinda Hughes Writing and Travel Blog, July, 2014
Writer, blogger and future RVer gave this blog a glowing review in her debut post in a series of blog reviews.

Sailing Groovy on Kyocera Solar Power – Kyocera Solar Power Website, June, 2013
Solar panel manufacturer Kyocera Solar featured our sailboat Groovy‘s solar power installation on their website.

Solar Power Installation on Sailboat “Groovy” – Clean Technica, May, 2013
CleanTechnica featured a story about our marine solar power installation aboard our sailboat Groovy.

Solar Sailboat Shows How “Groovy” Off-Grid Life Can Be – EarthTechling, May, 2013
EarthTechling featured a story about our off-the-grid lifestyle, powered by solar, aboard our sailboat Groovy.

Fun with the Fagans – Highways Magazine – April/May, 2012
The good folks at Good Sam Club published a brief story about our unusual land and sea traveling lifestyle.

Changes in Latitude – Latitude 38 Magazine – March, 2012
The West Coast’s most popular sailing magazine checked in with us in Acapulco, Mexico

RVing Magazine Links

Coast-to-Coast Magazine
This is the membership magazine for the Coast Resorts RVing organization.  Coast Resorts is a network of upscale RV parks that are available to members at a discounted price, and the magazine covers a full range of RVing topics for its members.

Escapees Magazine
This is the membership magazine for the Escapees RV Club, a club focused on the RV lifestyle, especially for long-term and full-time travelers.  Articles cover topics that are unique to living in an RV for an extended period of time as well as destinations that are worthy of a stop.

Highways Magazine
This was the official magazine for the Good Sam Club and ceased publication in 2014.  It was chock full of RV tech tips, previews of upcoming Good Sam events, RV equipment reviews and RV destination recommendations.

MotorHome Magazine
This magazine was first published in 1968 and was later purchased by Good Sam Club. It was dedicated to driveable RVs, that is, Class A’s, B’s and C’s, and was filled with motorhome tech tips and great RV destination stories. It was incorporated into RV Magazine in January 2021.

RV Journal
This excellent free magazine used to be found in Camping World, RV parks and other RV-related places of business in the western states.  It focused on happenings in the West that could inspire an RVing voyage to a particular destination, from musical events to festivals to country fairs. Unfortunately, it is no longer in print.

RV Life Magazine
This wonderful, over-sized magazine was one of the oldest regional RV magazines.  It included excellent destination articles and interesting news pieces about the RV industry. The name and brand were sold to new owners.

RV Magazine
Trailer Life Magazine and Motorhome Magazine merged to become RV Magazine in January 2021. This new magazine covered topics for all RVs rather than specializing in one type or another. RV Magazine ceased publication in December 2023.

Trailer Life Magazine
Part of the Good Sam family, this magazine was dedicated to towable RVs, and had tips for both tow vehicles (trucks) and trailers as well as the hitches that go in between.  The destination stories also offered inspiring ideas for the bucket list. First published in 1941, it was incorporated into RV Magazine in January 2021.

Cruising Magazine Links

Blue Water Sailing Magazine
Started in 1997, this delightful cruising-specific magazine is written by cruisers for cruisers with an emphasis on taking your own boat to exotic destinations.

Cruising World Magazine
This classic American sailing magazine has been spawning cruising dreams for decades.  Articles are split evenly between stories about all aspects of living aboard and cruising and stories about chartering both domestically and in foreign waters.  Cruising World is available in a Kindle edition as well, including iPad, iPod, iPhone and Android platforms.

Latitude 38
The west coast’s most popular sailing magazine is known for its lively letters to the editor and for keeping tabs on west coast cruisers all over the world.  The tone is fun, a bit sassy and sometimes irreverent, but the information is invaluable for cruisers, especially those heading to Mexico.

Sail Magazine
A widely read magazine that covers all aspects of sailing from tips and tricks for beginners to hot charter destinations to technical discussions of boat systems to world cruising explorations by sailboat.  From old salt to beginning sailor, there is something in this magazine for everyone.

Sailing Magazine
This is an over-sized and beautiful glossy magazine that prides itself on fine writing and dramatic photography.  Founded in 1966, I remember issues of this magazine lying on our coffee table when I was a child, fueling my father’s dreams of a circumnavigation (which, sadly, never came to pass).

Marina Chiapas – Waypoints, Cruising Guide & Inland Travel

Marina Chiapas is a new and attractive marina located next to the tiny seaside town of Puerto Madero and the new cruise ship terminal at Puerto Chiapas.  They are all situated around the same estuary about 18 miles (30 min.) from the city of Tapachula (pop 500,000).

This is a very handy marina for cruisers in many ways.  It is an excellent beginning or end point for crossing the Gulf of Tehuantepec.  It is also 10 minutes from Tapachula’s modern international airport.  Supermarket provisioning is a short cab ride away, and the big city of Tapachula has luxury bus service that will take you anywhere in Mexico or Central America.

The concrete docks are in good condition, there is no surge whatsoever, it is below the hurricane belt, and the huge lightning rods on the nearby coffee factory likely protect the boats from lightning strikes during the rainy season (summer).  However, there is little tidal exchange of water in and out of the marina, so when cruising boats discharge their toilets or holding tanks overboard, the water can get pretty scummy.

Because this port sits next to Mexico’s border with Guatemala, it is a very tightly controlled port.  When arriving in the estuary you must hail the Port Captain to let him know you are coming in.  If you are staying at the marina and wish to go out for a daysail, you must hail the Port Captain both on the way out and again on the way in.  If you don’t hail him, he will likely hail you, calling, “Velero velero” (“sailboat sailboat”).

To see what the marina looks like, we have blog posts about our spring visit and our return fall visit, both in 2012.

Marina Chiapas Waypoints Chart for Puerto Chiapas and Puerto Madero Mexico

Chartplotter image of the entrance to Marina Chiapa

WAYPOINTS

We have now been in and out of the marina a bunch of times, so I have noted some waypoints that may be of use to other cruisers.  These are from our Raymarine E80 chartplotter and are just offered as a guideline — we are not legally liable for their accuracy or inaccuracy.

I originally posted a set of four waypoints on this website when we first arrived at Marina Chiapas, and those have circulated among cruisers and turned up in the marina’s brochure literature (minus one waypoint that must have been overlooked).  However, there was a dredge blocking the marina channel at the time, so one waypoint was closer to shore than is necessary any more.

The five waypoints given here are more accurate and follow the contours of the channel better.  I don’t recommend entering anywhere new at night, but if you arrive in the dark and feel you just can’t wait outside the marina until dawn, I believe these waypoints will get you into the marina just fine.  As of June, 2013, there were still no buoys to mark the channel.  Those are likely in place by now, but just in case they aren’t yet, I hope these waypoints will help you out.

The marina was built by digging an enormous ditch and then allowing it to fill with water.  That is why the Marina waypoint is sitting on land in the image.  The dredged channel to the marina is fairly narrow.  There is plenty of depth, but stick to the middle of the channel.  The bottom is soft mud if you do happen to touch.

CHS01
CHS02
CHS03
CHS04
CHS05

Entrance to Puerto Chiapas
First turn (RIGHT) towards Marina
Second turn (RIGHT) towards Marina
Third turn (RIGHT) towards Marina
Fourth turn (LEFT) into Marina Chiapas

Marina Slips

14° 41.819 N,  92° 24.685 W
14° 42.173 N,  92° 24.327 W
14° 42.240 N,  92° 24.170 W
14° 42.195 N,  92° 23.781 W
14° 41.990 N,  92° 23.665 W

14° 41.930 N,  92° 23.525 W


  • The initial entrance to the channel is straight forward and the red and green buoys are easily visible.
  • As you go down the channel you will see two large “Aztec” looking thatch roofed palapas.  These palapas are used by the cruise ships at the cruise ship dock.  You turn right before passing these palapas.
  • Next you will see lots of large shrimpers on your left.  After passing most of the shrimpers you turn right into the marina channel.
  • You will not see the marina ahead of you when you take that right turn.  Simply stay in the middle of the channel and keep moving towards the final waypoint where you make a slight left turn following the contour of the channel.
  • The slips are oriented east and west and are set up with two boats to a slip.

CHECKING IN

After tying up at the dock your boat will be visited by the Port Captain and the Navy and their drug sniffing dog.  If you arrive in the middle of the night they will probably not visit your boat until morning, but it might be right at dawn.  The visit takes only 10 minutes or so, and in some cases the pooch wears booties to avoid scuffing up your boat!

GETTING AROUND

The cheapest way to get around is by “combi” van or by a shared taxi (the shared taxis are orange).  The cost to get to the city of Tapachula is 13 pesos per person (½ hour ride) in either the “combi” or orange taxi.  The cost to get to the small nearby village of Puerto Madero is 10 pesos in a shared taxi.  If you are in a hurry or have lots of bags, you can take an orange taxi to or from Puerto Madero by yourself (or with spouse/group) for 40 pesos.

To catch the “combis” and shared orange taxis, stand on the far side of the road right outside the marina’s entrance gate.

There is a Walmart and an air conditioned mall with a big cinema about halfway to Tapachula.  The “combi” or shared taxi is 13 pesos to go there.  The return trip is more complicated.  You can take a taxi directly to the marina for 150 pesos.  The taxis that go direct are the white and yellow radio-dispatched taxis.

Tell the driver you want to go to the “Marina Turistica” at the “Zona Naval.”  We found that simply saying “Marina Chiapas” was not specific enough because the marina was new and the locals referred to it as the Marina Turistica.

Unlike the radio-dispatched white and yellow taxis, the orange taxis are on a route like a bus system, so if you take an orange taxi from Walmart back towards the marina you will likely need to change taxis at a triangular intersection where a line of taxis waits.  Then the trip becomes 13 pesos per person per leg (52 pesos total for two legs for a couple).

You can also catch a “combi” van back to the marina from Walmart.  Stand on the opposite side of the road from Walmart and look for one labeled “Playa Linda” or “Zona Naval.”  They are not that frequent.

If you are going to the big “luxury” bus station in Tapachula to take a bus to Guatemala or San Cristóbal de las Casas, tell the driver you are going to “ADO” (the name of the bus line).  When you return from your trip, take a local cab from the ADO bus station to the “combi” station (a large terminal for “combi” vans going all over the place).  Find the van marked “Zona Naval.”

Marina managers Enrique and Guillermo also sometimes offer rides to cruisers when they return home for their lunch break (2:00 to 4:00 pm) or when they go into Tapachula for errands.  They will drop you off at Walmart, just make sure you are ready to be picked up on time when they are headed back to the marina.

PROVISIONING

There is a small market in Puerto Madero that sells canned and boxed goods and a limited selection of fresh food.  For a larger provisioning run, go to Walmart or continue another 2-3 miles towards Tapachula to Chedraui (which is also located in a large shopping mall area).  We found Walmart had a slightly better selection.

If this is your last stop before leaving Mexico, stock up!  From what we understand, it is much more complicated to provision in Bahía del Sol, El Salvador, than it is at Marina Chiapas.  If you are reading this before arriving in Marina Chiapas, do your biggest provisioning run at Chedraui in Huatulco where the cab ride is cheap and short.

LAUNDRY

When we were at Marina Chiapas there were no laundry facilities.  You can take your laundry to Puerto Madero (we saw a cruiser do this but did not find out exactly where the service was located) or to Tapachula.  You can also have your laundry picked up by marina worker Ronnie to be washed by his wife.  She has a washing machine but no dryer, so if the dust is flying when your clothes are on the line, they will come back dusty.

SHOWERS

The bathrooms and shower facilities are very nice.  The three shower stalls in each bathroom are spacious and have wonderfully gushing hot water.  There were no hooks on the walls for hanging clothes or shower bags when we were there, but there was a large bench.

WIFI

The wifi is improving.  In the fall of 2012 it was possible to get wifi from the boat but it was not always working.  You can take your laptop up to the air conditioned office and work there where the signal is often stronger.  TelCel Banda Ancha USB modems work fine.

FUEL DOCK

The fuel dock is located in a corner of the estuary just east of waypoint CHS-04.  There is deep water right up to the shoreline, so there is room to turn your boat in front of the dock.  No need to wait for high tide.  There are grubby black rubber tires lining the dock, so get your fenders out to avoid marking up your boat.  We ended up helping other boats get fuel and then we received help when it was out turn.  Marina manager Guillermo may also take you and your jerry jugs in the back of his pickup over to the fuel dock.

THINGS TO DO – PLACES TO GO

Marina Chiapas Puerto Madero Pedicabs

Puerto Madero Pedicab

Playa Linda – Leaving the marina entrance gate on foot, go right and then at the intersection about ½ mile away turn left.  This takes you to a small tree-lined street of homes and a handful of small shop stands.  There are several narrow paths between the homes on the right that take you down to the beach.  The beach is blustery and blowy.  We enjoyed running this route every morning from the marina.

Puerto Madero – Catch an orange shared taxi into Puerto Madero.  This is a fun and funky little seaside tourist town that has always been enjoyed exclusively by Mexicans.  We were the only gringos in town every time we went.  We were such a curiosity that a little girl took Mark’s picture when she thought he wasn’t looking.  The streets are filled with pedal cabs.  Hop in one and ask for a ride around town.  It is a hoot.  Some are driven by pedals on half-bicycles and others by a small half-motorbike.

You can also walk to Puerto Madero by walking around the marina’s docks to the far side (north side) and following the dirt road.  It will deliver you to a paved road not far from the fuel dock.  Take a left on the paved road and keep walking until you come into town.  This is a fairly long walk.

Guadelupe Cathedral San Cristobal

Guadelupe Cathedral in San Cristobal

Tapachula – Tapachula is a big city but we never took the time to explore it in depth.  There is a large, colorful central market along the “combi” route into town that looks like it could be a fun place to spend a few hours.

Chiapas & San Cristóbal de las Casas – The state of Chiapas is considered by many to be Mexico’s most beautiful.  San Cristóbal de las Casas is a wonderful colonial city full of pretty architecture.  Catch the ADO luxury bus from Tapachula to Tuxtla Gutierrez (5-7 hours) and then from there to San Cristóbal (2-4 hours).  This route uses big highways and the bus can drive at highway speeds.  As an alternative, you can take a long and interesting bus trip through the mountains instead.  If you wish to do this, catch the bus from Tapachula directly to San Cristóbal.  This route is a grueling 10 hour ride that averages less than 30 mph because of the many speedbumps, but it is dramatic and scenic and goes through endless small towns.  Once in San Cristóbal you’ll see oodles of vendors selling tours to Palenque from San Cristóbal.  In our opinion they cram way too much into too short a time, and the distances are significant.  If you have time, a better option is to go to Palenque on your own on an ADO bus and then see the sights of that area using Palenque as your base rather than San Cristóbal.  Here are pics and stories from our experiences on our scenic bus adventure through Chiapas and in San Cristóbal de las Casas.

Palenque Mayan Ruins

Mayan ruins at Palenque – breathtaking!

Palenque – Some of Mexico’s finest Mayan ruins are in the neighborhood of Palenque, which is a 5 hour bus ride via ADO bus lines from San Cristóbal.  The town of Palenque is charming and vibrant.  The ruins are a 10 minute “combi” ride from town.  For more Mayan ruins, take an organized day tour from Palenque to Yaxchilán and Bonampak.  Yaxchilán was an ancient city located on the river that separates Guatemala and Mexico, and getting there involves an hour-long boat ride upriver in an open launch.  We felt like we had walked into the pages of National Geographic.  Bonampak features some incredible, colorful frescoes on the inside walls of a few of the ruined buildings.  These are astonishing sights to behold.  If you have the time, do it.  Another side trip you can do from Palenque is to visit the waterfalls of Misol-Ha and Agua Azul (most easily done with an organized tour van from Palenque — many vendors sell these tours on the streets of Palenque).  Here are our pics and stories from our trip to Palenque, our tour of Misol-Ha and Agua Azul and our tour of Yaxhilán and Bonampak.  This was among the most exotic and exciting travel we experienced in three years of cruising Mexico.

Agua Azul Waterfalls

Agua Azul – the cascades of water go on forever

Boat ride to Yaxchilan

The ruins at Yaxhilán include a cool riverboat ride along the Guatemala border.

Mayan wall frescos at Bonampak

Vivid Mayan wall frescoes at Bonampak

Mayan glyph carvings at Yaxchilan

Mayan glyph carvings at Yaxchilán


Lakes and Canyons – From San Cristóbal you can also visit Lagos Montebellos and Sumidero Canyon, two trips full of natural beauty that sound utterly delightful but that we did not have time to do.  Sumidero Canyon can be viewed from an open launch boat on a 2-3 hour tour.

Guatemala – Guatemala City is a 9 hour bus ride (on TICA bus which leaves from the ADO terminal in Tapachula).  From there catch a cab to Antigua (our cab fare was $45 for this 45 minute trip).  Many people love the colonial city of Antigua and many also visit Lake Atitlán which is said to be very beautiful.  For us Antigua was a disappointment, but everyone has different travel experiences.

Spanish Immersion School – We attended a one-week Spanish immersion school in San Cristóbal de las Casas: Instituto Jovel.  It was very professionally run, and it cost $100 per person for five days of tutorial instruction 3 hours a day.  A tiny bit of material may provided on xeroxed pages, but most is given on the white board while you take notes.  Bring a notebook and pen and/or use a camera to capture everything before your instructor erases it!!  Three hours a day was about all we could absorb — more than that and our brains would have been mush.  We also asked for homework, which is optional.  There is a Spanish school on every street corner in Antigua, Guatemala with similar prices.  You can also arrange to live with a local family while attending school in either location.  The living conditions will be spartan but you will be speaking Spanish all the time.  Our pics and stories of our Spanish Immersion experience are part of our page on San Cristóbal.

Coffee Plantation ToursFinca Hamburgo is a coffee plantation high in the mountains north of Tapachula where you can cool off after sweltering in the marina for a while.  We did not do go there but got lots of info about it.  They have pretty cabins, hiking trails and tours of the plantation and processing plant, tours of the exotic flower gardens and bird watching tours (extra fees of ~$100 pesos per person for each 2-3 hour tour).  The restaurant is said to prepare awesome meals.  We were offered a 3-day stay including shuttle pickup at the Tapachula bus station for $2800 pesos in spring of 2012.  In the fall of 2012 we were offered a 3-day stay including shuttle pickup at Marina Chiapas for $3400 pesos.  Finca Argovia is another very popular coffee plantation a little closer to Marina Chiapas and slightly lower in the mountains.  They also have rooms but do not offer shuttle service to and from the marina.

Macaw Tours Tapachula

Awesome personalized tours!!

Macaw Tours Tapachula – Arturo of Macaw Tours Tapachula arranges wonderful, informative and personalized tours of everything in the area.  He will take you to Palenque, into Guatemala, or to the coffee plantations and you won’t have to arrange anything other than the pickup and delivery time at the marina.  He is a charming man and everyone who takes his tours raves about what fun they are.  If you want to simply enjoy the ride and don’t feel like dealing with the hassle of buses and hotel reservations and figuring out where and what to eat, go see the sights with Arturo.  He’s the best.  He gets the finest guides, arranges yummy and authentic food, and handles all the hard stuff for you. Cruisers often team up in groups of up to 8 or 10 to take a tour with him.

YACHT SERVICES

Marina Chiapas (Puerto Chiapas) is a new tourist port that until two years ago was strictly a shrimping port.  The smelly fish processing discharge has been cleaned up, a fancy new cruise ship dock has been erected, and this marina will one day be a true delight to visit.

At the moment, however, the port is still in a growth phase.  There are virtually no yacht services.  This marina has close ties with Huatulco, and they have tried to persuade marine service experts to make the 260 mile 9 hour bus ride to Marina Chiapas to service the cruising boats there.  However, some people have waited months and never seen the service experts come.  If you have major problems with your boat, you will find better services in Huatulco.

SUMMER RATES

In many ways Marina Chiapas is an ideal place to leave your boat for the summer.  We left Groovy for 7 months and found her in fine shape when we returned.  We asked local sport fishing captain Andres Reyes Prudente to oversee the cleaning and airing out of our boat and he did a great job.

During the marina’s first few summers (2012-2014), the marina offered a phenomenal introductory rate of $200 per month for the hurricane season (May-Nov).  I’m not sure if such a competitive rate will be offered again, but if it were, surely every boat within several hundred miles that needed a home for the hurricane season would stay there.

ANCHORING IN THE ESTUARY

You can anchor in the estuary off the beach on the west side (opposite the cruise ship terminal), rather than staying in the marina.  The fee is 80 pesos per day, payable to API upon departure (this “port fee” is built into the slip rates at the marina).

LEAVING MARINA CHIAPAS

Leaving Marina Chiapas is a chore, whether going north to Huatulco or south to El Salvador or beyond.  Boats headed north must get exit paperwork for leaving Puerto Chiapas, even though they are staying in Mexican waters.  You must visit the Port Captain’s office on the other side of town to get your exit paperwork ($76 peso fee for the documentation in fall of 2012).  Marina manager Guillermo may drive you there.  He will also check your documents and work up some preliminary paperwork before taking you there.  Allow 2-3 hours for this process.  There are two dates on the exit paperwork: the date the document is signed and your planned date of departure.  You have 48 hours to leave Puerto Chiapas from your planned date of departure listed on the document.  Otherwise you need to repeat the process and get new exit paperwork.

Misol-Ha Waterfall

Misol-Ha waterfall – you can creep in behind it!

For boats headed out of Mexico there is not just the visit to the Port Captain’s office but also a visit to Immigration.  Again, Guillermo may drive you there.  Allow 3-5 hours for the whole Port Captain / Immigration process, and more if there are several boats going through this process at once.  You have 48 hours from the departure date listed on your exit Zarpe to leave Puerto Chiapas.

Two hours prior to actual departure, both the Navy and Port Captain must visit your boat in person to do the final drug sniff with the dog and to fill out some final papers.  You can hail the Port Captain on VHF 16 to initiate this visit, or the marina managers may do it for you.  You need a copy of your Coast Guard documentation and passports for this visit.  Once the visit is completed you must leave within 2 hours.  If you are making a midnight or 3 a.m. departure, they will come at night and the same rules still apply for timing your departure.

The officials have been known to be as much as 3 hours late in making their visit to departing boats.  Most boats leaving Marina Chiapas are on a tight schedule due to either the blows in the Gulf of Tehuantepec or the timing of high tide at the entrance to Bahía del Sol in El Salvador (you can enter only during the daytime high tide each day).  Puerto Chiapas has never had many cruising boats visiting in the past, so all the paperwork processing for cruisers is relatively new to everyone involved.  Hopefully in the future the system will become easier, especially the timing of final inspections prior to departures.

Here’s our crazy story of our departure from Marina Chiapas…!!

The following is a summary of what we saw on our 3-week inland trip from Marina Chiapas:

To see more goodies about Mexico on this website, click here:

More Tips for Cruising Mexico

Sailboat Solar – Installing Solar Power & a Solar Panel Arch on a Boat

This page describes our solar panel installation on our sailboat, a Hunter 44DS.  This setup has allowed us to anchor out almost exclusively.

Groovy's solar panels.

Boat solar panel arch installation

Happy panels in full sun, Sea of Cortez.

Marine solar mount installation

Full sun & no shade (3 panels working):   22.5 amps

Boat solar mount

One panel partially shaded (2 panels working):  15 amps.

Boat Solar panel partial shade problems

Shade straddles two panels (only 1 panel working):  9.5 amps.

Boat solar arch for panels

Polished welds and drilled/tapped/screwed joints.

sv Groovy's solar panel arch welds. sv Groovy - sailboat solar panel arch.

Liquid Metal

boat solar power mount on a sailboat

Comparison: Factory weld on our Hunter arch.

Sailboat solar panel arch

The arch extension arrives for a fitting.

marine solar panel mount extension.

Alejandro tie-wraps it in place.

Sailboat solar panel installation

Mark helps hold it up.

Boat solar power Marine solar installation

The extension is in place -- without its legs yet.

Boat solar mount installed on a sailboat

Jose checks if it's level.

Sailboat solar arch extension

The arch extension returns -- now with support legs.

Marine solar panel arch support

It's maneuvered into place.

Boat Solar arch on a sailboat Telescoping davits on a solar panel arch

Telescoping davit arm (marine solar panel arch)

Boat solar installation with solar panel arch.

Held in place with tie-downs.

Boat solar power arch installation

Looking good!

Marine solar power

Alejandro drills and taps holes in the arch.

The boat's solar panels are ready!

The solar panels are ready!

Boat's solar panel arch extension removed while Alejandro taps and drills.

Arch extension removed from Groovy while Alejandro drills

and taps the arch on the boat.

Installing solar panels on a sailboat

Heave ho!!

Installation of marine solar power system Marine solar power system installation

The second panel is installed.

Boat solar installation with solar arch

Three panels - yay!

Sailboat Solar power setup

Alejandro and Mark test the strength of the arch extension.

Boat solar powert

Mark begins the big job of wiring it all up.

Marine solar power system diagram

Component layout:  3 panels, combiner

box, controller & 4 batteries

Sailboat solar power design

Combiner box (upper left) and controller (lower right).

Boat solar power design and installation

Wiring the panels.

Sailboat solar panel system design and installation

All done.

Solar panels on our Hunter 44DS Groovy.

In use 18 months later in Puerto Vallarta.

Marine solar power system and design

Sailing in Huatulco.

Sailboat Solar Power & Solar Panel Arch Installation

This page describes the solar power setup we installed on Groovy, our Hunter 44DS

sailboat.  This was our third solar installation.  Our two RV solar installations are described

here: RV Solar Installations, and we have a boatload of info here: Mobile Solar Power

.

We learned a lot from those installations, and have written lots of details about solar power on

this website, including a multi-part Solar Power Installation Tutorial for beginners. Going

into far more detail, we have a 4-part primer on battery charging which includes:

-- The basics of multi-stage charging

-- How converters, inverter/chargers and engine alternators REALLY work

-- How to optimize a solar charge controller

-- What happens when TWO systems (like solar/alternator) operate at once?.

The company Kyocera

Solar liked our solar

panel installation so

much, they featured

Groovy on their website.

OVERVIEW

For comparison, our solar power installations have consisted of

the following:

Lynx Travel Trailer

(1) 130 watt/12 volt Kyocera solar panel

(1) Morningstar 10 amp charge controller

Various 150 watt to 800 watt portable and

semi-portable modified sine wave inverters

(2) Energizer 6 volt batteries in series (220 amp-hours).

Hitchhiker Fifth Wheel

(1) 130 watt/12 volt Kyocera and (3) 120 watt/12 volt Misubishi solar panels (490 watts total), wired in series

(1) Outback 60 amp MPPT charge controller

(1) 2,000 watt pure sine wave inverter permanently mounted

(4) Trojan 105 6 volt batteries wired in series and in parallel (440 amp hours).

Hunter 44DS sailboat

(3) 185 watt/24 volt Kyocera solar panels (555 watts total), wired in parallel

(1) Combiner box (combines 3 panel wires into 1 going to the charge controller)

(1) Xantrex 60 amp MPPT charge controller

(1) 600 watt pure sine wave inverter

(1) Xantrex 2500 watt modified sine wave inverter/charger

(4) Mastervolt AGM 4D batteries, (1) Group 27 AGM battery (710 amp-hours)

Notes:  (1) Our odd collection of panels on the Hitchhiker was due to the Kyocera 130 panels not being available at the time of

our installation (we brought one over from the Lynx).  (2) Our switch from the Outback to the Xantrex charge controllers between

the Hitchhiker and the boat was due to the Xantrex being cooled by non-moving fins rather than a fan.  In hindsight I would

probably use the Outback charge controller in the future only because it displays more information on its screen rather than

having to scroll through multiple screens to get the voltage, amperage, watts and charging stage.  (3) Our Group 27 start battery

on the boat is isolated from the set of 4D house batteries only when the voltage of the bank drops too low.

The boat has a DC refrigerator and a DC freezer which together eat up some 100-130 amps or more every 24 hours, depending

on ambient temperature.  In addition we listen to music on the stereo with multiple speakers and a large subwoofer, we watch

DVD's many nights on a 22" TV, we use two laptops for several hours everyday.  We also have a water pump, electric flush

heads and VHF radio which we use at anchor.  Our cabin lighting is a combination of fluorescent and LED, and our anchor light is

LED.  So our typical daily amperage use at anchor is between 180 and 250 amps.

In December, around the winter solstice, on the southern mainland of Mexico (Zihuatanejo) our solar setup collected about 170

amp-hours per day.  In June, around the summer solstice, in the middle of the Sea of Cortez (San Carlos) our solar setup

collected about 250 amp-hours per day.  In hindsight, it would be nice to have at least 750 watts of solar power to meet our

power demands in winter.

PARTIAL SHADE KILLS SOLAR POWER PRODUCTION

The biggest problem with installing solar power on a sailboat is accidentally getting a little shade on the panels.  While swinging at

anchor, the mast, boom, radome and other things high up all conspire to throw pockets of shade on the solar panels and make

them quit working.  It is quite shocking to find out just how little shade is needed to reduce the panels to zero output.  We had

experimented a bit with partial shading issues on our fifth wheel solar installation (see bottom of Solar Setup), but we never park

near shading objects so it is not a problem on that moveable home.  A sailboat is a whole different story.

An interesting paper Shade Effects on Conventional PV (5th article down) from the Physics Department at the University of

Arizona describes how shading just half of one row of "squares" on a solar panel -- as often happens in the morning or afternoon

hours on a commercial installation if the rows of panels are placed too close together -- the panels shut down or reduce their

output significantly.  The opening sentence says it all:  A panel that is 8% shaded loses 94% of its productivity."  Deep down in the

meat of this paper the math lost me (sigh), but for a layman's explanation of just how devastating shade can be on solar panels,

this website delivers the skinny.

We placed our panels as high and as far back from the boom as we could.  We also pull the boom aside while at anchor, but the

panels still get shaded by the mast/forestay/radome when the sun is forward of the shrouds and they get shaded by the sails

when sailing.  As an experiment, we took some notes about how partial shade affects our panels.  This data was taken on

February 3rd at 10:00 a.m.  The shade was caused by the mast, forestay and radome (affixed to the front of the mast).  The

shade moved slowly back and forth across the panels as the boat swung at anchor.

Panels in full sun:

22.5 amps

One panel partly shaded:

15.5 amps

Two panels slightly shaded:

9.5 amps

As another experiment we sailed and noted the amperage

produced by the solar panels as we sailed on two different

tacks.  On one tack the mainsail shaded one entire end panel

and half of the middle panel.  On the other tack the boat was

heeled away from the sun but there was no shade on any of

the panels.  It was far better to be heeling away from the sun

than to have the panels shaded.  This data was taken at 11

a.m. on January 31.

1½ panels fully shaded by sails:

10 amps

No shade, tilted away from sun:

24.5 amps

So it seems to me that shade is the number one enemy of solar panel power production on a sailboat, and orientation towards

the sun is a lot less important.  If the solar panels are installed in such a way that a nearby radome or wind generator is always

partly shading one panel in the array, as too often happens in solar panel installations on sailboats, the result will be dramatically

reduced power production.

THE ARCH EXTENSION

Our boat came with a fantastic arch that supports the traveler.  We used it as a base for an elegant stainless steel extension that

supports the three panels.  We hired Allejandro Ulloa of Ensenada, Mexico to create this arch extensions.  Alejandro is an artist

and a master craftsman.  And he is extremely professional.  We gave him a sketch of what we were looking for, he responded

with a written quote for half of what it would have cost in San Diego, and we were off and running.

Alejandro prides himself on the beauty of his work.  He polishes the welds and installs tubing that

seems to flow like liquid metal as it rounds corners and changes thicknesses.  In our opinion, his

arch extension dramatically increased the esthetics of our boat.  It also added functionality

besides just supporting the panels.  It makes a great spot for hanging on when you're sitting in

the rear jump seats, it has a

telescoping davit system,

and the panels provide

much needed shade.

If you need to have an arch

or any kind of stainless steel

structure fabricated for your

boat and you are heading to

Mexico from the US or

Canada, spend some time in

Ensenada and look up

Allejandro Ulloa (email:

alejandrossw [at] hotmail [dot] com,

Mexican phone: (646) 171-5207).  He can

be contacted through the excellent Baja

Naval boatyard as well.  There are other

stainless steel fabricators in Mexico but we

haven't seen anyone nearly as skilled or

as professional in their approach.

Alejandro built the extension in his workshop and then brought it

to the boat to size its supporting legs.  This was a thrilling process

for us, as we began to see it taking shape on the boat.  The entire

arch extension was wrapped in plastic for this phase to protect

the finish.

Mark helped wherever he could and I took endless photos.

Alejandro returned on another day with the finished arch extension.

Now it had tabs for the solar panels, and the supporting legs had

been cut and welded at the right length.

We wanted the arch extension to double as a davit system.

Alejandro designed clever telescoping tubes that snap into place in

an extended or contracted position, and he fabricated two beautiful

cleats.  We have found that we use the davits in the contracted

position most often because they hold the porta-bote tight to the

swim platform where it fits perfectly into the swim step cutout in the

transom.

We anticipated

mounting the solar

panels ourselves,

as the quote

Alejandro provided

was for building

and installing an

arch extension,

not for installing

panels.  We

weren't sure how

we'd get them mounted, but we knew

we'd figure it out.

Meticulously adhering to the

"measure twice cut once"

philosophy, Alejandro

dismantled the whole thing

for some adjustments and

then mounted it one last

time for the final installation,

tapping and drilling and

screwing each of the arch's

feet into place in a bed of

3M-4200.

Then, to our amazement,

Alejandro and his assistant

began mounting each of

the panels.  Mark quickly

jumped in.  These are not

light panels, and it was

quite a stretch to get them

in position.  Alejandro was

concerned about possible

corrosion due to the

dissimilar metals of the

panels' aluminum frames

and the stainless steel arch

extension, so he placed a

plastic insulator in each

attachment point.

When it was all

finished, Alejandro

wanted us to be

confident that the arch

could support a dinghy

and engine.  He and

Mark swung from the

davits.  Both are

lightweights, but they

were still twice the

weight of our

dinghy and

outboard.

WIRING

Alejandro's work was done, but we still had a big project ahead.  We ran the wiring

inside the arch so it wouldn't show (it wasn't easy snaking it through!!), and we placed

the combiner box and charge controller in a transom locker.

The installation

looked beautiful

and it worked, but it did not work as efficiently as it

could have.  The whole system produced about

20% less power each day than it was capable of

doing.  We learned we'd made two vital mistakes.

One advantage of using 24 volt solar panels is that

we had half as much current in the wires as we

would have had if we'd used 12 volt panels.  Rather

than 36 amps (at 12 volts) at peak production we

had just 18 amps  (at 24 volts).  This allowed for a

smaller wire size, which is much easier to work with

as it is a lot more pliable, and it's cheaper to boot

(marine grade electrical wire is exorbitant).  Our

salesman at Northern Arizona Wind and Sun had recommended we use 10

gauge wire throughout the system.  This turned out to be inadequate

because the distance between the panels and the batteries is so long --

about 50'.  For wire gauge sizes, amps and

distances, see this chart.

Our second mistake was placing the charge

controller in an aft transom locker.  Our batteries

are next to the centerline of the boat at the lowest

point above the keel in the main salon.  The

charge controller needs to be close to the batteries

as possible.  The distance from the charge

controller in the transom locker to the batteries

was about 30' -- too far.    The combiner box was

fine back there, but the charge controller had to be

moved.

Although most of our circuit runs at 24 volts -- from

the panels to the combiner box to the charge

controller -- allowing for smaller wire, the portion

between the charge controller and the

batteries runs at 12 volts.  Therefore, the

cable between the charge

controller and the batteries

needs to be not only as short as

possible but very large as well.

We moved the charge controller

into the cabin in a hanging

locker about 10' from the

batteries and and switched to 8

guage wire to connect it, and we

saw a dramatic improvement.

When the distance between the

charge controller and the

batteries was 30' and we were

using just 10 gauge wire, the

resulting resistance in the wire created a large

voltage drop between the charge controller and the

batteries, artificially raising the voltage at which it

thought the batteries were operating.  The charge

controller would see the batteries at 14.4 volts whereas when we measured the batteries with a volt meter

they were actually at 13.2 volts.  This threw everything in the system way off, and ultimately resulted in a

daily loss of some 10-30 amp-hours that never made it from the panels to the batteries.  Once we moved the

charge controller to within 10' of the batteries and installed bigger wire, the resistance dropped.  The

controller saw the batteries within 0.2 volts of their actual voltage, and our daily power production increased.

Note: In three years of cruising Mexico, our boat was plugged into shore power for a total of 6 weeks

while it was in in-water storage in San Carlos. It was never plugged in while we lived aboard (even during

the 3 months we stayed at Paradise Village Marina in Puerto Vallarta).


Subscribe
Never miss a post — it’s free!

In addition to living off the grid on solar power on our sailboat, we have also lived on solar power in our RV since 2007. As of February, 2016, we have now installed solar power on two trailers and a motorhome as well as our sailboat, as described here. We have a huge library of solar power and battery charging articles on this website that draw on all of our experience:

SOLAR POWER OVERVIEW and TUTORIAL

BATTERIES and BATTERY CHARGING SYSTEMS

LIVING ON 12 VOLTS

The solar power setup aboard Groovy has inspired stories and articles all over the internet.  Here are a few of the websites and online magazines that have featured stories about Groovy and our marine solar power installation:

Where do you buy solar panels, charge controllers, inverters and such? Surprisingly, Amazon offers solar power kits and more. Click the following links for a wider selection of:

If you click through to Amazon from anywhere on this website, anything you put in your shopping cart or wish list immediately after that results in a small commission to us at no cost to you, no matter what you search for and no matter when you finalize the purchase. This is a wonderful way that you can "help us help you" with detailed and carefully researched articles. Thank you!


New to this site?  We have more info on Solar Power and tons of other great stuff for cruisers. Please check out our Home page and our Intro Page for Cruisers to learn more about us and discover what’s where on our site.

Our most recent posts:

More of our Latest Posts are in the top MENU above.

2007 Fleetwood Prowler Lynx 27′ Travel Trailer

We lived fulltime in our Fleetwood Prowler Lynx 270 FQS travel trailer, a good RV for fulltiming! The 27' Fleetwood Prowler Lynx 270FQS is a great RV for the fulltime RV lifestyle, even though it's a travel trailer A 27' travel trailer, the Fleetwood Prowler Lynx 270 FQS, has enough space for a part-time RV lifestyle but not enough for fulltiming

This layout is great for two people but is limited for

entertaining.

The Fleetwood Prowler Lynx 270FQS has an open floorplan that we liked for our fulltime RV lifestyle The 27' Fleetwood Prowler Lynx 270FQS travel trailer RV has an open floorplan -- good for fulltime RVers like us

The sofa and dinette are in a big slide

We opened the jackknife sofa all the time in our 27' Fleetwood Prowler Lynx 270FQS when we were living in that RV fulltime

The "jackknife" sofa easily folds out into a double bed. 

The dinette also folds down into a child-size bed.

We used the TV a lot in our Fleetwood Prowler Lynx 270 FQS travel trailer when we lived in that RV fulltime

The TV can be turned to face the bed or the sofa.  There

is a cigarette lighter on the wall that we used for our

inverter so we could watch TV and DVDs while

drycamping.

The kitchen in our 27' Fleetwood Prowler Lynx 270FQS travel trailer was a little small for our fulltime RV lifestyle

This little kitchen produced many great meals.

The 27' Fleetwood Prowler Lynx 270FQS is a smart floorplan that worked well for our fulltime RV lifestyle

Lynx Floorplan

solar panel installation (Kyocera 130 watt) on our 27' Fleetwood Prowler Lynx 270FQS travel trailer, our fulltime RV

Mark installs the solar panel on the roof of the trailer.

This gives us all the electricity we need without having

to hook up.

Solar panel installation (130 watt Kyocera) on our 27' Fleetwood Prowler Lynx 270FQS travel trailer, the RV we lived in fulltime

Getting psyched to start drilling holes in the roof.  Mark

was naturally quite worried about this part of the

installation.

solar panel installation (Kyocera 130 watt) on our 27' travel trailer, a Fleetwood Prowler Lynx 270FQS, our fulltime RV

Westport-Union State Park Campground in California

about 150 miles north of San Francisco was a nice

place to do this installation.

Kyocera 130 watt solar panel on the roof of our RV, a 27' Fleetwood Prowler Lynx 270FQS travel trailer, our fulltime RV home

Finished product, situated between a roof hatch and the

folded down TV antenna.

2007 Fleetwood Prowler Lynx 270FQS

We purchased our Fleetwood Lynx travel trailer as a fulltime RV,

and we lived in it from May, 2007 to May, 2008.  We bought it with

the idea of "Go cheap, go small, go now."  We wanted to use our

existing truck ('04 Toyota Tundra), and this trailer was the largest

size that our truck could handle (theoretically).  We wanted a travel

trailer so we could have a cap on the truck and keep our bikes out

of the elements.  What appealed to us about the Lynx was its very

spacious interior for its length.  It had an open and airy feeling

inside, and had a lot of storage space.  It was the ideal introduction

to larger sized RVs.

The 2007 Fleetwood Prowler Lynx 270FQS is a 29'

travel trailer from end to end, including the hitch, and

is 27' x 8' inside with a 3' x 14' slideout, providing 240

square feet of living space.  It weighs 5,500 lbs dry

and has a GVWR of 7,300 lbs.  It was billed as "half-

ton towable" but we had trouble towing it through the

mountains with our 2004 4.7 liter Toyota Tundra.  We

towed it for about 4,000 miles with that truck and

then replaced the truck with a Dodge Ram 3500

diesel.  The trailer holds 40 gallons of fresh water, 40

gallons of grey and 40 gallons of black.  It has a

15,000 BTU air conditioner and 35,000 BTU furnace.

There is a single slide that is 3' x 14' which contains the dinette and

sofa.  The queen bed on this model was a short queen (74.5" x 60"),

but Mark modified it to be a full quuen (80"x60").  The bed lifts up to

a huge storage area underneath that can be accessed by hatch

doors on both sides of the trailer.  It has a 6 cubic foot refrigerator,

kitchen sink, range, microwave and pantry.  The bathroom has a

shower, toilet and sink.

We used an Equalizer hitch with a 12,000 lb rating.  The hitch broke

twice.  Fortunately we were not hurt either time.  The first time the

welds cracked all around the hitch head.  The second time one of the

two bolts holding the hitch together sheered off when we came down

a driveway leaving a bank parking lot.  Equalizer was very good and

replaced the hitch head when the welds broke.  We replaced the hitch

bolts with #8 rather than #5 bolts (only a few bucks) just a few miles

from where we noticed the one had sheered off.  We got 9-10 mpg

while towing with the Tundra and 11-12 mpg while towing with the Dodge.

This trailer was an ideal starter for fulltime RVing.  In it we learned about

solar power, inverters and boondocking, and it taught us about the things

that were vital and the things that were unimportant in a fulltime rig.  In the

end we realized the Tundra was not strong enough to tow the Lynx and we

upgraded to a long bed, single rear wheel Dodge Ram 3500 one ton.  It was

more truck than the Lynx needed, but we purchased it knowing that one day

we might get a fifth wheel.

By starting with the little Lynx we got on the road sooner rather than later,

and we had time to research alternative big rigs at leisure.  As we traveled

we quizzed everyone we met in a larger trailer to find out what they liked

and didn't like about it.

We visited dealerships in towns from Oregon to Florida and slowly educated

ourselves about the brands, makes and models of the larger rigs.

There is no way that we could have done that kind of research when

we were working.  We finally  decided the Lynx was too small during

the long cold winter nights, and being a lightly built "half-ton towable"

trailer, it was a little fragile for the long term.  We also discovered that

it was very awkward to get into the storage space in the back of the

truck and we decided the bikes didn't really have to be stored out of

the elements.

Our solar setup on this rig was one Kyocera 130 watt solar panel

mounted permanently to the roof (not able to be tilted towards the

sun), and a Morningstar Sunsaver charge controller connected initially

to two 12 volt Nautilus Group 24 batteries.  We upgraded the batteries

to two 6 volt Energizer batteries from Sam's Club after six months.

The first pair of batteries had 140 amp-hours of capacity and the

second pair had 220 amp-hours of capacity.  The solar charging

setup provided about 25-50 amp-hours of battery charging capacity

per day, which meant that we could use about that much battery

power in the trailer each day without running the batteries down.

We had an 800 watt inverter connected directly to the batteries and we

ran a power strip style extension cord from its AC receptacle through

the storage area under the bed and into the trailer.  We had to go

outside to open the storage hatch to turn on this inverter, so we used it

only when we wanted to run the vacuum cleaner (which draws 300-400

watts).

Inside the trailer there was a cigarette-lighter style DC connector for

the antenna boost system on the wall next to the TV shelf.  We kept a

tiny Radio Shack 150 watt inverter on the shelf and turned it on

whenever we wanted to charge the computer, the razor, the camera

batteries or the toothbrush, or whenever we wanted to watch TV or

DVDs.  This little inverter's fan quit once, but Mark lubed it up with

WD-40 and it ran daily for 3-6 hours each day for the year that we

lived in this trailer.  It is amazing that a tiny $60 gadget could give us the ability to run all the AC appliances that we wanted to run

(except the vacuum).  We had never used a microwave much in our house, so we didn't bother getting an inverter large enough

to support the microwave (950 watts).  So we used the microwave as a breadbox.

We drycamped 83% of the time that first year -- 305 nights.  The solar

setup was more than adequate for the entire year except for the cold

winter months, December - February.  Until that time we never paid

much attention to our electrical use.  The four LEDs that showed the

status of the batteries generally had all four LEDs lit whenever we

checket it.  During the winter months the days were short, so the

panel did not have much time to get its charging done; the sun rode

low in the sky, so the panel did not sit at a great angle to the sun; and

the nights were long, so we sat around for hours while it was dark

outside, running the lights and the battery-draining furnace.  To

compensate, we used oil lamps for light at night and we wore a lot of

layers.  This is okay for a "roughing it" vacation, but it wore on our

spirits after a while.  It was clear by the end of the winter that we

needed more solar and battery capacity, a non-battery-draining

heating system, and more seating options in the trailer!

In the end it was hard to let the little Lynx go.  John and Carl at the dealership where we traded it in were very patient as we

continually sang its praises and wondered aloud whether the new huge fifth wheel would measure up.  The Lynx had everything

we needed, and if we had been traveling just 6-9 months a year we never would have given it up.  However, when your only

home is your trailer, little things like comfortable furniture, space to lie down on the floor and stretch, and general ruggedness

become important.  I'm not 100% sure, but I think the fellow that bought the Lynx from the dealership was a man who had just lost

his home -- a 1980's vintage Holiday Rambler travel trailer -- to a tornado that had flattened his town of Pricher Oklahoma.  If that

is the case, then I know the Lynx is very much appreciated by its new owner.


Why Do It? – Why We Left Home to Live in an RV!

Why leave the security of hearth and home and run away in an RV full-time?  We followed our hearts and our dreams to a live full-time RVing lifestyle. The Luvnest is our ticket to freedom, traveling fulltime by RV Fulltiming in our RV means no more fences holding us in We are soaring free in our full-time traveling lifestyle Stunning views are a regular part of the RVing lifestyle. Follow your dreams and start living full-time in your RV! Gorgeous sunsets are a regular sight when living the fulltime RV lifestyle We see gorgeous sunsets all the time in this fulltime RV lifestyle Living fulltime in our RV means having the chance to ponder the more important things in life. Living fulltime in our RV means we have time to stop and smell the flowers Fulltiming in our RV means we have the time to stop and smell the flowers.

Why Do It ?

Why on earth would we give up the security of hearth and home, get rid of all

our stuff, and run away on a traveling adventure?

To go places.

To see new things.

To be together.

To be free.

At 47 and 53, we had reached a point in our lives where certain chapters had

closed, and a new chapter needed to be opened.  We had each left the

corporate world fairly recently and were doing a lot of soul searching as we

considered different possible lifestyles.  We each worked part-time.  We had

cut our expenses way back and learned to live very frugally.  Mark operated

a boutique bicycle shop from our home, and I was a personal trainer at a

small studio.  The arrival of two adorable grandkids and the departure of Mark's son for the Navy planted us in a new position in the

circle of life.  As we contemplated this new phase of life, many memories bubbled up from our pasts.  At the same time, we

watched our parents settling into their late 70's, and realized that in a few short years we would be there ourselves.

Looking back on my life, my most thrilling memories were my childhood summers on the north shore of Massachusetts, travels

through Europe at age twenty-three, a few months in Australia at thirty-one, and the four years I lived on a sailboat in Boston

Harbor in my late thirties.  As one sailor wrote after completing a six-year sail around the world:  "Those memories are in

technicolor.  The rest of my life is in black and white."  His words rang true for me.  Mark's experience is much the same.  He feels

about the woods the way I feel about the sea, and he spent many happy childhood hours in the forest.  Whenever he is in the

woods he comes alive.  He took a motorcycle trip with a friend when he was twenty, going from Detroit through the Upper

Peninsula of Michigan, out west through the Canadian Rockies to Vancouver Island, down the Pacific coast to Tijuana, Mexico and

back to Detroit.  It was five weeks of his life that I heard about many many times.  There were lots of places along that route he

wanted to show me, and I had seen very little of that whole part of the country.  As we kept discussing those happy memories from

years ago, we kept wondering: what was it about those few weeks and months of our lives that made them stand out with such

vivid brilliance?  How was it that whole decades of our lives seemed to merge into indistinguishable years spent working in cubicles,

commuting in traffic and submitting timesheets?  What, exactly, made those other times so special?

Part of it was the excitement of seeing new places and experiencing new things.  Part of it was

meeting new people that weren't from our small circle of friends and family.  Part of it was the

adventures that we stumbled upon.  But those were just the icing on the cake.  As we thought

about and talked about the exhilaration of those memories, it became clear to both of us that the

real joy of those times was the total independence we had, the utter freedom we felt.  There was

nothing in this world quite as satisfying as living without a schedule.

Life in our culture today doesn't allow much freedom.  Too often the focus of our lives seems to be the passage of money through

our fingers.  We try very hard to cup our hands so we don't lose too much, and some have better luck at this than others.  We build

our lives by acquiring things and stashing them around us.  Some people have a huge stash that towers over them and their

friends.  Some don't have a stash at all.  Almost everyone, however, is frantically busy.  Every minute of every day is committed.

Spontaneity is a lost art.  There is no time to think.  No time to be.

The only way to get some time to yourself is to leave your life -- take a vacation, or even a

long weekend.  But too often a shadow hangs over the whole experience.  I left on a Saturday

for a 9-day Caribbean sailing vacation once.  I remember the incredible sadness I felt on the

following Thursday.  I had just started to get into the rhythm of the tropics -- and I was leaving

in three days.

As a child I was blessed to live on a beach in the summertime.  My mom would open the door

in the morning to let me out -- like a cat -- and tell me:  "Don't come in unless it's raining."  I

don't remember any rainy days!  It must have rained.  Massachusetts gets a lot of rain in the

summer.  In fact, I remember distinctly that as soon as I started working full-time as an adult,

it rained all weekend every weekend between Memorial Day and Labor Day.  But during those precious years on the beach it never

rained.  My friend and I played all day long, building things in the sand, splashing in the water until our lips turned blue, and lying on

the hot granite boulders we lovingly called "hot rocks."  The tide gave our days their shape and form.  At high tide there was no

beach, just massive boulders.  As the ocean rolled outwards, a fresh palette of sand laid before us with endless wonders waiting in

the tide pools.  Our rumbling stomachs marked the passage of time.  Lunch drew us home when the fire station whistle blew at

noon, and we went in for dinner when we grew cold from the lengthening shadows on the beach.

Those were days of pure freedom.  I never knew when I woke up in the morning what I would do that day.  But every

day was delicious and fun.  The important things in those days were very tactile:  the warmth of the sun drying the

salt water off my cheeks while hot trickles of water dripped down the rocks I laid on; the sound of the kids' voices on

the more distant beaches, a kind of dim, high-pitched roar; the taste of the salt water on my fingers.  We would

watch the tiny red bugs, no bigger than a grain of sand, that crawled over the rocks, creeping in and out of the

granite crevices.  We would lie on those rocks for hours, feeling the sun slip across our bodies as it moved across

the sky.  We didn't do anything useful.  We didn't do anything productive.  But we were infinitely happy.

I found that kind of open-ended freedom just twice again in my life: when I went to Europe for three months and

when I went to Australia for three months.  During my travels I woke up not knowing what I would do that day, and I

went to bed savoring the memory of whatever had come my way.  Those months of travel were all about freedom.  There was an

overarching structure that held the days together and propelled me from one locale to the next; I planned my course as I heard

about interesting places to visit, and I followed the seasons along north-south routes.  However, my days were unscheduled.  If I

liked a place and wanted to stay an extra few days, I did.  If I looked out the window and didn't like what I saw, I kept going.

Now, in the middle of middle-age, I found myself yearning for that kind of freedom once again.  I had always longed for it, but it

wasn't possible.  I was busy building a stash of stuff around me.  It was what adults in our

culture do.  But now I looked at my stash -- a very small one -- and I realized that it was all

replaceable.  I could buy any of it again.  Very little was unique.  Just my photo albums and a

few mementos.  The rest was meaningless, manufactured and aging.

Mark and I discussed possible scenarios for our lives at great length.  We made up lists of

adventures we wanted to have, researched the logistics online, subscribed to magazines and

talked endlessly.  I found logs of people out adventuring, both online and at the library.  It was

amazing how many people were living really exciting lives, full of travel and independence.

They all shared some common themes.  They found a mode of transportation and housing that they liked and could afford; they

painted the plans for future travels in broad brush strokes with bright colors; and they left the details to be discovered as they went

along.  Some traveled by bicycle, some by sailboat, and some by RV.

These intrepid souls shared something even more fundamental in their new chosen lifestyles: they had given up

their stash of stuff.

We outlined all kinds of adventures we wanted to have.  We wanted to ride our bikes along the Mediterranean

coast from Italy through France to Spain.  We wanted to take our pop-up tent trailer on a tour of the western states

and National Parks.  We wanted to take our bikes from the northern tip of the North Island of New Zealand to the

southern tip of the South Island.  We wanted to spend a few years sailing up and down the Caribbean island chain.

We wanted to sail the great circle route of the Pacific Ocean.

But each of those journeys would take many months, at the very least.  What would happen to our stash of stuff

while we were gone?  The more we got excited about embarking on a new life filled with travel and independence,

the more it seemed in conflict with our stuff.  We were looking for something intangible: a life of freedom.  Our stash of stuff, small

as it was, was tying us down.

As we sat in our little garden that we had lovingly transformed from a barren gravel lot to a

lush flowering arbor, we longed to get away.  I wanted to wake up when my body decided it

was time.  I wanted to read when an easy chair and a good book beckoned.  I wanted what

I had wished for in my journal twenty years ago, "mornings filled with quiet cups of coffee."

I didn't want to wake up to an alarm clock.  I didn't want to answer a phone.  I didn't want to

drive in rush hour traffic.  But I knew that even if I eliminated the alarm clock, the phone and

the traffic, as long as I lived in a community surrounded by people engaged in today's

frantic lifestyle, I would feel their pressure.  True freedom lay out there somewhere, on the

road, away from the push and pull of modern life.

As I read, and thought, and stared at my stuff around me, I slowly realized a simple truth.  The amount of freedom in my life was

inversely proportional to the amount of stuff I had.

My friends who left their home on their bicycles in 2002--and were still out on the road today--unquestionably lived the most freely.

All their worldly possessions fit into the panniers on their bikes.  To date, they have ridden from Arizona through Central America to

the bottom of South America, through China, around Australia and New Zealand.  After six years on the road they are just getting

started.  They anticipate traveling the world by bike for twenty years or longer.

The sailors I have followed in their wanderings around the world are also very free, though not quite as free as the

cyclists because they have a boat and a dinghy to care for.  The most unique might be Lin and Larry Pardee who

have spent the past forty years in a 37' sailboat with no engine.  They have visited over 80 countries.  Living without

an engine gives them more space in a small boat and requires no maintenance.

RV travel offers incredible freedom as well.  Unable to cross oceans easily, RVs are essentially restricted to one

continent or another.  But the basic elements of living without a schedule, having all your possessions within arm's

reach, and wandering from place to place on a whim, are the same.

I have always been intrigued by people who live independently.  I was a teenager during the homesteading movement of the

1970's, and the ideas of subsistence farming and living off the land or the sea have always been deeply appealing to me.  I was

raised in the city and always lived near cities.  I became an engineer and worked in high tech for twenty years.  Those simpler

lifestyles attracted me, but I had never made the opportunity to live that way.  I was an armchair homesteader with dreams of a

small cottage by the sea, or a cabin in the woods, or a sailboat bobbing at anchor in the tropics.  Yet in my current life I had none of

those.

At the same time we felt very restless.  Our travels around Arizona, Colorado, New Mexico and California with the popup had

whetted our appetites.  Whether we took a 12 hour drive to some faraway place for a week-long vacation or dashed 30 minutes to

the campground at the edge of town for a weekend, we always had an adventure and we never wanted to come home.  In our first

two years with the popup we spent 157 nights in it.  And we had barely scratched the surface of the southwest.

Our dream slowly and gradually took shape.  We wanted to be on the move, we wanted to

live simply, and we didn't want to be tied to a schedule.  These little desires burned in our

souls, just a small flame at first, and then a roaring fire.  We bought digital cameras with the

idea that we would be taking photographs as we traveled.  We bought a laptop so we could

communicate with friends and send those pictures to them.  We tossed around ideas of

buying a boat, but couldn't decide which coast to start on and couldn't come up with a good

name for it.  That seemed like an omen, as the popup had taken the name "Luvnest" so

easily.  We toyed with the idea of taking the popup on a summertime jaunt and coming home

in the winter to deal with our stuff.  That darned stuff.  It was a real nuisance.  Cars, furniture,

house, bikes, rental house.  It would take money to maintain it all while we were gone -- and

for what?

Suddenly at the end of April, 2007, Mark put his foot down.  He is a very mild mannered person, and is not one to force his opinion

on anyone.  "I'm tired of scenario building!"  He said.  "I'm putting a sign in the yard tomorrow."  I came home from work to find two

signs in the yard -- "Yard Sale" and "For Sale By Owner."  At 6:00 the next morning the garage door flew open and garage salers

from all over town poured in.  By the end of the weekend we had sold the car, the popup, half our stuff, the house was in escrow,

and we had put a deposit on a trailer -- sight unseen -- in Dallas, 1,000 miles away.  Twenty days later we had sold or given away

just about everything we owned, put the remaining things in a shed in our friends' yard, and found tenants for the house after it fell

out of escrow.  We drove to Dallas with everything we would need in our new lives packed into the bed of our pickup.

Since then we have lived our dream.  Every day is an adventure.  I never know what any

day will bring when I wake up.  Some days it's a beautiful new place; some days it's an

interesting new person; some days we stay in bed until noon talking about our childhoods.

I truly feel like a child again.  Sometimes I lie back and watch the clouds.  We take endless

photographs of flowers and sunsets.  Mark bakes wonderful things in the oven.  I haven't

answered a phone since we left in May, 2007.  Every day, at least once a day, one or the

other of us spontaneously blurts out, "what a great life!"  We live largely on public lands,

boondocking in secluded places away from the fray.  Our solar panels provide all the

electricity we could ever need, and we get water in our jerry jugs whenever we find a spigot

in town.

I haven't missed my stash of stuff for one minute.  Ironically, we have photographs of all our stuff because we sold most of it on

Craigslist.  Sometimes I bump into those photos and I feel as if I still own it all.  It's at home, of course, in the house we live in,

right?  This is just an extended vacation, a very wonderful and very long one, isn't it?  And since I still feel like all my stuff is back

there in my old house, what difference does it make that it isn't really?  Afterall, memories and dreams live and flourish in the same

place -- the imagination.

Our story is hardly unique.  Lots of people are out adventuring.  Most are propelled by

something profound in their lives.  Our motivation was a deep undercurrent of desire that

had flowed in our souls since childhood.  And we wanted to start before time ran out.  It

was hardly a financially prudent move.  Most of our friends are building up significantly

larger retirements and will enjoy far more security in old age.  But I fear that for each year

a dream is postponed, the risk of it never happening jumps exponentially.  We have met

too many people who wanted to go out traveling but waited too long and either traveled

for just a year or two or never made it out at all.  On the opposite side is a couple we met

who started their RV travels because his stressful job had damaged his heart so badly

the doctor gave him just one year to live.  She worried about becoming a widow on the

road, but the doctor said, "either you can stay home and wring your hands while you watch him die, or you can get out there

together and live your dream as long as he lasts."  That was twelve years ago, and he is far healthier today than when they started.

Perhaps the hardest thing is figuring out exactly what your dream is.  Unless it is far more appealing than whatever your life holds

now, why change?  Whenever we drive by beautiful homes in beautiful settings, I wonder if I ever could have left such a place if it

were mine.  Possibly not.  Most people we meet on the road are traveling part-time, three to nine months a year.  In each case they

say that they love their homes too much to give them up for fulltime RV travel.  If we had been able to have our dream home and

have dreamy part-time travels too, then we would probably be among their ranks.  However, without the means to pull that off, it

just took a leap of faith and a bit of soul searching to decide that it was worthwhile to give up the security and familiarity of life at

home for the unknown thrills waiting for us on the road.

Note: I wrote this after our first 14 months of full-time RV travel, in July, 2008

--Emily


Subscribe
Never miss a post — it’s free!

More essays and musings about life on the road as our experiences and reactions to them evolved:

Below are some of our most POPULAR POSTS (also in the MENUS above)

Buddy - A Journey in Spirit - The story of an event that changed our lives forever.

ARTICLE INDEXES
  • RV Tech Tips Articles - A one page index of links to all our RV Tech Tips, RV Upgrades & RV Maintenance articles.
  • RV Lifestyle Tip Articles - An index of links to all our RV Lifestyle Tips (finances, boondocking, major repairs, work/jobs, etc.)
  • Solar Power Articles - Overview and tutorial articles for how to design and install solar power on an RV or boat
  • Product Reviews - An index of links to all of our Product Reviews
RV UPGRADES, SYSTEMS & TIPS MONEY FULL-TIME RV LIFESTYLE GEAR STORE
  • Gear Store - A list of the goodies, equipment and gear we've found useful in our RV lifestyle!
 

Our most recent posts:

More of our Latest Posts are in the MENU.   New to this site? Visit RVers Start Here to find where we keep all the good stuff. Also check out our COOL NEW GEAR STORE!! *** CLICK HERE *** to see it!