How To Change The Inner Rear Tire on a Dually Truck

One of the first questions we had when we began considering buying a new pickup truck to tow our fifth wheel trailer was: How do you change the inside rear tire on a dually truck? Well, a few days ago we found out!

How to change an inside rear tire on a dually truck copy

We got a flat on our dually’s inside rear tire (passenger side) while towing our trailer — Oof!!.

Our 2016 Dodge Ram 3500 Dually has been a fabulous truck for us since we bought it six months ago, and we’ve now got 9,100 miles on it now, 4,633 miles towing and 4,467 miles driving around without our fifth wheel trailer attached.

A few days ago, we stopped at the Libby Dam on the Kootenay River in Montana to get a photo. As I walked around the back of the truck, I heard a weird hissing noise. I stuck my head into the wheel well, and my heart sank when I saw a huge bolt head on the rear inside tire. I put my finger on it, and the hissing stopped. I lifted my finger and the hissing started again. Oh, no!

I almost didn’t have the heart to tell Mark, but after we’d gotten our photos of the dam, I told him the bad news.

We were in a pretty remote spot, completely out of cell phone and internet range. We hit the nifty “Assist” button on the rear view mirror of the truck to give Dodge a call and ask some questions about changing rear tires, but the call wasn’t able to go through.

Assist button rear view mirror Dodge Ram 3500 truck

Ram trucks have a cool “Assist” button that connects you straight to Dodge…if you’re not in the boonies!

The closest town was Libby, Montana. It boasts a population of 2,700 people, but it was 17 miles down the road.

So much for getting any kind of roadside assistance!

The timing for this little inconvenience wasn’t great. We’d been on the road, towing, for 100 miles, and Mark had just been telling me he was ready to call it quits and take a nap. Oh well. No napping just yet!

Luckily, unlike the last time we’d been stranded on the side of the road — when one of our trailer tires blew out four months ago, shortly after our trailer suspension repair — rather than being on the traffic side of an interstate with cars whizzing by at 75 mph, we were working curbside in a nice big pullout next to an extremely quiet country road where a car would leisurely pass by us every five minutes or so.

We unhitched the truck from the trailer to make it a little easier to get at the rear wheels. Mark got our bottle jack out from its storage spot under the driver’s side rear seat of the truck, and he began setting it up. I grabbed a stool from our fifth wheel basement and laid out some mats on the ground to create a work space for him.

From a lifetime of mechanical work, he learned long ago to protect his hands, so he pulled on a pair of leather work gloves that he keeps in the truck.

The first step for changing the tire was to remove the hubcap.

Remove hub cap on Ram 3500 truck rear wheel

Start by removing the hubcap to reveal the lug nuts.

Then, using a breaker bar, he loosened all of the lug nuts. Doing this with the wheel still on the ground is easier than after it’s lifted, because the wheel can’t spin.

Breaker bar to remove rear wheel on dually truck

Use a breaker bar to loosen the lug nuts while the wheels are still on the ground.

We used to carry a 4-way lug wrench for swapping out flat tires, but one time one of the arms twisted like a strand of licorice as Mark tried to unscrew a stubborn lug nut that wouldn’t budge. It was probably a cheap 4-way lug wrench. Most likely, a better quality 4-way lug wrench wouldn’t have done that, but Mark swore off of those things right then and there, and we’ve been carrying a breaker bar ever since.

The lug nuts on our 2007 Dodge Ram 3500 required a 15/16″ socket. The ones on our 2016 Dodge Ram 3500 require a 7/8″ socket.

Our bottle jack is rated for 12 tons, enough to hold up the axles of either our trailer or truck easily. More important, it’s also tall enough for the axles on our trailer which we raised a few inches higher from the factory standard during our trailer suspension overhaul to help keep our rear end from dragging on steep ramps at gas stations and on uneven dirt roads.

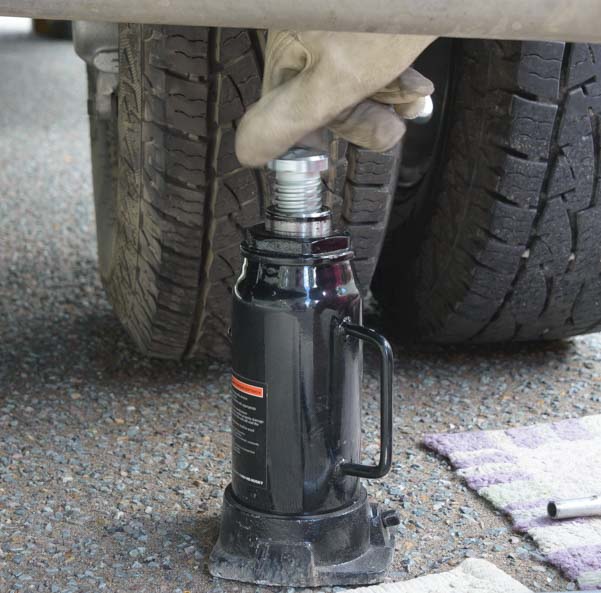
He unscrewed the top of the bottle jack to raise it up.

Bottle jack for fixing a flat tire

Unscrew the top of the bottle jack by hand to raise it.

He placed it under a flat metal piece that was welded onto the axle.

Bottle jack under the rear axle of a dually truck

Place the bottle jack under a solid flat spot on the axle.

The bottle jack comes with a two-part handle. After removing the two plastic end caps, one tube can be fitted into the other to make a long handle and give you some leverage while pumping up the jack.

Bottle jack handle for fixing a flat tire

Remove the plastic endcaps and fit the tubes together to form a long handle.

He pumped the handle up and down to raise the top of the bottle jack and lift the axle slightly so the wheels no longer touched the ground.

Raise the jack under Ram 3500 dually truck rear axle-2

Raise the rear axle of the truck by pumping the bottle jack handle.

With the lug nuts slightly loosened, he now used a Rigid cordless impact driver to remove them completely.

Impact driver to remove lug nuts fix rear flat tire Ram 3500 dually truck

A Rigid 18 volt cordless impact driver makes it a breeze to remove the lug nuts.

We got the impact driver, a cordless drill and a portable radio as part of a terrific kit that included two lithium-ion battery packs. We use the drill every time we raise and lower our fifth wheel’s stabilizer jacks, and we listen to the portable radio all the time!

He collected the lug nuts in the hub cap.

Fixing rear flat on Ram 3500 dually pickup

Collect the lug nuts in the hubcap so they don’t roll away.

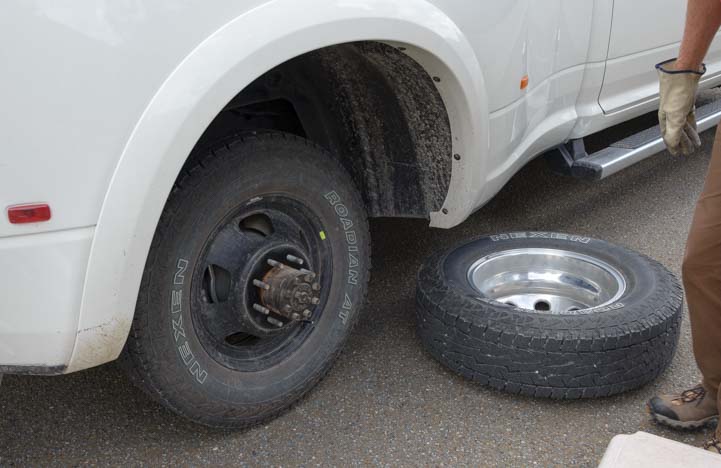
Then he pulled off the outer wheel.

How to change a flat tire on a dually pickup truck

Pull the wheel off.

How to change a flat tire on a dually pickup truck

The outer wheel is off, now for the inner wheel…

The wheel studs on a dually are extra long to hold both wheels onto the truck. So, once the outer wheel was removed, he could pull off the inner wheel.

Remove the inner rear tire of a dually truck

Slide the inner wheel off.

And there was the culprit — a big fat self-tapping bolt!

Flat tire on a dually pickup

And there it is — a nasty self-tapping bolt. Arghh!!

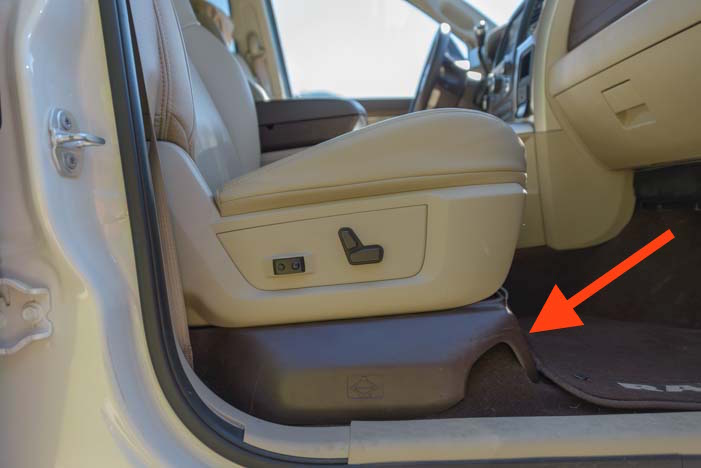
Our 2016 Ram 3500 came with a toolkit for raising and lowering the spare tire. It is located behind a plastic trim piece under the passenger’s seat.

Spare tire toolkit in Ram 3500 truck stored under passenger seat

The toolkit for lowering the spare tire is under the passenger’s seat.

He pulled off the plastic trim piece to get the toolkit out.

Spare tire toolkit Ram 3500 pickup truck

Here is the toolkit for lowering and raising the spare tire from its spot under the truck chassis.

Then he pulled the toolkit out from under the passenger’s seat. It is held in place with two knobs, one of which is tightened with a wingnut. When he put the toolkit back in place later, he had to align it before sliding it in, and then tighten the wingnut.

Mounting brackets spare tire toolkit Ram 3500 truck

The toolkit is held in place by these knobs (the left one is a wing nut).

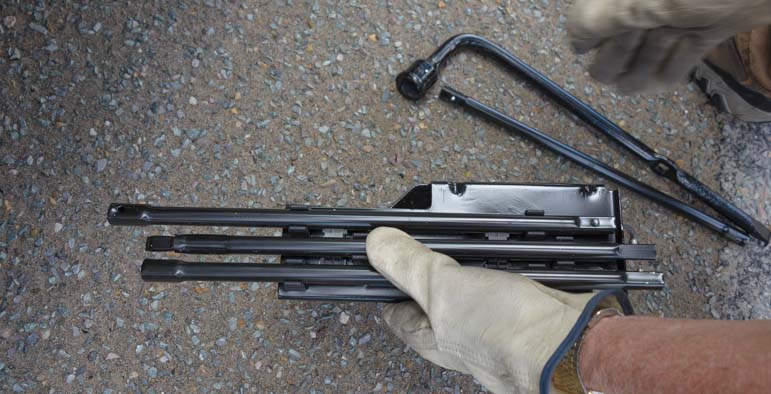
The toolkit has several handle extensions and other goodies in it.

Spare tire toolkit Ram 3500 truck

The toolkit has all kinds of goodies in it, including a lug wrench that Mark opted not to use since it is probably even more flimsy than a 4-way.

One of the goodies is an L-shaped handle, and there are several extensions that interconnect to lengthen the handle as well.

Spare tire toolkip Ram 3500 pickup truck

Two of these tubes fit together to form a long handle that attach to the L-shaped handle.

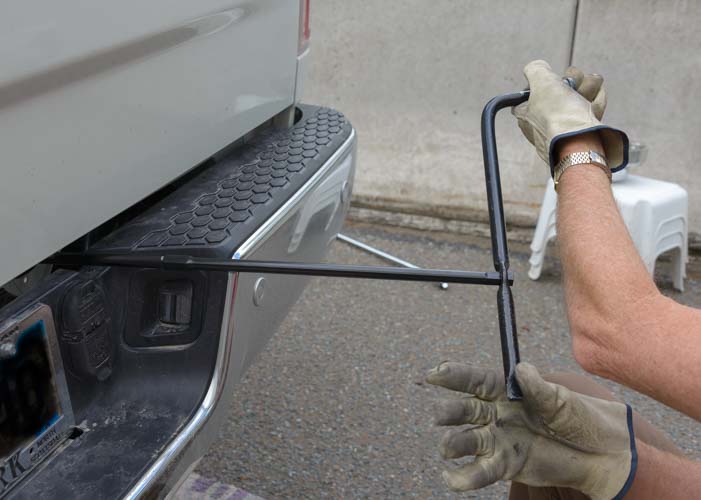
He assembled two handle extensions to make a long rod and attached the L-shaped handle to the end. Then he inserted this handle into a hole above the license plate bracket. There is a square fitting inside the hole. The end of the handle slipped over the square fitting.

Lowering the spare tire on a Ram 3500 dually truck

The L-shaped handle and extension tubes fit onto the square fitting in the hole next to the license plate bracket.

Then, he rotated the handle slowly.

Lowering the spare tire on a Ram 3500 dually truck

Twist the handle to lower (or raise) the spare tire.

This gradually lowered the spare tire from its storage spot under the chassis of the truck onto the ground

Lowering the spare tire on a Ram 3500 pickup truck

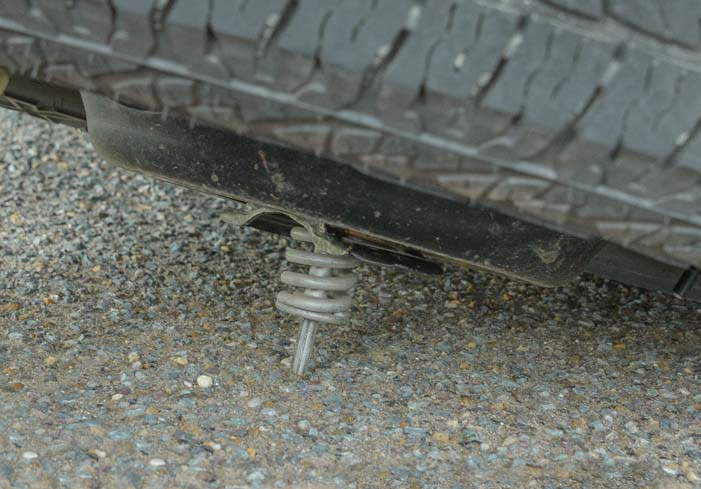
The spare tire is held to the truck chassis by a brace that compresses a spring.

The spare tire is held tight to the underside of the truck with a spring fitting that can be snugged nice and tight.

Spare tire mounting system Ram 3500 pickup truck

Bracket and spring under the spare tire.

Then he mounted the spare tire on the truck to replace the flat tire.

Mounting the spare tire on rear of Ram 3500 dually truck

The spare tire is mounted on the truck.

Next, he slid the outer wheel in place. Using his cordless impact driver, he replaced the lug nuts, tightening them in increments. Starting at the valve stem, he tightened the closest lug nut a bit and then tightened the one that was opposite, then tightened the next one, and then the one opposite that one, etc., working his way around the rim and tightening the wheel equally all the way around. Then he gave each lug nut a final tightening using the breaker bar.

Then he put the hubcap back on. It didn’t pop on really easily using his palm, so he used the top of a rubber mallet to tap it in place.

Replace hub cap on dually truck rear wheel

The hubcap didn’t snap in place using palms only, but the butt end of a soft rubber mallet did the trick.

Interestingly, we could now see exactly how much rubber we had worn off our rear tires in 9,100 miles, because the wheels didn’t hang down evenly.

Spare tire and used tire height difference on Ram 3500 dually truck

The brand new spare and 9,000 mile used tire are different heights.

Using a pocket knife, he got a rough estimate of just how much rubber had been worn off — maybe 1/8″ or so.

Rear tIre wear dually truck 9000 miles

About 1/8″ of rubber has come off of the tire in 9,000 miles of driving.

He raised the flat tire up into the storage spot under the truck chassis where the spare tire had been, and lowered the bottle jack under the axle so the truck was sitting on all four rear wheels again. We hitched the trailer back up and started to drive.

This little hiccup in our RVing lifestyle had taken about 30 minutes.

Our fancy new truck has a cool display (the DID, or Driver Information Display) that shows the air pressure in each of the six tires on the truck (this is the TPMS, or Tire Pressure Monitor System). We were both really alarmed when the spare tire reported that it had 17 lbs. of pressure while the other three rear tires all had 63 to 65 lbs. What the heck??

Tire pressure dashboard readout Ram 3500 truck

The tire pressure for the spare is 17 lbs. Yikes!! (huh????)

The dealership where we bought the truck had told us they’d aired up the spare when we bought the truck new six months earlier. Even though Mark usually uses a tire gauge to measure the air in the spare, he hadn’t this time because it was a brand new tire that seemed perfectly good, had the right sound when he thumped it, and bounced nicely on the ground.

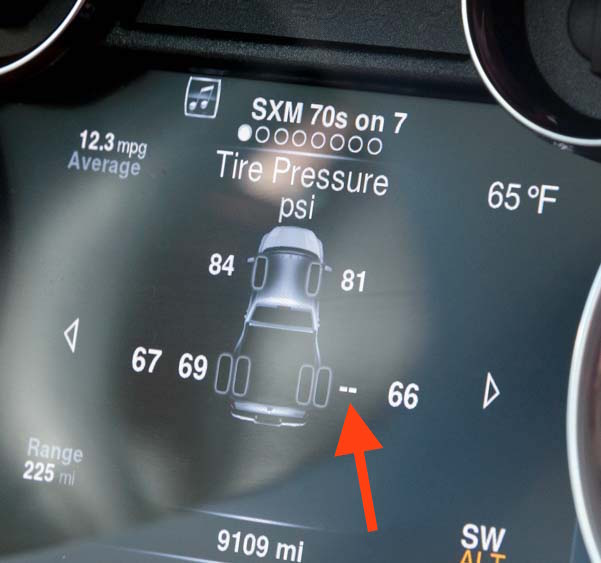
But we grew ever more alarmed as the dashboard display showed 15 lbs., then 13 lbs., and then went to dashes. The road was super quiet, so while driving the 17 miles to get to the Les Schwab tire place in Libby, we pulled over several times to check that the tire wasn’t heating up… It wasn’t.

Tire pressure dashboard readout Ram 3500 truck

Now the tire pressure is dashes. What does THAT mean??

We made it to Les Schwab, and they put a terrific new kind of patch on the tire that mounts from the inside. It has a big round rubber flange that mounts inside the tire with a plug that fills the hole.

The spare turned out to have 65 lbs. of air pressure, just the way it should have. So, we all scratched our heads for a while about the weird air pressure numbers we’d seen on the dashboard.

Then our service guy suddenly brightened up. “I know what it was!” he said. “The spare tire doesn’t have a sensor in it to report its tire pressure to the truck, but the original tire did!”

So, as the original tire was being carried under the chassis of the truck, where the spare usually sits, it was transmitting its decreasing tire pressure to the console on the dashboard, and the dashboard was dutifully displaying the numbers as coming from the right inside rear tire even though the tire was no longer in that position. Eventually the tire pressure got so low it was below the minimum, so the display showed dashes.

It turns out that that option for the spare tire to have a sensor on the valve stem is only available on Premium models of Ram trucks. We never saw that option in any dealer option lists.

I just showed this post to Mark to see what he thought, and he looked at me in astonishment and said, “When did you take all these photos? This is great!”

“When you were changing the tire!” I explained. “I’m sneaky!” (And I’d MUCH rather write about changing a tire than do it myself!)

Subscribe

Never miss a post — it’s free!

Other blog posts about trucks and trailer towing:

Our most recent posts:

More of our Latest Posts are in the MENU.   New to this site? Visit RVers Start Here to find where we keep all the good stuff. Also check out our COOL NEW GEAR STORE!! *** CLICK HERE *** to see it!

RV Tips and Tricks – Make RVing EASY and FUN!

There are a million RV tips and tricks to make the RV life easier, and this page offers some little jewels we’ve discovered since we started RVing full-time in our fifth wheel trailer in 2007. We’ve broken them down into:
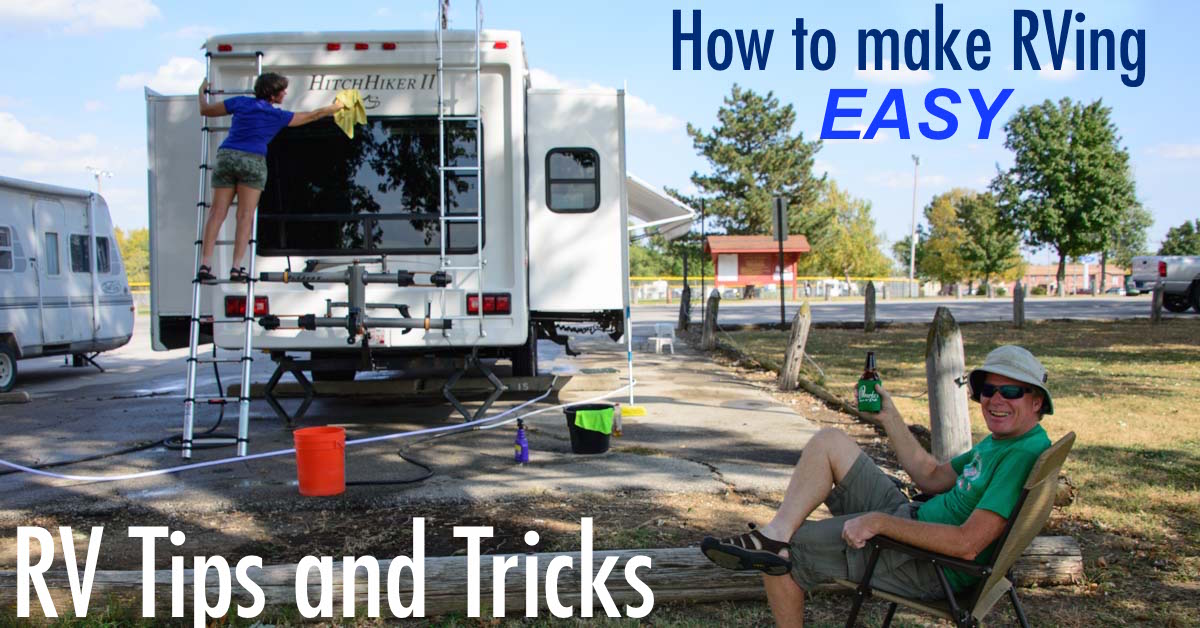
RV Tips and Tricks for making RVing and the RV Life easy

.

OUTDOOR RV TIPS and TRICKS

High Powered “Search” Flashlight

We often camp in areas that are quite remote, and getting to and from and around the rig at night is much easier with a very high powered flashlight!

Lumintop SD75 LED flashlight

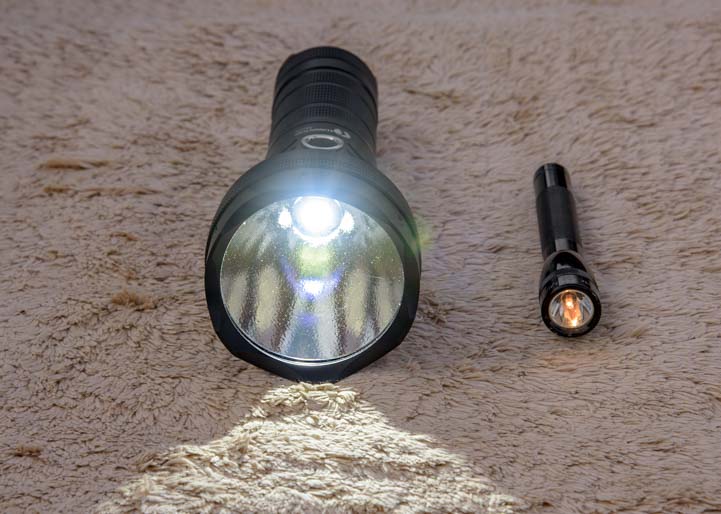
Lumintop SD75 Flashlight compared to a pocket Maglite

We have a Lumintop SD75 Flashlight which is downright phenomenal. We have hiked Bryce Canyon and the Grand Canyon at night to photograph the stars and the Milky Way, and this flashlight is literally like holding a car headlight in your hand.

Here is more info about this flashlight:

Lumintop SD75 Flashlight Review

Getting Parked Without Damaging Anything

The most basic element in RVing is learning to hitch up and unhitch, whether you are driving a car pulling a popup, a diesel truck towing a fifth wheel or a Class A motorhome towing a car. Of course, lots of people have loads of fun in their motorhomes without towing a car behind, but getting hitched up and unhitched is part and parcel of the RV lifestyle for an awful lot of us.

The most important thing for the driver and the person standing outside of the rig is to stay in eye contact with each other. This is entirely up to the person running around outside. If you can see the driver’s face in the rear view mirrors, you are golden. If you can’t, then any kind of gesture you make, including jumping up and down and waving your arms because the driver is about to drive the rig right off a cliff, will never be seen.

We use two-way radios to give us a way to talk to each other and to lessen the impact if I inadvertently end up in a position where Mark can’t see me in the rearview mirror. We use the longest distance radios we can get, to make sure the signal is decent. Right now we have 36 mile GMRS radios, which are realistically good to about 3-5 miles. We used these on our boat (a godsend when anchoring) and we’ve used them ever since we started RVing. We’ve gone through three sets so far, because the salt air ate up two pairs during our cruising years.

Two-way radios for backing up an RV

We use our two-way radios all the time…

Besides the radios, it’s really helpful to have good hand signals. I indicate the distance until disaster by spreading my arms wide and then bringing my hands closer and closer together until I give a “halt” sign (palms forward). Shaking my head and waving my hands and giving a few slices to the neck can help too if it starts to look really bad.

Midland 36 mile GMRS radios

36 mile GMRS radios

It is royally embarrassing to make all these gestures when you’ve got an audience of people watching, but I’ve learned that there’s no ego in getting the rig parked well. Every RVer who has been around a while has made a huge blunder of some kind while parking, and they’ve all lived through it. So a few members of your giggling audience will probably be very sympathetic to whatever mistakes you have up your sleeve.

My worst gaffe was in front of two very special friends we hadn’t seen since we’d moved into our fifth wheel a year earlier. They had come out to camp with us, and we were all excited. I had just finished telling them (with great pride) that we didn’t need their help parking because we parked our rig all the time, we had a system, and we had gotten pretty darn good at it.

Mark began to back up as our friends watched, and I began to warn him that he needed to go more towards the driver’s side to avoid a tree. He adjusted, but again, I told him, he needed to go more towards the driver’s side! I kept repeating my instructions louder and louder as our good friends watched in bewilderment. When Mark was just about to cream the tree, we all started shouting STOP!!! Mark got out of the truck, calmly assessed the situation, and then said to me: “Ahem…. which side does the driver sit on?”

Our friends smiled weakly and I looked for the nearest rock to crawl under…

So, don’t be embarrassed and don’t be shy. Make your gestures big and strong, and remember which side of the rig the driver sits on!

Hitching and Unhitching a Fifth Wheel Trailer

Some folks drive their RVs solo, and although I can’t say much about hitching and unhitching a motorhome and car combo, our good friend Bob has found a great way to hitch and unhitch a fifth wheel trailer solo. He marked the front landing leg that’s near the extend/retract button at regular intervals all the way up and down the leg.
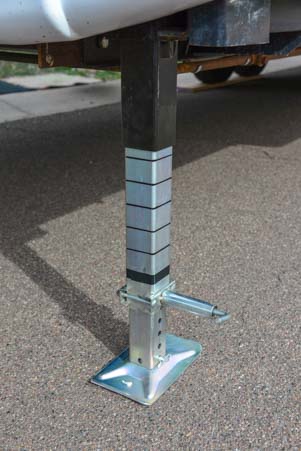
Fifth wheel landing leg marked with hash marks

Hash marks on a landing leg help get the rig back to the right height before hitching up.

Then he numbered each hash mark. He keeps a pad and pen in the hatch near the landing legs button. When unhitching, once he’s raised the trailer to where he can drive the truck out from under it, he jots down the hash mark number that is visible on the leg. Then he drives out, parks, and returns to the trailer and raises or lowers the landing legs as necessary to get the trailer level.

When he hitches up again to leave, he adjusts the trailer height to the exact position where he unhitched. That way, when he gets in the truck to hitch up, he knows the trailer will be at the correct height as he backs the truck up into the hitch pin (and he doesn’t have to get in and out of the truck several times to check and adjust the height of the trailer).

We marked our landing legs at 1.5″ intervals and have not numbered them. There are only 6 hash marks, and I make a mental note of what mark we were at when we unhitched. Frequently, by the time we leave, I’ve forgotten where we were at before we leveled the trailer, but I’ve developed a good eye for knowing how much to raise or lower the rig as Mark backs the truck towards the trailer.

We also marked the centerline of the fifth wheel pin box and pin plate so it is easy for Mark to line up the hitch with the pin box and king pin when he is backing the truck into the trailer.

Leveling the Trailer

There are many methods for getting a trailer level, and hydraulic leveling is a blessing that takes all the excitement out of it. For those without hydraulic leveling, we found in our early years that with two 5′ lengths of 2″x8″ board and one 5′ length of 1″x8″ board we could always find a combination that worked to get the trailer level from side to side. A 5′ board is relatively easy to drive onto and provides a solid platform for the trailer’s wheels.

We store the boards in the bed of the pickup. When using two boards, we stagger them a few inches so the trailer is driven first onto one level and then up a step to the next. We have to remember to back up when coming off stacked boards or the upper one will tip up and hit the bottom of the trailer while driving off it (think of a sailor walking the plank).

Leveling boards fifth wheel RV trailer

This was an extremely unlevel spot where we used quite a few boards and strips of horse stall mat.

If you don’t like the idea of hauling long boards around in your truck, there are nifty plastic leveling board kits (here’s another type) that are very popular.

We also use plastic wheel chocks whenever we park on a steep incline to prevent the trailer from rolling, especially while unhitching and hitching up.

Our friend Ken introduced us to using a sliced up horse stall mat rather than pine boards. We cut a 4’x6′ sheet of horse stall mat into five 1×5 strips and four 1×1 squares, and those have worked really well for us. They hold up to the elements really well and they roll along with the contour of whatever crazy surface we might park on. It is also possible to drive off of them either forwards or backwards because they don’t slap the underside of the trailer.

The only disadvantage is that they are much heavier than pine boards, but we can drag them around and they don’t disintegrate. We use the 1’x1′ squares under the landing legs and scissor jacks for cushioning.

We also have four large blocks made of three 1′ lengths of 2″x8″ boards screwed together. We put handles on the ends to make them easy to lug around. In a really unlevel site in the Smoky Mountains we had to stack them on top of each other AND extend the jack legs all the way!

RV fifth wheel landing legs

A very unlevel spot that required two blocks plus all the leg length.

What Is Level and How Do You Know?

Determining what constitutes “level” inside an imperfectly constructed RV is an interesting trick. We used a carpenter’s level on our kitchen floor, in several directions, and on our table, and on the bedroom floor. Of course, none agreed! But we found a good compromise and then mounted some RV levels on the outside of the rig to give us a reasonable guess when we’re setting up.

There are two different types of levels: Bubble Levels that have an air bubble that floats to the high side, and Ball Levels that have a ball that drops to the low side. Bubble levels are more responsive (the bubble moves more quickly as the RV moves). Ball levels take a few seconds to react. If you use both types, you can get confused because they move in opposite directions.

We have a large Level Master level on the fifth wheel pin box that is easy to see from inside the truck. We also have two small bubble levels on the trailer on the corner by the landing jack power button, one facing forward (for left to right leveling) and one facing sideways (for front to back leveling).

RV Fifth wheel hitch level and center mark

The ball style level (visible from inside the truck) shows which side of the rig is low.
We painted a line on the pin box to help with hitching up.

Our pin box mounted Level Master, a ball level, is easy to see from inside the truck. When the trailer is higher on one side than the other, the Level Master ball falls to the low side.

Our smaller levels on the front corner of the fifth wheel are bubble levels, so the one on the front of the rig showing the side-to-side level has a bubble that rises to the high side. This is the opposite of the ball level on the pin box, and sometimes, when we are struggling with white line fever from hours on the road, this messes us up.

RV bubble levels on a fifth wheel trailer

Small bubble levels show left/right and front/rear level near the landing jack power button on our fifth wheel.

I’d recommend sticking to either ball levels or bubble levels and not mixing and matching like we did! A good solution might be to mount a ball level like this on both the pin box and on the front of the trailer near the landing jack power button.

Why do you need two side-to-side levels? When I’m running around placing the boards in line with the wheels for Mark to drive onto, I want to see a level on the fiver easily myself, and the front of the pin box is impossible to see from the side of the truck when we’re hitched up.

However, lots of folks rely on a single pin box mounted level that has both side-to-side and forward-back levels in it. There are a few from Camco and Hopkins that are very popular.

You can forego all this nonsense with a slick hydraulic leveling system. However, this does introduce a complicated and expensive system into your life, and we’ve heard many stories of the jacks falling down while driving, or not retracting properly and systems failing in other ways. On the plus side, though, you can easily jack up the trailer to change a flat!


Cordless Drill for Easy Jack Setup

We don’t have electric stabilizer jacks on our fifth wheel trailer (nor did we on our travel trailer). However, we use an 18 volt cordless drill, and it’s very easy.

Cordless drill set up for RV stabilizer jacks

Ready for action with the drill, extension and socket for the stabilizer jacks

We use the following setup to crank the scissor jacks:

We keep the 1/4″ Hex to 3/8″ Socket Adapter in the drill. Mark glued the extension and 3/4″ socket together with JB Weld, making it ultra easy to grab the extension, jam it in the drill and go.

18 volt cordless drill, 8" extension and socket for RV scissor jacks

18 volt cordless drill, extension, socket and adapters for RV scissor stabilizer jacks

This setup worked on both the four stab-jacks on our travel trailer and the two rear scissor jacks on our fifth wheel. We keep the drill right inside a basement hatch door so it’s easy to find during both setup and breakdown of the trailer.

RV stabilizer jacks with cordless drill

Raising and lowering the jacks takes 2 seconds!

Rigid Drill Set Radio

This goofy radio is in the Rigid Drill Kit (along with an impact driver & regular drill & lithium ion batteries and charger). We love it even more than the other stuff!

Camco makes a special Leveling Scissors Jack Socket that replaces those three pieces, but there is no 8″ extension. Personally, I like the long extension because you don’t have to crawl in so far to make contact with the scissor jacks.

Last year we bought a Rigid drill kit which includes a regular 18 volt drill, an impact driver (awesome for the lug nuts when changing a tire) and a radio as well as two rechargeable lithium-ion batteries and a charger.

After going through three different 18 volt drills during our years of RVing and sailing, we’ve been really impressed with this Rigid kit. The Lithium-Ion battery charges up in about 15-20 minutes and it’s good for a really long time.

The kit comes with two batteries, so we use one for the drill and one for the radio. And what a hoot it is to have a portable radio. In this day and age of slick electronics, we’ve gotten such a kick out of this thing…


Cleaning the RV

No matter where we park, the slide roofs need attention before we bring them in. Either they are dusty, in the desert, or they are covered with twigs and leaves, in the woods, or they are wet from rain. Slide toppers might help with this, although I have heard that they tend to make noise in high winds, sag over time, and sometimes end up with leaves and twigs trapped underneath.

Mark has a long handled squeegee he uses to get the water off, a broom for the leaves and branches, and a California Duster and/or broom for the dust. Getting up on the roof is also useful for checking out all the rooftop items like hatches, TV antenna, solar panels and wiring. His favorite cleaning tool for all this is a telescoping scrub brush that we used for cleaning our boat.

Scrub brush on RV roof

Our telescoping brush from our boat is a favorite for cleaning the rig.

He just loves this soft bristled brush. Murphy’s Oil Soap mixed with water is a good solution to wash the roof. To get rid of black scuff marks on the outside of the rig, he uses Mr. Clean Magic Eraser sponges.

Telescoping Ladder
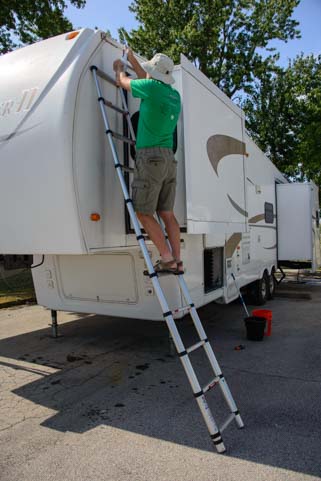
Telescoping ladder on an RV

A second ladder is really helpful!

Telescoping ladder

.

The first trailer we lived in full-time didn’t have a walk-on roof, and the signature of an RV without a walk-on roof is that it doesn’t have a built-in ladder.

We got a telescoping ladder so we could get up on the roof, and we have kept that ladder and used it ever since, even though our fifth wheel has a built-in ladder.

You may not think you need a second ladder when you’ve got one on the rig already, but polishing the front cap is one job where you do.

Washing or working on any part of the rig that is high up and out of reach of the ladder on the back is much easier with a second ladder, including the high corner of the rear end opposite the built-in ladder!


RV Patio Mats

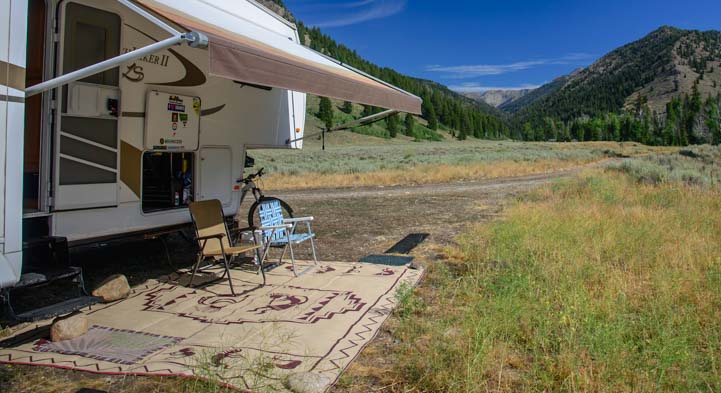
A beautiful patio mat extends your living space and defines your outdoor area in an elegant way, and we love ours.
RV Patio mat defines outdoor space while camping

A classy patio mat extends your living space into the outdoors.

But they can be pricey if you’re just getting started with weekend RVing. An alternative is to get some green indoor/outdoor carpeting. We had this with our popup tent trailer, and it fit the bill perfectly (and our friends who now own our popup still use it!).

Popup tent trailer indoor-outdoor carpet patio mat

Save a few bucks and use green indoor/outdoor carpeting!

Waxing the Fifth Wheel Cap

Unfortunately, there’s no quick fix for getting the fifth wheel cap to have a deep shine. It’s made of ABS plastic and shows every swirl mark of a first-pass at waxing. The only way to bring back the luster it had when it was new is to use an orbital buffer and fiberglass polish and a whole lot of elbow grease.

Polished front cap on RV fifth wheel trailer

An orbital buffer and 3M Marine Cleaner Wax give the front cap a nice shine
but leave Mark’s shirt speckled with white spots!

Mark likes the 3M Marine Cleaner & Wax that we used on our sailboat. Unfortunately, you’ve gotta do this a bunch of times, and the worse condition the front cap is in, the more times it takes. But eventually you can get the shine back. Just be sure you keep the buffer moving lightly across the surface at all times so you don’t dig a hole in the plastic!

We have more cleaning tips for giving an RV that extra shine while boondocking here: Tips for Washing an RV While Boondocking


Truck Overloads
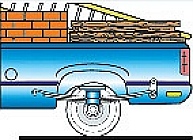
Timbren SES Suspension System for truck

Timbren SES Suspension

Our 14,000 lb. fifth wheel was right at the weight limit of what our 2007 Dodge 3500 could tow, and the pin weight of the trailer along with all the things we carry in our truck loaded down the bed of that truck quite a bit.

When hitched up, although the rig looked quite level, the truck sagged a bit, leaving the front wheels a little light and giving the truck a tendency to wander.

To alleviate this, we installed a Timbren Suspension Enhancement System between the axles and leaf springs of the truck. These are solid rubber donuts (not airbags) that fit between the axle and the leaf springs. That made the truck sit better and wander less.

We had that setup for eight years. In 2016 we purchased a 2016 Dodge Ram 3500 dually truck which had a much higher weight capacity in the truck bed and could handle the pin weight of the trailer along with the additional weight of the water jugs and leveling boards we carry in the bed of the truck much better.

How to Put Diesel Exhaust Fluid (DEF) in a Truck

Our 2016 Dodge Ram 3500 has a five gallon Diesel Exhaust Fluid tank which needs to be refilled every thousand miles or so. We’ve got some tips for where to get this stuff cheap and how to get it in the truck without spilling here:

How to Put Diesel Exhaust Fluid (DEF) in a Truck and Which Brand is Cheapest
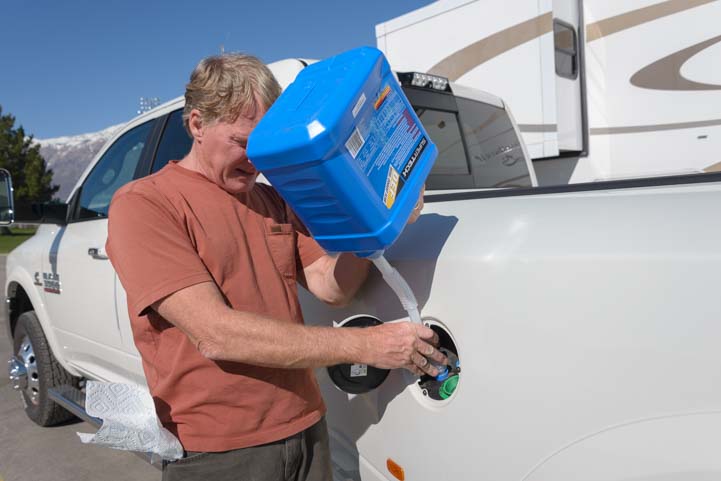
How to put Diesel Exhaust Fluid (DEF) in a truck without spilling

Putting DEF in a diesel truck is a new necessary evil, but there are tricks to make it cheap and easy…

RV Grill Operating on the RV’s Propane Tanks

Mark loves to barbecue, and ever since our first popup trailer, we’ve had a wonderful, small RV barbecue, the “RV sidekick grill.” It comes with a mounting kit to hang it on the side of an RV. Flipped sideways, this same kit becomes legs so the grill can stand up off the ground.

RV grill attached to fifth wheel trailer

The RV sidekick grill is designed to hang on the side of an RV or stand on its own.

We had this grill installed on the side of both our popup tent trailer and travel trailer, but with the fifth wheel, Mark installed an extra gas line and valve coming from the RV’s propane tanks so it can run from them. A quick disconnect LP gas hose goes from the grill to this gas line.
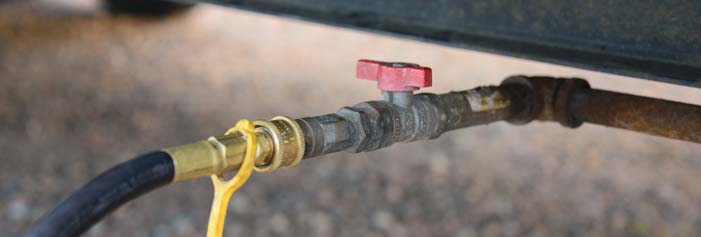
RV grill gas pipe connection

An extra gas line and valve lets the grill runs from the trailer’s propane tanks.

We’ve had this little grill since 2005 and it still makes a great meal!


RV Water Toys – Water Spigot Connections

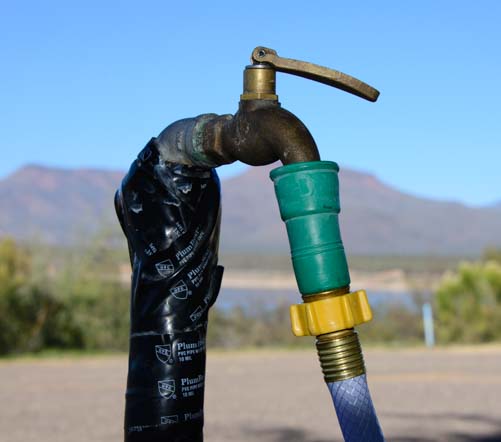
In many dry camping campgrounds where there are water spigots available but no water hookups at the campsites, the water spigots don’t have threads. We’ve found a water bandit makes it possible to thread our water hose onto the spigot so we can fill up with water easily.
Water Bandit spigot adapter for RV fresh water at campgrounds

The water bandit makes it possible to connect a fresh water hose when there are no threads on the spigot.

In cases where we get water hookups and leave the water hose connected to the trailer, we screw a 90 degree elbow onto the trailer so the hose can hang straight down rather than come out of the our city water connection horizontally and then droop down towards the ground, putting pressure on the connection and potentially causing drips. We discovered this nifty little elbow when we lived on our boat in a marina before our cruise.

In addition, a water pressure regulator keeps the water pressure down to a level inside the rig that prevents any unexpected damage or leaks. A quick release makes it easy to connect and disconnect the fresh water hose. Mark also keeps a Y valve in his water hose arsenal. This is handy if the rig is connected to city water and we want to fill pails with water for washing the truck, or if an RV dump station has only one water spigot and we want to fill our fresh water tanks and run the black water flush at the same time.

Lots of folks like to attach a water filter as well. We used various filters at first, but no longer use any, although we periodically add a cap full of bleach to the fresh water tank. When we got a new fresh water tank, we were surprised that there was no sludge of any kind inside the old tank, even after 7 years of use.

Changing the Inner Rear Tire on a Dually Truck

We have a Dodge Ram 3500 dually truck with a B&W fifth wheel hitch, and wouldn’t you know it, the first time we had to change a tire on it, it was the inner rear tire. Ugh!

We had always wondered exactly how you went about doing this, and we found out. Here is a blog post that explains the entire process:

How to Change the Inner Rear Tire on a Dually Truck


INDOOR RV TIPS and TRICKS

Creating STORAGE SPACE with Seating for Four in the Dinette

We replaced the two chairs in our dining area with two wonderful storage ottoman benches, and this has increased our storage space by quite a bit. The storage ottomans we chose have a nice faux leather padded top that is really comfy to sit on, and they have voluminous storage space inside.

Storage benches in RV dinette

Our dining area – lots of storage and seating for four.

We have his-and-hers benches, and we keep our camera gear in them. The great thing is it got rid of all our clutter and gave us a place that is low down in the trailer and slightly ahead of the trailer’s axles (a smoother ride) where we could make custom padded storage for this delicate gear.

For more info and more pics of our benches, see this blog post about our setup: Making STORAGE SPACE in an RV.

You can buy the storage ottomans we purchased HERE, and you can get ideas of other brands and sizes of storage ottomans on the market HERE.

Protecting the Carpets Under the Slide-Outs

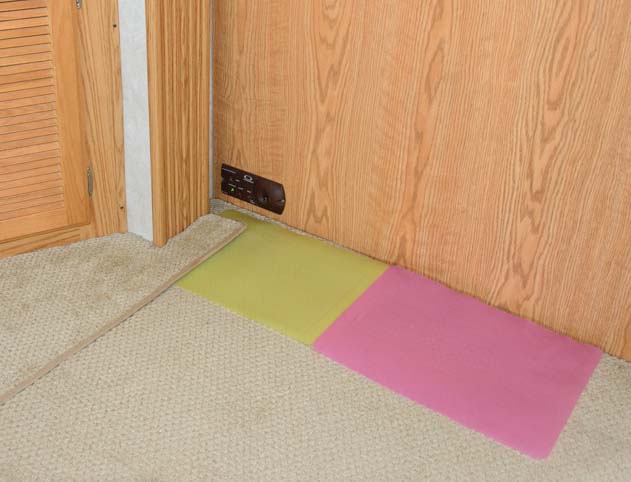
The carpets take a beating as the slide-outs roll in and out. Some slide-outs aren’t quite square and one wall or the other presses particularly hard on the floor while driving. You can buy fancy carpet protectors that fit under the slides. We went a cheaper route and bought a package of four flexible plastic cutting boards.
RV tips - cutting boards under RV slide-out

Flexible cutting boards taped together protect the carpet under the slide-outs.

We used packing tape to tape two of these together, end-to-end, and each pair fits under the slide-out walls perfectly yet are thick enough to protect the carpets. I keep one pair under one slide-out wall while driving, because that slide is crooked and its one wall gets wedged against the floor pretty tightly. The other slide-out walls hover above the carpet as we drive, so I pull the plastic cutting boards out from under them so they don’t get lost underneath while in transit.

Keeping the Cabinets Closed

After having a cabinet door fly open while driving over a bumpy road, causing two unbreakable Corelle bowls to fly across the trailer and break in half, we now latch every cabinet door with 6″ bungee balls. For drawers we use mini 10″ bungee cords with a hook at each end, hooking the top and bottom drawer handles.

RV tips bungee balls and bungee cord on RV cabinet doors and drawers

Bungee balls and bungee cords ensures the cabinets and drawers all stay closed.

Rolled up Carpets

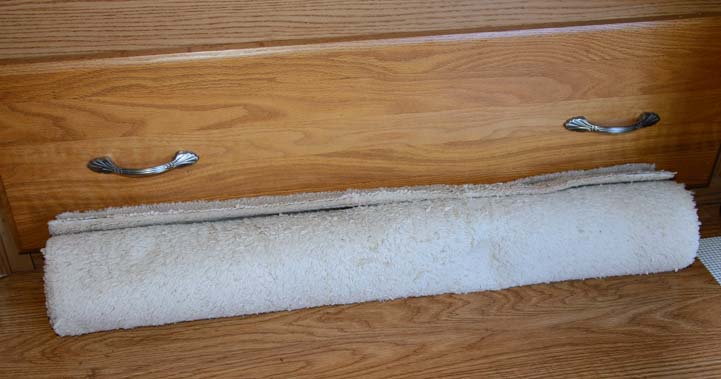
We have a large pots-and-pans drawer that occasionally likes to open. We roll up our throw rugs and place them so they can’t unroll in front of the drawer to keep it closed.
How to keep RV drawer closed in kitchen

Rolled up throw rugs keep this big pots and pans drawer closed while driving.

Rubber Shelf Liners

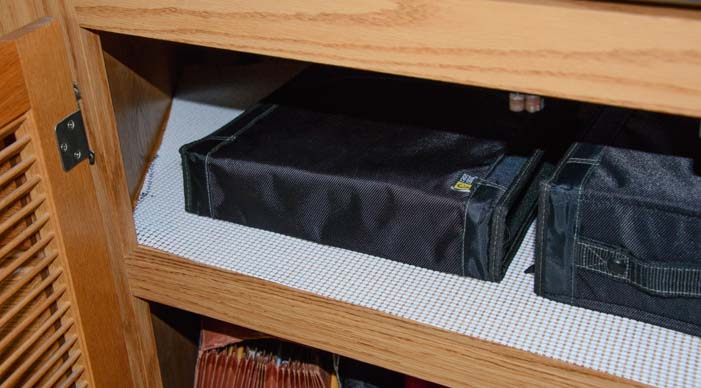
Rubber Shelf liners are invaluable, keeping everything in its place on each shelf as we travel. We try to make sure no plates, mugs or glasses are touching each other when we set out.
Shelf liner for RV shelves

Shelf liner keeps things in place when we drive

Closet Organization with Plastic Drawers

Our bedroom has a marvelous 8′ wide closet with sliding doors on it, but the interior is just open space with a rod for hangers. We don’t use it as a hanging closet (we have a different closet for that). Instead, we put stacked plastic drawers inside to give us more drawer space as well as a horizontal surface on the top.

RV closet plastic drawer organizer

We created more drawer space in one closet with lightweight, inexpensive plastic drawers.

These drawers don’t latch closed, so Mark drilled a hole through each drawer and the frame, and we simply slip a screw through each hole to keep it closed as we drive.
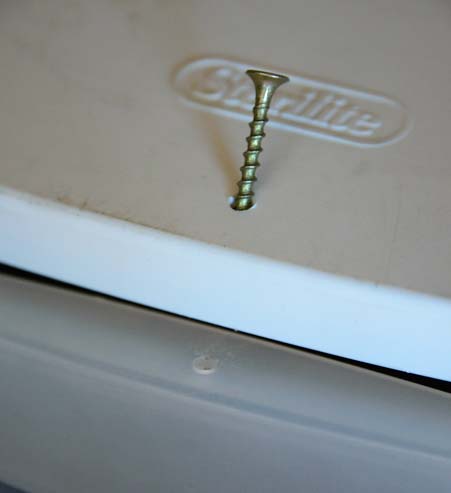
How to keep RV drawers closed

A screw through each drawer keeps it from opening in transit

Book Organization with Special Bins

We like to keep our heaviest items, like books, on the floor, as shelving in an RV tends to be quite flimsy. I found an awesome line of Rubbermaid “All Access” bins that have a clear plastic latching door on the front. Ours fits neatly under our desk (which we never use as a desk, so it’s wasted space). We can move the whole thing easily, can load it from the top easily and can get at the books from the front easily.
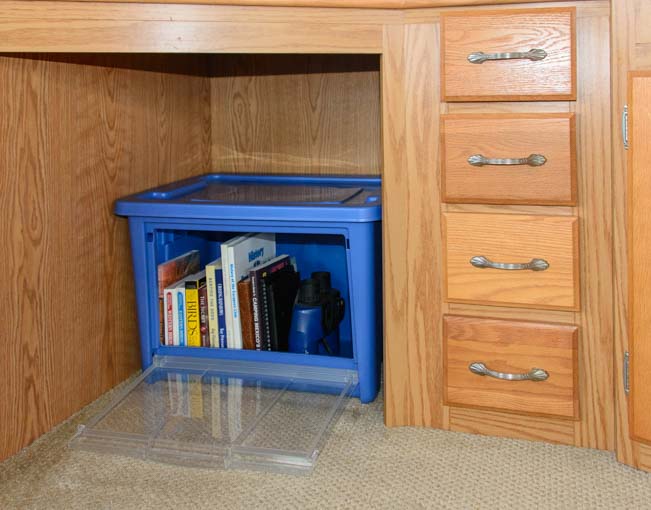
Rubbermaid All Access storage in RV

Rubbermaid’s “All Access” bins have clear front opening doors!

Dish Drying Mat

We do several small loads of dishes everyday, and I just love our little dish drying mat. It soaks up all the water, and once I move the dishes off of it I can hang it up to dry. Every so often I throw it in the laundry with the dish towels, and it comes out just fine.

RV dish drying mat

A dish drying mat sops up water, can be hung out to dry and thrown in the laundry.

How to Defrost an RV Refrigerator in 20 Minutes!

Propane RV refrigerators build up a lot of frost very quickly. After trying many different methods for defrosting our fridge over the years, we’ve outlined the steps we use to get this job done quickly:

How to Defrost an RV Refrigerator in 20 Minutes!
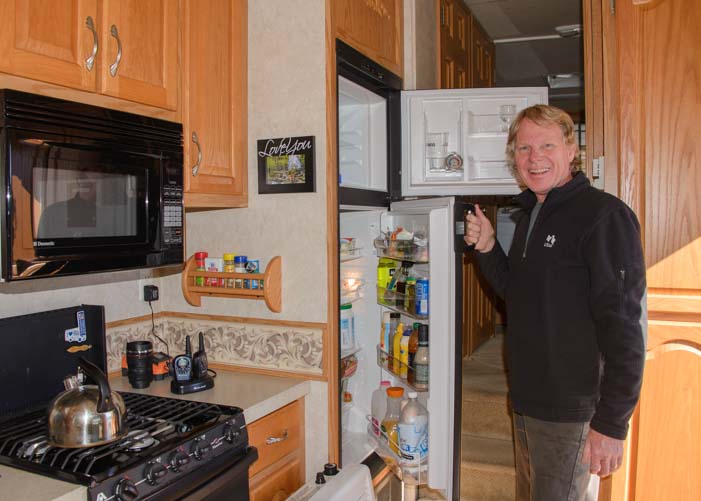
How to defrost an RV refrigerator

Defrosting the fridge doesn’t have to be a big nasty chore…

LED Wax Pillar Candles

I love romantic lighting, and there’s nothing like candles for that. But having an open flame isn’t great. Sailing friends of ours introduced us to pillar shaped LED candles made of real wax, and they are delightful. We’ve had ours for five years now, and we’ve had to change the batteries just once. They are wonderful for dim lighting in the pre-dawn hours or late at night, and they are a nice light around the rig when we watch a movie. The best part is they really look and feel like real candles, but you don’t have the risk that comes with an open flame.

RV tips LED flameless wax pillar candles in RV

LED pillar candles add warmth and create romantic mood lighting

Departure Checklist

RV Departure Checklist

All our mistakes on one page
with the worst ones underlined!

We thought we could memorize all the things that need to be done when we pack up the rig for towing, but a few mishaps taught us otherwise.

We now have a checklist taped inside the same cabinet that houses the main slide-out controls.

A quick glance before we leave ensures us that indeed all the hatches are closed, the shower door is latched, the window-mounted hummingbird feeder is not stuck on a window somewhere, etc.

This list is a comedy of errors made over several years of RVing. I’m sure more items will be added in the future!


Simmons Beautyrest Mattress

An RV can be outfitted with ordinary residential furniture, and we have upgraded our recliners to comfy La-Z-Boys.

More important for full-time RVers, there is no need to sleep on some funky RV mattress every night. We upgraded our mattress to a Simmons Beautyrest and just love it.

One important note is that many RV mattresses are non-standard sizes. An “RV Queen” is shorter than a standard Queen, and an “RV King” is narrower than a standard King. Here’s a chart showing the differences:

Standard “RV” Size
Queen 60″ x 80″ 60″ x 74″
King 76″ x 80″ 72″ x 80″
Simmons Beautyrest Plush Pillowtop mattress for RV

A good night’s rest…

In most rigs that have a Queen bed, the floorplan clearly states whether it is an RV Queen or a regular Queen. However, in virtually all RVs that have a king bed, it is an RV king. If you are buying an RV with a king bed and think you might want to upgrade to a residential mattress someday, make sure there are 4″ of extra width on the sides so the mattress can fit, even if it hangs over a little.


Laptop Lap Insulator

I mentioned that we don’t use our desk, and that’s because we use our dining room table for writing things out by hand and we use our laptops on our laps in our recliners. To keep from frying our legs with our laptops, we each have a laptop sized thin piece of foam that was part of the packaging of a solar panel. If you don’t have that handy, there are laptop lap insulators that can do the trick.

Laptop on thin foam insulation

A thin piece of foam keeps our legs from cooking under our laptops

Cleaning the Ceiling

We have a fabric ceiling liner and twice we’ve had to clean a stain from it. Each time we used spray bleach and the results were miraculous. You couldn’t see where the stain had been. Just make sure you cover everything nearby before spraying bleach in the air or you’ll have not just a clean ceiling but white spots on the rugs and upholstery too.


HEALTH and COMFORT in the RV LIFE

Living in an RV is not all that different than living in a stick-built house, so anything you enjoy in a conventional life is more than likely going to be something you can enjoy in your RV life. Here are some goodies that we use everyday, that have made a significant difference in our lives, and that we will continue to use daily no matter what kind of home we live in:

Amazing Grass

Amazing Grass powdered wheat grass drink

Helps keep fair haired people with thin skin from bleeding!

Mark has found that when he works around the rig, it is really easy for him to get little cuts and blood spots on the backs of his hand his hands. This turns out to be common with fair haired (red haired) formerly freckle-faced guys over 50. After some research, we found that the remedy is bunches of Vitamin K, and it turns out that wheat grass is loaded with Vitamin K! It has lots of other beneficial nutrients as well.

As long as Mark drinks a small dose of wheat grass everyday, his hands are as tough as when he was 20. But miss that wheat grass for a few days, and the next time he does any work around the rig, the slightest flick of his hand against something breaks the skin and he’s bleeding again. The best brand we’ve found is Amazing Grass.

Sound weird or too good to be true? We’ve suggested this crazy remedy to formerly red-haired friends, and they are now big believers and wheat grass connoisseurs too. Mark mixes it with fruit juice and actually loves the flavor! For those who don’t like veggies, the claim is that a spoonful of this wheatgrass powder is akin to a bushel basket of veggies. I don’t believe that myself, and I keep putting broccoli on our plates, but I think this stuff is worth its weight in gold when it comes to toughening up thin skin.

Hand-held Electric Massager

As former athletes, we’ve both spent a lot of time looking for ways to soothe aching muscles. We’ve owned a lot of different hand-held massaging tools over the years, including the very popular massager, and they’ve all been okay. But many of them ultimately wound up in yard sales because they had bad habits of pinching skin or were awkward to use.
 electric massager

electric massager

We’ve found that the hand-held massager is really fantastic. Because it has just one ball head on it (rather than the more common and goofy twin ball heads), you can place it over any sore spot and get instant relief. Rub it slowly on your leg muscles after a hike or bike ride or rub it on that weird spot in your neck after you sleep funny and wake up unable to turn your head, and you’ll feel better right away.

This massager was a lifesaver for me after a bad cycling accident I had years ago that messed up my shoulders and collar bone for a very long time, and Mark recently relied on it heavily when he wrenched his back. We’ve never had it pinch our skin at all.

The neat thing about these massagers is that they increase the blood and fluid flow in the sore area, which is really helpful for getting nutrients into the injured spot and getting waste fluids out. You don’t need to press hard on it — just place it on the sore area and you’ll feel the muscle relax instantly.

We have had ours for four years now, and we used it both on the boat and in our RV. It’s amazing just how kinked up you can get living in a small space, and it is so helpful to be able to get unkinked in a matter of minutes. We keep it in our living room so it’s always handy.

Sonicare Toothbrush

Sonicare toothbrush

Sonicare toothbrush

If only these Sonicare toothbrushes (and toothbrush heads) had been around when we were kids! It may seem ridiculous to spend a bunch of money on an electric toothbrush, but brushing your teeth with one of these makes your mouth feel like you just came from a cleaning at the dentist’s office. I’ve used a Sonicare toothbrush for 13 years now, and what a difference it has made in the overall health of my teeth.

One note for boondockers and off-the-grid RVers living on solar power, Phillips, the manufacturer of Sonicare toothbrushes has noted that the rechargeable batteries do not like modified sine wave inverters very much. I read this years ago, and have always charged ours on our pure sine wave inverter. Perhaps the batteries are better in newer models, I don’t know.

Also, for tech junkies who like to collect tech goodies, the magnet inside the Sonicare toothbrush heads is incredibly strong. Mark has saved a few of the magnets from our discarded Sonicare toothbrush heads and has found all kinds of interesting uses for them, including gluing one onto a long stick to retrieve tiny metal objects from hard to reach spots in the bowels of something.

Other RV Tips & Tricks

We have loads of other tips and tricks for RVers on this website. Many of the links can be found here:

RV Tech Tips and Product Reviews

A small sampling is below:

A wonderful website dedicated to RVing tips and tricks is RVtravel.com

Subscribe
Never miss a post — it’s free!

Our most recent posts:

More of our Latest Posts are in the MENU.   New to this site? Visit RVers Start Here to find where we keep all the good stuff. Also check out our COOL NEW GEAR STORE!! *** CLICK HERE *** to see it!

Below are some of our most POPULAR POSTS (also in the MENUS above)

Buddy - A Journey in Spirit - The story of an event that changed our lives forever.

ARTICLE INDEXES
  • RV Tech Tips Articles - A one page index of links to all our RV Tech Tips, RV Upgrades & RV Maintenance articles.
  • RV Lifestyle Tip Articles - An index of links to all our RV Lifestyle Tips (finances, boondocking, major repairs, work/jobs, etc.)
  • Solar Power Articles - Overview and tutorial articles for how to design and install solar power on an RV or boat
  • Product Reviews - An index of links to all of our Product Reviews
RV UPGRADES, SYSTEMS & TIPS MONEY FULL-TIME RV LIFESTYLE GEAR STORE
  • Gear Store - A list of the goodies, equipment and gear we've found useful in our RV lifestyle!
 

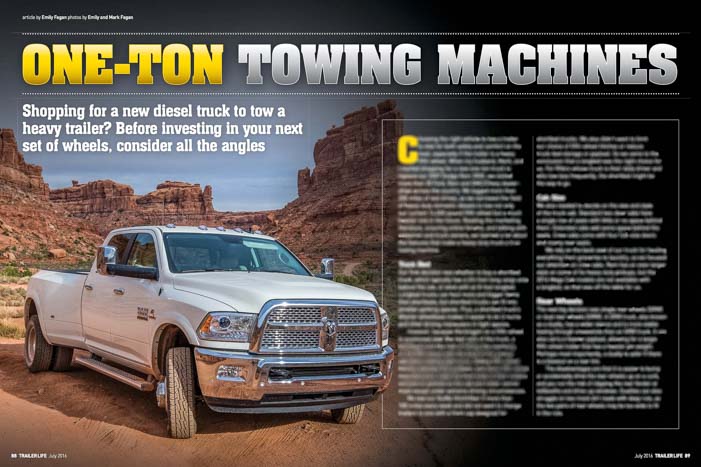
One Ton Towing Machines and 75 Years of Trailer Life

The July 2016 issue of Trailer Life Magazine is featuring our article about what it takes for a One Ton Truck to be a true heavy duty towing machine. We are incredibly proud to have been asked to write this article about diesel trucks for Trailer Life, and especially that it appears in this month’s very special edition: Trailer Life’s 75th Anniversary Issue.

Trailer Life Magazine Choosing a Truck for Heavy Duty Towing

Trailer Life Magazine – July 2016
Article by: Emily Fagan. Photos by Mark & Emily Fagan
You can read the article here: One Ton Towing Machines

Trailer Life Magazine has been reviewing trucks and giving readers insights and pointers for towing trailers since 1941. As they note on the cover, Trailer Life is “North America’s oldest and most-read magazine for RV enthusiasts.”

Besides our 7 page article about selecting a diesel pickup truck for towing a heavy trailer, this issue looks back at 75 years of RV history and has some wonderful articles on the evolution of RVing.

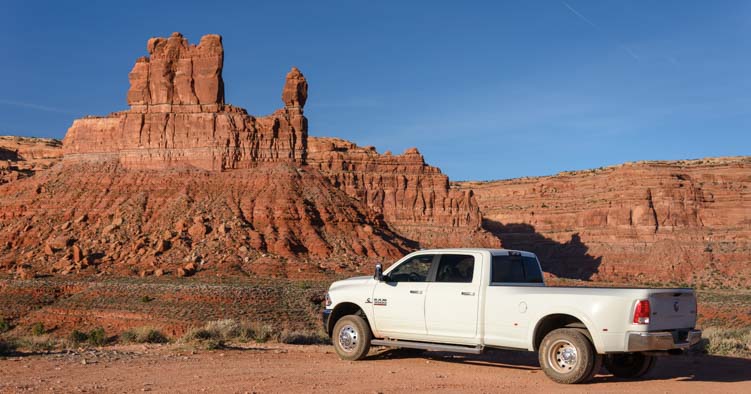
2016 Dodge Ram 3500 Dually truck in Valley of the Gods Utah

Trucks and trailers have gone through a huge evolution in the past 75 years!

From the Bowlus Road Chief aluminum sided trailers that resembled an upside down boat and inspired the Airstream, to the Shasta trailers that my hubby Mark remembers from his boyhood camping days with his family, to the iconic Winnebago bread box motorhomes with the big “W” on the side that we still see people driving all over the country, this issue of Trailer Life takes us back in time.

1937 Bowlus Road Chief

A 1937 Bowlus Road Chief — precursor to the Airstream Trailer!

1954 Shasta Travel Trailer

1954 Shasta Travel Trailer – Mark camped in one of these as a kid!

In this issue, they also talk about the resurgence of interest in retro trailers — we see so many retro trailers on the road as we travel! — and they also have a biographical article about the “Godfather” of Trailer Life Magazine, Art Rouse.

1950 Chevy and 1947 Tear Drop Trailer

We spotted a 1950 Chevy and 1947 Tear Drop Trailer in Sun Valley Idaho

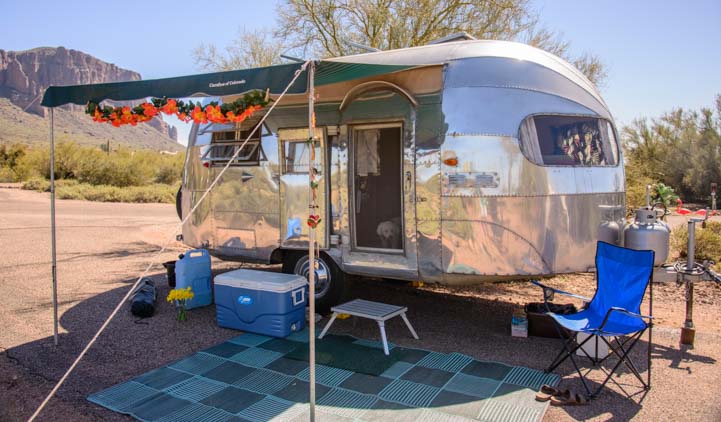
1959 Streamline Trailer

We met up with owners/restorers of a 1959 Streamline Trailer in Lost Dutchman State Park, Arizona

It is really exciting for our contribution about 2016 diesel trucks to be published this month right alongside such a fun and detailed retrospective look at the RV industry’s history.

Americans — and the world — have taken to RV living in trailers and motorhomes with great gusto for many years. We first got a true feeling for this long history when we visited the RV/MH Hall of Fame Museum in the heart of the RV industry — Elkhart, Indiana — back when we traveled through that area in 2010.

A Visit to the RV/MH Hall of Fame Museum

Besides being able to go into the museum library and peruse yellowed copies of Trailer Life, Escapees Magazine and Motorhome Magazine, as well as many others, from decades ago (the advertisements are hilarious and say so much about American culture in each era!), we also took a walk back in time along their winding indoor “Road Back in Time” exhibit. This took us past and through small and classic RVs from every decade.

RV-MH Hall of Fame Museum Road Back in Time

The “Road Back in Time” at the RV/MH Hall of Fame Museum in Elkhart, Indiana

Some of the craziest and earliest trailers of nearly 100 years ago were just a canvas tent on wheels (some even had wooden wheels!). The museum also displays Mae West’s House Car and other exotics, as well as a few Shasta, Mallard and Coachmen trailers and Winnebago motorhomes from the 50’s to the 70’s.

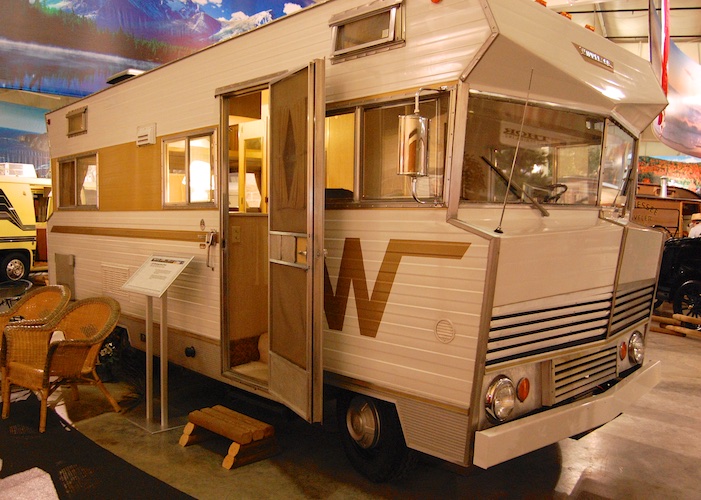
1967 19' Winnebegao Motor Home

a 19′ 1967 Winnebegao Motorhome on the “Road Back in Time”

But the cool thing is to see these oldies-but-goodies out on the road and still in use as we travel, and to meet people who have bought brand new retro style trailers too. You can get the old fashioned look but have all brand new appliances with the latest technology. How fun!

Modern retro trailer RV

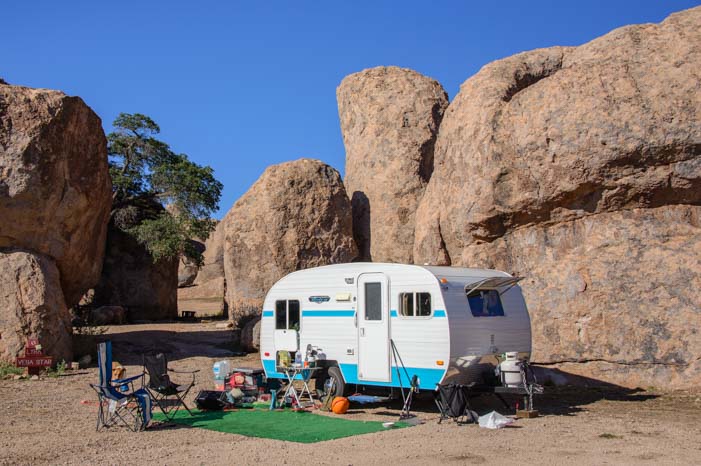
We had a chance to peek inside a brand new retro-style trailer in City of Rocks. NM – Wonderful!

Retro trailer RV

This fantastic retro trailer was pulled by a Honda Element… perfect!

Trailer Life Magazine has been celebrating their 75th anniversary all year long with some really intriguing online articles about the RV industry’s history. Here a link to a few delightful ones:

75 Years of Trailer Life – Online Article Index

For anyone contemplating the RV life or currently enjoying it, Trailer Life Magazine fills a special educational and inspirational niche. It is available both as a glossy print magazine and in digital form online.

After being subscribers ourselves for many years, we began publishing travel destination and technical features in their pages a few years ago (a sampling can be read here), and we still find something new and valuable in every issue. You can subscribe to Trailer Life’s print magazine or digital edition here:

Subscribe to Trailer Life Magazine

We love vintage trailers and get such a kick out of seeing them on the road. We’ve had a few fun enounters with owners of special trailers who have lovingly restored them:

As for buying a big ol’ truck to tow a modern monster fifth wheel trailer, there are some important things to take into account, as not all One Ton trucks are created equal, by a long shot. We talk about a few of those “must have” features in this blog post:

What to Look For When Choosing a Truck for Heavy Duty Towing – Tips for Truck Buyers

There are also quite a few other articles about trucks and towing on this blog as well:

Blog posts about trucks and trailer towing:

Subscribe
Never miss a post — it’s free!

Our most recent posts:

More of our Latest Posts are in the MENU above.

Yoho National Park – Emerald Lake & Natural Bridge – Aqua Magic!

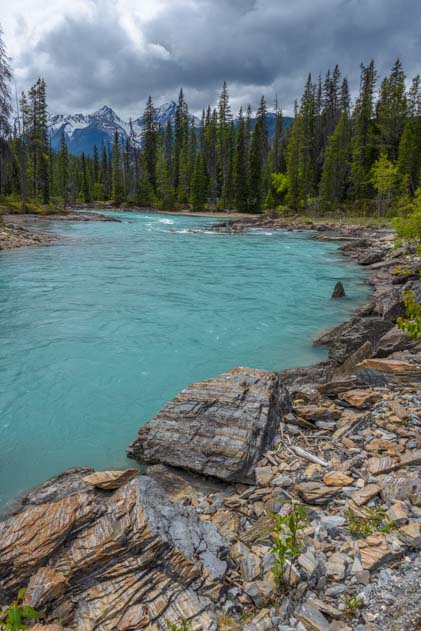
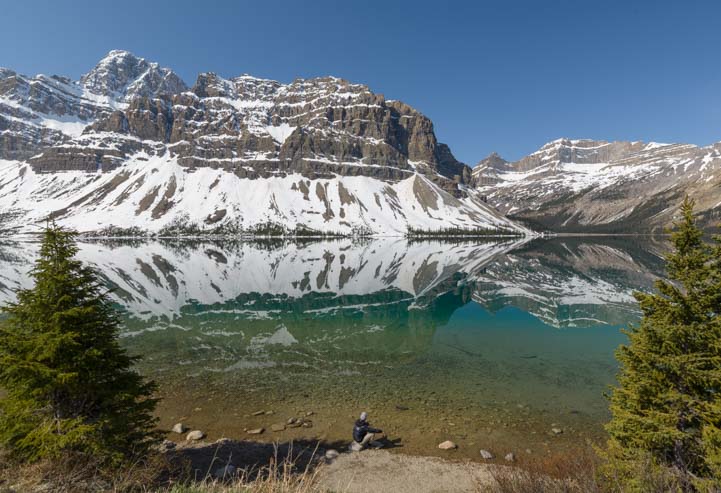
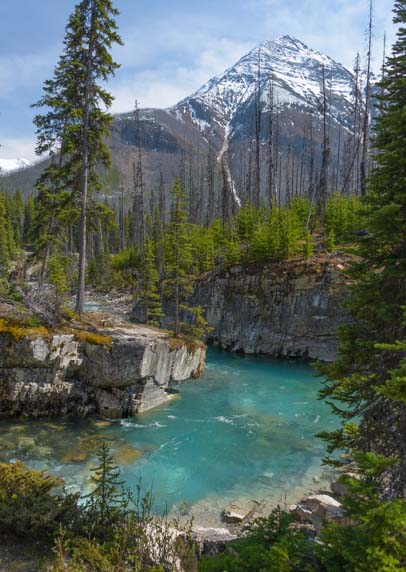
May 2016 – Just 25 miles from Lake Louise, there is a treasure trove of glittering aqua magic at the rushing waters of Natural Bridge and in the serene, glassy depths of Emerald Lake in Yoho National Park.

Yoho National Park British Columbia Natural Bridge

Views along Emerald Lake Road in Yoho National Park.

Four national parks are clustered together in this part of the Canadian Rockies, and Lake Louise is within reasonable shooting distance of all of them. Banff National Park and Jasper National Park lie on the eastern slope of the Continental Divide in the province of Alberta while Kootenay National Park and Yoho National Park lie on the western slope. All four parks abut each other.

Natural Bridge Yoho National Park British Columbia Canada Rocky Mountains

.

Despite the cold gray weather of a late May morning, we headed out to see what we could find at Yoho National Park. We’d never heard of it before, but being a National Park, it had to be good!

Natural Bridge Yoho National Park British Columbia Canada

.

We were aiming for Emerald Lake on the map. A name like that seemed to hold real promise! So it was a total shock when we rounded a bend on Emerald Lake Road and came across a fabulous bowl of turquoise waterfalls! This definitely wasn’t “Emerald Lake,” but it was a vivid aquamarine color and was very cool!

Natural Bridge Yoho National Park British Columbia Canada Rocky Mountains

Natural Bridge came as a complete surprise on our way to Emerald Lake.

It turned out that this place was called Natural Bridge.

Waterfall at Natural Bridge Yoho National Park BC Canada

Water tumbled every which-way.

We wandered all around the rocks, totally mesmerized by the vivid color of the water flowing over them.

Waterfalls at Natural Bridge Yoho National Park BC Canada

Jagged rocks and rushing water.

It was all so beautiful, it was impossible to decide whether to stand still and try to take it all in and admire it quietly, or to run around on the rocks and zip back and forth over the bridge to try and see it from all angles all at once.

Bridge at Natural Bridge Yoho National Park British Columvia

Tourists line the bridge overlooking the falls.

The Natural Bridge itself is formed by two rocks that make a narrow arch over the rushing water.

Yoho National Park Natural Bridge Canadian Rockies

The “Natural Bridge” is an arch over fast moving water.

Natural Bridge Yoho National Park British Columbia

.

But the most beautiful spot is right in front of this bowl of waterfalls where they seem to cascade into each other from every direction.

This spot is also where the tour buses let people off, and the buses were arriving in droves!

Tourists Natural Bridge Yoho National Park BC Canadian Rockies

Busloads of people arrived in waves.

The mission of everyone on every bus was to jump off and get a quickie selfie before jumping back on and zooming away to the next destination.

Selfie Natural Bridge Yoho National Park British Columbia Canada

The name of the game of the modern tourist – Selfie!!

I thought it would be neat to do a timelapse video that would show the water flowing over the rocks. Instead, I captured an awesome 6 second snippet of selfie-crazed tourists visiting a world renowned travel destination!

Continuing a few miles further down the same road, we finally arrived at Emerald Lake. Our first glimpse was of the Emerald Lake Lodge peeking out between the trees.

Emerald Lake Lodge Yoho National Park Canadian Rockies

Emerald Lake Lodge appeared between the trees in the distance.

What a lovely lodge and in what a great setting!

Emerald Lake Yoho National Park British Columbia Canadian Rockies

Emerald Lake Lodge

Emerald Lake Lodge Emerald Lake Yoho National Park British Columbia Canadian Rockies

Emerald Lake has canoes for rent, and even though it was a bit cool to be on the water, people were happily taking the canoes out.

Emerald Lake Yoho National Park British Columbia Canadian Rockies

Canoes ready and waiting on the dock.

Canoe Emerald Lake Yoho National Park British Columbia Canada Rocky Mountains

.

Maybe by taking the canoes out they persuaded the sun to come out for a little bit too. For a few moments, it was almost sunbathing weather on the dock!

Emerald Lake sunbathing Yoho National Park British Columbia Canada

Dreams of summer.

Like nearby Lake Louise and Moraine Lake as well as Peyto Lake and Waterfowl Lakes on the Icefields Parkway, we were blown away by the bright and rich color of the water here at Emerald Lake.

Canoes Emerald Lake Yoho National Park British Columbia Canada Rocky Mountains

.

Canoe Emerald Lake Yoho National Park British Columbia Canadian Rockies

Paddling across the pages of a brochure!

There is an easy trail that heads out around the western side of the lake, and we strolled along this path we came across a field of pretty wildflowers that lured Mark right down to the ground.

Wildflowers Emerald Lake Yoho National Park British Columbia Canada

Mark gets down with the flowers.

And what wonderful photos he took!

Wildflower Emeral Lake Yoho National Park

.

The view across the lake looking back towards the Emerald Lake Lodge was expansive, and the water was amazingly still.

Emerald Lake Lodge Yoho National Park Canada

The mountains reflect in the lake below.

Just then, out of the corner of my eye, I noticed something floating by. Then it splashed around a bit and threw a spray of water into the air. It was a loon!

Loon in Emerald Lake Yoho National Park BC Canadian Rockies

It’s a loon!

He was taking a late afternoon bath!

Loon Emerald Lake Yoho National Park BC Canada Rocky Mountains

.

He didn’t seem to mind being photographed as he dipped and bobbed in the water, so I clicked away. What luck!!

Loon Emerald Lake Yoho National Park BC Canada Rocky Mountains

.

There is a lot more to see in Yoho National Park than just Natural Bridge and Emerald Lake, and on our way home we stopped in the unique little train depot town of Field to poke around. This is a cute village of B&B’s that is perched right on the edges of Banff and Yoho National Parks, making an ideal home base for visitors.

One of the homes is the original Yoho National Park Superintendant’s house. He had some pretty nice digs! A sign explained that he had such an elaborate house to give him an air of authority in the newly formed National Park where the more gritty industries of mining and railroads had always ruled.

Yoho Natioanl Park Superintendant's House British Columbia

The original Yoho National Park Superitendant’s House

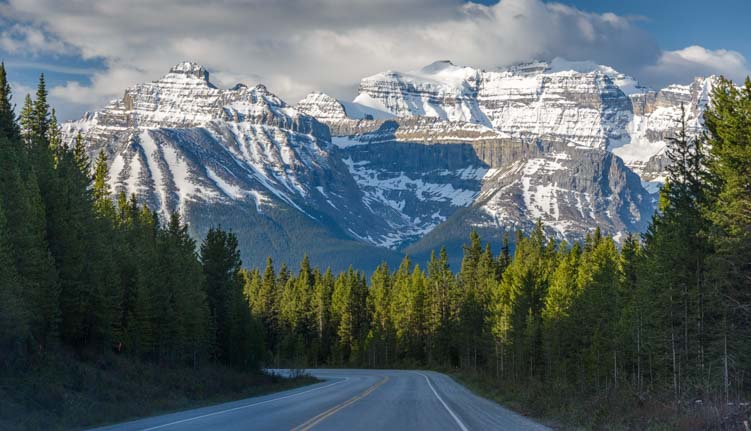
The drive to and from Yoho National Park is beautiful — as are all the highway drives in the area. Some of the best mountains views to be found are actually right on the Trans-Canada 1 highway!

Yoho National Park Canadian Rockies Canada

The drive between Lake Louise and Emerald Lake was striking.

We returned home to Lake Louise and unwound a bit. It was cold and gray and wet, but the scenery we had been seeing was so heavenly we sure didn’t mind!!

Happy campers Lake Luise Banff National Park Canada

Yeah, it’s cold, but who cares?!

More info about Emerald Lake & Natural Bridge in Yoho National Park in the links below…

Subscribe
Never miss a post — it’s free!

Links for travelers heading to Yoho National Park:

<-Previous || Next->

Other blog posts from our RV travels in Canada:

Tips for travelers visiting Canada by RV
Tales from our RV travels in Canada

Our most recent posts:

More of our Latest Posts are in the MENU above.

Choosing a Tripod – Sunwayfoto Tripod & Ball Head Review

Selfie mania has taken the world by storm, and in our travels we are no exception.

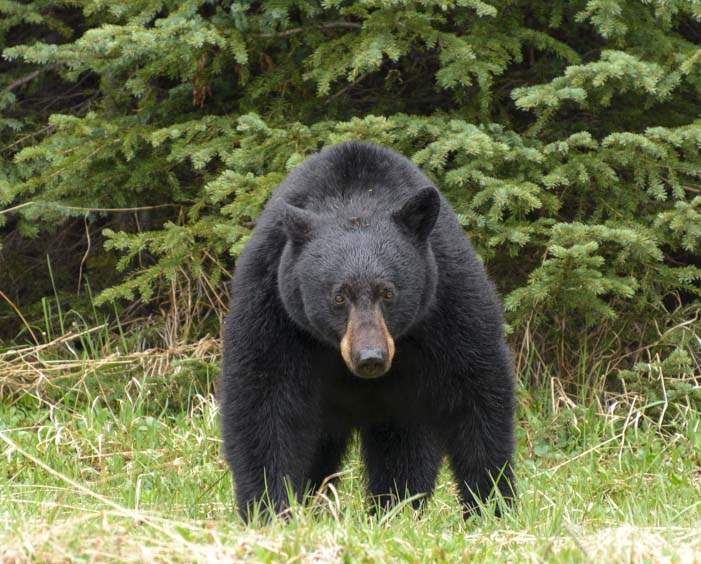
Selfie photo taken with a bear

Mark gets a selfie with a bear. Wow!

And selfie sticks are all the rage at every scenic overlook we go to.

Selfie sticks and camera tripod

The gear of choice in the National Parks is the selfie stick!

But there is a better way to hold a camera still, especially a big DSLR: a good quality tripod and ball head!

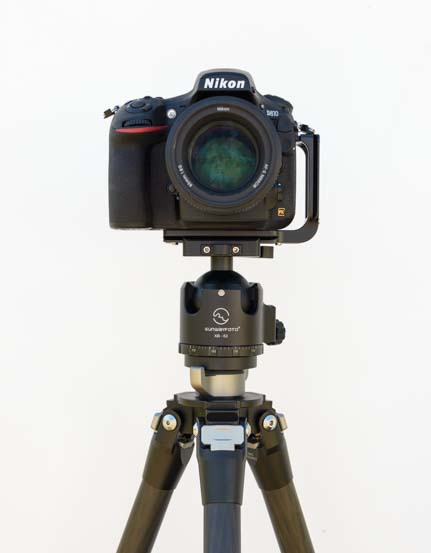
Nikon D810 on Sunwayfoto T2C40C Tripod with XB-52DL ballhead and PNL-D810R bracket

Sunwayfoto T2C40C Tripod and XB-52 Ballhead

Photography has become a major part of our lives and travels, and as our skills have improved, we have upgraded our camera equipment as well. In the following link we outline all of the gear we use, from cameras and lenses to accessories like flashes and tripods to software for post-processing (as well as explaining how we organize our photos), and we also provide links to all the resources we’ve used to learn how to take photos:

Photography Gear, Tips and Resources

Tripods – Cheap vs. Expensive

It is said that as a photographer improves, his or her biggest equipment concern goes from getting the right camera body to buying the most appropriate lenses to finding the best tripod. We are working our way along this progression, and soon after Mark purchased his Nikon D810 camera a few months ago, he began casting about to find a suitable tripod for it.

Mark’s old tripod / ball head combo was too flimsy to support the D810 properly, and it wasn’t all that easy to use. He decided on the Sunwayfoto XB-52DL “Low Profile” Ball Head sitting on the Sunwayfoto T2C40C tripod legs with an optional DDC-60LR Quick Release Clamp.

Because we have a lot of readers who are seeking to improve their photography as they travel, just like we are, we wanted to share our experiences with this new tripod kit.

Sunwayfoto XB-52DL Ballhead with T2C40C Tripod and DDC-60LR Quick Release Clamp

Sunwayfoto DDC-60LR Quick Release Clamp atop an XB-52 Ballhead
all sitting on a Sunwayfoto T2C40C Tripod

When we first became interested in photography, we couldn’t understand why tripods could be as cheap as $29 or as much as $1,500. But we have learned since then that the price/performance trade-off is very simple, and it all boils down to three things:

  • Sturdiness
  • Overall weight
  • Ease of use

Cheap tripods take precious time to set up, can be difficult to position the camera correctly to get the image you want, don’t necessarily hold the camera perfectly still (and sometimes even let it droop a little after you’ve got everything in place), and are often too short to put the camera at eye level. Expensive tripods do all those things with ease, and they are lightweight enough to carry comfortably.

When is a tripod handy to use? Whenever the shutter speed is so slow that hand-holding the camera will make the whole image blurry because your hand moves while taking the photo.

Sunwayfoto XB-52DL Ball Head T2C240C Tripod PNL-810R L-Bracket Review-2

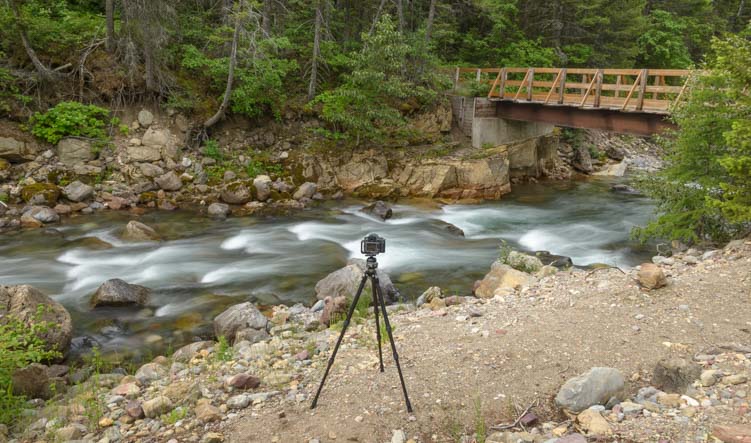
With a tripod, flowing water can be made to look silky smooth.

We use ours all the time for low light photography (sunrise and sunset), for night photography (shooting starry nights and the Milky Way), for long shutter speeds to reveal movement, like the flow of waterfalls, and for time-lapse sequences that show movement in a video format, like fast moving clouds and changing light.

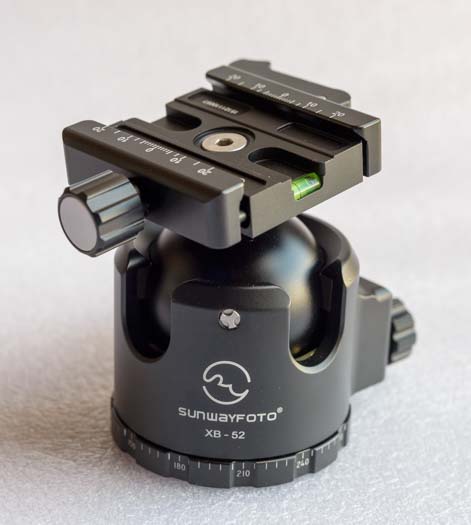
Sunwayfoto XB-52DL Ballhead with DDC-60 Quick Release Clamp

The Sunwayfoto XB-52DL ball head is rated to support a whopping 132 lbs., far more than other comparable tripod ball heads.

Like most budding photographers, we’ve frittered away lots of good money on cheap tripods as we’ve learned these lessons. After all, when you’ve broken the bank buying a camera and lenses, who wants to dig deeper in their pockets to get a decent tripod?

As is his way, Mark did an exhaustive search with a few criteria in mind for what he wanted in his new tripod. It had to be:

  • Stable enough to hold the camera with our longest lens, which is a Tamron 150-600mm 
  • The ball head had to be strong enough that the camera wouldn’t droop after it was tightened 
  • The tripod legs had to be carbon fiber (i.e., strong and lightweight)
  • He didn’t want it to spend all our savings on it
Sunwayfoto XB-52DL Ballhead with T2C40C Tripod and DDC-60LR Quick Release Clamp

An excellent value.

In the end he settled on the Sunwayfoto T2C40C Tripod with the Sunwayfoto XB-52DL “Low Profile” Ball Head. This is a Chinese brand that is not particularly well known in the US yet, and is competing against the much more expensive brands like Gitzo.

Sunwayfoto – Quality Camera Gear at a Good Price

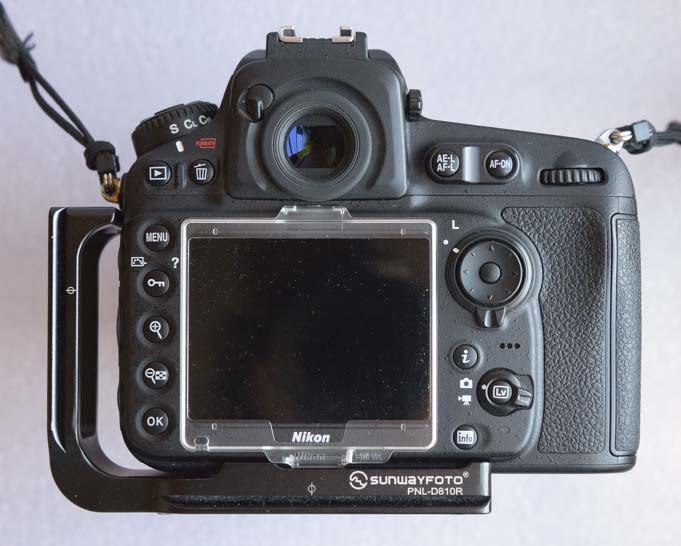
Mark began looking into the Sunwayfoto brand because we both used their L-Brackets on our Nikon D610 cameras and Mark now uses the Sunwafoto PNL-D810R L-Bracket on his new Nikon D810. We liked the craftsmanship of our L-brackets, and when we discovered Sunwayfoto makes tripods and ball heads, their tripod kits seemed worthy of a closer look.

Side note: an L-Bracket is a handy piece of gear that mounts on the camera so the camera can be slipped onto the tripod easily. Because the bracket is an L-shape, the camera can be switched from a landscape orientation to a portrait orientation quickly and easily.

PNL-D810R Bracket for Nikon D810 camera

The Sunwafoto PNL-D810R L-bracket mounts on the camera to simplify the use of a tripod.

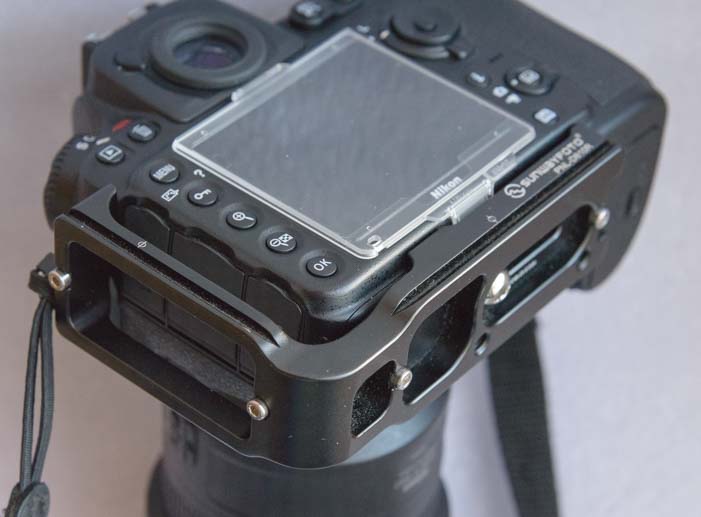
Sunwayfoto PNL-D810R mounted on Nikon D810 camera

Nikon D810 camera with Sunwafoto L-bracket attached.

Sunwayfoto PNL-D810R mounted on Nikon D810 camera

The L-bracket gets screwed into the bottom of the camera.

What’s neat about the Sunwayfoto L-brackets is that they fit the camera body perfectly, even when the plastic cover protecting the camera’s LCD display is in place. L-brackets made by other manufacturers don’t always fit properly when the plastic LCD protector is on. The Sunwayfoto L-brackets also provide lots of room to plug optional cables (like an external microphone) into the left side of the camera.

Sunwayfoto XB-52 “Low Profile” Ball Head

Getting a good, solid and easy to use ball head was the most important criteria for Mark’s new tripod. The Sunwayfoto XB-52DL “Low Profile” Ball Head is the biggest of Sunwayfoto’s ball head offerings, and it is truly unbelievable in craftsmanship and strength. It is beautifully machined and anodized from a solid piece of aluminum. It also has a geared locking mechanism that claims a Max Load of 132 lbs (60 kg)! That is 82 more pounds than top-of-the-line Really Right Stuff’s largest ball head.

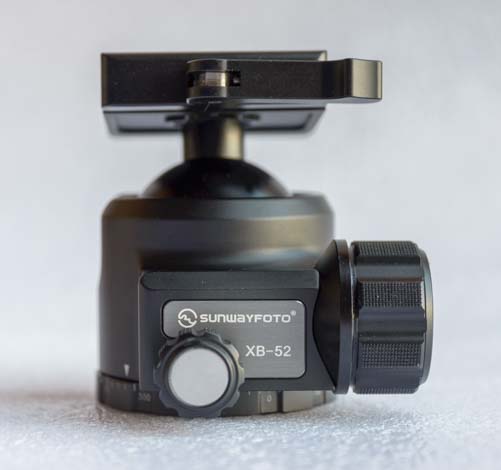
Sunwayfoto XB-52DL Ballhead for camera tripod

Sunwayfot XB-52DL Ballhead

Sunwayfoto XB-52DL camera ballhead

Sunwayfoto XB-52DL ballhead

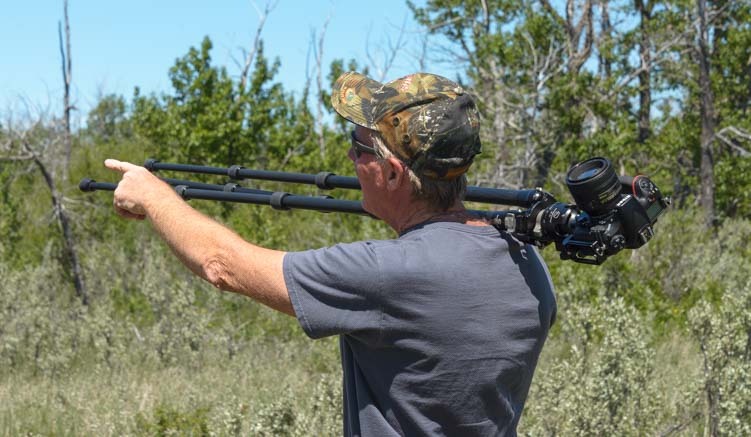
When locked down, the camera does not budge on this ball head. Even when carrying the tripod on his shoulder, Mark has found the camera doesn’t droop like it did with his old tripod setup.

Carrying Sunway T2C40C Tripod with XB52-DL and Nikon D610 camera

The ballhead holds the camera securely when walking around with the tripod on your shoulder.

The large locking knob on this ball head is made from solid metal and has an excellent feel to it. There is no rubber to wear out or come loose.

Sunwayfoto XB-52DL Ballhead Adjustment Knob

There are two adjustment knobs for the ball,
a large outer knob and a smaller inner dial.

There are two knobs for adjusting the position of the camera, a larger knob for gross adjustments and a fine tuning dial within that knob that lets you set precisely how easily (loosely) the camera swivels on the ball head.

Sunwayfoto XB-52DL Ballhead Fine Tuning Knob

The smaller knob fine-tunes how easily the camera flops around on the ball when it is loose. The larger one tightens it down.

There are also two notches on the ball head body to allow the camera either to be dropped extra far forward (for images aimed towards the ground) or to be tilted sideways (for portrait oriented images).

Sunwayfoto XB-52DL Ballhead notches

There are two notches that allow the camera to be dropped down, rather than just a single one like many ball heads.

Sunwayfoto XB-52DL ballhead notches for camera angles

The notches in the ballhead allow the camera to be faced down.

Sunwayfoto XB-52DL ballhead notch points camera down

.

The notches for setting up a portrait orientation are handy if you don’t want to use an L-bracket.

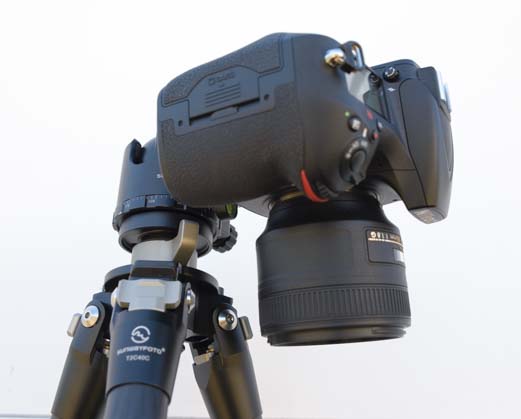
Nikon D810 on Sunwayfoto XB-52DL ballhead PNL-D810R bracket and T2C40C Tripod

The notches allow the camera to be flopped on its side for a portrait shot.

We prefer using an L-bracket and not using the ball head notches for portrait shots because of the inherent stability of placing the camera on the top of the tripod for portrait orientations instead of having it hang off the side.

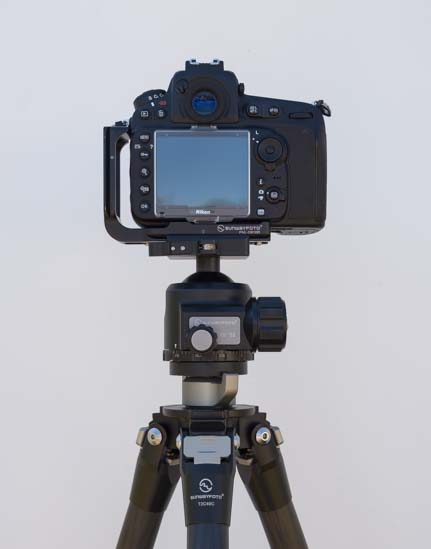
Nikon D810 camera landscape mode on Sunwayfoto PNL-D810R and XB-52DL ballhead

Using an L-bracket gives the option of either a
landscape orientation…

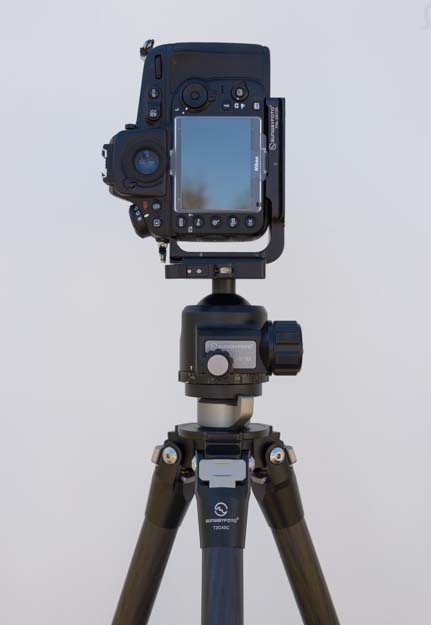
Nikon D810 camera portrait mode on Sunwayfoto PNL-D810R and XB-52DL ballhead

…or portrait orientation
Here the camera is on top of the tripod and not flopped to the side in one of the notches, a more balanced and secure setup.

For the weight conscious, the Sunwayfoto XB-44 ball head is slightly smaller and lighter than the XB-52 but can still support a whopping 88 lbs. It weighs just 483 grams as compared to the 685 grams of the bigger ballhead, a difference of over 7 ounces (nearly half a pound), which some folks would find makes a difference on a long hike.

“Quick Release” or “Lever Release” Clamps

One of the best things about the XB-52DL “Low Profile” Ball Head is the fast action of the quick release. Simply flip the quick release lever open and slip the camera into the Arca Swiss compatible slot and then close the lever, and you are ready to go.

Sunwayfoto DLC60 Quick Release Lever Clamp

The Sunwayfoto quick release clamp makes it super easy to lock the camera in position.

Note that the Sunwayfoto XB-52 ball head without the “DL” suffix does not have a quick release clamp.

I was so impressed by Mark’s new tripod ball head, and especially the quick release mechanism, that I got one too. It replaced the Benro V2 ball head that had come with my Benro Travel Angel II tripod. The Benro ball head had a knob that had to be unscrewed and screwed back in each time the camera was mounted or dismounted on the tripod, something that got to be a real pain when I wanted to switch between portrait and landscape orientations quickly. It is also not nearly as finely crafted.

Like Mark, I absolutely LOVE the XB-52DL ball head. Even though it is almost 13 ounces heavier than my old Benro ball head, I find it is fast and easy and precise and worth the few extra ounces of carrying weight on a long hike. My tripod can still be strapped onto my Camelback H.A.W.G. hydration pack for those long days of hiking where I want 100 ounces of water along with a second lens, assorted filters, spare battery and SD cards.

Sunwayfoto XB-52DL ball head on Benro Travel Angel II Tripod Legs carried on a Camelback H.A.W.G

The ultlra strong Sunwayfoto XB-52DL ball head fits comfortably on my Benro tripod legs and can be carried easily with my Camelbak H.A.W.G. hydration pack.

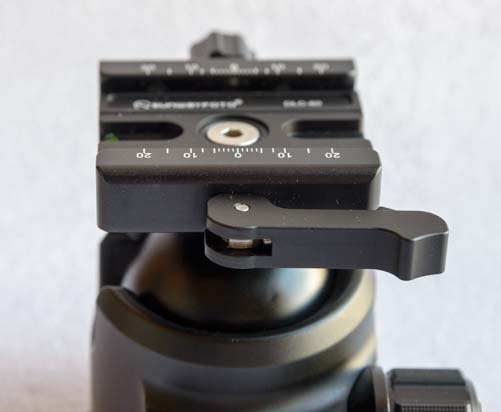
The quick release clamp locking lever has three positions: Open (right), Center, and Closed (left). There is a slide-lock on the lever so you can’t accidentally bump it and risk having your camera fall off the tripod.

The knob opposite the quick release clamp is used to fine-tune the tension, or grip, on the clamp holding the camera’s L-bracket in place. This is an important knob if you have more than one camera body and L-bracket (or other Arca Swiss style plate), because the widths vary ever so slightly.

Sunwayfoto DLC60 Quick Release Lever Clamp

In the “open” position, the camera slips onto the plate.
The knob (top) adjusts the grip on the camera’s L-bracket or plate

When the lever is in the Center position, the locking mechanism is half open and allows the camera to slide from left to right within the range of the stops on the L-Bracket, but is still secure so the camera won’t slide out and fall to the ground.

Sunwayfoto DLC60 Quick Release Lever Clamp

In the “center” position the camera can be slid from side to side on the plate without falling off.

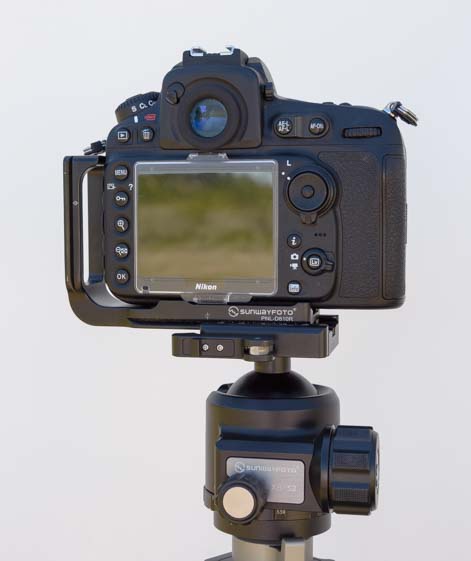
Nikon D810 on Sunwayfoto T2C40C Tripod with XB-52DL ballhead and PNL-D810R bracket

The camera can be slid about an inch to the left and right while everything else remains in place on the tripod.

When the lever is opened all the way, the camera can be removed for handheld shooting or for switching to the other orientation (portrait or landscape) quickly.

Sunwayfoto DDC-60LR Quick Release Clamp

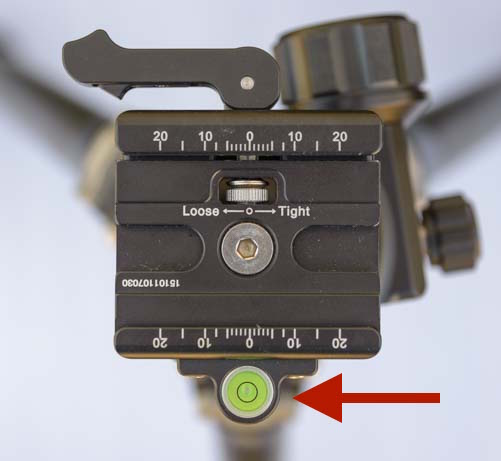
Mark likes to do panorama shots, so he opted to replace the quick release clamp (or “Lever Release”) plate that comes with the XB-52DL ball head with the DDC-60LR Quick Release Clamp instead, because it has a bubble level that indicates whether the series of shots are going to be level with the horizon or are going so go sailing off on some kind of crazy diagonal, ruining the final, stitched image.

Sunwayfoto DDC-60LR Lever Release clamp bubble level and tension knob

The optional DDC-60LR lever release has a bubble level which helps with stitching multiple images into one panorama shot.

This is another finely made product that not only makes mounting the camera on the tripod a snap and makes switching from landscape to portrait (with an L-bracket) an absolute breeze, but provides a mechanism for leveling as well.

The primary difference between this quick release clamp and the one that comes with the XB-52DL ball head is that the knob opposite the quick release clamp that is used to adjust the grip tension on the camera’s L-bracket (or other Arca Swiss style plate) is no longer there. It has been replaced by the bubble level. In the absence of this knob, there is a small dial on the plate for adjusting the grip tension instead.

Sunwayfoto DDC-60LR Lever Release clamp bubble level and tension knob

The fine tuning grip tension knob is now a dial on the plate itself.

There is a spring that sits against the dial to hold it in place once you set it to your liking. Mark found the spring was a bit loose and the dial would turn a little on its own until he put a drop of Blue Loctite on the threads. In hindsight, he’s found that this has made it difficult to adjust the tension.

Another subtle difference between the Sunwayfoto DDC-60LR Quick Lever Release Clamp and the one that comes with the XB-52DL ball head is that the open/closed positions of the quick release lever can be reversed (for left handed people). Simply place the lever in the center position, pull it out slightly, and rotate it. Then the open and closed positions will be in the opposite directions (left to open and right to close).

Our overall impression is that the quick release clamp that comes with the Sunwayfoto XB-52DL Ball Head is easier to work with than the DDC-60LR Quick Release Clamp because the grip tension adjustment is done with a knob rather than a tiny dial. However, it also has a minor limitation, for those who want to stitch together lots of images for panoramas, that it doesn’t have a bubble level.

Sunwayfoto T2C40C Tripod

The tripod legs Mark chose are the Sunwayfoto T2C40C tripod legs. This tripod is a thing of beauty, with 8 layers of woven carbon fiber and a one piece CNC machined main structure.

Sunwayfoto T2C40C Tripod legs

The Sunwayfoto T2C40C tripod has carbon fiber legs.

The leg joints on this tripod have longer (40mm) friction tubes in them than are found on most comparable tripods, which makes a sturdier connection between the leg joints when they are extended. The tripod is rated at a max load of 12KG or 26.5 lbs. which isn’t the beefiest tripod out there, but the legs seem solid enough for the Nikon D810 and big Tamron 150-600 lens.

Sunwayfoto T2C40C Tripod leg joints

The legs extend and retract by rotating a knob at each joint.

The only drawback is that the tripod is only 52.5” tall (without the center column extended). Once the XB-52 ball head is attached, it stands 56” high, which is a few inches taller than Mark’s older tripod setup and is almost at eye level for him (he would love for it to be just a few inches taller!).

Another improvement would be to have some foam on at least one of the legs for carrying in cold weather, although foam might start to deteriorate over time, and this tripod looks like it will last a long time.

Sunwayfoto T2C40C Tripod with Nikon D810 camera

The tripod is just about at eye level for Mark, but not quite.

The Sunwayfoto T2C40C tripod also has a very innovative (patented) leg pivot mechanism. Instead of the typical hex head screw attachment to connect the legs, there is a connector which has a special anti-twisting boss design on one screw head while the other side screws into it with a torx type connecting screw (the Torx wrench is included with the tripod). This prevents the screws from twisting and loosening up inside the leg attachment as the legs are pivoted and moved back and forth to set up. Most Tripods legs need to be tightened frequently with two hex style wrenches.

Mark found that after using this tripod for about a month he actually needed to tighten those screws a bit. He removed the screws and put a drop of Blue Loctite on the threads which helped.

Sunwayfoto T2C40C Tripod and XB-52DL ballhead

There are torx screws to keep the leg joints at the top stiff.

One neat feature of the Sunwayfoto T2C40C tripod is that the rubber feet on the bottoms of the legs can be unscrewed and removed to expose corrosion resistant Titanium spikes. These spikes plant the tripod firmly in loose conditions. Some of the other hardware used in this tripod is also made of Titanium, which very impressive indeed!

Sunwayfoto T2C40C Tripod titanium feet covers

The rubber feet at the bottom of the tripod legs can be unscrewed.

Sunwayfoto T2C40C Tripod titanium feet

Underneath the rubber protection booties, the tripod has titanium points for gripping loose soil.

The center column of the tripod can be removed and replaced with the included short column so you can splay the legs out all the way out for close-to-the-ground macro photography.

Sunwayfoto T2C40C Tripod without center column for macro photography

The center column is removable to allow for close-up photography
that is low to the ground.

The Sunwayfoto T2C40C tripod also comes with a spring hook that can be put on the bottom of either the long or short center column tube to help weight it down in windy conditions. Mark likes to hang his gear bag on it to keep his pack off of the ground and help steady the tripod.

Sunwayfoto T2C40C Tripod with gear bag suspended

You can hang your gear bag on the center hook to weight the tripod down.

The Sunwayfoto T2C40C tripod comes packed in a high quality padded carry bag that has carry straps that can be attached to it for hiking. The kit even includes a nice lens cleaning cloth (a cleaning cloth is also provided with the Sunwayfoto XB ball heads).

Sunwayfoto T2C40C Tripod in padded carrying case

The Sunwayfoto T2C40C tripod comes with a good quality
padded carrying case.

Sunwayfoto T2C240C Tripod Review

The tripod carrying case has both a shoulder strap and a carrying handle as well as several pockets for small items like spare memory cards and battery.

Sunwayfoto is continuing to perfect their design of this tripod. When it was first introduced, it had only one anti-twist slot or groove in each of the legs, which made it prone to rotating and breaking. This resulted in some unfavorable online reviews of the tripod. The design has been upgraded and now has 2 slots in each leg. 

If you are in the market for a quality tripod kit, the Sunwayfoto ball heads, quick release clamps, L-brackets and tripod legs are a good bang for the buck. All of these are mix-and-match, so if you already have tripod legs you like, as I did, you can simply upgrade the ball head and/or the quick release clamp. Or, go all out like Mark did, and get the whole darn kit!

Sunwayfoto XB-52DL Ball Head T2C240C Tripod PNL-810R L-Bracket Review

.

Happy shooting!!

Subscribe
Never miss a post — it’s free!

Here is a little more manufacturer info about these products and links to buy them:

Here is all the camera gear we use and resources we’ve relied on to learn photography:

Our most recent posts:

More of our Latest Posts are in the MENU above.


Moraine Lake – Crown Jewel of Banff National Park

May 2016 – While Lake Louise may be the heart of Banff National Park in Canada, Moraine Lake is its crown jewel. During our stay in this glorious part of the Canadian Rockies, we visited Moraine Lake several times.

Moraine Lake Banff National Park Alberta Canada

Moraine Lake is without doubt the crown jewel of Banff National Park!

If you do a Google search for Banff National Park and click on “Images,” almost every image is of Moraine Lake. It is such a beloved spot that the iconic view of the lake from the moraine rock pile on its northern shore was on the back of the Canadian $20 bill for ages.

Moraine Lake Canada 20 dollar bill

Moraine Lake was on the back of the $20 bill in Canada.

For much of our stay in Lake Louise, the road to Moraine Lake was closed to motor vehicles. However, it was open to cyclists, and we enjoyed a fabulous 18 mile round trip bike ride to the lake and back.

Moraine Lake Bike Ride View Lake Louise Bnaff

The view over the handlebars!

The snow was still thick in certain areas, and Mark noticed someone had drawn a heart in the snow and put their initials in it. He made a slight modification to those initials so they would be “M + M.” Sweet!

Moraine Lake Bike Ride Lake Louise Banff National Park Canada

There was still a lot of snow along the road to Moraine Lake when we rode there on our bicycles.

The bike ride to Moraine Lake is very popular, especially in the pre-season when bikes have the entire road to themselves.

Tandem bicycle Moraine Lake Louise Banff National Park Alberta Canada

There’s a bit of a climb heading to the lake, but what a view to ride towards!

When we got to the lake we found hundreds of logs lying on the ground. Even though we were in cycling clothes, we scrambled all over the place on the shore to get photos and enjoy the views that were all ours for the moment.

Moraine Lake Bike Ride Banff National Park Alberta Canada

When we first got to Moraine Lake on our bikes, we were the only ones there.

Cyclist at Moraine Lake Banff National Park Canada

Woo hoo!!

The lake was extremely low. It was so low that a floating dock in front of the Moraine Lake Lodge was sitting on the ground.

Moraine Lake Dry lakebed Lake Louise Banff

The water level in the lake was low enough that a summertime float was sitting on the ground.

Luckily, there was still plenty of lake to enjoy. I crawled up on the huge pile of rocks to get a bird’s eye view. Wow!!

Moraine Lake Banff National Park Lake Louise Canada

What a view!

Our bike ride to Moraine Lake was one we will never forget.

Bike Ride Moraine Lake at Lake Louise Banff National Park Canada

What a fantastic ride this was.

On the return trip from Moraine Lake to Lake Louise, after an initial climb, we had a fantastic, screaming descent. I was surprised to look on my bike computer afterwards and see I’d hit 40.5 mph. Not bad for just coasting on a mountain bike! (But not quite as zippy as when Mark and I hit 64.5 mph on our tandem descending a steep hill in Texas years ago!).

Bicycle computer 40.5 mph riding at Moraine Lake Banff National Park

Not too shabby for a mountain bike.

The road to Moraine Lake was finally opened to motor vehicles in the last week of May, and we drove up there early one morning to catch a sunrise.

Sunrise Moraine Lake at Lake Louise Banff National Park

The first glimpse of sunrise at Moraine Lake.

The pink and orange hues of the mountain peaks reflected beautifully in the lake below.

Dawn Moraine Lake at Lake Louise Banff National Park

Reflections at daybreak.

As we were leaving, we noticed a nearly full moon between the peaks.

Moon at dawn Moraine Lake Banff National Park Canada

There was a cool moon too!

Full moon at Moraine Lake Banff National Park Canada

Moraine Lake deserves many return visits, and we couldn’t stay away.

Cycling Lake Moraine Banff National Park Alberta Canada

What a place to ride a bike!

Both cyclists and motor vehicles of all kinds drive up from Lake Louise all day long. It’s an okay road for a small RV, but I wouldn’t take anything much bigger than a short Class C because the parking lot at the lake gets crowded.

RV travel Moraine Lake Banff National Park Alberta Canada

RVing in the Canadian Rockies – Wow Wow Wow!

There is a terrific viewing area right next to the parking lot called the “Rock Pile.” When we had come by bike, we didn’t see it, and I had scrambled all over the slippery rock pile. But when we came by car, we saw the trail right by the bathrooms and joined the throngs of people that were walking on the easy and short paths and staircases in and around the rocks.

Rock stairs Moraine Lake Banff National Park

On our first visit, we had no idea there were stairs up onto the rock pile for the best lake views.

Everyone wants to see “The View” at Moraine Lake, and no wonder, it is gorgeous! But this is also a place where you can slip away from the crowd a bit, find a comfy seat on a rock, and take in other views around the lake.

Relaxing at Moraine Lake near Lake Louise Banff NP Alberta Canada

Mark took a little time out away from the crowds.

Snow clouds Moraine Lake Banff National Park

And how great it is to kick back and gaze at this view high above!

We both savored our time at Moraine Lake, and I wandered away from the rim too.

Happy camper Moraine Lake at Lake Louise Alberta Canada

Sometimes it’s most satisfying to stop dashing here and there and just to sit down and look around.

I looked up and saw the crests of the mountains were filled with beautiful patterns.

Patterns in the Rocky Mountains Moraine Lake Banff Lake Louise

Wonderful patterns in the mountains around Moraine Lake

We discovered the rock pile at the north end of the lake is filled with savvy little chipmunks. These guys are adorable little beggars (buggers) who are anything but shy.

Chipmunk at Moraine Lake Banff National Park Lake Louise

Smart little chipmunks live in the rock pile and keep an eye out for free food.

Their main focus is seeing who’s got what kind of snacks to share. Sometimes they get lucky and can have lunch with a view.

Chipmunk at Moraine Lake near Lake Louise Alberta Canada

Sneaking a snack with a fabulous view!

The views at Moraine Lake drew us back again and again.

Boulders at Moraine Lake Banff National Park Canada

Moraine Lake is truly exquisite.

Even when the scenic overlook is filled with people who have turned their backs to the view while they worship the selfie god, it is still a spectacular place to be.

Moraine Lake at Lake Louise Banff National Park Alberta Canada

Worshipping the selfie god – what a great place to do it!

If you take your RV to Lake Louise, a visit to Moraine Lake is an absolute must.

In the pre-season, the car-free bike ride is truly exhilarating and you’ll find the lake very peaceful and quiet when you get there. But even in the busier season when the road and parking lot are loaded with cars, and people are crammed in everywhere, it is still a beautiful drive with utterly breathtaking views.

Moraine Lake Lake Louise Banff National Park Alberta Canada

Moraine Lake – Sensational!!

There’s more info about Moraine Lake in the links below…

Subscribe
Never miss a post — it’s free!

Here are some helpful links for the area:

Other blog posts from our RV travels in Canada:


Tips for travelers visiting Canada by RV
Our RV travels in Canada

<-Previous || Next->

Our most recent posts:

More of our Latest Posts are in the MENU above.

Icefields Parkway – True Blue Lakes, Avalanches & Grouse!

May 2016 – The Icefields Parkway weaves between towering mountain peaks through the Canadian Rockies in Banff and Jasper National Parks, offering up a new and utterly astonishing vista at every turn.

RV travel Icefields Parkway Banff National Park Canadian Rocky Mountains

The Icefields Parkway takes you from one jaw-dropping view to another..for 150 miles!

We wanted to catch the magic of Canada’s Rocky Mountains at dawn, and on a few mornings we hopped on the Icefields Parkway at the break of day to chase down down that magical moment.

Bow Lake Icefields Parkway Banff National Park Canadian Rockies

Dawn at Bow Lake on the Icefields Parkway

But it is hard to capture the soft pinks that fill the sky a half hour before sunrise when the sun crests the horizon at 5:30 a.m., as it does in this part of the world in late May, especially since it wasn’t getting totally dark until nearly 11 p.m. So much for sleeping!

Bow Lake Icefields Parkway Banff Canada

Morning on the Icefields Parkway.

So, we didn’t quite make it before sunrise, but we still got the beautiful golden glow that spreads across the mountains as they wake up.

Rocky Mountains Banff National Park Icefields Parkway

Soft light radiates across the peaks of the Rocky Mountains

Banff National Park Rocky Mountains Icefields Parkway_

.

The snow was thick in certain spots up on the mountain peaks, and we loved the patterns the rock and snow made high above us.

Canadian Rocky Mountains Icefields Parkway Banff

.

Patterns on the Rocky Mountains Banff National Park Canada

Beautiful patterns on the crests of the Rockies

The tourist literature for the Icefields Parkway doesn’t wax poetic about any particular location. Their implied suggestion is simply that you should explore on your own and discover the most exquisite spots for yourself.

Bow Lake Icefields Parkway Banff National Park Alberta Canada

Looking across Bow Lake.

Luckily, a friend had told us to make sure we didn’t miss Peyto Lake. He hadn’t elaborated about why Peyto Lake was a “must see,” but as soon as we emerged from the short hiking trail to the viewing area that overlooks the lake, we knew exactly why he wanted us to go there.

Peyto Lake Banff National Park Icefields Parkway Alberta Canada

Peyto Lake comes into view.

“Oh, Wow!” I blurted, my eyes like saucers. “Who spilled the can of blue paint?”

Peyto Lake Icefields Parkway Canadian Rocky Mountains Banff National Park

Is Peyto Lake really that blue? Yes!

The small crowd on the viewing platform laughed. Every hiker that arrived had the same shocked look on their face as I did when they came upon the stunningly gorgeous view in front of them. The color of Peyto Lake was extraordinary.

A group lined up for a selfie, and who wouldn’t?

Selfie at Peyto Lake Icefields Parkway Banff National Park Canada

Selfie time!

A dad took his son below the deck and sat with him for little while enjoying the view. What an unforgettable moment and priceless memory.

Peyto Lake Icefields Parkway Banff National Park Alberta Canada

A father and son take a moment to enjoy the view together.

His wife was standing next to me at the overlook, and we chatted for a few moments. I discovered they were from Germany and they had visited Peyto Lake a week earlier when the mountains had been blanketed in snow. “It was all white — except for that blue,” she said, her hand sweeping across the painted landscape as she described what she had seen.

All of the rivers and lakes in the Canadian Rockies turn vivid green and blue in the sunlight, as long as the water isn’t too stirred up. The water is full of “glacial flour” which is crushed rock that the glaciers have ground down to a fine powder as they move. This crushed rock becomes suspended in the water and creates vivid blues and greens in the sunlight.

Another beautiful pair of lakes on the Icefields Parkway is the Waterfowl Lakes (Upper and Lower). Rather than royal blue, these lakes are turquoise colored like Lake Louise.

Waterfowl Lake Banff National Park Icefields Parkway

Unlike the true blue of Peyto Lake, the Waterfowl Lakes are turquoise!

We didn’t see any waterfowl there, but as we were wandering around the shore, we came across a grouse.

Grouse on the Icefileds Parkway Banff National Park

Down at our feet, Mark spotted a grouse!

This bird noticed us, but she wasn’t too concerned. She was preoccupied with brushing off the amorous attentions of a her suitor who was walking around her in circles.

Male grouse on the Icefileds Parkway Banff National Park

“Hey, baby, are you free tonight?”

This guy was pulling out all the stops for her.

Male grouse strutting Banff National Park Canada

Do you think I’m sexy?

She wasn’t all that impressed, even though he was strutting his stuff for all he was worth, but I sure was!

Male grouse struts Banff National Park Canada

She was having none of it, but I thought his display was great!

Back out on the Icefields Parkway, we continued to be blown away by the towering mountains and their snowy peaks.

Icefields Parkway scenic drive Banff National Park Canada

The scenery on the Icefields Parkway never gets boring!

Occasionally, when we pulled over to admire the views, we could hear the thunderous sound of an avalanche high up in the mountains.

Rocky Mountains Peyto Lake Icefields Parkway Banff National Park

.

Then we’d see the snow pouring down the crevices in the side of the mountain.

Avalanches Icefields Parkway Banff National Park Alberta Canada

Avalanches are common as the snow melts in the spring.

It was incredible just how loud these avalanches were, and equally incredible just how hard it was to spot where the avalanche was happening. They were way far up in the peaks, and they didn’t seem all that big from our vantage point on the ground.

Canadian Rocky Mountains Icefields Parkway Banff NP

Triangles in the sky.

The loftiness of the mountains was awe-inspiring.

Canadian Rockies Icefield Parkway Banff National Park

.

And the clarity of lakes was too.

Herbert Lake Icefields Parkway Banff National Park Canada

Herbert Lake

The Icefields Parkway is a fast moving thoroughfare between Lake Louise and Jasper, but we never got tired of driving it!

RV at Bow Lake Banff National Park Icefields Parkway

Now THAT’s a scenic drive!

The village at the southern end of the Icefields Parkway, Lake Louise, makes a great “home base” for exploring the southern half of the Icefields Parkway. For more info, see this post: Lake Lousise – Heart of Banff National Park. At the end of that post (and in the following link) there is info about RV camping at Lake Louise.

Subscribe
Never miss a post — it’s free!

More info about the Icefields Parkway:

Other blog posts from our RV travels in the Canadian Rockies:

<-Previous || Next->

Places we’ve traveled where there is vivid blue or turquoise water:

Our most recent posts:

More of our Latest Posts are in the MENU above.

Icefields Parkway – Canadian Rockies Scenic Drive – WOW!

May 2016 – The Icefields Parkway is the quintessential “Canaadian Rockies Scenic Drive,” 150 miles of Canada’s most dramatic Rocky Mountain scenery. It goes between Lake Louise in Banff National Park at the south end and the town of Jasper in Jasper National Park at the north end.

It is touted to be one of the world’s top scenic drives. And they aren’t kidding!

Icefields Parkway Banff National Park Alberta Canada

The Icefields Parkway is one of the world’s most spectacular scenic drives.

We drove the southern half of this eye-poppoing scenic drive several times during our stay in Lake Louise. We were blown away by the thrilling views every single time.

Icefields Parkway Banff National Park Alberta Canada

The dramatic views never quit!

The Canadian Rockies were right there all around us, nearly close enough to reach out and touch.

RV on Icefields Parkway Banff National Park Canada Rocky Mountains

RVs are the most common vehicles on the Icefields Parkway.

The mountains towered in front of us and behind us, and we kept jumping around in our seats looking in every direction out the windows, our jaws hanging open in amazement.

Icefields Parkway Canadian Rocky Mountains Banff National Park

.

The mountains changed shape and color constantly as we drove in the varying light of early morning, midday and late afternoon.

RV in Rocky Mountains on Icefields Parkway

.

The magnificent Icefields Parkway provides a feast for the eyes while driving but, for its length, it has suprisingly few scenic overlooks and pullouts where drivers can stop to admire the breathtaking vistas.

One of the best scenic viewpoints is at Herbert Lake. It is the very first pullout at the south end of the Icefields Parkway, and loads of drivers who start their drive at Lake Louise zoom right by.

Herbert Lake Icefields Parkway Canada Rocky Mountains Banff National Park

Herbert Lake – A gorgeous spot on the Icefields Parkway that many northbound tourists skip past!

The temptation when you round the bend and pass Herbert Lake and first catch a glimpse of the mountains reflecting in the water is to think, “Oh, we’ll have lots of scenic viewpoints on this drive, and the Icefields Parkway is 150 miles long, so let’s keep going for a while and stop a little further down the road.” After all, you’ve been on the Icefields Parkway for all of about three minutes at this point! We zipped by the first time but made a point to stop there on several return visits.

As I stared at the mirrored reflections in the lake one morning, I noticed the clouds were flying across the sky. So I set up a timelapse on my camera to capture the swift movement and variable light. What a cool result!!

One day as we drove along the Icefields Parkway, we were craning our necks looking up at the mountains when we noticed a cluster of cars pulled over on the shoulder of the road. Everyone was pointing their cameras towards the woods. It turned out there was a black bear just in front of the trees.

Getting a photo of a bear Banff National Park Canada

People stopped their cars to snap pics of a bear.

What a beauty he was!! We were tickled to see a bear so effortlessly for a second time here in the Canadian Rockies.

Black bear Icefields Parkway Banff National Park Canada

Another wonderful black bear sighting!

He stood still for a long time, chowing down on the grass, and our cameras clicked furiously.

Black Bear Banff National Park Icefields Parkway

.

Black Bear Icefields Parkway Banff National Park_

.

He stayed so long that his audience cycled in and out. Some folks got back in their cars and drove off and newcomers pulled over to park and stare in awe. Finally, the bear lumbered off into the woods.

Black bear Banff National Park Icefields Parkway Canada

.

There are a number of dry camping campgrounds on the Icefields Parkway but most were closed, even in late May. We wandered through a few — what great spots to camp during the summertime! — and we discovered a lovely view of the Rockies reflecting quietly in a large puddle on the ground near Mosquito Creek Campground.

Reflections Canadian Rocky Mountains Icefields Parkway Banff

Canadian Rockies reflections…

Lots of RVs travel this highway, and we saw more rental RVs than any other kind of vehicle on the road. The Icefields Parkway was under construction in spots, so there were loads of big construction trucks driving very fast on a mission to get where they were going. In the early mornings, though, we had the road to ourselves.

Rental RV Icefields Parkway Banff National Park Canada Rocky Mountains

The Icefields Parkway is a popular spot to take an RV!

One of the biggest and most popular scenic pullouts is at Bow Lake. This is a stunning lake, and we caught it in a mild mood one morning when it was as still as glass.

Bow Lake Icefields Parkway Banff National Park Canadian Rockies

Serenity on Bow Lake.

The patterns of the snow on the mountains reflected beautifully in the green depths of the water.

Bow Lake Icefields Parkway Banff National Park Canadian Rocky Mountains

We loved the images the mountains created in the green water of Bow Lake.

The pullout at Bow Lake is very large, and we hung out for an hour or so watching the tourists come and go. First there was one RV.

RV driving on Icefields Parkway to Jasper Banff National Park Canada Rockies

An RV slows down to pull over at Bow Lake

Then two.

RV parking on Icefields Parkway to Jasper Banff National Park Canada Rockies

.

Then the tour buses began to show up and park alongside the cars and RVs. There was a constant shuffle of vehicles coming and going and people running around the overlook admiring the exquisite view.

RV and tour bus sightseeing Icefields Parkway Banff National Park Canada Rocky Mountains

Bow Lake is the most popular pullout in the southern half of the Icefields Parkway. It was busy in the off season!

Everyone wanted a selfie. Well, if you can’t lick ’em, join ’em! So, we got one too!

Happy hikers Banff National Park Icefields Parkway

.

Our original plan had been to drive the Icefields Parkway with our rig, going slowly from south to north, and possibly camping midway at the Columbia Icefields.

Canadian Rocky Mountains Icefields Parkway Banff National Park Canada

We never got tired of views like these!

But we soon found out that being 55′ long from end to end, we would have struggled to fit in most of the pullouts and in almost all the trailhead parking areas.

Rocky Mountains Icefields Parkway Canada

Icefields Parkway scenery – beautiful!

So, we drove the Icefields Parkway at leisure in our truck, stopping in different places each time we drove it, and never having to fight to squeeze a big rig into a tiny parking area.

Eventually, when we were finally ready to go all the way to Jasper, we took our rig straight through without stopping. But there was a lot to see around Lake Louise and Banff first, so that story will have to wait!

Fifth wheel RV on the Icefields Parkway Banff National Park Canada

.

The Icefields Parkway is a glorious road, and it is an easy drive that doesn’t involve any hairpin turns or steep climbs. So it is very manageable for a big RV and tow vehicle/toad as long as you don’t plan to pull over too often. And the views… oh my, the views!!

Canadian Rockies Banff National Park Icefields Parkway Canada

We saw sensational Canadian Rockies scenery at every turn on the Icefields Parkway

Subscribe
Never miss a post — it’s free!

More info about the Icefields Parkway:

Other blog posts from our RV travels in Canada and the Canadian Rockies:

Canada RV travel tips – Border crossing, currency exchange, gas prices, etc.
Our RV adventures in Canada – All the places we have enjoyed in Canada

<-Previous || Next->

Our most recent posts:

More of our Latest Posts are in the MENU above.

Lake Louise – RV Travels to the Heart of the Rockies in Banff

May 2016 – Banff National Park is the heart of the Canadian Rockies, and Lake Louise is at the very center of that heart. After we took our RV through the wonderful mountain scenery of Kootenay National Park, our appetites had been whetted by all the gorgeous snowcapped peaks rising up in the distance, and we were ready to slow down and see them up close. Lake Louise was the ideal spot.

Lake Louise dawn Banff National Park Alberta Canada-2

Dawn at Lake Louise in Banff National Park

Lake Louise is a turquoise lake tucked into a circle of snowcapped mountains, and at dawn we found the water was glassy smooth and utterly clear.

Lake Louise Banff National Park Canada

Lake Louise

This is a top tourist destination, and from just after sunrise until well after dark it is loaded to the gills with people from all over the world. But during the pre-dawn hours of quiet mornings in mid-May, we found ourselves sharing the lake with just a few other people, all with cameras aimed across the lake.

Dawn Lake Louise Banff National Park Alberta Canada

Crystal clear water and mirrored reflections at Lake Louise

The early morning rays of sun cast a pink and orange glow on the snow covered peaks in the distance. The air was calm, and the few people down at the lake were silent as they gazed across the water. When we spoke, we whispered. There was a special, intimate aura among us all, an acknowledgement that this was a unique moment we would all remember.

Lake Louise Dawn Banff National Park Alberta Canada

Sunrise at Lake Louise

Just a few steps behind us, the enormous Fairmont Chateau Lake Louise Hotel rose up to towering heights, and slowly came to life.

Fairmont Chateau Lake Louise Hotel Alberta Canada

The Farirmont Chateau Lake Louise Hotel

Hotel guests made their way down to the water’s edge to join us admiring the lake. Soon, tourists began to descend on the shore by the dozens. Our magical few minutes of privacy with the sunrise by the lake had passed.

Not long after, the tourist buses began to arrive, disgorging fifty selfie-stick wielding tourists at a whack. We left the shore and wandered inside the hotel to explore its luxurious and posh interior.

Lake Louise Fairmont Chateau Hotel interior

The elegant lobby of the Fairmont Chateau Lake Louise

This is an elegant hotel with a beautiful dining room that overlooks the lake. What a spot for a meal!

Lake Louise Fairmont Chateau fine dining

Fine dining right on the lake at the Fairmont Chateau Lake Louise

Lake Louise is best enjoyed outdoors, though, and there are lots of bright red canoes for rent at the boat dock. One by one, the canoes paddled out onto the lake.

Canoe on Lake Louise Banff National Park Alberta Canada

A canoe slips by on the lake

We followed the shoreline trail for a ways, with one eye on the path in front of us and the other peering between the trees at the shockingly bright turquoise water.

Lake Louise Pine Trees Banff National Park Canada

Vivid turquoise water on Lake Louise

Turquoise Lake Louise Banff National Park

Is it real?!

Lake Louise Banff National Park Alberta Canada

Have a seat and soak in the beauty of this place!

Dandelions were in full bloom and filled a hillside. Whoever thought dandelions could add so much to a scene?!

Lake Louise Dandelions and jade water Banff National Park

.

Lake Louise was first explored by Swiss mountaineers, and it soon became a tourist destination. Two tea houses were built up in the hills as destinations for hikers where they could get a yummy bite to eat and have a place to hike to besides just “the top.”

We took the trail that heads to the Lake Agnes Tea House, and it climbed steadily for quite a ways.

Lake Agnes Tea House Trail Banff National Park Canada

The mountain views intensified on the hiking trail to the Lake Agnes Tea House

The mountain peaks were breathtaking — and the trail got us huffing and puffing and out of breath too!

Canadian Rockies Lake Agnes Tea House Hike Banff National Park

.

Eventually, we came to a small lake. Mark climbed up on a pair of stumps for a better view.

Stump man Lake Louise Banff National Park Canada

.

Some other hikers came along behind us and got our pic leaning against these stumps. Even though it was the off-season and it was a cold, gray day, there were a lot of hikers on the trail. I can only imagine how busy this trail must be on a gorgeous, sunny day in July!

Selfie Lake Agnes Banff National Park Canada

.

Just a little further on we came to Lake Agnes. There was still a lot of ice on the water, but the edges near the trail on the shore were crystal clear.

Lake Agnes Banff National Park Canada

Lake Agnes was still partially covered in ice.

Apparently, the Lake Agnes Tea House is extremely popular when it opens in the summertime. The workers who staff it stay there during the work week and hike down to the Lake Louise village on their days off (or do more adventurous hikes into the mountains starting from the Lake Agnes Tea House).

Ice on Lake Agnes Banff National Park Canada

Thin veils of ice cover the rich aqua hues of Lake Agnes

Many of the goods for the restaurant are brought up by horses and wagons on a different trail, but a lot of the provisioning is done by workers who hike up and down this steep trail carrying heavy loads alongside the tourists.

Lake Agnes Banff National Park Alberta Canada

Lake Agnes

Happy Hikers Lake Agnes Tea House Trail Banff National Park Canada

.

The wildlife stays on the mountain year round, of course, and a chipmunk came over to see if we’d carried up a snack for him.

Chipmunk at Lake Louise Alberta Canada

.

The Lake Agnes Tea House wasn’t going to open for another two weeks when we were there, but the hike was still really enjoyable.

Lake Agnes Tea House at Lake Louise Alberta Canada

The Lake Agnes Tea House – Not open quite yet. Darn!

A cup of hot tea at the Tea House would have been very welcome. After we’d been up there tip-toeing around the ice and snow and taking photos for a while, I was chilled to the bone. And then it began to drizzle!

Freezing cold at Lake Agnes Banff National Park

A hot tea would be nice right about now!

We’ve heard the baked goodies that come out of the Lake Agnes Tea House kitchen are very tasty. But we made do with our water bottles and protein bars in our packs. Sigh.

The amazing thing about Lake Louise is that after you look at it for a while, you get used to the stunningly vivid turquoise color. But each time you look away and then look back again, your jaw drops. And so it happened as we hiked back down to the lake.

Lake Louise Glimpse Banff National Park Canada

Lake Louise jumps out at us through the trees.

Lake Louise Rain Banff National Park Canada

The jade hues glowed as rain flattened the water.

The trees opened up as we neared the lake and the incredible color was right there in front of us once again.

Lake Louise Banff National Park Alberta Canada

The vivid colors of Lake Louise are stunning.

We returned to the shoreline of Lake Louise at dawn and at dusk several times and saw the lake in both sunshine and rain. Each time the beauty of the whole area caught us off guard.

Lake Louise Reflections Banff National Park Alberta Canada

Dawn at Lake Louise is a special time, and we enjoyed taking photos down at the shore
(see Mark down there with his tripod?!).

It didn’t matter if we were sharing the lake with two hundred other awe-struck tourists or with just two or three other photographers who were as determined as we were to capture its beauty on camera, this place was incredible.

Lake Louise Dusk Banff National Park Alberta Canada

What a place!

.

Lake Louise RV & Camping Info

For RVers heading to Lake Louise, there is a National Park campground next to the village that is fairly big rig friendly and has electric and water hookups as well as slightly lower pricing for dry camping in those same sites if you choose not to plug in.

Most of the campsites are surrounded by trees, so RVs with solar power may not get much sunshine. The campsites are all double-wide with two rigs sharing a single pull-through, coming from opposite directions, with power pedestals on the outsides (it can be a tight squeeze between neighbors).

During the off-season, payment is made at a self-pay kiosk at the entrance (American credit cards accepted, just write the number on the envelope), however during high season the entrance booth is manned.

For the few weeks in mid to late May that we were there, the campground was less than half full every weeknight, and almost every RV had a double-wide site to itself. On the weekends it was busier. May Long Weekend (Victoria Day), the weekend before America’s Memorial Day, it promised to be packed with visitors from nearby Calgary, but cold rain kept them away this year.

Virtually all of the RVs we saw were rental units. Later in the season, reservations are a must, and the campground is full every night. Once the kids are out of school in late June, the RV fleet becomes a mix of personally owned family RVs and rental units.

There is a dump station that is the biggest RV dump station we have ever seen anywhere, with six stations lined up side by side!

RV dump station Lake Louise Campground Alberta Canada

Six RVs were using the dump station at once when we were there, and one was in line waiting…in the off-season!!

Lake Louise Village is essentially a strip mall with a handful of boutique tourist shops. There is a grocery store that caters to the young, hip, hiking crowd, offering all the fancy gourmet goodies you might long for at prices that are significantly north of their normally high costs. So, for the budget conscious, get provisioned up before you arrive.

May weather is very unpredictable. During our stay we saw highs ranging from the high 40’s (Fahrenheit) to the low 80’s and lows as low as the low 20’s. We saw sleet, snow, rain, and beautiful bright warm sunshine too.

Lake Louise Village Alberta Canada

Lake Louise Village

Many, if not most, of the hiking trails were closed in the pre-season due to avalanche activity, and some of the roads were closed too. However, the trade-off was that the crowds were manageable and we could always find a place to park and a place to put our tripod for a photo, something we’ve heard can be challenging during the warmer and more popular midsummer months of July and August.

More info and links below and more Canadian Rockies blog posts coming soon!

Subscribe
Never miss a post — it’s free!
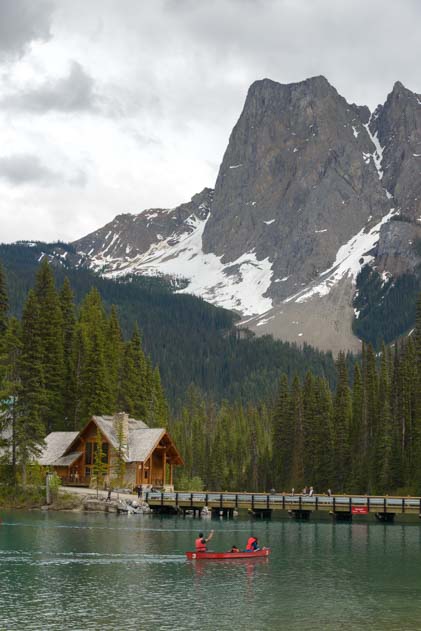
Here is some more info about Lake Louise:

Related blog posts about Canada, the Canadian Rockies and Photography:

Tips for RVers traveling to Canada
Links to our blog posts from all of our RV travels in Canada
Photography Tips – Resources that Taught Us to take Great Photos plus the Camera Gear We Use!

Our most recent posts:

More of our Latest Posts are in the MENU above.

<-Previous || Next->

Kootenay National Park Canada – Bears, Mountains & Rivers!

May 2016 – The Canadian Rockies are a huge mountain range, and at their heart there is a cluster of four adjacent National Parks (a few more National Parks are tucked into other regions in the range). After spending a little time in Fernie and Invermere on our way north from Glacier National Park in Montana, we entered Kootenay National Park and purchased an annual Parks Canada Discovery Pass for C$136.40 (about $100 US) on our way in.

Because Canada is celebrating its 150th year of confederation in 2017, all the National Parks entrance fees will be waived in 2017. So, the ranger happily informed us that our 2016 pass is effective for two years, which is another way of looking at it. Either way, it was a deal because we knew we’d be enjoying these parks for a while this year and, who knows, maybe next year too!

Entering Kootenay National Park British Columbia Canada

Knowing we’d be in Canada’s National Parks for a while, we bought a Discovery Pass as we drove into Kootenay National Park near Radium Hot Springs

The Rockies are in your face as you drive on the highway through Kootenay National Park, and what a fabulous thing to have in your face! Even though the weather turned cloudy and gray as we drove, the mountains were breathtaking.

Kootenay National Park British Columbia Canada

The weather wasn’t cooperating, but the mountains were astonishing.

Highway 93 travels in the valleys between the towering mountains in Kootenay national Park, first along the Kootenay River and then along the Vermillion River. We stopped at one point when the turquoise color of the water in the river jumped out at us from the side of the road.

Stream Kootenay National Park British Columbia Canada

We drove by this gorgeous turquoise water and just had to stop for a photo!

We were entering serious bear country, and every souvenir shop and hiking shop we’d visited so far in Canada had funny t-shirts or cards about the danger of these frightening beasts. I couldn’t help but get pics of a few.

Bear sign Send More Tourists

.

Bear Sign Canadian Fast Food

.

Bear Sign Finally some Lean Meat

.

There was a definite theme here: don’t get chased by a bear or you’ll be toast. Or lunch!

Bear sign Canadian Take-out

.

Bear sign hike with someone you can outrun

.

Bear Sign Exercise Some Motivation Required

.

One thing that is sold everywhere is bear spray. This is a mace-like spray that will keep you safe if a grizzly rears up on its hind legs and comes after you, claws pawing the air and roaring. Or so they say. I try to imagine being faced with an angry, hungry bear towering over me and having the presence of mind to remember where my bear spray is and to get it aimed and sprayed in the right direction.

“Hold it right there, Yogi, while I get my bear spray out of my back pack and aim it at you…hmmm… I know it’s in here somewhere!”

Bear spray sign

.

But with so much excitement about bears, we knew we’d have to see some somewhere. Eventually.

As we had discovered just a few miles south of here, when a group of big horn sheep crossed the highway in front of our truck, it is a common occurrence for animals to cross the highways in this part of the world. It is so common, in fact, that there is an automated detection system that notices when the animals are crossing the highway and lets drivers know.

Wildlife Detection System road sign Kootenay National Park Canada

We need this for our cameras!!

There were lots of signs about bears on the highway as we drove through Kootenay National Park, and the ranger at the entrance station had actually given us a slip of paper that talked about them and talked about not getting out of the car in certain sections of the highway.

“The bears have just come out of hibernation,” she explained, “and they’re hungry.”

We figured there was little chance we’d see a bear on the highway and thought nothing of this when, all of a sudden, off in the distance, we saw a big black animal eating dandelions. We slowed down as we came up to him, and sure enough, it was a beautiful black bear!

Black Bear Kootenay National Park BC Canada

Hey, there he is – a black bear in the dandelions right next to the highway!

We hadn’t gone but a few miles further when we spotted a big brown bear munching away in the grass too.

Brown bear Kootenay National Park BC Canada

Another bear by the highway! Wow!!

We slowed to get his photo and he stared right at us.

Brown bear Kootenay National Park British Columbia Canada

Wow. We hadn’t been in the Canadian Rockies very long or gone on any epic hikes, and we’d already seen big horn sheep and bears!

Brown bear Kootenay NP British Columbia Canada

.

The scenery continued to be beautiful as we drove north through Kootenay National Park.

Canadian Rocky Mountain scenery Kootenay National Park British Columbia Canada

The Vermillion River is actually turquoise!!

We stopped at Numa Falls and explored the rocky shoreline of the Vermillion River.

Rocks and stream Kootenay National Park BC Canada

The rocks at Numa Falls have been carve by the water.

Waterfall Kootenay National Park British Columbia Canada

Rushing water at Numa Falls.

Kootenay National Park suffered three huge forest fires in recent years, and we did a short hike into the burned forest where young trees were just getting started between their scorched ancestors.

Regrowth after forest fire Kootenay National Park BC Canada

Huge forest fires in Kootenay National Park wiped out the old trees, but here come some new ones!

It was eerie to walk among the tall and skinny trunks of what was once a thick forest of huge trees. In between the charred trunks, young trees were starting to create a new forest.

Burnt trees from a wildfire in Kootenay National Forest British Columbia Canada

Ghosts of towering pines stand next to saplings that are starting a whole new forest.

A little further along on Highway 93 we saw a sign that said, Paint Pots. This sounded intriguing. We stopped and followed the hiking trail to a stream, but had no idea how far down the trail these paint pots were or even what they were. Other hikers coming towards us told us they were just a little further on, so we kept going over a bridge. But then the trail forked.

Luckily there was a sign, but apparently the sign makers forgot to include directions to the Paint Pots! So, someone had written it in. Another hiker had written, “Thanks.” Yes, indeed!

Hiking sign for Kootenay National Park BC Canada

Parks Canada left “Paint Pots” off the sign, but a helpful hiker wrote it in. Nice!!

The Paint Pots are vividly colored muddy puddles, and we walked between them — on a boardwalk sometimes — marveling at the bright orange hue.

Ocher Creek Paint Pots Kootenay National Park BC Canada

Brightly colored waters at the Paint Pots.

In earlier times, the Indians had used this colored water to paint themselves. In more modern times someone painted a heart on a tree!

Heart painted on a tree

“Paint” from the paint pots works great on tree trunks!

Just up the road we stopped to hike at Marble Canyon. Bright turquoise water filled the canyon at the base. Further up we found a rushing waterfall.

Marble Canyon Kootenay National Park British Columbia Canada

Marble Canyon’s turquoise water shows off the rocky cliffs, green trees and snowy mountains beautifully.

Parks Canada has placed pairs of red chairs throughout their National Parks in scenic spots, inviting visitors to have a seat and enjoy the view — and take a selfie. At the end of the trail into Marble Canyon we spotted a pair of red chairs and did just that.

Red chairs Marble Canyon Kootenay National Park BC Canada

We found a pair of the famous Red Chairs at the end of the Marble Canyon hike.

There are lots of other hikes and things to see in Kootenay National Park, not least of which is to take a dip in the magical Radium Hot Springs (more on that in a future post), but we were excited to get up to the true heart of this awe inspiring area, Banff National Park, which is just up the road from Kootenay National Park.

Fifth wheel RV in Kootenay National Park British Columbia Canada

The buggy posed for us as we took pics of the incredible mountain scenery.

Subscribe
Never miss a post — it’s free!

More info about Kootenay National Park:

Related posts from the Canada and the Rockies:

Tips for RVers Traveling to Canada
Blog posts from our RV travels in Canada

Our most recent posts:

More of our Latest Posts are in the MENU above.

<-Previous || Next->