Goldline RV Cover – Winter protection for our new trailer!

After our summer travels, it is time to put our Genesis Supreme 28CRT fifth wheel toy hauler to bed for the winter with a Goldline RV Cover, something we never had to do as full-timers. For those who are going to be doing the same thing, we wanted to let you see what how this winter protection will work with our new trailer.

Goldline RV Cover for a Fifth Wheel Trailer

.

Before we left in June, one of the things that concerned us most about buying our virtually brand new Genesis Supreme toy hauler was how we’d protect it from the elements during the eight months of the year it was sitting dormant waiting to be the Mothership for our travel adventures the next summer.

Our 2007 Hitchhiker fifth wheel that we lived in full-time was out in the elements 24/7/365 for the twelve years we owned it because we were living in it year round except for the months it was in storage between 2009 and 2013 as we sailed Mexico’s Pacific Coast on our boat.

Sadly, even though we washed and waxed the Hitchhiker fifth wheel regularly, by the last few years we owned it, the exterior seriously showed its age and looked terrible. Likewise, the exterior of the formerly garage kept Arctic Fox truck camper we owned for a year was just beginning to show a few signs of aging after it sat outside for the 12 months we had it.

We don’t have a good covered storage option for our new trailer, so we decided we’d try protecting our new trailer each winter with a fabric RV cover.

There are quite a few brands of RV covers on the market, and all get mixed reviews. They tend to tear over time and generally fall apart. For several weeks before we left, we read reviews of various RV covers until our eyes got tired.

Then we came across a discussion in the Escapees RV forum about the Goldline RV cover, a brand we hadn’t heard of before.

This cover is made from a 7-ply material rather than the standard 6-ply material used by other manufacturers, and the reviews and discussion about its construction were very favorable.

We dug a little deeper and discovered that one of the things that makes the Goldline RV cover unique is the Marine Grade fabric used in its construction. Similar to Sunbrella, which has a weave density of 800D, this fabric, Marinex, has a weave density of 600D which translates to a 33% weight savings, a big plus when trying to pull a 50′ x 25′ piece of it up onto an RV roof!

Also, the the color of the fabric is obtained by dyeing the thread rather than dyeing the finished fabric which makes the color hold much better over time.

One of the things we liked is that the Goldline RV covers are sized in two foot increments. Other covers we considered have as much as four foot increments between sizes, making it difficult to get a good fit.

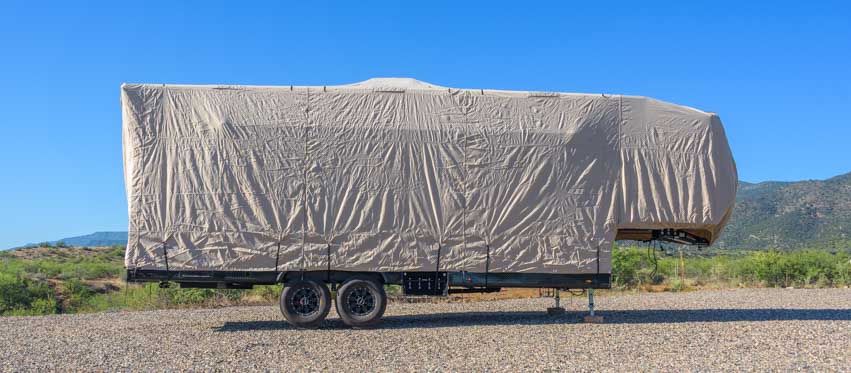
Our toy hauler is 32′ 10″ long, so we chose a 33′ Goldline RV cover. We’ve done a trial run of putting the RV cover onto the trailer so we could see how it worked and what we are in for when we’re finally ready to cover it for the winter.

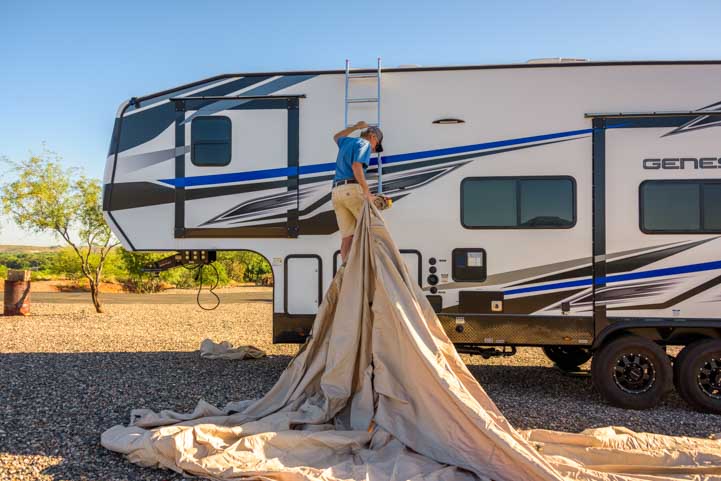
It’s not hard to put this RV cover on. We laid it out on the ground next to the toy hauler, putting the “Front of cover” label at the front of the rig, and then Mark pulled it up onto the roof and lowered the sides.

Eevelle Goldline RV Cover fifth wheel installation 1

We laid the cover on the ground alongside our trailer.

Eevelle Goldline RV Cover fifth wheel installation 2

We located the “Front of Cover” label. You can also look for the piping that is on each side of the fifth wheel overhang.

Eevelle Goldline RV Cover fifth wheel installation 3

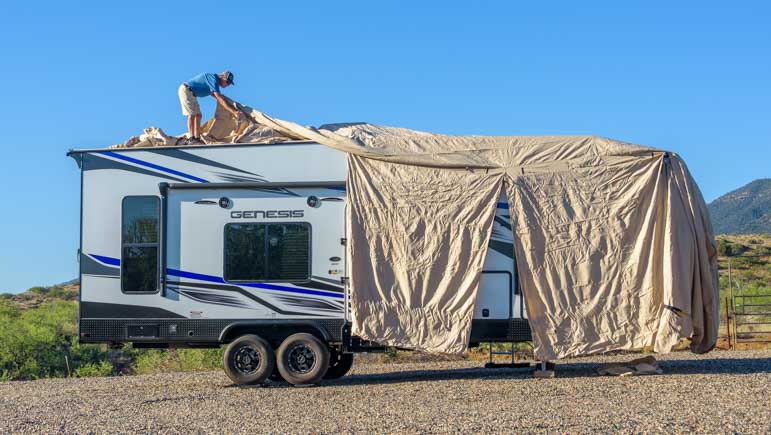
Up the ladder he goes! This is where the full weight of Sunbrella fabric would be a challenge.

There are panels on the two sides of the Goldline RV cover that can be rolled up by the roof or lowered down and zipped closed. This allows access to the RV door, windows and hatches as needed.

Goldline makes toy hauler RV covers for travel trailer toy haulers that have an opening in the back for the ramp door as well. This would be terrific! However, they don’t have a model for a fifth wheel toy hauler like ours available yet, so we went with the regular fifth wheel RV cover. We just won’t be able to open the ramp door when the cover is on the trailer.

Eevelle Goldline RV Cover fifth wheel installation 4

Mark pulled the cover towards the back of the trailer and let the sides fall as he went.

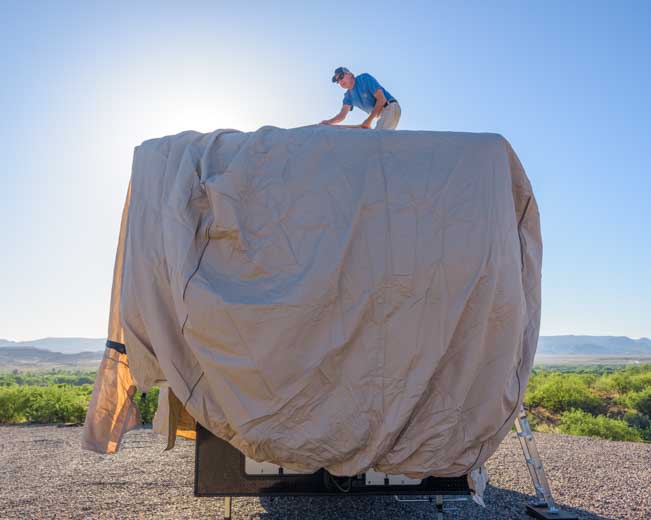
The last step in the installation is to cinch up the straps that go beneath the trailer and hold the sides down and also to tighten the straps on the rear end as well as the fabric that covers the fifth wheel overhang.

Eevelle Goldline RV Cover fifth wheel installation 5

Looking good up there!

Eevelle Goldline RV Cover fifth wheel installation 6

It seems like a good overall fit.

I’ll be writing a more detailed review of this RV cover once we’ve had it on our trailer for the winter months, gone in and out of various hatch compartments and the front door with the cover in place, and seen the cover through the worst of the mid-winter storms.

We rarely get snow in our area but we do get plenty of heavy rain in short doses, some wind, and tons of UV-filled sunshine. Those UV rays cause the worst damage to an RV’s exterior, so we’re excited to have found an RV cover made of UV resistent fabric that can protect our rolling home and hopefully keep it looking good!

Eevelle Goldline RV Cover fifth wheel installation 7

We tied a few of the straps but not all of them…this was a trial run.

Eevelle Goldline RV Cover fifth wheel installation 8

While it’s “in storage” we’ll be able to go in and out of it easily…nice!

Subscribe
Never miss a post — it’s free!

More info about the Goldline RV Cover:

Other RV tech tips:

Our most recent posts:

More of our Latest Posts are in the MENU.   New to this site? Visit RVers Start Here to find where we keep all the good stuff. Also check out our COOL NEW GEAR STORE!! *** CLICK HERE *** to see it!

RV Awning Installation and Repair – Replacing the Awning Fabric

Our RV awning is 11 years old now, and the canvas fabric recently tore at the top and bottom. RV awnings are a pain in every respect (except for the wonderful shade they offer), and we knew we were in for a challenging DIY repair if we tried to do it ourselves.

Fixing an RV awning is a job for at least two people, preferably three or four for certain parts of the job, and it’s easiest if someone in the group has done it before because it can be a little tricky.

Ripped RV awning torn before replacement-min

Oh no! Time for new RV awning fabric!

We were traveling through Rapid City, South Dakota, and recent hail storms had made a mess of many RVs and RV dealerships all around the area. Only one of the local RV dealerships and repair shops could get us in within the week, so we were thrilled when we backed into a bay at Jack’s Campers.

Fortunately, they had the fabric for a 17′ Dometic Sunchaser awning in stock, an old manual model that is not installed on new RVs any more. Luckily, there must be enough oldies-but-goodies on the road these days that Jack’s Campers stocks them.

We back our fifth wheel trailer into a bay at Jack's Campers in Rapid City South Dakota-min

We got into position at Jack’s Campers in Rapid City, South Dakota.

We called our RV Extended Warranty folks, Wholesale Warranties, to find out if this awning failure would qualify for reimbursement under our warranty plan.

We have had so much good luck with our extended warranty on major repairs like our refrigerator, trailer axle, suspension, toilet and window leaks and plumbing, that we were hopeful this repair would be covered too. However, only the mechanical aspects of the awning were covered, not the fabric.

In the end, the whole RV awning repair job ended up costing $444 out of pocket, most of that being for the new fabric, and it took the guys at Jack’s Campers just 45 minutes to do it.

The first step was to remove the awning arms and roller from the sidewall of our fifth wheel. They unrolled the fabric about a foot and unscrewed the mounting brackets that attached the awning arms to the side of the trailer.

Remove the bolts attaching RV awning to the side of the fifth wheel trailer-min

First, remove the awning arms from the sidewalls of the trailer.

There was putty in the awning fabric track where the mounting bracket had been, so this had to be removed with a flathead screwdriver.

Use flathead screwdriver to remove putty from RV awning track on fifth wheel trailer-min

There was some putty in the awning track, so it was removed with a flathead screwdriver.

Next, two guys slid the awning fabric off of the awning track on the RV wall and marched the whole thing into the workshop and rested it on some saw horses.

Two people slide the RV awning off the track on a fifth wheel trailer RV-min

Two mechanics walked the awning out of the track on the trailer.

Rest the RV awning on saw horses to remove the fabric-min

Once in the shop the awning was laid across some saw horses.

Manually operated RV awnings have a spring inside the roller mechanism (a “torsion assembly“) for rolling up the fabric. At one end of the roller there is a locking mechanism to keep the spring inside the roller tight so the fabric doesn’t unroll. This locking mechanism became important when the new fabric was installed to get the spring tensioned correctly inside the roller.

Locking end of RV awning-min

The right arm of the awning has a locking mechanism which keeps the fabric from rolling off the roller.

At the opposite end of the roller there was no locking mechanism. The bolt holding the awning arm to the roller at the non-locking end was removed and the arm was pulled off. The arm at the locking end of the roller remained attached throughout the job.

Remove bolt holding RV awning arm to the roller-min

Remove the awning arm from the non-locking end of the roller.

RV awning endcap and spring-min

Awning arm removed.

Then the rivets on the endcap were drilled out and the torsion assembly was pulled out.

Drill out rivets from endcap on RV awning-min

Drill out the rivets on the endcap.

Remove spring and endcap from RV awning to replace fabric-min

The endcap and spring (torsion assembly) are removed from the roller.

RV awning spring and endcap-min

The torsion assembly is out of the roller.
Spraying it with silicone spray will help the awning roll more easily.

Then the awning fabric was slid off of the roller.

Two mechanics hold the RV awning to slide the torn fabric off the track-min

Two mechanics slid the old awning fabric out of the track.

The new fabric was unfolded and laid out in the workshop, and then it was slid into the track on the roller until the fabric stretched the whole length of the roller.

Open up and spread out the new RV awning fabric-min

The new awning fabric was unfolded and laid out.

Opened up RV awning endcap-min

The new awning fabric will be slid into the track on the roller.

Install new RV awning fabric by sliding it along the track-min

The new awning fabric was started in the track on the roller.

Spraying the track with a heavy duty silicone spray helped the fabric slide along the track smoothly.

Spray heavy duty silicone on the RV awning track before sliding the fabric onto it-min

Spraying the track with silicone helps the fabric slide more smoothly.

Slide new RV awning fabric onto the roller along the track-min

Two mechanics slid the new awning fabric along the roller track.

Then the torsion assembly was placed inside the roller and new endcap rivets were installed.

Reinstall RV awning endcap and spring-min

The endcap and spring were reinserted inside the roller.

Install new rivets on RV awning cap-min

Put new rivets on the endcap.

New rivet installed on RV awning endcap-min

New rivet in place.

The fabric was positioned so it went all the way to the locking end of the awning. At the opposite end a set screw was screwed in to prevent the fabric from sliding off the track.

New RV awning fabric at endcap on locking end of roller-min

Make sure the awning fabric has been slid all the way to the locking end of the roller.

Screw in set screw to keep RV awning fabric from falling off the track-min

Put a set screw at the non-locking end of the fabric so it doesn’t slide off the track.

The new fabric was laid out so it could be rolled onto the roller. Then a vice grip was used to turn the spring between 15 and 18 times to get the right spring tension.

New RV awning fabric installed-min

New awning fabric is in place.

Use vice grips to wind up the new RV awning fabric-min

Use vice grips to rotate the spring 15 to 18 times to ge the right spring tension.

Then the awning arm was reattached to the roller with a bolt.

Bolt on the RV awning arms to the roller-min

Bolt on the awning arm.

New RV awning fabric with set screw and awning arm attached-min

Awning arm (non-locking end) is reattached.

Back at the trailer, the awning track was sprayed with heavy duty silicone.

Use heavy duty silicone spray to lubricate the RV awning track-min

Out at the trailer spray the awning track with silicone.

Then the new awning fabric was loosely wrapped around the roller and the whole thing was marched outside to the trailer.

Wrap the new RV awning fabric around the roller-min

Four guys assisted in wrapping the new awning fabric around the roller a few times.

Carry the RV awning out to the fifth wheel trailer-min

The awning is taken out to the trailer.

Our little project supervisor, Buddy, had been watching all the goings on through open big shop door from a safe distance out by the trailer. When the awning and its new fabric were brought out to the trailer, he backed up as far as he could into the parking lot to give the guys room to work!

Supervising puppy keeps his distance from the RV awning project-min

Stand back!

Using ladders and reaching overhead, four guys maneuvered the awning fabric into the track on the trailer and slid it all the way to the front end of the track. This is where having lots of hands can help.

Slide the RV awning fabric along the track on the wall of the fifth wheel trailer RV-min

The awning fabric is slid along the track on the side of the trailer.

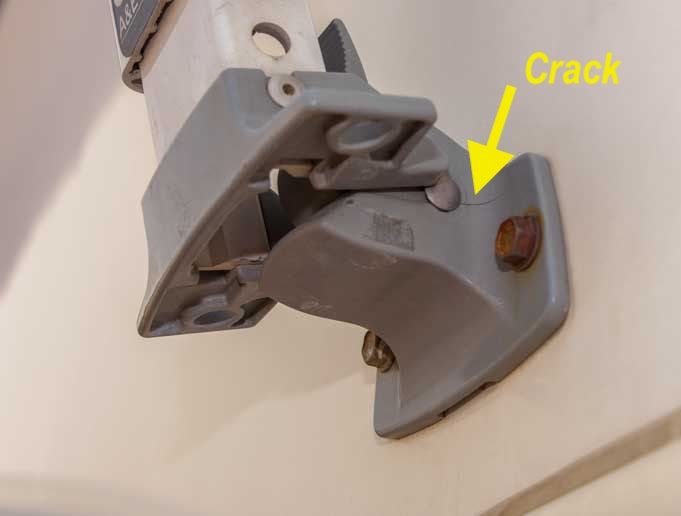
After installing the awning on the trailer, the mechanics noticed that the two feet that held the bottoms of the two awning arms had each developed hairline cracks. So, they replaced each foot.

Replace the cracked RV awning foot-min

The feet of both awning arms had developed small cracks, so they were replaced.

The last step was to test the awning by rolling it all the way out and then all the way in again.

New RV awning installed on our fifth wheel trailer RV-min

Test the awning to make sure it rolls all the way out and all the way in again.

Completed installation of the new RV awning fabric on a fifth wheel trailer-min

Done!

Ta Da!! A job well done. The whole project took 45 minutes from start to finish.

Now that we’ve seen how a manual RV awning gets installed, Mark is confident he could do it without going to an RV repair shop as long as he had some extra hands for sliding the awning fabric on/off the trailer awning track and on/off the roller track.

Side note: If you have a manual awning, it is really important that you use some kind of velcro straps or bungee cords wrapped around the awning arms as extra security to keep the awning from accidentally opening while you are traveling.

Our photo above doesn’t show them, but we have used these awning straps ever since we bought the trailer.

Subscribe
Never miss a post — it’s free!

More cool articles about RVs and RVing:

  • RV Tech Articles – An index of all our technical articles (upgrades/mods)
  • RV Lifestyle Articles – An index of all our RV lifestyle articles (RV lifestyle costs, repairs & breakdowns, “living the dream” and more)

Below are some of our most POPULAR POSTS (also in the MENUS above)

Buddy - A Journey in Spirit - The story of an event that changed our lives forever.

ARTICLE INDEXES
  • RV Tech Tips Articles - A one page index of links to all our RV Tech Tips, RV Upgrades & RV Maintenance articles.
  • RV Lifestyle Tip Articles - An index of links to all our RV Lifestyle Tips (finances, boondocking, major repairs, work/jobs, etc.)
  • Solar Power Articles - Overview and tutorial articles for how to design and install solar power on an RV or boat
  • Product Reviews - An index of links to all of our Product Reviews
RV UPGRADES, SYSTEMS & TIPS MONEY FULL-TIME RV LIFESTYLE GEAR STORE
  • Gear Store - A list of the goodies, equipment and gear we've found useful in our RV lifestyle!
 

Our most recent posts:

More of our Latest Posts are in the MENU.   New to this site? Visit RVers Start Here to find where we keep all the good stuff. Also check out our COOL NEW GEAR STORE!! *** CLICK HERE *** to see it!

Trailer Suspension Nuts & Bolts – RV Blues on Rough Roads!

Lots of full-time RVers with big rigs are very sensible and stick to traveling on paved roads. But we like to get off the beaten path, and sometimes that puts us on crazy, rough and rugged dirt roads.

On our recent trip to Bisti Badlands in northwestern New Mexico, a 45 minute drive down three miles of extremely washboarded, nasty dirt road wreaked havoc with our trailer’s suspension.

Equalizer bolt walks out of fifth wheel suspension

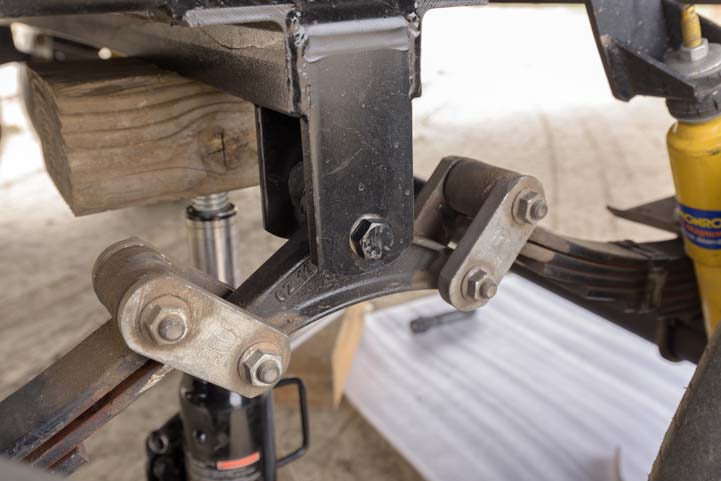
Hmmm…. That center bolt on the equalizer doesn’t look right!

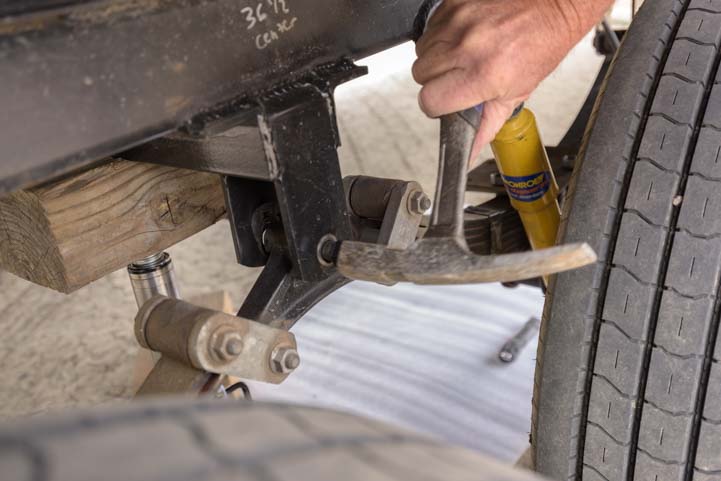
As we were hitching up to leave, Mark did his usual walk around our trailer to make sure nothing was about to fall off and that everything was secure. To his shock, he noticed that the long bolt that goes through the equalizer on our trailer’s leaf spring suspension system had walked almost all the way out!

Fifth wheel suspension Equalizer bolt unscrews itself on rough road

Yikes!

Holy Smokes! Our 14,000 lb. 36′ fifth wheel trailer was about to lose the bolt holding this vital piece of gear together!

We were miles from nowhere, and I immediately began scenario building in my head to plan various ways we might get out of this mess.

While I theorized, Mark calmly set about getting out his tools and tackling the problem right there in the dirt. His first task was to raise the trailer up so he could get the bolt properly aligned horizontally and tap it back into place with a hammer.

So, out came the 12 ton bottle jack.

Raise fifth wheel trailer with bottle jack for suspension repair

First things first:
Raise the wheels totally off the ground with our 12 ton bottle jack.

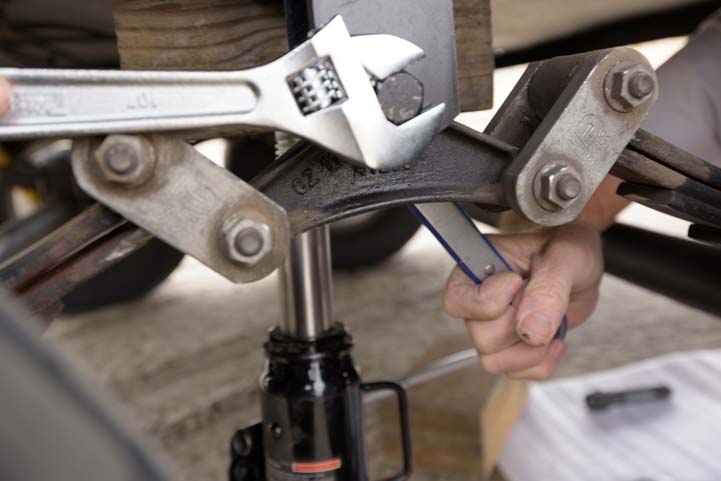
He needed to raise the trailer up quite high to relieve all the pressure on that bolt, so he took a piece of wood we sometimes use under the fifth wheel landing legs and put it under the bottle jack to raise it higher. Then he took a second block of wood and put it on top of the bottle jack to span the c-channel tube that runs the width of the trailer.

Pumping away on the bottle jack, he finally got the wheels entirely off the ground and began tapping the bolt through the two sides of the hanger with a small hammer.

Hammer fifth wheel equalizer bolt pack in place in suspension repair

With the pressure off, Mark taps the bolt back into place.

It took a little finagling to get the bolt to line up and go through the second hole on the back side of the hanger.

Fifth wheel equalizer bolt holds suspension together

At first, the bolt didn’t want to go through the second hole on the axle hanger.

But he was able to get it aligned and he got it to go through.

Equalizer bolt in position for fifth wheel suspension hanger assembly

All the way through. Yay!

The bigger problem, though, was figuring out what had happened to the nut that had been holding this bolt in place. It was nowhere to be found and undoubtedly was somewhere out on that nasty 3 mile dirt road.

So, now what?

Mark is a really amazing mechanic, and he keeps a magic container of potential spare parts in his Man Cave in the basement of our trailer. This magical container is a lot like the carpet bag that Mary Poppins carried.

Remember how Mary Poppins pulled all kinds of surprising things out of that bag, to the sheer delight and amazement of Jane and Michael Banks? Among other things, she pulled out a hat rack, a potted plant and a full-size standing lamp while Michael searched under the table to try to figure how she did it.

Well, that’s just the way Mark’s magic box of spare parts tricks works. When he needs a special little gizmo to make things right again, he fishes around in the box and finds just the thing while I scratch my head wondering how such a little container could always produce exactly what he needs.

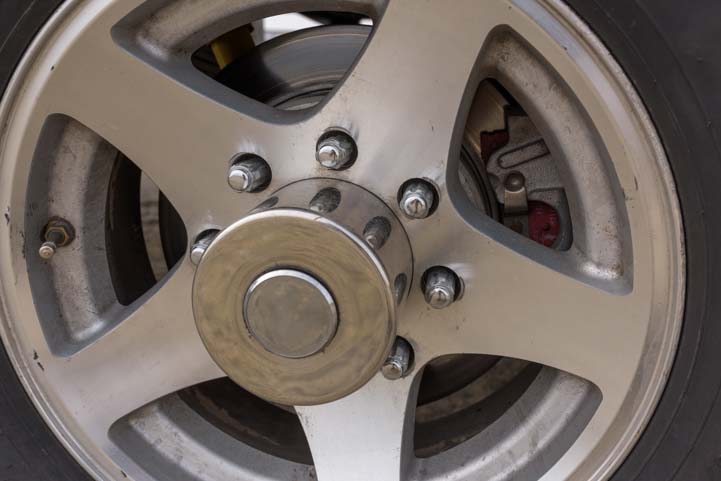
A few months back we’d replaced the tires on our fifth wheel trailer and decided to replace the original lug nuts with locking lug nuts. A few of the original lug nuts also had cosmetic cracks on them which didn’t look attractive, so the new locking lug nuts were much nicer all around. Mark had decided to put a few of the old lug nuts in his magic box of tricks.

5th wheel trailer wheel lug nuts

A few months back we had replaced all the lug nuts on our trailer wheels.

So, as he fished around for an appropriately sized nut, lo and behold, it turned out those lug nuts were the exact diameter he needed!

Fifth wheel trailer lug nut_

This old lug nut is exactly the right diameter for our wayward bolt!

The thread pitch on the lug nut was not quite right, but the threads on the bolt had been damaged anyway as it walked itself out of the hanger.

While I held the bolt in place with a wrench on one side, Mark ratcheted the lug nut on the other side. He was able to jam the nut on the bolt and re-groove the bolt’s threads enough to make a super tight connection.

In no time we were back up and running and towing our fifth wheel trailer back down that crazy 3 mile road to the paved highway to go see other new and exciting destinations.

As I mentioned in my post about Bisti Badlands, it’s okay for a passenger car or van, but I would leave a bigger RV in Farmington and drive the tow vehicle or toad to Bisti instead!

Ratcheting 5th wheel equalizer suspension bolt in place

With some force, we secure the lug nut on the bolt. What a terrific temporary fix!

Who would’ve ever thunk that a rough road could loosen the nut on a big fifth wheel trailer’s suspension and walk the bolt that holds the equalizer in position almost all the way out?!

And who would’ve ever thunk that a lug nut from the trailer’s wheels would give us such a great temporary fix to get us back on the road?!

Other blog posts about our fifth wheel trailer suspension:

Subscribe
Never miss a post — it’s free!

Other tech tips for RVs:

Our most recent posts:

More of our Latest Posts are in the MENU.   New to this site? Visit RVers Start Here to find where we keep all the good stuff. Also check out our COOL NEW GEAR STORE!! *** CLICK HERE *** to see it!

Royal Flush! – A Surprise RV Toilet Replacement…Under Warranty :-)

Our fifth wheel trailer is 10 years old now, and we’ve been living in it full-time for most of those years. Our RV toilet has been with us every step of the way, although over the last few years it has struggled to hold water in the bowl.

Last week, out of the blue, Mark put his foot on the pedal to flush the toilet, heard a loud snap, and then the toilet flapper valve refused to budge. It was completely broken and unable to open and flush properly. Ugh!!

Luckily, the toilet bowl couldn’t hold water any more either, so it was kinda able to flush, just in a dribbling sort of way!

RV Toilet Replacement under an Extended RV Warranty

.

So, our delightful plans to go play in the dunes at Great Sand Dunes National Monument in Colorado were dashed, and we drove off over the horizon in pursuit of a replacement RV toilet.

Broken RV toilet can't hold water in the toilet bowl

The toilet flushing mechanism broke, and pressing the pedal no longer opened
the flush valve in the toilet bowl. Fluids dribbled out quickly anyway… Not good!

After some calling around, we found a shop that had our exact Thetford toilet in stock, and when we arrived, there it was on the display rack!

New RV toilet at the RV repair shop

What luck! There is an identical toilet on the display rack.

We have an RV Extended Warranty with Wholesale Warranties that has been a huge help in dealing with the many surprise financial blows we’ve faced as our trailer has aged and various components have quit working.

We first got our warranty in October of 2014, and by Christmas of the following year it had paid for itself several times over as we faced one major repair after another, all in a row.

Unlike vehicle insurance, which protects vehicle owners against accidents, an extended RV warranty protects against failures of the systems in the RV that aren’t caused by a mishap.

Installing new RV toilet in tiny RV toilet room in fifth wheel trailer

There wasn’t a whole lot of space to work in our little toilet room!

We learned from our last RV toilet repair job that replacing broken parts in an RV toilet is often more expensive than simply swapping out the toilet all together.

So we weren’t surprised when the service manager said he wanted to replace our toilet rather than troubleshooting the problem and disassembling and reassembling the toilet to replace the broken part. He called our RV warranty company and explained that the toilet couldn’t flush and that the flushing mechanism was broken.

The warranty company agreed to cover the toilet replacement in full.

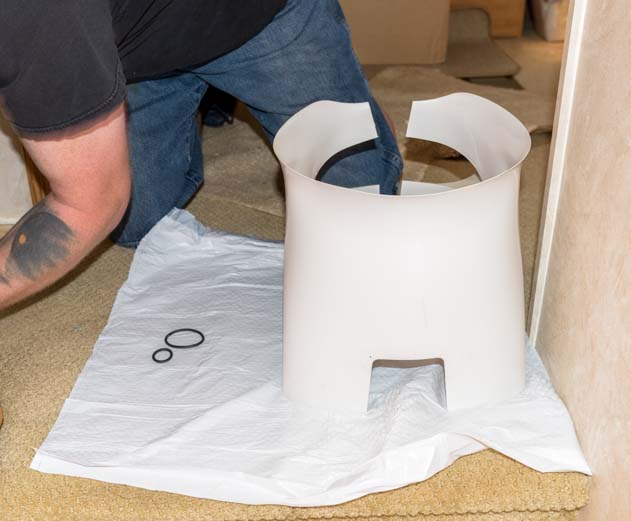
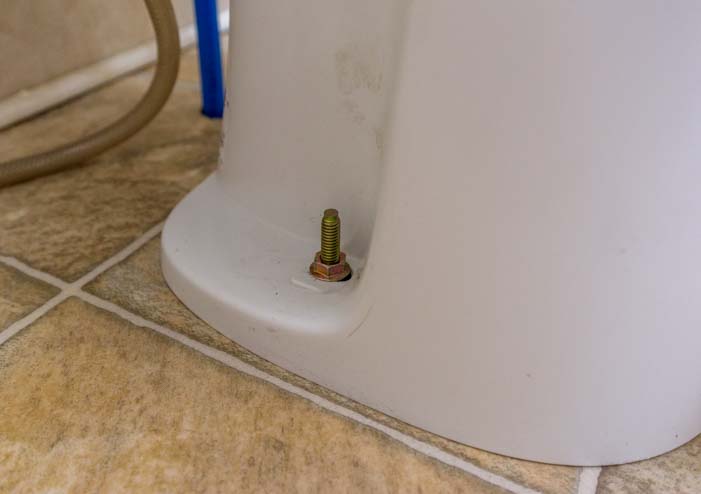
To get started, the RV technician removed the shield around the base of the toilet and then unscrewed the two large bolts that hold the RV toilet to the floor.

Remove RV toilet base shield in fifth wheel trailer

The first step to removing the toilet is to remove the shield from around the base.

Two bolts hold an RV toilet to the floor of a fifth wheel trailer

Two bolts — one on either side of the base — hold the RV toilet to the floor.

Then he detached the fresh water line from the toilet and pulled the toilet off of the hole in the floor that goes to the black tank underneath.

Old RV toilet removed from hole to black sewage wastewater tank

The toilet is removed from its position over the sewer drain hole that goes to the black wastewater holding tank.

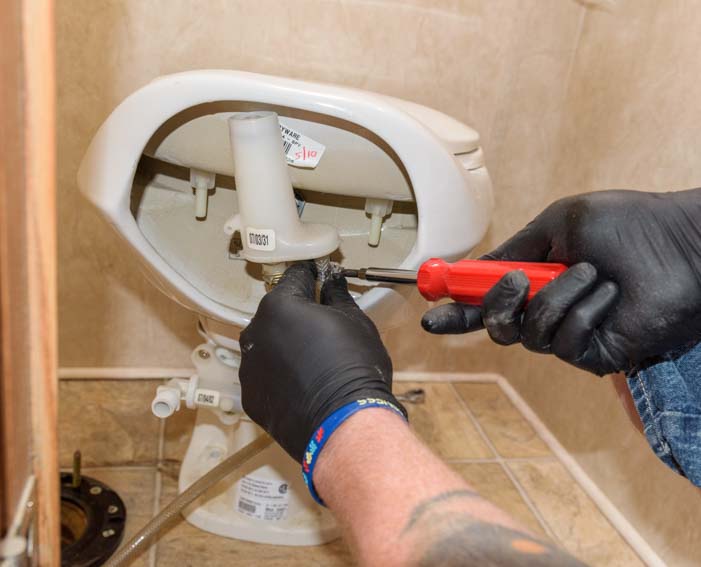
Next, he detached the hose clamps holding the rinse spray wand’s flexible hose onto the toilet

Removing broken RV toilet before installing new RV toilet

The hose clamp for the fresh water rinse sprayer is removed.

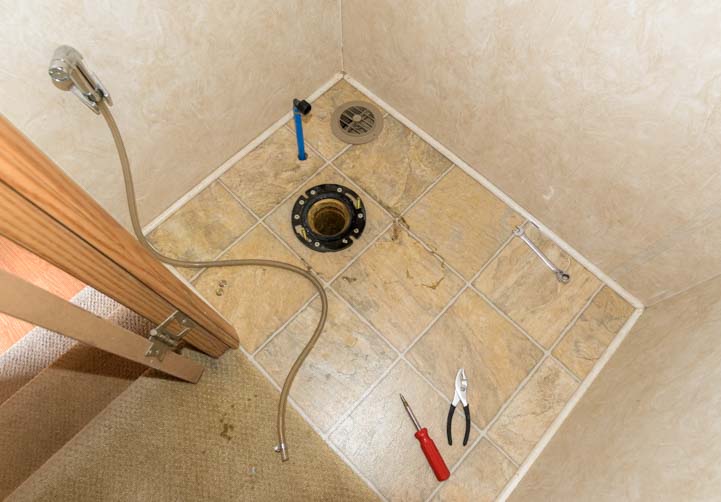
After pulling out the toilet, all that was left in the little toilet room was the hole in the floor that goes to the black wastewater holding tank, the blue fresh water line that fills the bowl and flushes the toilet, and the fresh water spray wand with its flexible hose (this was an option on our old toilet and didn’t come with the new toilet, so we kept the old spray wand).

Empty RV toilet room in 5th wheel trailer

After the toilet is removed, all that remains is the black water sewer hole, the blue fresh water flush pipe and the flexible fresh water sprayer hose.

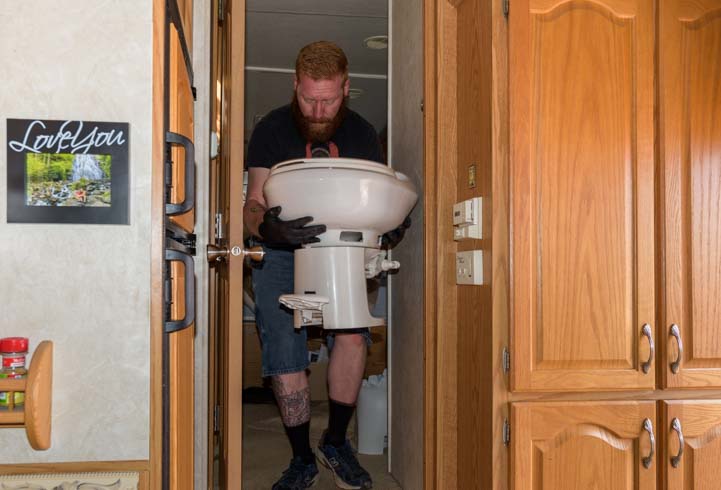
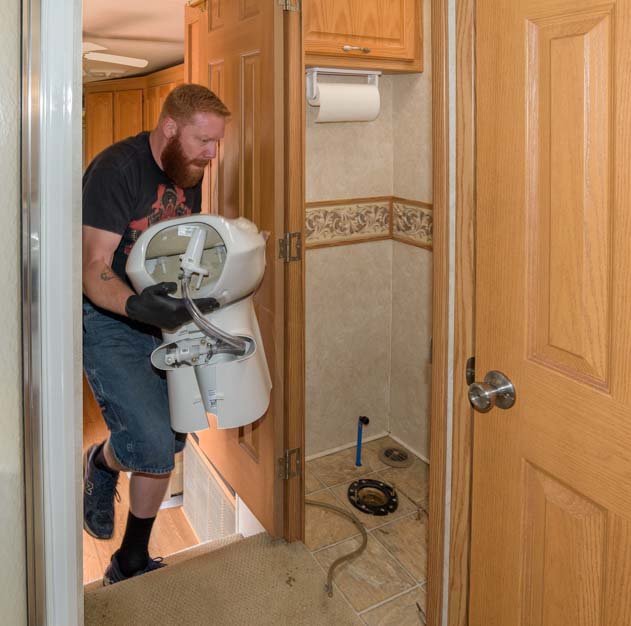
Then it was out with the old — and in with the new!

Removing broken RV toilet from fifth wheel trailer

Out with the old toilet…

Installing new RV toilet in a fifth wheel trailer

…In with the new toilet!

To install the new RV toilet, the process was repeated in reverse. First the toilet was positioned over the black tank hole, then the fresh water line and the fresh water spray wand were reattached, and finally the RV toilet was bolted to the floor.

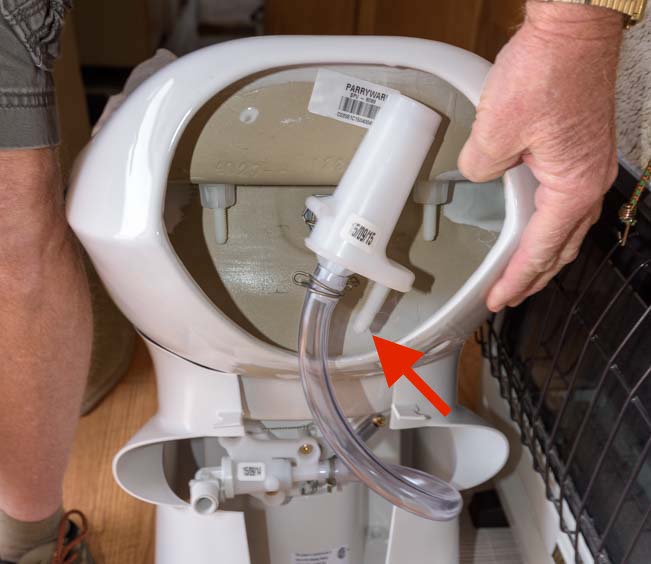
Since the spray wand is an option, the toilet ships with the barbed hose fitting it slides onto sealed shut. So, before sliding the hose onto the barbed hose fitting, the end of the fitting had to be clipped off.

Back of new Thetford RV toilet with optional spray wand

In order to attach the rinse sprayer, the hose connection must be clipped to open it up.

Optional sprayer nozzle on RV toilet installation

Sprayer and fresh water flush lines attached.

And then the installation was finished and our sparkling new RV toilet was all ready for its first Royal Flush!

The whole procedure took an hour from start to finish. When we settled up with the service manager, the final bill was the following:

FINAL BILL FOR REPLACING OUR RV TOILET:

Parts – New RV toilet (porcelain bowl) $297.59
Labor – One hour $105.00
Tax $11.61
Total Cost $414.20

RV EXTENDED WARRANTY PAYMENT BREAKDOWN:

Warranty Coverage (amount we saved) $314.20
Out of Pocket Cost (our deductible) $100.00
Total Payment $414.20
New RV toilet installation in fifth wheel trailer

A nice sparkling brand new toilet. Yay!

This brings our total repairs and savings with our Trailer Extended Warranty to the following:

Here's a summary of what our four year RV warranty through Wholesale Warranties cost, what our repairs WOULD HAVE cost, and what our warranty reimbursements have been to date:

Cost of Warranty $1,904
Total Cost of Repairs we've had done $7,834
Total Out of Pocket Costs for those repairs $1,145
Repair Reimbursements:
Trailer Axle Replacement $1,036
RV Refrigerator Replacement $1,647
Plumbing Issues & Window Leak $1,142
Suspension Replacement $2,550
RV Toilet Replacement $314
Total Repair Reimbursements $6,689

Our trailer warranty has paid for itself 3.5 times over!
Confused about the nitty gritty fine print buried in RV Extended Warranties? Here's an excellent detailed explanation!!

If you are curious what an extended RV warranty would cost for your rig, Wholesale Warranties is offering a $50 discount to our readers. Call our contact, Missi Emmett at (800) 939-2806 or email her at missi@wholesalewarranties.com and mention that you heard about them from our website, Roads Less Traveled. Or go to this link:

Wholesale Warranties Quote Form

The $50 discount comes off of the quoted price at the time of purchase — just be sure to ask!

Subscribe
Never miss a post — it’s free!

The Full Case History of our RV Extended Warranty:

Other Plumbing and Black Tank Articles!

Our most recent posts:

More of our Latest Posts are in the MENU.   New to this site? Visit RVers Start Here to find where we keep all the good stuff. Also check out our COOL NEW GEAR STORE!! *** CLICK HERE *** to see it!

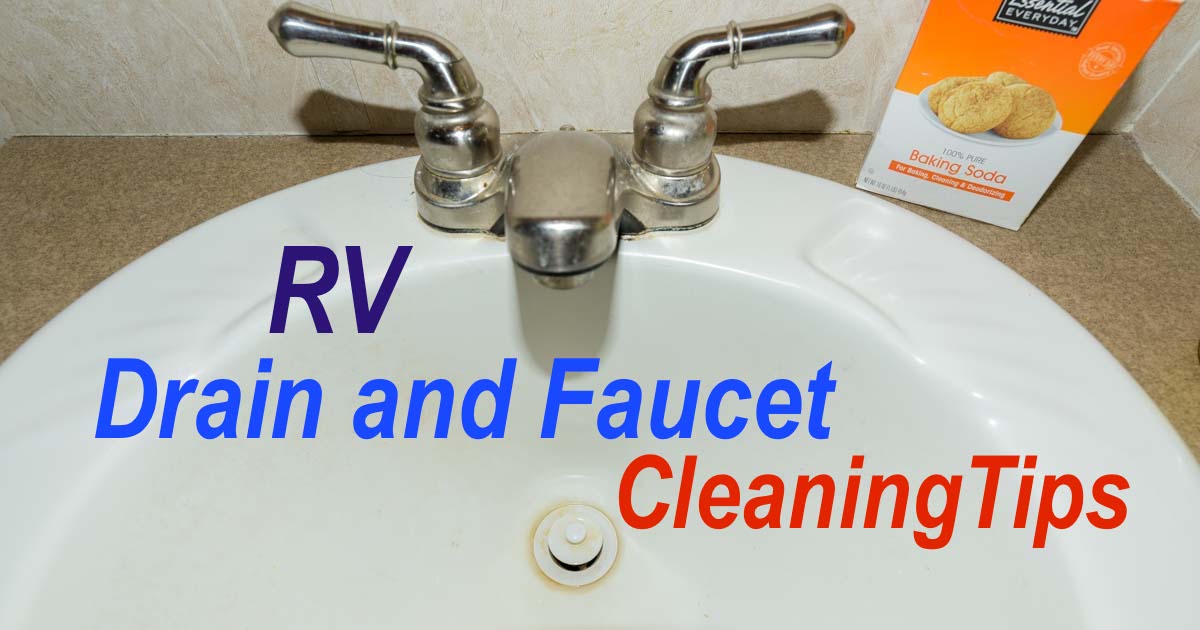
RV Plumbing Tips – Cleaning RV Faucets, Sink Drains & Shower Wands

The effects of hard water on RV sinks, faucets and drains can be an ongoing problem for RVers. This page describes a few tips for how we remove these pesky mineral deposit buildups from our bathroom and kitchen sinks in our fifth wheel trailer and keep the water flowing smoothly in our shower wand and RV toilet rinse sprayer.

RV plumbing tips for cleaning RV faucets and drains and removing mineral deposits

RV plumbing tips for removing mineral deposits and cleaning RV faucets and drains.

We like the water to flow freely in our RV vanity sink faucet, kitchen sink faucet and in the shower and RV toilet sprayer wands, however, periodically these faucets begin to spray water in weird directions because their inner workings have gotten clogged up by mineral deposits from the hard water.

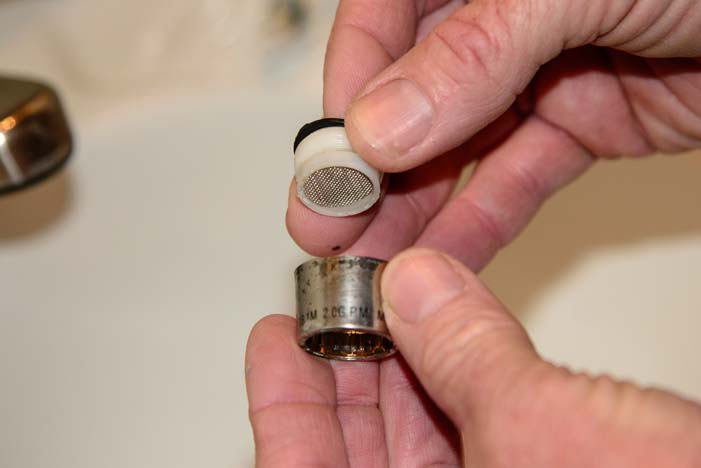
In our bathroom vanity, our first step is to remove and clean the screen filter in the faucet. Sometimes the faucet tip can be unscrewed by hand, but if we’ve let it go too long, we have to use a pair of pliers to break the faucet tip free due to corrosion that makes it impossible to unscrew.

Remove RV faucet screen with pliers

Remove the RV faucet screen (with pliers if it’s stuck!)

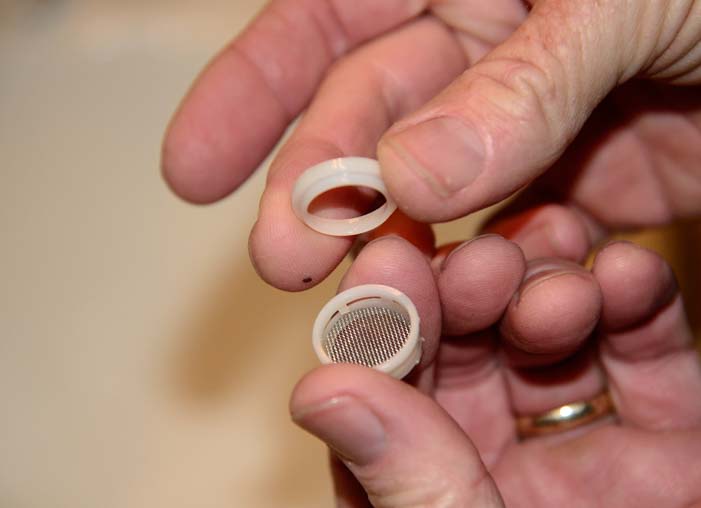
Then we unscrew the entire screen assembly from the faucet.

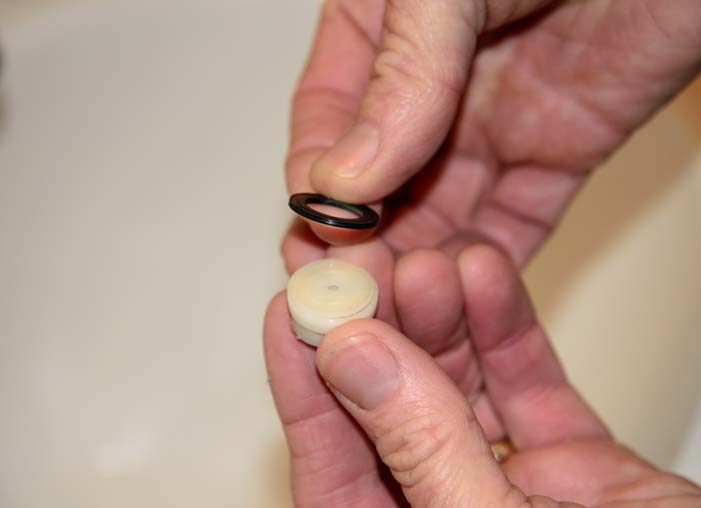
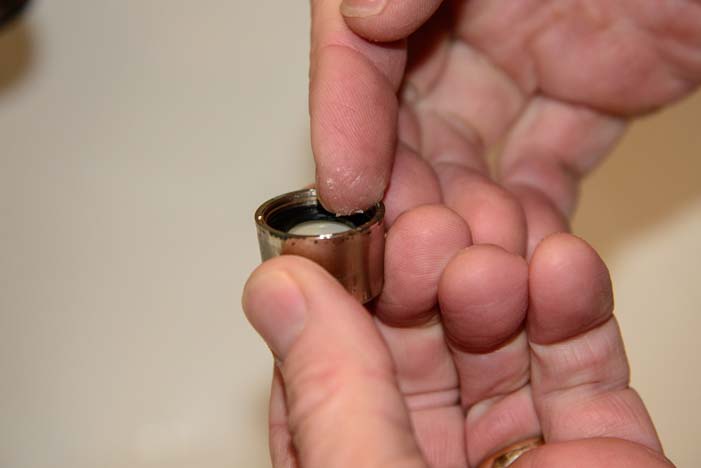
Disassemble RV faucet

The faucet tip unscrews from the faucet.

Dirty RV faucet screen

Ugh… the screen is pretty dirty. No wonder the water comes out funny!

This time the screen was very corroded. We remove the corrosion and mineral buildup by putting all the pieces in a bath of white vinegar for 20-30 minutes or so.

Prior to putting the pieces in the white vinegar bath, it is a good idea to make note of the order that these parts go into the faucet assembly!

Soak RV faucet parts in white vinegar

After noting how the pieces go together, soak them in white vinegar.

After the bath, the bits of corrosion can be seen in the white vinegar!

RV faucet parts get cleaned with white vinegar

Here are all the pieces. You can see the dirt that came off in the vinegar bath!

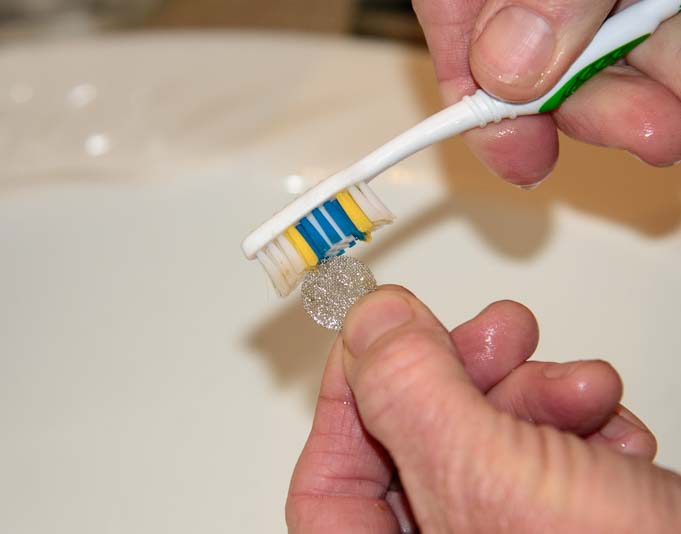
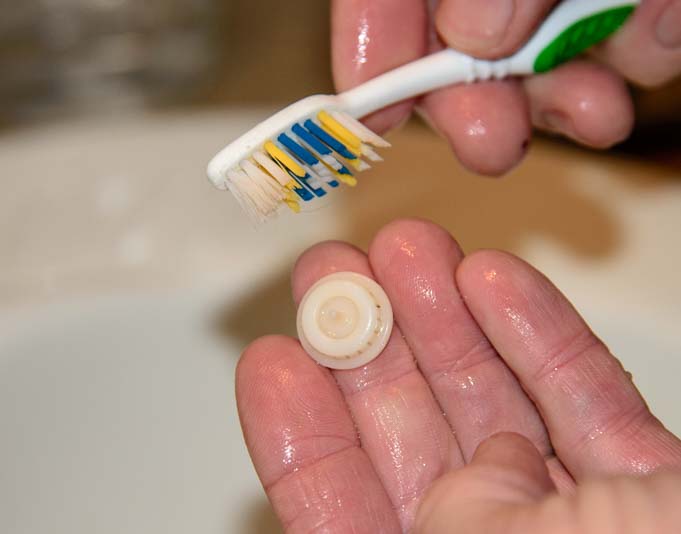
Using an old toothbrush, we scrub each piece until it is clean.

Use toothbrush to clean RV faucet screen

Use a toothbrush to get the screen totally clean.

RV faucet cleaning with toothbrush and white vinegar

Scrub all the parts with the toothbrush.

Then we reassemble the pieces in the correct order and orientation.

Reassemble RV faucet after cleaning 2

.

Reassemble RV faucet after cleaning 1

Reassemble the pieces.

Put RV faucet together after cleaning it 2

.

Put RV faucet together after cleaning it

.

To make it easier to remove the faucet tip the next time we do this job, it helps to grease the threads with a marine PTEF lubricant prior to screwing the assembly back onto the faucet.

Lubricate RV faucet with PTEF lubricant grease

Lubricating the threads makes it easier to unscrew next time!

Lubricate RV faucet after cleaning

.

Reassemble RV faucet

Screw it back into the faucet.

RV faucet cleaned and lubricated

Ta da! Now the flow will be smooth and full.

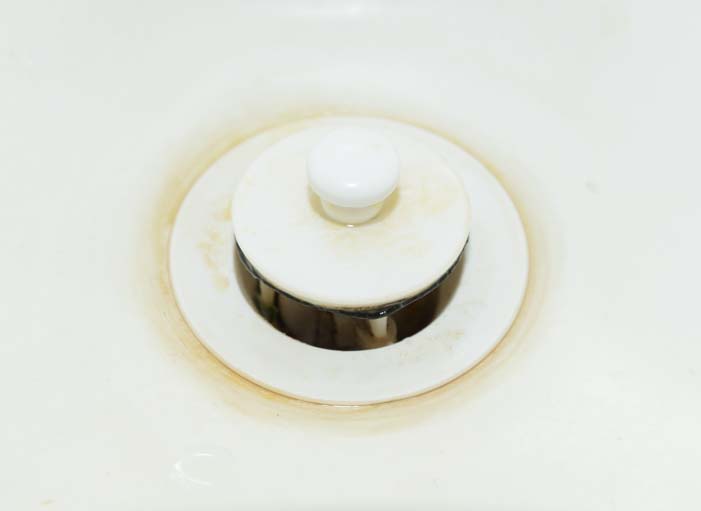
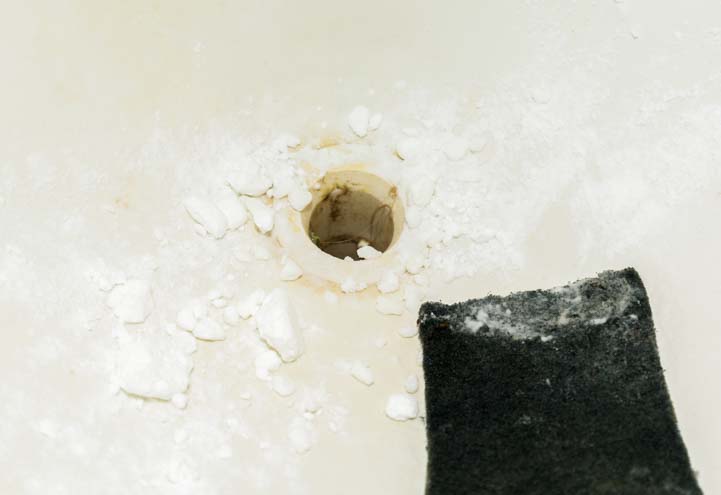
Our trailer has white plastic sinks in the bathroom and kitchen, and these sinks often develop a skanky brown ring around the sink drain. For years, we relied on Comet to clean these sinks. We sprinkled it on the entire sink, let it sit for a bit, and then scrubbed.

We recently discovered that Baking Soda is just as effective!! The fantastic thing about Baking Soda is that it is non-toxic. This is wonderful not only for our gray water holding tanks but also for the RV dump stations as well as the septic fields and municipal waste water treatment systems that are downstream from them.

It’s also really cheap!

Tips for cleaning an RV sink drain

White plastic RV sinks are prone to getting ugly stains.

Dirty RV sink drain

Yuck!

We simply sprinkle it on the sink and then scrub the sink with a damp Scotch-Brite scrubbing pad.

RV sink drain cleaning with baking soda

Sprinkle the baking soda in the sink and scrub the stains with a damp scrubby pad.

What a great result — a wonderfully squeaky clean sink!

RV sink drain is sparkling clean

Sparkling!

The drain plug also gets gummy, and we use an old toothbrush to scrub it clean with either baking soda and/or Murphy’s Oil Soap (a handy all around biodegradable cleanser).

In an RV that is used for dry camping a lot, like ours, the bathroom vanity sink drain can get really gross really quickly because in an effort to conserve fresh water not much clean water gets flushed down the drain.

This can result in foul odors in the sink drain, and it’s pretty unsightly too.

So, we do two things.

First, we scrub the inside of the bathroom sink drain with an old toothbrush. To get a longer reach down the drain, we taped our toothbrush to an old tent stake we had lying around. Anything long and narrow will work.

Toothbrush and extension rod to clean RV sink drain

Tape an old toothbrush to a long stick to reach deep down the RV sink drain.

Cleaning an RV sink drain

Scrub inside the sink drain.

We also scrub the sink drain plug.

Second, to keep the RV bathroom sink drain fresh smelling, we use Happy Camper Holding Tank Treatment which we’ve found is a particularly good deodorizer. We put scoop of powder in an old water bottle, fill it up with water and shake it well (the bottle gets warm as the enzymes get activated!), and then pour it down the drain.

Most of it goes into the gray water tank, but a small amount stays in the bathroom sink drain p-trap and does its magic there, killing off the offensive odors.

Use toothbrush to scrub RV sink drain plut

Scrub the sink drain plug with a toothbrush.

To keep our RV shower in tip-top shape, we clean the drain there as well. The biggest problem in our RV shower drain isn’t foul odors, because the shower drain gets flushed with lots of water everyday. Instead, the challenge with the RV shower drain is accumulated hair.

In a house, it’s easy enough to use a powerful cleanser like Drano to clean out any clogs caused by hair, but we don’t want strong chemicals like that sitting in our gray wastewater holding tank. Afterall, we want the enzymes and bacteria in the Happy Camper and Unique RV Digest-It holding tank treatment products we use to thrive and go to work breaking things down!

So, we use a long spring hook (and flashlight) to pull the hair out. It just takes a few minutes and then the drain is clear.

Some RV shower stalls may have drain components that can be removed for cleaning. Ours doesn’t.

Cleaning hair from an RV shower drain

Use a spring hook to pull hair out of the RV shower drain.

Periodically, the RV shower wand gets crudded up with mineral deposits just like our RV sink faucets do. Again, we rely on white vinegar to clean up the deposits clogging the spray holes in the shower nozzle.

First, we pour the white vinegar through the shower wand to let it soak from the inside.

Tips for cleaning an RV shower wand

The RV shower wand can be cleaned with white vinegar.

Then we soak the shower wand’s face in a bath of white vinegar.

Tips for cleaning an RV shower wand

Put the RV shower wand face down in a white vinegar bath to clean all the little holes.

If we’ve let a little too much time pass, we’ll also use a toothpick to clean out each hole in the shower head. We use bamboo toothpicks because they hold up well in water. Ordinary wooden toothpicks tend to disintegrate when they get wet. A scribe also works well.

The before-and-after difference in the flow of water through the shower wand is startling. When half of the little holes are blocked from mineral deposits and the other half have an impeded flow, the water can feel like needles on your skin. After cleaning the wand, it is more like a waterfall.

Clean each hole in an RV shower wand with a toothpick or scribe

Use a toothpick or scribe to clean each hole in the shower wand.

Lots of RVers love the Oxygenics RV shower head. We don’t use it because it doesn’t work well with the low water pressure we use to conserve water since we dry camp every night, but for RVers who get water hookups a lot, these shower heads are extremely popular. Of course, in hard water areas, these shower heads will need periodic cleaning as well.

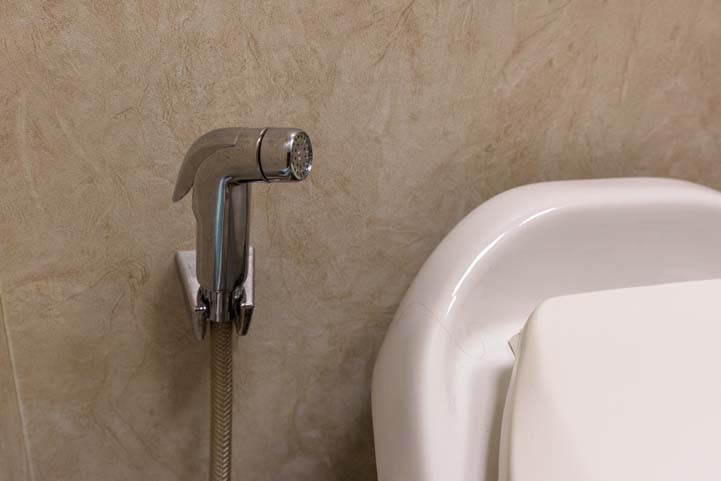
The RV toilet bowl rinsing wand is also subject to corrosion from mineral deposits, and after a while when we go to rinse the toilet bowl we find the water flow from the sprayer is restricted and funky.

RV toilet sprayer wand cleaning

The RV toilet sprayer wand gets clogged with minerals too.

Again, it’s easy to unscrew the end of the toilet spay wand, put it in a white vinegar for 20-30 minutes, scrub it a bit with a toothbrush, and then put it back on the wand.

RV toilet rinse wand cleaning

Unscrew the tip of the toilet rinsing wand and soak it in white vinegar to clean the holes.

As an aside, if you have energy leftover after cleaning all your RV sinks, faucets, drains and spray nozzles, a spray bottle filled with a water and white vinegar mixture is super for washing the windows. As I wrote this, some flies got in our trailer and Mark started spraying them when they landed on the window next to him using a spray bottle filled with water and white vinegar. Besides slowing them down and killing them, he was really impressed with how clean the window was when he finished!

So, these are a few of the things we do to keep our sinks and drains flowing smoothly in our life on the road in our RV.

We hope they help you too!

Subscribe
Never miss a post — it’s free!

A recap of some of the goodies mentioned in this post:

Below are some of our most POPULAR POSTS (also in the MENUS above)

Buddy - A Journey in Spirit - The story of an event that changed our lives forever.

ARTICLE INDEXES
  • RV Tech Tips Articles - A one page index of links to all our RV Tech Tips, RV Upgrades & RV Maintenance articles.
  • RV Lifestyle Tip Articles - An index of links to all our RV Lifestyle Tips (finances, boondocking, major repairs, work/jobs, etc.)
  • Solar Power Articles - Overview and tutorial articles for how to design and install solar power on an RV or boat
  • Product Reviews - An index of links to all of our Product Reviews
RV UPGRADES, SYSTEMS & TIPS MONEY FULL-TIME RV LIFESTYLE GEAR STORE
  • Gear Store - A list of the goodies, equipment and gear we've found useful in our RV lifestyle!
 

Our most recent posts:

More of our Latest Posts are in the MENU.   New to this site? Visit RVers Start Here to find where we keep all the good stuff. Also check out our COOL NEW GEAR STORE!! *** CLICK HERE *** to see it!

Is RV Solar Affordable? 3 Solar Power Solutions for RVs and Boats

Is RV solar power affordable? Or is installing a solar power system on a motorhome or trailer — or even on a sailboat — just too darn expensive to be cost effective? We never thought this question would be hard to answer until recently.

This article outlines three different RV solar power solutions and lists all the parts (and costs) of everything you need to buy:

1. A Small, Expandable Rooftop RV Solar Power Solution – For weekends and vacations
2. A Portable RV Solar Power Solution – To get you up and running effortlessly
3. A Big Rooftop RV Solar Power Solution – For full-time RVing

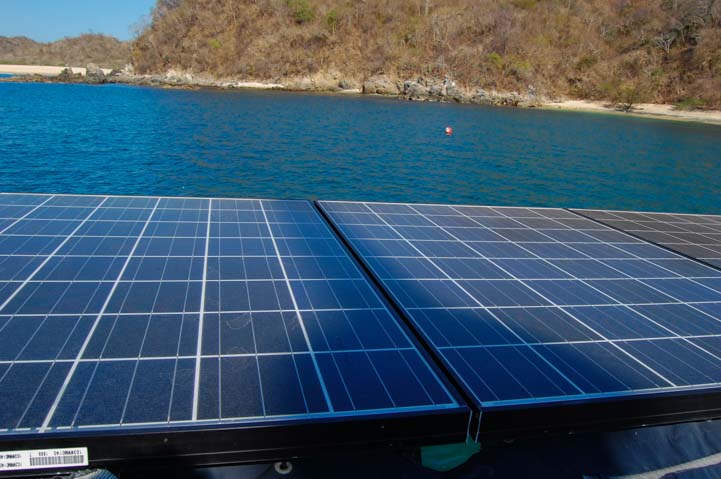
Solar panels on a fifth wheel trailer

Can a solar power installation on an RV or sailboat pay for itself?

Ever since we installed our first (very small) solar power system on our first full-time RV nearly ten years ago, we’ve been excitedly telling people it is a very affordable do-it-yourself project for anyone with some mechanical and electrical knowledge. And for those who can’t turn a wrench, it shouldn’t be that much more.

Our first 130 watt solar power system cost us about twice as much as the same system would today, but even at that high price, we felt it was dollar-for-dollar an equal value to buying a Yamaha or Honda 1000 generator. Best of all, once a little system like that was installed, it was a whole lot less noisy, expensive to operate and complicated to use than a generator would be.

At today’s super cheap solar prices, that little solar power system is even more valuable compared to one of those nice Japanese portable gas generators than it was 10 years ago!

Installing solar panels on a motorhome RV

Installing solar power can be a DIY project if you’re handy.

Recently, however, we’ve heard some crazy prices being quoted for installing solar power systems on RVs. We met one couple with a gorgeous brand new DRV Suites fifth wheel who were quoted $13,000 for a solar power installation. Not long after that, we read an article in a popular RV magazine describing a $12,000 solar power installation on a fifth wheel.

Yikes!! These are outrageous prices!!

We sure hope no one is finding they have to spend that kind of crazy money to get a solar power system installed on their trailer or motorhome or sailboat.

We’ve got oodles of articles on this website that go into the nitty gritty details of things to consider when designing and installing a solar power system on an RV or a boat (located HERE). However, all that theory aside, it’s not all that complicated.

Here are three solar power “packages” — with approximate prices — that will do the trick whether you’re a part-timer or full-time RVer.

Although it is possible to buy “pre-packaged RV solar power kits” online, we suggest hand selecting the components you want so that just in case any individual item has a problem it can be returned easily.

We’ve heard of cases where people bought a pre-packaged solar power kit online and then had problems returning a broken part because they had to return the entire kit — solar panels, charge controller, cables and all — just because the one item wasn’t working right.


SMALL ROOFTOP RV SOLAR POWER SYSTEM – 150 WATT SYSTEM

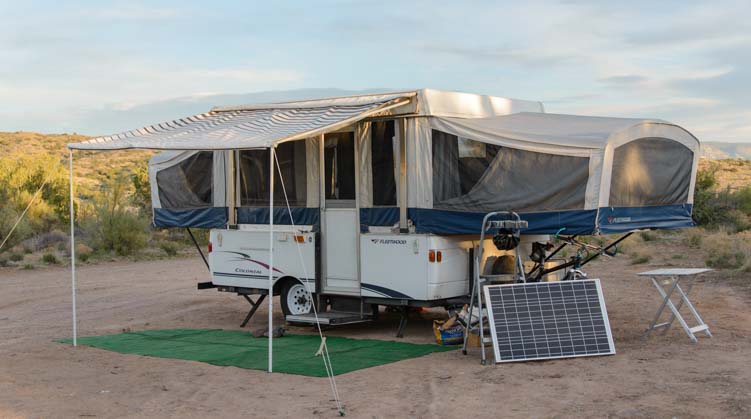
Affordable solar panel with a popup tent trailer

For part-time RVers, installing solar on the roof isn’t a requirement.

The following is essentially what we put on our roof and what we camped with off the grid every night for a year when we started.

The brands are not exactly the same, but these components are highly rated and will do the trick for anyone that wants a roof-mounted solar power system on their motorhome or trailer.

This kit includes both a solar battery charging component and an 110 volt AC power component provided by an inverter. If you don’t understand the distinction, please see our post: RV Solar Power Made Simple.

The simplest inverter installation is to connect the inverter to the batteries using heavy duty cables and then to run an ordinary (but long) power strip (or two) from the inverter to somewhere convenient inside the rig.

Rather than using the wall outlets in the rig, just plug the AC appliances into the power strip as needed, taking care not to operate too many things at once and overload the inverter.

Prices always change, so check the links to see the current prices.

The nice thing about this kit is that it is easily expandable. If a second or third solar panel is eventually desired (to double or triple the size of the system to 300 or 450 watts, for another $200 or $400), those panels can be purchased at a later date. At that point the solar charge controller can also be replaced with a bigger and more sophisticated charge controller (for $600).


PORTABLE FOLDING SOLAR POWER KIT SUITCASE – 120 WATT SYSTEM

Portable folding solar panel suitcase for RV and motorhome use

A portable solar power kit that folds up and can be carried like a suitcase is an awesome solution for weekenders, vacationers and seasonal RVers.

A really nifty alternative for anyone that isn’t super skilled with tools or that’s a bit spooked by electrical things, is a portable solar power kit that folds into a suitcase. These come with two matching solar panels, battery cables with alligator clips, and a panel-mounted solar charge controller. The solar panels are hinged together and can be folded towards each other. A handle on the side of one of them makes the whole thing easy to carry and store like a suitcase.

These portable folding suitcase solar panel kits come in all sizes. A good size is anywhere from 120 to 200 watts:

The advantage of a portable suitcase solar kit like this is that it is self-contained. If you think you might upgrade to a different RV soon, then there’s no loss in investment when one RV is sold and another is purchased. Also, if you decide to install a roof-mounted system at a later date, the suitcase solar panel kit can be sold to another RVer.

As for the inverter, heavy duty cables and power strip, they are included here just to round out the package so you have AC power in the rig as well as the ability to charge the batteries just like the “small solar power kit” described above.


Affordable solar power on a motorhome

Installing solar panels on tilting brackets is popular, but only necessary in mid-winter. We’ve never done it.

With a big RV solar power installation, it is likely that the RV’s house battery bank will need to be upgraded or replaced too, so this package includes a “replacement” AGM battery bank.

The Magnum inverter is an inverter/charger that has a built in transfer switch, making it very straight forward to wire the inverter into the house AC wiring system so you can use the standard wall outlets in the rig rather than plugging things into a power strip.

We’ve been living exclusively on solar power since we started this crazy traveling lifestyle in 2007, and this system is larger than any system we’ve ever had on a boat or trailer. So it ought to work just fine for anyone who wants to RV full-time and do a lot of boondocking.


INSTALLATION COSTS

If you are not a DIY RVer, you’ll need to budget for the installation labor too. As a very rough estimate, I would allow for $500-$1,000 for a small system installation and $1,500-$2,500 for a big system installation. The variations in labor costs will depend on how difficult it is to work in your rig, how hard it is to mount the various components and run the wires from roof to basement, and whether or not you choose to have the batteries upgraded or replaced.


RETURN ON INVESTMENT

RV park and campground prices are all over the map, but assuming that the average cost is $25 per night for a site with hookups if you don’t take advantage of monthly discounts or $15 per night if you do, these systems can pay for themselves in anywhere from 18 camping days to 14 months, depending on what size system you buy, whether or not you do the installation yourself, and how you typically camp. Of course, this assumes the rig is equipped with a refrigerator that can run on propane and that if air conditioning is needed an alternative power source like a generator is used.

As with everything in the RVing world, starting small and cheap is the best way to go.


BIG and COMPLEX SOLAR POWER INSTALLATIONS

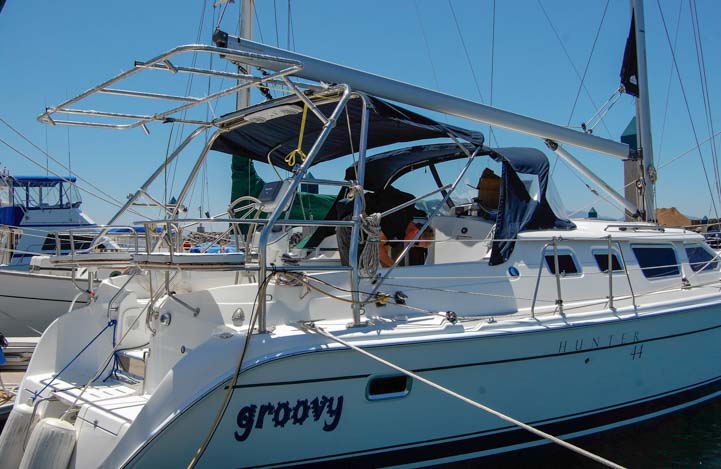
Solar panel arch with solar panels on sailboat transom

Installing solar power on a sailboat has its own set of challenges.

We have installed three different RV solar power systems and one solar power system on a sailboat.

We published an article in the February 2017 issue of Cruising World Magazine (one of the top magazines in the sailing industry) describing the solar power system we installed on our sailboat Groovy back in 2010. This system gave us all the power we needed to “anchor out” in bays and coves away from electrical hookups in marinas for 750 nights during our cruise of Mexico.

Cruising World has posted the article online here:

Sunny Disposition – Adding Solar Power – Cruising World Magazine, February, 2017

Installing solar power on a sailboat is very similar to installing it in an RV, but there is an added complexity because there isn’t a big flat roof to lay the panels on. Instead, we had to construct a stainless steel arch to support the panels. Fortunately, our boat, a 2008 Hunter 44DS, had a factory installed stainless steel arch over the cockpit already. So, we hired a brilliant Mexican metal fabricator named Alejandro Ulloa, to create our solar panel arch in Ensenada, Mexico.

Solar power installation on sailboat Hunter 44

We turned to Alejandro Ulloa of Ensenada, Mexico, for our solar panel arch
He can be contracted the=rough Baja Naval.

Solar panel arch installation on Hunter 44 sailboat

Alejandro is an artist. He wrapped the arch in plastic to prevent scratches until it was permanently mounted on our boat!

Solar panel arch on sailboat Hunter 44

The arch went back to Alejandro’s workshop for tweaking after this measuring session.

Solar panel arch on sailboat Hunter 44 installed by Alejandro Ulloa

Dimensions now perfect, Alejandro mounts the arch permanently.

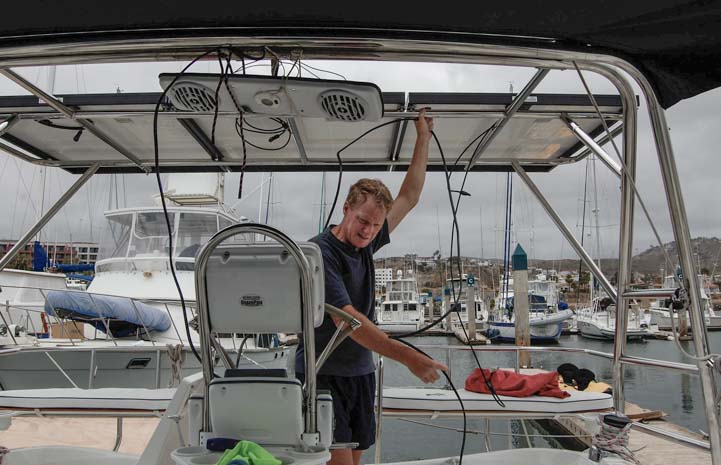
Getting the 185 watt 24 volt solar panels up onto the arch was a challenge. Getting solar panels up onto an RV roof is tricky too!

Affordable marine Solar panel installation on sailboat Hunter 44

Getting the solar panels onto the roof of an RV or up onto this arch takes two people (at least!)

Installing solar panels on an arch on sailboat (Hunter 44) with Alejandro Ulloa Baja Naval Ensenada Mexico

The second of the three panels gets installed.

The solar panel arch was going to double as a “dinghy davit” system with telescoping rods that extended out over the transom. These davits supported a pulley system to hoist the dinghy up out of the water. So once the solar panels were mounted on the arch, we had to be sure it could handle the weight of the dinghy.

Our dinghy weighed a lot less than the combined weight of Mark and Alejandro!

Strong solar panel arch and dinghy davit extension

Alejandro and Mark test the arch to be sure it can support the dinghy (which weighed half what they do).

The solar panels were wired in parallel because they would be subjected to shade constantly shifting on and off the panels at certain times of the day as the boat swung at anchor.

Wiring solar panels on a sailboat (Hunter 44) marine solar power installation

Mark wires up the panels in parallel.

Affordable solar panel installation on a sailboat

.

Solar panel arch with dinghy davit extension supporting affordable solar power on sailboat

A beautiful, clean installation with wire loom covering the exposed cabling and the rest snaked down inside the tubes of the Hunter arch. The davit extensions for hoisting the dinghy are clearly visible under the panels.

Solar panels installed on arch on Hunter 44 sailboat

Nice!

Down below the cockpit inside a huge locker in the transom, Mark mounted a combiner box that brought three cables in from the three panels and then sent out one cable to the solar charge controller.

Emily and Mark Fagan aboard sailboat Groovy

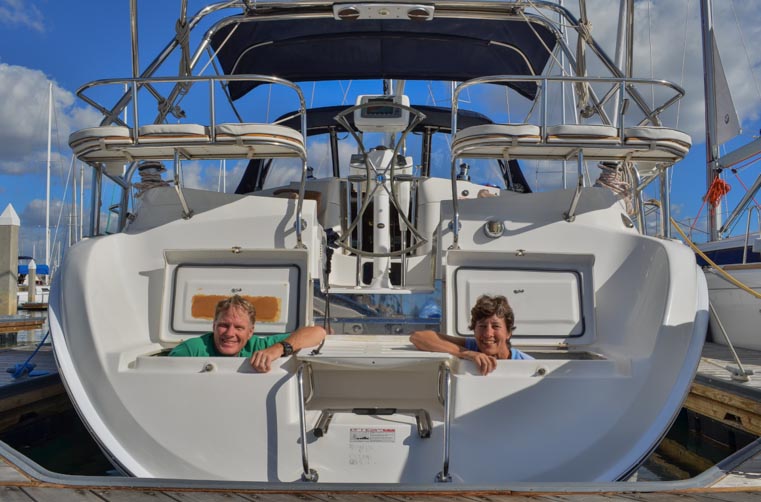
The transom locker in our Hunter 44DS sailboat was very large!

Combiner box for solar panel parallel wiring on a sailboat

A combiner box brings the wires from the three panels together before a single run goes to the solar charge controller (this is optional and not at all necessary).

The solar charge controller was installed in the cabin inside a hanging locker in the master stateroom.

Xantrex solar charge controller installed in sailboat locker

We have an Outback FlexMax charge controller on our trailer but chose a Xantrex controller for our boat because there were no moving parts. We compare the two HERE.

The solar charge controller was located about 8 feet from the near end of the battery bank which spanned a ~14 foot distance under the floorboards in the bilge.

Two 4D AGM batteries in bilge of sailboat

We had four 160 amp-hour 4D AGM batteries for the house bank and a Group 27 AGM start battery installed under the floorboards in the bilge.
One 4D house battery and the Group 27 start battery are seen here

This 555 watt solar power system, which charged a 640 amp-hour house bank of 4D AGM batteries, supplied all of our electrical needs, including powering our under-counter electric refrigerator.

Usually our engine alternator provided backup battery charging whenever we ran the engine. However, at one point our alternator died, and we were without it for 10 straight weeks while we waited for a replacement alternator.

Why such a long wait for a simple replacement part? Getting boat parts in Mexico requires either paying exorbitant shipping fees and import taxes or waiting for a friend to bring the part with them in their backpack when they fly from the US to Mexico.

During that long wait our solar power system supplied all our electricity without a backup while we were anchored in a beautiful bay. Diesel engines don’t require an alternator to run, so we moved the boat around and went sailing etc., and lived our normal lives during our wait.

Solar panel arch and dinghy davit extension with solar panels installed on sailboat

View from the water — cool!

The dinghy davit extensions on the solar panel arch made it easy to raise and lower the dinghy from the water and also to raise and lower the 6 horsepower outboard engine.

Solar panel arch and dinghy davit extension on sailboat

A pulley system on the davit extensions made hoisting the outboard and dinghy a cinch for either of us to do singlehandedly.

Solar panel arch and solar panels on sailboat transom

For 7 months we left our boat at the dock in Chiapas, unplugged from shorepower, and let the solar panels keep the batteries topped off. Everyday during that time they put 19 amp-hours into the batteries which was essentially the power required to operate the solar charge controller!

At anchor, sometimes the solar panels were in full sun all day long if the current and wind and the pattern of the sun crossing the sky allowed the boat to move around without the sun coming forward of the beam of the boat.

However, whenever the sun was forward of the beam, the shadow of the mast and the radome fell on the panels. We could watch the current production from the panels go from full on, to two-thirds, to one-third and back again as the shadow crossed one panel and then two at once, and then one and then none, etc, as the boat swung back and forth at anchor.

Mast and radome cast shade on solar panels on sailboat

RV solar installations have to avoid shade from air conditions and open vent hatches.
On boats the shade from the mast and radome is often unavoidable.

Mast and radome cast shade on pair of sailboat solar panels

When the shadow fell across two 185 watt panels at once, it knocked both of them out of the system so only one of the three solar panels was actually producing power.

The coolest and most unexpected benefit of having our solar panels mounted on an arch over the cockpit was the shade that they provided. The sun in Mexico is very intense, especially out on the water, and it was wonderful to have two huge forward facing jump seats at the back of the cockpit that fully shade as we sailed!

Under the shade of solar panels and a solar panel arch on a sailboat

Made in the shade — What a life that was!!

We have more solar power related articles at these links:

SOLAR POWER OVERVIEW and TUTORIAL

BATTERIES and BATTERY CHARGING SYSTEMS

LIVING ON 12 VOLTS

Our technical articles in Cruising World magazine can be found here:

Do We Miss Our Boat “Groovy” and Sailing?

We describe our thrilling — and heart wrenching — first and last days on our wonderful sailboat in the following posts. It is very true that the happiest days of a boater’s life are the day the boat is bought and the day it’s sold!

Our most recent posts:

More of our Latest Posts are in the MENU.   New to this site? Visit RVers Start Here to find where we keep all the good stuff. Also check out our COOL NEW GEAR STORE!! *** CLICK HERE *** to see it!

Subscribe
Never miss a post — it’s free!

What’s A Girl To Do at the RV Dump Station?

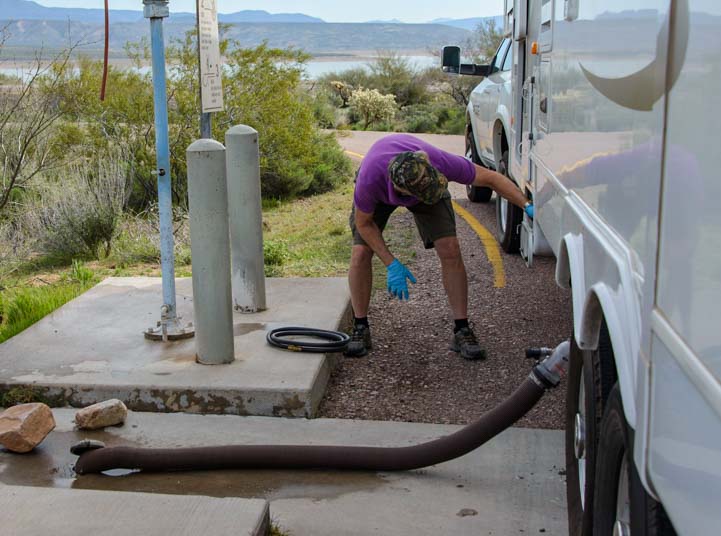
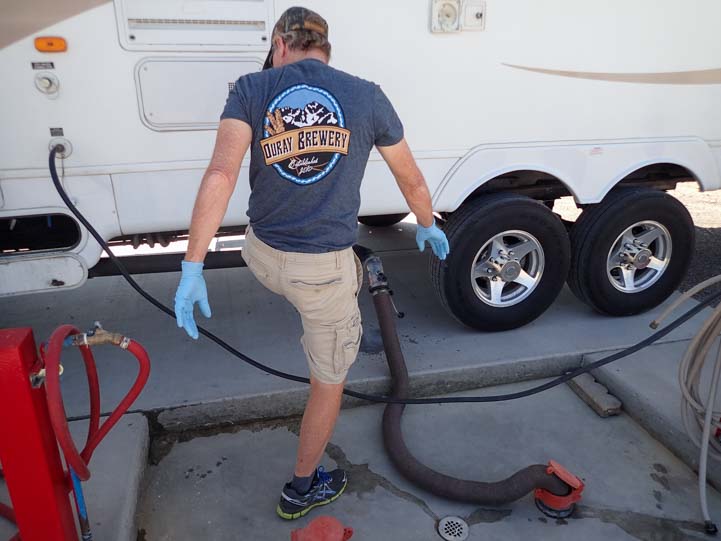
Dumping the RV holding tanks is a nasty little job, but it’s part of the fun of traveling around in an RV, and we’ve all gotta do it. It’s really not all that bad when it’s a shared job, but of course that’s easy for us gals to say, because it’s usually our male partners-in-love-and-life who get to do the bulk of the dirty work.

RV dump station tips for women RVers-2

Despite lots of progress over the years for the types of work women can do, emptying an RV’s waste water holding tanks is a job many women are just as happy to leave to their better half.

Sometimes, when we go to an RV dump station, I am amazed to see a woman remain in the passenger’s seat of her truck or motorhome for the whole duration of the job. I’m not sure how these women have negotiated that arrangement with their significant other, but I figure they must be incredibly good cooks to be able to chat with a friend on the phone or check the latest on Facebook while their hubby is grinding it out with the sewer hose, the splashing water, and all that muck and mire.

RV dump station tips for RVing women

Mark looks like he’s having so much fun. Can I get away with doing nothing?

I wish my skills were so awesome in the kitchen that I could be exempt from doing anything at the RV dump station. But alas, in our marriage, I need to be a participant in this dirtiest of deeds to win brownie points for other aspects of our life together. Nonetheless, it took me a few years to find things to do while we were at the RV dump station that were truly useful and helpful.

We have a full set of “blue” RV dump station procedural tips below — but they don’t say much about the “pink” side of the job:

Dirty Little Secrets from the RV dump station

Too often at the beginning of our RVing lives I found my best efforts to help with setting up the RV sewer hose or screwing in the water hose ended up with me underfoot and in the way of the general flow of things. Mark had his methods, and I couldn’t read his mind as to what came next.

Few people are in truly sunny and radiant moods when they don their rubber gloves at the RV dump, and too often I found that my most valiant attempts to be helpful resulted in tensions rising between us.

RV dump station tips for women RVers

I think he’s trying to tell me something.

Then one day I discovered a way that I can be of significant help and get some important jobs done at the same time.

GIVE THE BLACK TANK A BOOST FLUSH

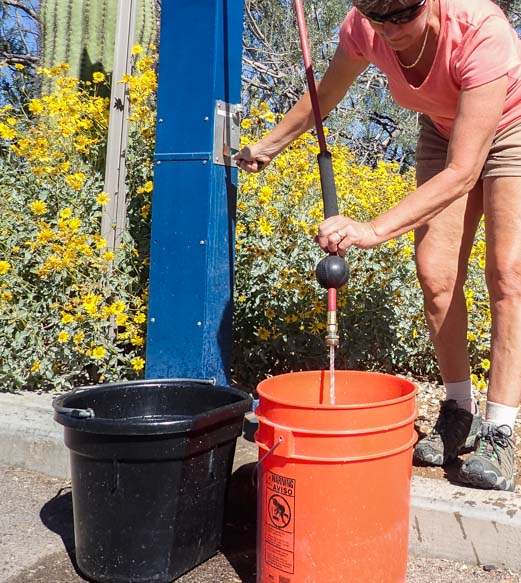
For starters, I fill two 5-gallon water buckets with water and carry them into the rig to dump them down the toilet after the black tank has been emptied. Even if an RV has a black water flush system like ours does, it is still surprising just how many little bits of gunk and human waste solids get flushed out when two 5-gallon buckets of water are poured down the toilet.

I fill the buckets while Mark gets the sewer hose out and attaches the clear elbow so he can see when the holding tanks are fully drained. Then I can scoot out of the way and carry the buckets around to our RV’s door before he begins attaching the black water flush hose between the rig and the water spigot. This way we don’t end up stepping on each when we first start working at the RV dump station.

RV dump station tips flushing black tank with buckets of water in toilet

We have two buckets and I fill each one with water to give the toilet and sewer pipes an extra flush.

The buckets are heavy to carry around to our trailer’s front door, but I don’t mind a little bit of a shoulder and arm workout, and I take them one at a time. Maneuvering a heavy bucket of water up stairs is excellent exercise for both balance and strength.

I grab the inside of the doorway with my left hand for extra balance, tighten my abs so I don’t throw my back out with the uneven weight distribution of carrying a heavy bucket, and I leverage myself up and set the pails down inside in the kitchen.

RV dump station tip flush black tank with buckets of water in toilet

The buckets are heavy, but I take my time and grab the door frame to keep my balance as I go up the stairs.

For those who can’t carry the buckets, your partner will likely be happy to carry them for you since this really helps ensure the black tank and toilet get a complete flush. Also, filling the buckets only half way or three quarters of the way can help not only lighten the load but keep the water from splashing all over the place and all over you.

CLEAN THE BATHROOM

The other task I tackle is cleaning the toilet room from top to bottom and cleaning the bathroom vanity and kitchen sink. I figure that if my sweet hubby is dealing with the darker side of RVing outside at the RV dump station, I can deal with the same stuff on the inside..

This insures the bathroom gets cleaned on a regular basis and also means that when we arrive at our next campsite not only are the holding tanks empty but our bathroom is sparkling clean and smells fresh.

So, once I get the water buckets inside the rig, I begin assembling the things I will need to clean the toilet and the bathroom. When I hear Mark’s knock on the wall, I know he has finished emptying the black tank and it is time to dump the buckets of water down the toilet.

RV dump station tips flush black tank

I pour one bucket at a time and Mark watches the flow in the sewer hose to make sure the water eventually runs clear.

Since the buckets are just inside the RV door, it takes me a minute to grab one and empty it. Then it takes a few minutes more to go grab the other one and empty it too. Having a few minutes between flushes is helpful because then Mark can monitor whether the water from the second bucket is running clear or is still flushing solids out. If there are still chunks coming out, then, depending on whether anyone is waiting to use the RV dump after us, I’ll fill another bucket or two with water and dump them down the toilet.

Sometimes I have the water pump turned on as I dump the buckets of water down the toilet and sometimes it’s turned off. Having it turned on means even more water flushes down, which is great, but it also uses up water from the fresh water tank. So, whether or not I have the water pump turned on depends on whether there are people waiting behind us at the dump station, as it will take a little longer for us to fill the fresh water tank if we flush a few extra gallons down the toilet as part of the dumping process.

Now that the black tank is completely flushed, Mark begins emptying our kitchen gray tank. We have two gray tanks, one for the kitchen and one for the shower. We empty the kitchen tank first because it is dirtier and has more things in it (like broccoli bits) than the shower gray tank which is just sudsy water.

While he works on emptying the two gray tanks, I get to work cleaning the toilet.

RV dump station tip woman cleans toilet and bathroom

If Mark is mucking around in gross stuff outside, the least I can do is muck around in gross stuff inside. This also gives us a clean bathroom when we set up camp.

Since we have a hatch in the toilet room that we leave open a lot, the toilet lid and the floor often get dusty in just a few days. So I remove everything from the toilet room and clean everything, including the floor.

Over the years we’ve found that the toilet bowl — more so than the black tank itself — can be a big source of foul odors. Unlike household toilets, RV toilet bowls are basically dry except during flushing, so urine can end up drying in the bowl and producing an odor.

Also, the flow of the flushing water doesn’t necessarily rinse every inch of the bowl, so some areas simply don’t get rinsed all that well, even when using the toilet’s spray nozzle. So, I go to town on the inside of the bowl as well as everything else.

We use two enzyme/bacteria based RV holding tank treatment products: Happy Campers RV holding tank treatment has worked best for us in extreme temperatures (very cold and very hot) and for controlling tank odors. RV Digest-It holding tank treatment has worked best for us in moderate temperatures to break down the solids in the tank.

Because these are both basically solutions of living critters, the toilet cleaning products we use can’t be too toxic or the colonies of feces-eating bacteria can’t get established and become self-perpetuating. I’ve been using Murphy’s Oil Soap for the last few years with good results.

This is the soap that is recommended for cleaning the rubber roofs on the tops of RV’s, which is why we had it on hand to try on the toilet a few years ago. In addition to being biodegradable, what we like about it for cleaning the toilet is that it assists in keeping both the seals in the toilet bowl and on the black holding tank valve lubricated. I used white vinegar for cleaning the toilet for a while, and after a few months the black tank valve got really sticky. Since switching to Murphy’s Oil Soap a few years ago, that valve hasn’t gotten gummed up.

Periodically, we’ve found the seals in the toilet bowl have stopped holding water which meant the bowl drained completely dry between flushes. This allowed foul odors to come up from the black water tank. This problem is usually due to mineral and gunk build-ups on the seal.

So, I give that seal a really good cleaning too. The critical areas are on both the top and bottom surfaces of the rubber seal, that is, between the seal and the toilet bowl (the top side) and underneath the seal where the dome flapper (the “waste ball”) closes up against it.

RV toilet assembly and flapper valve installation

A disassembled RV toilet shows what the rubber toilet seal looks like without the toilet bowl sitting on it. To prevent it from leaking and draining the toilet between flushes, I scrub both top and bottom of the rubber seal.

I make sure the water pump is off at this point and hold the toilet flush lever down so I can get at the underside of the seal.

Often, the build-up is due to having hard water in the fresh water tanks which is very common in Arizona and other western states where the fresh water comes from deep, mineral rich aquifers.

RV toilet flapper cleaning tips

The seal needs to be completely free of mineral deposits on both the top and bottom, so I clean the area between the seal and the bowl on the top (red arrow) and below the seal on the bottom (the backside of the seal in this view).

At this point, depending on what Mark is up to outside, I’ll move on to other cleaning projects. If we have nearly emptied our fresh water tanks prior to coming to the RV dump station, it may take 10 minutes to refill them. Also, sometimes the potable water spigot is a little ways beyond the waste water dump area, requiring Mark to move the whole rig a few feet forward.

So, if there is time, I will clean the bathroom vanity sink and then move on to the kitchen sink. Depending on our plans for the next few days and depending on how much time I have at the RV dump, I may also add the holding tank treatment to the black tank, via the toilet, and add it to the gray tanks via the bathroom sink, shower and kitchen sink.

Sometimes, however, I prefer to wait two or three days until those tanks have some liquids in them before adding the holding tank treatment. And sometimes I add just a half tank’s worth of holding tank treatment at the RV dump station and then add the other half a few days later once the holding tanks have become partially full.

Of course, we add a capful of bleach to our fresh water tanks every few months, and that totally obliterates any colonies of anything that have started to grow in any of the holding tanks (including the fresh water tank) as the bleach water works its way through our plumbing system from the fresh water tank to the gray and black waste water tanks.

So, for us, creating fully self-sustaining communities of healthy organisms in any waste water tank is not 100% doable. But by using non-toxic cleansers we can help them along in between bleach blasts.

So, all in all, there is a LOT a girl can do at the RV dump station. We find we are both much happier about the whole process when we each have a set of tasks to do when we get there that are not only similarly grungy but are equally important and that take place in different parts of the RV.

The best part is that when we leave the RV dump station to go set up camp in a new, beautiful location, not only do we have empty waste water tanks but our bathroom is clean and fresh too.

Happy cleaning!!

Subscribe
Never miss a post — it’s free!

Goodies I use for my jobs at the RV Dump Station:

More RV tips and Tricks:

Our most recent posts:

More of our Latest Posts are in the MENU.
New to this site? Visit RVers Start Here to find where we keep all the good stuff!!

Hitch Tighteners – Anti-Rattle Hitch Clamps Stop the Creaks & Wiggles!

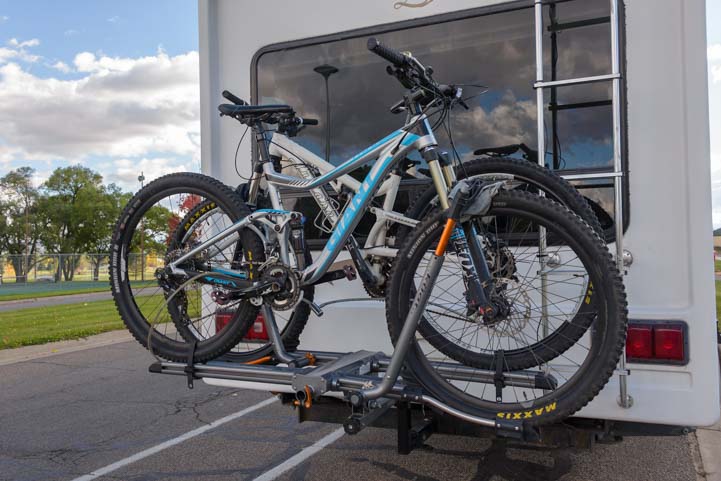
We carry our bicycles on the back of our 36′ fifth wheel trailer with a Kuat NV bike rack inserted into the trailer’s hitch receiver (we reviewed the Kuat bike rack here). We installed this bike rack in 2012 and it has been great for the past five years of our full-time RV travels.

Kuat NV Bike Rack on back of fifth wheel trailer RV

We carry our mountain bikes on the back of our 5th wheel with a Kuat NV Bike Rack

To keep the bike rack from dragging on the ground in crazy places like steep gas station ramps or deep gulleys on small roads, we had a “Z” shaped “hi-low” hitch riser made. This raises the rack up quite high, so now the first thing to hit the ground is the hitch receiver itself rather than the bike rack.

Hitch extension with Kuat NV bike rack

A “Z” shaped “hi-low” hitch riser raised the bike rack so it can’t drag on the ground in a gully or dip.

As is often the case with hitch receivers, the bike rack isn’t a perfectly tight fit in the hitch receiver riser, and the bottom of the riser isn’t a perfect fit in the trailer’s hitch receiver either. So, the whole bike rack tends to wiggle.

We’ve used various shims to make it all tight, but too often they would wiggle loose over time, and eventually the bikes would be jiggling all over the place on the rack again.

Using a shim in a bumper hitch

We wedged shims in to tighten things up, but it wasn’t an ideal solution

Last fall we stopped in at JM Custom Welding in Blanding, Utah, to talk with Jack, the man who had made our “Z” hitch riser (more info about it here). We wondered if he had any tricks up his sleeve for making our bike rack arrangement less wobbly.

JM Custom Welding Blanding Utah

Mark and Jack of JM Custom Welding in Blanding, Utah

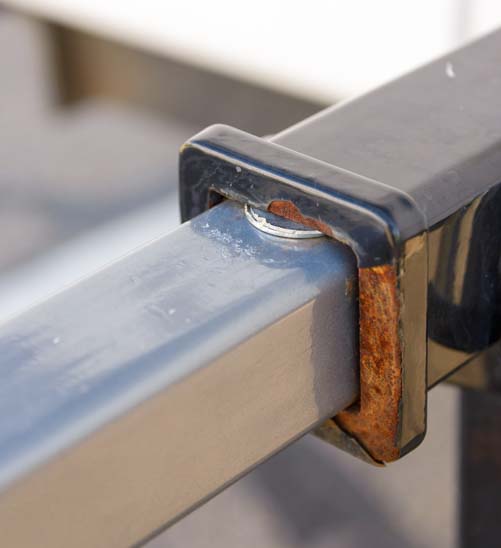
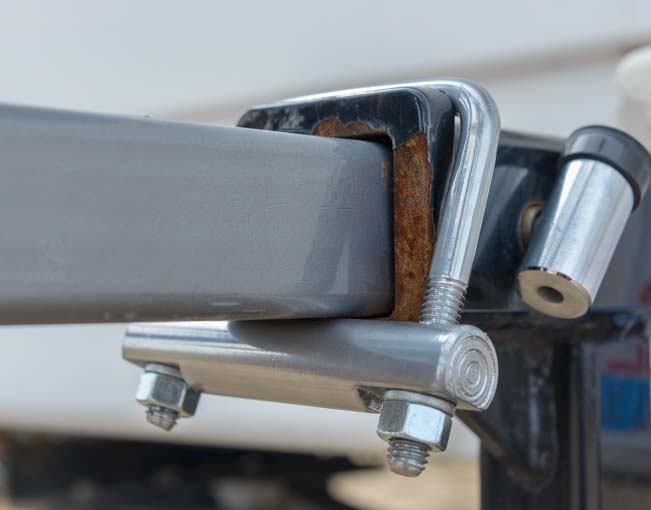
It turns out that he had solved this very problem for other customers by making a hitch tightener. This is essentially a hitch clamp that fits over the end of the hitch receiver and snugs up whatever is inserted into the receiver with some lock washers and nuts.

Bumper hitch tightener for car or RV hitch

Jack put this nifty hitch tightener on our hitch receiver.

Bumper hitch tightener for bike rack

.

So, we got two of them, one for the top and one for the bottom of our “Z” shaped hi-low hitch riser extension.

Hitch tightener on RV for bike rack

He put a second hitch tightener on the trailer’s receiver as well.

The difference in the amount of movement of the bikes was absolutely astonishing. They were rock solid now!

Hitch tightener for bike rack mounted in bumper hitch

Looking down at both hitch tighteners on our hitch extension.

After installing the hitch tighteners, which was just a matter of tightening the nuts, Mark drove the rig around the JM Custom Welding dirt lot while I walked behind and watched the bikes, and they were steady as could be.

Hitch tighteners on bumper hitch mounted bike rack

Hitch tighteners at the top and bottom of the hi-low hitch riser extension.

Hitch tightener for bike rack mounted in bumper hitch

.

But unlike the shim solution we’d used before, these hitch tighteners have stayed tight without needing any adjusting or fuss for several months and several thousand miles of driving on all kinds of roads.

Kuat NV BIke rack and bike rack extension and hitch tightener

The whole system is completely rigid now and has not needed any adjustments in six months of use.

The hitch tighteners do make for some extra steps if we want to move the bike rack from the hitch receiver on the trailer to the hitch receiver on our truck. However, we’ve started hauling our bikes in our truck in a different way using a furniture blanket, so there’s no need to take the bike rack off the trailer any more.

Mountain bikes on truck rather than a bike rack

An easy way to get the bikes from the trailer to the trail head!

Jack makes these hitch tighteners in batches, so if you are passing through Blanding, Utah, perhaps on your way to or from the beautiful Natural Bridges National Monument, just a mile or so south of Blanding you can stop by JM Custom Welding and pick one up! In 2016 the were $38 apiece.

We discovered later that hitch tighteners of various kinds are also commercially available. So, if Blanding, Utah, isn’t in your sights, you can choose from many different kinds of hitch clamps online.

However, a visit to Jack’s welding shop is very worthwhile, especially if you need any kind of custom metal fabrication done on your RV. He is very creative and does excellent work.

While we were in Jack’s office, we noticed a display of his for a folding storage solution for the beds of pickup trucks he’s created that fits right behind the truck cab. He calls it the “Jack Pack” and it is essentially a framed canvas storage bag the width of the truck bed that is easily opened to throw your bags of groceries into and then easily folded away when you need to haul lumber or fill the truck bed with something else.

If we didn’t have that part of our truck filled up with extra water jugs, we would have snagged one of those from him at the same time!

We’ve got a few more links below.

Subscribe
Never miss a post — it’s free!

Info on hitch tighteners and hitch clamps:

There are many brands of hitch tighteners on the market. These are a few:

There’s also a “Z” shaped hi-low hitch riser available:

If you need custom metal fabrication work done:

Related Posts:

Our most recent posts:

More of our Latest Posts are in the MENU.   New to this site? Visit RVers Start Here to find where we keep all the good stuff. Also check out our COOL NEW GEAR STORE!! *** CLICK HERE *** to see it!

How to Heat an RV in Cold Weather and Winter Snow Storms

Heating an RV in cold weather during the winter, especially in a snow storm, is quite different than heating a house, and it often requires utilizing different kinds of heaters and a little creativity too.

RV camping and travel in snow in winter

Is that SNOW??!! We sure didn’t expect THAT!!!

A few weeks ago, at the end of September, we woke up to find ourselves in a beautiful snowstorm at 10,000′ elevation in Colorado.

We had to pull out all the stops to make sure we were cozy warm in our RV even though overnight lows were in the 20’s and daytime highs didn’t get out of the 40’s for a week.

Bikes on RV bike rack in snow in winter

We looked out our back window and saw snow covering our bikes!

The first order of business was to go outside and build a snowman, and Mark got right to it.

Winter RV tips for staying warm in cold weather

It’s snowing!!! Let’s make a snowman!!!

While he’s busy getting that snowman together, I wanted to share with you the strategies we’ve used for heating our RV without electrical hookups, because we use different heating appliances in different situations.

For “cool” conditions, like December and February in the Arizona desert or May in the Canadian Rockies, when lows are in the 30’s, keeping our buggy warm is a cinch with our blue flame vent-free propane heater that Mark installed back in 2008.

But in in “extreme” conditions, like this recent snowstorm on a mountaintop in Colorado, we use a different strategy and rely more on our RV furnace that was factory installed in our trailer.

We have tried different strategies in very cold weather at very high altitudes like this in the past, and this most recent cold spell was our most comfortable, despite the wet gloppy mess of snowy covered jackets, hats, mittens and boots and the sullen gray skies that persisted for several days. So, we seem to have gotten it right this time.

Of course, “lows in the 20’s” is far from “extreme” for North Americans living in houses with central heating, but it definitely feels extreme when living in an RV off the grid. In reality, RVs are most comfortable in temperatures that stay above freezing.

Winter RVing in the snow

The snowman gets sticks for his arms…

Even though high end RVs are marketed as being “four season” coaches, boasting high R-factors in the walls, ceiling and floor, you just can’t compare 1.5″ styrofoam walls that have a thin layer of gelcoat and wallpaper board to a residential house wall that’s made of 3.5″ fiberglass insulation covered with a half-inch of drywall, half-inch of plywood, Tyvek and exterior siding.

Besides the skimpy walls, we find that the RV windows are the biggest reasons for the poor insulation. The metal window frames are extremely cold to the touch when temps outside are in the 20’s, and all that metal around our many windows conducts the cold right into the rig.

Some folks like to have thermopane (dual pane) RV windows, but if moisture gets between the two panes, which can happen more easily in an RV that rattles down the road all the time than in a house that stands still on its foundation, the moisture is likely to remain there permanently, no matter what the weather does outside or how many years go by.

RV windows don’t seal all that well either. Our top quality, four season fifth wheel trailer is downright drafty inside, with a definite breeze that can, at times, flutter a tissue by the “escape” windows. You don’t notice it so much when it is 70 degrees both outside and inside with no wind blowing. But when it is a blustery18 degrees outside and we are trying to heat the rig to 65 degrees inside, the breeze by those windows is a shock.

The microwave vent is another drafty spot, and if the wind is howling outside and blowing directly on that wall of the RV, it blows right into the kitchen through the vent holes on the top of the microwave. One solution for that, of course, is to tape over the vent on the outside of the rig and not use the microwave for the duration of the cold snap (we haven’t done that, however).

Winter RV trip in the snow

The snowman gets a hat!

So, in our experience, keeping an RV and everything in it toasty warm when it is snowing out can require a little creativity.

Back in our house living days in snow country, we would set the thermostat to our preferred indoor temperature and keep it there 24/7, perhaps raising it slightly at the breakfast and dinner hours and lowering it slightly while we were at work or asleep.

When a blizzard blows into our RV lifestyle nowadays, we can have that kind of stable heat in our rig if we plug into shorepower with access to unlimited electricity. Portable electric heaters can back up the RV furnace, and RVs that have an air conditioner with a heat pump can use that (ours doesn’t).

We have a portable electric ceramic heater for just such an emergency where going to an RV park and plugging in is our best line of defense for weathering a storm.

However, it is possible to stay warm without hookups, even when it starts snowing.

RV in snow in winter

What fun!!

We rely on our vent-free propane heater for 95% of our heat year round. These little heaters use propane very efficiently, don’t need any electricity to run, and can be installed in an RV permanently to run off the RV’s propane tanks.

There are also handy portable models that can be stored in a closet when not in use and then placed anywhere in the rig where you want a little heat. These run on disposable propane bottles, so it isn’t necessary to plumb the heater to the RV’s big propane tanks.

Animal tracks in the winter snow

We found fresh animal tracks in the snow.

We have a detailed article describing the different kinds of vent-free propane heaters on the market, the pros and cons of each type and the type of heat they generate, plus a step-by-step guide for how to install one in an RV at this link:

How to Install a Vent-free Propane Heater in an RV

These heaters heat the rig amazingly quickly. We find that our 20k BTU blue flame heater warms our rig at a rate of about one degree every two minutes. So, in twenty minutes we can warm up our home by 10 degrees, and in an hour we can raise the inside temp by 30 degrees.

The best part is that we can hover over it and warm our hands, bodies and clothes, just like standing in front of a woodstove or fireplace. We do that a LOT and totally love our little heater for the terrific blast of instant hot air it provides!!!

How to heat an RV in winter and cold weather

When you’re chilled, there’s nothing like hovering over this heater!

We use our blue flame heater year round, and we have used it at elevations ranging from sea level to 10,000′.

This past year we traveled primarily in cold places where overnight lows were in the 30’s and 40’s. We went north through Utah, Idaho and Montana in March and April and spent May and early June in the Canadian Rockies. Consequently, we saw quite a bit of snow and hail, and during those months we used our heater almost every day.

Aspen and pine trees in winter snow

The snow in Colorado fell for hours and gave us a beautiful winter wonderland — in September!

Colorful aspens in winter snow storm with pine tree

Fall colors with snow – Magic!

We thawed out in July long enough to get overheated and write a blog post: “How to Beat the Heat in an RV.” Then it was back to the high elevations of Utah and Colorado in mid-August where we saw more hail and overnight lows in 30’s once again.

Our vent-free blue flame heater has been keeping us warm during all four seasons like this since Mark installed it in 2008!!

Snowy road with aspen for an RV in winter

.

Snowy road in winter

It was really cold, but it was so beautiful we didn’t mind!!

The basic difference between an RV furnace and a vent-free propane heater is this:

  • RV furnace – Uses a lot of electricity, uses propane inefficiently, brings fresh air into the rig (because it’s vented)
  • Vent-free propane heater – Doesn’t use electricity, burns propane efficiently, uses up oxygen in the RV

So each has its place under certain circumstances. In a nutshell:

— The ventless propane heater is awesome as long as there is sufficient oxygen for it to run. We like to use it in the mornings and evenings, and since we are in and out of the rig a lot, there is a lot of air exchange inside our RV from opening and closing the front door all day long as well as from all the drafts and breezes that blow in the RV windows and microwave vent.

— The RV furnace is best for other scenarios: in cases where there is a risk of the water pipes freezing (the hot air ducts keep the basement and water lines warm), at very high elevations in extreme cold, and at night, because it is vented and continually circulates the air in the rig. The RV furnace is very loud and tends to wake us up at night, however, so we don’t use it overnight very often.

So, we use our vent-free blue flame heater for 95% of our RV heating, and we turn to our RV furnace on rare occasions.

Aspen and pine trees in snow in winter

Fall colors and snow — a gorgeous combinations!

Dodge pickup truck covered in winter snow

This snowfall was definitely sticking around a while!

Vented vs. Ventless Propane Heaters and Propane RV Stoves & Ovens – Safety Concerns

An RV furnace is a vented system, meaning that it releases warm, moist air from inside the RV to the outside, and it brings cold air from outside to the inside of the rig. This makes it very inefficient in its use of propane, because it is essentially heating the outdoors as well as the indoors. Put your hands by the RV furnace vent outside, and they will get nice and warm and a bit damp too!

While RV furnaces are safely vented yet very inefficient, vent-free gas heaters are very efficient and are required by law to have an automatic shutoff when the available oxygen goes below a certain threshold (there is a built-in sensor that triggers the shut-off). We know when ours is about to shut off because the flame begins to sputter and make noise. Once it has shut itself off, it won’t turn on again until we air out the RV a little by opening the door or windows for a while.

Ironically, propane RV stoves and ovens are not required to shut off automatically when the available oxygen is depleted. To me, this makes them inherently quite a bit more dangerous than vent-free propane heaters.

Of course, an RV fitted with propane tanks is basically a rolling bomb, so it’s a very unsafe place to call home (I say this with a smile, because we wouldn’t trade our 9 years on the road for anything)!

Every time we have seen our blue flame heater shut itself off (probably 30+ times), the RV stove and/or oven has kept right on a-cookin’ without any hint that our supply of oxygen inside the rig was running out. We could easily have baked something in our factory installed propane RV oven and simmered something on our factory installed propane RV stove for hours while camped at 10,000′ with no inkling that the oxygen in our rig had dipped below safe levels!

Winter snow on RV steps

Welcome home…. Brrrrr!

Which Heater is Best Under Which Conditions?

For most of this year as we traveled in cold country, the lowest temperatures we saw were in the low to mid 30’s overnight. Daytime highs were in the mid-60’s to mid-70’s. These kinds of conditions are very similar to what we see in the southwestern deserts in the winter months (except January, which can be colder). These conditions are ideal for a vent-free propane heater.

We usually run our vent-free propane heater every morning until the rig is 60 to 75 degrees inside (depending on our mood) and then again in the evening if the temperature inside has dipped below 65. If the windows have fogged up from condensation (about 5% of the time, usually only in the winter), we run the RV furnace too to help dry the air out.

In general, we don’t heat our RV overnight in this kind of climate. We prefer to bundle up with down comforters instead. If we do run the heat at night, we use the RV furnace and set it to 50 degrees. If outdoor temps drop into the 30’s overnight, the RV furnace will come on once or twice in the pre-dawn hours.

Golden aspen in snow in winter

Golden aspen leaves in snow.

Ironically, if the outside temps dip really low — into the 20’s or teens — and daytime highs don’t get much past 50 degrees, then the RV furnace will start coming on before midnight and will come on every hour for 15-20 minutes as it struggles to keep the rig at 50 degrees.

Since we are light sleepers, this is extremely annoying. So, at the times we would want to run the RV furnace most — overnight when it’s really cold — we opt not to!

On overnights that we don’t heat the rig, when we wake up in the morning our bedroom is around 10-12 degrees warmer than the outside air (bedroom door closed all night) and our living area is around 5-7 degrees warmer than the outside air.

It is routine for us to wake up to temps in our trailer that are between 37 and 42 degrees. For us, that is a small price to pay for living off the grid, however, for many RVers it is good reason to get electric hookups and have more substantial and consistent heat in the rig overnight.

Aspen covered with snow in winter

The colors of Fall in Colorado.

There is a lot of debate about whether you can operate a ventless propane heater at high elevations. By the time we got caught in that September snow storm in Colorado two weeks ago, we had been living at elevations between 8,000′ and 10,000′ for 5 straight weeks, running our vent-free propane blue flame heater every morning and evening without a hitch.

Along with many weeks spent heating our rig at high elevations in previous years, including 8 weeks or so at 6,000′ or higher this past spring, our 5 weeks at 8 to 10 thousand feet this fall kind of proved the point for us: it’s no problem to run a vent-free propane heater at high altitudes in cool weather.

But in sub-freezing overnight temperatures and daytime highs in the 40’s under stormy skies at 10,000′ elevation, we’ve found a vent-free propane heater is best used in combination with the RV furnace.

Bikes on back of RV in snow

Well, we won’t be biking any time soon!!

Until the the snowstorm came to our mountaintop spot in the Colorado Rockies at 10,000′, we hadn’t been using the RV furnace at all. But once the temps dropped to the 20’s (lows) to 40’s (highs) at that elevation, we couldn’t rely on our blue flame heater exclusively any more and had to change our heating strategy for three reasons.

1) There is less available oxygen at 10,000′ than at lower elevations, and once the oxygen in the rig dipped below a certain level, the blue flame heater would shut itself off automatically. Because it was so cold outside, we weren’t thrilled about opening the windows and doors to let in more air just so we could turn on the blue flame heater again. It was time to use the RV furnace.

2) Our RV roof and ladder — along with our solar panels — was covered with snow and ice. Mark wasn’t jumping up and down with excitement to climb up there to clear off the solar panels, and I wasn’t about to get up on that slippery roof either. So, our batteries were no longer getting charged by the sun and wouldn’t have enough juice to run the RV furnace.

3) Vent-free propane heaters emit a lot of moisture. We had just had several days of torrential rain, and everything in our rig was wet. Our shower was filled with raincoats and rain hats hung up to dry, our boots and socks were wet and muddy by the door, our pants were wet and hanging in the bathroom and our bath towels refused to dry. While our blue flame vent-free heater would exacerbate the moisture problem, our RV furnace would help dry out the air inside our buggy.

Doing all these things gave us a nice dry and toasty warm environment to live in during this cold spell in snowy conditions at 10,000 feet.

To implement this heating strategy, we did two things. We stocked up on gasoline and propane and ran our Yamaha 2400i generator and RV furnace a lot. Sometimes we also ran the blue flame heater alongside the furnace.

Yamaha generator in bed of pickup truck in snow

Our Yamaha generator got a good hard workout for over a week.

The generator ensured that the batteries got fully charged. Because we were running our RV furnace so much, which burned up lots of electricity, the batteries were being depleted much faster than normal. So, not only did we need the generator because the solar panels were snoozing under the snow and ice, we also needed it because of running the RV furnace.

RV in snow in winter

A few weeks prior we had been roasting in the summer heat. What a crazy life we live in this RV!!

In general, we ran the RV furnace every morning until the rig was 65 degrees inside and then ran it on and off during the day and in the evening. If the air wasn’t too moist, we also ran blue flame vent-free heater alongside the furnace to warm things up faster. The vent-free propane heater never shut itself off, so the RV furnace was doing its job of circulating the air.

Golden aspen in snow by pond in winter

Getting creative heating our RV made it possible to enjoy views like this as it snowed.

Using the RV furnace also lessened the possibility of the water pipes freezing. The heater is ducted through the belly of the rig, and the warm air passing through the ducts helps warm the nearby water and sewer pipes. If the temps had gotten below 20 degrees, we would have run the RV furnace once or twice overnight as well just to be sure no ice formed in the pipes.

If we had had brilliantly sunny days every day, we may or may not have needed the generator. Our 490 watt solar panel array may have been able to charge the batteries fully, despite the additional load from the RV furnace.

Also, we probably wouldn’t have needed to use the RV furnace so much because the sun would have warmed up our rig and dried it out a bit during the day.

See how flexible and variable all this is??!!

Colorado fall colors after winter snow

This is why we came to Colorado at this season… Wow!!!

We have descended out of the clouds now and have been living at elevations between 5,000′ and 6,500′ for the past few weeks. The RV furnace is back on vacation and our trusty blue flame heater has taken over all the RV heating duties. Our generator is on break for another 6 months or year, and the shore power cord is buried somewhere in the basement once again.

RV in winter snow staying warm in cold weather

Snug as a bug in a rug!!

If you are going to be using your RV in cold weather this winter, we have another post full of tips for keeping warm that you might enjoy:

How to Stay WARM in an RV – Winter RVing Survival Tips

And if you think a vent-free propane heater is something you’d like to get, have a look at our detailed article that discusses the different types of heaters and shows how we installed ours:

Vent-free Propane Heaters (Catalytic, Infrared and Blue Flame) PLUS How to Install One in an RV

Subscribe
Never miss a post — it’s free!

For more images of the Colorado fall colors in the snow, see this post:

Below are some of our most POPULAR POSTS (also in the MENUS above)

Buddy - A Journey in Spirit - The story of an event that changed our lives forever.

ARTICLE INDEXES
  • RV Tech Tips Articles - A one page index of links to all our RV Tech Tips, RV Upgrades & RV Maintenance articles.
  • RV Lifestyle Tip Articles - An index of links to all our RV Lifestyle Tips (finances, boondocking, major repairs, work/jobs, etc.)
  • Solar Power Articles - Overview and tutorial articles for how to design and install solar power on an RV or boat
  • Product Reviews - An index of links to all of our Product Reviews
RV UPGRADES, SYSTEMS & TIPS MONEY FULL-TIME RV LIFESTYLE GEAR STORE
  • Gear Store - A list of the goodies, equipment and gear we've found useful in our RV lifestyle!
 

Our most recent posts:

More of our Latest Posts are in the MENU.
New to this site? Visit RVers Start Here to find where we keep all the good stuff!!

How to Beat the Summer Heat in an RV

There are a lot of ways to beat the heat in summertime when you’re traveling in an RV. The most obvious is simply to head to a cool place when a heat wave hits. Afterall, your home has wheels!

How to Beat the Heat in an RV

.

But there are other things you can do to prevent the sun from baking the interior of your home, even if you don’t have electrical hookups to run the air conditioner. And if it does get unbearably sultry, and you do need to run the A/C from a portable gas generator, there are some tricks we’ve learned to make it possible…

GO SOMEWHERE COOL – In the MOUNTAINS, FAR NORTH and/or NEAR WATER

Cooler places are located either in high elevations, and/or up north, and/or by a big body of water — the ocean or a lake.

This may seem simplistic, but places in the eastern states like Acadia National Park in Maine, where you might get out on a boat, or the White Mountains in New Hampshire where you might catch a cool train ride to the top, are good bets.

Moraine Lake Rocky Mountains in Canada

Moraine Lake in Banff National Park is a cool place, even mid-summer.

In the west, the key to temperature is elevation. Many folks who are new to the western states are surprised to find out that there can be a 20 degree difference in temperature between two places that are just 150 miles apart.

For instance, Phoenix, Arizona (1,100′ elevation), is 20 degrees hotter than Flagstaff, Arizona (6,900′ elevation). And the North Rim of the Grand Canyon (9,000′ elevation), (about 200 miles further away) can easily be another 10 degrees cooler than that.

Likewise, Stanley, Idaho is about 15 degrees cooler than Boise, Idaho. It is just a few hours north but is 3,500′ higher up.

In Utah, Zion National Park (3000′ elevation) is 10 degrees hotter than Bryce National Park (9,000′ elevation), and if that’s still a little toasty, a run up to Cedar Breaks National Monument (10,000′ elevation) will be just a bit cooler still.

RV in mountains and trees

Camping near trees in the mountains is pretty cool!

Generally, you can’t go wrong in the Rocky Mountains, and a trip to Ouray, Colorado (7,700′), or Banff National Park in Canada will definitely be much cooler than most other places when a heat wave buries North America.

Similarly, the coasts enjoy wonderfully cool sea breezes. The whole west coast, from San Diego to the Olympic Peninsula in Washington is much much cooler than the communities that lie directly inland (over the coastal mountains), 150 miles from the coast.

Go to the beach to stay cool in summer

Life is definitely cool at the beach (Lake Pend Oreille, Sandpoint, Idaho)!

Bandon, Oregon, on the Pacific coast is 15 degrees cooler than Bend, Oregon, which is in the inland desert, baking away behind the range of coastal mountains that stop the flow of cool air coming in from the Pacific.

If the ocean isn’t easily accessible, spending time near a big lake can do the trick.

Play in the water to stay cool in summer

Want to get cool? Find your inner child and play in the water with a toy wagon.

Large lakes offer “sea breezes” in the afternoons, and many lakeside towns have fantastic waterfronts, like Seneca Falls, New York, in the Finger Lakes, and McCall, Idaho, on Payette Lake.

GO SOMEWHERE COOL IN TOWN

The worst part of the day is the late afternoon and evening, and that’s a great time to get out of the rig. A late afternoon or early evening outdoor picnic under a shady tree in a place with a breeze or cool grassy lawn will work wonders. A trip to the air conditioned library or bookstore with a little cafe inside can be a delightful change of pace.

A hot afternoon is a perfect time to take in a matinee at the local cinema. If the laundromat is air conditioned, the heat of the afternoon might be the time to get that chore done, or if your laundry is already clean, doing the week’s grocery shopping could give you an hour or two of air conditioned respite at the supermarket.

HOW TO RUN a 15K BTU RV AIR CONDITIONER with a YAMAHA 2400i GENERATOR

Sometimes, it’s just too darned hot to survive without air conditioning, and in that case it’s really nice to turn it on.

We boondock every night, and we have just 490 watts of solar power on our RV roof and 434 amp-hours of battery capacity in the basement.

Yamaha 2400i portable gas generator for RV

Our generator gets a good workout a few times a year running our 15k BTU air conditioner.

Dometic RV Air Conditioner 15k BTU

This RV roof AC unit takes some oomph to run!

So, the only way we can get air conditioning in our trailer is to drag out our Yamaha 2400i gas generator and set it up to run our Coleman 15,000 BTU air conditioner.

Some folks say this can’t be done, but we’ve been doing it for years.

We use a variety of adapters to plug the generator into the shore power outlet on the outside of the rig.

To get from the 15 amp outlet on the generator to our shore power outlet on the outside of our trailer, we could use one adapter plus the shore power cord:

50 amp Female to 15 amp Male dogbone adapter

15 amp Male to 50 amp Female dogbone adapter (15 amp Male plugs into generator)

50 amp 125 : 250 volt RV shore power cord

50 amp 125-250 volt RV shore power cord (50 amp Male plugs into dogbone above)

However, when we first bought our trailer, we stayed at an RV park that had a 30 amp pedestal that didn’t match our 50 amp shore power cord, so we had to buy an adapter. Making good use of that adapter with our generator now, we use two adapters plus our shore power cord when we connect to the generator:

30 amp Female to 15 amp Male dogbone adapter

15 amp Male to 30 amp Female dogbone adapter
(15 amp Male plugs into generator)

50 amp Female to 30 amp Male RV dogbone adapter

30 amp Male to 50 amp Female to RV dogbone adapter
(30 amp Male plugs into previous dogbone)

50 amp 125-250 volt RV shore power cord

50 amp 125-250 volt RV shore power cord
(50 amp Male plugs into previous dogbone)

When the generator is powering the RV this way, the generator supplies power to the converter inside the trailer (or inverter/charger), which charges the batteries as efficiently as possible using a multi-stage charging algorithm (if the converter or inverter/charger is a “smart” charger).

Our 2400 watt generator is able to power our 15K BTU air conditioner just fine. However it sometimes takes a little coaxing to get it to fire up because there is a big spike when the air conditioner’s compressor first turns on. Over the years, we’ve learned that the trick to persuading it to run is the following:

  1. Run the generator for a few minutes with no load and make sure it is warmed up
    (also make sure the hot water heater and fridge are set to “gas” and no other electrical appliances are running)
  2. On the air/heat control unit, set the Fan button to High On
  3. Set the System button to Fan and let it run for a few minutes
  4. Set the System button to Cool and listen to the compressor come on
Coleman RV air conditioning control unit

Make sure the genny is warm and let it power the fan on high for a while first… THEN switch on the A/C.

Sta-Bil Gas stabilizer

Keeps the gas in the genny fresh

If the last step trips the breaker on the generator, set the System button back to Off, restart the generator and try again.

On a few occasions it has taken us 2-3 tries to get the air conditioner going. However, most of the time it fires up on the first try.

We always run it for 4-6 hours when we turn it on, and it purrs along just fine. However, we run the air conditioning just a few days each year. The rest of the time we stay cool using other means.

To keep the gas in the generator (and in the gas can) fresh and to ensure quick starts after storage and to prevent gumming and varnish, Mark puts the stabilizer Sta-Bil Gas stabilizer in the gas.

POSITION THE RV
— BIGGEST WINDOWS FACE NORTH and SMALLEST WINDOWS FACE WEST

The toughest time of day is the afternoon when the sun is in the southwest and western sky and is slowly baking the RV. Sometimes it seems to take forever for the sun to set while everything inside the rig quietly fries!

No matter what the wall and roof insulation R-factor is for an RV, the windows are where all the heat comes in. So, keeping them shaded as much as possible throughout the day makes all the difference in the world.

Every rig has a different arrangement of windows, but if you can position the biggest ones to face north or east and the smallest ones (or the wall with no windows if you have one) towards the west and southwest, the difference to the interior temperature will be astonishing.

If there is a way to block the afternoon sun entirely by parking next to shade trees or a building, that is even better.

SET UP THE RV AWNING

Even if the awning will only shade a small part of the RV’s walls and windows for a few hours of the day, this is still helpful! When an RV wall gets hot, you can feel the warmth on the inside of the rig. And you can especially feel it in the cabinets. There’s nothing like a hot bottle of olive oil in the kitchen pantry!

Shade from RV awning

Even though it’s shading just one small window, the awning is keeping the whole wall cool.

Modern rigs have wonderful powered awnings, but ours is the old fashioned manual crank type of awning. The other day we heard two RVers complaining about how putting these old awnings out was really difficult and was a two man job.

It’s actually not that bad, and Mark does it by himself in just a few minutes. Here are the steps:

How to set up RV awning - loosen handle

1. Unscrew the knob on the back of each awning arm.

How to set up RV awning - undo clip

2. Open the clip right above the knob on each awning arm

How to set up RV awning - use tool to lower lever

3. Use the awning tool to open the lever on the roller

How to set up RV awning - lower lever

4. Pull down on the lever to open it.

How to set up RV awning - lever in lowered position

The roller lever is now in the down position.

How to set up RV awning - hook awning loop

5. Use the awning tool to pull out the awning by grabbing the webbing loop

How to set up RV awning - pull awning out

6. Pull the awning part way out with the awning tool

How to set up RV awning - lower awning completely

7. Grab the webbing and pull the awning out the rest of the way

How to set up RV awning - Close RV door handle

8. Close the RV door handle to get it out of the way

How to set up RV awning - Pull awning arm out

9. Slide out the awning arm in its track

How to set up RV awning - Tighten down awning arm

10. Pushing down on the awning arm to keep the canvas taught, tighten the knob.

How to set up RV awning - Tighten down other awning arm

Do this on both sides

How to set up RV awning - Raise awning

11. Open the big awning handle to raise the awning up.

If it looks like it might rain, position one side of the awning a little lower than the other so the water will drain off of the awning.

When Mark closes up the awning for travel, he puts velcro straps around the arms to keep them from accidentally opening as we travel.

Another neat awning trick is to get an awning shade extension that drops from the edge of the awning to the ground. This provides shade from touching the rig even when the sun is at a low angle.

INSULATE THE WINDOWS and HATCHES INSIDE

The day/night shades in most RVs are great for reducing sunshine in the rig, but do little for eliminating the heat that pours in through the glass and metal frame.

RV window in summer heat

Pulling down our night shades doesn’t block much direct sunlight.

We cut Reflectix, which is a bubble wrap kind of aluminum foil that comes in a huge roll, to fit each window (a pair of scissors is all you need). We labeled each piece for the window it fits into.

Reflectix rolled up to keep RV cool in summer

Reflectix picks up where RV insulation leaves off…

We raise the RV’s day/night shades, press the piece of Reflectix against the window, and then lower the shade to hold the Reflectix in place.

RV window in summer heat with Reflectix

A layer of Reflectix behind the shade blocks all the sun!

RV Vent Insulator

When leaving the trailer, we close the hatches
and put vent insulators in them.

In our big rear window we jam a pillow under the large piece of Reflectix to hold it up. Otherwise it would drop to the floor.

If we are going to leave the rig for a while, we close all the windows and put an RV Vent Insulator in each of the roof vents. It is amazing to come home after many hours of running around to find that the rig is still fairly cool inside.

However, if we are planning to stay home, we don’t like to live in a tomb, so we have another strategy using fans and open windows that allows us to have some ambient light coming in…

STAY COOL WITH FANS

We rely on two different types of fans to stay cool.

Vent Fans

We have a Fan-tastic Vent Fan in two of our trailer’s four roof hatches. These are designed to push a maximum amount of air in or out of the rig. We set them to push the air out of the rig, and then we open the windows on the shaded side of the trailer to let the cool air from outside come in.

Fan-tastic Fan in RV hatch

Fan-tastic Fan in an RV hatch

If we were to replace our Fan-tastic Fans, or if we wanted to upgrade another hatch to one of these or a similar type of vent fan, we would choose a very simple model that does just the basics.

Our Fan-tastic Fans are whiz-bang models with remote control, rain-sensing, auto-opening, auto-closing, slicing and dicing and who knows what else. Unfortunately, they have minds of their own, and they won’t listen to reason.

They auto open and auto close at the weirdest times, they don’t necessarily know when it’s raining, and they make it impossible for the mechanically challenged (ahem…me) to turn them on or off or to open and close them. There are way too many buttons that do way too many different things.

Also, Mark has had to rebuild various parts of both of these fans, and by the colorful flow of expletives I heard him let loose on these jobs, I would gather that it was not easy.

Portable Fans

While vent fans help move fresh air through the rig by forcing hot air out the vents and pulling cool air in through the windows, portable fans are a godsend to aim right at you when you start reaching the boiling point.

We have a standalone, portable 12 volt Fan-tastic Endless Breeze Fan (and DC extension cord) so we can move it around the rig.

Fan-tastic Endless Breeze Fan

A 12 volt fan may seem necessary, but…

We got this fan in Quartzsite one year for our (not yet purchased) sailboat and we’ve used it a lot in the years since then. But it is extremely noisy. Forget trying to sleep with it running nearby! It’s also kind of silly to spend so much money on a 12 volt fan when a smaller and quieter 120 volt fan will do just as good a job, if not better, for a fraction of the cost. All you need is an inverter.

Portable fan in RV to keep cool

…A small, quiet, cheap portable fan will run on an inverter just fine!

Our little portable fan is terrific, but there are lots of portable fans in all kinds of styles that are just as good.

MAKE ICY DRINKS!

Last of all, there’s nothing that can cool down your body temp like an ice cold drink. A smoothie in a blender tastes wonderful and can bring your core temp down quite a bit. We make ice using old fashioned ice cube trays in our freezer, and we use a few cubes and frozen fruit in our smoothies to ensure they are as cold as possible.

Our Osterizer blender draws 1000 watts, which is well within the limit for our 2,000 watt pure sine wave inverter.

Osterizer blender and frozen berries for smoothie to keep cool in RV in summer

Smoothie time – Get cool with lots of ice and frozen fruit!!

Those are a few of our tips for surviving the dog days of summer in our RV without hookups. It can take a little finagling and strategy, but these things have kept us cool in our trailer for ten summers now!

Subscribe
Never miss a post — it’s free!

Below are some of our most POPULAR POSTS (also in the MENUS above)

Buddy - A Journey in Spirit - The story of an event that changed our lives forever.

ARTICLE INDEXES
  • RV Tech Tips Articles - A one page index of links to all our RV Tech Tips, RV Upgrades & RV Maintenance articles.
  • RV Lifestyle Tip Articles - An index of links to all our RV Lifestyle Tips (finances, boondocking, major repairs, work/jobs, etc.)
  • Solar Power Articles - Overview and tutorial articles for how to design and install solar power on an RV or boat
  • Product Reviews - An index of links to all of our Product Reviews
RV UPGRADES, SYSTEMS & TIPS MONEY FULL-TIME RV LIFESTYLE GEAR STORE
  • Gear Store - A list of the goodies, equipment and gear we've found useful in our RV lifestyle!
 

Our most recent posts:

More of our Latest Posts are in the MENU above.